Transform Your Space with an Easy DIY Basket Wall Hanging: Boho Meets Modern Farmhouse Charm
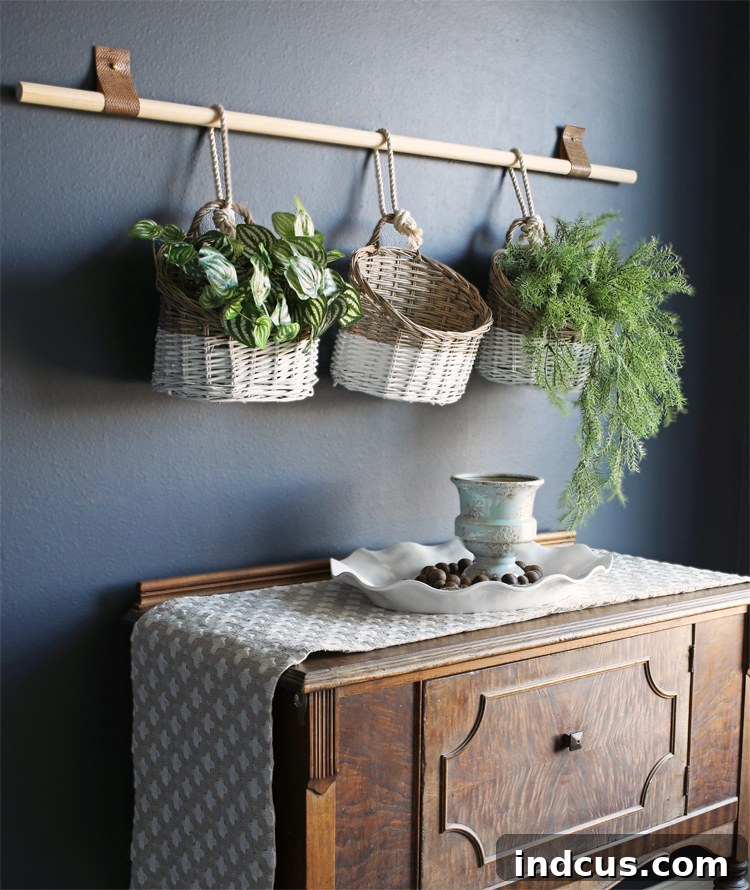
Are you looking for a refreshing way to update your home decor without breaking the bank or spending countless hours on a project? Look no further! This DIY basket wall hanging offers the perfect blend of trendy boho aesthetics and the rustic appeal of modern farmhouse style. It’s a surprisingly simple craft that delivers a stunning visual impact, allowing you to personalize any room in under an hour.
For years, my entryway maintained a consistent look, adorned with the same decor since I first painted it a deep navy blue almost six years ago. While I loved the classic feel, I felt a growing desire for change, something fresh and inviting to greet guests. My quest for inspiration naturally led me to the aisles of Hobby Lobby, a treasure trove for any DIY enthusiast. It was there, amidst their vibrant spring collection, that I stumbled upon a delightful display of wall baskets. An idea began to take root – a creative way to incorporate these woven beauties into my home.
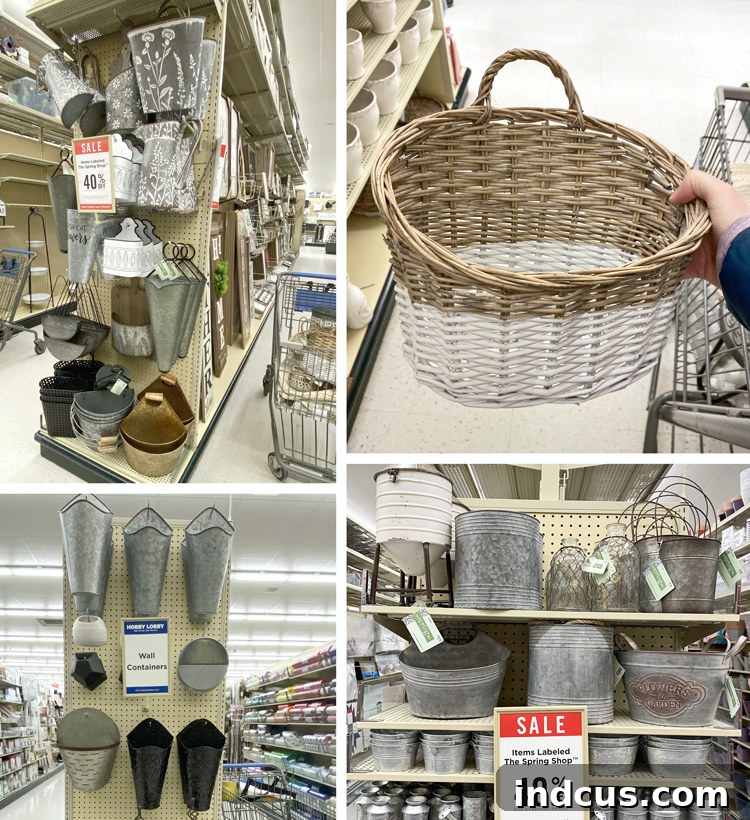
The selection of wall baskets was charming, but I was particularly captivated by a set of two-toned wicker baskets. Their subtle contrast and natural texture instantly sparked a vision. I purchased a few, confident I could devise a unique hanging method using humble materials like leather and a wooden dowel. The result exceeded my expectations, radiating a cozy yet chic vibe. It turned out so wonderfully that I simply had to share this tutorial, so you too can create your own personalized basket wall art.
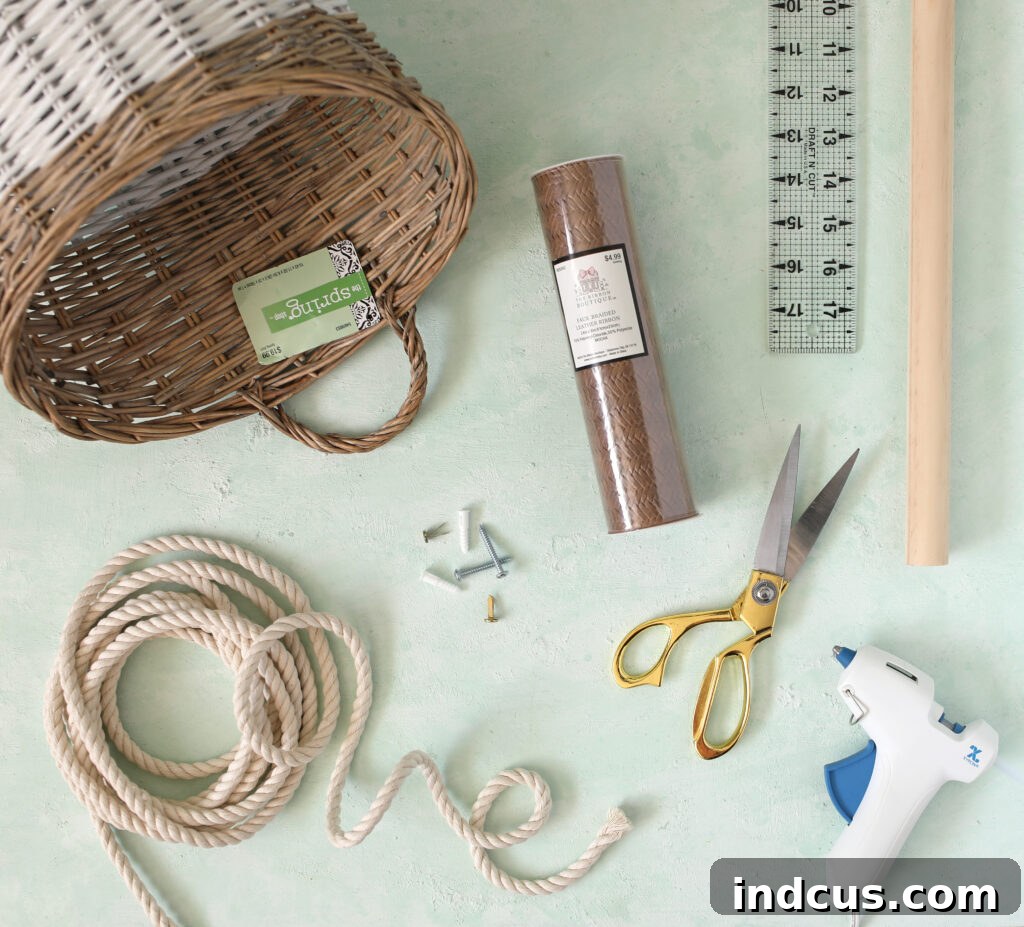
Essential Materials for Your Basket Wall Creation
Gathering your supplies is the first exciting step in any DIY adventure. For this project, you’ll find most items readily available at craft stores like Hobby Lobby or your local hardware store. Here’s a comprehensive list of what you’ll need to bring this vision to life:
- 3 Wall Baskets: Opt for baskets with a flat back for easy hanging. The two-toned wicker baskets were my choice, but any style that complements your decor will work beautifully.
- 3-Ply Cotton Cord: A natural, sturdy rope that adds to the bohemian aesthetic. Consider the thickness based on the size and weight of your baskets.
- Faux Braided Leather Ribbon (or genuine leather): This adds a touch of sophistication and secures the dowel to the wall. Faux leather is often more affordable and easier to work with.
- 1 Inch x 4 Foot Wooden Dowel: The structural backbone of your hanging. Choose a smooth dowel that is visually appealing.
- Screws: Essential for securely attaching the leather straps to your wall. Ensure they are appropriate for your wall type (e.g., drywall, plaster).
- Decorative Metal Brads (or decorative screw caps): These are purely for aesthetic purposes, transforming ordinary screw heads into attractive design elements.
- Scissors: For cutting cord and leather.
- Hot Glue Gun + Gluesticks: For securely attaching the leather straps to themselves.
- Ruler or Straight Edge: For accurate measurements.
While I sourced my baskets, cord, leather, and brads from Hobby Lobby, you can find screws and wooden dowels at any standard hardware store. When selecting your baskets, remember that variety in size and texture can add depth to your wall display. Don’t be afraid to mix and match if you find complementary styles.
A quick note on the decorative brads: If you can find screws with attractive, finished heads (perhaps in a metallic tone or a unique shape), you might be able to bypass the brads entirely. They are purely an aesthetic choice to conceal the functional screw heads. In my case, I didn’t think to look for decorative screws at the hardware store and didn’t want to make an extra trip, so the brads proved to be a perfect, stylish solution. Either approach works beautifully!
Step-by-Step Guide to Crafting Your Basket Wall Hanging
Ready to get started? This project is designed to be straightforward and enjoyable. Follow these instructions carefully, and you’ll have a stunning new piece of home decor in no time.
Step 1: Prepare Your Leather Straps
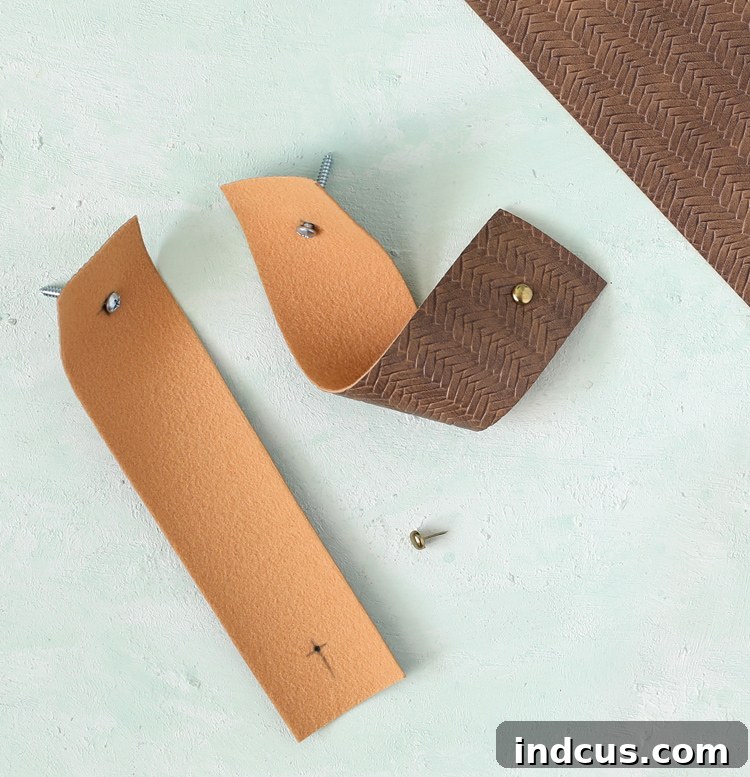
Begin by cutting two strips of your chosen leather. Each strip should measure approximately 2 inches wide by 8 inches long. Precision here ensures a neat finish. Once cut, take each leather strip and, from one end, measure 1 inch down and 1 inch in from each side. At this precise point, create a tiny hole. This hole needs to be just large enough for your screw to pass through comfortably, but not so large that the screw head slips through easily. You can use a leather punch, a sharp awl, or even the tip of a small, sharp pair of scissors to create these holes.
Step 2: Attach Decorative Brads to Leather Straps
With your holes made, it’s time to add the decorative touch. Slide a screw into the hole you just created, entering from the “wrong” or backside of the leather strap and pushing through to the “right” or visible side. Now, on the visible side of the leather, insert your decorative metal brad, aligning its head with the screw head. This clever technique makes it appear as though the brad is securing the strap, while the screw does the heavy lifting. The finished look should be clean and aesthetically pleasing, as shown:
Step 3: Prepare Your Basket Hanging Loops
Next, cut three lengths of your 3-ply cotton cord. Each length should be approximately 24 inches. The exact length can be adjusted based on how low or high you want your baskets to hang. Take one length of cord and tie it securely to the handle or a sturdy part of one of your baskets. The goal is to create a loop large enough to easily slip over your wooden dowel. Repeat this process for all three baskets, ensuring the loops are consistently sized for even hanging. A simple overhand knot or a square knot works well here for security and aesthetics, as depicted:

Step 4: Mount Leather Straps to the Wall
This step requires careful placement and secure fastening. Identify the desired location for your basket wall hanging. It’s crucial to screw your leather straps either directly into a wall stud for maximum stability or, if a stud isn’t available, to use appropriate drywall anchors. Position one leather strap against the wall with the screw end pointing upwards. Drive the screw through the leather and into the wall (or anchor). Once secured, fold the strap onto itself to form a loop. Apply a generous amount of hot glue to the inner surface of the folded strap, pressing it firmly against the other side. Take care to align the top and side edges precisely to ensure a tidy, professional appearance. If you chose to use decorative screws directly (without brads), simply fold the leather into a loop and screw through both layers of the folded leather into the wall. Use a level to ensure both straps are at the same height and evenly spaced.
Step 5: Assemble Your Basket Wall Hanging
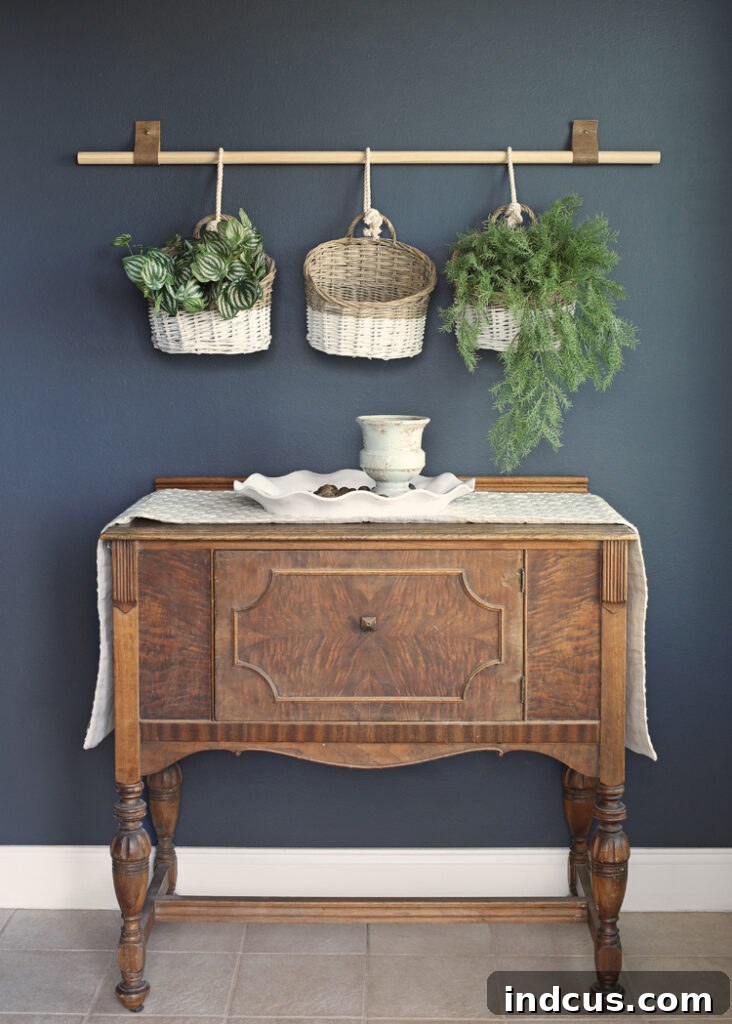
If you prefer a different look, you can sand your wooden dowel for a smoother finish and apply a wood stain or paint to match your decor. I personally loved the natural, raw color of my wood dowel, so I opted to leave it as-is. Now, carefully slip all three rope loops from your baskets onto the dowel. With the loops in place, gently guide one end of the dowel through one of the mounted leather loops on your wall. Slide the dowel far enough through so you can easily maneuver the other end into the second leather loop. Once the dowel is securely resting in both loops, adjust the spacing of your baskets evenly along the dowel. Take a step back, admire your handiwork, and boom! You’ve successfully created a charming new decoration that perfectly reflects your personal style!
A Fresh Look and Endless Customization Possibilities
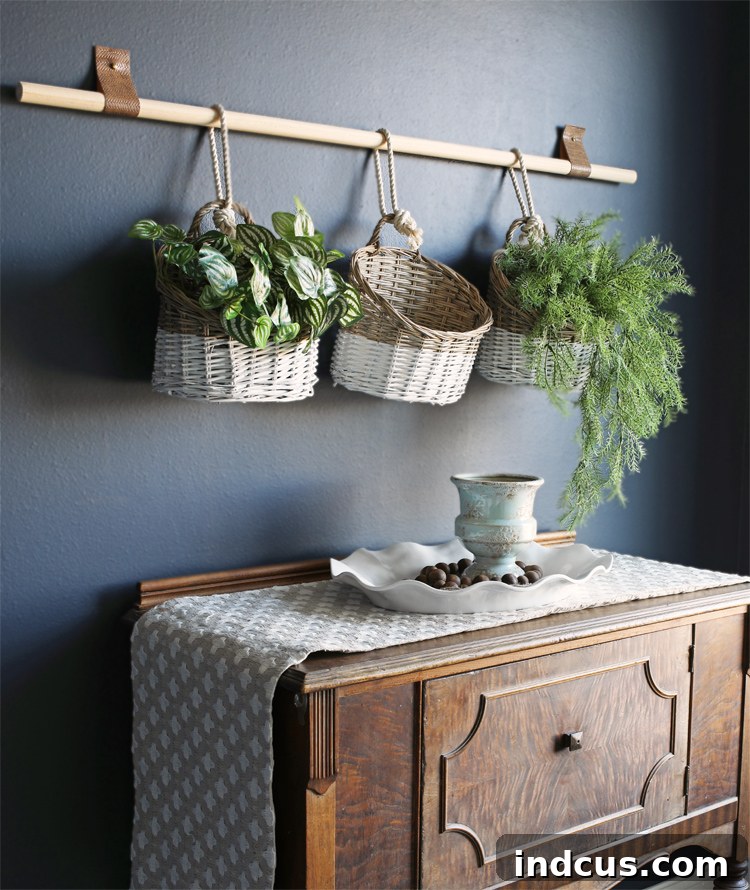
I am absolutely enamored with the transformation this simple DIY project brought to my entryway. It has effortlessly achieved that coveted balance between modern elegance and traditional warmth, while the addition of some subtle greenery adds a much-needed touch of spring vitality. The change was so impactful that even my husband, who rarely comments on home decor, noticed and complimented it – a true testament to its charm! His positive feedback alone made all the effort worthwhile. LOL.
What makes this DIY idea truly remarkable is its incredible versatility. The potential for personalization and creative adjustment is limitless, allowing you to infuse your unique spin into the design. Imagine the fun variations! My daughters are already asking for one for their room, envisioning it as a stylish and practical holder for their sunglasses, scrunchies, and other girly accessories. This hanging would also be utterly darling in a nursery, providing both aesthetic appeal and gentle storage for small items like bows or plush toys. The possibilities truly are endless, from displaying small potted plants to holding mail in a mudroom or even showcasing lightweight art pieces. Consider varying the sizes, shapes, and textures of your baskets for a more dynamic display, or painting the dowel a contrasting color to make it pop. You could even incorporate different materials for the hanging loops, such as macrame or colorful fabric strips, to further customize its aesthetic. This project is a canvas for your creativity!
VIDEO TUTORIAL
For those who prefer a visual guide, a detailed video tutorial demonstrating each step of this DIY basket wall hanging project is available on this blog. It offers additional insights and tips to ensure your crafting experience is smooth and successful.
If you have a corner, a wall, or an entire room in your house that’s yearning for a little refresh, embarking on a DIY project like this is the perfect solution. Stores like Hobby Lobby are fantastic resources for inspiration and materials. Keep an eye out for their frequent 50% off home decor sales – you might just snag some darling baskets or other embellishments at an unbeatable price to kickstart your next creative endeavor. Embrace the satisfaction of crafting something beautiful with your own hands, and watch as your home transforms into a reflection of your unique style and personality!