

Craft a Stunning & Unique DIY Charger Plate Fall Wreath for Your Home

As autumn leaves begin to turn and a crispness fills the air, there’s no better time to infuse your home with the cozy spirit of the fall season. DIY fall decor projects offer a wonderful way to express your creativity and personalize your living space. If you’ve been searching for a craft that’s both simple and produces a show-stopping result, look no further than this innovative charger plate fall wreath. Move beyond traditional grapevine wreaths and discover how an ordinary charger plate can transform into an extraordinary piece of seasonal art for your front door or interior.
Inspired by the rich colors and textures found during a recent shopping trip for another fall wreath project, it became clear that one piece of autumn decor simply wouldn’t suffice. The versatility and charm of fall materials sparked numerous ideas, leading to the creation of not just one, but multiple festive designs. Today, we’re excited to guide you through the process of turning a stylish buffalo check charger plate into a uniquely charming door hanging that celebrates the beauty of autumn.
Affiliate links are used in this post. If you purchase something using my links, I may earn a small commission at no extra cost to you.
Why Choose a Charger Plate for Your Fall Wreath?
Utilizing a charger plate as the base for a fall wreath offers several compelling advantages over more conventional materials. Firstly, charger plates are incredibly versatile and come in a vast array of patterns, colors, and textures, making it easy to find one that perfectly matches your personal style and existing decor. From rustic buffalo check and farmhouse plaids to elegant metallics and vibrant solids, the possibilities are endless.
Secondly, they are often lightweight and durable, especially those made from plastic, melamine, or wood, ensuring your wreath is easy to hang and resilient against accidental bumps or door slams. This durability means your beautiful creation can be enjoyed for many seasons to come. Lastly, charger plates provide a smooth, sturdy surface that simplifies the attachment of embellishments, making the crafting process faster and more enjoyable for crafters of all skill levels. It’s an affordable and unexpected base that yields surprisingly sophisticated results, setting your autumn decor apart.
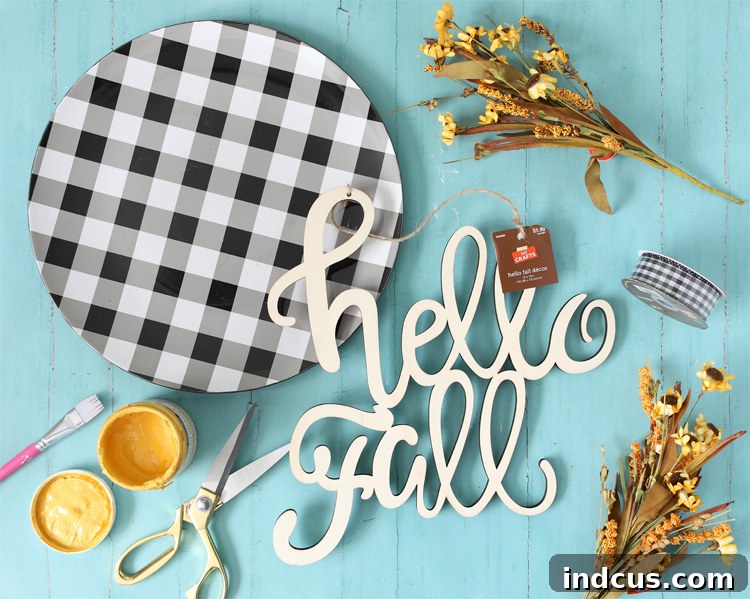
Essential Materials for Your Charger Plate Fall Wreath
Gathering all your supplies before you begin is key to a smooth and enjoyable crafting experience. Most of these items can be found at your local craft store, general merchandise retailer, or even dollar stores, making this a budget-friendly DIY project. Here’s what you’ll need to create your unique fall door hanging:
- Buffalo Plaid Charger Plate: While a buffalo check pattern offers a classic farmhouse charm, feel free to explore other patterns or solid colors that resonate with your autumn aesthetic. Look for lightweight materials such as plastic, melamine, or thin wood to ensure ease of hanging and durability. Charger plates can be found at Hobby Lobby, Dollar Tree, Walmart, Target, and Michaels, often at very affordable prices. Ensure it’s shatterproof for long-lasting use.
- Wood Word Cutout: A “Hello Fall” wooden cutout adds a welcoming touch. Alternatively, consider words like “Gather,” “Give Thanks,” “Autumn,” or even a single initial for a personalized touch. These come in various fonts and sizes, so pick one that complements the size of your charger plate.
- Two Floral Picks: Select floral picks that embody the spirit of fall. Options include vibrant sunflowers, rustic berries, delicate dried grasses, various autumn leaves (maple, oak), small gourds, or even pinecones. Choose colors that either coordinate harmoniously with your charger plate and wooden words or provide a striking contrast for visual interest. The two picks will provide a balanced, lush appearance to the top of your wreath.
- Ribbon: A sturdy ribbon is essential for creating a hanging loop and optionally a decorative bow. Wired-edge ribbon is often easier to shape and maintain its form for bows. Consider patterns like gingham, plaid, burlap, or solid colors in fall hues such as burnt orange, deep red, olive green, or cream.
- Craft Paint: Choose a color that will allow your wooden cutout to pop against the charger plate or blend seamlessly with your floral elements. Acrylic craft paints work perfectly and dry quickly.
- Paint Brush: A small to medium-sized brush for painting your wooden word cutout.
- Scissors: For cutting ribbon and any excess from your floral picks.
- Glue Gun + Glue Sticks: A hot glue gun is indispensable for this project, providing a strong, instant bond for all your elements. Ensure you have plenty of glue sticks on hand.
Step-by-Step Guide: Crafting Your Unique Charger Plate Fall Wreath
This DIY fall wreath project is designed for ease and enjoyment, making it a perfect weekend craft. The simple steps outlined below will guide you through creating a beautiful and personalized piece of autumn decor. If you prefer visual learning, a short video tutorial is also available further down to demonstrate each instruction.
Detailed Instructions:
Step 1: Prepare Your Wooden Sentiment
Begin by carefully removing any pre-attached jute string or hanger from your “Hello Fall” wooden words. This ensures a clean surface for painting and a seamless integration into your wreath design. Next, paint the wooden cutout in your chosen craft paint color. Consider a color that either creates a striking contrast against your charger plate for maximum visibility, or a subtle hue that beautifully complements your selected floral picks. Allow the paint to dry completely according to the manufacturer’s instructions before proceeding to the next step. You might apply a second coat for full coverage if desired.
Step 2: Secure the Wooden Words to the Charger Plate
Once your painted wooden words are dry, carefully position them on the front of your charger plate. Take a moment to experiment with placement, ensuring they are centered and aesthetically pleasing. Once you’re satisfied with the positioning, apply a generous amount of hot glue to the back of the wooden cutout. Press it firmly onto the charger plate, holding it in place for a few seconds to allow the glue to set and form a strong, lasting bond.
Step 3: Create a Sturdy Hanging Loop
To hang your finished wreath, you’ll need a robust loop. Cut a piece of your chosen ribbon to a suitable length, typically around 12-18 inches, depending on how long you want your wreath to hang. Form the ribbon into a loop and attach both ends securely to the back of the charger plate using a substantial amount of hot glue. Apply the glue to multiple points along the ribbon ends for added reinforcement, ensuring the loop can support the weight of the wreath without detaching. Press firmly until the glue cools and hardens.
Step 4: Arrange and Secure Your Fall Floral Picks
Now comes the fun part: adding the lush floral elements! Gently bend and shape your two floral picks into a rounded curve. This will help them conform beautifully along the top edge of your charger plate, creating a natural and inviting arc. Carefully slip the bottom stems of the shaped floral picks into the ribbon loop you created in the previous step. This initial placement will offer some stability. Once the picks are positioned nicely along the plate’s upper edge, use more hot glue to secure the ribbon closed around the center stems of the picks. Additionally, apply small dots of hot glue at various points where the floral picks touch the charger plate to ensure they are firmly attached and maintain their desired shape and position.
Step 5: Add an Optional Decorative Ribbon Bow
For an extra touch of charm and elegance, consider adding a decorative ribbon bow. You can create a simple loop bow or a more elaborate multi-loop bow with your remaining ribbon. Once crafted, use a dab of hot glue to attach the bow to your wreath. Popular placements include the bottom center of the floral arrangement, or slightly off to one side, where it can beautifully complement the fall picks and wooden words. This step allows for a final flourish of personalization and style.
Charger Plate Fall Wreath Video Tutorial
Sometimes, seeing the steps in action can be incredibly helpful. Watch this brief video tutorial for a visual guide on how to assemble your unique charger plate fall wreath. It provides a clear demonstration of each instruction, ensuring you can follow along with confidence and ease.
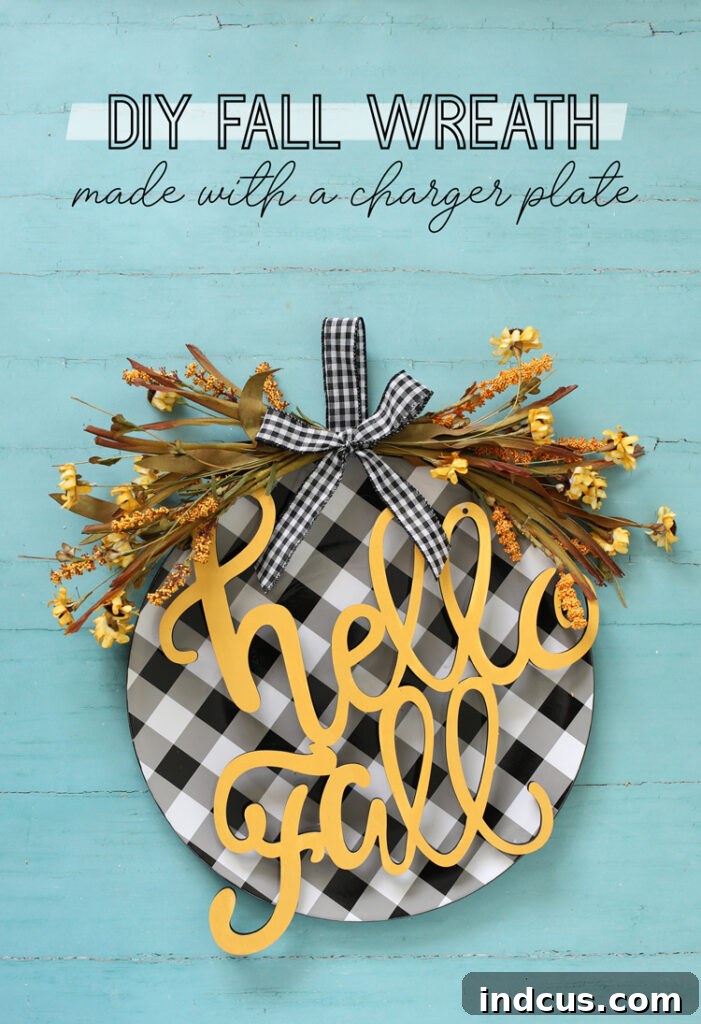
Like this idea? Pin it to save it for later!
Customization Ideas & Creative Variations
The beauty of this charger plate wreath lies in its adaptability. You can easily modify the design to suit various themes, holidays, or personal preferences, extending its use beyond just general fall decor.
- Thanksgiving Theme: Instead of “Hello Fall,” opt for a wooden cutout that says “Gather,” “Give Thanks,” or “Grateful.” Incorporate miniature faux gourds, pumpkins, or corn husks into your floral arrangement to emphasize the harvest season.
- Rustic Farmhouse Look: Choose a distressed wood charger plate or one with a natural burlap texture. Use burlap ribbon for the hanger and bow, and select floral picks featuring cotton bolls, wheat stalks, and muted green leaves.
- Modern Elegance: Start with a metallic charger plate (gold, silver, or rose gold) or a sleek matte black one. Use sophisticated, minimalist floral picks with slender branches, white berries, or subtle eucalyptus leaves. A velvet ribbon in a deep jewel tone could add a luxurious touch.
- Winter & Holiday Transition: While designed for fall, with a few tweaks, this concept can carry you through the winter holidays. Swap out fall picks for frosted greenery, pinecones, and red berries. A “Merry Christmas” or “Joy” cutout and a festive plaid ribbon would complete the transformation.
- Monogrammed Wreath: Replace the “Hello Fall” sign with a painted wooden monogram of your family’s initial for a truly personalized touch.
- Alternative Embellishments: Consider adding small battery-operated fairy lights intertwined with the floral picks for a magical glow in the evenings. Small bells, fabric leaves, or even dried orange slices can also be incorporated for unique textures and scents.
Where to Display Your Handmade Fall Wreath
Once your unique charger plate fall wreath is complete, finding the perfect spot to display it is the next exciting step. Its versatility allows it to enhance various areas of your home, both indoors and out.
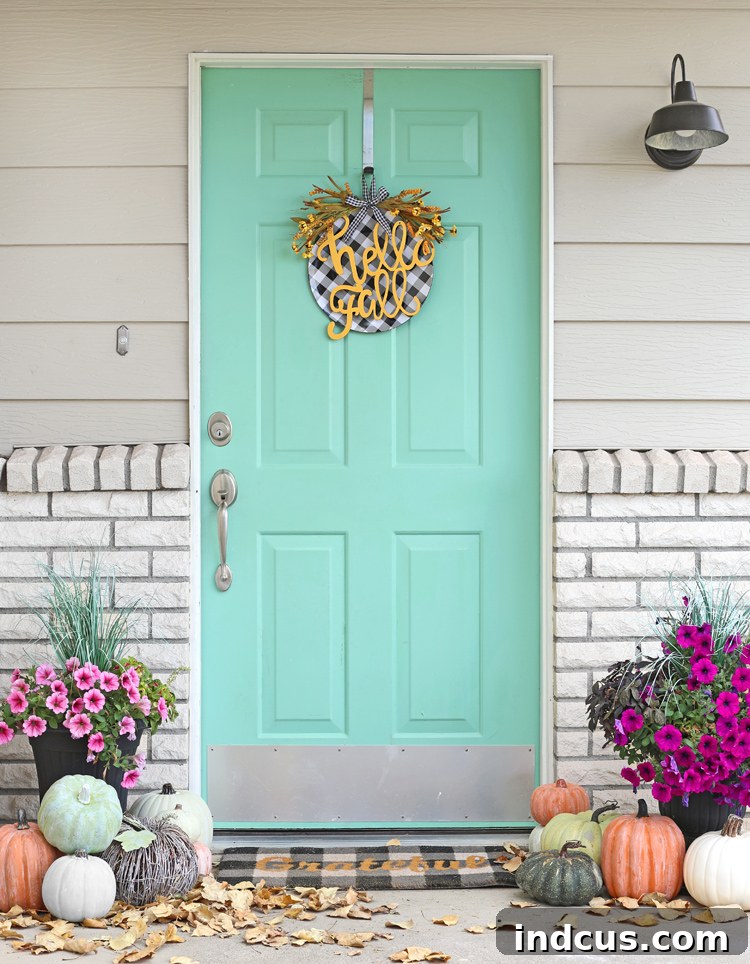
- Front Door: The most classic placement for any wreath, your charger plate creation will offer a warm and inviting welcome to guests. If your door is exposed to the elements, consider spraying your floral picks with a UV protectant and a clear sealant for the wooden sign to help preserve their colors and integrity.
- Entryway Wall: Create an inviting first impression inside your home by hanging the wreath in your entryway. It can serve as a focal point or be part of a larger gallery wall arrangement.
- Above the Mantelpiece: Positioned above a fireplace, your wreath will contribute to a cozy and festive living room atmosphere, especially when paired with other fall decor like candles, pumpkins, and garlands.
- Kitchen or Dining Room: Bring the warmth of autumn into your culinary spaces. It can hang on a kitchen cabinet door, a pantry door, or as a decorative accent in the dining area, complementing your table settings.
- Bedroom Accent: For a touch of seasonal charm in your personal sanctuary, hang the wreath above your bed or on a bedroom wall.
- Window Decor: Hang your wreath in a prominent window to be enjoyed both from inside and outside your home.
Maintenance Tips for Your DIY Fall Wreath
To ensure your beautiful charger plate fall wreath remains vibrant and appealing for many seasons, a little care goes a long way.
- Dusting: Periodically dust your wreath with a soft cloth, feather duster, or a gentle brush to keep it looking fresh. For hard-to-reach areas, a blast of canned air can effectively remove accumulated dust.
- Outdoor Exposure: If your wreath is displayed outdoors, especially on an unprotected porch, consider applying a UV-resistant clear spray to your floral elements and a weather-resistant sealant to any painted wooden components. This will help prevent fading from sun exposure and offer some protection against moisture.
- Storage: When the fall season concludes, store your wreath in a sturdy box or a dedicated wreath storage bag. Place it in a cool, dry place away from direct sunlight to prevent damage and help it retain its shape and colors for next year. Avoid stacking heavy items on top of it.
Conclusion: Embrace the Art of Autumn Crafting
Creating this unique charger plate fall wreath is more than just a craft project; it’s an opportunity to infuse your home with personalized charm and celebrate the beauty of the autumn season. With simple materials and straightforward steps, you can transform an everyday item into a captivating piece of decor that reflects your individual style.
Whether you choose a classic buffalo check, a modern metallic, or a rustic wood base, this project offers endless possibilities for customization. Enjoy the process of selecting your floral picks, painting your sentiment, and assembling your wreath, knowing that you’re crafting something truly special. Hang it on your front door to welcome guests, display it over your mantel for a cozy vibe, or give it as a thoughtful handmade gift. Embrace the joy of DIY fall decor and let your creativity flourish!
Need more inspiration for embracing the autumn season? Dive into our extensive archive of DIY fall decor ideas, fun fall crafts, and delicious fall recipes to continue your seasonal crafting and culinary adventures.







