Elevate Your Easter Decor: Crafting Exquisite Sequin and Pearl Eggs – A Luxurious DIY Guide for Adults
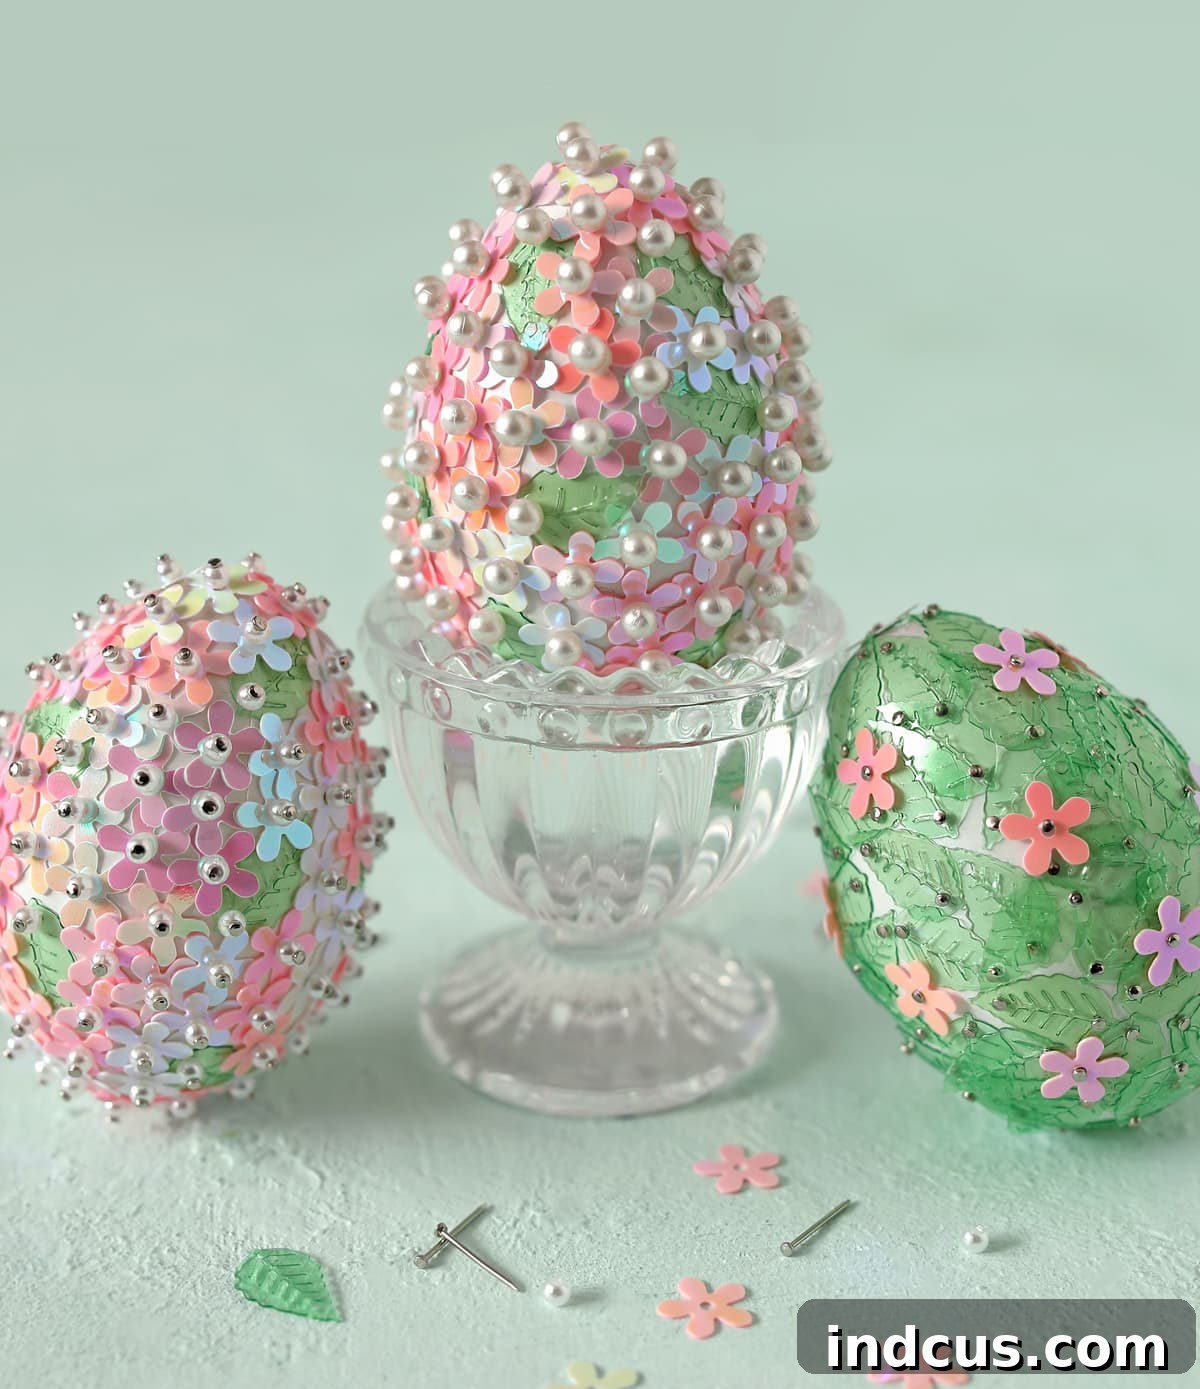
Welcome to a truly enchanting craft tutorial that promises to transform your Easter celebrations! Today, we’re diving into the delightful process of creating stunning Easter eggs adorned with shimmering floral sequins and delicate pearls. These aren’t just any ordinary decorated eggs; they evoke the grandeur and intricate beauty reminiscent of the famed Fabergé eggs from Russia, but with a distinctly fresh, spring-inspired twist perfect for modern decor. Imagine adding a touch of sophisticated sparkle to your home this season with these handmade treasures.
This project is specially designed for adults who appreciate elegant craftsmanship and a mindful creative escape. While the final result is undeniably luxurious, the process itself is surprisingly straightforward. You don’t need years of artistic training or a special talent for intricate detailing. What you do need is a dash of patience, a keen eye for beauty, and a willingness to immerse yourself in a wonderfully therapeutic crafting experience. We’re here to guide you through every step, ensuring your journey from basic craft supplies to dazzling decorative eggs is both enjoyable and rewarding.
This post is proudly sponsored by Hobby Lobby, your ultimate destination for all the supplies needed to bring these magnificent jeweled eggs to life. From the foundational foam eggs to the sparkling sequins and lustrous pearls, everything you require for this elegant Easter project can be found conveniently in one place. Get ready to unleash your inner artisan and craft a collection of personalized, ornate Easter eggs that will be cherished for years to come!
Gather Your Essential Supplies for Elegant Sequin Eggs
Embarking on this beautiful Easter egg crafting journey begins with assembling the right materials. Fortunately, all the key components are readily available at Hobby Lobby, making your preparation phase as simple as possible. We’ve curated a list of exactly what you’ll need, along with important considerations to help you choose the best options for your desired aesthetic.
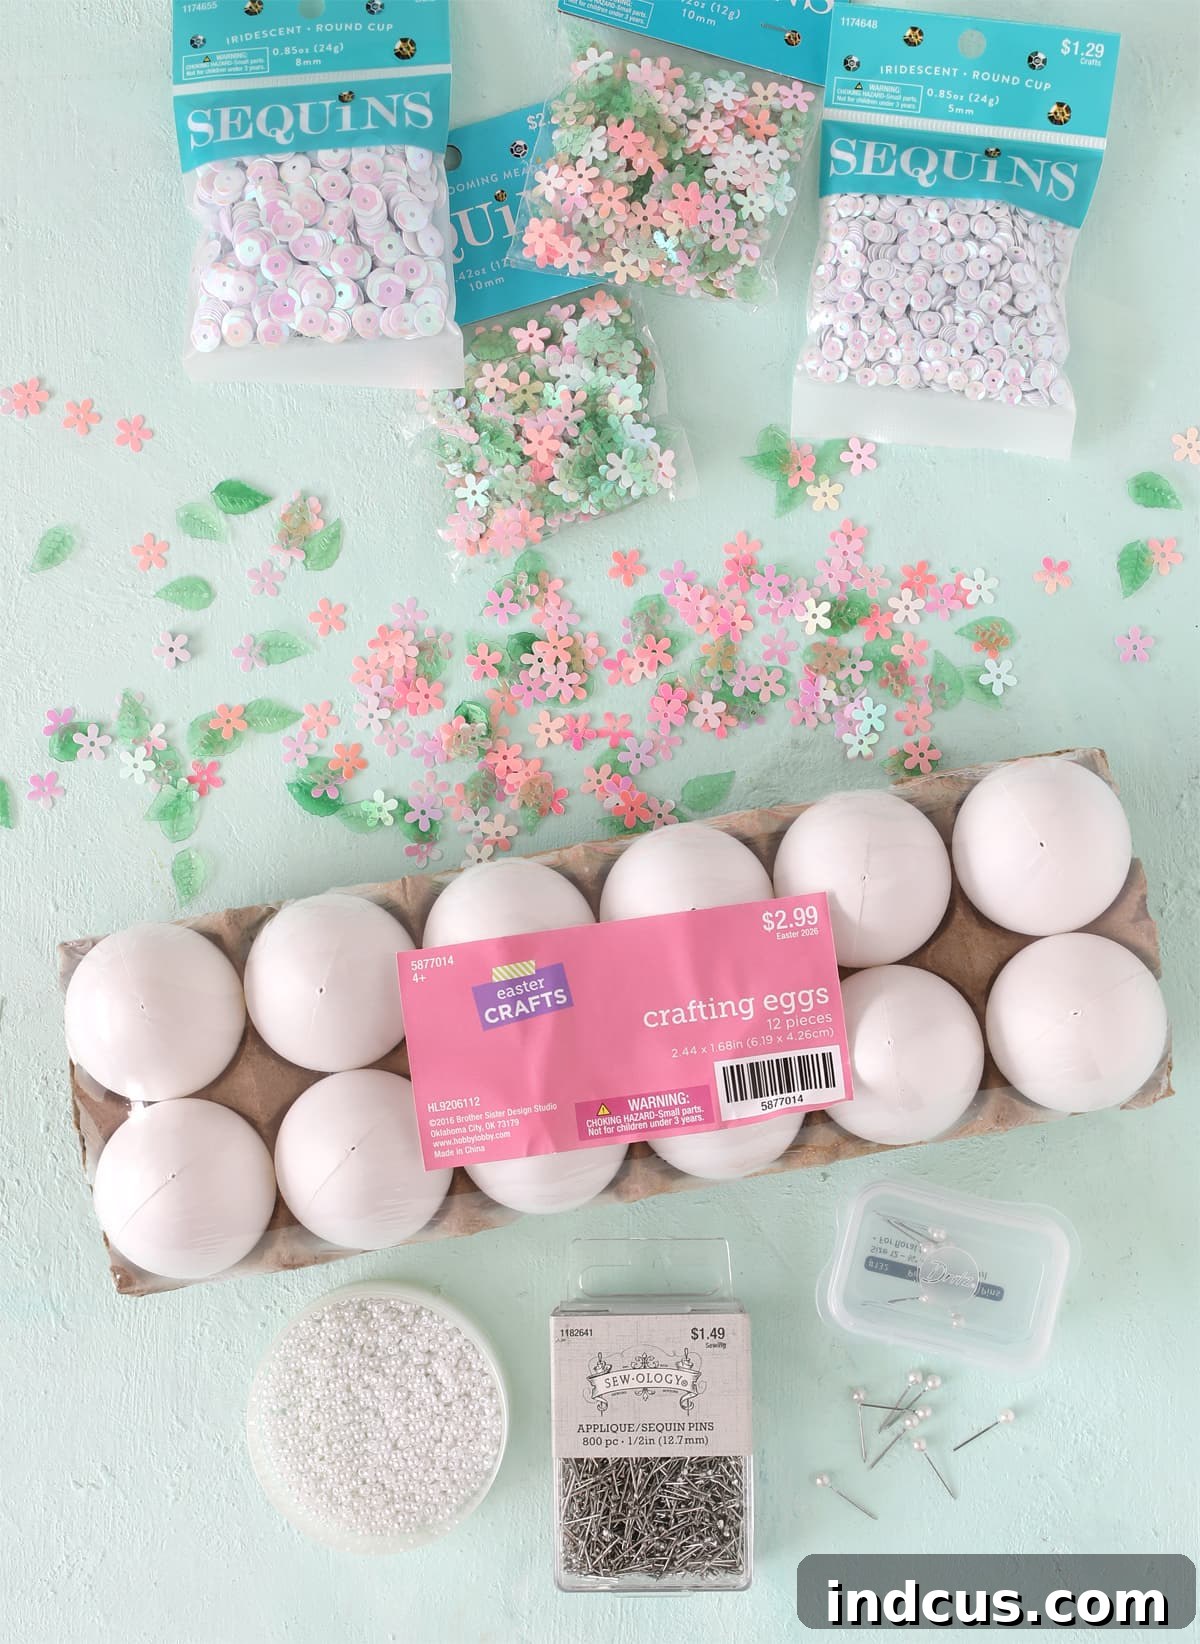
- Foam Craft Eggs: These are the foundation of your sequined masterpieces. Opt for smooth, sturdy foam eggs that will securely hold your pins. They come in various sizes, so consider whether you prefer a collection of smaller, delicate eggs or a few larger, statement pieces. The classic egg shape works best for mimicking traditional decorated eggs.
- Blooming Meadow Sequins: Head to the sequin section in-store to discover these exquisite floral-shaped sequins. The “Blooming Meadow” collection often features a variety of botanical shapes like leaves, petals, and tiny flowers, which are perfect for achieving that organic, spring-inspired look. Don’t limit yourself to just one type; a mix of shapes and sizes will add depth and visual interest to your eggs. Consider a pastel palette for a soft, traditional Easter feel, or vibrant hues for a more contemporary display.
And now, for the crucial element that brings the sequins to life:
- Applique/Sequin Pins: These tiny pins are specifically designed for attaching sequins and beads to fabric or foam. Their small size makes them virtually invisible once applied, allowing your sequins and pearls to truly shine.
- Plastic Pearl Beads – 3mm (or any color/style 3mm beads): If you choose plain sequin pins, these small beads are essential. The 3mm size is ideal for creating a delicate border around each sequin, giving your eggs a truly jeweled appearance. While classic ecru pearls offer timeless elegance, feel free to experiment with other bead colors or styles to match your sequins or create unique combinations.
Alternatively, for a simpler approach:
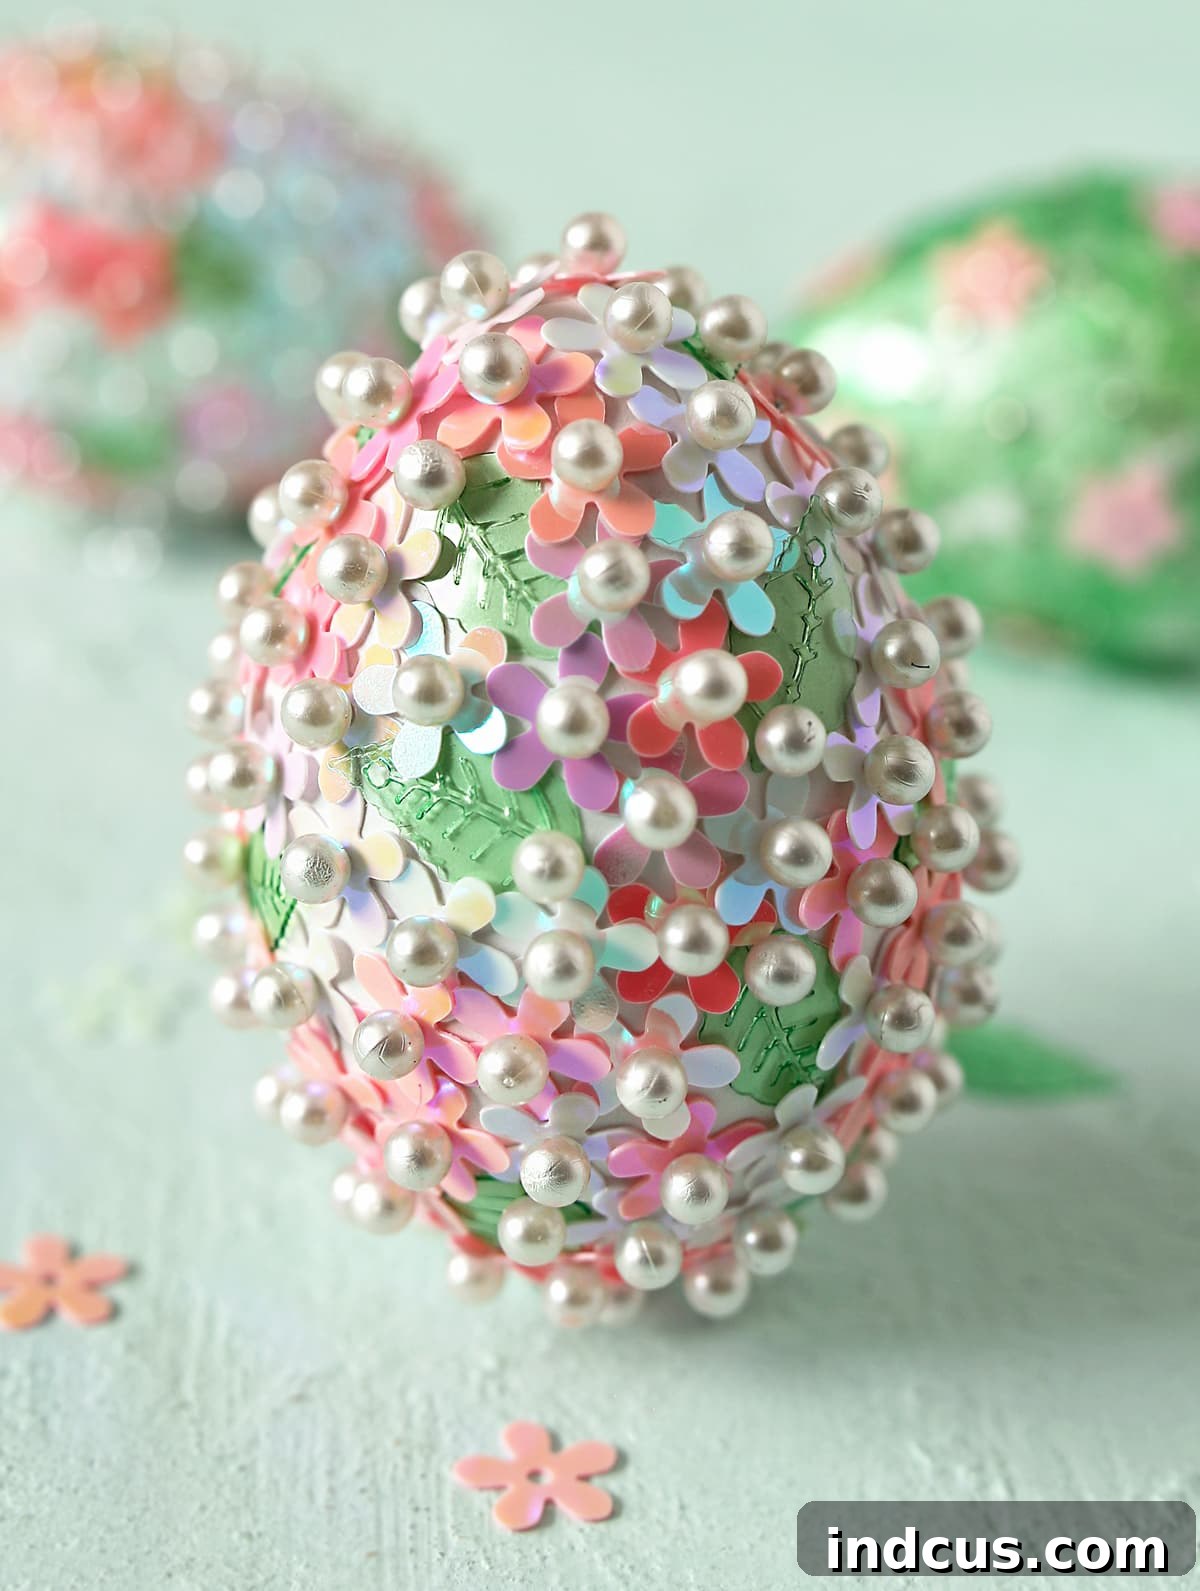
- 3/4″ Petite Pearlized Pins: These pins come with a pearl head already attached, saving you the step of adding individual beads. They are slightly larger than plain sequin pins and offer a distinct look.
Choosing Your Pins: A Comparison for Perfect Results
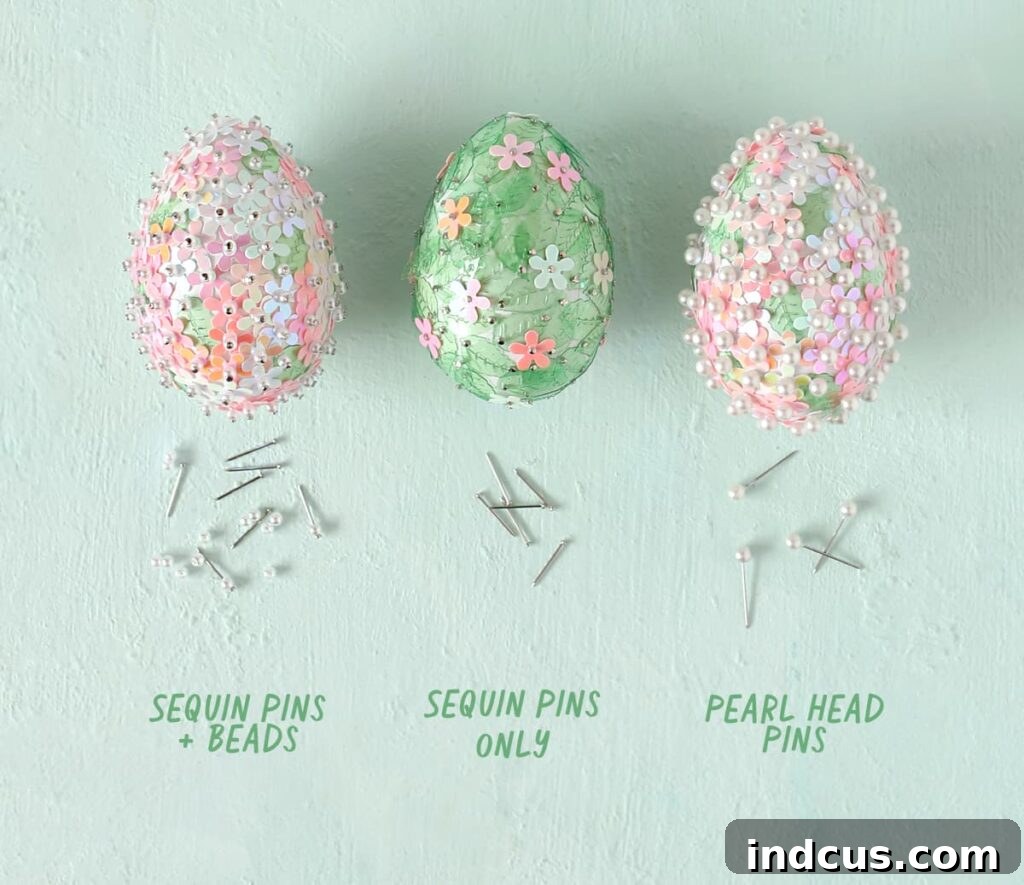
Your choice of pins will subtly influence the final look and feel of your decorated eggs, as well as the ease of the crafting process. Here’s a detailed breakdown to help you decide:
- Sequin Pins (Plain) + Separate Beads:
- Pros: Offers an enormous variety of options for bead colors, allowing for unparalleled customization. This method is generally more cost-effective as plain pins and small bead packs are budget-friendly.
- Cons: Handling tiny pins and even tinier beads can be a bit challenging and may strain your hands over time. It adds an extra step to the process for each application.
- Pearl Head Pins (Pre-Pearlized):
- Pros: Significantly easier to work with, as they save you the step of adding a separate bead. Their slightly larger size makes them easier to grip and manipulate. The pre-attached pearl heads provide a consistent and elegant finish.
- Cons: These pins are typically more expensive per pack. The pearl heads are usually fixed in color (most commonly white or ecru), limiting bead color customization. Expect to use a considerable quantity; one egg might require almost an entire package (e.g., 150 count) of pearlized pins.
- No Pearls (Sequins Only):
- Pros: This option offers the fastest application, as you’re only dealing with pins and sequins. It results in a flatter, sleeker look that truly highlights the sequins as the main decorative element.
- Cons: While still beautiful, the absence of beads can make the eggs appear less “jeweled” or three-dimensional.
No matter which pin type you select, the results will be undeniably beautiful. The choice simply comes down to your personal preference for ease of use, customization, and desired aesthetic.
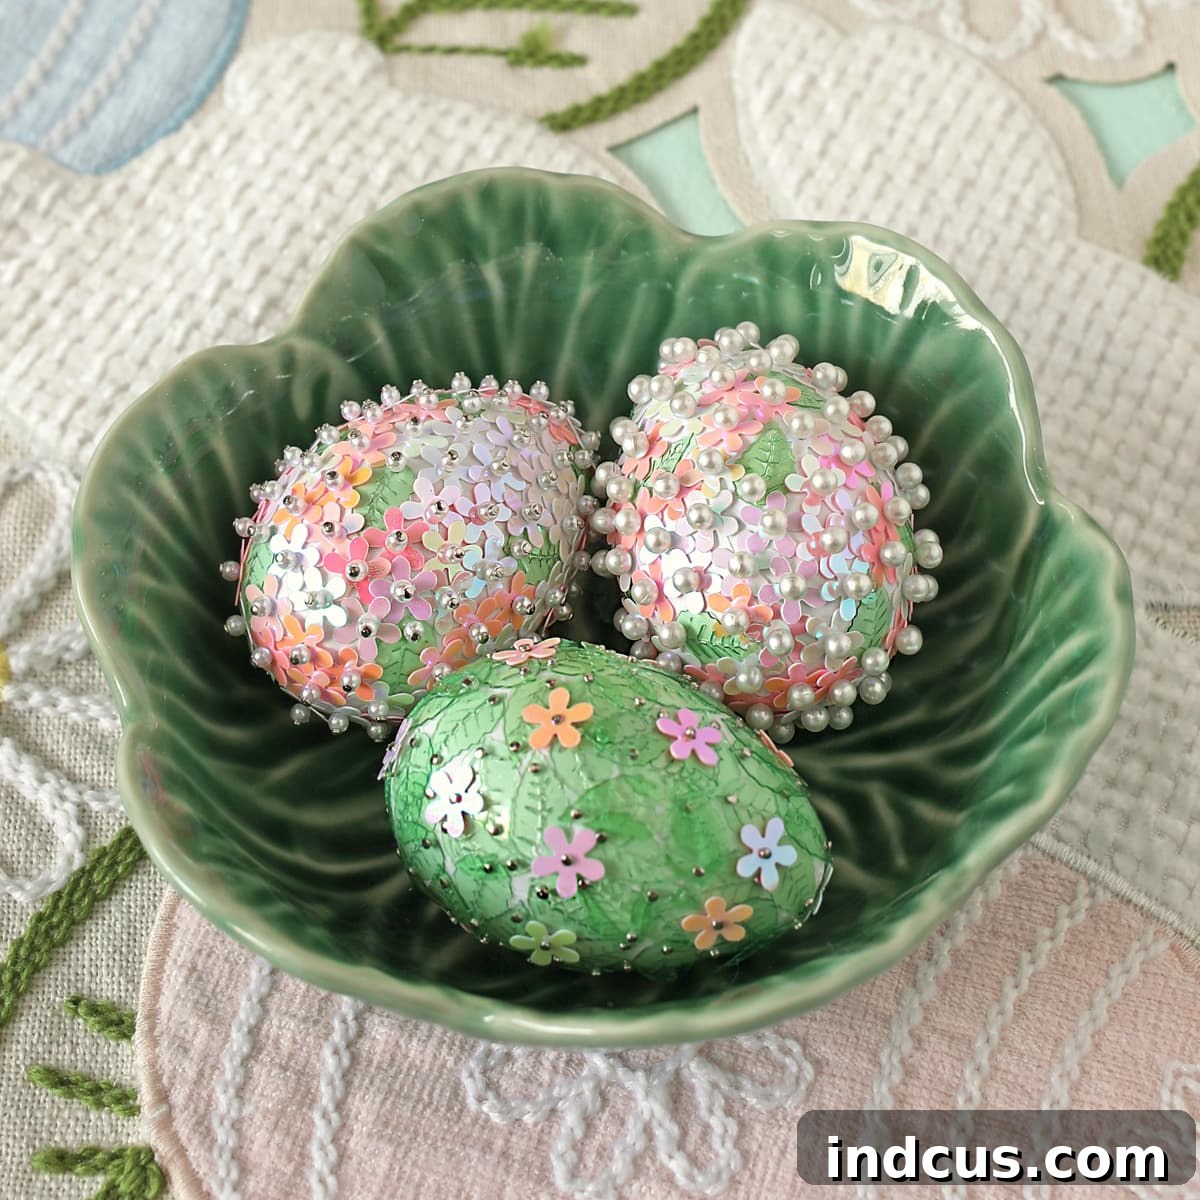
As a final decorative touch for your crafting station, the exquisite embroidered table runner and the charming cabbage bowl featured in our photographs are also sourced from Hobby Lobby. While the table runner might require an in-store search as it’s not consistently listed online, the bowl is readily available. Both pieces beautifully complement the spring theme and add a touch of rustic elegance to your Easter display.
Step-by-Step Guide: Crafting Your Pearl and Sequin Easter Eggs
Despite their elaborate appearance, these sequin and pearl-covered Easter eggs are surprisingly simple to create. The process is meditative and enjoyable, perfect for unwinding. Follow these straightforward steps to transform plain foam eggs into dazzling works of art:
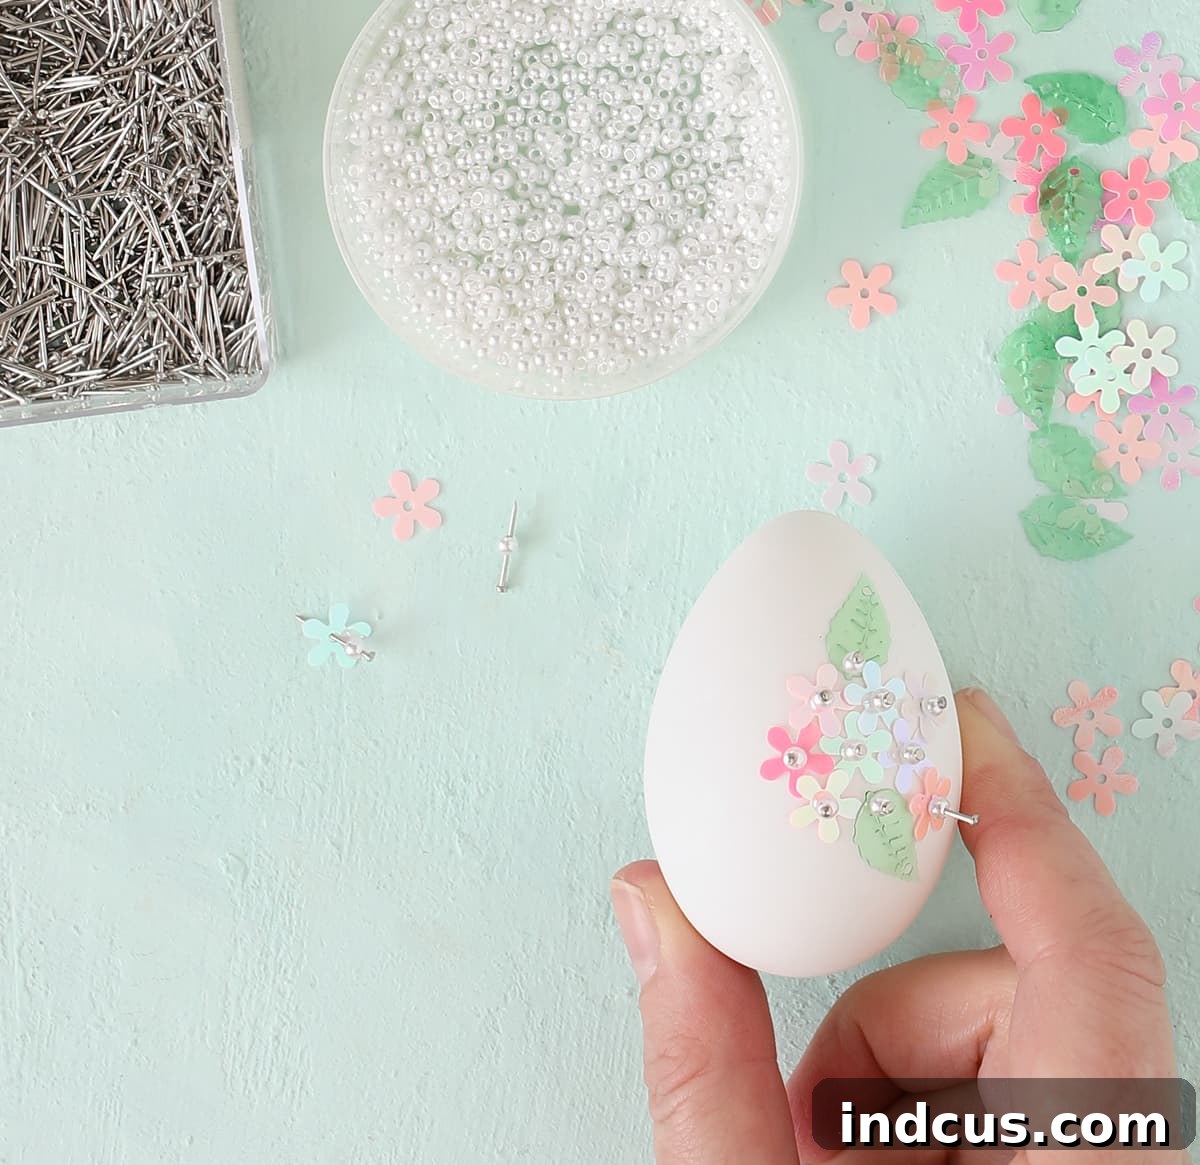
- Prepare Your Pin (If Using Separate Beads): If you’ve chosen the plain sequin pins and separate 3mm pearl beads, this is your first step. Carefully thread one pearl bead onto a sequin pin. Ensure the bead sits snugly at the head of the pin. If you’re using pearlized pins, you can skip this step entirely, as the pearl head is already integrated.
- Add a Sequin: Next, gently thread a sequin onto the pin, positioning it directly below the pearl bead (or the pearl head, if using pearlized pins). Ensure the sequin is facing the direction you want it to display on the egg, usually with the concave side slightly curving away from the pin for a fuller look, or the convex side if you prefer a flatter appearance.
- Position and Secure the Pin: Hold the foam egg in one hand and the prepared pin (with bead and sequin) in the other. Carefully press the sharp end of the pin into the foam egg. Aim for an even distribution, allowing the sequin to lie flat against the egg’s surface with the pearl bead resting atop it. Push the pin in firmly until the sequin and bead are securely fastened and the pin shaft is mostly hidden within the foam.
- Repeat and Cover: Continue this process, applying sequins and beads in a systematic manner until the entire surface of the foam egg is covered. Work in rows, spirals, or random patterns – the choice is yours! The key is to ensure each sequin slightly overlaps or touches the adjacent ones, minimizing any visible gaps in the foam underneath.
It’s truly that simple! The magic happens as you progressively cover the egg, watching it transform with each applied sequin and pearl. Patience is your greatest tool here, as the beauty lies in the meticulous repetition.
Expert Tips and Creative Tricks for Flawless Sequin Easter Eggs
While the basic instructions for this craft are wonderfully straightforward, a few insider tips and clever tricks can significantly enhance your experience and the final outcome of your sequin and pearl Easter eggs. These insights will help you navigate common challenges and make the process even more enjoyable.
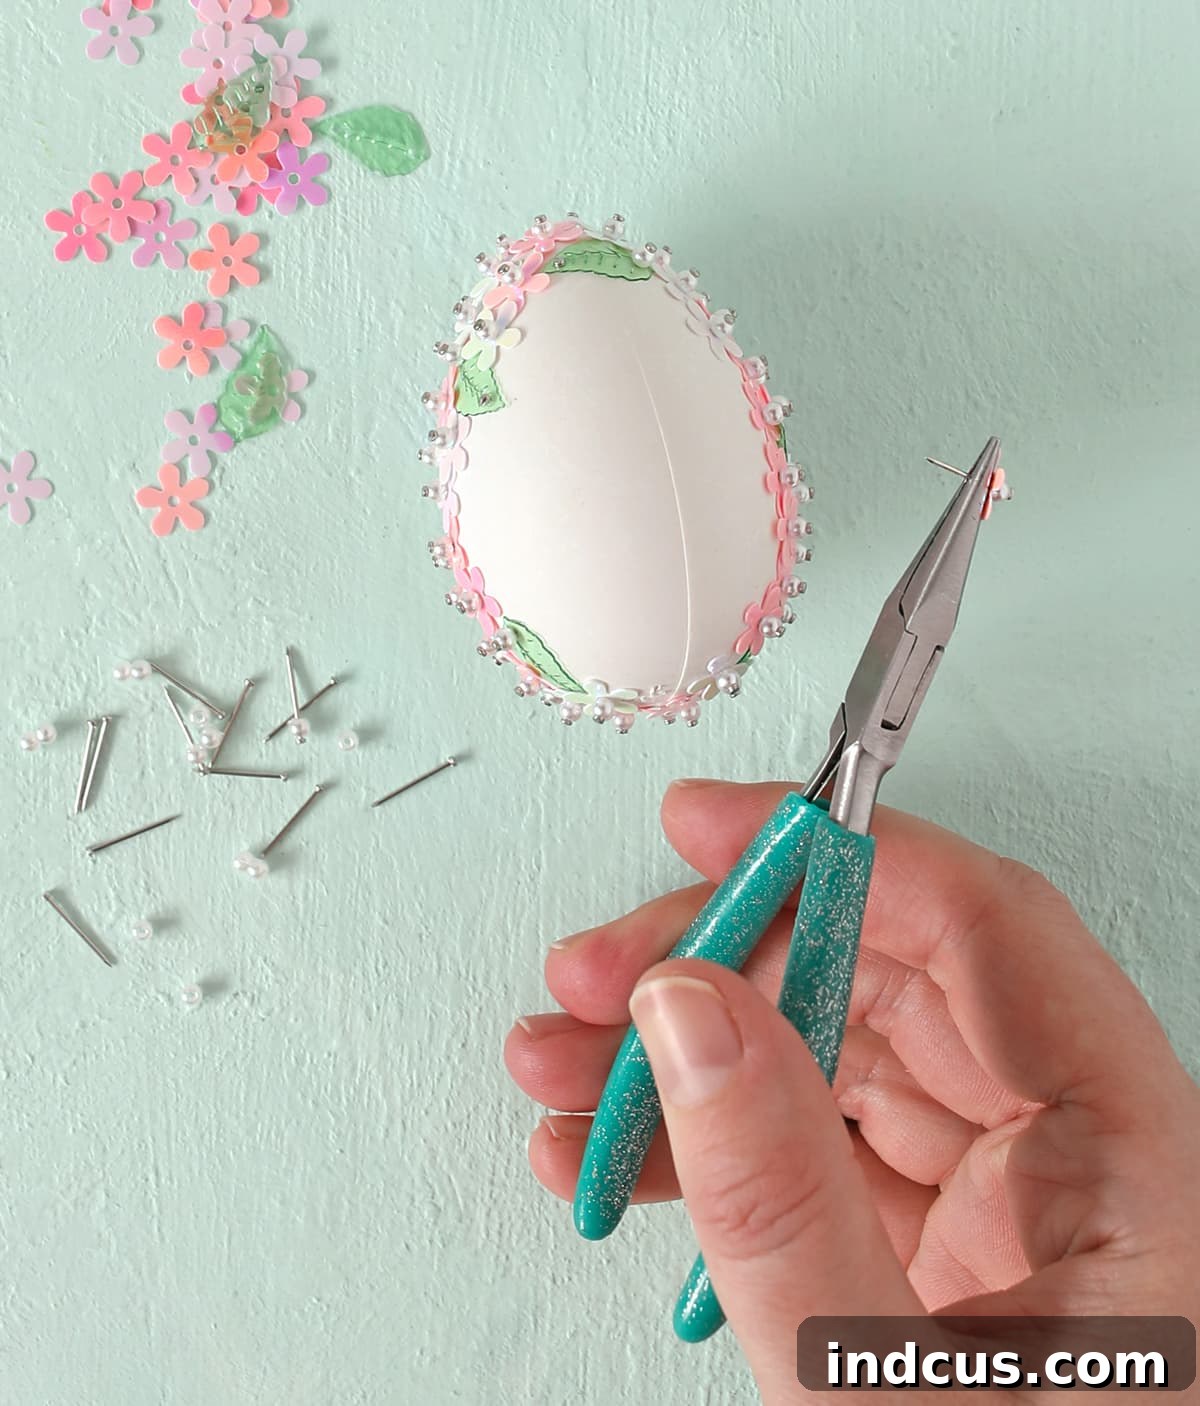
- Mastering Tiny Pins with Pliers: The minuscule nature of standard sequin pins can make them challenging to grip and painful to push into the foam, especially over extended periods. My best discovery for this was to use a pair of jewelry pliers. Grab the pin firmly with the pliers, thread on your bead, then your sequin. Keeping the pin securely squeezed in the pliers, use the tool itself to push the pin smoothly and deeply into the foam egg. This technique saves your fingertips and provides better leverage.
- Assisting Pin Insertion for Pearlized Pins: Pearlized pins, being a bit thicker and sometimes encountering denser areas of the foam egg (particularly around seam lines), might resist going in. If you find a pin stubborn, don’t force it. Instead, use a regular sewing needle or a sharp push pin to create a small starter hole. This pre-punched guide will make it much easier for the pearlized pin to glide in. Be cautious not to make the hole too large, or your sequin pin might become loose and slide out.
- Embrace the Meditative Process: While this craft is simple, it is also time-consuming. Each egg can take approximately an hour to complete, depending on its size and the density of your sequin application. Rather than viewing this as a chore, embrace it as a wonderful opportunity for mindful crafting. I personally adore listening to audiobooks or podcasts while my hands are busy with repetitive tasks like this. The rhythmic motion of placing each sequin is incredibly soothing and can be a fantastic way to unwind. What some might call tedious, I find to be a delightful, productive form of relaxation.
- Strategic Sequin Placement: To achieve a truly professional look, pay attention to the overlapping of sequins. Try to overlap each new sequin slightly over the edge of the previous ones. This technique helps to minimize visible foam gaps and creates a richer, more opulent texture. You can work in concentric circles from the top or bottom of the egg, or follow a spiral pattern for a dynamic effect.
- Mixing Sequin Shapes and Sizes: Don’t be afraid to experiment with different sequin shapes and sizes. Combining round sequins with leaf-shaped ones, or mixing larger focal sequins with smaller fillers, can add incredible dimension and visual interest to your eggs. This approach allows for greater creativity and truly unique designs.
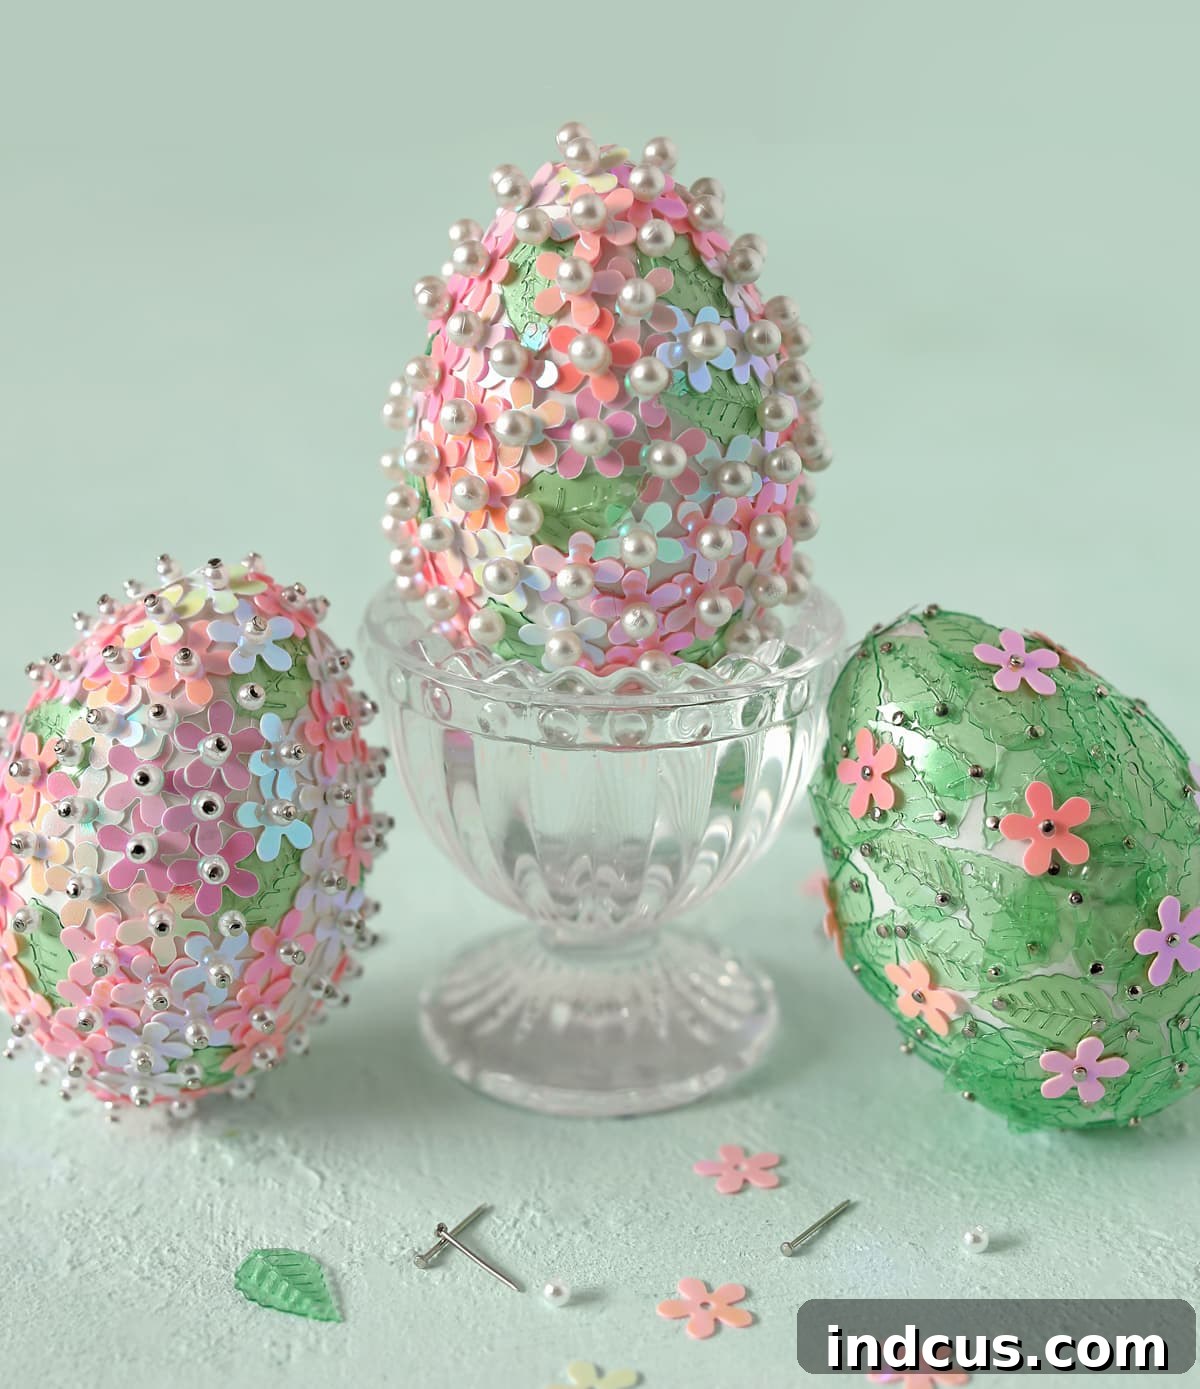
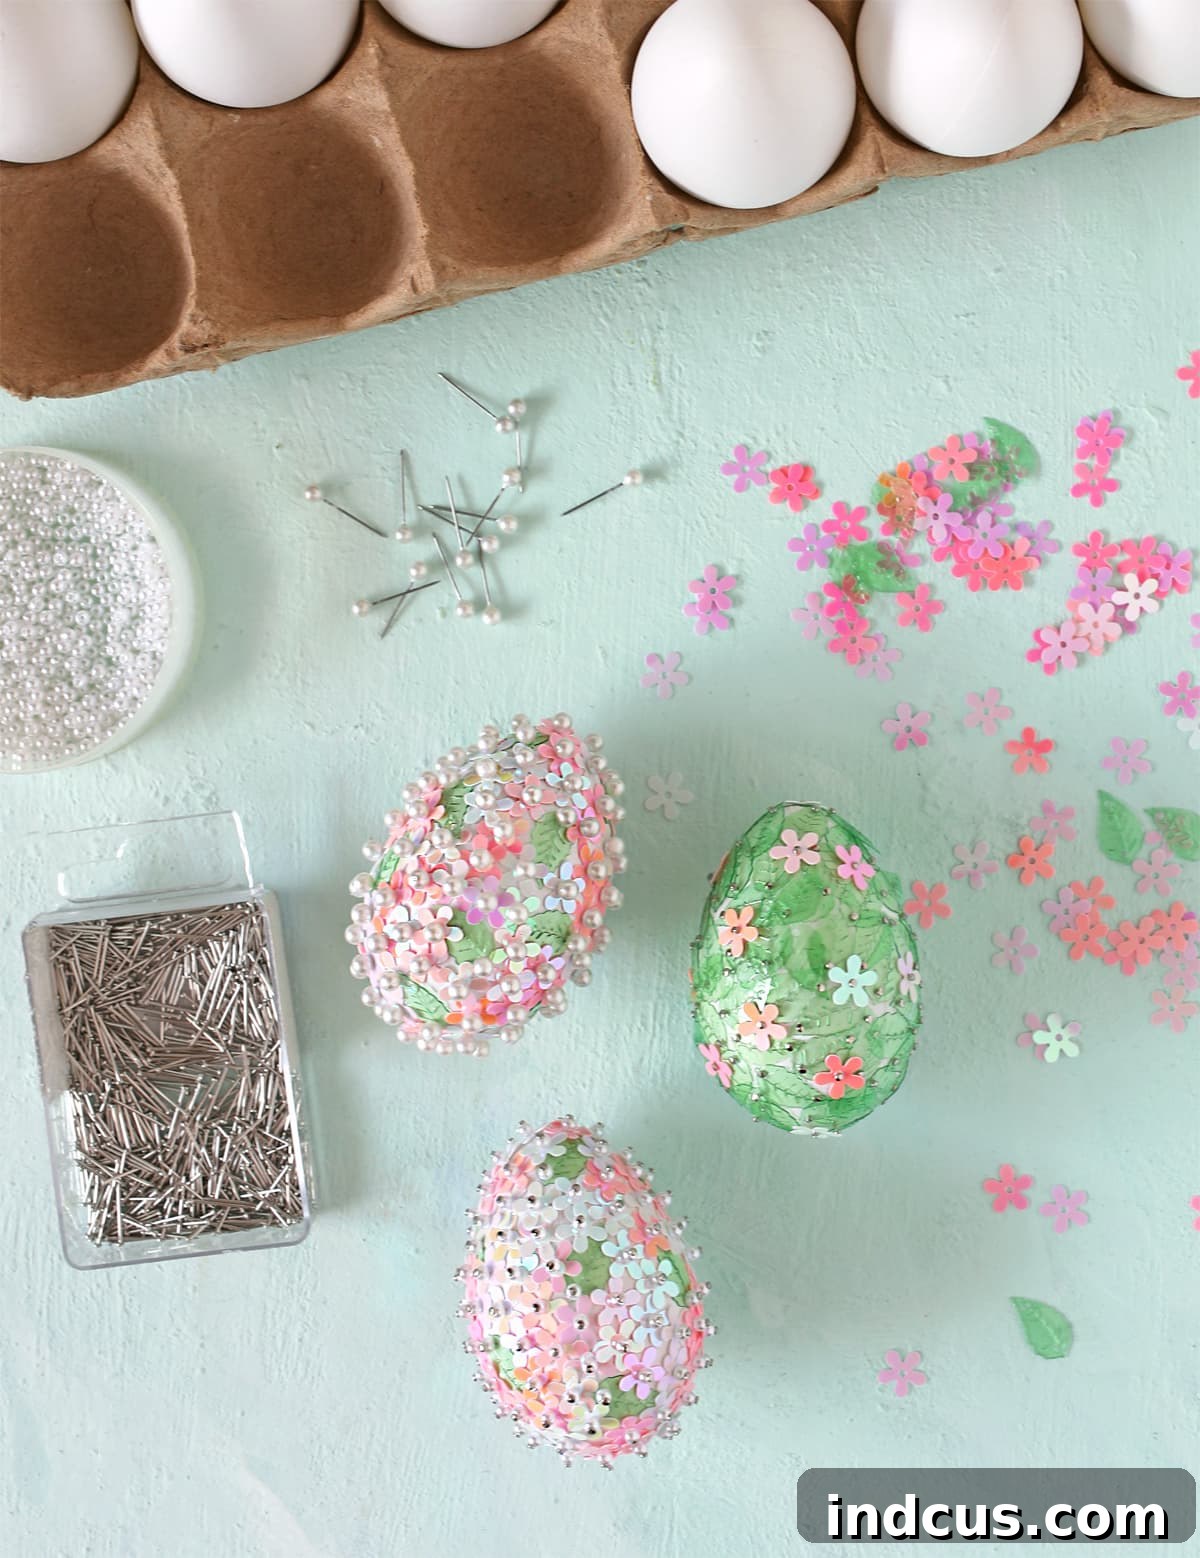
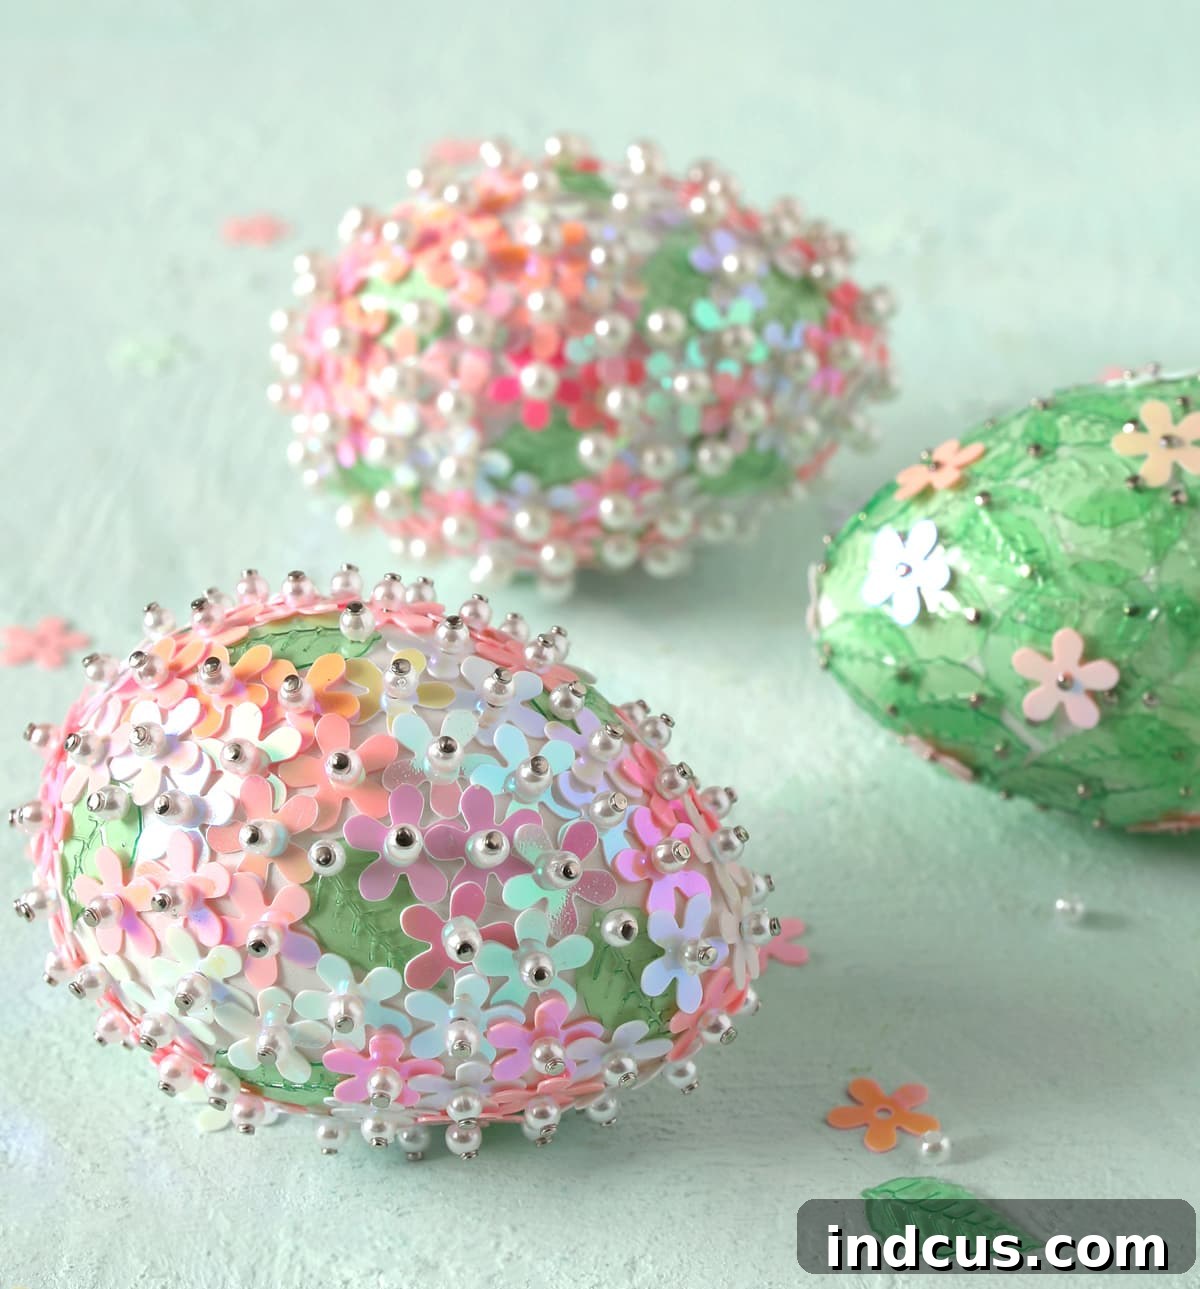
One of my favorite experiments was creating an egg primarily with leaf-shaped sequins. The natural, organic feel it achieved was simply beautiful and, to me, felt the most distinctly “Easter-like” among my collection. The beauty of this craft lies in how each egg can develop its own unique character, yet they all come together to form a cohesive, stunning display. This trio of decorated eggs truly exemplifies the charm and versatility of this project!
Watch and Learn: DIY Sequin Beaded Easter Egg Video Tutorial
Sometimes, seeing the process in action is the best way to grasp the nuances of a craft. For a visual guide and additional insights, be sure to watch our comprehensive video tutorial. It demonstrates each step, offers close-up views of the pin and sequin application, and provides practical tips to help you achieve perfect results.
Unleash Your Creativity: Endless Possibilities for Your Sequin Eggs
The beauty of this DIY project lies in its remarkable versatility. Once you’ve mastered the basic technique, the possibilities for customization are truly endless. I’m already envisioning countless variations and eagerly planning my next batch of sequin eggs!
- Explore New Sequin Shapes: Beyond floral and leaf designs, keep an eye out for other unique sequin shapes like stars, hearts, butterflies, or even geometric patterns. Each new shape will lend a completely different character to your finished eggs.
- Play with Color Palettes: While pastels are perfect for a classic Easter look, consider a bold monochrome design, a vibrant rainbow, or even a sophisticated metallic theme with gold and silver sequins. You could also create ombré effects by gradually transitioning colors across the egg’s surface.
- Experiment with Bead Types: Instead of traditional pearls, imagine using tiny faceted beads for extra sparkle, matte beads for a subtle texture, or even colorful seed beads to create intricate patterns with your sequin pins. I’m currently on the hunt for a pastel pack of tiny beads to use with plain sequin pins, curious to see the delicate effect they’ll create.
- Add Embellishments: Once your eggs are fully covered, consider adding small ribbons, delicate charms, or even tiny painted details for an extra touch of personalization. You could also attach a loop of ribbon to the top of some eggs, transforming them into hanging ornaments.
Each egg offers a blank canvas for your imagination. Which egg in our example collection is your favorite? Perhaps the subtle elegance of the white, the vibrant pop of color, or the nature-inspired charm of the leaf design? Let these inspire your own creative journey!
Showcasing and Caring for Your Bejeweled Easter Eggs
Once your beautiful sequin and pearl Easter eggs are complete, it’s time to display them proudly! These decorative pieces are far too stunning to be hidden away. Consider arranging them in an elegant bowl as a striking centerpiece, placing them individually on small egg stands for a more curated look, or incorporating them into a larger spring tablescape alongside fresh flowers and other decorative elements. They also make exquisite, heartfelt gifts for loved ones, offering a unique token of handmade beauty.
To ensure your handcrafted treasures last for many Easters to come, handle them gently. Store them in a box with soft tissue paper or individual compartments when not on display, protecting the delicate sequins and pearls from dust and damage. With proper care, these shimmering eggs will become a cherished part of your annual Easter traditions.
Start Your Own Elegant Easter Crafting Journey!
Creating these exquisite sequin and pearl Easter eggs is more than just a craft; it’s an invitation to slow down, enjoy a meditative process, and produce something truly beautiful and unique. Whether you’re a seasoned crafter or new to the world of DIY, this project offers a rewarding experience with dazzling results. We hope this comprehensive guide has inspired you to gather your supplies and embark on your own journey of crafting these luxurious Easter decorations. Share your creations with us, and let your creativity shine this spring!