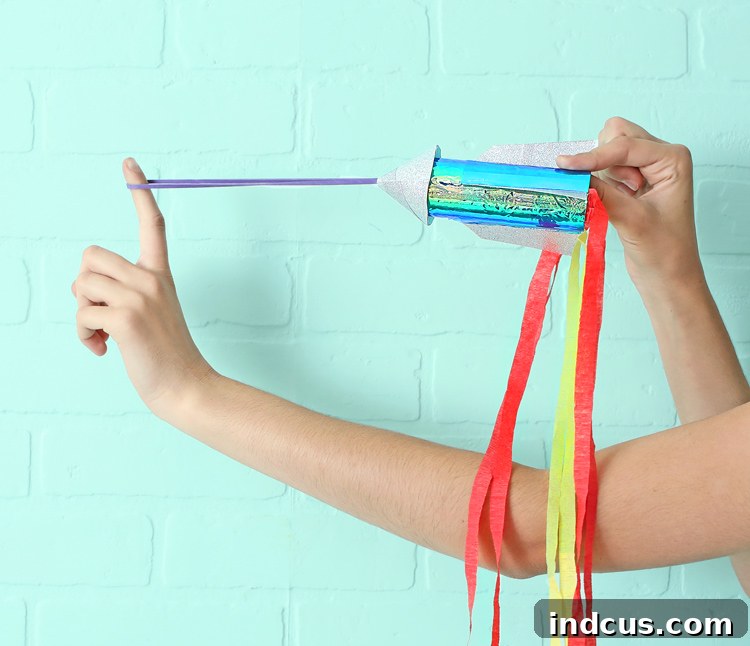
Blast Off into Fun: How to Make Amazing DIY Rubber Band Rockets for Endless Outdoor Adventures!
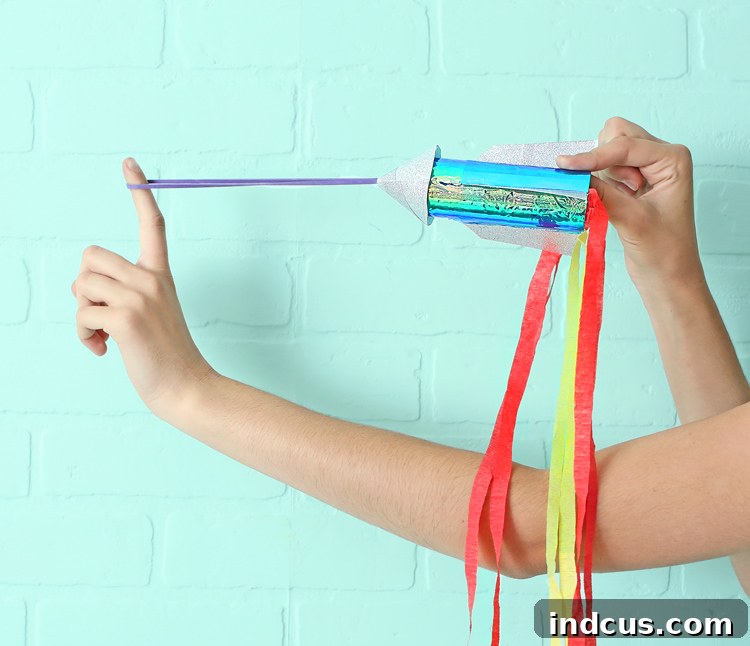
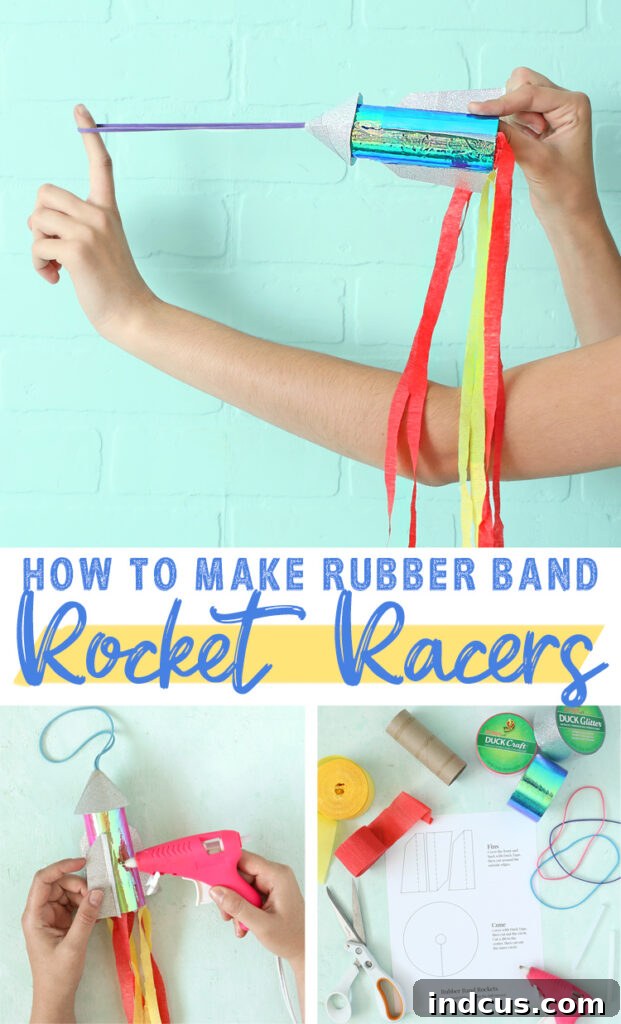
Get ready for an exciting craft adventure that will send your spirits soaring! We’re about to transform ordinary toilet paper rolls and a few simple supplies into spectacular toy rockets, perfect for launching high into the sky. Imagine the thrill on your children’s faces as they send their handcrafted rockets zooming upwards, ready to be caught and launched again and again. This project is not just incredibly fun; it’s also a fantastic way to spark creativity, encourage outdoor play, and introduce basic principles of physics in an engaging, hands-on manner.
Thanks to the vibrant and durable Duck craft tape, these rockets won’t just fly; they’ll dazzle with shiny, glittery designs that are truly out of this world. The reflective quality of Duck Mirror Tape, in particular, adds an undeniable “space-age” vibe, making each rocket feel like a mini spacecraft ready for its next mission. This simple DIY craft promises hours of entertainment, making it an ideal activity for playdates, family gatherings, or just a sunny afternoon in the backyard.
This post is proudly sponsored by Duck Brand.
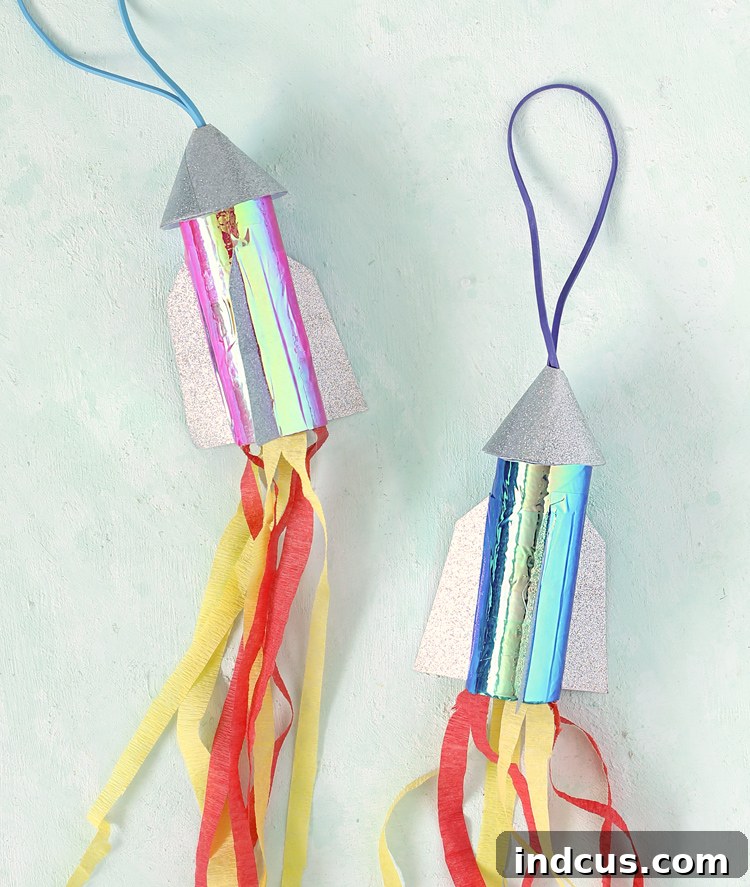
As the warmer months draw to a close, squeezing in those last few memorable outdoor activities with the kids becomes a top priority. Our family recently embarked on this rocket-making journey, and the sheer delight and excitement it brought were contagious. The joy of creating something together, followed by the exhilaration of launching it into the air, made for an unforgettable experience. It was so much fun, in fact, that I simply had to share this easy-to-follow tutorial with you, so your family can create their own fleet of high-flying rubber band rockets too!
Why Make DIY Rubber Band Rockets?
Crafting these rockets offers a multitude of benefits beyond just pure entertainment. It’s an accessible project that utilizes common household items, making it budget-friendly and convenient. It promotes fine motor skills as children cut, tape, and assemble, and encourages problem-solving as they learn how different components contribute to the rocket’s flight. Furthermore, these rockets are an excellent way to get kids off screens and into the fresh air, fostering active outdoor play and exploration. Each launch provides a mini lesson in aerodynamics and potential energy, making science exciting and tangible. Plus, the satisfaction of creating a toy from scratch and then seeing it perform is incredibly rewarding for children of all ages.
Essential Supplies for Your Rocket Launchpad
Before we embark on our crafting mission, gathering all your materials is key. Most of these items are readily available, and you might even have some lying around your home already. Here’s a detailed list of what you’ll need to build your very own rubber band rocket:
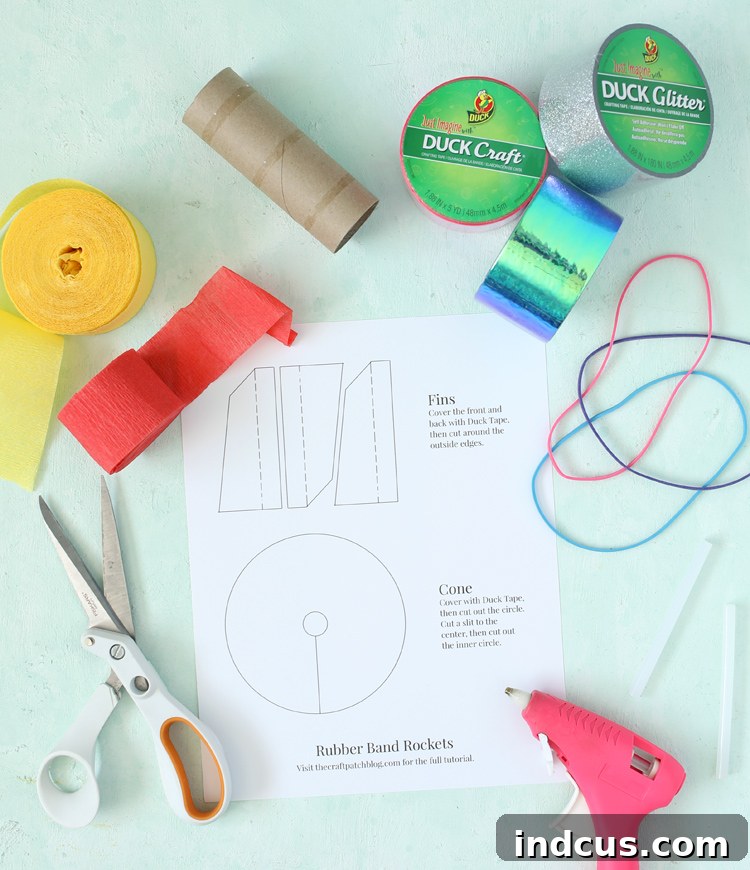
Materials Needed
- Duck Mirror Crafting Tape: This tape is fantastic for creating a sleek, futuristic body for your rocket. Its reflective surface will shimmer as your rocket flies, catching the sunlight beautifully.
- Duck Glitter Crafting Tape: Perfect for adding sparkle and flair to your rocket’s nose cone and fins. The glitter texture makes your rocket truly stand out.
- White Duck Tape: A versatile tool for securing components, providing structural integrity, and reinforcing areas that need extra strength.
- Cardboard Tubes: These form the main body of your rocket. Craft-specific cardboard tubes are ideal, but empty toilet paper or paper towel rolls work just as well.
- Large Rubber Bands (File Bands – 7 Inches): The larger size and strength of file bands are crucial for providing the necessary propulsion for a good launch. Ensure they are robust enough to withstand stretching.
- Crepe Paper Party Streamers: These serve as the rocket’s “exhaust trail” and add a dynamic visual element during flight.
- Printable Template (Linked Below): This essential template provides the precise shapes for your rocket’s nose cone and fins, ensuring accurate assembly and optimal flight performance.
- Scissors: For cutting tape, paper, and streamers. A good, sharp pair will make clean cuts easier.
- Hot Glue Gun + Glue Sticks: Essential for strong, quick-drying bonds, particularly for attaching the nose cone and fins securely to the rocket body. Adult supervision is recommended when using a hot glue gun.
When it comes to cardboard tubes, you have several convenient options. While you can certainly purchase crafting cardboard tubes specifically designed for projects like this (I’ve linked them in the materials list above for your convenience), repurposing household items is a great eco-friendly alternative. Empty toilet paper rolls are perfect, and if you have a larger family, you’ll accumulate them quickly. A handy tip is to collect the center rolls from new toilet paper packages before they even enter the bathroom, ensuring they are clean and ready for crafting. Longer tubes, such as those from paper towels or gift wrap, can also be used by simply cutting them down to a suitable length for your rocket body. The key is to have a sturdy, cylindrical base that can withstand the assembly and launching process.
Step-by-Step Guide: Building Your Launch-Ready Rocket
Follow these detailed instructions to construct your incredible rubber band rocket. Take your time with each step to ensure your rocket is well-built and ready for flight!
Step 1: Prepare the Rocket Body with Mirror Tape. Begin by taking your cardboard tube, which will serve as the main body of your rocket. Carefully cover the entire surface of the tube with Duck Mirror Crafting Tape. Start at one end, pressing the tape down smoothly to avoid wrinkles or bubbles. Overlap the edges slightly as you wrap to ensure full coverage and a seamless, reflective finish. This step not only gives your rocket its sleek, metallic, space-age look but also adds a layer of durability to the cardboard tube. A well-wrapped body will be more resilient to repeated launches and landings.
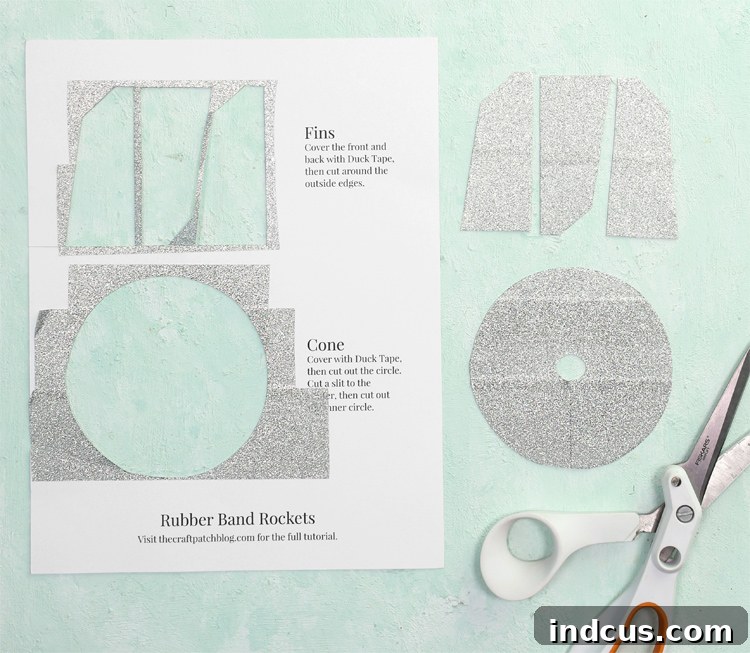
Step 2: Access and Print Your Rocket Template. Scroll to the bottom of this post where you’ll find the link to our exclusive printable rocket template. Click to download and then print it out onto white cardstock. Using cardstock is crucial here because it’s much sturdier than regular paper, providing the necessary rigidity for your rocket’s nose cone and fins. This will ensure they maintain their shape during flight and withstand the forces of launching and landing.
Step 3: Decorate and Prepare the Nose Cone. Now, take the circle piece from your printed template that is designated for the nose cone. Carefully cover one side of this circle with Duck Glitter Crafting Tape. Smooth out any air bubbles as you apply it to achieve a dazzling, flawless surface. Once covered, meticulously cut out the glitter-covered circle. Next, make a single slit from the outer edge of the circle directly to its center point. Finally, cut out the small inner circle marked on the template – this will be where your rubber band is anchored. This glittery cone will be the visible tip of your rocket, adding significant visual appeal.
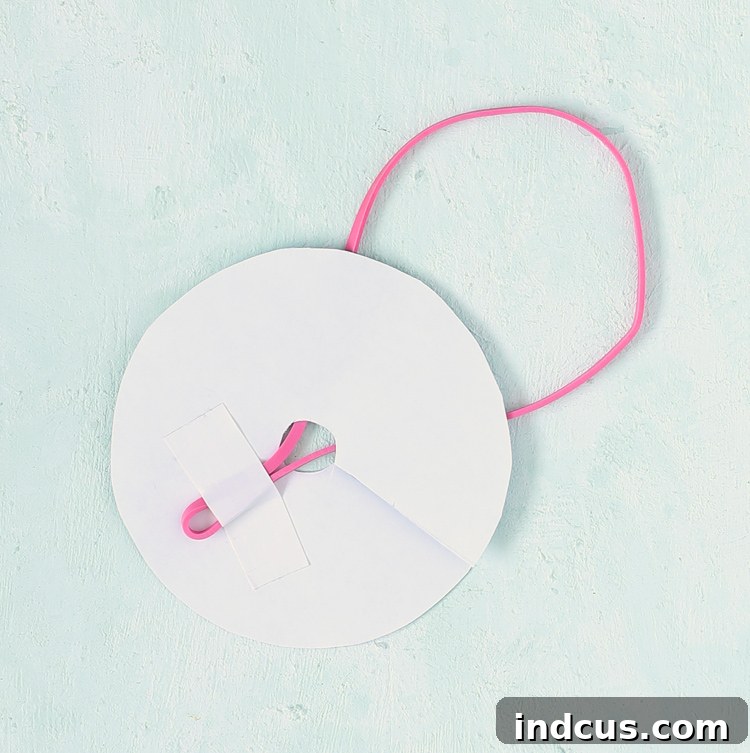
Step 4: Integrate the Rubber Band and Form the Cone. This is a critical step for your rocket’s launch mechanism. Take your large file band and carefully slip one end through the small center hole you just cut in the glitter-covered circle. Once the end is through, secure it firmly to the back (un-taped side) of the cone piece using a small, strong piece of White Duck Tape. Ensure the rubber band is securely fastened and won’t pull loose under tension. Next, gently roll the taped circle into a cone shape, aligning the edges where you made the slit. Once you have the perfect cone shape, secure the overlapping edges with a line of hot glue. Hold it in place for a few moments until the glue sets, creating a robust and aerodynamic nose cone with its integrated launcher.
Step 5: Attach the Nose Cone to the Rocket Body. With your nose cone ready, it’s time to attach it to one end of your mirror-taped cardboard tube. Apply a generous bead of hot glue around the rim of the cardboard tube. Carefully center the cone on top of the glue and press down firmly. Hold the cone in place for a good 30 seconds to a minute, allowing the hot glue to cool and create a strong, permanent bond. A secure nose cone is vital for the rocket’s structural integrity and flight stability.
Step 6: Craft and Attach the Stabilizing Fins. Retrieve the fin shapes from your printed template. For maximum durability and visual appeal, cover *both* sides of each fin shape with Duck Glitter Crafting Tape. This not only makes them sparkly but also protects them from wear and tear. After taping, carefully cut out each fin along its outline. Now, fold each fin along the dotted line indicated on the template – this crease will form the attachment tab. Apply a thin line of hot glue along this folded tab and carefully attach the fins to the sides of the cardboard tube, making sure they are evenly spaced around the rocket’s circumference. Proper fin placement is crucial for stable flight, so aim for symmetry. Typically, three or four fins work best for balance and directional stability.
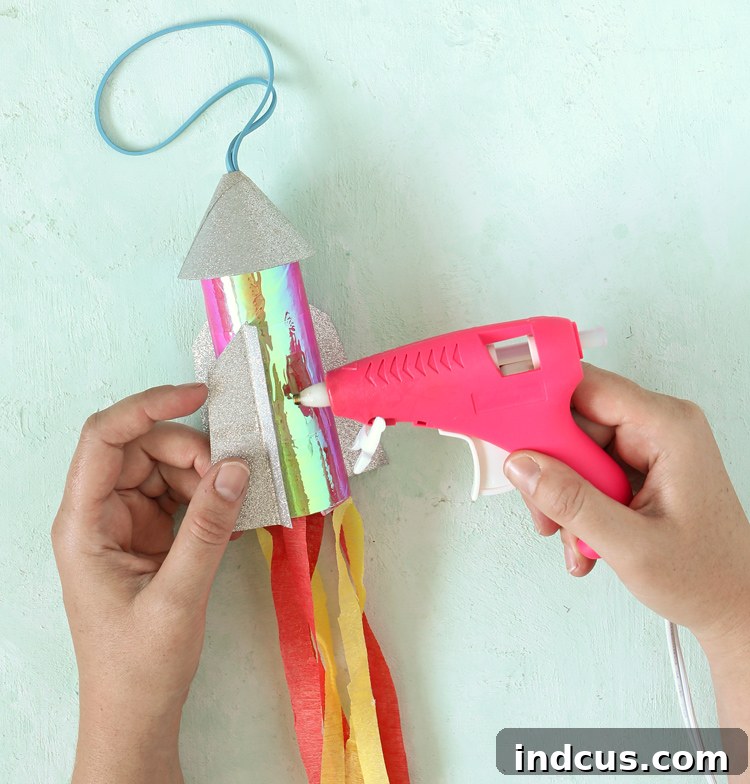
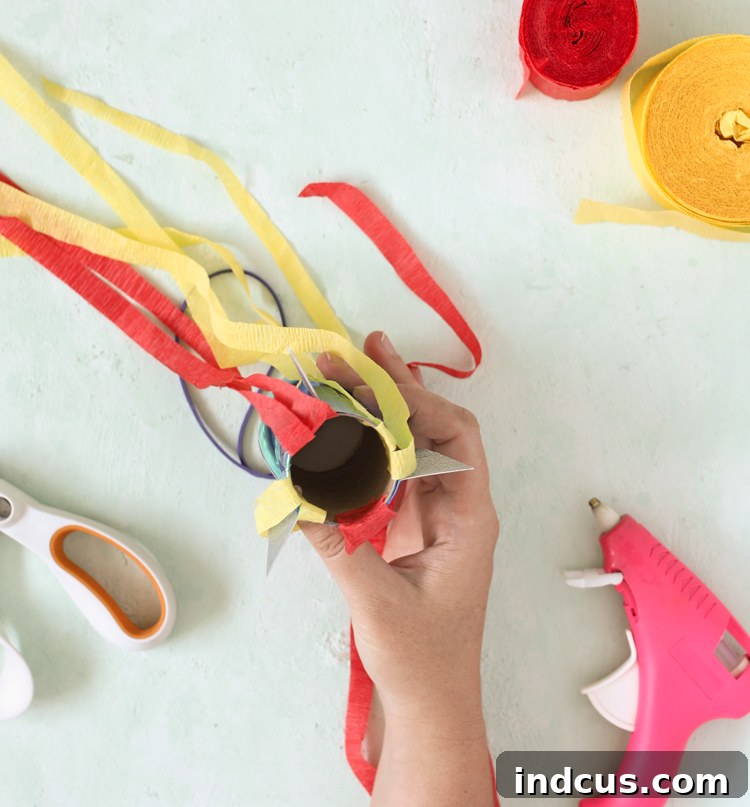
Step 7: Add the Dynamic Streamer “Exhaust”. To complete the visual effect and add a touch of flair, cut several long pieces of crepe paper party streamer. The length can vary based on your preference, but aim for pieces that will trail nicely when the rocket is in flight. Gather these streamer pieces together and secure one end of the bundle inside the open, bottom end of the cardboard tube using a dab of hot glue or a piece of White Duck Tape. The streamers will create a vibrant, trailing “smoke” effect as your rocket launches, enhancing the illusion of a powerful liftoff.
Launching Your DIY Rubber Band Rocket
Now for the most exciting part – launching your beautifully crafted rocket! To make your Duck Tape rocket fly, hold the rocket body firmly in one hand. With the other hand, hook a finger through the loop of the rubber band that extends from the nose cone. Pull the rubber band back, stretching it taut, while keeping a firm grip on the rocket. Aim your rocket away from people, animals, and delicate objects. When you’re ready, simply let go of the rocket body while keeping your finger hooked in the rubber band. Watch it zoom through the air! The stretched rubber band converts potential energy into kinetic energy, propelling your rocket upwards.
Safety Tips for Launching: Always launch in an open outdoor space, such as a park or a large backyard, free from overhead obstructions like trees or power lines. Ensure there’s plenty of clear space around you. Never aim the rocket at anyone’s face or eyes, as even a soft rocket can cause injury. Adult supervision is highly recommended, especially for younger children, to ensure safe and responsible play. Remember, these rockets are designed for fun, gentle play.
Tips for a Better Flight: Experiment with the angle of your launch. A slightly upward angle often yields the best height and distance. You can also try adjusting how far you pull back the rubber band – more tension generally means more power, but be careful not to overstretch the band. If your rocket consistently veers off course, double-check that your fins are evenly spaced and securely attached. Minor adjustments can make a big difference in flight stability.
Note: This file is hosted on Google Drive. In some environments, particularly school districts or corporate networks, access to Google Drive may be blocked. If you encounter issues accessing the files, please try again from an unrestricted computer or network connection.
Watch the Rubber Band Rocket Video Tutorial
We hope you and your family have an amazing time crafting and launching these delightful rubber band rockets. It’s a fantastic way to bond, explore creativity, and enjoy the great outdoors. Don’t forget to customize your rockets with different colors of Duck Tape or other embellishments to make each one uniquely yours. Share your rocket-flying adventures with us!
Enjoyed this creative project? Pin it to save it for later and inspire others to build their own fleet of high-flying rubber band rockets!