Elevate Your Fall Decor: A Guide to Crafting a Cross-Stitched Foam Pumpkin with a Modern Twist
As the leaves begin to turn and the crisp autumn air sets in, our thoughts naturally drift towards fall decorations. While the classic orange, red, and brown palettes have their timeless charm, there’s an increasing desire among crafters and home decorators to explore fresh, non-traditional aesthetics. This year, why not infuse your home with a unique touch of autumnal elegance that stands out from the crowd? We’re thrilled to share an inspiring DIY project that combines the rustic appeal of a pumpkin with the intricate beauty of cross-stitch, all while embracing a modern, unexpected color scheme. Get ready to transform a simple craft foam pumpkin into a stunning piece of personalized fall decor.
This delightful crafting adventure is brought to you with the generous support of Hobby Lobby, your go-to destination for an endless array of creative supplies and inspiration. We invite you to join us on this journey to create a truly special decoration that reflects your unique style and brings a breath of fresh air to your fall home.
Why Choose a Foam Pumpkin for Your Fall Craft Project?
Craft foam pumpkins have revolutionized seasonal decorating for good reason. Unlike their natural counterparts, these synthetic wonders offer unparalleled durability and reusability, allowing you to enjoy your creations year after year without worrying about decay. Their smooth, carvable surface provides a perfect canvas for a multitude of artistic techniques, from painting and glittering to, as we’ll explore today, cross-stitching. The lightweight nature of foam pumpkins also makes them easy to display anywhere in your home, from mantels and entry tables to outdoor porches (weather permitting). Choosing a foam pumpkin means investing in a sustainable and versatile decorative piece that truly lasts.
Embracing a Non-Traditional Fall Color Palette
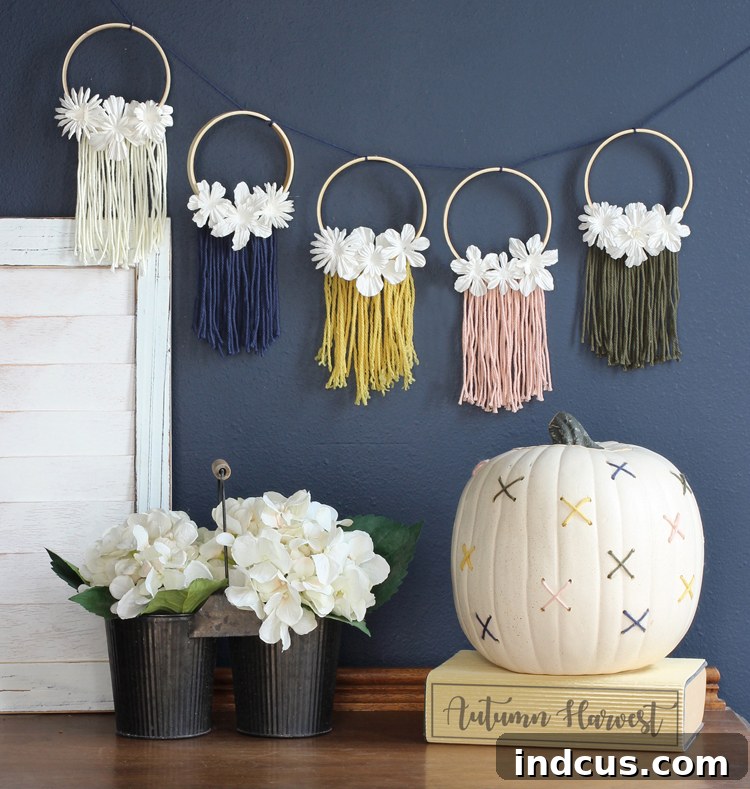
When envisioning fall decor, our minds often default to the warm, earthy tones that define the season. However, there’s immense joy and creative freedom in challenging these norms. This year, we decided to break away from tradition and explore a more contemporary color scheme. Our inspiration sparked in the vibrant yarn aisle of Hobby Lobby, where a beautiful array of hues presented the perfect opportunity for a fresh take on autumn. Opting for shades like blush pink, olive green, cream, navy, and mustard yellow creates a sophisticated yet playful contrast to conventional fall colors. This non-traditional approach allows your decor to feel both festive and uniquely stylish, seamlessly blending with various interior designs.
The Art of Cross-Stitch on an Unexpected Canvas
Cross-stitch, a timeless needlework technique, is typically associated with fabric and embroidery hoops. However, by adapting this charming craft to a foam pumpkin, we unlock a world of textural beauty and unique visual appeal. The tactile quality of yarn combined with the classic ‘X’ stitch creates a captivating surface that is both inviting and visually intriguing. This project is not only satisfying for experienced crafters but also accessible for beginners, offering a straightforward path to an impressive finished product. Get ready to transform a simple foam pumpkin into a handcrafted masterpiece.
Your Step-by-Step Guide to a Beautiful Cross-Stitched Pumpkin
Step 1: Preparing Your Foam Pumpkin for Stitching
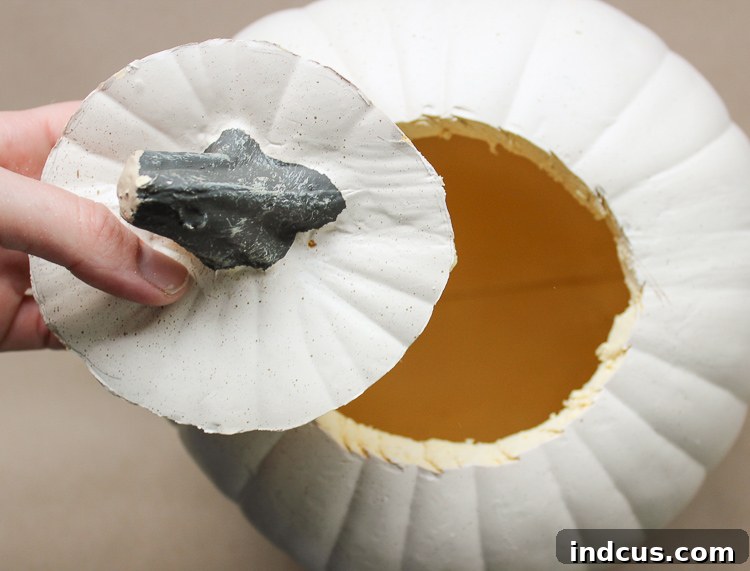
The first crucial step in our crafting journey is to prepare your carvable foam pumpkin. You’ll need to create an access point to the pumpkin’s interior to secure your yarn tails. Initially, one might instinctively cut a hole from the top, much like carving a real pumpkin. However, a clever tip for foam pumpkins is to cut the access hole from the bottom. This brilliant maneuver ensures that any cut lines or imperfections are completely hidden when your pumpkin is displayed, resulting in a cleaner, more professional finish. Use a craft knife or a small serrated knife to carefully cut a circular or square opening large enough for your hand to reach inside comfortably. Precision isn’t paramount for this cut, as it will be out of sight, but aim for a clean edge to make handling easier.
Step 2: Curating Your Yarn & Color Palette
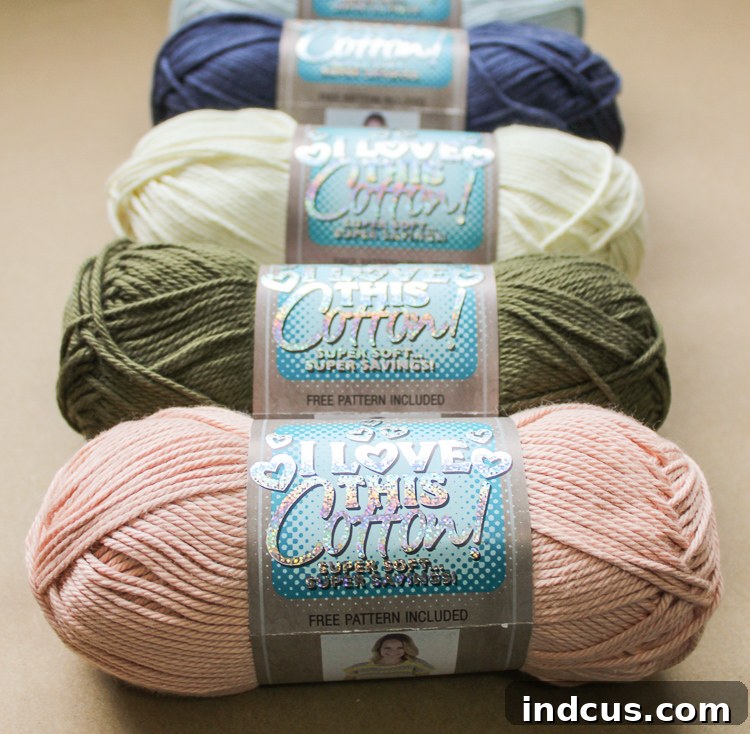
Now for the fun part: selecting your yarn! This is where your chosen non-traditional fall color scheme truly comes to life. Head to Hobby Lobby’s yarn aisle and gather a few different colors of I Love This Cotton Yarn or a similar weight yarn. For our project, we chose a delightful palette of blush pink, olive green, cream, navy, and mustard yellow. These colors, while not traditionally autumnal, create a surprisingly harmonious and sophisticated look when combined. Feel free to experiment with your own preferred shades! Consider analogous colors for a serene look, or complementary colors for a bold statement. Cotton yarn works wonderfully for this project due to its smooth texture and rich color saturation, providing excellent stitch definition. Ensure you have enough of each color to complete your desired pattern.
Step 3: Designing and Preparing Your Cross-Stitch Pattern
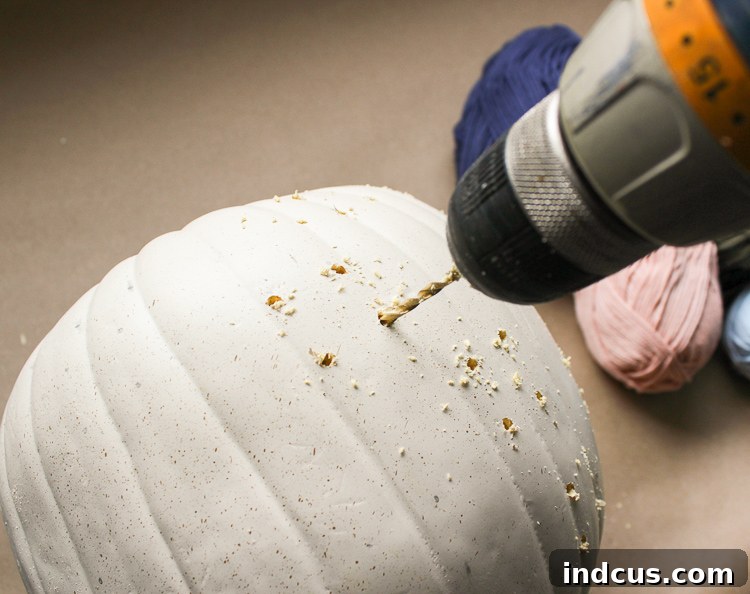
The design phase is where your creativity takes center stage. While a simple smattering of X’s can create a charming, minimalist effect, the possibilities are truly endless. You could opt for geometric patterns, an initial, a small floral motif, or even an abstract design. Begin by lightly sketching your chosen design onto the surface of the pumpkin with a pencil. Don’t press too hard, as you want these lines to be guides rather than permanent marks. Once you’re satisfied with your design, it’s time to create the holes for stitching. Using a power drill fitted with a small drill bit (the size should accommodate your yarn and needle, typically around 1/8 inch or smaller), carefully drill holes at each point where your cross-stitches will begin and end. Maintain even spacing between holes to achieve a consistent stitch appearance. Always exercise caution and prioritize safety when using power tools.
Step 4: The Art of Stitching Your Design
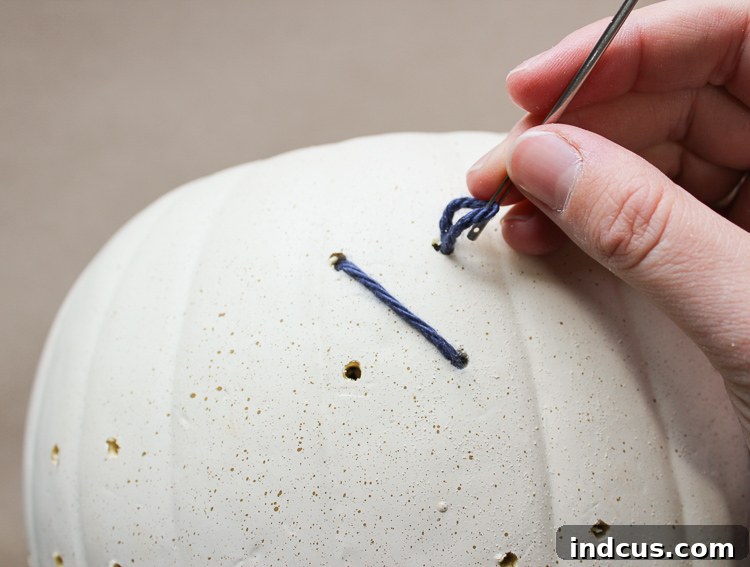
With your pumpkin prepped and holes drilled, it’s time for the most rewarding step: stitching! You’ll need a blunt tip needle with a large eye to easily thread your chosen yarn. A blunt tip is essential to avoid snagging the foam or enlarging the pre-drilled holes. Cut a comfortable length of yarn – not too long to prevent tangling, but long enough to complete a significant section of your design. Thread your needle and begin stitching your cross-stitch pattern. A traditional cross-stitch is formed by two diagonal stitches that cross each other to form an ‘X’. Push the needle through a hole from the outside, pull the yarn through, leaving a tail inside the pumpkin. Secure this tail by tying a knot around a small piece of foam or by taping it down. Then, guide the needle back through another hole to form the first half of your ‘X’. Continue this process, ensuring consistent tension for a neat finish. Alternate colors as per your design. When you finish a section or run out of yarn, secure the end inside the pumpkin similarly to how you started. The beauty of this project lies in the rhythmic process of creating each stitch, watching your unique design come to life on an unexpected medium.
Beyond the Pumpkin: Complementary Fall Decor
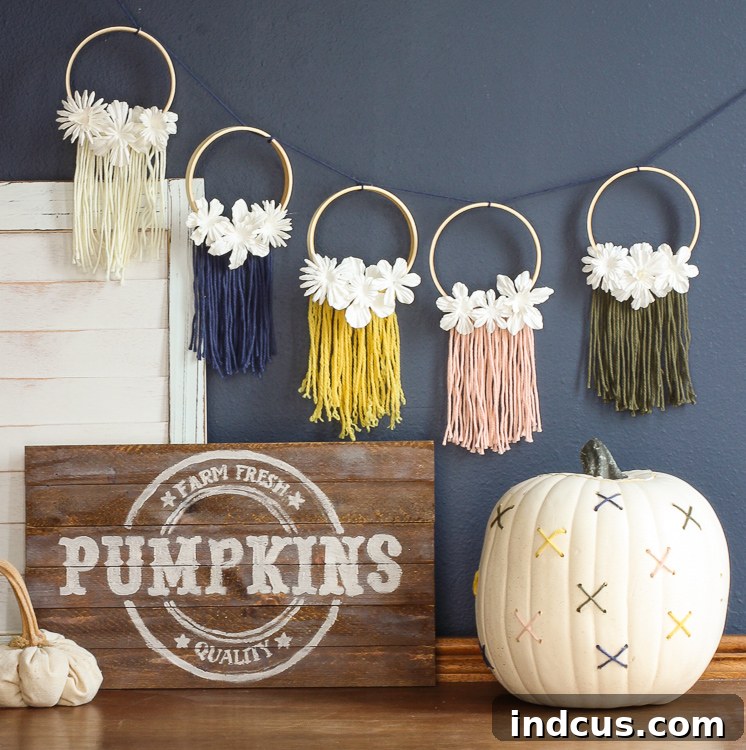
Once your cross-stitched pumpkin is complete, you might find yourself with leftover yarn and a renewed burst of creative energy. This is the perfect opportunity to craft complementary pieces that tie your non-traditional fall decor together. We suggest creating a beautiful boho-style garland, perhaps incorporating macrame techniques or simple yarn tassels, to complement the texture and color scheme of your pumpkin. This adds another layer of warmth and handmade charm to your autumnal display. You can find an excellent garland tutorial here, which pairs perfectly with the aesthetic of our cross-stitched pumpkin. Creating cohesive decor elements elevates your overall display, turning individual crafts into a stunning, integrated seasonal theme.
Tips for Customization and Display
- Vary Stitch Sizes: Don’t feel limited to uniform X’s. Experiment with larger or smaller stitches, or even combine different stitch types for added texture.
- Add Embellishments: Consider incorporating small beads, sequins, or even delicate fabric flowers between your stitches for extra sparkle or dimension.
- Mix Media: For a truly unique look, try painting sections of your pumpkin first with acrylic craft paint, letting it dry completely, and then cross-stitching over it.
- Personalize: Stitch an initial, a significant date, or a small, meaningful symbol to make your pumpkin truly yours.
- Display Creatively: Your finished cross-stitched foam pumpkin will be a standout piece. Display it on your entryway table, as a centerpiece, on a bookshelf, or grouped with other pumpkins and seasonal elements. Its unique charm will undoubtedly spark conversation.
Conclusion: Embrace Your Unique Fall Style
What do you think of this fresh approach to fall decorating? Are you ready to embrace a non-traditional color palette, or do you prefer to stick with the beloved norms? The wonderful aspect of DIY crafting is its inherent flexibility; you can effortlessly adjust this project to perfectly suit your personal preferences, whether that means choosing different yarn colors, a more intricate design, or even a different type of foam pumpkin. The goal is always to create something that brings you joy and reflects your individual taste.
This cross-stitched foam pumpkin project is more than just a craft; it’s an invitation to infuse your home with creativity, personality, and a touch of handmade magic this autumn. It’s a testament to how simple materials, combined with a little imagination, can yield truly extraordinary results. For all your crafting needs and an endless supply of inspiration, be sure to stop by Hobby Lobby. Their extensive selection ensures you’ll find everything required to bring your next brilliant idea to life. Happy crafting, and may your fall be filled with beauty and creativity!