Craft a Magical Christmas Countdown: Your Guide to a DIY Hot Cocoa Tree Advent Calendar
This is a sponsored post written by me on behalf of Hobby Lobby. All opinions are 100% mine.
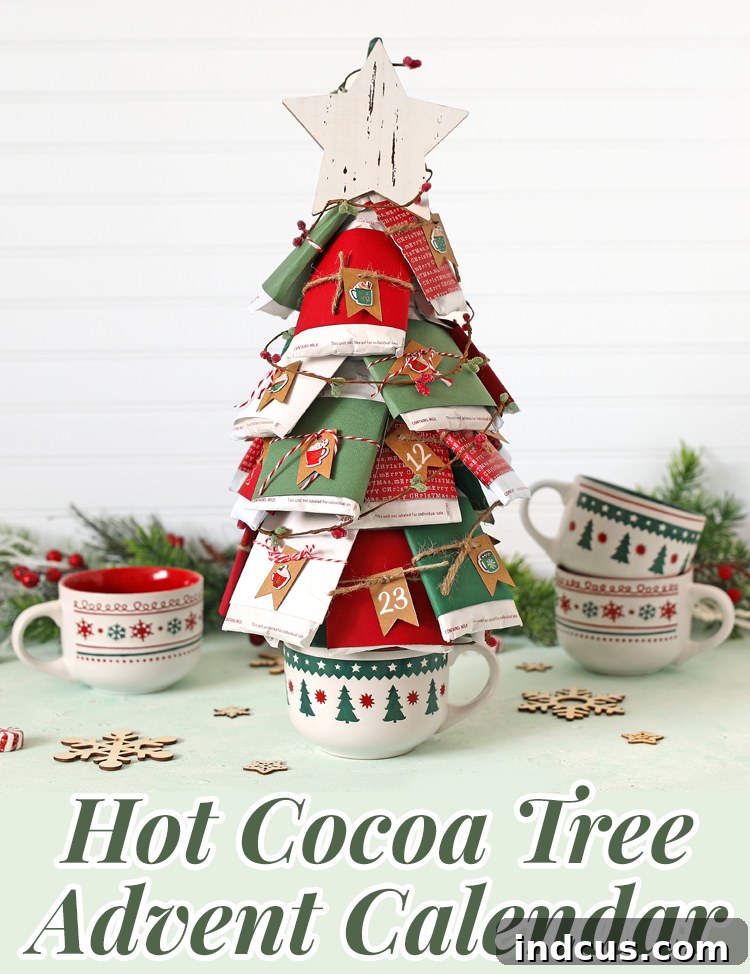
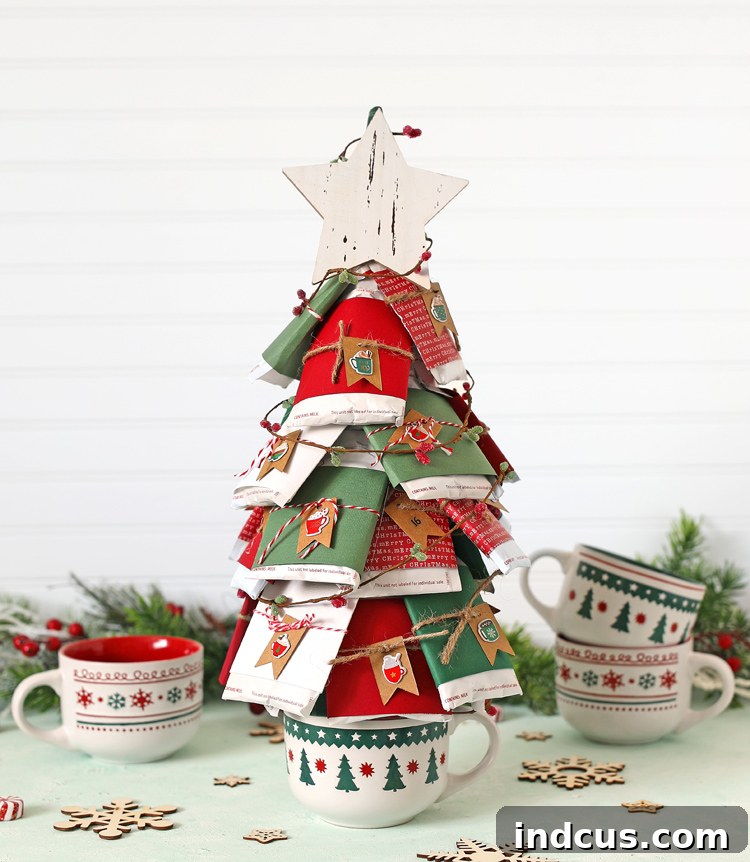
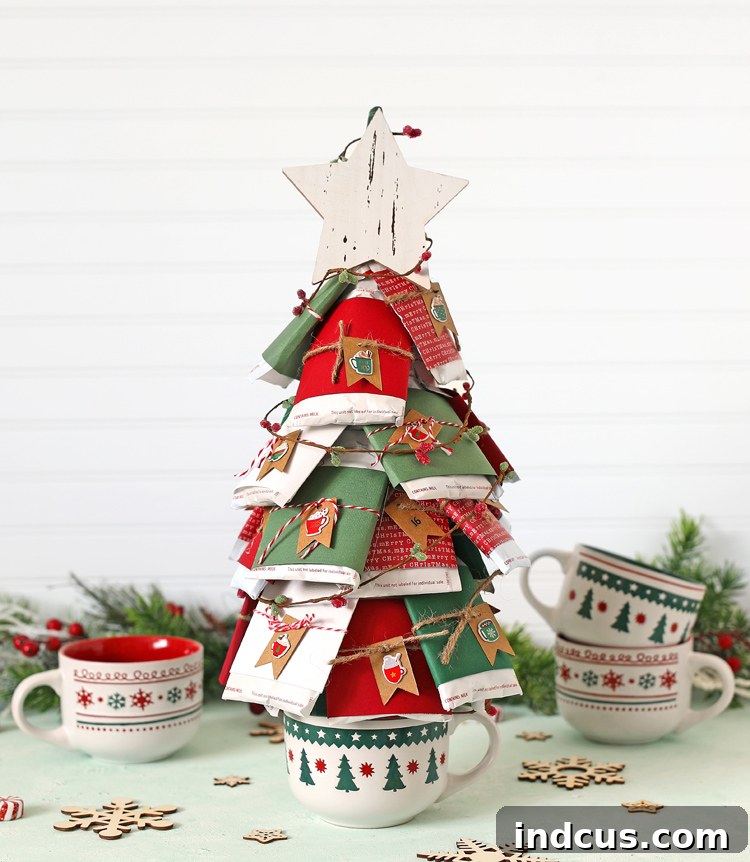
There’s an undeniable magic that fills the air as Christmas approaches, and for many, the anticipation is the most cherished part of the holiday season. Advent calendars amplify this excitement, turning each day into a delightful countdown to December 25th. While traditional calendars offer a daily treat or picture, we’re here to guide you through creating something truly unique and interactive: a DIY Hot Cocoa Tree Advent Calendar. Imagine a festive tree adorned with 24 individual hot cocoa packets, each waiting to be plucked and enjoyed as you draw closer to Christmas morning. This isn’t just a calendar; it’s a cozy, warm, and utterly charming way to celebrate the holiday spirit every single day.
Why a Hot Cocoa Tree Advent Calendar is Your Next Favorite Holiday Project
Our hot cocoa tree advent calendar stands out as a delightful blend of festive decor, a practical daily treat, and a heartwarming gift. Unlike typical advent calendars, this project offers a tangible experience: a warm cup of cocoa to savor as you tick off another day. Its tree shape makes it a beautiful centerpiece, adding a whimsical touch to any holiday display. Beyond its aesthetic appeal, this advent calendar is incredibly versatile. While we’ve chosen hot cocoa packets for a classic winter treat, you’re only limited by your imagination. Consider tea bags, coffee pods, small candies, mini cookies, or even tiny crackers that come in appropriately sized packages. The possibilities for personalization are endless, ensuring your calendar is as unique as your holiday celebrations.
One of the best features of this design is its thoughtful dual purpose. The sturdy mug base not only provides stability for your cocoa tree but also serves as a beautiful gift in itself. When presented as a gift, the recipient can easily detach the tree from the mug, allowing them to use their new Christmas mug for their daily cocoa – or any other warm beverage – throughout the season and beyond. Hobby Lobby, our trusted partner for this project, offered an array of charming Christmas mugs, making the selection process a joy in itself.
What You’ll Need: Gathering Your Supplies for This Festive Craft
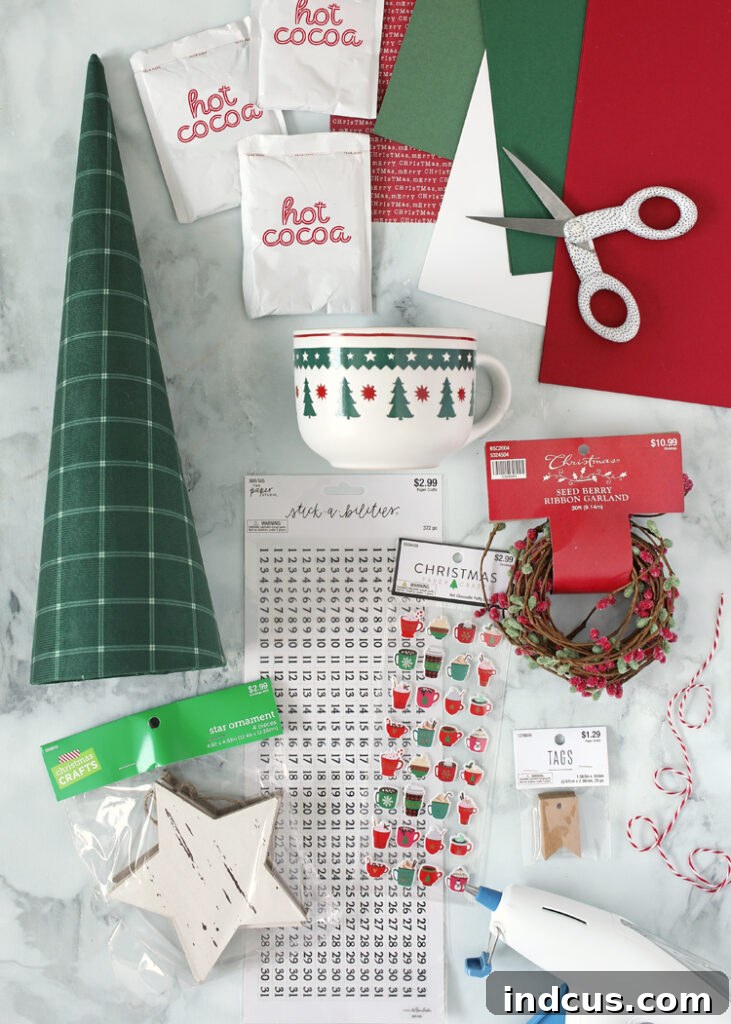
Before you embark on this enchanting DIY journey, gathering the right materials is key. Each item plays a crucial role in bringing your hot cocoa tree to life, transforming simple craft supplies into a beautiful, functional advent calendar. Don’t worry, most of these items are readily available at craft stores like Hobby Lobby, making your preparation phase as simple as possible. Quality materials ensure durability and a polished finish, so take your time selecting each component.
Essential Materials
- Christmas Mug: Choose a mug with a wide, stable base that can comfortably support your cone tree. A festive design will add to the holiday cheer.
- Cone Tree (Size Small): A foam or paper mache cone tree provides the perfect base for shaping your advent calendar. The small size works best for 24 packets.
- Wood Star Ornament: A classic tree topper, a wooden star adds a rustic and charming finish to your design.
- Kraft Paper Tags: These provide a lovely, neutral canvas for numbering your cocoa packets and adding personal touches.
- Number Stickers: Essential for labeling each day from 1 to 24. Look for clear, legible numbers that complement your chosen paper.
- Hot Cocoa Puffy Stickers: (Optional) While not strictly necessary, these adorable stickers add an extra layer of charm and personality to your wrapped packets. They’re a fun way to embellish!
- Seed Berry Garland: A delicate garland adds a pop of color and festive texture, mimicking traditional tree decorations.
- Jute Twine or Baker’s Twine: Perfect for tying your tags onto the cocoa packets, adding a rustic or classic holiday feel.
- Hot Glue Gun + Glue Sticks: Your essential tool for securely attaching items while still allowing for easy removal when desired.
- 24 Hot Cocoa Packets: The star of the show! Ensure you have enough for each day leading up to Christmas. You can opt for various flavors to add more variety.
- Scrapbook Paper or Colored Cardstock: (Not explicitly listed in original, but mentioned in Step 1) Approximately 24 pieces, enough to wrap each cocoa packet. Choose festive patterns or solid colors that match your holiday theme.
- Paint Pen (White, optional): If your number stickers are too small, a paint pen offers an excellent alternative for clear, bold numbering.
Step-by-Step Instructions: Building Your Hot Cocoa Tree
Now that you have all your materials, let’s dive into the fun part: assembling your very own hot cocoa tree advent calendar. Follow these detailed steps to create a beautiful and functional countdown that will bring joy throughout the holiday season.
Step 1: Personalizing Your Hot Cocoa Packets
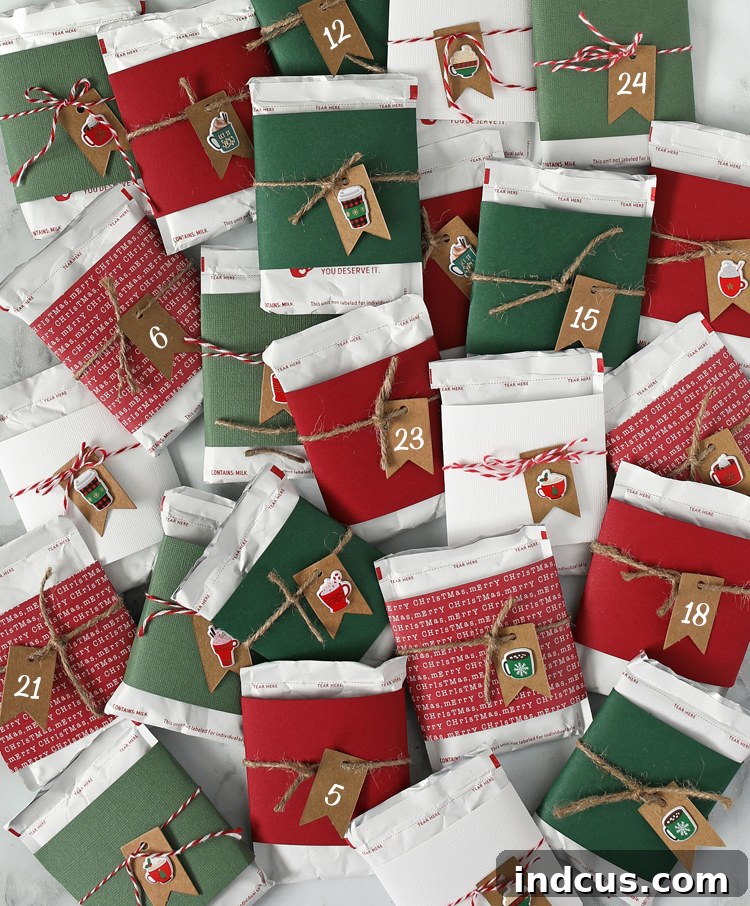
This initial step is where you infuse your personality into each daily treat. Begin by taking each of your 24 hot cocoa packets. Select a variety of festive scrapbook papers or colored cardstock. Cut the paper to size so that it can neatly wrap around each individual packet, creating a uniform and attractive look. Secure the paper wrapper with a small piece of tape or a dab of hot glue, ensuring it’s snug but easily removable. Once wrapped, it’s time to add the all-important daily tag. Attach a small Kraft paper tag to each packet using jute or baker’s twine, creating a charming little bundle. Crucially, label each tag with numbers 1 through 24, corresponding to the days in December leading up to Christmas. While number stickers are convenient, if they appear too small or aren’t easily visible, consider writing the numbers directly onto the tags with a white paint pen for a bolder, more handcrafted look. Don’t hesitate to add extra embellishments like the adorable puffy hot cocoa stickers mentioned in the materials list, or even a sprinkle of glitter or a mini stamp, to make each packet uniquely charming.
Step 2: Attaching the Cocoa Packets to Your Cone Tree
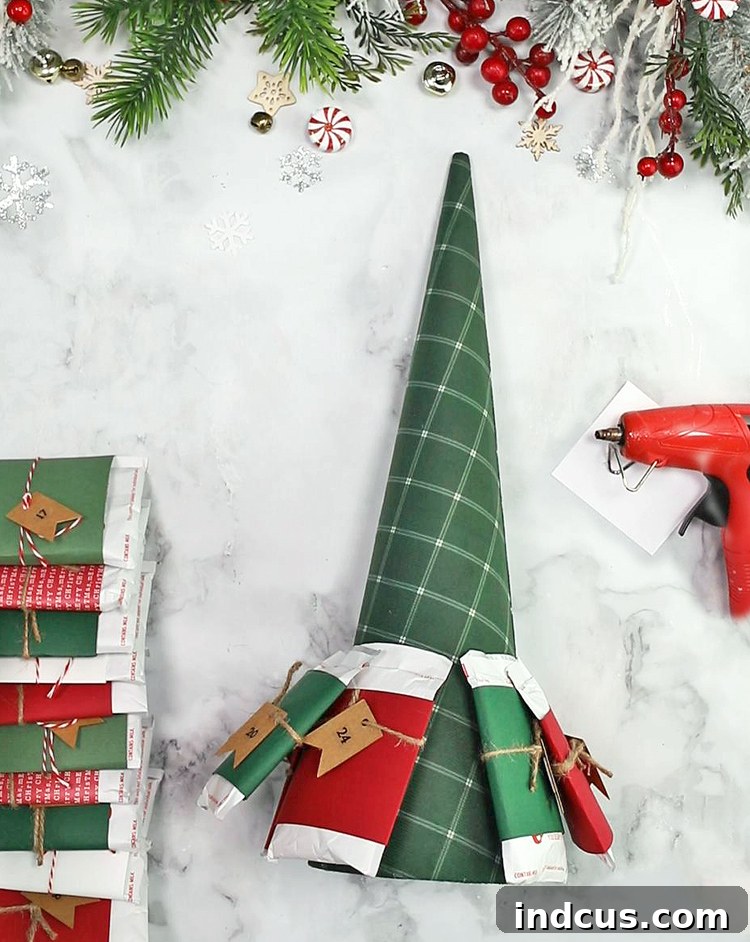
With your personalized cocoa packets ready, it’s time to build the tree structure. Take your cone tree and begin attaching the wrapped hot cocoa packets using your hot glue gun. Start from the bottom of the cone and work your way up, arranging the packets in a spiral or circular pattern. A key tip here is to apply the hot glue very sparingly to the back of each packet, just enough to secure it to the cone without making it difficult to remove later. The goal is for the packets to pull off easily each day without damaging the cone, allowing the calendar to be potentially reused for future seasons. As you glue, ensure you place the numbered packets in sequential order, so that each day’s cocoa can be easily identified and enjoyed in the correct countdown sequence. This meticulous placement will enhance the user experience and maintain the advent calendar’s primary function.
Step 3: Securing the Tree to its Festive Mug Base
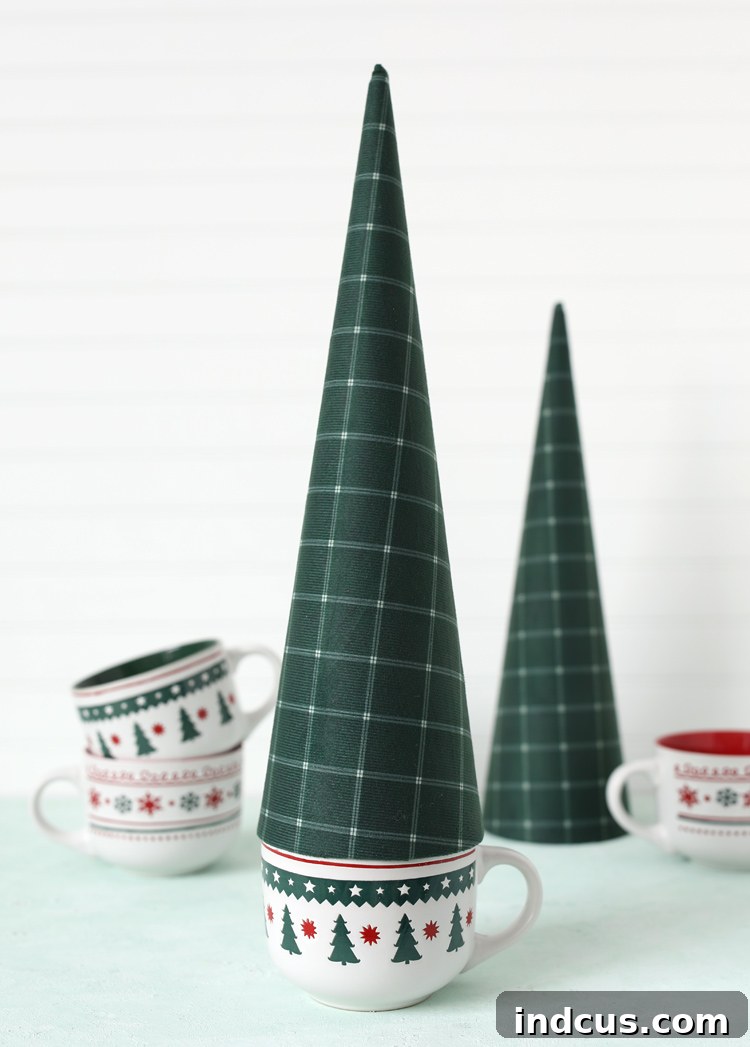
Once all 24 cocoa packets are securely attached to your cone tree, it’s time to unite it with its base: the Christmas mug. Carefully place the cone tree into the opening of the mug. You’ll notice how nicely the cone fits into most standard mug openings, creating a seamless and sturdy base. To ensure the tree remains stable and upright, apply a very small amount of hot glue to the bottom edge of the cone where it meets the inside of the mug. Again, the emphasis is on a light application. The aim is to provide just enough adhesion to keep the entire project together during display or transport, while still allowing the cone tree to be easily lifted out of the mug. This detachability is crucial, especially if you plan to gift the calendar, as it allows the recipient to enjoy their beautiful new mug for daily use once all the cocoa packets have been enjoyed.
Step 4: Adding the Finishing Touches: Star and Garland
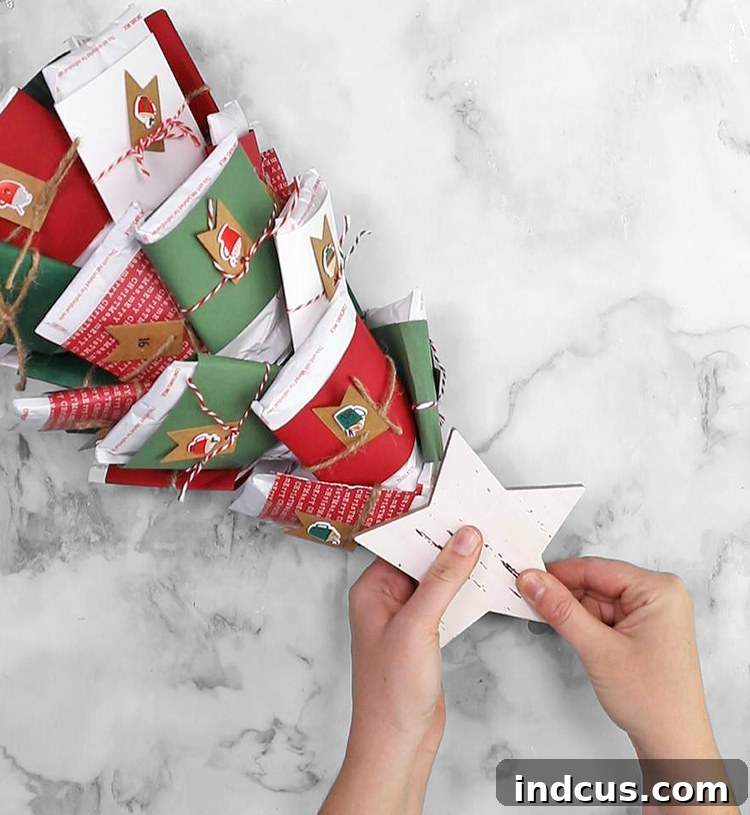
With the structure complete, it’s time for the final flourishes that transform your cocoa-laden cone into a true Christmas tree. Start by taking your wooden star ornament. Apply a dab of hot glue to its base and carefully attach it to the very top of your cone tree. This instantly gives your creation the iconic silhouette of a Christmas tree. Next, gently wrap the seed berry garland around the entire tree, weaving it between the cocoa packets. The garland adds a beautiful pop of festive color and texture, enhancing the overall holiday aesthetic. Secure the ends of the garland with a tiny dot of hot glue if necessary to prevent it from unraveling. Step back and admire your beautiful, unique, and utterly charming hot cocoa tree advent calendar!
Tips for a Perfect Hot Cocoa Tree Advent Calendar
- Glue Smart: Always use hot glue sparingly. The goal is to hold items in place, not to permanently adhere them. This ensures easy removal of packets and potential reusability of the cone.
- Customize Your Treats: Don’t limit yourself to hot cocoa! Small tea bags, coffee pods, individually wrapped candies, or even tiny toys can work wonderfully, provided their packaging allows for easy attachment.
- Numbering Matters: Double-check that your numbers are sequential and clearly visible. This prevents confusion and enhances the daily countdown experience.
- Involve the Family: This is a fantastic project for kids and adults alike. Let children help with wrapping packets, numbering tags (with supervision), or selecting decorations.
- Display with Pride: Choose a prominent spot in your home for your hot cocoa tree – on a mantel, a side table, or as a dining room centerpiece – so it can be admired throughout the season.
- Safety First: When using a hot glue gun, always exercise caution and ensure children are properly supervised or that adults handle the gluing steps.
Gifting and Displaying Your Handmade Advent Calendar
The beauty of this hot cocoa tree advent calendar lies not only in its creation but also in its versatility as a gift or a cherished family tradition. Imagine the delight on a loved one’s face as they receive this thoughtful, handmade present. It makes an exceptional gift for a spouse, children, a best friend, a neighbor, or even a co-worker who appreciates a touch of handmade holiday cheer. When gifting, you can present it fully assembled, or consider wrapping the tree and mug separately with a note explaining how they fit together. For display in your own home, place it in a high-traffic area where it can be easily accessed and enjoyed daily. It serves as a charming festive decoration, bringing warmth and cheer to any room while reminding everyone of the exciting countdown to Christmas.
Frequently Asked Questions About Your DIY Hot Cocoa Tree
- Can I use different treats besides hot cocoa?
- Absolutely! The design is very adaptable. Consider using small tea bags, coffee pods, individually wrapped chocolates, small toys, or even miniature cookies or crackers. The main consideration is the size and shape of the packaging to ensure it can be easily attached to the cone tree.
- How long does this project typically take to complete?
- Once you have all your materials gathered, the actual crafting time is relatively quick. You can expect to spend about 1-2 hours on this project, depending on how much detail you put into wrapping and embellishing each packet.
- Is the hot cocoa tree advent calendar reusable for future years?
- Yes, with careful handling! By applying hot glue sparingly to the packets, they should pull off easily without damaging the cone tree. You can then gently remove any residual glue and store the cone, mug, star, and garland for next year. Simply purchase new cocoa packets and tags to refresh it for a new season.
- What if I can’t find a specific cone tree or mug?
- Don’t worry! Most craft stores offer a variety of foam or paper mache cone shapes that can be adapted. For the mug, any sturdy, festive mug with a wide enough opening to support the cone will work perfectly. Feel free to explore different styles to match your personal aesthetic.
There you have it – a comprehensive guide to creating a unique and heartwarming hot cocoa tree advent calendar. This project is more than just a craft; it’s an invitation to infuse your holiday season with warmth, creativity, and daily moments of joy. We hope you love making and enjoying this festive countdown as much as we do. It’s a truly special way to count down to Christmas, creating lasting memories and a beautiful piece of handmade holiday decor.
Like it? Pin it for later!