Transform Any Gift into a Spectacular DIY Gift Bouquet
Are you searching for a gift presentation that truly stands out from the crowd? Do you want to elevate an ordinary present into something extraordinary and deeply personal? This comprehensive guide will unlock the secrets to crafting stunning, festive, and incredibly unique gift bouquets. Forget traditional wrapping paper; imagine transforming everyday items – from gourmet snacks to craft supplies, or even practical tools – into a magnificent, eye-catching display that speaks volumes about your thoughtfulness. A custom-made gift bouquet isn’t just a present; it’s an experience, a delightful surprise perfect for birthdays, anniversaries, graduations, holidays, or any occasion that calls for a touch of creative flair.
This DIY gift wrapping method is surprisingly straightforward yet yields results that look professionally designed. Its versatility means you can adapt it for virtually any gift item, making it an ideal solution for those moments when you want to make a lasting impression. We’ll walk you through every single detail, from gathering your initial supplies to applying the final decorative touches, ensuring you can create a beautiful, memorable, and personalized gift bouquet with ease and confidence every time you try.
Getting Started: Essential Supplies for Crafting Your Unique Gift Bouquet
Before you dive into the exciting process of creation, let’s ensure you have all the necessary materials at hand. One of the many joys of this project is its inherent flexibility; you might even find many of the required items already within your home, or you can easily source affordable options from various retailers. The thoughtful selection of your supplies is crucial, as the colors, textures, and quality of each component will significantly influence the final aesthetic of your gift bouquet, allowing you to perfectly tailor it to the recipient’s taste and the specific event.
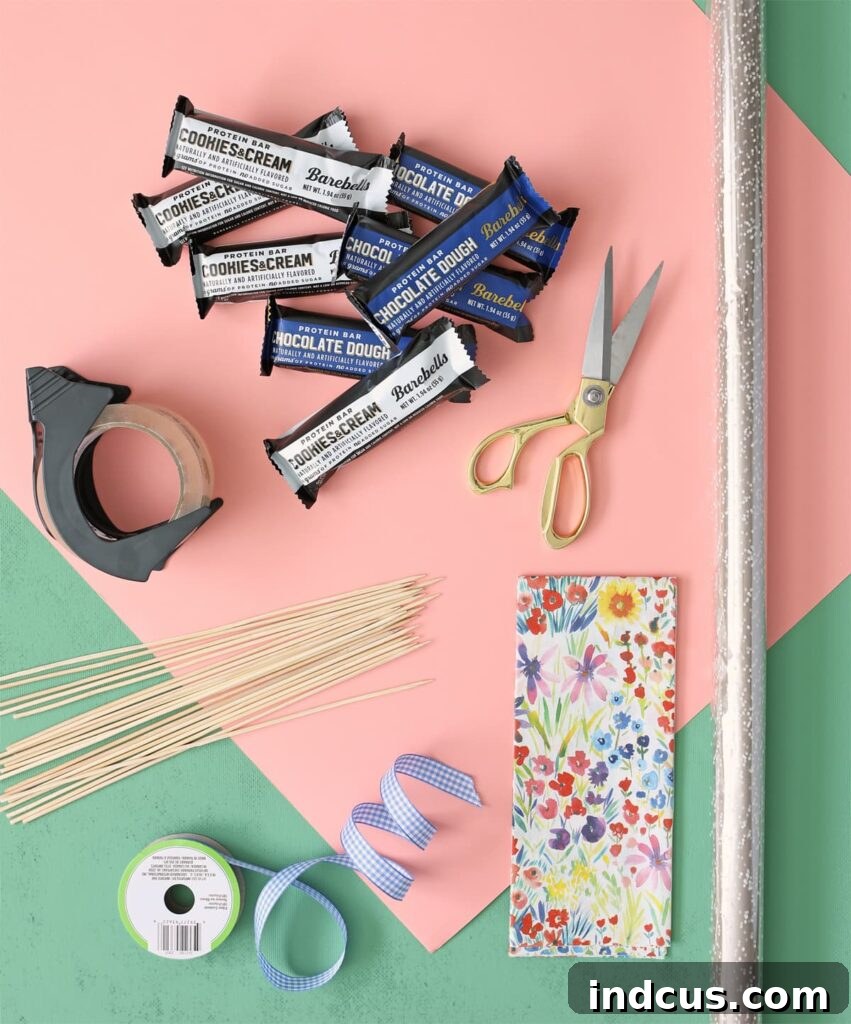
Materials You Will Need:
- Gift Item(s): This is the cherished centerpiece of your bouquet! The possibilities are virtually endless: a selection of your favorite protein bars (as beautifully demonstrated in our tutorial photos), an assortment of gourmet chocolates, small beauty products, elegant stationery, compact gardening tools, charming baby shower items, or even a collection of whimsical socks. The best items are typically lightweight and can be easily and securely affixed to a flat surface.
- Poster Board: This sturdy board provides the foundational structure for your entire bouquet. When choosing, consider its color and any patterns, as they will form the visible ‘stem’ and backdrop. Opt for vibrant hues or subtle, elegant designs that harmoniously complement your gift items and the overall theme. (Explore an array of Cute Colors!)
- Cellophane Gift Wrap: Clear cellophane is essential for achieving that polished, professional florist-like finish. It not only protects your carefully arranged gifts but also significantly enhances their visual appeal. Ensure you choose a roll that is wide enough to comfortably envelop your entire bouquet, allowing for ample overlap.
- Tissue Paper: This material plays a crucial role in adding delightful volume, soft texture, and a vibrant burst of color to the base of your bouquet. Select colors that either perfectly coordinate with your chosen poster board and ribbon or boldly contrast them for a more dramatic and captivating effect.
- Ribbon: A beautifully chosen ribbon acts as the perfect unifying element, both literally and aesthetically. Pick a style, material (such as luxurious satin, sturdy grosgrain, or delicate sheer), and width that complements your bouquet’s overall aesthetic. You’ll likely need a length of approximately 2-3 feet to tie a generous, elegant bow.
- Strong, Clear Packing Tape: This adhesive is indispensable for securely attaching your gift items and firmly forming the cone base. A strong, reliable adhesive is paramount for ensuring the durability and stability of your finished gift bouquet.
- Scissors: A pair of sharp, high-quality scissors is vital for making clean, precise cuts on poster board, cellophane, and ribbon, ensuring a neat and professional finish.
- Skewers, Balloon Sticks or Wooden Dowels (Optional but Recommended for Certain Items): These items are incredibly useful, even often necessary, for gifts that are difficult to tape directly. This includes soft, flexible materials like fabric goods (e.g., socks, small towels) or items with particularly irregular shapes. They provide a rigid, secure structure onto which these challenging items can be attached, ensuring they remain perfectly positioned within your display.
You’ll be pleasantly surprised to find that the majority of these essential supplies are readily available and easily accessible. You can typically find them at popular craft stores such as Hobby Lobby and Michaels, as well as at larger general retailers like Walmart and even budget-friendly options like Dollar Tree. As a personal recommendation, I’m particularly fond of exploring dedicated craft stores for their extensive and inspiring selections of patterned poster board, their vast array of charming tissue paper designs, and their unique ribbon varieties. These specialized stores truly allow for the creation of exceptionally personalized and visually appealing bouquets. Never underestimate the significant impact that carefully chosen colors, harmonious patterns, and varied textures can have in making your DIY gift bouquet truly spectacular and unforgettable!
A brief but important note regarding the optional use of sticks: while I initially anticipated that skewers or dowels would be absolutely indispensable for every bouquet, my experience has shown that for many common gift items, direct taping works perfectly well and often simplifies the overall assembly process. However, for items made of soft, pliable fabrics – such as a collection of colorful socks, a set of small apparel like baby onesies, or even lightweight dish towels – wrapping them securely around a stick and then firmly taping that stick to the poster board provides a far more secure, stable, and aesthetically pleasing attachment. This method is crucial because standard adhesive tape frequently struggles to adhere effectively directly to fabric surfaces. Therefore, always consider the specific nature and material of your chosen gift items when deciding whether to incorporate sticks into your bouquet design for optimal results.
Step-by-Step Guide: Crafting Your Perfect Gift Bouquet with Ease
With all your essential supplies neatly gathered and ready, we can now embark on the exciting and rewarding journey of assembling your magnificent gift bouquet. This detailed, step-by-step guide is designed to lead you through each phase, ensuring a flawless and professional-looking finish. Remember, the true beauty of this project lies in paying close attention to detail and allowing your unique creativity to fully shine through in every element you choose and place. Take your time, enjoy the process, and prepare to create something truly special!
Detailed Instructions:
Step 1: Preparing Your Sturdy Poster Board Base
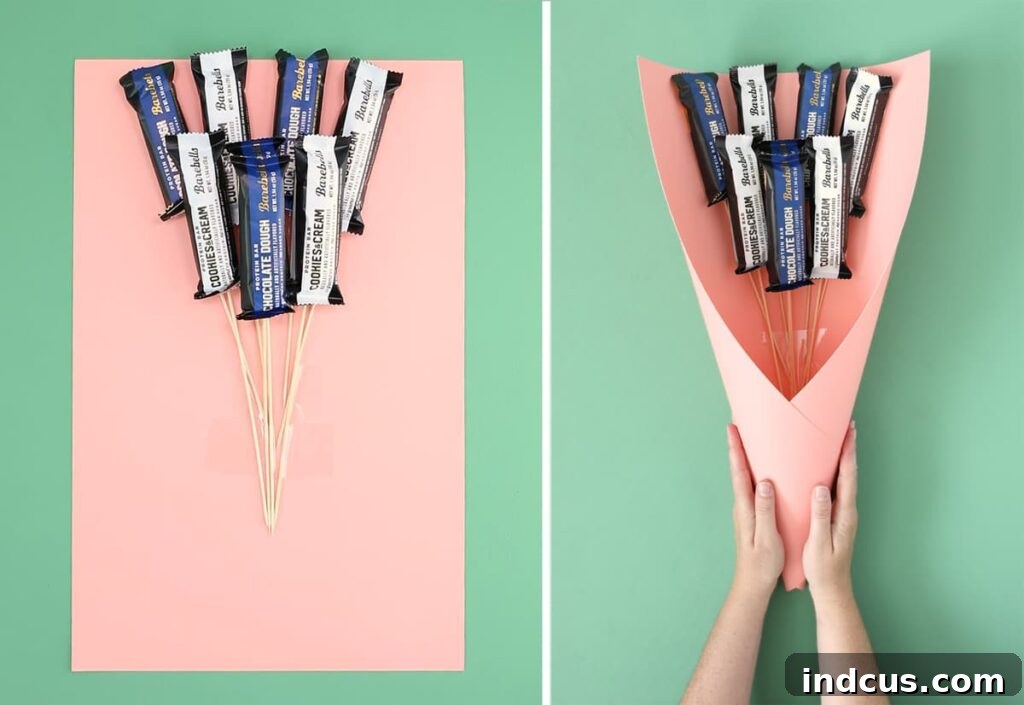
To begin, take a standard-sized sheet of poster board and carefully cut it in half. This will result in a foundational piece that measures approximately 14 inches by 22 inches. This dimension is generally considered ideal for the vast majority of gift bouquets, as it offers ample surface area for arranging your chosen items while maintaining a manageable and sturdy structure. If you are envisioning a charming, more compact “mini” bouquet, you could opt for a smaller 12×12 inch piece of robust cardstock instead. Conversely, for a truly grand, oversized, and impactful bouquet, utilizing a full, uncut sheet of poster board might be necessary to accommodate a larger array of gifts. The poster board serves as the essential, rigid ‘stem’ or backbone of your bouquet, so it’s important to ensure your cut is both clean and perfectly straight for optimal stability.
Step 2: Thoughtful Arrangement and Secure Attachment of Gift Items
This is arguably the most creative and visually impactful step, where your bouquet truly begins to take its unique form! Lay your freshly cut poster board piece flat on a clean, spacious work surface. Now, with an artistic eye, carefully arrange your selected gift items along one of the shorter 14-inch edges of the board. Visualize the final bouquet and aim for visual balance, incorporating varying heights and depths, much like a professional florist would arrange a fresh flower bouquet. Typically, taller or larger items are positioned towards the center-back, while smaller, lighter, or filler items are placed towards the front or interspersed throughout the display. Utilize your strong, clear packing tape to firmly and securely fasten each individual gift item to the poster board. For many items with relatively flat or stable surfaces (such as neatly packaged snacks, small paperback books, or the protein bars shown in our example), you can simply tape them directly. However, if you are gifting items like soft socks, small fabric accessories, or unusually shaped trinkets that are difficult to tape flat, it’s highly recommended to first wrap them securely around one of your optional skewers or wooden dowels. You can use a bit of twine or tape to hold the item to the stick, and then firmly tape the stick itself to the poster board. This technique ensures that every item remains perfectly positioned and contributes to a professional and enduring appearance.
Step 3: Expertly Forming the Elegant Cone Base
Once all your gift items are meticulously arranged and firmly secured to your satisfaction, gently and deliberately roll the two bottom corners of the poster board towards each other to create a stable and elegant cone shape. This carefully constructed cone will serve as the attractive “handle” or robust base for your entire bouquet. Strive to create a tight, symmetrical, and structurally sound cone that is capable of comfortably supporting the collective weight of all your gifts. Once you have achieved the desired form, use a generous piece of strong packing tape along the back seam of the cone to hold it firmly and permanently in place. Double-check that the cone is well-formed, balanced, and provides an unwavering foundation for the entire, magnificent bouquet you are creating.
Step 4: The Initial Phase of Cellophane Wrapping
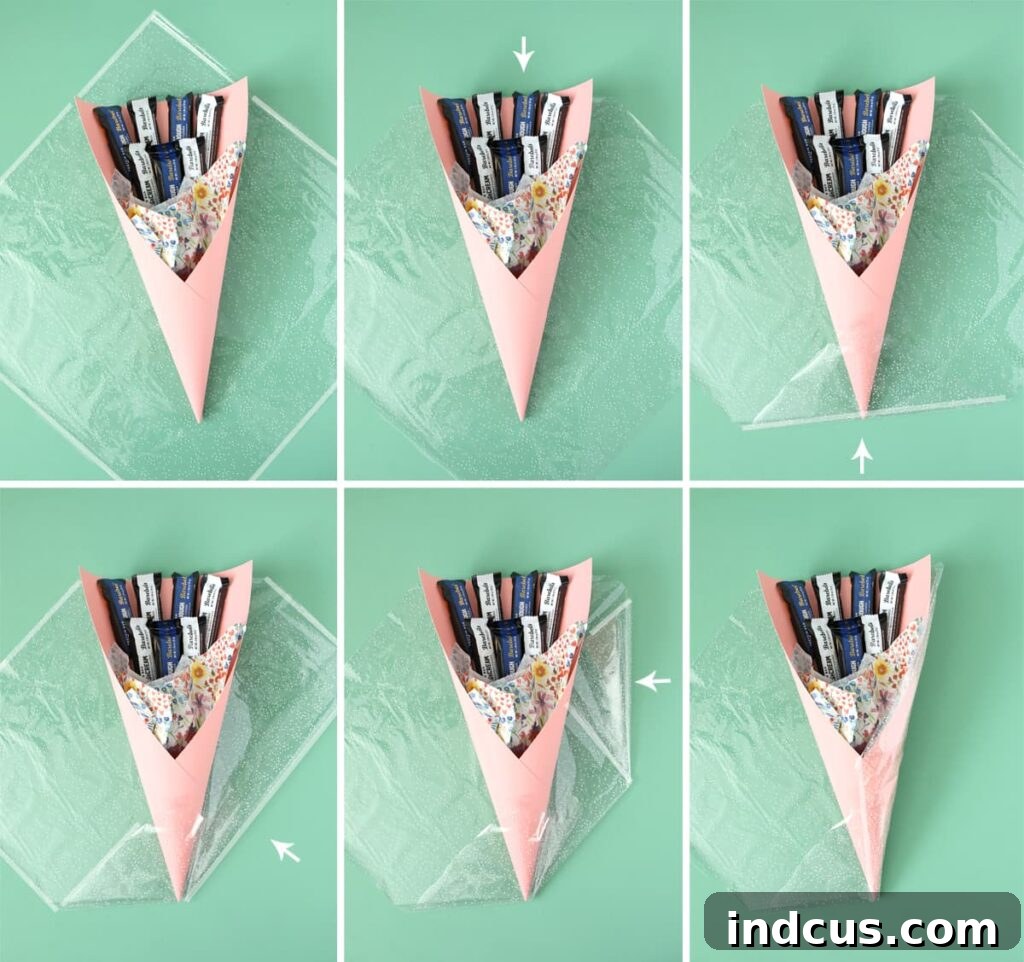
Now, it’s time to impart that unmistakable professional, florist-quality touch with the cellophane wrap. Unroll and cut a generously sized square piece of cellophane, ensuring it is ample enough to comfortably encase your entire bouquet with room for maneuvering. Lay the cellophane sheet flat on a clean, smooth work surface, positioning it diagonally so it resembles a diamond. Carefully place your fully assembled gift bouquet directly on top of the cellophane square, making sure to align the flat, top edge of your gift arrangement with one of the cellophane’s diagonal points. Next, meticulously fold down the top edge of the cellophane to meet the top edge of your gift display, creating a neat initial fold. Then, bring the bottom point of the cellophane up and over the bottom of your cone, taping it securely into place on the back. This initial wrapping step creates a snug, elegant, and secure enclosure for both the top and bottom portions of your burgeoning bouquet.
Step 5: Expertly Completing the Cellophane Wrap for a Polished Finish
With the top and bottom sections of your bouquet now securely wrapped, we move on to completing the sides, which is key to achieving a truly polished and professional appearance. Take the right edge of the cellophane and gently bring it inward, carefully aligning it with the side edge of the poster board cone. As you do this, create a crisp, clean crease along the outer edge, defining the shape. Now, take the top right corner of this folded section and tuck it neatly behind the cone, striving to match the existing angle of the inner cone structure. Smoothly wrap this folded piece around the back of the cone and secure it firmly with a piece of strong packing tape. Repeat this entire process with equal precision on the left side of the bouquet. The ultimate goal here is to achieve smooth, taut cellophane wrapping that elegantly encases your gifts without any excessive bulk, distracting wrinkles, or loose edges. If this step feels a bit intricate or challenging, visualizing the action or even performing a dry run without tape can be incredibly helpful; aim for clean lines and a consistently snug fit around the cone.
Step 6: Adding Decorative and Voluminous Tissue Paper
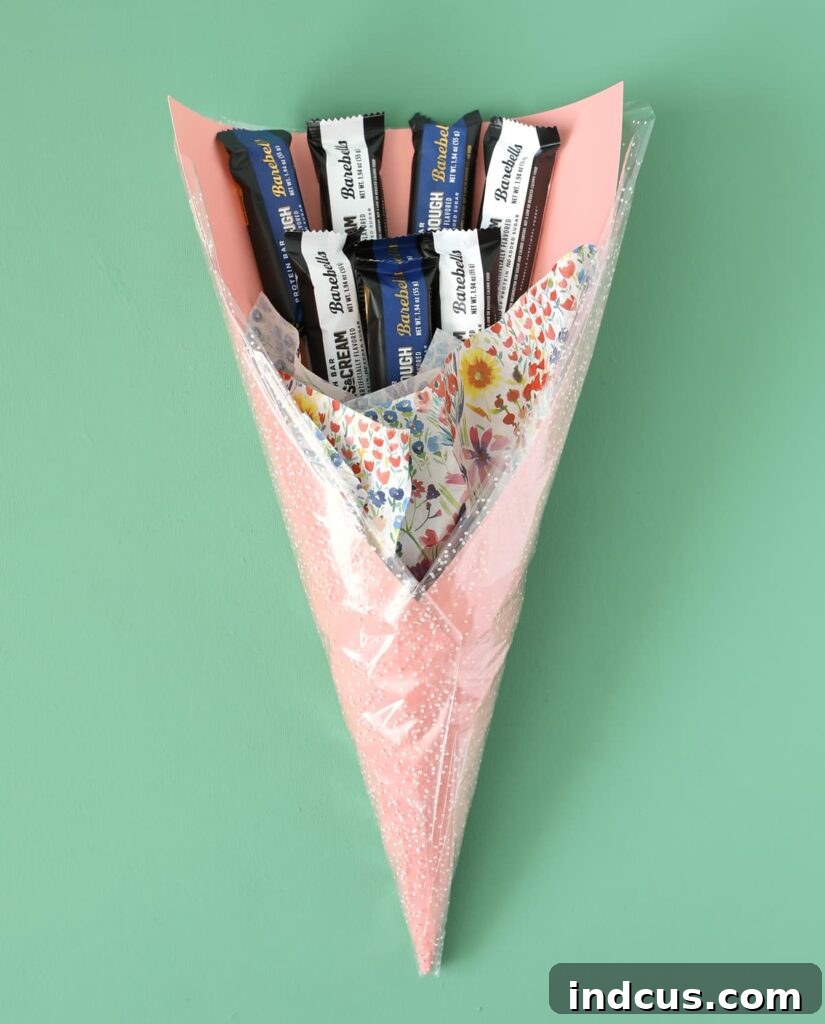
It’s time to introduce a vibrant splash of color and delightful volume! Take several sheets of your carefully chosen tissue paper. Gently crinkle, fold, or fan them out to create soft, voluminous shapes that resemble natural foliage or delicate flower petals. Carefully insert these prepared pieces of tissue paper into the open top section of the cone, arranging them artfully so that their corners and edges elegantly peek out and stick up around your gifts. This step serves a dual purpose: it not only adds an exquisitely beautiful decorative element, enhancing the visual richness of your bouquet, but also crucially helps to fill any empty space within the cone. This provides additional structural support, making the bouquet feel fuller, more substantial, and even more impressive. Feel free to experiment with different arrangements and amounts of tissue paper until you achieve a truly pleasing, balanced, and vibrant look that complements your gift items.
Step 7: Embellishing with a Charming Ribbon
A thoughtfully selected and beautifully tied ribbon is the quintessential finishing touch that brings your entire gift bouquet together. Carefully wrap your chosen ribbon around the base of the cone, positioning it just below where the gift items and tissue paper begin. Then, tie a pretty, decorative bow at the front or side of your bouquet, ensuring it sits elegantly and securely. If you’re working with a particularly silky or slippery ribbon, such as a satin variety, a tiny, discreet dot of hot glue applied to the back and front of the ribbon can work wonders in tacking it down. This prevents it from slipping or sliding down the cone, ensuring your perfectly tied bow remains impeccably positioned throughout its presentation. Opt for a ribbon color and texture that perfectly complements your bouquet’s overall design, adding an extra layer of luxuriousness, charm, and personalized elegance.
Step 8: Applying Final Decorative Touches (Optional, but Highly Recommended)
At this stage, your primary gift bouquet structure is complete and already looks absolutely fantastic! However, to truly elevate it and infuse it with even more personality, consider adding some final decorative embellishments. This is where your personal style and creative vision can truly shine. Think about incorporating small, personalized tags with heartfelt messages, charming decorative picks (like miniature butterflies, stars, or seasonal motifs), a sprinkle of subtle glitter accents for a touch of sparkle, or even tiny, battery-operated fairy lights for a magical, enchanting glow, especially if presenting it in the evening. For a natural and elegant touch, in my example, I gently tucked a few delicate sprigs of faux lavender between the protein bars, which added a lovely aesthetic appeal and a hint of organic beauty. These thoughtful final touches can significantly enhance your bouquet’s theme, make it even more special, and create an unforgettable, unique present for the recipient.
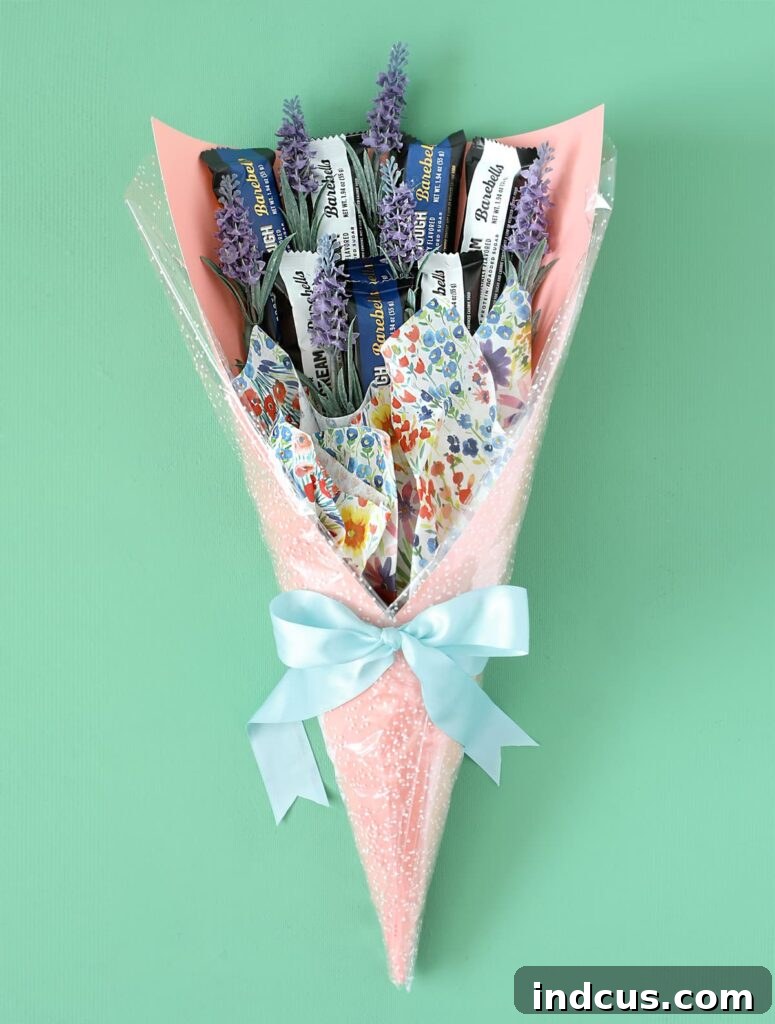
Unleash Your Imagination: Endless Possibilities for Unique Gift Bouquets
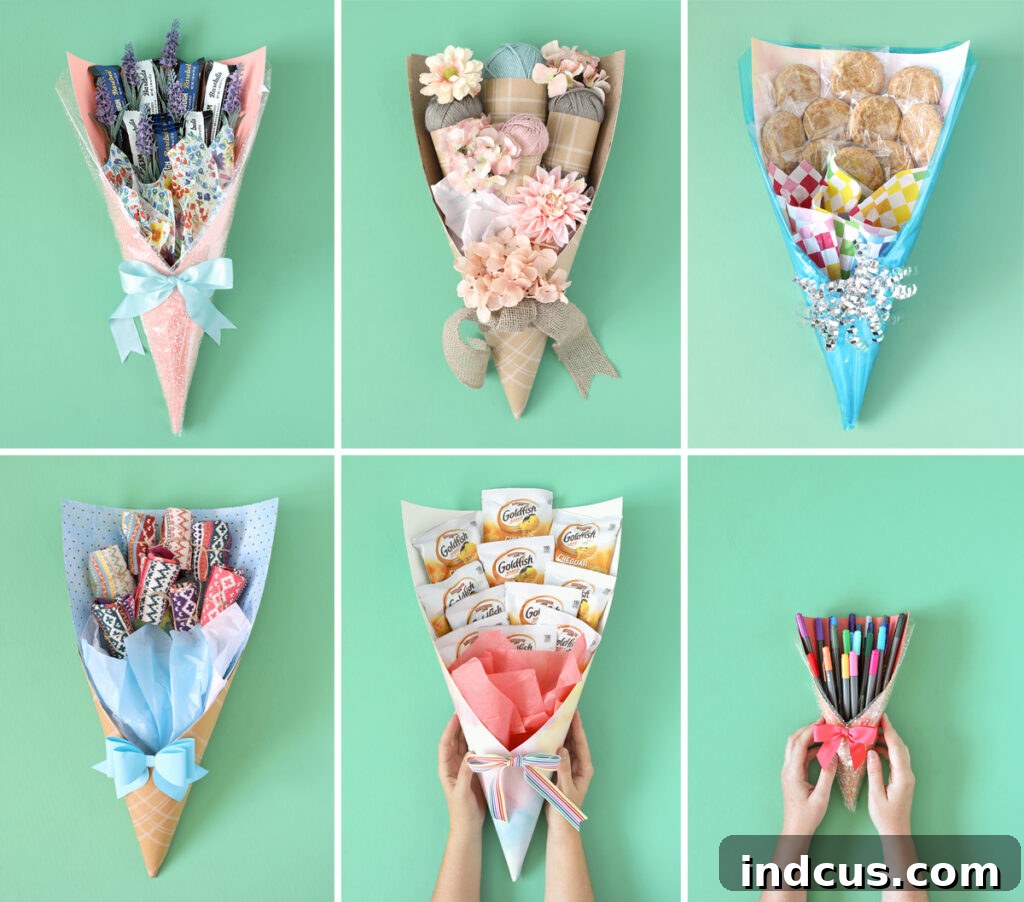
The true brilliance of this DIY gift bouquet tutorial lies in its astounding versatility. Once you’ve mastered the fundamental technique, you’ll quickly realize that almost any collection of items can be brilliantly transformed into a dazzling and memorable gift display. The only limit is your imagination! Here are just a few inspiring ideas to ignite your creativity and demonstrate the boundless potential of this exceptional gift-wrapping method:
Inspiring Creative Gift Bouquet Examples:
The Savory Snack Sensation: A Chip Bag Bouquet
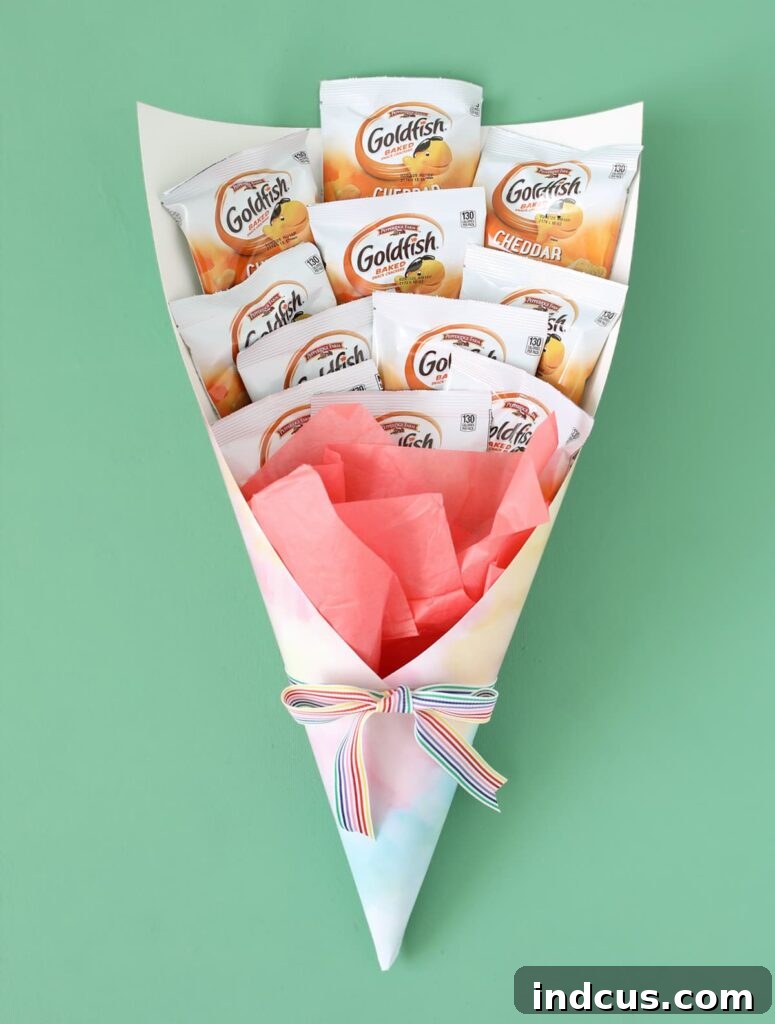
Imagine the delight on someone’s face receiving a bouquet crafted entirely from an assortment of their favorite snack-sized chip bags! This particular gift bouquet is an absolute guaranteed hit for avid movie buffs, enthusiastic gamers, or anyone who simply appreciates a delicious and varied munch. Strategically arrange a delightful variety of flavors and popular brands to create an exciting visual tapestry and an irresistible culinary treat. The inherently lightweight nature of most chip bags makes them exceptionally easy to attach directly and securely to the poster board base, resulting in a vibrant, fun, and truly irresistible “snack-cessory” that’s sure to be devoured with glee.
The Crafty Creator’s Delight: A Yarn Bouquet
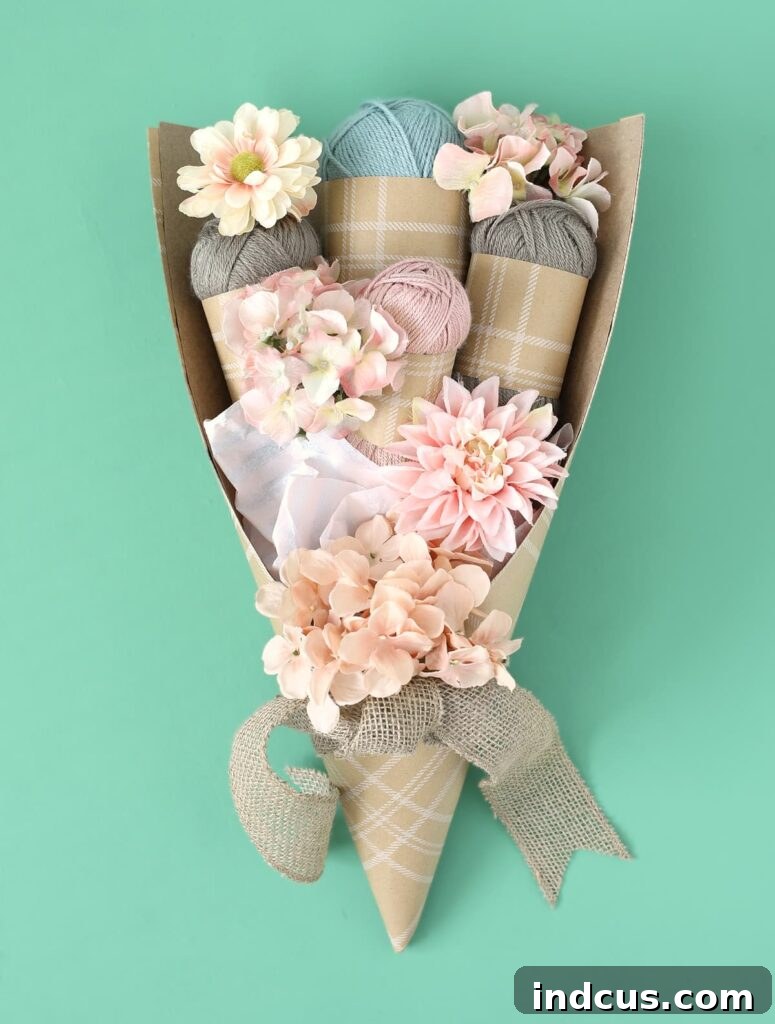
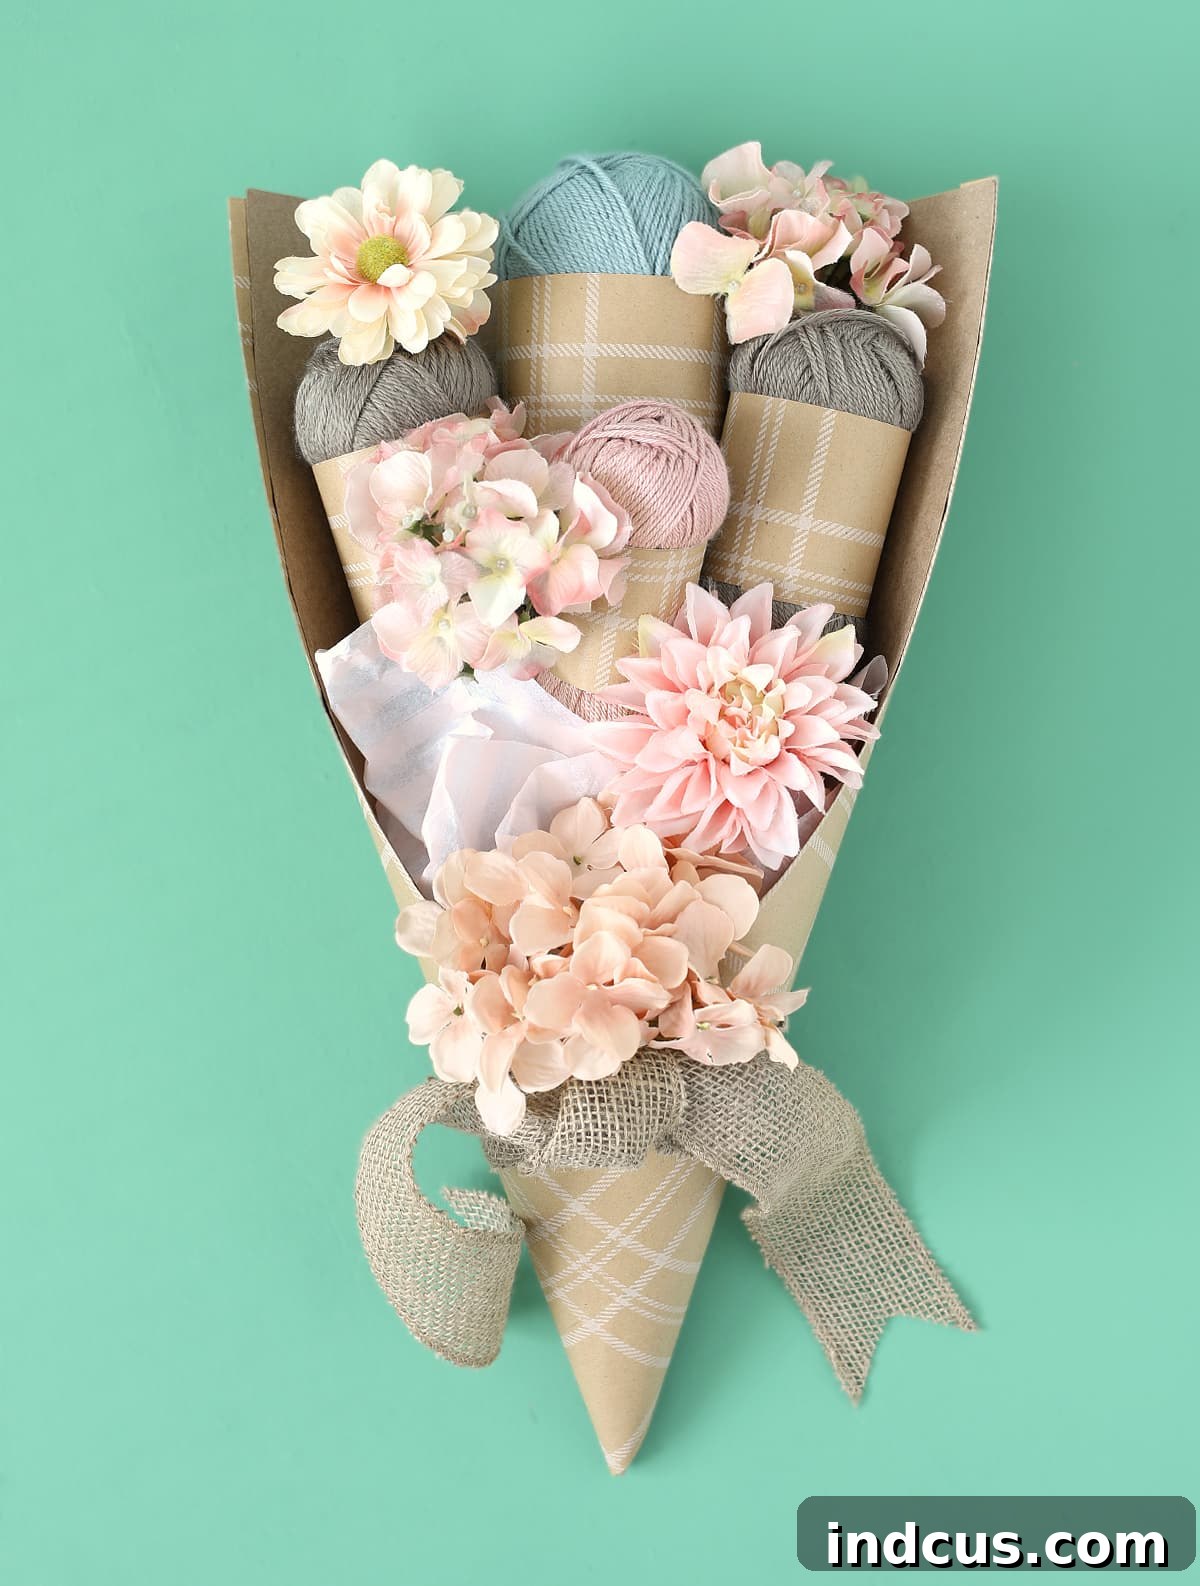
For those with an artistic spirit and a passion for DIY projects, a craft supplies bouquet is an absolute dream come true. Consider, for example, a beautiful yarn bouquet: featuring an exquisite selection of various colors and textures of yarn, perhaps accompanied by a few knitting needles, crochet hooks, or charming stitch markers. This type of bouquet is not only visually stunning but also incredibly functional and inspiring. Similarly, small tubes of artist’s paints, a collection of fine brushes, shimmering glitter, or even an assortment of colorful seed packets for the avid gardener can all be artfully arranged into charming and thematic bouquets, beautifully celebrating their unique hobbies and passions.
The Sweet Treat Spectacle: A Fresh-Baked Cookie Bouquet
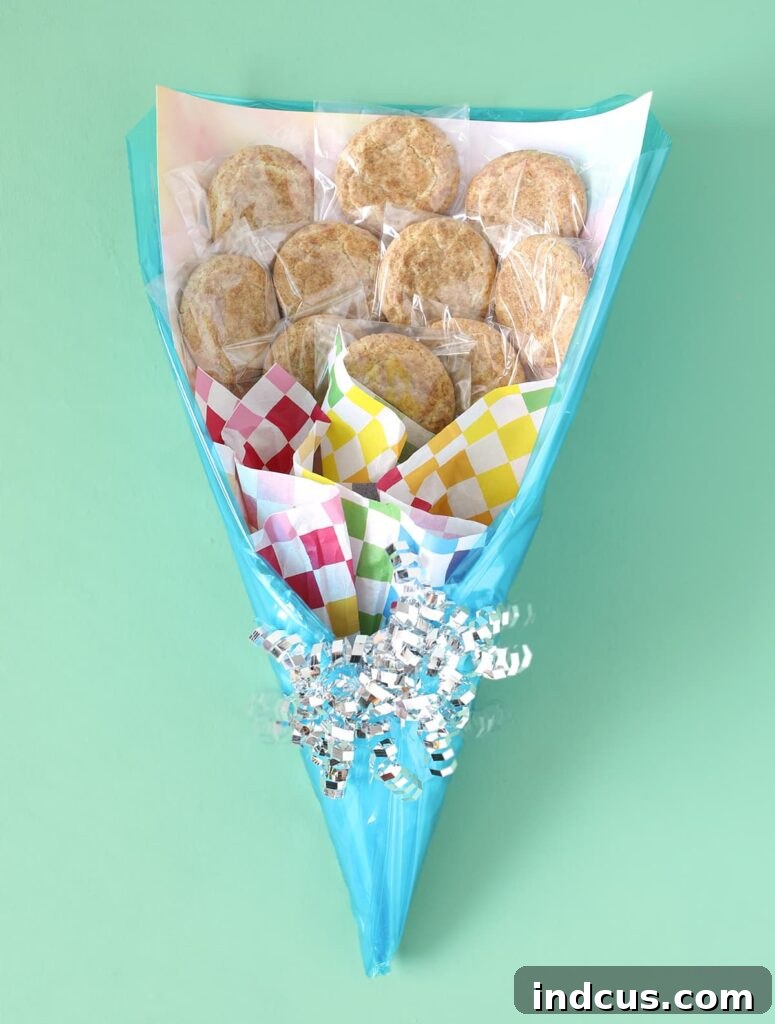
Few gifts convey warmth and thoughtfulness quite like homemade treats. A fresh-baked cookie bouquet, featuring individually wrapped cookies, brownies, or other delightful confections, is an incredibly thoughtful, personalized, and utterly delicious present. For this particular type of bouquet, you might consider gently inserting wooden dowels directly into the cookies (if they are soft enough to accommodate this without crumbling) or, more practically, securely tying the wrapped treats to sticks before attaching these sticks to your poster board. This method is excellent for ensuring both impeccable hygiene and easy removal of the treats for immediate enjoyment, making your delicious gift both appealing and convenient.
The Funky Footwear Fiesta: A Crazy Sock Bouquet
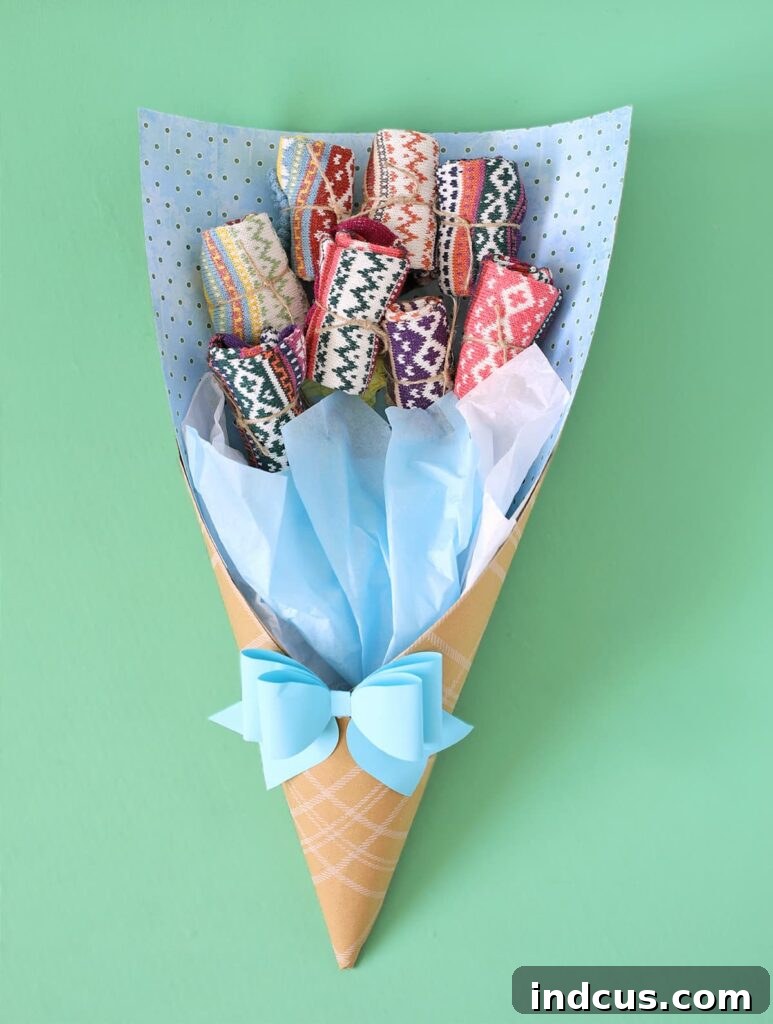
Who would have imagined that a simple pair of socks could be transformed into such an exciting and visually captivating gift? A vibrant bouquet composed of crazy, colorful, or uniquely patterned socks is a fantastic and surprisingly practical gift that is guaranteed to bring a genuine smile to anyone’s face. For these particular items, I highly recommend making full use of the optional wooden sticks or dowels. The technique is simple: carefully roll up each pair of socks, secure them neatly with a small piece of twine or a thin ribbon, then insert a stick directly into the center of the rolled sock. Finally, firmly tape this stick to your poster board base. This highly effective technique works wonderfully for any and all fabric-based items you wish to include, such as charming baby onesies, small decorative tea towels, or even a collection of embroidered handkerchiefs, ensuring they are displayed beautifully and securely.
Scalable Creativity: From Miniature to Grand Bouquets!
One of the most remarkable and appealing aspects of this gift bouquet technique is its extraordinary scalability. While many of the inspiring bouquets showcased in this guide typically measure around 22 inches tall (achieved by using half of a standard poster board), you are by no means confined to this specific dimension. You possess the creative freedom to effortlessly adjust the scale of your bouquet to perfectly fit your specific gifting needs and the size of the items you wish to present.
For a charming, more intimate gesture, consider utilizing a smaller 12×12 inch piece of sturdy cardstock as your foundational base. This compact size is absolutely perfect for crafting an adorable “mini” bouquet, ideally suited for presenting small desk accessories, a collection of gourmet candies, or a curated set of a few high-quality art markers. Here’s a delightful example of a compact art marker bouquet, standing at a neat and charming 12 inches tall:
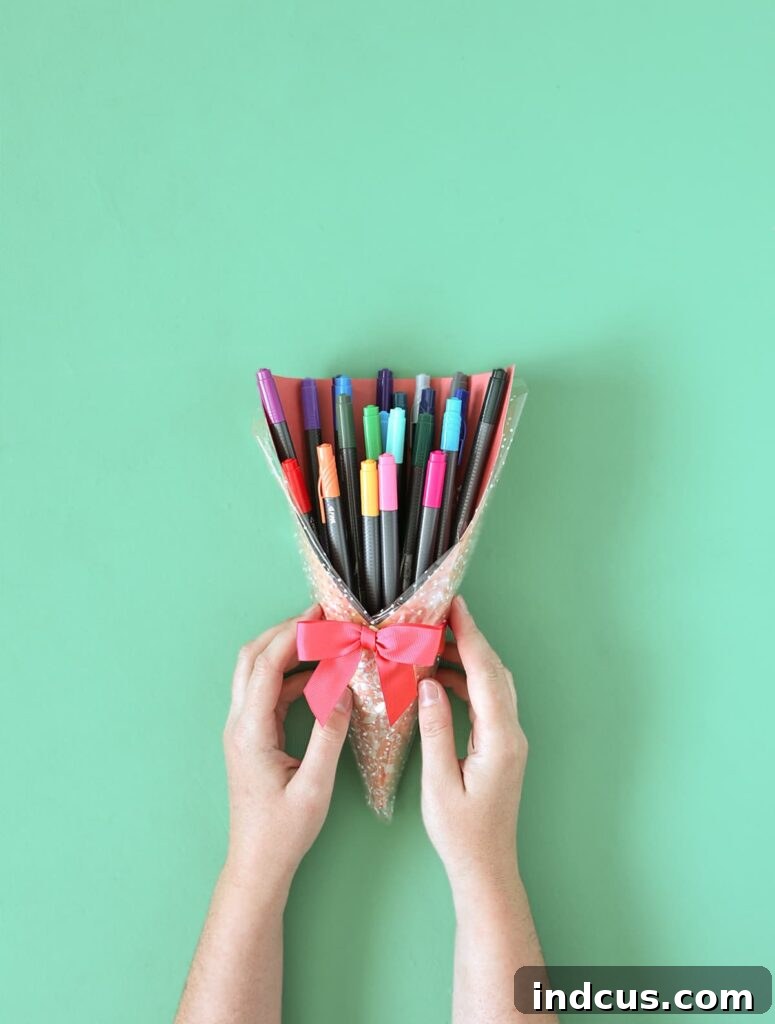
Conversely, for those occasions that demand a truly grand and unforgettable statement, you can confidently utilize a full, uncut sheet of poster board. This allows you to construct a magnificent, “humongous” bouquet, generously packed with an abundance of diverse and exciting gifts. Imagine the awe inspired by a giant bouquet brimming with essential gardening tools, a luxurious assortment of innovative kitchen gadgets, or an exquisite selection of premium coffees and exotic teas! The possibilities for scale and impact are truly limitless.
As you can now clearly see, this general tutorial can be effortlessly adapted and applied to transform virtually any gift into an eye-catching, unique, and deeply personalized bouquet! The only true limit is your imagination and the creative spark you bring to each project.
With an ever-expanding array of poster board colors, captivating ribbon styles, and intricate tissue paper patterns readily available at your fingertips, you possess the boundless creative freedom to design a gift bouquet that perfectly suits the specific occasion, beautifully reflects the recipient’s unique personality, and flawlessly matches your distinctive aesthetic. Each individual bouquet you meticulously craft will stand as a beautiful testament to your thoughtfulness, dedication, and artistic flair, leaving an indelible impression on anyone fortunate enough to receive such a special creation.
Learn Visually: Gift Bouquet Video Tutorial
While comprehensive written instructions are invaluable, sometimes, a visual demonstration can provide the clearest understanding and effortlessly clarify any lingering questions. Watching the entire process unfold can be incredibly helpful for grasping the subtle nuances of cellophane wrapping techniques and the art of precise item arrangement. The video tutorial below offers a dynamic, step-by-step perspective on how to expertly craft your perfect gift bouquet, ensuring you grasp every detail for a flawless finish.
(A video demonstrating the complete process of making a showy and festive gift bouquet would typically be embedded here.)
Learn how to turn just about any gift into a stunning, showy, and festive gift bouquet with this visual guide.
The Profound Power of a Thoughtful Gift Bouquet
Beyond the simple act of giving, presenting a gift in such a wonderfully creative, unexpected, and utterly personalized manner elevates the entire exchange into a truly unforgettable experience. Imagine the sheer delight and heartfelt appreciation when someone receives a “bouquet” brimming with charming baby onesies for a new parent, a meticulously curated collection of gourmet beef jerky for the adventurous palate, an assortment of essential handy tools for the dedicated DIY enthusiast, a stack of captivating new books for the avid reader, a practical and eco-friendly bundle of high-quality cleaning supplies, or an array of innovative kitchen gadgets for the culinary wizard in your life. Whatever their passion, whatever “floats their boat,” presenting it in a fancy, schmancy, handmade gift bouquet virtually guarantees that you will garner raving reviews and be celebrated far and wide as an amazing, incredibly creative, and truly thoughtful gift-giver extraordinaire.
Alright, perhaps I’m getting a little carried away with the “happily ever after” part. *LOL.* But in all seriousness, the immense joy, genuine surprise, and deep appreciation you’ll inspire in your recipient with a beautifully handmade gift bouquet are truly immeasurable. It’s far more than just a beautifully wrapped item; it’s a profound reflection of your invested time, meticulous effort, and sincere care, making the gift itself feel even more precious and meaningful. So, go forth, embrace your inner artisan, unleash your creativity, and start crafting these delightful, unique, and truly unforgettable presents today! Make every gift an event to remember.