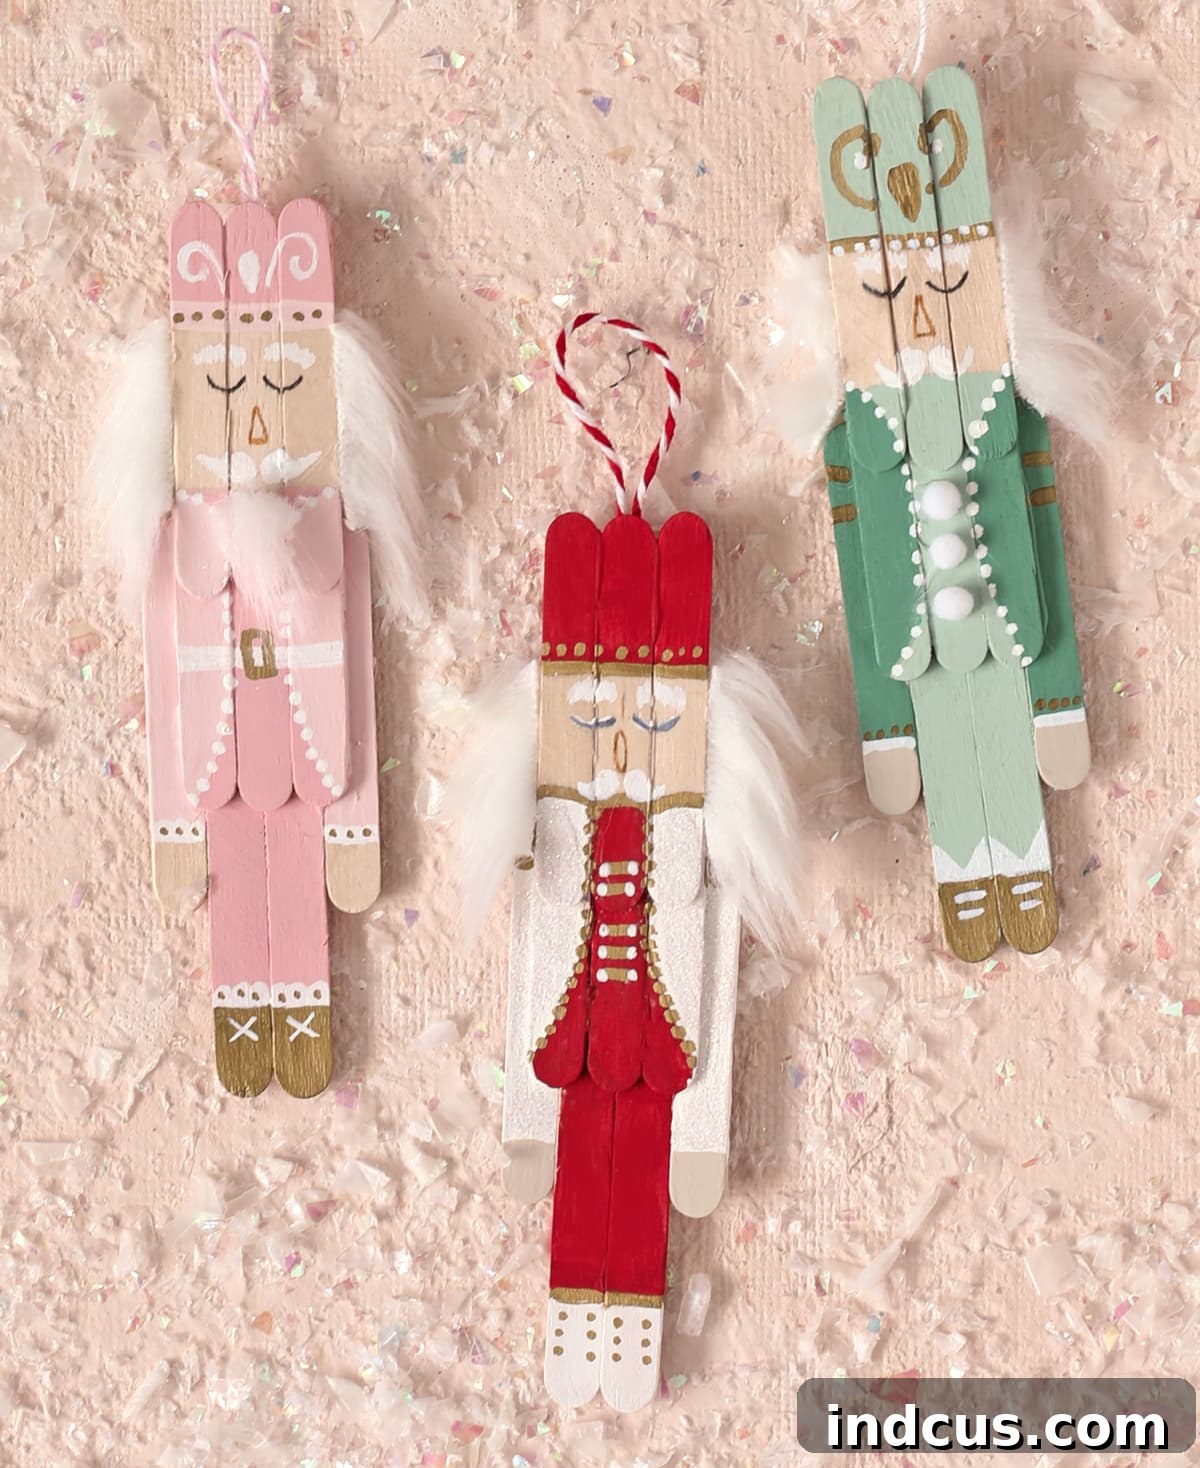
Craft Stick Nutcrackers: Adorable Handmade Christmas Ornaments You’ll Love!
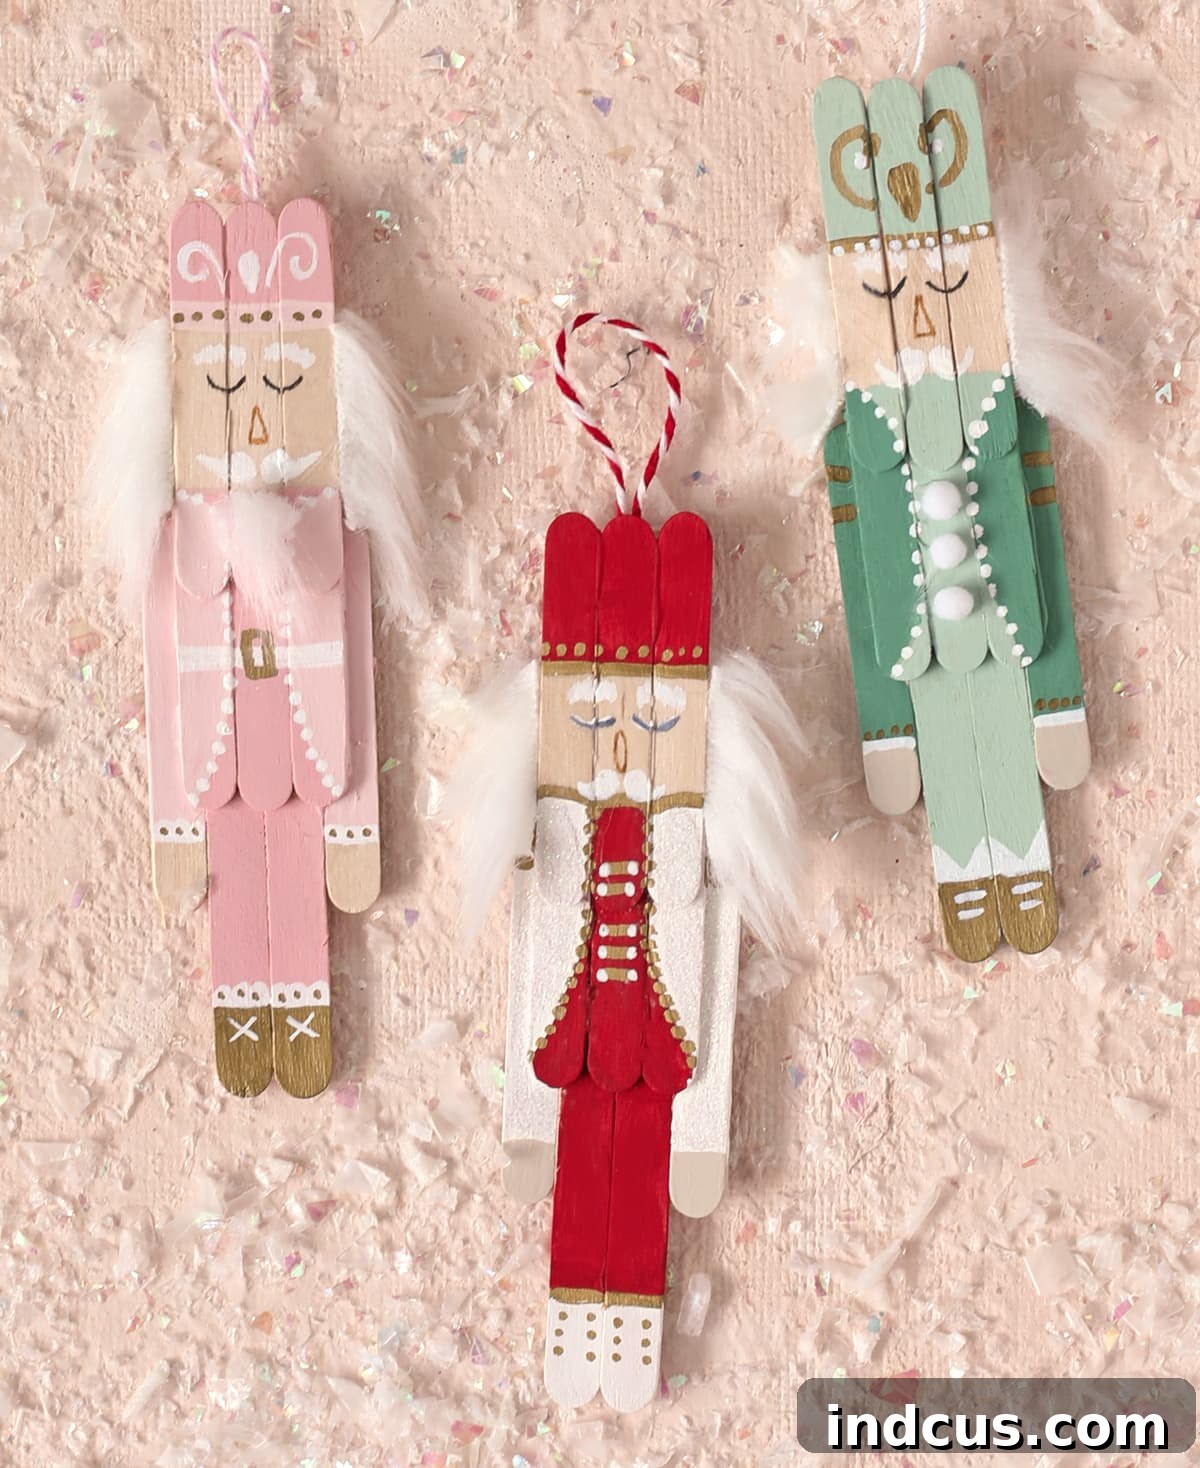
Transform simple craft sticks into enchanting miniature nutcracker ornaments with this incredibly fun and rewarding DIY Christmas project! If you’re searching for unique, handmade holiday decorations that truly capture the spirit of the season, look no further. These charming little figures, fashioned from humble popsicle sticks, are not only a joy to create but also add a touch of whimsical elegance to any Christmas tree. Their customizable nature allows you to tailor them to your specific holiday decor, making each nutcracker a unique reflection of your personal style. While initially conceived as a fantastic craft for kids, the intricate details and creative freedom involved make this a truly enjoyable endeavor for crafters of all ages, including adults seeking a delightful festive pastime.
There’s something truly special about hanging handmade ornaments on your Christmas tree, and these craft stick nutcrackers are no exception. Each one tells a story of creativity and festive cheer. Imagine the delight of seeing these intricately detailed characters, complete with tiny buttons, boot laces, and majestic hats, gracing your holiday display. They evoke a nostalgic charm, reminiscent of classic holiday tales, and become instant family heirlooms. This comprehensive tutorial will guide you through every step, ensuring a smooth and enjoyable crafting experience, whether you’re a seasoned crafter or just starting your DIY journey. Get ready to unleash your creativity and bring these adorable, pint-sized guardians of the holiday spirit to life!
Gather Your Crafting Essentials: Materials for Your Nutcracker Ornaments
Before embarking on this magical crafting journey, it’s essential to gather all the necessary supplies. The beauty of this project lies in its accessibility; most materials are readily available at craft stores or even around your home. Having everything laid out and organized before you begin will ensure a smooth and enjoyable crafting process. Pay special attention to the types of craft sticks, as the varying sizes are crucial for constructing the nutcracker’s distinct body shape.
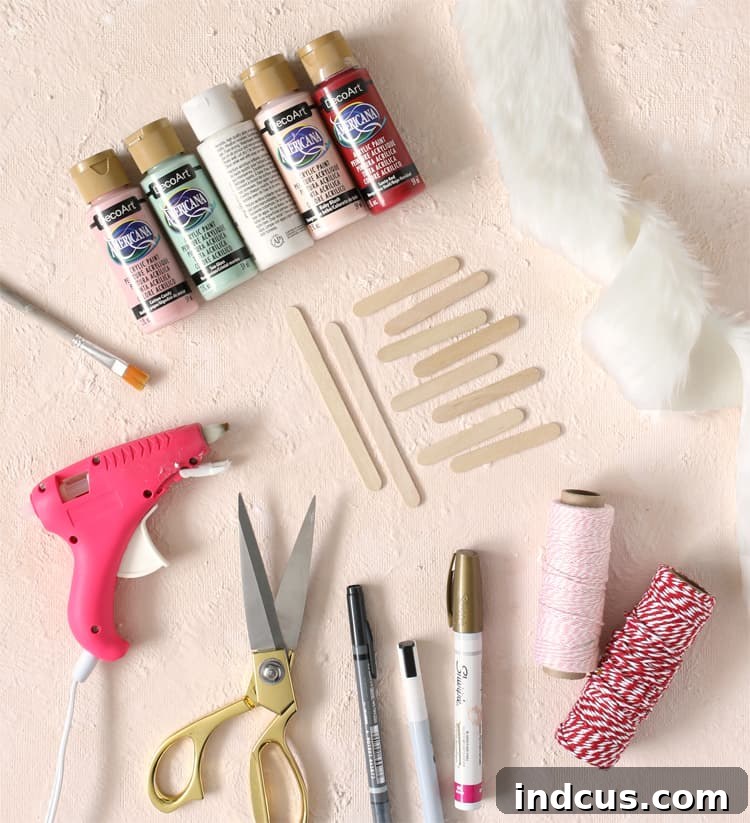
Detailed Materials List:
- 8 Small Craft Sticks (approximately 2.5 inches long): These shorter sticks are perfect for forming the nutcracker’s upper body and hat structure. Their compact size helps maintain the miniature scale of the ornament.
- Two Regular Craft Sticks (approximately 4.5 inches long): These longer sticks will serve as the foundational back support and leg structure for your nutcracker, providing stability and shape.
- Hot Glue Gun + Glue Sticks: A hot glue gun is indispensable for this project, offering quick and strong adhesion. Always exercise caution when using a hot glue gun, especially if crafting with children. A low-temp gun can be a safer option for younger crafters.
- Assorted Craft Paint: Acrylic craft paints are ideal due to their vibrant colors, quick drying time, and easy cleanup. You’ll need various colors for the hat, uniform, and skin tones.
- Small Paint Brushes: A selection of fine-tipped brushes will allow you to achieve precise details and smooth base coats. Having different sizes will be beneficial for various areas of the nutcracker.
- Fine-Tip Paint Pens (e.g., White, Gold, Black): Paint pens are absolutely perfect for adding those intricate facial features and decorative uniform details. Their precise tips make drawing eyes, noses, mustaches, buttons, and decorative trims incredibly easy and neat.
- White Faux Fur: A small scrap of white faux fur will bring your nutcracker to life, creating his iconic hair and beard. Its soft texture adds a delightful tactile element to the ornament.
- Twine, Ribbon, or String: Essential for creating a hanging loop if you intend for your nutcracker to adorn your Christmas tree. Choose a material that complements your nutcracker’s color scheme.
Recommended Paint Colors for a Classic Look:
- DecoArt Cotton Candy (for soft pink accents)
- Decoart Sea Glass (for a soothing green tone)
- White (for base coats, details, and highlights)
- Decoart Baby Blush (for a delicate skin tone or blush)
- DecoArt Santa Red (for vibrant uniform elements)
- DecoArt Eucalyptus Leaf (for a sophisticated darker green)
Feel free to experiment with your own color combinations to match your existing holiday decor or to create a truly unique collection of nutcracker characters!
Step-by-Step Guide: Crafting Your Popsicle Stick Nutcracker
Now that you have all your materials ready, let’s dive into the creative process! Follow these detailed steps carefully, and you’ll soon have a charming army of handmade nutcrackers ready to stand guard over your holiday celebrations.
Step 1: Constructing the Nutcracker’s Body with Craft Sticks
This initial assembly forms the foundation of your nutcracker. While the process may seem a bit like a puzzle at first glance, referring to the visual diagram and following these instructions will make it clear. Precision here ensures a sturdy and well-proportioned figure.
- Lay the Foundation: Begin by placing the two longest craft sticks (4.5 inches) side by side on your work surface. These will serve as the structural back and legs of your nutcracker. Ensure they are aligned evenly.
- Attach the Top Support: Take one of the small craft sticks (2.5 inches) and apply a line of hot glue along its entire length. Carefully place this glued stick horizontally across the top ends of the two long sticks, ensuring it is centered and its top edges line up perfectly with the top edges of the long sticks. Press down firmly to secure. This stick forms the top crossbeam of the nutcracker’s upper body.
- Form the Shoulders and Upper Body: Apply hot glue to either side of the small stick you just attached. Then, immediately place two more small sticks parallel to the first, one on each side, so that their ends also line up with the top edge of the long sticks. These three sticks together create the width of the nutcracker’s upper torso and the base for his hat.
- Reinforce the Structure: Flip your partially assembled nutcracker over. Now, glue two small sticks underneath, positioning them so they are even with the long sticks but attached securely to the three small sticks you just glued in front. This step adds depth and stability to the torso, effectively creating a more robust frame.
- Create the Hat Brim/Overlap: Apply a thin line of hot glue along the very top edge of the three small sticks forming the upper body. Then, attach three more small sticks, lining their bottom edges up so that they overlap the existing three sticks by about one-third of their width. This creates a distinct brim or layered effect for the nutcracker’s hat, adding character and dimension.
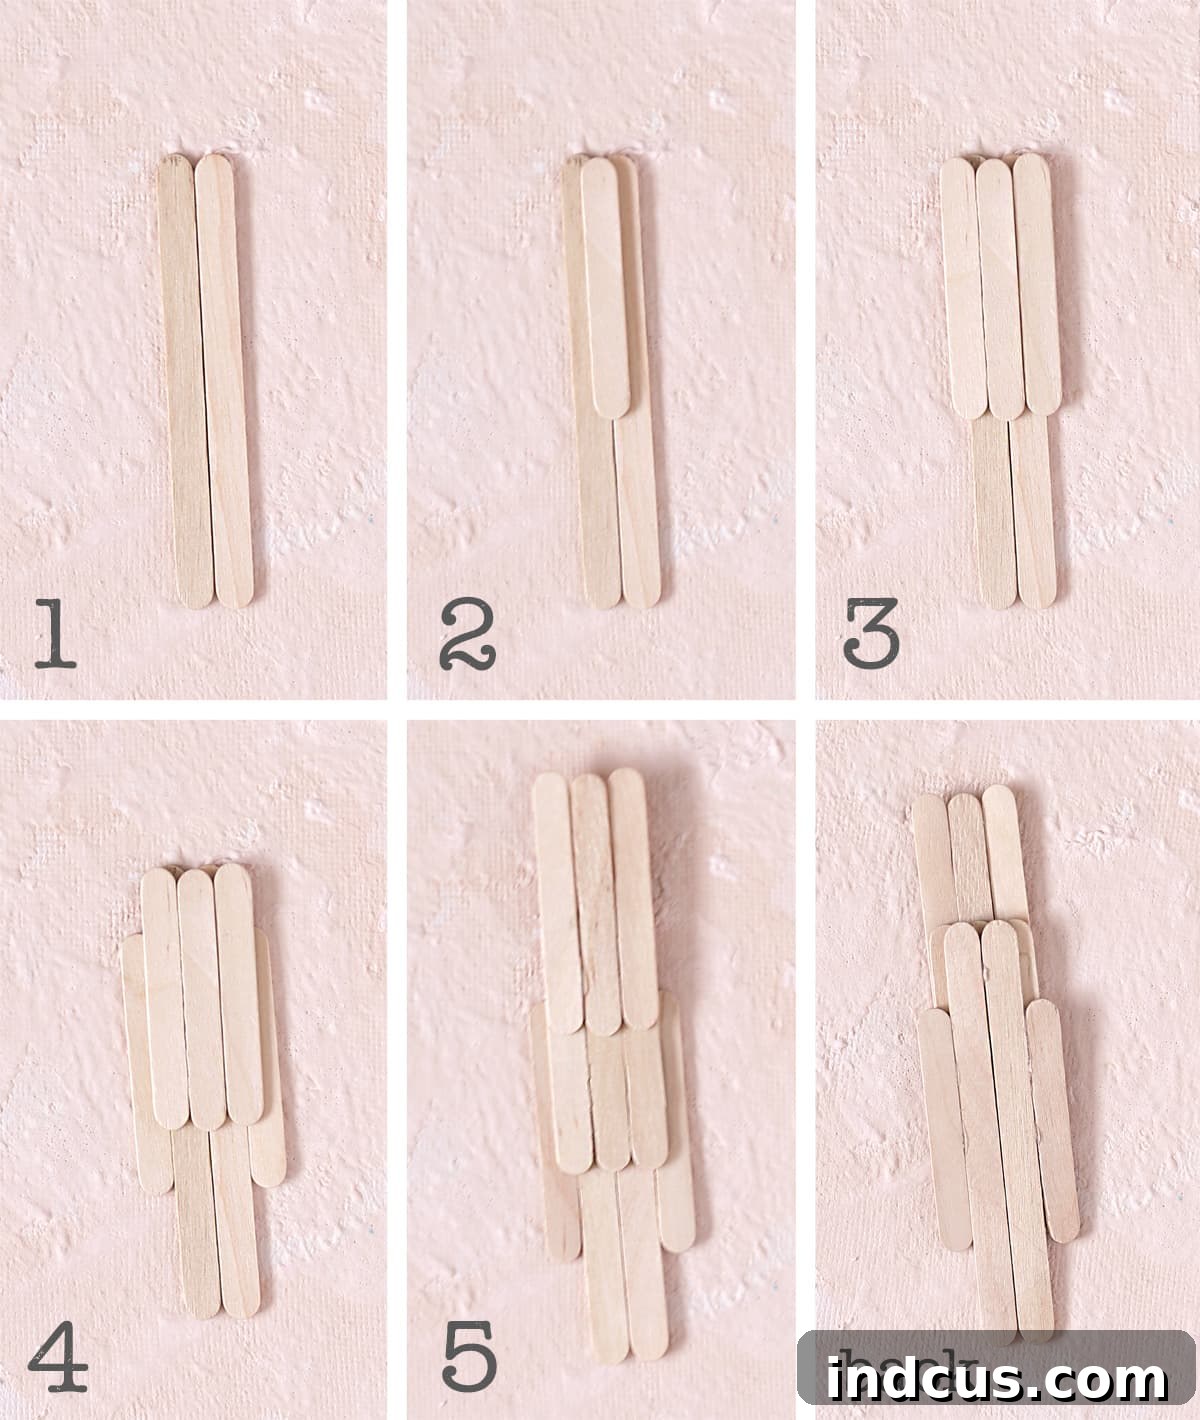
Don’t be intimidated if the verbal instructions seem complex; the accompanying image clearly illustrates the precise placement of each stick. A quick glance at the photo, particularly the back view, will clarify any confusion and guide your hands. The key is to work quickly with hot glue before it sets, ensuring firm and accurate attachments. This assembly forms the canvas for your artistic masterpiece!
Step 2: Bringing Color to Life – Painting the Base
With the structure complete, it’s time for the exciting transformation with paint! This step lays down the foundational colors that will define your nutcracker’s uniform and character. Patience is key here, allowing each coat to dry properly for a smooth finish.
Begin by painting the top section of the assembled craft sticks to form the nutcracker’s distinctive hat. Choose a bold color like red, blue, or a festive green. Apply thin, even coats, allowing sufficient drying time between layers to prevent streaking and ensure full coverage. Next, intentionally leave the central face area of the nutcracker as raw wood for now; this will serve as the natural skin tone, or you can later paint it a light peach or beige if preferred. For the main body, paint the jacket or uniform section a light green, or any primary color you choose for the bulk of his outfit. Once this light green base is completely dry, which is crucial for preventing colors from bleeding, add the darker green sleeves and a curved area to delineate the jacket’s opening or lapels. This layering creates depth and definition for the uniform.
A little anecdote from my own crafting journey: I initially intended to leave the tips of the “arms” (the side sticks) as raw wood to naturally represent hands. However, I forgot during the painting frenzy! If you make a similar oversight, don’t worry. Simply use a small brush and a beige or light peach craft paint to carefully paint in the hand shapes. This adds a subtle, yet effective, human touch to your little figure. Remember, crafting is all about adaptation and enjoying the process, even with minor detours!
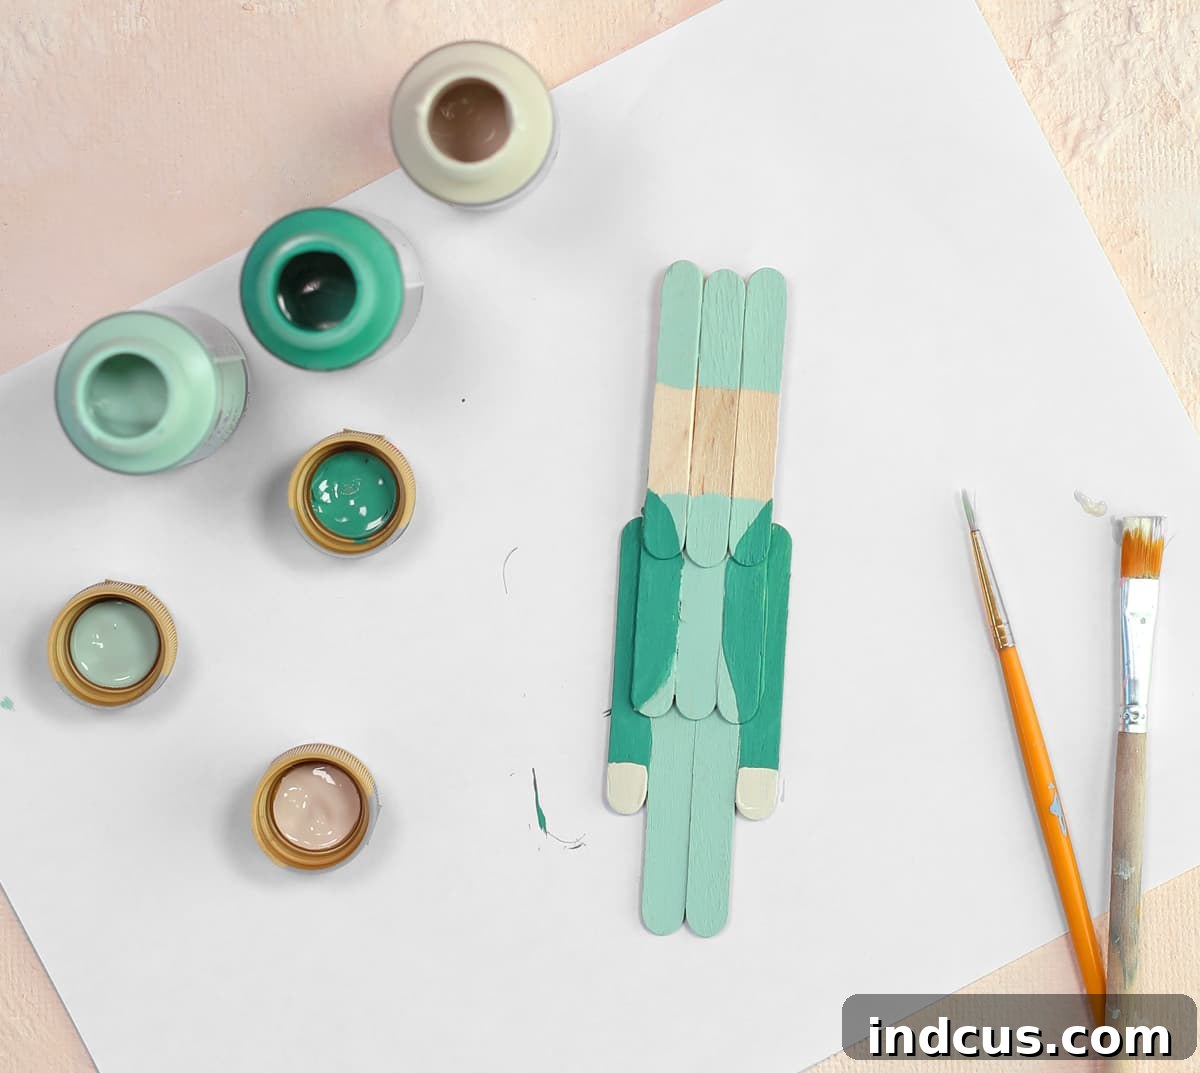
At this stage, your nutcracker might still look a bit abstract, like a blank canvas waiting for its masterpiece. But trust the process! The true magic is about to unfold as we move to the detailing stage, where personality and charm truly emerge.
Step 3: Unleashing Personality – Adding Intricate Details with Paint Pens
This is arguably the most exciting part of the entire process – bringing your nutcracker to life with intricate details! Paint pens are your best friends here, offering precision and vibrant color that transforms your painted sticks into a character with personality and flair. This is where your nutcracker truly comes alive and develops its unique charm.
Grab your fine-tipped paint pens (white, gold, and black are excellent choices for classic nutcracker features). Start by carefully drawing the eyes. You can opt for simple black dots, or add a tiny white dot for a sparkle of light, giving them a lively gaze. Next, define his nose – a simple oval or a small triangle works perfectly. The most iconic feature, the bushy mustache, is next. Use a black or brown paint pen to create a stylized, twirly mustache that perfectly complements his stern yet friendly expression. You can even add a small, determined mouth line below it.
Beyond the face, let your imagination run wild with uniform embellishments! Use gold or white paint pens to add decorative trim along the edges of his hat, creating a band or intricate patterns. Define sleeve cuffs with contrasting colors, and add tiny, symmetrical buttons down the front of his jacket. Don’t forget the boots! Use a black paint pen to draw shoelaces or buckles, adding a realistic touch to his miniature footwear. You can also add epaulets on his shoulders, belts around his waist, or decorative lines to mimic piping on his uniform. Each tiny detail contributes to the overall charm and character of your nutcracker, making him truly unique. Don’t be afraid to experiment with different patterns and flourishes; there’s no right or wrong way to personalize your tiny sentinel!
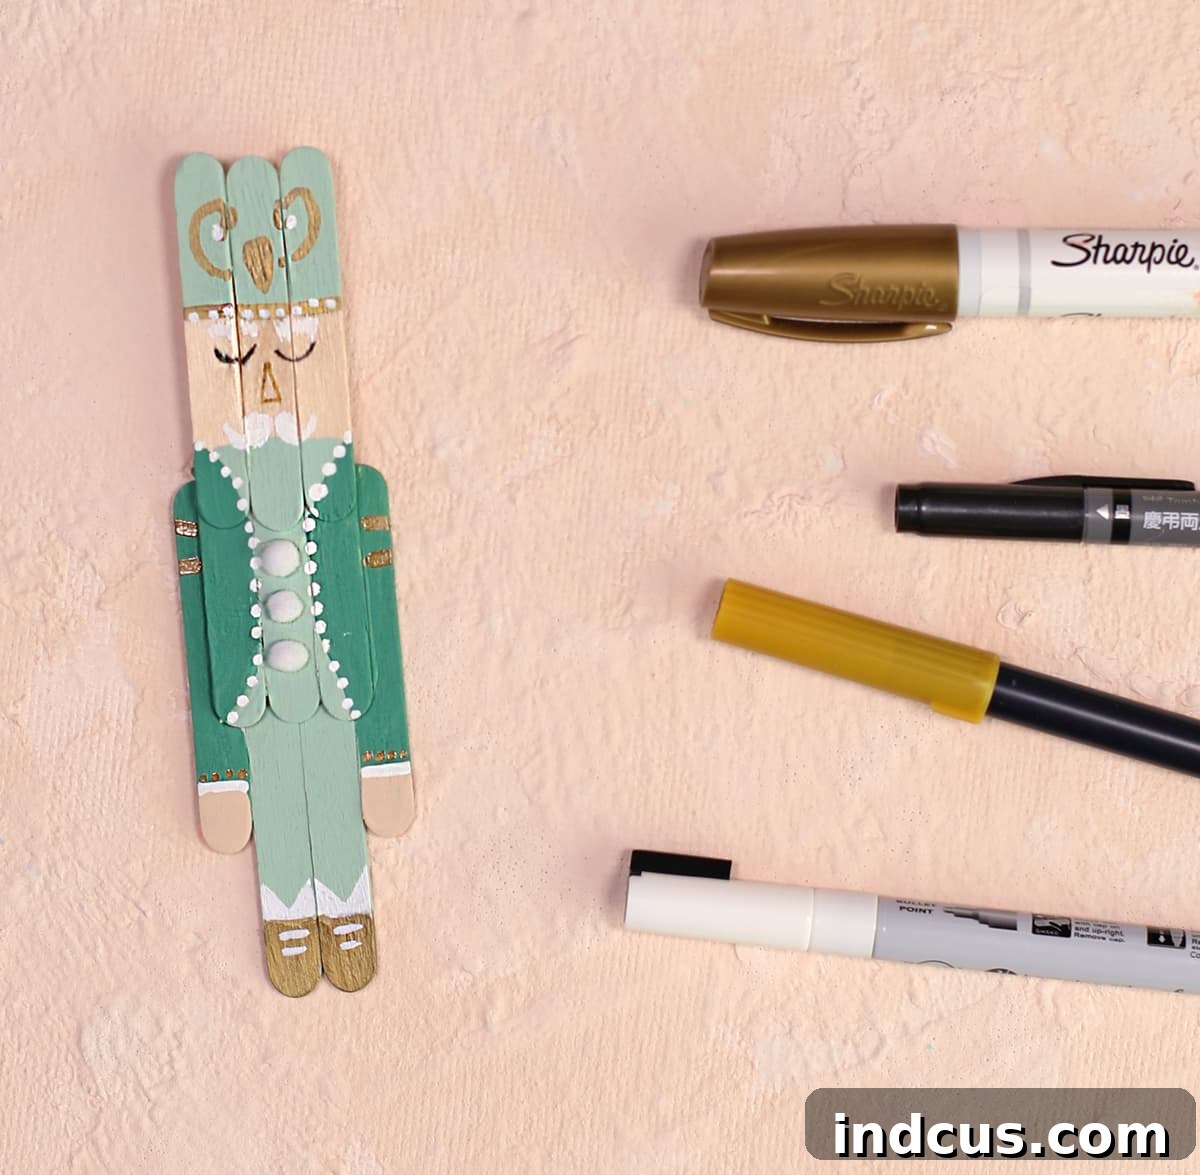
The more details you add, the more expressive and delightful your nutcracker will become. This step truly allows you to infuse each ornament with its own distinct personality. Take your time, enjoy the creative freedom, and watch as your simple craft sticks are transformed into something truly magical.
Step 4: The Touch of Whimsy – Adding Faux Fur Hair
No nutcracker is complete without his characteristic wild hair and beard! Adding faux fur is a simple step that makes a dramatic difference, instantly giving your nutcracker a more authentic and whimsical appearance. This detail softens the edges and adds a delightful textural element.
Take a small piece of white faux fur. The key to working with faux fur is to cut it carefully to avoid creating a messy, shaggy edge. Here’s a super helpful tip: flip the faux fur over to its backing side. Using just the tip of your scissors, gently slide it under the backing fabric and cut only the fabric, not the fur fibers themselves. This technique, often called “scoring,” minimizes shedding and results in a cleaner, more natural-looking fur edge when viewed from the front.
HELPFUL TIP: When cutting faux fur, always work from the backside. Slide the tip of your scissors just under the backing fabric, carefully cutting only the fabric itself. This preserves the fur fibers, resulting in a cleaner, less shaggy edge and significantly less mess.
Once you have tiny strips of faux fur cut to the appropriate size, apply a small dab of hot glue to each side of the nutcracker’s face area. Gently press the faux fur strips into place, shaping them to resemble sideburns or a wispy beard. You can also add a small piece across the top of his head, under the hat brim, if desired. This furry addition brings an incredible amount of character and warmth to your little ornament, making him even more charming and ready for his holiday duties.
Step 5: The Finishing Touch – Adding a Hanging Loop
If your adorable nutcracker is destined to grace the branches of your Christmas tree, this final step is essential. Adding a hanging loop transforms your decorative figure into a functional ornament, ready to twinkle amidst the fairy lights and other festive decorations. If you plan to use your nutcrackers as stand-alone figurines for a mantelpiece display or as gift toppers, you can simply skip this step and enjoy them as they are.
To create the hanging loop, cut a piece of twine, ribbon, or sturdy string approximately 6-8 inches long. Form a loop with the string, bringing the two ends together. Apply a generous dab of hot glue to the upper back of your nutcracker, ensuring it’s positioned discreetly and securely. Press the knotted or joined ends of your twine loop firmly into the hot glue. Hold it in place for a few seconds until the glue cools and sets completely, ensuring a strong bond. Test the loop gently to make sure it can bear the weight of the ornament. For added security, you can apply a small additional dab of glue over the secured ends once the first application has dried.
Choosing the right material for your loop can also add to the aesthetic. Natural twine provides a rustic charm, while a thin satin ribbon can offer a touch of elegance. Regardless of your choice, this simple addition makes your handmade nutcracker ready for its grand debut on your Christmas tree, spreading cheer and adding a personal touch to your holiday decor.
Behold Your Magnificent Miniature Nutcrackers!
Oh, my goodness, aren’t these little men just the absolute sweetest? This entire crafting process, from the initial stick assembly to adding those delightful final details, was an absolute joy. It’s truly amazing how much personality and charm can be infused into simple craft sticks with a bit of paint and creativity. Each button, each curl of the mustache, and every dash of color contributes to making these nutcrackers incredibly endearing. Take a moment to admire your handiwork – soak in all the intricate details, the vibrant colors, and the whimsical expressions you’ve created. They stand as a testament to your creativity and the magic of handmade holiday decorations.
These adorable craft stick nutcrackers are more than just ornaments; they are tiny works of art that carry the warmth and love of the season. They make fantastic additions to your own Christmas tree, bringing a unique, rustic, yet elegant touch. Imagine them nestled among the branches, catching the light and sparking joy. Beyond tree decorations, they are perfect for gifting to friends, family, or teachers, offering a heartfelt, personalized present. You can use them as charming gift tags, tie them onto holiday wreaths, or even arrange a whole brigade of them on a mantelpiece for a festive display. The possibilities for these versatile little characters are endless, and their handmade nature makes them truly special in a world of mass-produced decor.
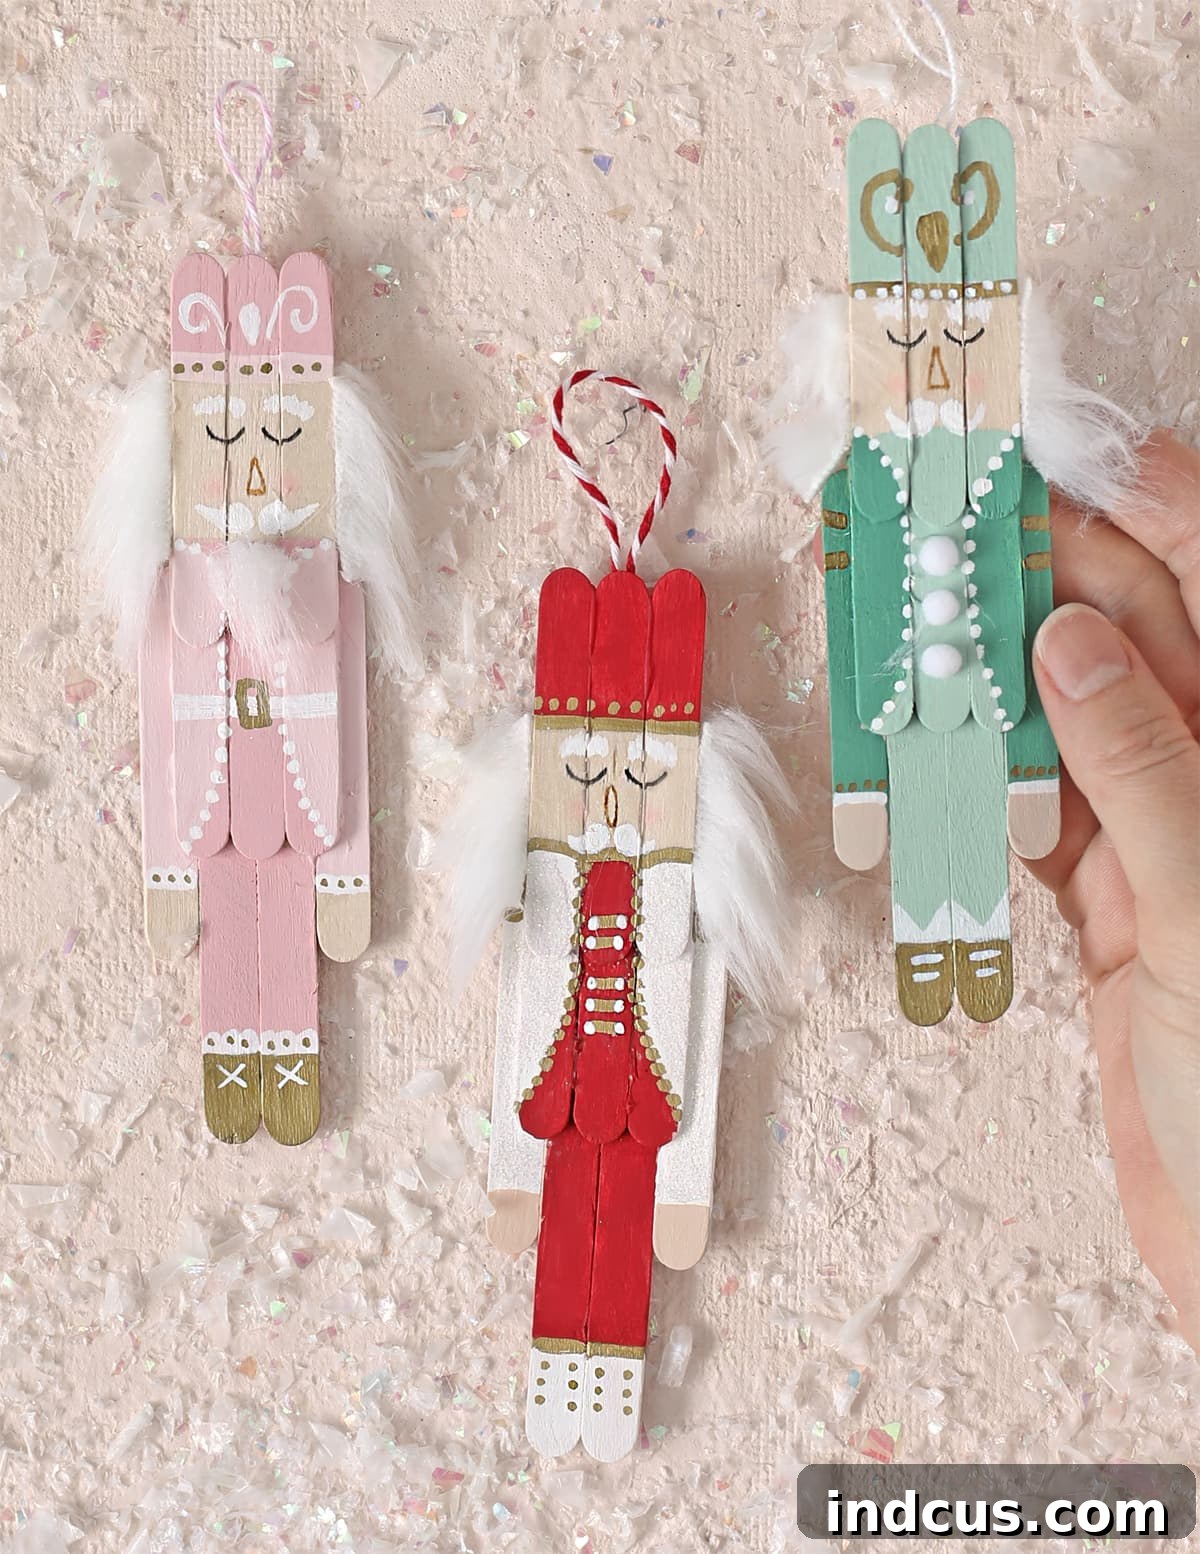
We hope you’ve enjoyed creating these delightful miniature nutcrackers as much as we have! Their charm and personality are bound to bring smiles and festive cheer to your home throughout the holiday season. Embrace the joy of crafting and the unique beauty of handmade ornaments. If you’re hungry for more festive crafting inspiration, be sure to explore more fantastic popsicle stick Christmas crafts here to keep your creativity flowing all season long!
Watch the Popsicle Stick Nutcrackers Video Tutorial!
For a visual step-by-step guide and to see these charming nutcrackers come to life, be sure to watch our comprehensive video tutorial. It’s the perfect companion to this written guide, offering clear demonstrations and additional tips to help you craft your perfect miniature nutcracker.