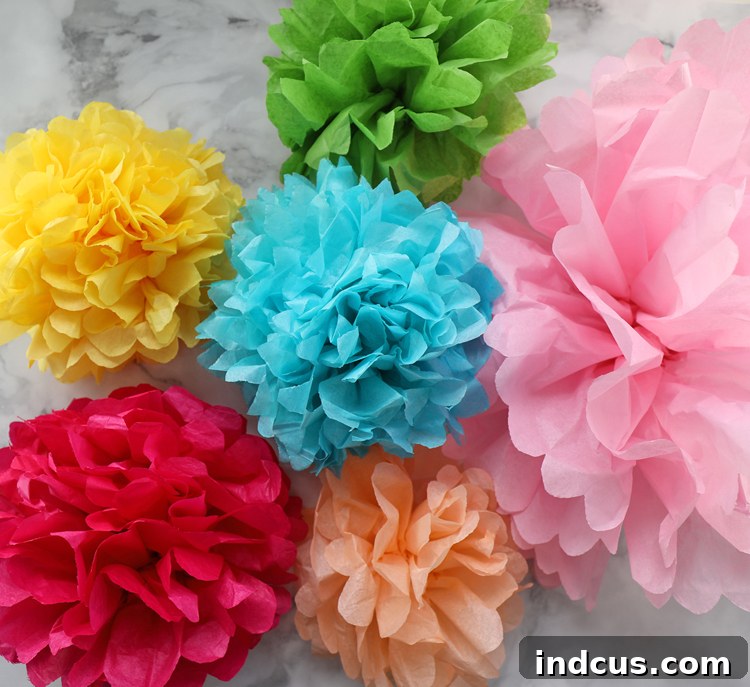
The Ultimate Guide to Making Tissue Paper Flowers: Step-by-Step Tutorial & Decor Ideas
Unlock your creativity and transform simple tissue paper into stunning floral masterpieces! This comprehensive guide provides everything you need to know about crafting beautiful tissue paper flowers, from basic steps to advanced techniques, hanging tips, and inspiring decoration ideas. Get ready to add a touch of handmade elegance to any occasion!
Have you ever explored the delightful world of tissue paper flowers? They are an incredibly easy, budget-friendly craft that offers immense versatility for decoration. Whether you’re planning a party, sprucing up a room, or adding a personal touch to a gift, these charming flowers are the perfect solution. This article is designed to be your definitive resource, covering every aspect of tissue paper flower creation and application. We’ve gathered all the essential information, tips, and tricks in one convenient place, ensuring you have everything you need to become a tissue paper flower expert!
How to Make Tissue Paper Flowers: A Step-by-Step Tutorial
Creating your own tissue paper flowers is a surprisingly simple process that yields beautiful results. Follow these easy steps to craft your first gorgeous bloom.
Materials Needed: Gather Your Supplies
Before you begin, make sure you have these basic crafting tools readily available. Most of these items are inexpensive and can be found at any craft or dollar store.
- Colorful Tissue Paper: The star of our craft! Choose a variety of colors to create vibrant and diverse flowers. The number of sheets will depend on the size and fullness desired.
- Sharp Scissors: Essential for clean cuts and shaping your petals.
- Stapler + Staples: To secure the center of your folded tissue paper, ensuring your flower stays intact.
- Ruler or Measuring Tape: For precise folding and determining the initial width of your tissue paper stack, especially when aiming for specific flower sizes.
Step-by-Step Instructions: Blossom Your Creativity
Step 1: Prepare Your Tissue Paper Stack
Begin by neatly stacking several layers of tissue paper. The number of layers and the initial dimensions of your tissue paper stack are crucial for determining the final size and fullness of your flower. For smaller, daintier flowers, fewer layers and a narrower stack will suffice. For large, voluminous blooms, you’ll need more layers and a wider base. (Refer to our handy sizing chart below for specific recommendations).
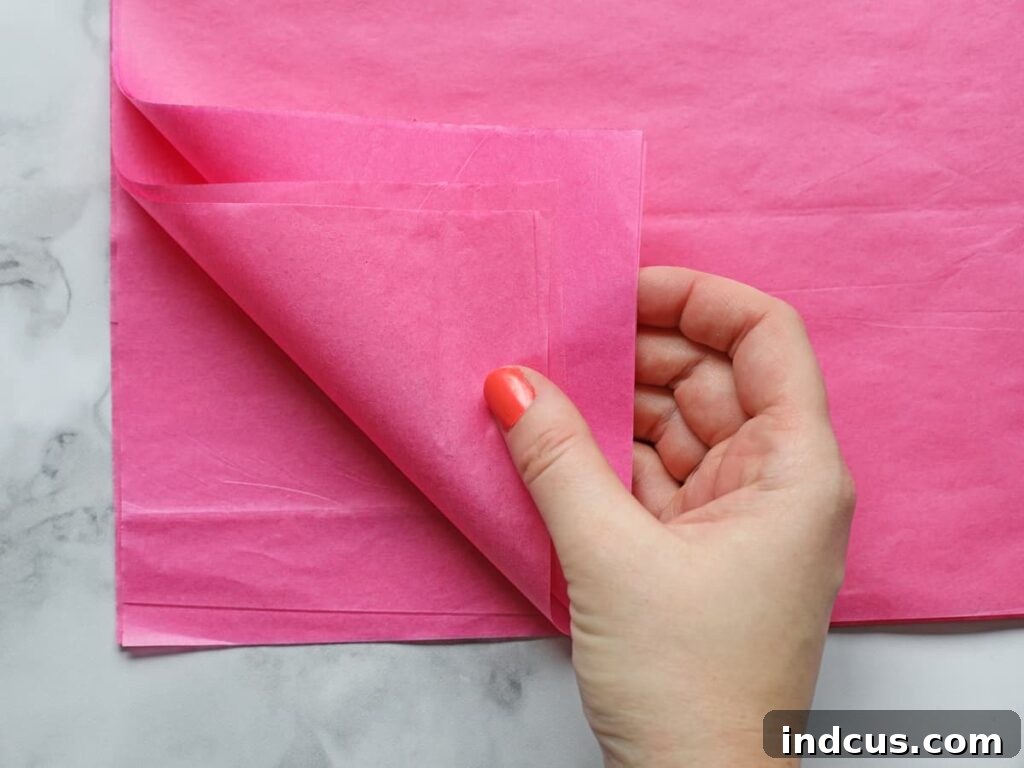
Step 2: Create Accordion Folds
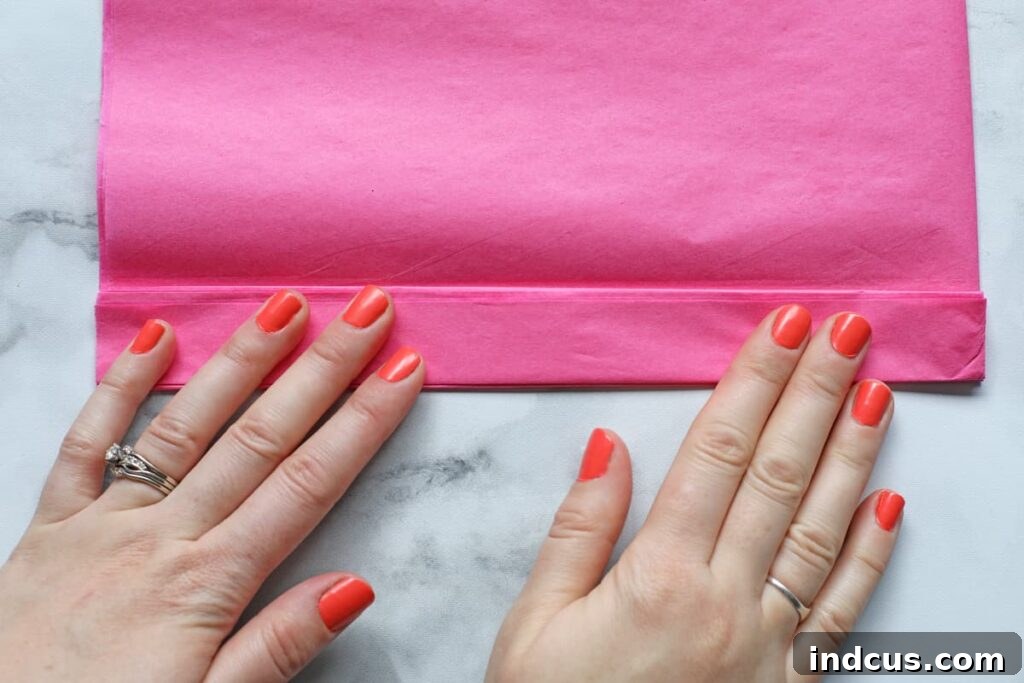
Starting from one of the short ends of your stacked tissue paper, begin to accordion fold the entire length. Each fold should be approximately 1 inch wide. Strive for consistent folds as this will contribute to the symmetry and overall aesthetic of your finished flower. Continue folding until the entire stack of tissue paper is transformed into a compact, pleated strip.
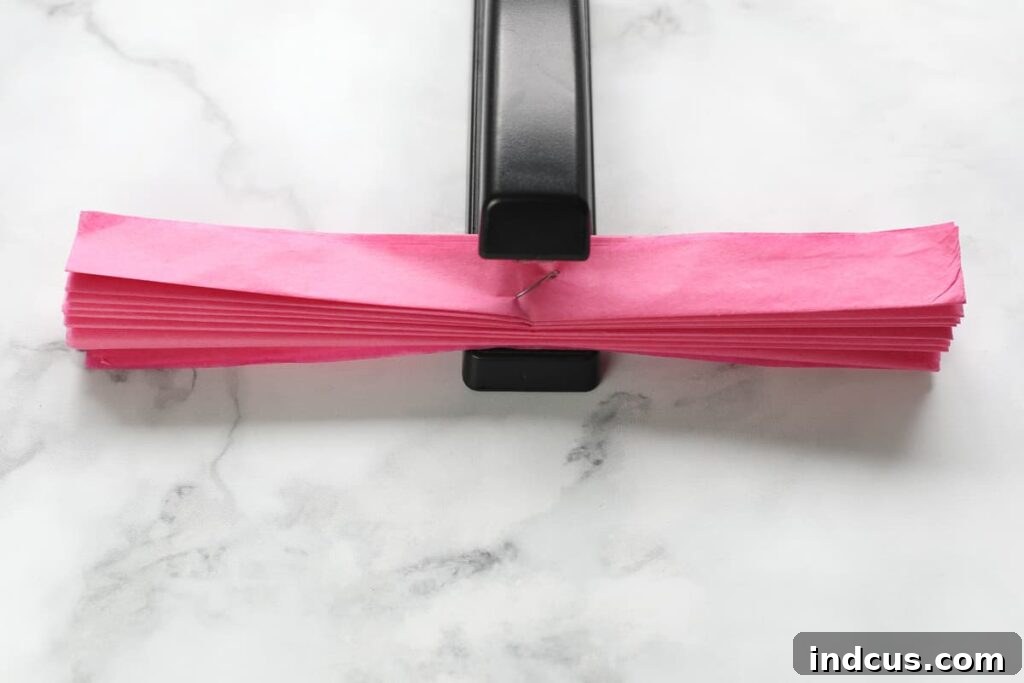
Step 3: Secure the Center
Once your tissue paper is fully accordion-folded, locate the precise center of the folded strip. Using your stapler, firmly secure the center with at least one staple. For larger flowers or thicker stacks of paper, you might consider using two staples side-by-side to ensure all layers are securely fastened. This central anchor point is vital for holding your flower together as you begin to fan and fluff it.
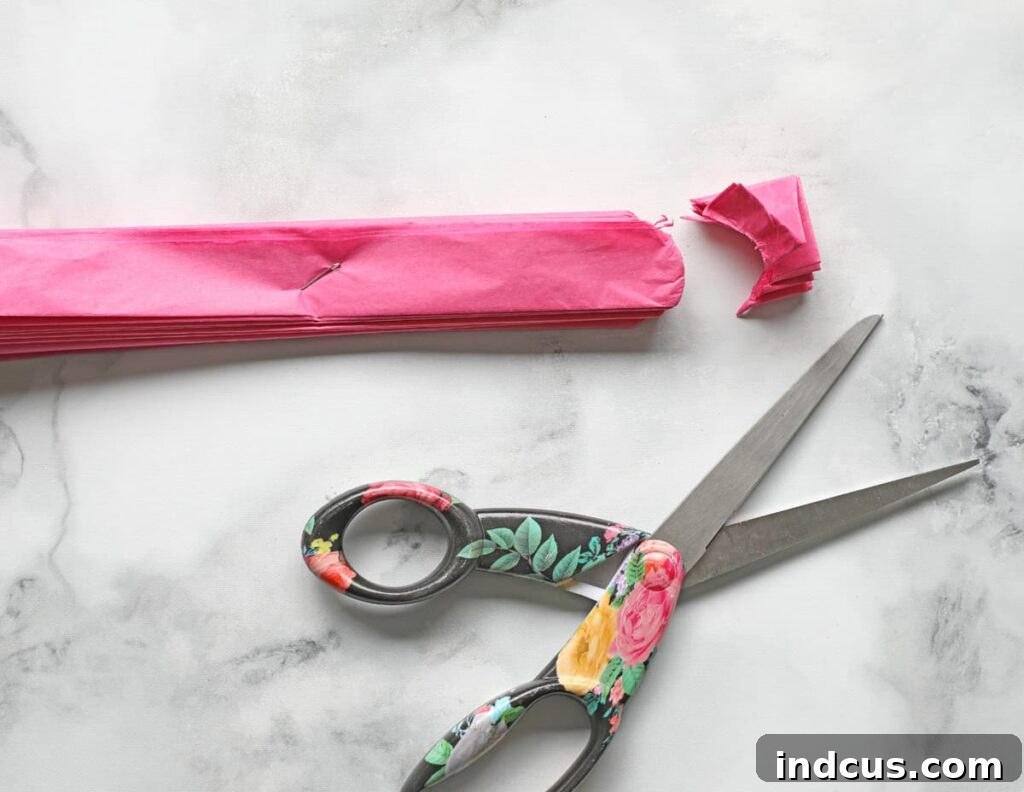
Step 4: Shape the Ends into Petals
Now comes the creative part! With your scissors, carefully shape both ends of the accordion-folded tissue paper. The way you cut these ends will dramatically alter the final appearance of your flower’s petals. You can round them for a classic soft look, cut them to a sharp point for a more edgy bloom, or even create scalloped edges. Scroll down a bit further to discover a detailed chart illustrating various cutting techniques and the unique flower shapes they produce.
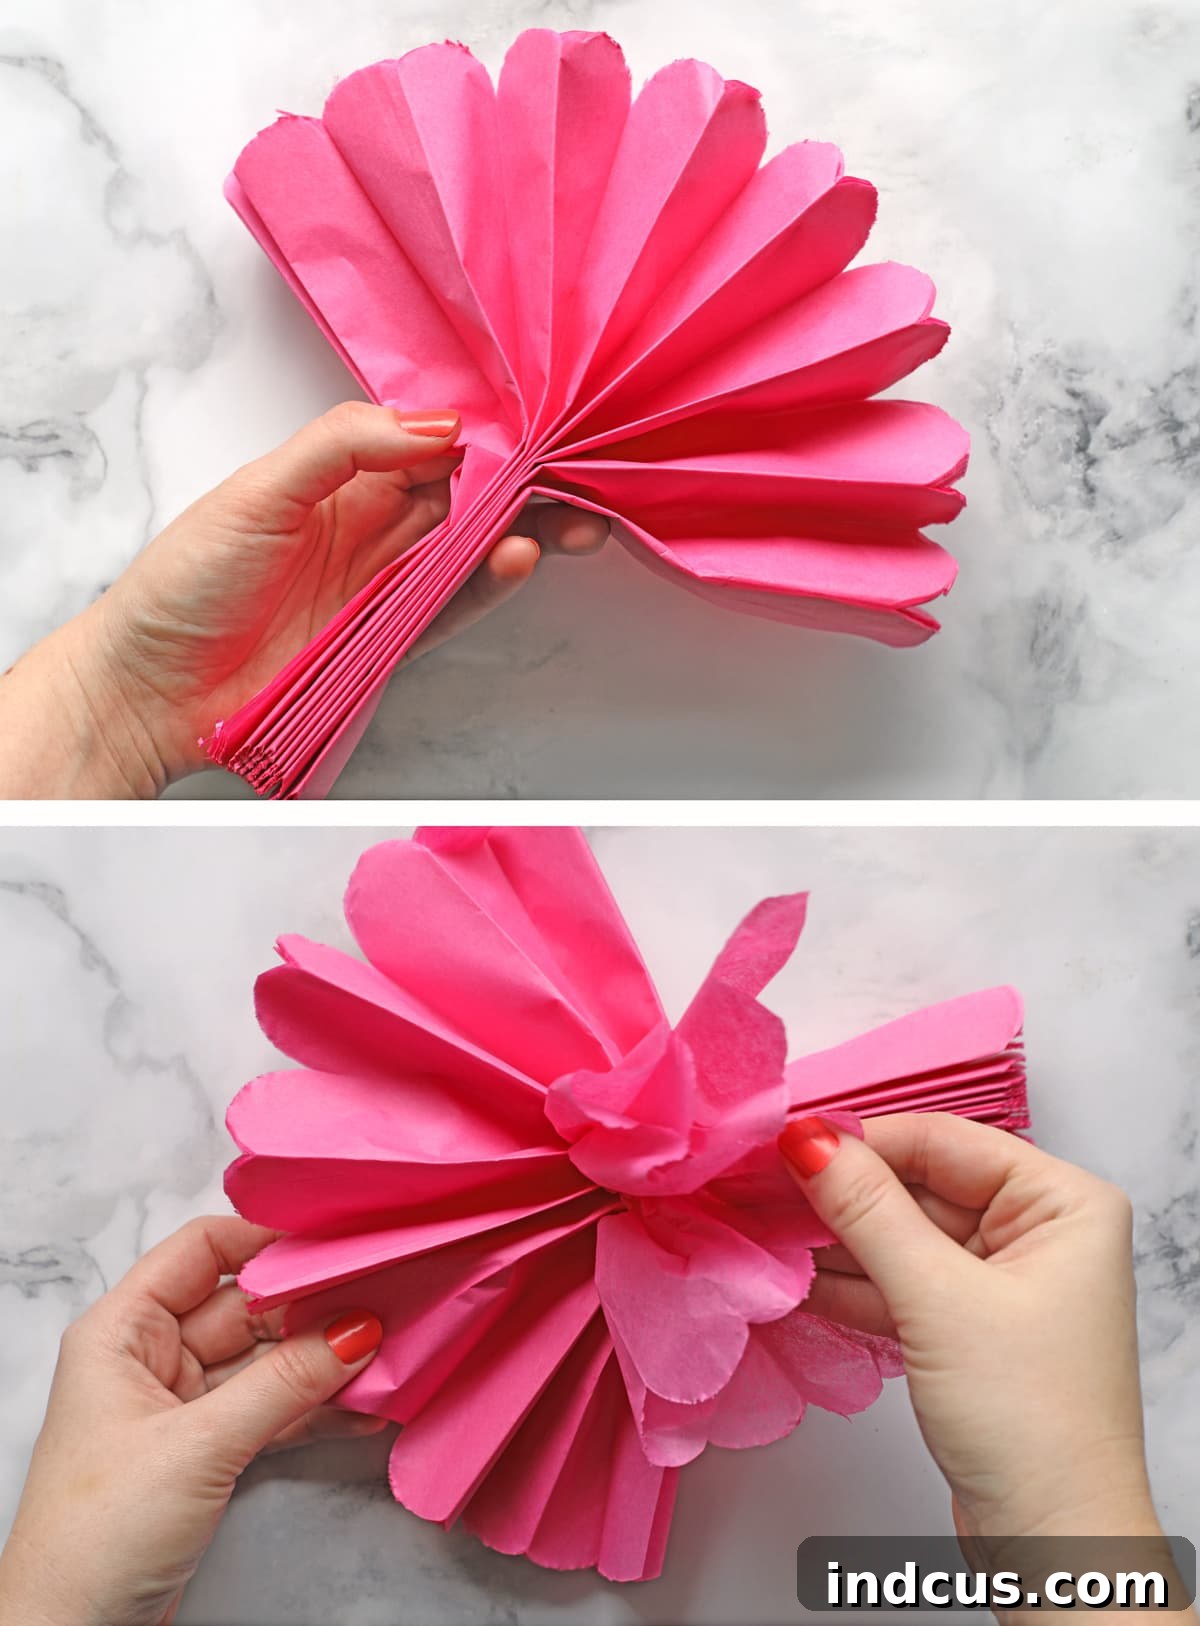
Step 5: Fan and Fluff Your Flower
Gently fan out the accordion folds on both sides of the staple. Once fanned, begin carefully separating each individual layer of tissue paper, pulling them upwards and towards the center. Work slowly and delicately to avoid tearing the delicate paper. As you separate and lift each layer, you’ll see your flat folded paper transform into a three-dimensional, fluffy flower. Continue fluffing and shaping until your flower achieves its desired fullness and beautiful form.
If any part of these written instructions was unclear, don’t worry! We’ve also prepared a concise video tutorial that visually demonstrates each step, ensuring you can follow along with ease and confidence.
Tissue Paper Flower Video Tutorial
For visual learners, watching the process unfold can be incredibly helpful. This short video guide provides a clear demonstration of how to make tissue paper flowers, ensuring you master each step with confidence.
[Please note: A video tutorial demonstrating these steps would typically be embedded here. For this text-only output, we encourage you to search for “how to make tissue paper flowers video” on platforms like YouTube for a visual guide.]
How to Make Big Flowers Out of Tissue Paper: Sizing Guide
One of the fantastic aspects of tissue paper flowers is their adaptability in size. You can effortlessly create flowers of any dimension, from small accents to grand, impactful blooms, simply by adjusting the initial width of your tissue paper stack and the number of layers you use. A general rule of thumb is: the larger the desired flower, the more layers of tissue paper it will require to achieve a full, luscious, and truly pretty appearance. Using too few layers for a large flower can result in a sparse or flimsy look.
To help you achieve perfect sizing every time, here’s a handy reference chart. The first number indicates the initial width of the tissue paper (after you’ve accordion-folded it and before cutting the ends), and the second number suggests the optimal number of tissue paper layers to use for that size.
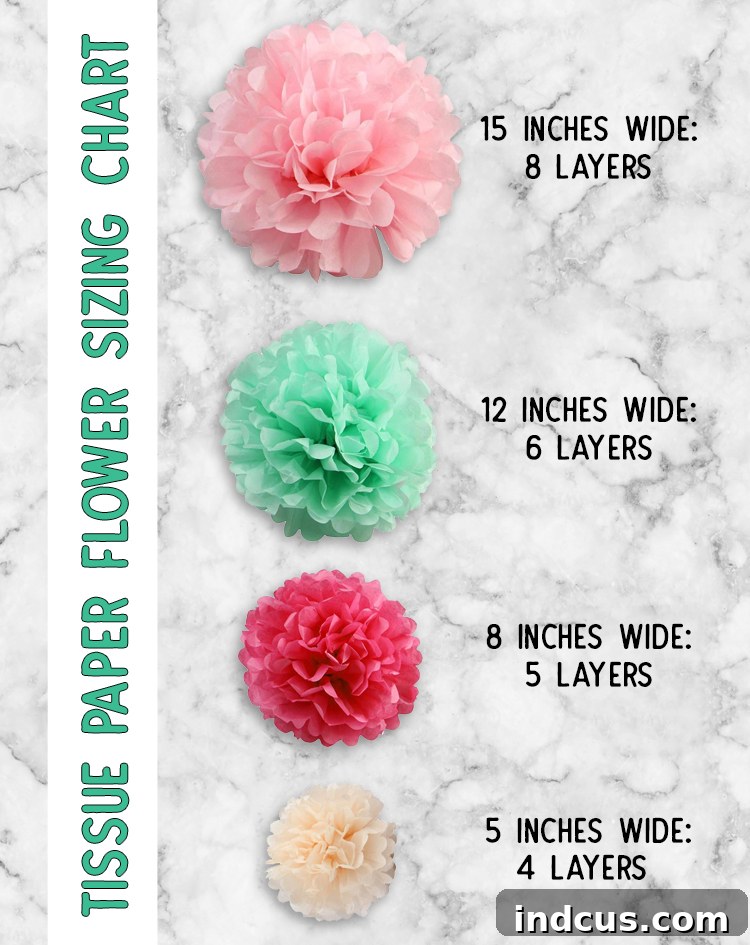
Experiment with these guidelines, but don’t be afraid to adjust based on the specific type of tissue paper you’re using (some are thicker than others) and the fullness you personally prefer.
How to Make Different Tissue Paper Flower Shapes: Customizing Your Blooms
The beauty of tissue paper flowers lies in their versatility. You can easily transform the look and character of your flowers by simply changing the way you cut the ends of the folded tissue paper and by varying the thickness of your accordion folds. A slight modification can lead to a completely different floral aesthetic.
Consider the examples below, where four distinct cutting and folding techniques result in four uniquely shaped flowers:
- Fluffy & Large Scale: For the first flower, I opted for very large, rounded petal cuts and made slightly thicker accordion folds. The outcome is a wonderfully fluffy, grand-scale flower that commands attention.
- Classic Scalloped Edge: The second flower features the timeless and elegant scalloped edge cut, giving it a soft, traditional petal appearance that is universally appealing.
- Pointy Edges: The third flower showcases sharp, pointed edges, which lend it a modern, almost star-like quality, adding a dynamic touch to its form.
- Fringe-Cut Edges: Finally, the fourth flower employs a fringe-cut technique on its ends, creating a playful, textured look that resembles certain types of chrysanthemums or carnations.
Beyond shaping the ends, another fantastic way to introduce variety is by incorporating multiple colors of tissue paper into a single flower. As demonstrated in the last flower example above, layering a smaller strip of one color over a larger strip of another can create a beautiful contrasting flower center. Alternatively, layering different colors that are all the same size can produce a stunning striped or ombre effect. The possibilities for customization are virtually endless, so don’t hesitate to let your imagination soar and create truly unique blooms!
Tissue Paper Flowers vs. Pom Poms: What’s the Difference?
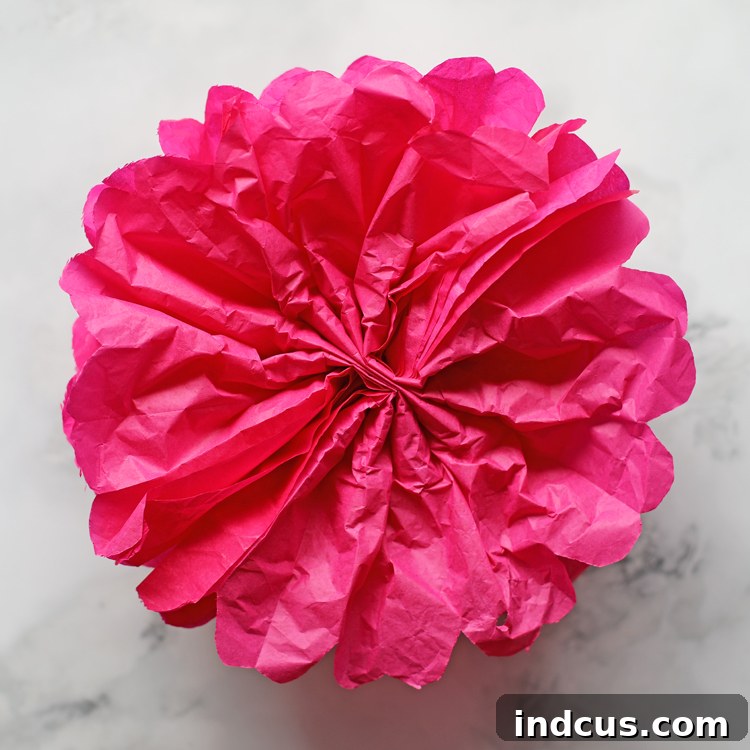
While often used interchangeably, there’s a subtle distinction between tissue paper flowers and tissue paper pom poms, primarily related to their shape and intended use. In essence, a traditional tissue paper flower, as described in our step-by-step tutorial, is typically flat on the back, making it ideal for attaching to walls, backdrops, or gift packages. A tissue paper pom pom, on the other hand, is designed to be fully spherical or ball-shaped, perfect for hanging from ceilings or branches, offering a volumetric decoration.
There are two primary methods to achieve a perfectly round tissue paper pom pom:
- Attaching Two Flowers: The most reliable way to create a beautifully rounded pom pom is to make two tissue paper flowers of identical size. Once both are fluffed, simply attach their flat backs together using adhesive (like hot glue or double-sided tape) to form a complete sphere. This method consistently yields a full, even shape.
- Doubling the Layers: You can attempt to create a pom pom by doubling the number of tissue paper sheets you start with for a single flower. While this adds significant volume, it sometimes leaves the finished shape a little less than perfectly spherical, with one side appearing slightly flatter than the other. For this reason, I generally prefer and recommend the method of attaching two individual flowers together for the best results.
How to Hang Tissue Paper Pom Poms & Flowers: Creative Display Ideas
Once you’ve crafted your lovely tissue paper pom poms and flowers, the next exciting step is displaying them! Their lightweight nature makes them incredibly easy to hang and arrange. Here are several effective and secure methods for displaying your handmade decorations:
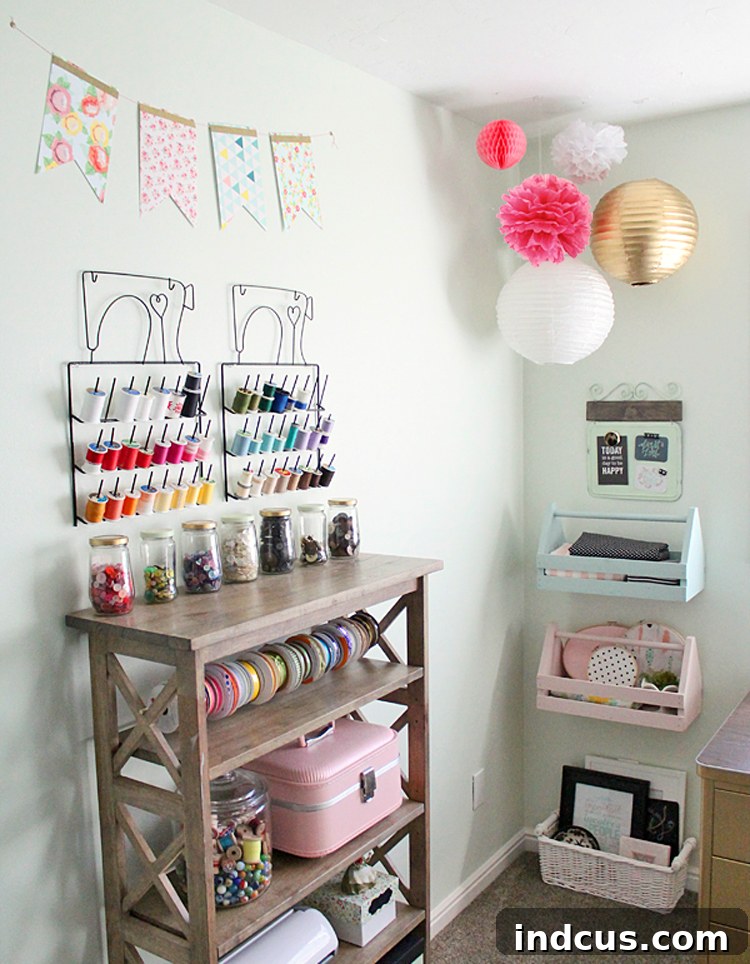
- Pre-Fluffing Ribbon/Line for Hanging: This method is ideal for pom poms or flowers intended to hang from ceilings or high points. Before you begin fluffing the tissue paper (specifically between steps 4 and 5 in the instructions above), take a piece of ribbon, string, or clear fishing line. Tie it securely around the middle of the folded tissue paper, right where your staple is located. Once you’ve completed fluffing and shaping your flower, the string will be conveniently accessible, ready for hanging. For a seamless look, I highly recommend using clear Command Hooks (affiliate link), which are specifically designed for party decor and temporary hanging without damaging surfaces. I’ve personally used these to beautifully suspend tissue paper flowers and paper lanterns in my craft room, as seen in the photo below.
- Temporary Wall Attachment with Tape: For short-term displays or events, masking tape or packing tape works wonderfully for attaching flat-backed tissue paper flowers directly to a wall. Ensure the surface is clean and dry for the best adhesion. This method is quick, easy, and generally safe for most painted surfaces for temporary use.
- Long-Term Display with Push Pins or Command Strips: If you plan to showcase your tissue paper flowers for an extended period, or if you need a more robust attachment, push pins or Command Strips are excellent choices. Tape can sometimes lose its adhesive quality over time, leading to flowers falling. When using push pins, simply hide them discreetly within the fluffy layers of the tissue paper; they’ll be virtually invisible and provide a secure hold. Command Strips offer a strong, damage-free alternative for semi-permanent decorations.
Where to Buy Tissue Paper: Sourcing Your Craft Supplies
Finding quality tissue paper at a good price is key to making this an inexpensive craft. Depending on the scale of your project, you have several excellent options for purchasing your supplies:
- Budget-Friendly Retailers: For smaller projects or if you need a limited color palette, stores like Dollar Tree, Hobby Lobby, and Walmart are fantastic choices. Dollar Tree, for instance, often sells tissue paper for as little as 4 cents per sheet, making it incredibly cost-effective, though their color selection might be somewhat limited.
- Bulk Online Purchases: If you’re undertaking a large-scale project, such as crafting a hundred tissue paper flowers for a wedding, a major party, or event decor, buying in bulk online is often the most economical and offers the widest variety. Amazon is an excellent resource, providing an extensive selection of colors and quantities from various sellers. When shopping online, aim for a target price of approximately 5-7 cents per sheet to get the best value for quality tissue paper.
- Specialty Craft Stores: Stores like Michaels or JOANN Fabric and Craft Stores also carry tissue paper, often with a good selection of colors and seasonal options, though prices might be slightly higher than discount retailers. Look out for coupons and sales!
Always consider the quality of the tissue paper. Thicker, more vibrant sheets tend to produce fuller, more impactful flowers, while very thin paper might require more layers or be more prone to tearing during the fluffing process.
How to Decorate with Tissue Paper Flowers: Inspiring Ideas for Every Occasion
This is arguably the most exciting part – putting your beautiful creations to use! Tissue paper flowers are incredibly versatile and can elevate the decor of almost any event or space. From intimate gatherings to grand celebrations, here are some incredibly creative and visually stunning ideas from around the web to inspire your next project. Click on the links below each picture for more detailed information and tutorials on each specific tissue paper flower project. Please note that if a link is not provided, the original source may no longer be available.
- Elegant Table Runner: Create a continuous cascade of floral beauty for your dining table.
- Charming Gift Topper: Replace traditional bows with a handmade floral embellishment.
- Sophisticated Napkin Ring: Add a touch of handmade elegance to your place settings.
- Adorable Nursery Decor: Brighten up a child’s room with whimsical, soft floral accents.
- Grand Party Arch: Frame an entrance or a special area with an impressive floral arch.
- Vibrant Party Decor: Scatter flowers throughout your event space for an instant festive feel.
- Stunning Photo Backdrop: Create a picturesque setting for memorable photos.
- Eye-Catching Dessert Table Backdrop: Enhance your sweet treats display with a beautiful floral wall.
- Whimsical Garland Curtain: Transform a doorway or window with a flowing floral curtain.
- Dynamic Party Wall Decor: Arrange various sizes and colors to create an artistic wall display.
- Festive Garland: String flowers together to drape across mantels, tables, or staircases.
- Elegant Ribbon Chandelier: Combine flowers with ribbons for a soft, floating centerpiece.
- Custom Chandelier: Craft a unique overhead statement piece for any room.
- Lush Table Centerpieces: Create voluminous floral arrangements for your tables.
- Delicate Cake Topper: Adorn your celebration cakes with a charming floral touch.
- Personalized Tissue Paper Flower Birthday Number: A fantastic way to celebrate a milestone birthday.
- Forever Tissue Paper Flower Bouquet: Craft a lasting bouquet that never wilts for weddings or home decor.
- General Party Decor: Integrate flowers into various elements of your party theme.
- Spectacular Tissue Paper Flower Arch – This entire party is absolutely stunning and provides endless inspiration. Definitely worth checking out for a grand statement!