Mastering Doll Dressmaking: Your Ultimate Guide to Sewing a Basic Dress for American Girl & 18-Inch Dolls (Free Pattern Included!)
Are you ready to dive into the delightful world of doll clothes creation? There’s something uniquely satisfying about crafting tiny garments, and we’re thrilled to share a fantastic project that’s perfect for both novice sewers and seasoned crafters alike. This comprehensive guide will walk you through sewing a beautiful and versatile basic dress for your cherished American Girl doll or any other 18-inch companion. Not only is this pattern incredibly easy to follow, but it also opens up a world of creative possibilities, allowing you to whip up a diverse wardrobe for your doll without breaking the bank.
Sewing doll clothes isn’t just a hobby; it’s a creative outlet that offers numerous benefits. It’s a wonderful way to utilize fabric scraps, save money on costly store-bought outfits, and most importantly, unleash your inner designer. Imagine dressing your doll in unique, handmade creations that reflect your personal style or match your child’s favorite aesthetics. This free pattern is your gateway to achieving just that!
Why This American Girl Doll Dress Pattern is Perfect for You
Our featured pattern is designed with simplicity and versatility in mind. We understand that starting a new sewing project can feel daunting, which is why we’ve streamlined the process to ensure a smooth and enjoyable experience. What makes this pattern truly stand out?
- Beginner-Friendly: The steps are straightforward, making it ideal for those just learning to sew.
- Incredibly Versatile: With just a few modifications, this basic dress pattern can transform into a variety of outfits.
- Cost-Effective: Use fabric remnants or repurpose old clothing items, saving you money on materials.
- Quick to Sew: Doll clothes are small, meaning projects can be completed in a fraction of the time it takes to sew human-sized garments.
- Instant Gratification: See your creation come to life quickly, boosting your confidence for future projects.
Once you master this foundational pattern, you’ll be amazed at the array of stylish ensembles you can create. Let’s explore just a few of the exciting variations:
Inspiring Design Variations from One Simple Pattern
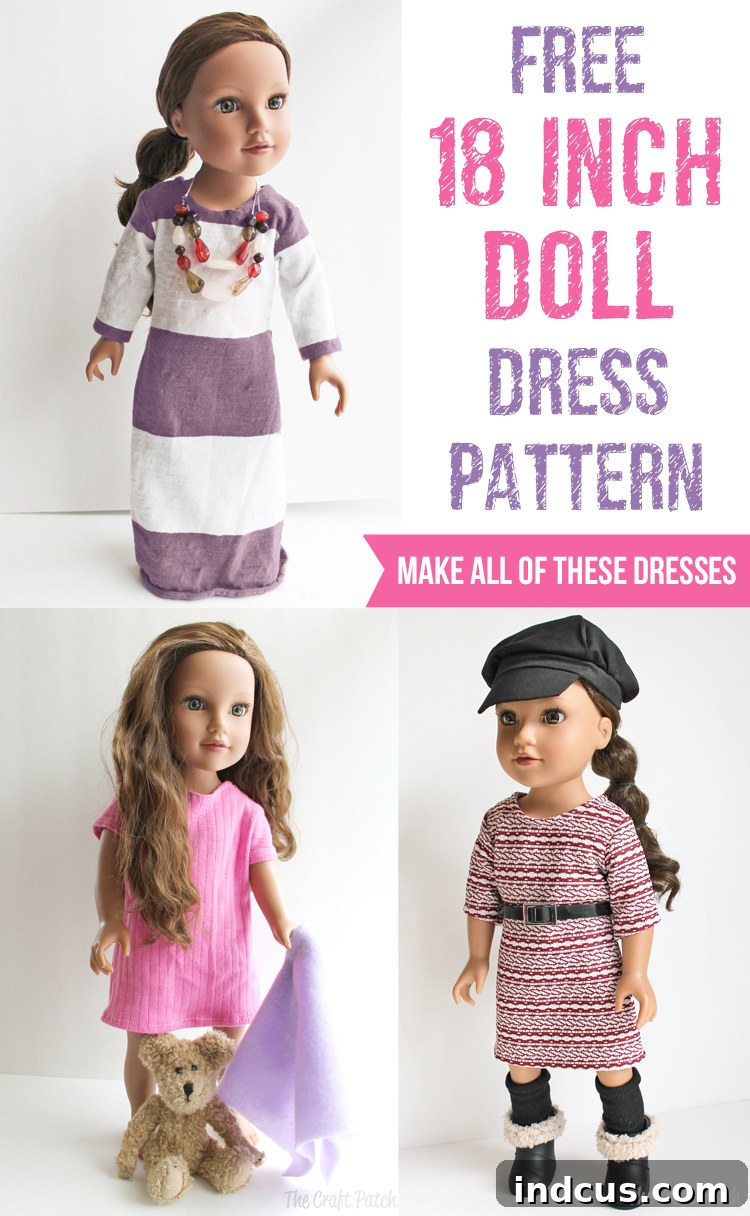
The beauty of this basic dress pattern lies in its adaptability. Take a look at these examples, all stemming from the same core design:
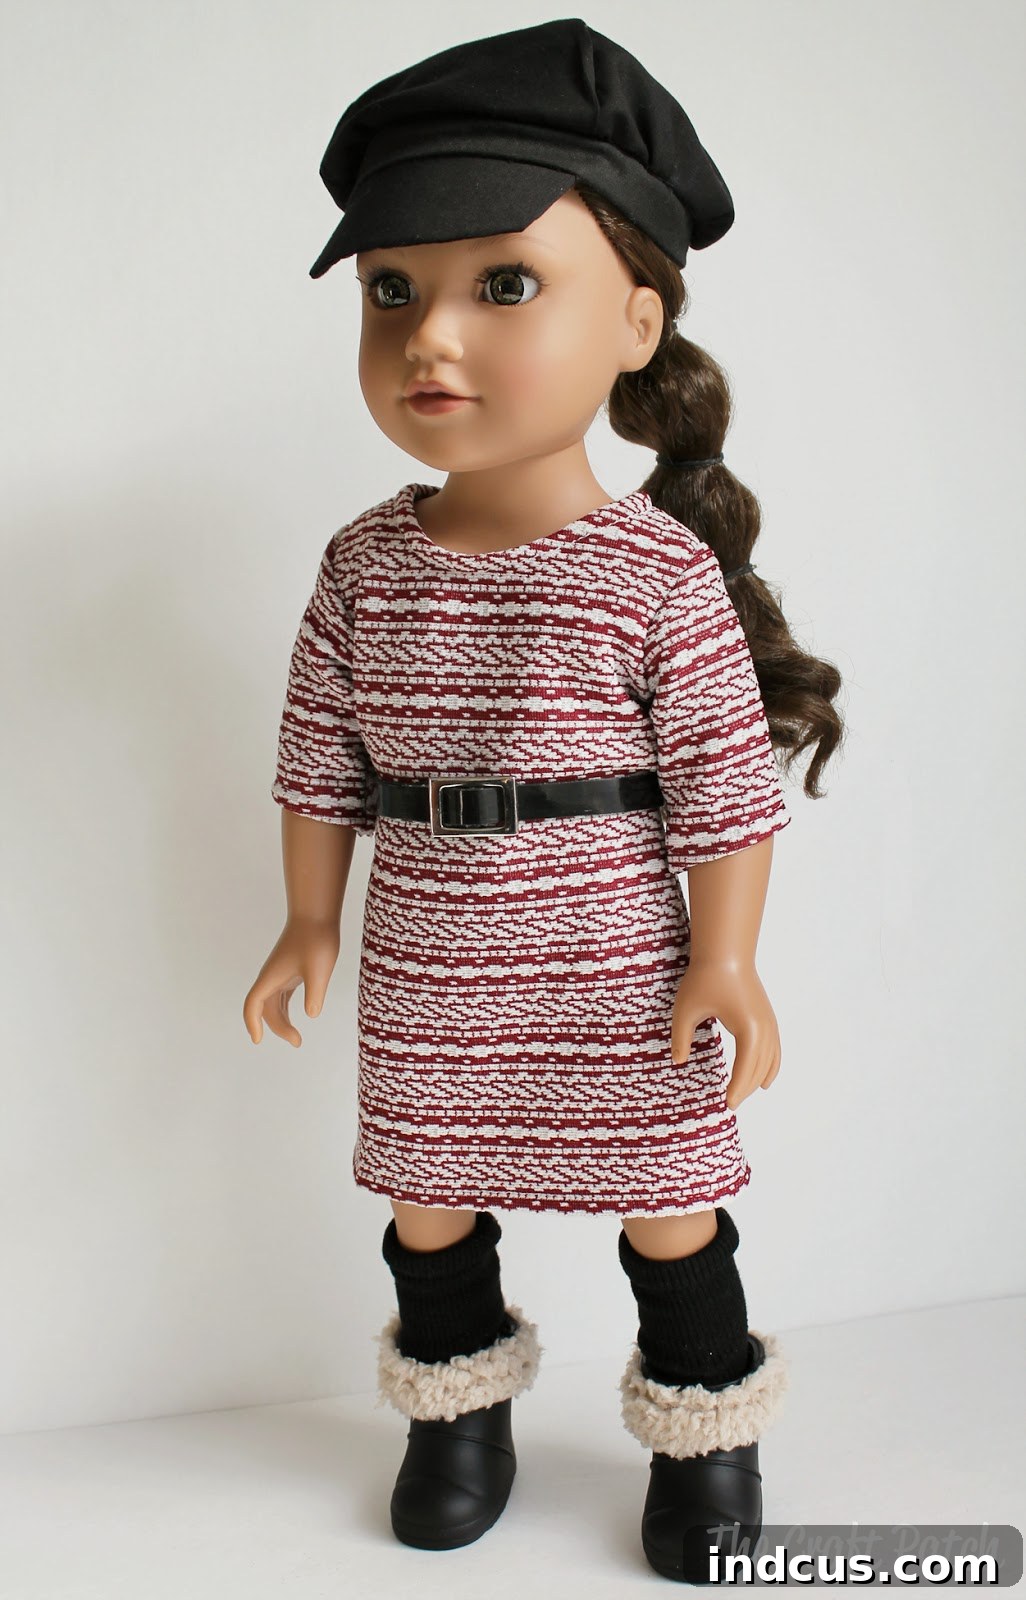
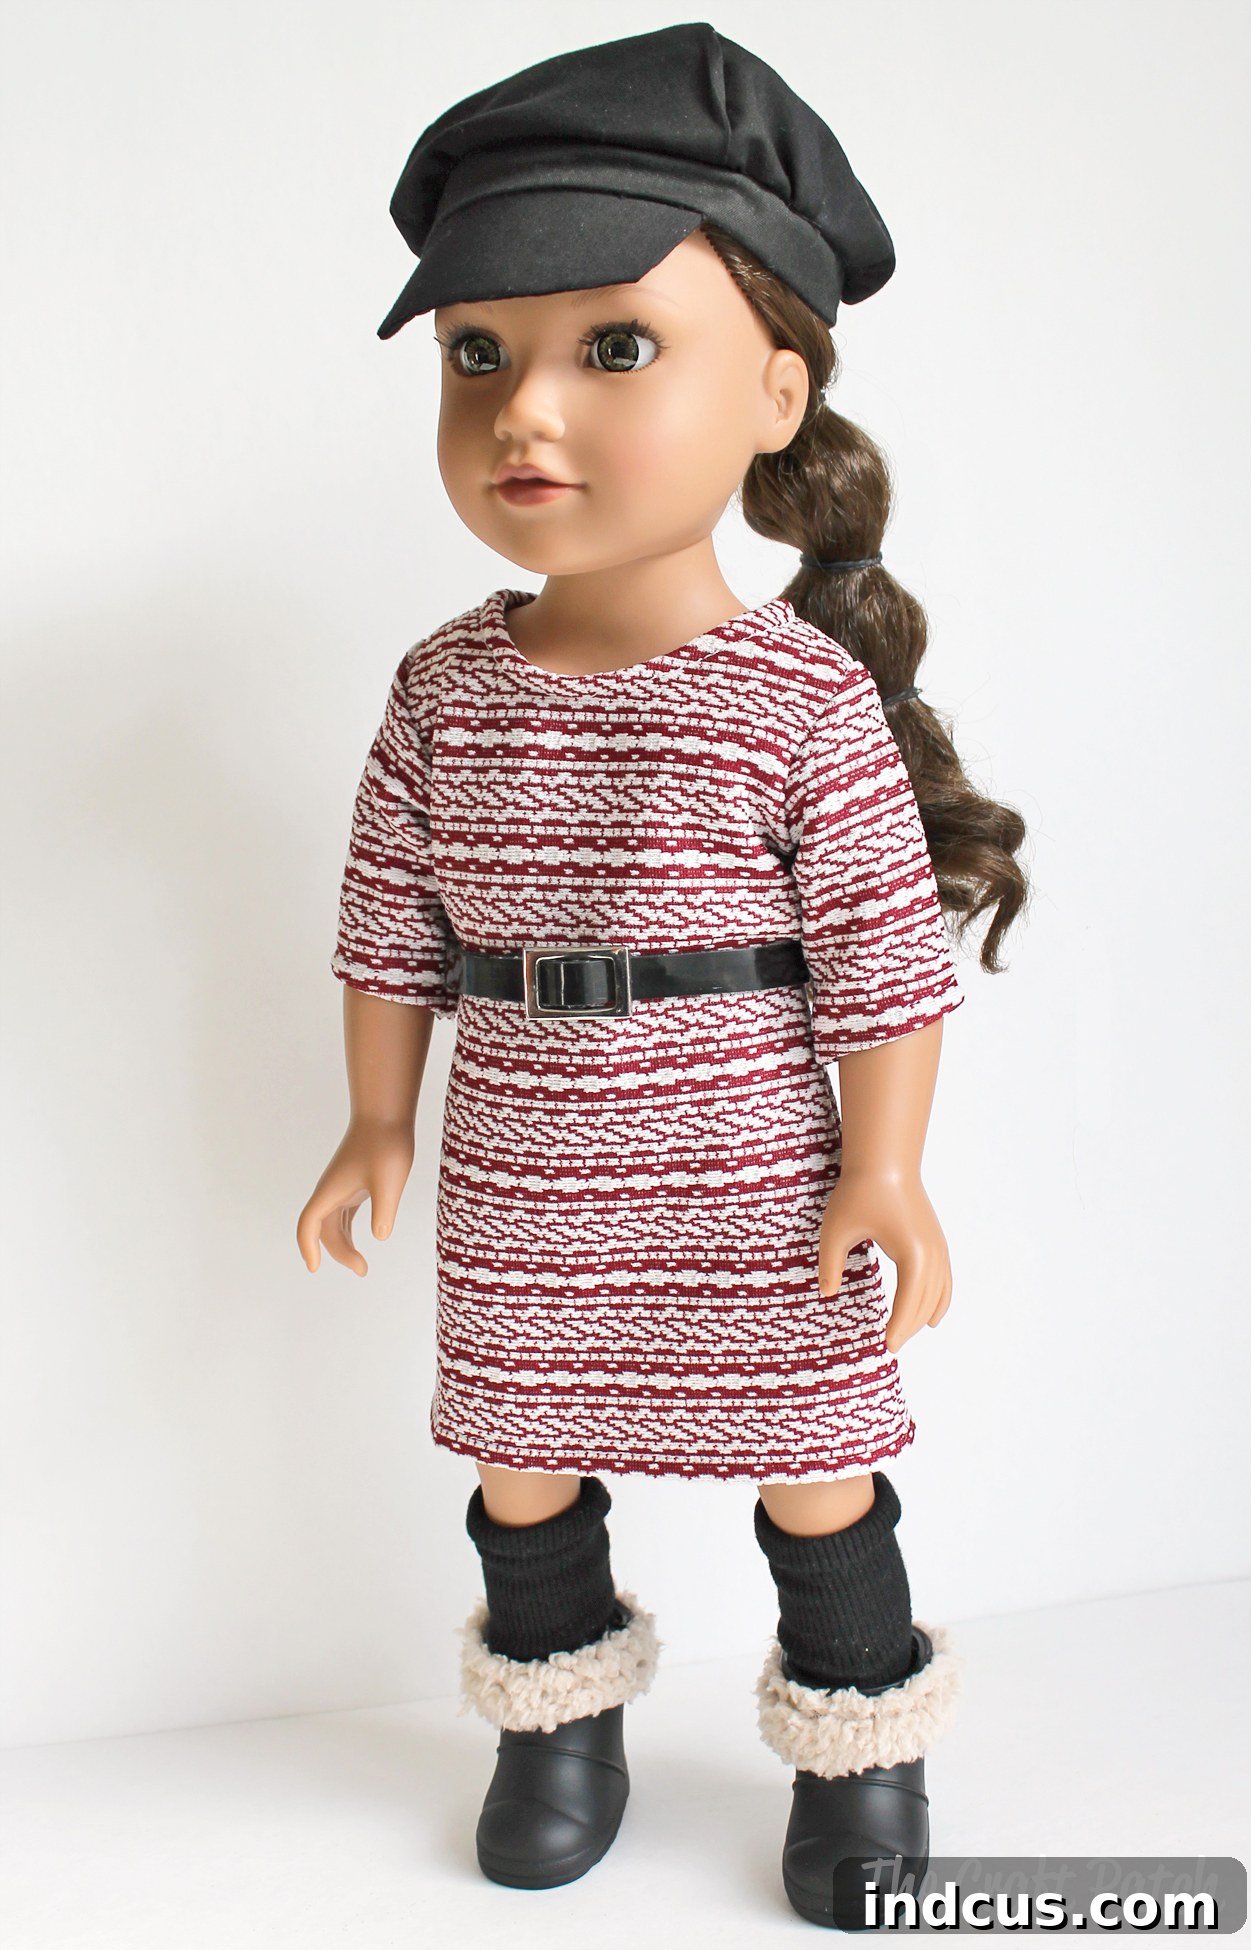
A Cozy Sweater Dress: Perfect for cooler weather, a sweater dress made from a soft knit fabric adds warmth and style.
A Comfy Nightgown: Transform the pattern into an adorable nightgown using flannel or soft cotton for sweet dreams.
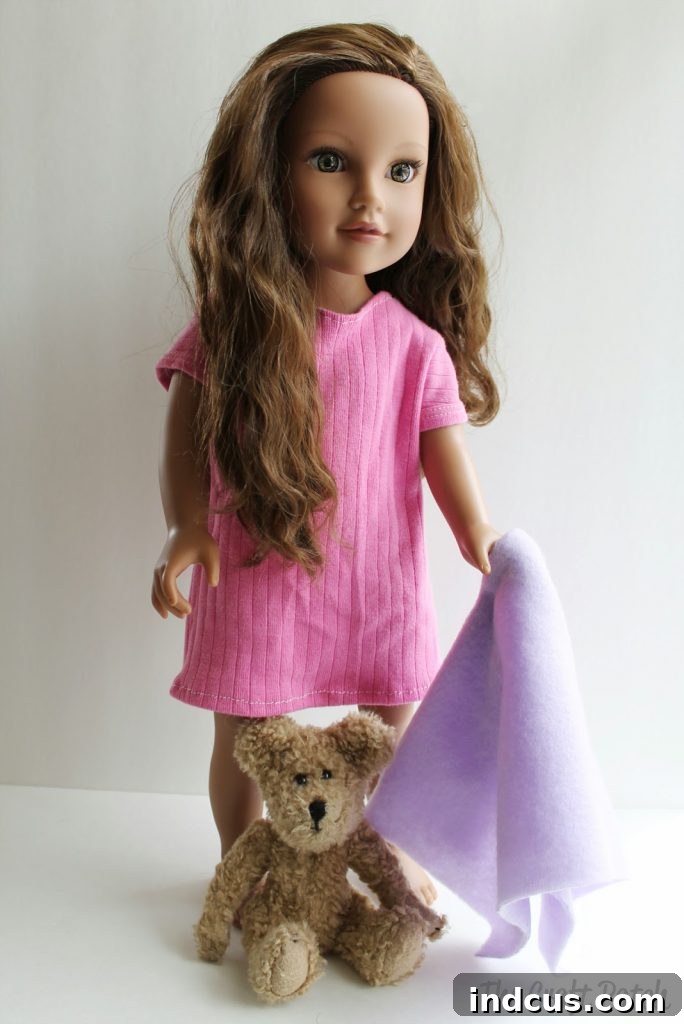
A Long, Flowy Maxi Dress: Extend the length for an elegant maxi dress, ideal for doll picnics or beach outings.
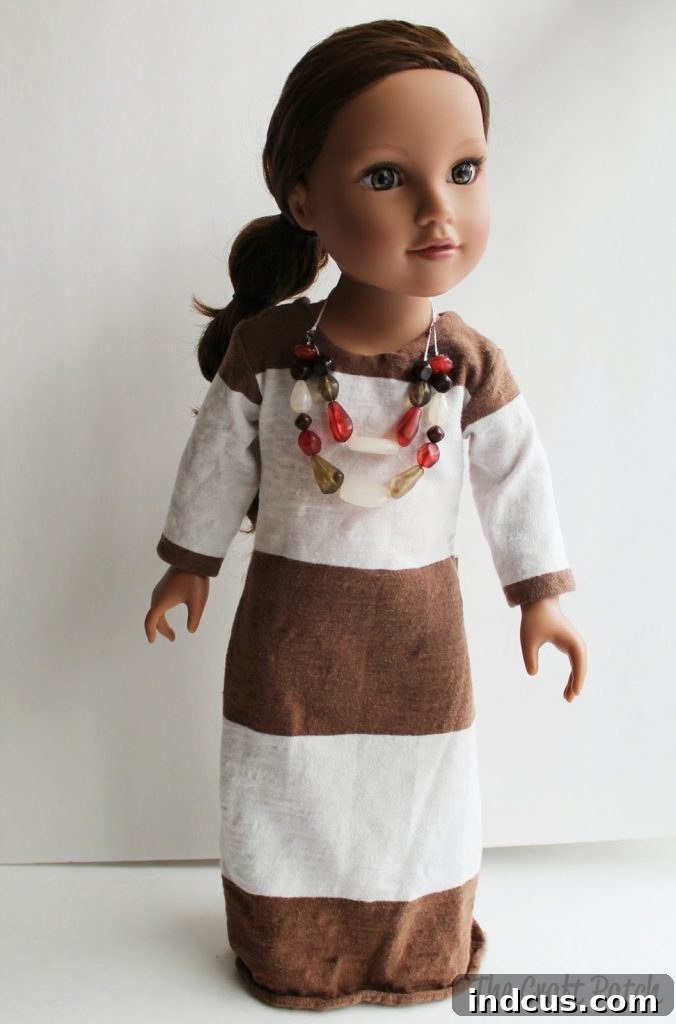
These are just a glimpse of the endless possibilities! Now, let’s gather your materials and get started on creating your very own doll dress.
Essential Tools and Materials for Your Doll Dress Project
Before you begin, ensure you have the following:
- Your downloaded and printed free pattern pieces.
- Fabric (refer to our detailed section below for recommendations).
- Matching thread.
- Fabric scissors or a rotary cutter and mat.
- Pins or fabric clips.
- A sewing machine (or needle and thread for hand sewing).
- Measuring tape or ruler.
- Iron and ironing board.
- Velcro closures (approximately 4-6 inches).
- Optional: Ballpoint needle for knit fabrics, fabric marking tool.
Choosing the Perfect Fabric: Knits vs. Wovens
The success and ease of your project will largely depend on your fabric choice. For this beginner-friendly pattern, we highly recommend using stretchy knit fabrics. Knits, like jersey, interlock, or even an old t-shirt, have edges that don’t fray. This means you can often skip the tedious step of double-folding hems, making the neckline and armhole finishes significantly simpler and quicker. Upcycling old t-shirts is not only eco-friendly but also a fantastic way to give new life to beloved garments that might otherwise go to waste.
If you opt for a woven fabric (like quilting cotton or broadcloth), be prepared for a few extra steps. Woven fabrics fray easily, so you will need to finish all raw edges – either by serging them, using a zigzag stitch on your sewing machine, or French seams – and fold all hems under twice for a neat finish. While beautiful results can be achieved with woven fabrics, knits undeniably offer a more forgiving and beginner-friendly experience for this specific pattern.
Pro Tip for Knits: When sewing with knit fabrics, use a ballpoint or stretch needle in your sewing machine. These needles are designed to push through the fabric fibers rather than piercing them, preventing skipped stitches and damage to the fabric. Also, use a stretch stitch or a narrow zigzag stitch to maintain the fabric’s stretchiness.
Step-by-Step Guide: Sewing Your American Girl Doll Dress
Follow these detailed instructions to bring your doll dress to life. Remember to take your time and enjoy the process!
1. Download and Prepare Your Free Pattern Pieces
The first step is to get your hands on the pattern! You’ll find three downloadable PDF files, all conveniently located in a single folder on Google Drive. Simply click on the big blue button at the bottom of this post to access and download the patterns. Once downloaded, print them out at 100% scale (ensure your printer settings do not “fit to page”) and carefully cut out all the pieces along the marked lines. Double-check a measurement guide on the pattern (if provided) to ensure it printed at the correct size.
2. Carefully Cut Out Your Fabric Pieces
Lay your chosen fabric flat and smooth. Pin your pattern pieces securely to the fabric, paying attention to the grainline (usually indicated by an arrow on the pattern pieces). If you’re repurposing an old t-shirt, strategically place your pattern pieces to utilize existing finished hems or seams, which can save you a step later on. Carefully cut around each pattern piece. Precision here will lead to a better-fitting garment.
3. Join the Shoulder Seams
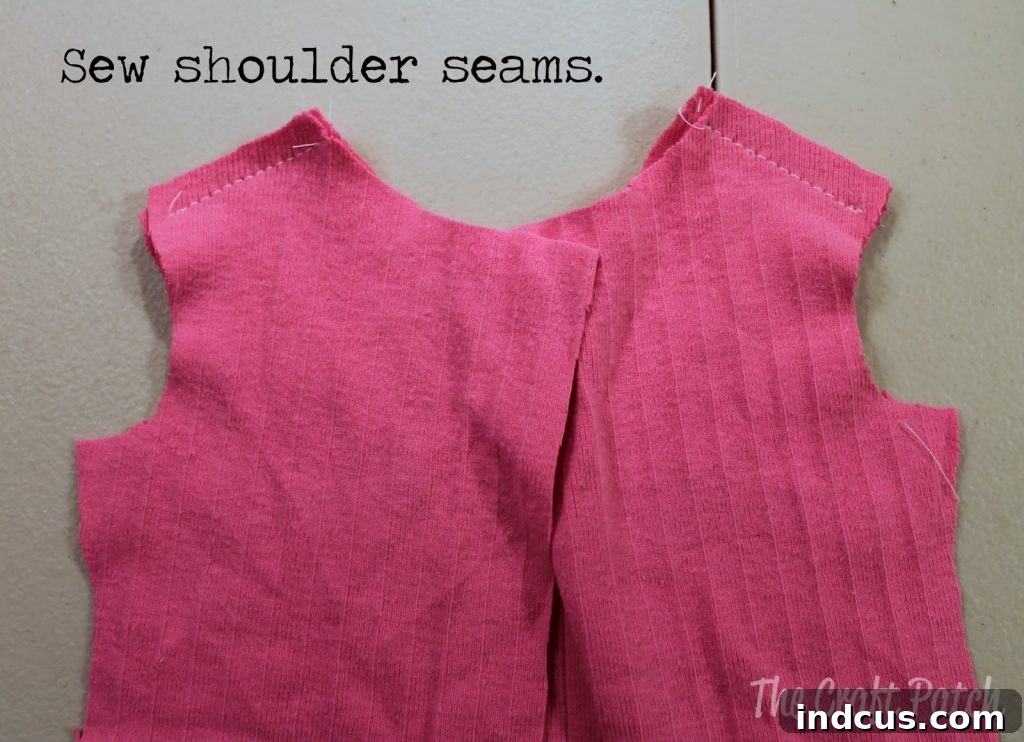
With the right sides of the fabric facing each other, align the front bodice piece with the two back bodice pieces at the shoulder seams. Pin them securely in place. Using a 1/4 inch (6mm) seam allowance, stitch these seams together. Press the seams open or towards the back for a neat finish.
4. Master the Neckline Finish
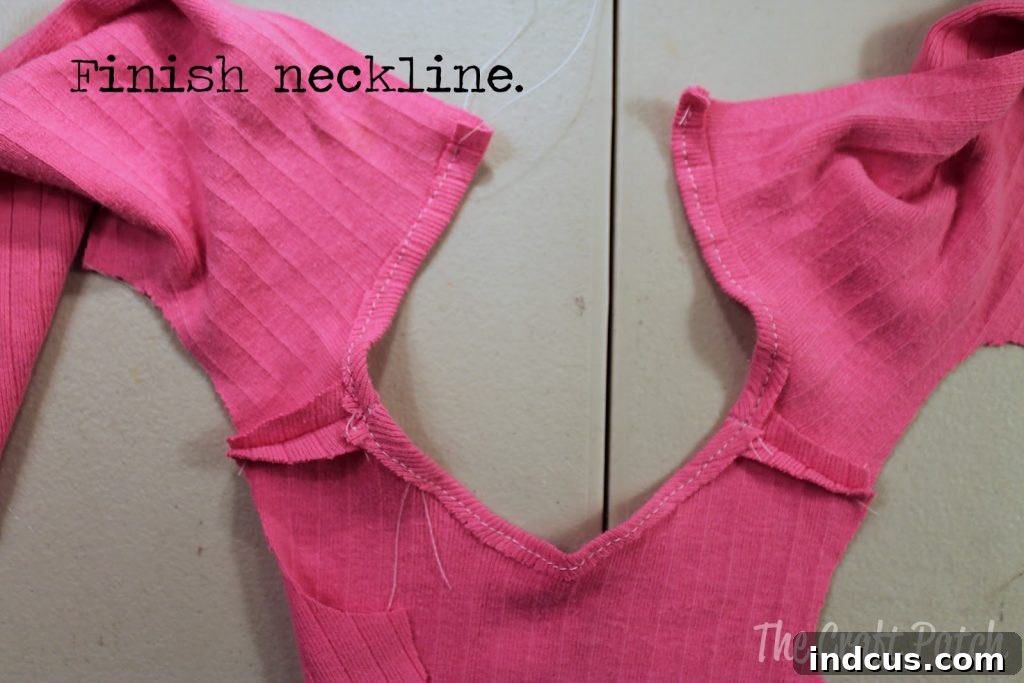
This step requires a delicate touch. Roll the raw edge of the neckline under by about 1/8 inch (3mm) to the wrong side of the fabric. Pin in place and stitch carefully. The key here is to avoid pulling or stretching the fabric as you sew, especially if you’re working with knits. Excessive stretching will cause the neckline to pucker and lose its shape. A gentle, even hand will ensure a smooth, professional-looking finish. For knits, a narrow zigzag stitch or a twin needle can give a nice stretchable hem.
5. Hem the Bottom Edge (If Necessary)
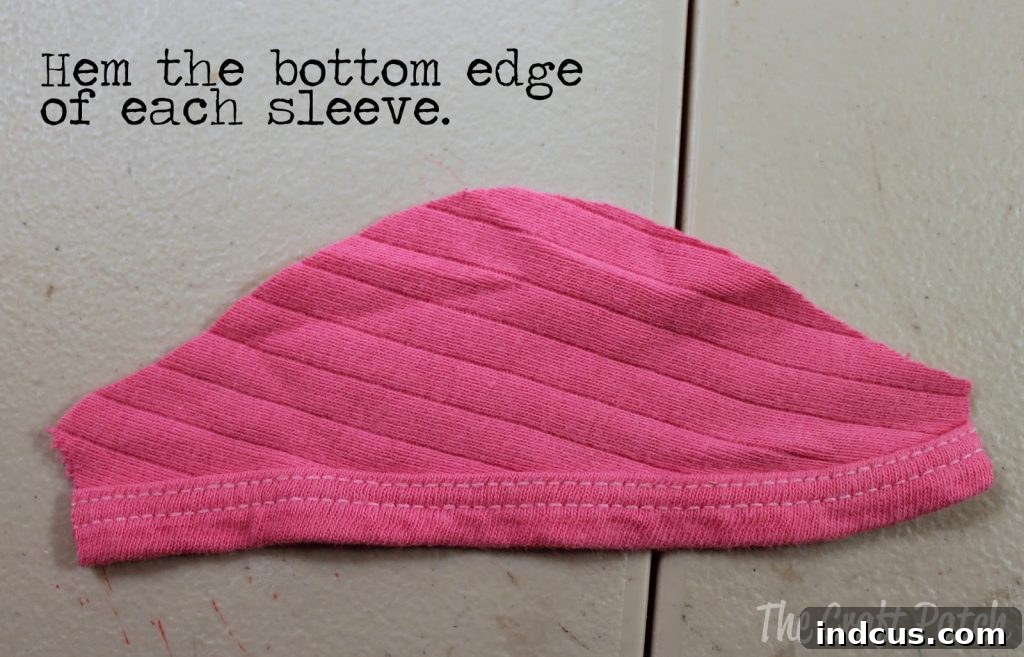
If you cut your fabric from scratch, roll the bottom edge of the dress up about 1/4 inch (6mm) twice towards the wrong side to create a narrow hem. Press and stitch in place. As seen in the photo, if you were clever and utilized a pre-finished hem from an old t-shirt, you get to skip this step entirely – a great time-saver!
6. Attach the Sleeves
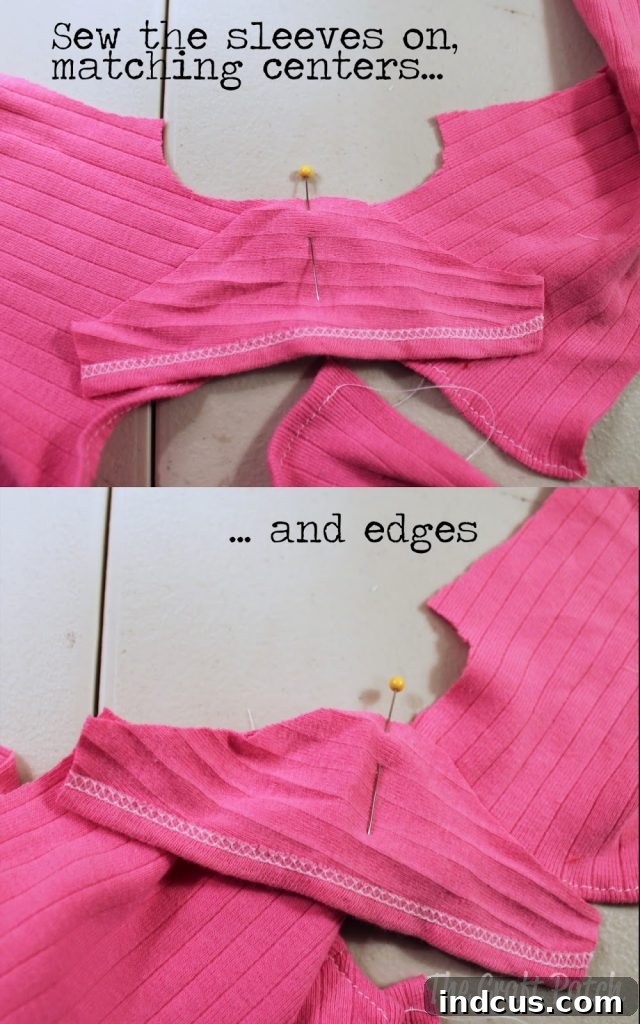
With the right sides together, align the center of the sleeve with the shoulder seam you created earlier. Pin this point. Then, match the raw edge of the armhole with the raw edge of the sleeve, pinning as you go. You’ll likely need to “ease” the fabric, which means gently manipulating the curves of the sleeve and armhole so they fit together perfectly without puckering. Stitch the sleeves into place with a 1/4 inch seam allowance. Repeat for the other sleeve.
7. Sew the Side Seams and Underarms
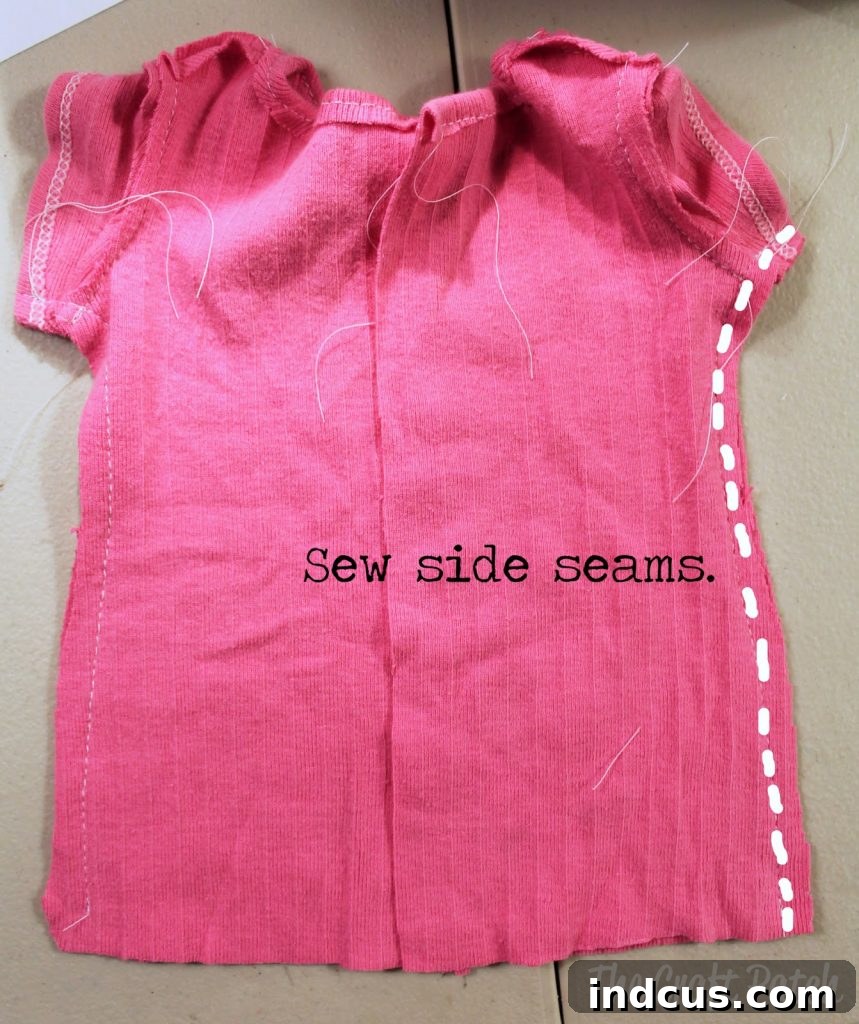
Once both sleeves are attached, fold the dress in half lengthwise, right sides together. Carefully align the raw edges of the sleeves and the side seams of the dress. Pin from the bottom edge of the sleeve, down the sleeve seam, and then continue pinning all the way down the side seam of the dress to the bottom hem. Stitch this entire length in one continuous seam, using a 1/4 inch seam allowance. Repeat on the other side. Press the seams open or towards the back.
8. Finish Back Edges and Add Closures
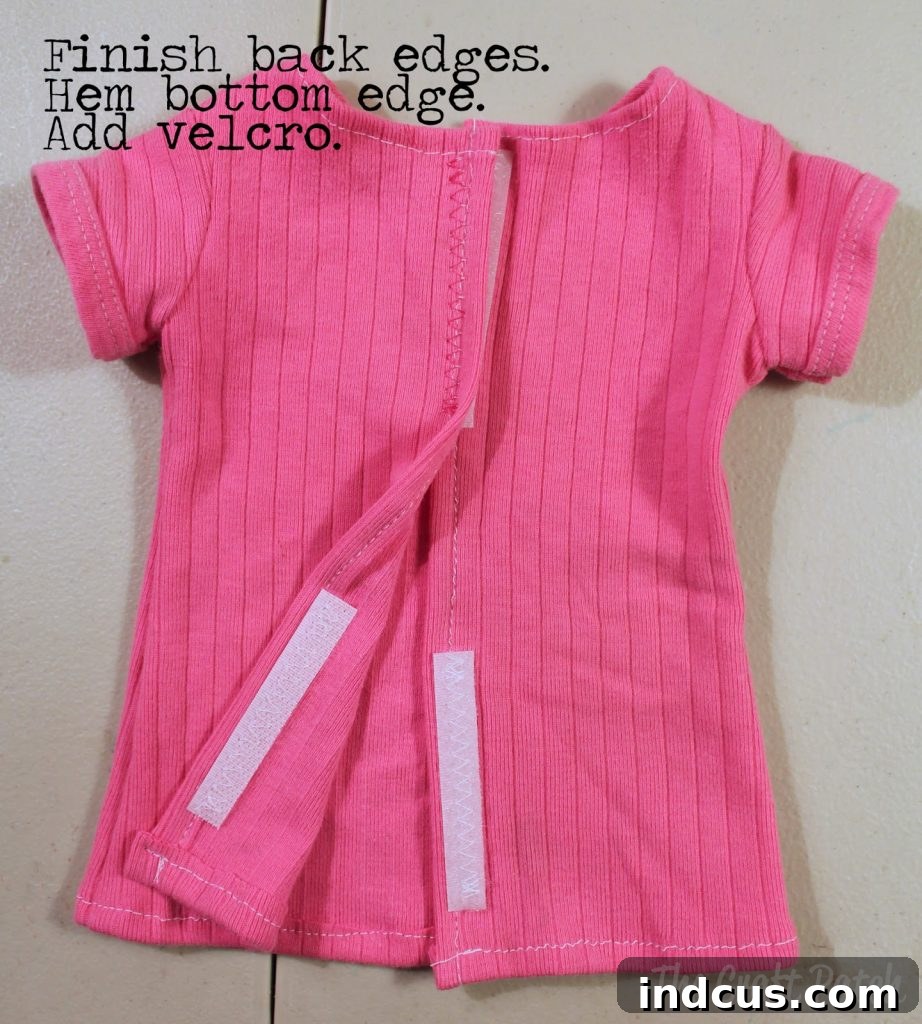
To give the back opening a clean finish, turn under the raw edges of the two back pieces by about 1/4 inch (6mm) and stitch them down. This creates a neat edge for your closure. Finally, it’s time to add your Velcro! Cut two strips of Velcro, each about 2-3 inches long. Attach one side of the Velcro to the underside of one back opening and the corresponding side to the top of the other back opening. I often use a zig-zag stitch for extra durability when attaching Velcro, but a straight stitch works too. And just like that, you’re done!
Unleash Your Creativity: Design Variations & Customizations
This simple pattern is a launching pad for endless creative projects! Once you’ve mastered the basic dress, let your imagination run wild:
- Tunic or Shirt: Shorten the hemline to create a trendy tunic to pair with doll leggings or pants.
- Add Ruffles: Gather a strip of coordinating fabric and attach it to the bottom hem for a sweet, playful touch.
- Color Block Design: Use two contrasting fabrics for the bodice and skirt for a modern, color-blocked look.
- Embellishments: Add a tuxedo bib detail, faux buttons, tiny bows, lace trim, or even delicate embroidery to personalize your design.
- Gathered Skirt Dress: Keep the bodice as is, but attach a wider, gathered skirt for a fuller, more traditional dress silhouette.
- Cardigan: Don’t sew the back opening completely! Instead, finish the edges and add tiny faux buttons or snap closures over the Velcro to create a stylish cardigan.
- Different Sleeve Lengths: Easily modify the sleeve pattern to create short sleeves, cap sleeves, or even long bell sleeves.
- Layering: Use thinner fabrics for summer dresses or thicker knits for winter layering pieces.
The possibilities are truly fun, fun, fun!
Don’t forget to Pin this tutorial so you can easily find it later!
Get Your Free American Girl Doll Dress Pattern Now!
We hope this detailed guide empowers you to create beautiful, handmade clothing for your 18-inch dolls. Sewing doll clothes is a rewarding craft that allows for endless creativity and personal expression. Enjoy the process, and don’t hesitate to experiment with different fabrics and embellishments. We can’t wait to see what you create!
Looking for more DIY American Girl doll ideas and free patterns? Check out these popular projects:
- American Girl Doll Swimsuit
- DIY Doll Sized Hangers
- American Girl Doll Pajamas
- DIY Doll Wardrobe
- How to Pierce an American Girl Doll’s Ears
- DIY American Girl Doll Clothes Ideas