
Woohoo! The long-awaited transformation of our kitchen, dining, and living room is finally underway! This ambitious home renovation project kicked off with an exhilarating, albeit exhausting, Saturday dedicated to dismantling the old and making way for the new. It was a day of controlled chaos, filled with the sounds of demolition and the promise of a brighter, more functional space.
While my spouse and I dove headfirst into the renovation whirlwind, our children enjoyed a fun-filled day with their grandparents. Upon returning home that evening, our two-year-old surveyed the scene – a room stripped bare, walls opened up, and the unmistakable signs of a major overhaul. With her most concerned and adorably pouty face, she declared, “Our house is ruined!” And honestly, from a toddler’s perspective, she wasn’t entirely wrong. It certainly looked like a disaster zone, but to us, it was the exciting beginning of a dream taking shape.
Are you ready to witness the “before” state and the initial stages of this dramatic transformation? Let’s delve into the damage, the challenges, and the vision that will guide us to our revitalized home.
The Starting Point: A Tour of Our Outdated Kitchen
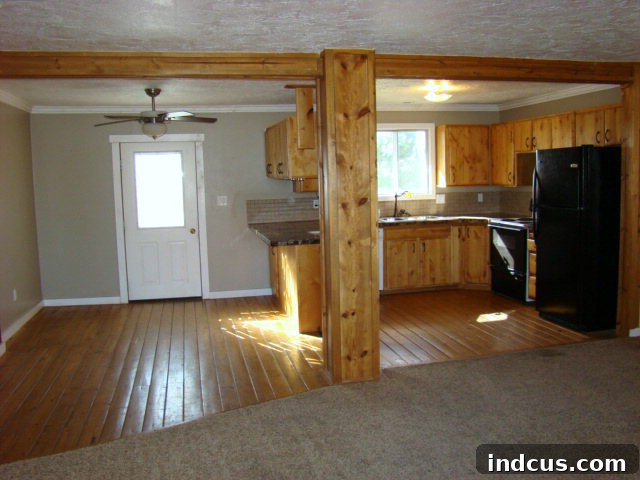
Here’s the very first glimpse of our kitchen before the demolition crew (us!) moved in:
This image captures the essence of what we were living with – a space that was functional on a basic level, but deeply flawed in terms of aesthetics, efficiency, and overall usability. From the flooring to the awkward layout, every element contributed to a sense of claustrophobia and frustration. We knew that for our family to truly thrive and enjoy our home, a comprehensive overhaul was not just desired, but absolutely necessary.
Bidding Farewell to the World’s Worst Kitchen Floor
One of the most immediate and impactful changes we made was to bid a not-so-fond farewell to the kitchen floor. In pictures, it might not appear terribly offensive, perhaps even offering a rustic charm. However, trust me when I say, in person, its true nature as an absolute nightmare was undeniable. This wasn’t typical wood flooring; instead, it was tongue and groove siding, the kind you might expect to find lining the walls of a cozy log cabin. While charming in one context, it was utterly unsuitable for a high-traffic, spill-prone kitchen environment.
The problems were manifold. Food crumbs, dirt, and various spills found their way into every single crack and crevice, clinging stubbornly and refusing to be dislodged, no matter how diligently we swept or vacuumed. Mopping was a futile exercise; the thin, inadequate top coat finish simply couldn’t withstand regular cleaning, leading to accelerated wear and dullness. Furthermore, the material itself was incredibly soft and prone to damage, collecting dents, scuffs, and scratches with alarming ease. Every dropped utensil, every shifted chair, left its permanent mark. It was not merely an aesthetic issue; it was a daily battle against grime and deterioration, making the kitchen feel perpetually unclean and unwelcoming. Replacing this atrocious flooring was not just an upgrade; it was an essential restoration of sanity and hygiene to our culinary heartland.
Dismantling the Pillar of Shoddy Workmanship
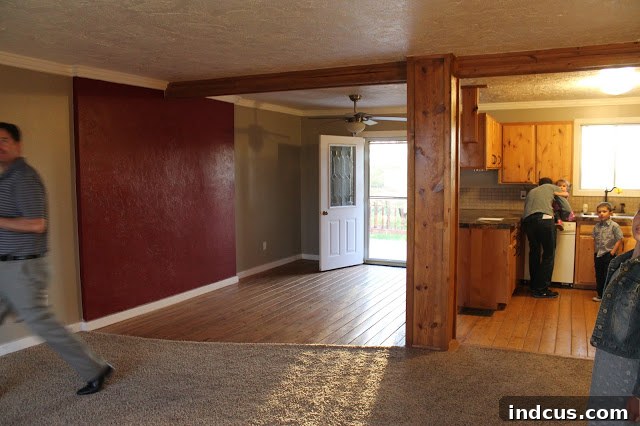
Another major structural and visual impediment was a seemingly random pillar that stood prominently in the living space. We finally took the plunge and removed it, and in doing so, we uncovered what we believe was its original purpose, revealing a tale of questionable DIY choices by previous homeowners. Our theory is that the original room featured a full wall extending to where this pillar stood. Rather than undertaking the more complex (and correct) task of rewiring the electrical systems, they likely opted for a shortcut, adding this “decorative” pillar to conceal and support the cables for a light switch and an outlet.
This solution, while perhaps expedient for them, resulted in what I affectionately dubbed “The Collage of Shoddy Workmanship.” The pillar, along with its attached beams, was not just an eyesore; it was a testament to poor planning and execution. It created an unnecessary visual barrier, broke the flow of the open space, and frankly, looked out of place and poorly finished. Its removal was one of the most gratifying parts of the initial demolition phase, instantly opening up the room and allowing us to envision a truly integrated and expansive living area. Here’s a closer look at why this pillar, and the craftsmanship surrounding it, caused us so much frustration:
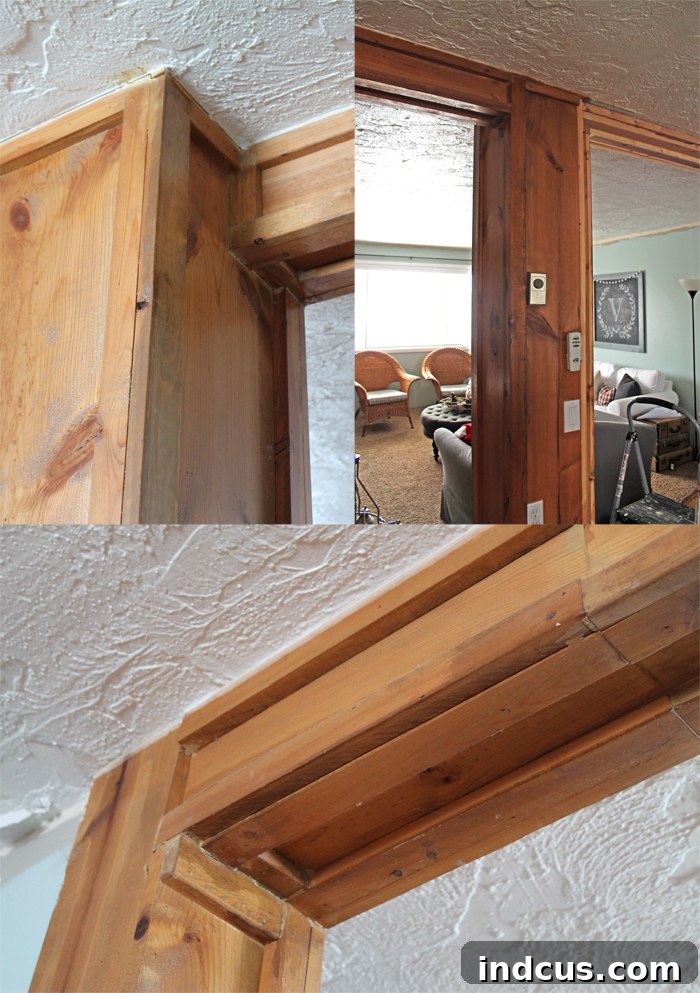
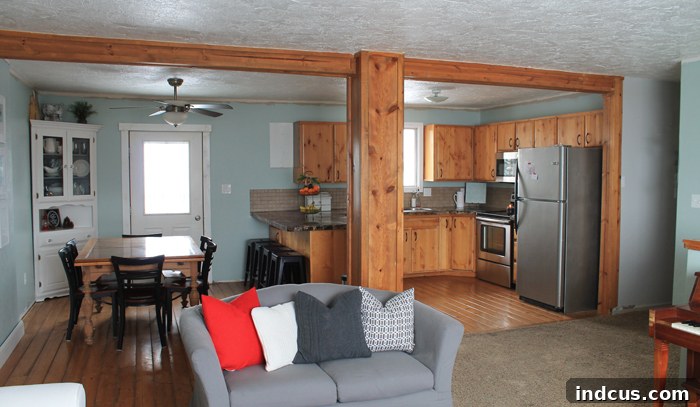
I was incredibly happy to rip the entire structure out! The immediate effect was transformative, creating a much more open and inviting atmosphere. Witness the dramatic difference:
Before:
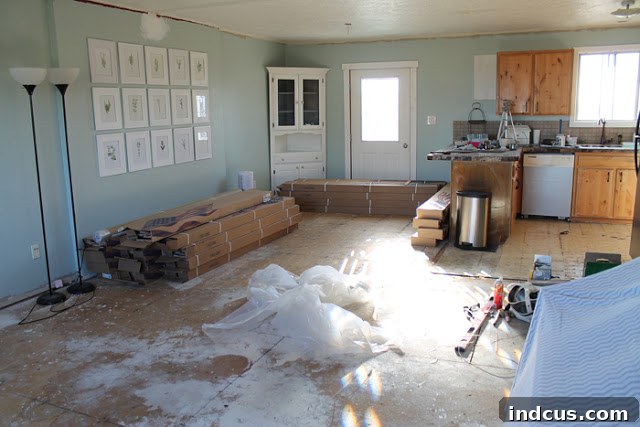
During: Pillar Removal in Progress
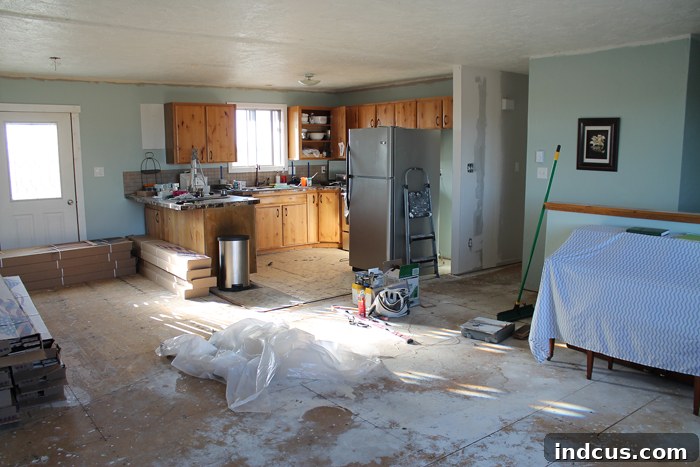
With the pillar gone, our focus shifted to rectifying the structural changes. We’ve made significant progress on drywalling the newly opened wall adjacent to the fridge. Currently, we’re meticulously working on filling the hole in the ceiling that was left behind by the removed beam, ensuring a seamless finish. Once these structural repairs are complete, the next steps involve texturing and painting these surfaces to create a fresh, clean canvas, all before the exciting installation of our new, much-improved flooring.
And for one last, glorious shot of the now-vanquished pillar – please excuse our realtor attempting to gracefully exit the frame! Ha!
Reimagining the Heart of Our Home: The New Kitchen Layout
With the structural hurdles addressed, my mind immediately turned to the exciting prospect of designing a truly functional and beautiful kitchen layout. I had already taken a significant step by removing the hanging cabinets that hovered above the peninsula (you can see those transformation photos here). This initial removal had already hinted at the potential for a more open feel. However, the complete removal of that pesky pillar truly ignited a complete rethink of how the entire space could, and should, be utilized.
After countless hours of brainstorming, sketching ideas on graph paper, and meticulously considering every angle of flow and functionality, a clear vision emerged. I’ve decided to move away from the traditional peninsula/bar area and embrace the transformative power of a kitchen island! This change promises not just aesthetic improvement, but a fundamental enhancement in how we cook, entertain, and live in our home.
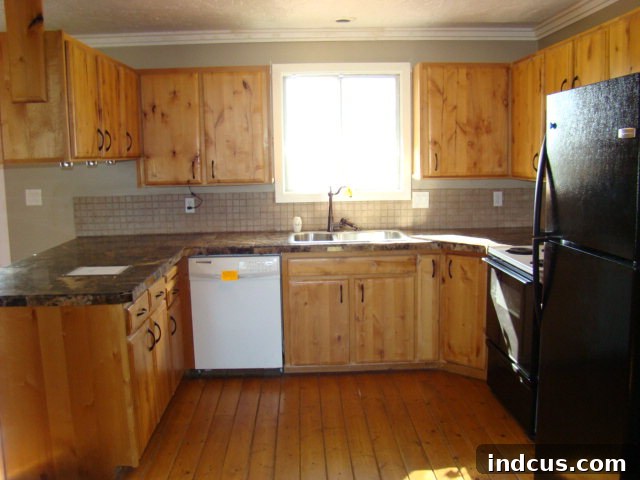
Here’s a photograph that provides an excellent visual of our previous U-shaped kitchen layout, before the full extent of the demolition:
And to better illustrate the conceptual shift and how this new plan will physically manifest, here’s a sketch detailing the proposed island layout:
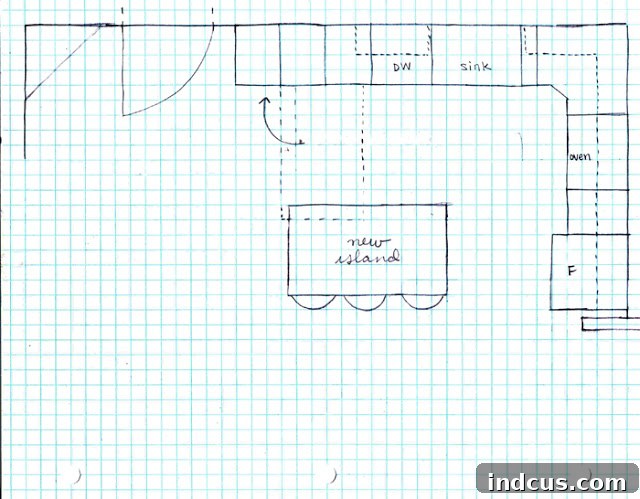
The ingenious part of this plan lies in its efficiency: we intend to repurpose and reorient the existing peninsula base cabinets. By turning them 90 degrees, we can align them perfectly with the back wall and the dishwasher, creating a continuous run of cabinetry. This clever adjustment will then create ample space in the center of the kitchen for a brand-new island – the focal point of our redesigned culinary haven. To complete the look and add both style and functionality, the empty wall space above these reconfigured cabinets will be adorned with elegant, open shelving, perfect for displaying favorite dishes or storing frequently used items within easy reach.
Why the Switch to an Island? Unpacking the Benefits of a New Kitchen Layout
This decision to transition from a peninsula to an island wasn’t made lightly. It stems from a thorough evaluation of our daily needs, entertaining habits, and a desire to maximize every inch of our living space. Here are my compelling reasons for embracing the island design:
-
Enhanced Accessibility and Improved Workflow
With the current, outdated layout, the kitchen workflow is incredibly inefficient and frustrating. One of the most significant pain points is the interaction between the dishwasher and the upper cabinet. When the dishwasher door is open, it completely obstructs access to the upper cabinet directly above it. This means that unloading clean dishes becomes a cumbersome two-step process: close the dishwasher, grab dishes, open dishwasher, put dishes away – or, more often, an awkward dance around the open door. Furthermore, the cabinets within the peninsula itself become inaccessible when the dishwasher is open, creating a functional dead zone during crucial kitchen tasks. That entire corner configuration is just an awkward, inefficient mess that actively hinders meal prep and cleanup. An island layout will strategically relocate these elements, ensuring seamless access to all storage and appliances, making everyday kitchen chores far more enjoyable and less of a logistical challenge.
-
Optimized Traffic Flow and Superior Entertainment Space
Our home is often a hub for gatherings, and while we love hosting, the current layout makes it challenging to accommodate a crowd comfortably. When we have people seated at both the dining table and the peninsula’s bar, the barstools and chairs are simply too close together. This creates a bottleneck, making it difficult for people to walk through the space, fetch drinks, or move freely between the kitchen and living areas. It leads to constant jostling and a feeling of being cramped, detracting from the relaxed atmosphere we aim to create. By moving the primary seating (barstools) to face a different direction, centered around an island, the walkway around the dining table will be liberated. This ensures that even during peak entertaining, guests can circulate freely, without impediments. If you scroll back up to the picture that includes the couch, you can visually grasp just how tight that squeeze can be between the table and the existing barstools – a problem an island effortlessly solves.
-
Maximizing Storage and Counter Space: A Kitchen Essential
In any kitchen, especially in an open-concept living area, you can truly never have enough storage or counter space. As we are already committed to replacing both the countertops and the flooring, this renovation presents a golden opportunity to make significant, lasting improvements to our kitchen’s functionality. The new island will be a powerhouse of utility, designed to house two spacious cabinets complete with smooth-gliding drawers – perfect for cutlery, utensils, and linens. Additionally, it will incorporate a dedicated cabinet with a convenient pull-out garbage can, discreetly keeping waste out of sight and easily accessible during meal preparation. This addition of an island dramatically increases our available surface area for cooking, baking, and serving, making it a dream for both daily use and large-scale entertaining. It’s an investment in efficiency and order that will transform our kitchen into a truly capable and organized space.
Your Thoughts? We’d Love Your Feedback!
So, what are your thoughts on this bold new direction for our kitchen? I’m particularly eager to hear your feedback on the island versus peninsula idea. Have you made a similar switch in your own home, or do you have insights on the pros and cons of each configuration? Your input and experiences are invaluable as we continue on this exciting journey.
Stay tuned for more updates, and perhaps even some sneak peeks of the materials and finishes we choose. The transformation is well underway, and we can’t wait to share the finished result with you!
SEE THE FINISHED KITCHEN AND LIVING ROOM REMODEL HERE!







