
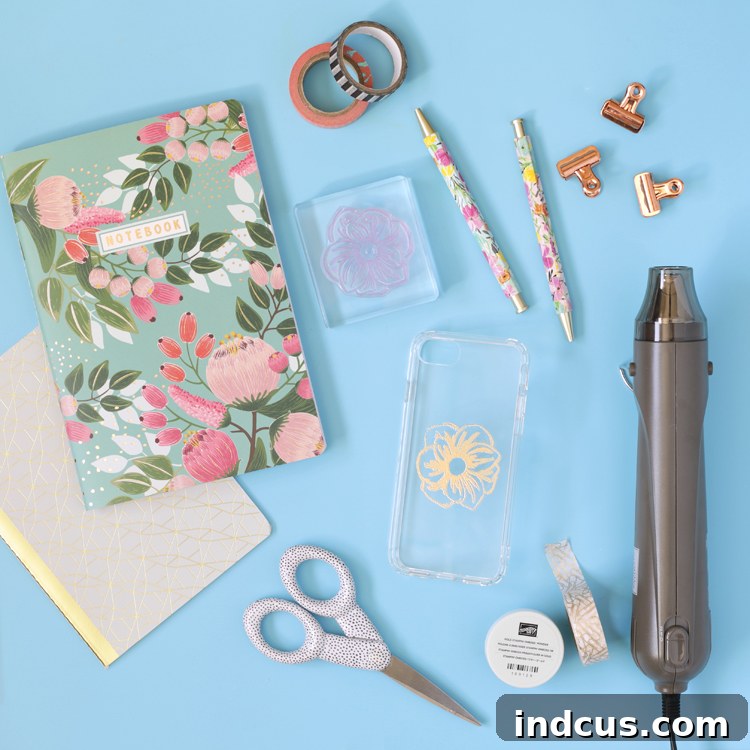
DIY Gold Embossed Phone Case: Unleash Your Creativity with Dazzling Results
Are you tired of your plain, generic phone case? Do you dream of a unique accessory that truly reflects your style without breaking the bank? Look no further! This comprehensive guide will walk you through the magical world of heat embossing, showing you how to transform a simple phone case into a stunning, personalized masterpiece with a luxurious gold embossed design. It’s an incredibly fun, easy, and rewarding craft that yields impressive, expensive-looking results.
Heat embossing is a captivating technique where powdered pigment is melted onto a surface using heat, creating a raised, tactile, and often shiny finish. Today, we’re harnessing the power of metallic gold embossing powder to give your phone case an elegant, customized flair. The process is not only straightforward but also incredibly satisfying, especially when you witness the powder magically transform into glistening gold under the heat tool. Get ready to add a personal touch to your everyday tech!
Why Heat Embossing is Your Next Favorite Craft Technique
Heat embossing offers an unparalleled way to add texture, dimension, and a professional finish to your crafting projects. Unlike regular stamping, which simply deposits ink, embossing creates a raised design that you can both see and feel. This tactile quality, combined with the often vibrant or metallic sheen of the powders, makes for truly eye-catching results. It’s perfect for personalizing gifts, creating intricate card designs, or, as we’re doing today, elevating everyday items like phone cases.
Using gold embossing powder adds an extra layer of sophistication. Gold naturally evokes feelings of luxury, warmth, and timeless elegance. When applied to a phone case, it transforms a mundane accessory into a statement piece that reflects your personality and attention to detail. The technique is surprisingly simple to master, making it accessible for crafters of all skill levels. Once you try it, you’ll be hooked on the “wow” factor heat embossing delivers!
Essential Materials for Your Gold Embossed Phone Case
Before diving into the creative process, gathering all your materials is key. Each item plays a crucial role in achieving that perfect raised gold design. While we’ll be using specific Stampin’ Up! products recommended by our sponsors for their quality and ease of use, feel free to substitute with similar products if you have them on hand. However, investing in good quality embossing supplies will significantly enhance your results.
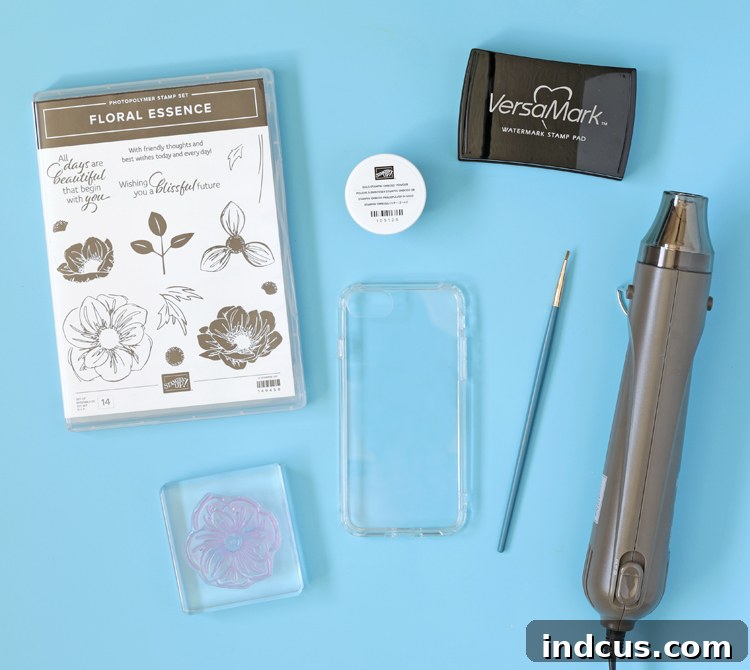
Your Crafting Arsenal:
- Floral Essence Stamp Set (or a stamp set of your choice): The heart of your design! Choose a stamp with a clean, well-defined image for the best embossing results. Floral patterns are popular, but monograms, geometric shapes, or abstract designs can also look fantastic.
- Clear Stamping Block: Essential for mounting your rubber or photopolymer stamps. Its clear nature allows for precise placement, ensuring your design lands exactly where you want it on the phone case.
- Versamark Stamp Pad: This special clear, sticky ink is the magic behind embossing. It creates a “tacky” surface that holds the embossing powder in place until it’s melted. It’s crucial because it remains wet long enough for the powder to adhere.
- Gold Stampin’ Emboss Powder: The star of the show! These fine plastic particles will melt and fuse to create your raised, shiny gold design. Available in various colors and finishes, but gold offers that premium touch.
- Heat Tool (also known as a heat gun): This specialized tool provides concentrated, high heat necessary to melt the embossing powder. A regular hairdryer won’t get hot enough and will blow the powder away.
- Small Paint Brush: A fine-tipped brush is invaluable for sweeping away any rogue embossing powder granules, ensuring a crisp and clean final image.
- Hard Plastic Phone Case: Choose a plain, hard plastic case for the best results. The smooth, non-porous surface allows the ink to sit on top, and the heat tool won’t warp it easily. Ensure it’s clean and free of dust or oils before starting.
Your Step-by-Step Guide to a Flawless Gold Embossed Phone Case
Now that you have all your materials ready, let’s get crafting! Take your time with each step, and don’t be afraid to practice on a scrap piece of plastic or paper first if you’re new to embossing. Precision and patience are key to achieving a professional-looking finish.
Step 1: Prepare Your Stamp with Versamark Ink
Begin by carefully adhering your chosen stamp to a clear acrylic stamping block. Ensure it’s firmly attached and sits flat. Open your Versamark stamp pad and gently press your mounted stamp onto it, ensuring the entire surface of the stamp’s design is evenly coated with the clear, sticky ink. Since Versamark ink is transparent, it can be tricky to see. Hold the stamp up to the light at an angle; you should see a subtle sheen across the design, indicating sufficient ink coverage. Avoid pressing too hard, which can flood the stamp and lead to a blurry image.
Step 2: Stamp Your Design onto the Phone Case
Carefully position your inked stamp onto the back of your clean, hard plastic phone case. Take a moment to consider the placement – whether you want a single focal point, a repeating pattern, or an asymmetrical design. Once satisfied with the placement, press the stamp down firmly and evenly onto the phone case. Apply consistent pressure across the entire stamp for a few seconds to ensure a crisp transfer of the Versamark ink. It’s often helpful to support the phone case from underneath to prevent it from shifting or bending during this step. Lift the stamp straight up to avoid smudging.
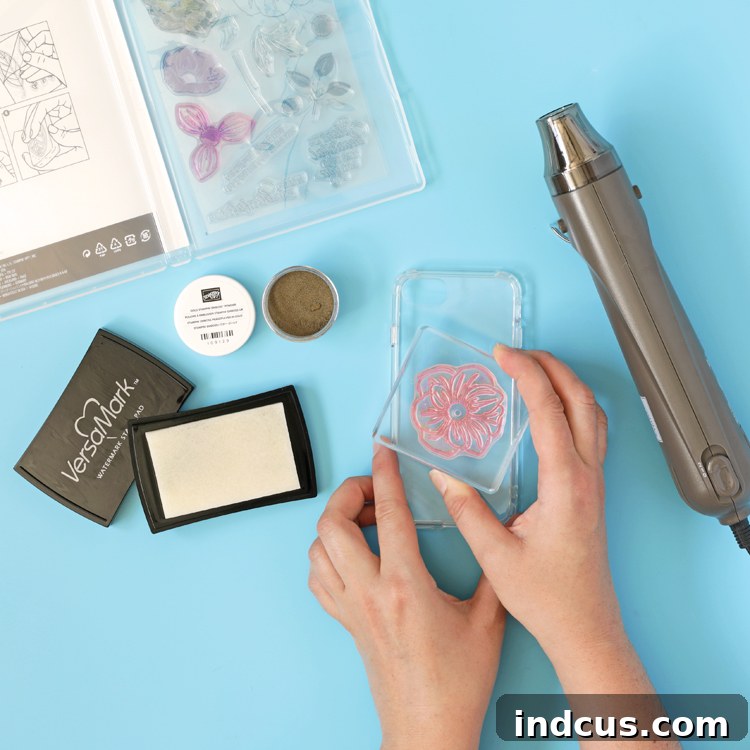
Step 3: Apply the Gold Embossing Powder Generously
Immediately after stamping, place your phone case on a clean sheet of paper. This paper will catch any excess powder, making it easy to return it to the jar. Liberally sprinkle the gold embossing powder over the freshly stamped Versamark image, ensuring the entire inked area is thoroughly covered. Don’t be shy with the powder; more is better at this stage. Once covered, gently tap the phone case on the side or back to shake off any loose, unadhered powder onto your sheet of paper. You should now see the outline of your stamped design beautifully highlighted in gold powder.
Step 4: Refine and Clean Up Your Embossed Design
Before applying heat, take a moment to perfect your design. Use a small, fine-tipped paint brush (or a dry, soft brush) to carefully sweep away any stray granules of gold embossing powder that have stuck to unintended areas of the phone case. Pay close attention to the edges of your design and any surrounding areas. This crucial step prevents unwanted specks of melted gold from appearing on your finished piece, resulting in a much cleaner, sharper, and more professional-looking embossed image. Once you’re happy, carefully pour the excess powder from your sheet of paper back into its jar for future use.
Step 5: The Magical Heat Embossing Process
This is where the magic happens! Turn on your heat tool and allow it a few seconds to warm up. Carefully hold the heat tool about 1 inch (approximately 2.5 cm) above your powder-coated design. Begin moving the tool slowly and steadily across the entire design. As the heat hits the powder, you’ll witness an incredible transformation: the dull, powdery texture will melt and fuse, instantly turning into a raised, glossy, and shiny gold finish. Keep the tool moving to ensure even melting and prevent overheating any single spot, which could scorch the powder or even damage the phone case. Continue until all the powder has melted and turned uniformly shiny. Please exercise extreme caution: the tip of the heat tool gets very hot, and your phone case will become hot to the touch. Use common sense and avoid touching the heated areas until they have cooled down completely.
Once all the powder has transformed into that stunning, brilliant gold sheen, your gorgeous new custom phone case is complete! Allow it to cool for a few minutes before handling extensively.
Tips for Success and Creative Variations
Mastering the Art of Embossing:
- Practice Makes Perfect: If you’re new to heat embossing, try a few stamps on scrap paper or an old plastic lid before tackling your phone case. This helps you get a feel for the process and the heat tool.
- Work Clean: Ensure your workspace and phone case are free of dust, lint, or oils before you begin. Even tiny particles can interfere with the powder adhesion.
- Don’t Overheat: While the transformation is mesmerizing, prolonged heat can scorch the powder, dulling its shine, or potentially warp your plastic case. Keep the heat tool moving.
- Anti-Static Pouch: For advanced users, an anti-static powder tool (like an embossing buddy) can be lightly dabbed over the surface before stamping. This helps prevent stray powder from sticking where it shouldn’t, yielding an even cleaner image.
- Ventilation is Key: Work in a well-ventilated area, as the heating process can sometimes release fine particles or fumes.
Unleash Your Creativity:
- Experiment with Colors: While gold is timeless, don’t limit yourself! Embossing powders come in a rainbow of colors, metallics, opaques, and even glitter finishes. Imagine a vibrant pink or a sophisticated silver case.
- Combine Stamps: Create intricate patterns by layering different stamps or repeating a single design in a mosaic fashion.
- Monograms and Initials: Personalize your case further with a bold initial or a monogram stamp for a truly bespoke look.
- Emboss Other Items: The beauty of heat embossing extends beyond phone cases. Apply this technique to cards, journal covers, gift tags, ornaments, and even certain fabric items for unique handmade touches.
Troubleshooting Common Embossing Issues
- Powder not sticking: Ensure your Versamark ink pad is juicy and that you’re applying enough pressure when stamping. The ink needs to be wet enough for the powder to adhere.
- Smudged image: This usually happens if the stamp shifts during application or if you didn’t lift it straight up. Practice precision in stamping.
- Dull or scorched powder: You might be overheating it. Keep the heat tool moving and don’t hold it in one spot for too long. The goal is for the powder to melt and become shiny, not to bubble or burn.
- Stray specks of powder: This means you didn’t clean off all the unadhered powder with your brush in Step 4. Take your time with cleanup for a crisp result.
Watch the Magic Happen: DIY Gold Embossed Phone Case Video Tutorial
Sometimes, seeing is believing! Watch this short video demonstration to see the heat embossing process in action. It’s truly mesmerizing to observe the gold powder transform into a raised, metallic design right before your eyes. This visual aid will help clarify any steps and give you a better understanding of the timing and technique involved.







