Transform Your Bathroom on a Budget: A Complete DIY Makeover Story
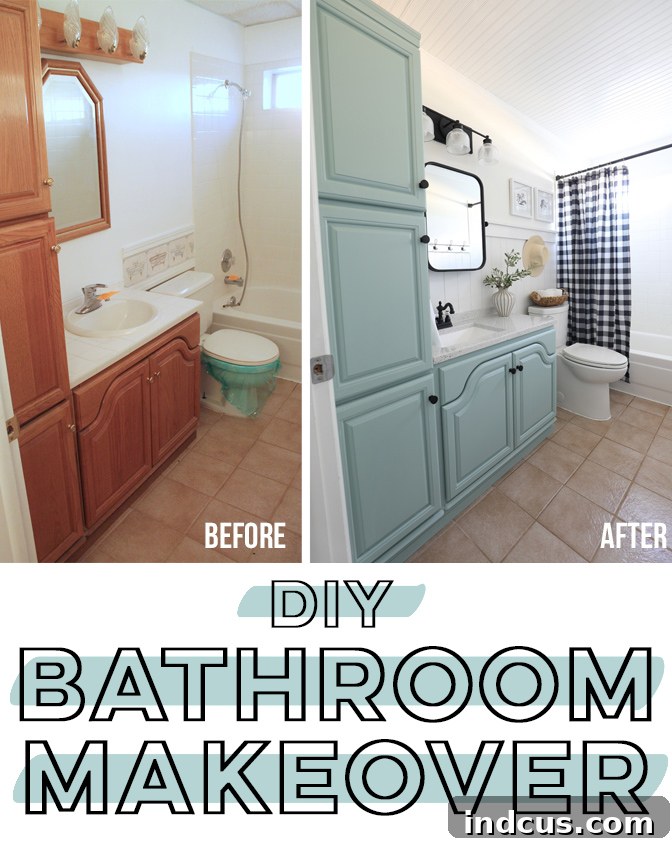
There’s an undeniable satisfaction that comes with transforming a space with your own hands, especially when it’s a project that brings a dated, boring bathroom into the modern era. Today, I’m thrilled to share the comprehensive journey of our recent bathroom remodel – a project that breathed new life into an uninspiring space through strategic updates like a new vanity top, refreshed lighting, a stylish mirror, and a whole lot of paint and dedication. This isn’t just a remodel; it’s a testament to what can be achieved with vision, elbow grease, and a smart budget, proving that a significant upgrade doesn’t always require a professional crew or an exorbitant price tag.
I must admit, I’m incredibly proud of this freshly revitalized bathroom. Unlike many of the home renovation projects my husband and I have tackled as a team, this particular space was almost entirely a solo endeavor! For a while now, I’ve been actively challenging myself to get more hands-on with power tools and to take on more of the actual construction work involved in our DIYs. This bathroom became the perfect canvas for that personal growth. While my wonderful husband provided crucial assistance with pushing large sheets of material through the table saw, helped immensely with the ceiling installation (definitely a two-person job for safety and efficiency!), and lent a hand with a few other minor tasks, I completed approximately 95% of this transformation on my own. And frankly, I’m feeling incredibly empowered and accomplished right now, like one tough chick who can truly build things!
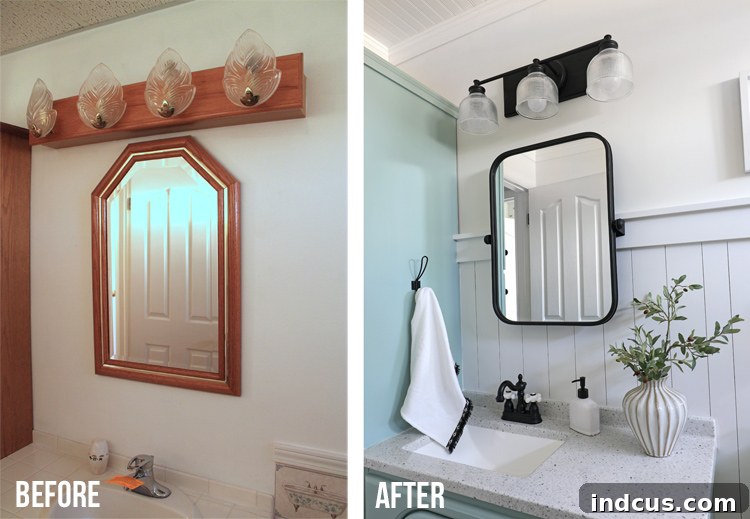
To truly grasp the dramatic transformation and fully appreciate just how far this space has evolved, let’s take a moment to revisit the “before” picture. Prepare yourself for a glimpse into the past, where design choices from decades ago reigned supreme.
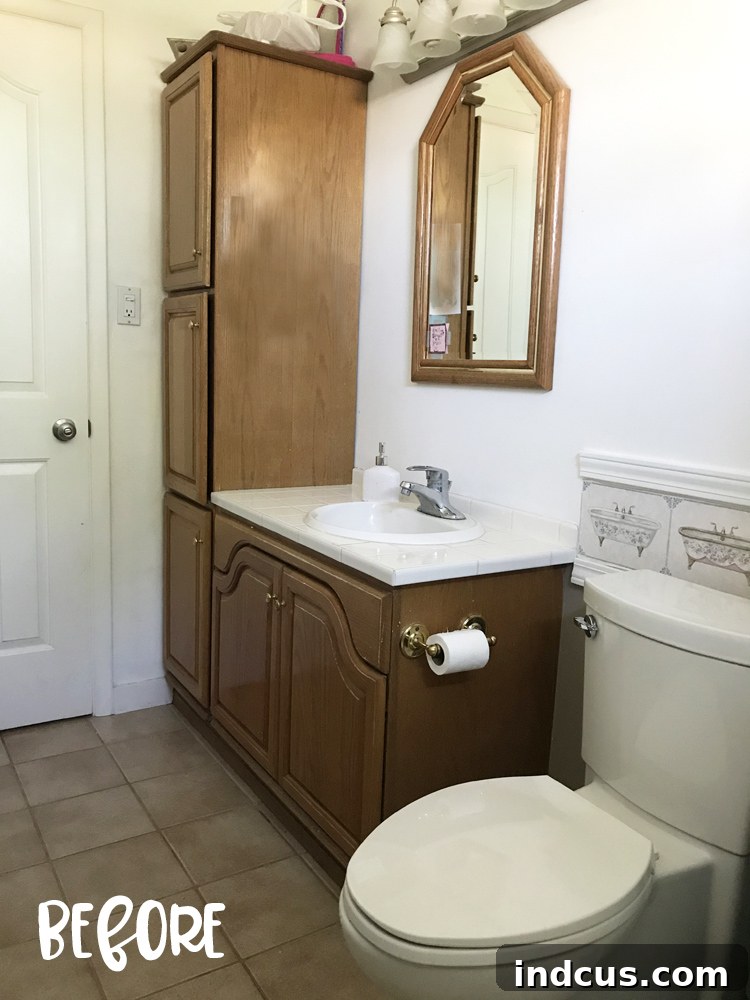
Eek! That’s often the first reaction. The original bathroom was a clear relic of a bygone era. The prominent orange oak vanity and its perfectly matching mirror were undeniably “straight outta 1998,” projecting an outdated and somewhat heavy aesthetic. But perhaps the most jarring element was the wallpaper border, adorned with a rather whimsical – and unfortunately, very dated – bathtub motif. It was, without a doubt, a feature that absolutely *had* to go, as it significantly contributed to the room’s tired and uninspired atmosphere. The overall feeling was dark, cluttered, and lacking any sense of modern charm or freshness, making the need for an update quite apparent.
One of the initial considerations was the flooring. The existing tile floor seamlessly runs through the entire basement level of our home, and crucially, it remains in excellent condition. Opting to replace it would have not only been a significant expense but also an unnecessary undertaking given its good shape and functional integrity. So, a key decision was made to keep the existing tiles, saving both time and money. Similarly, the original vanity cabinet, despite its dated appearance, was perfectly functional. New bathroom vanities, especially those of decent quality and size, can be shockingly expensive – a cost I was determined to avoid if possible. This led to a pivotal decision: paint to the rescue! This approach allowed us to recycle a perfectly good cabinet, drastically reducing the overall budget while still achieving a completely fresh look. It’s an excellent example of how smart choices can lead to big savings in a renovation project.
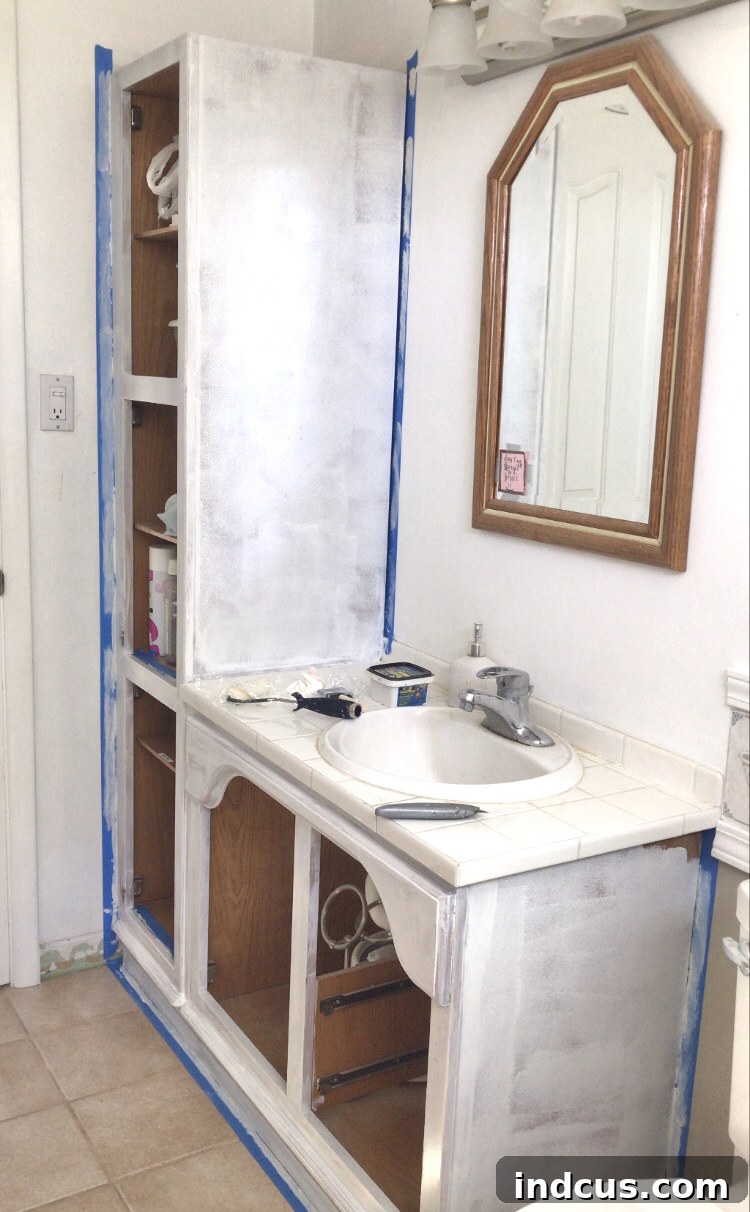
When it comes to painting cabinetry, whether it’s in a kitchen or a bathroom, my advice will always be consistent: prioritize sanding and priming before you even think about applying that first coat of color. While these steps undeniably add extra time and effort to your project, I can tell you from personal experience that you will regret skipping them. Proper preparation ensures maximum paint adhesion, durability, and a smooth, professional finish that will stand the test of time and humidity. For this vanity, I used the best paint for cabinetry, which I’ve previously detailed in depth here, and it truly performed beautifully, providing exceptional coverage and a hard-wearing surface. The chosen cabinet color is Sherwin-Williams Halcyon Green, a sophisticated hue that I would describe as a captivating blue-green-gray hybrid. Its unique quality is that it subtly morphs and shifts based on the lighting conditions in the room, offering different nuances throughout the day. It evokes a super beachy, refreshing, and serene vibe, and I absolutely adore the character and calm it brings to this newly transformed bathroom, perfectly complementing the desire for a coastal cottage aesthetic.
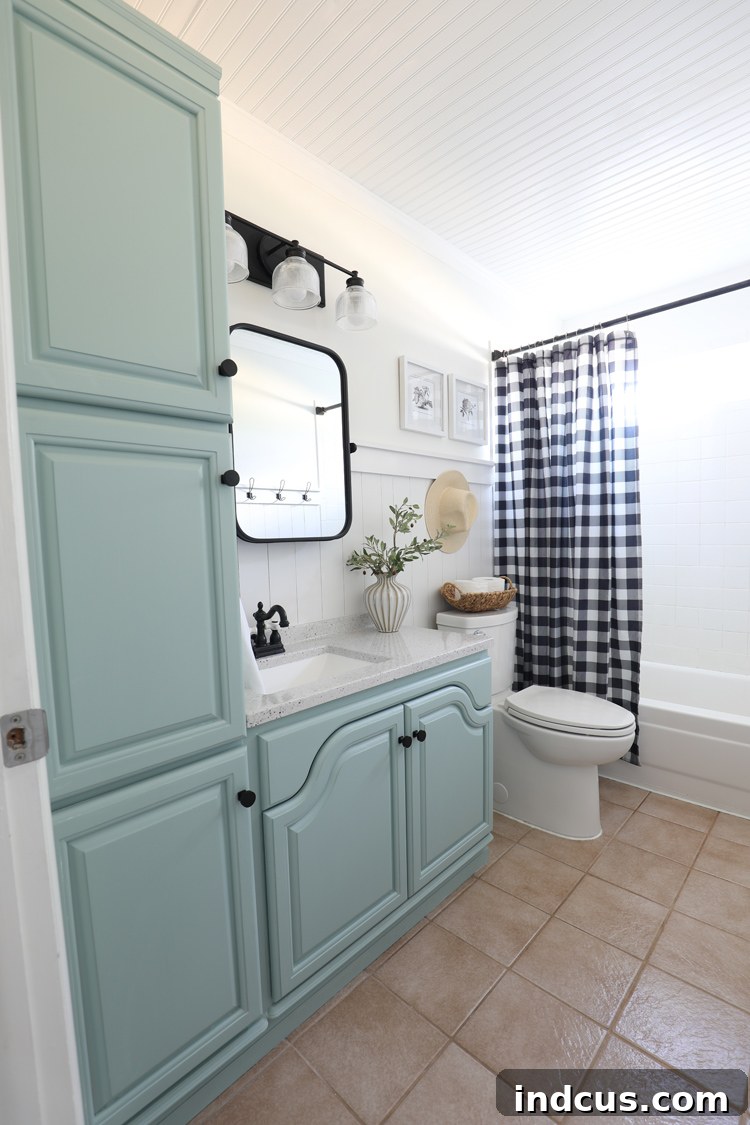
Beyond the fresh coat of paint, a significant functional and aesthetic upgrade was achieved by replacing the old vanity top with a sleek new solid surface. This proved to be a particularly challenging aspect of the renovation due to the vanity’s non-standard depth of only 19 inches. Finding a pre-made countertop that precisely fit this unique measurement without breaking the bank or requiring extensive custom fabrication was a genuine hurdle. After considerable searching, I landed on a creative solution: I ended up purchasing an entire vanity set (cabinet and all) that included the perfectly sized solid surface countertop I needed. Once the countertop was carefully removed and installed onto our existing painted cabinet, I cleverly listed and sold the brand-new cabinet base online. This ingenious strategy allowed me to acquire the ideal vanity top at a much more affordable price point than a custom order, while also recouping some of the cost by selling the unused component. It’s a perfect example of thinking outside the box to stay within budget!
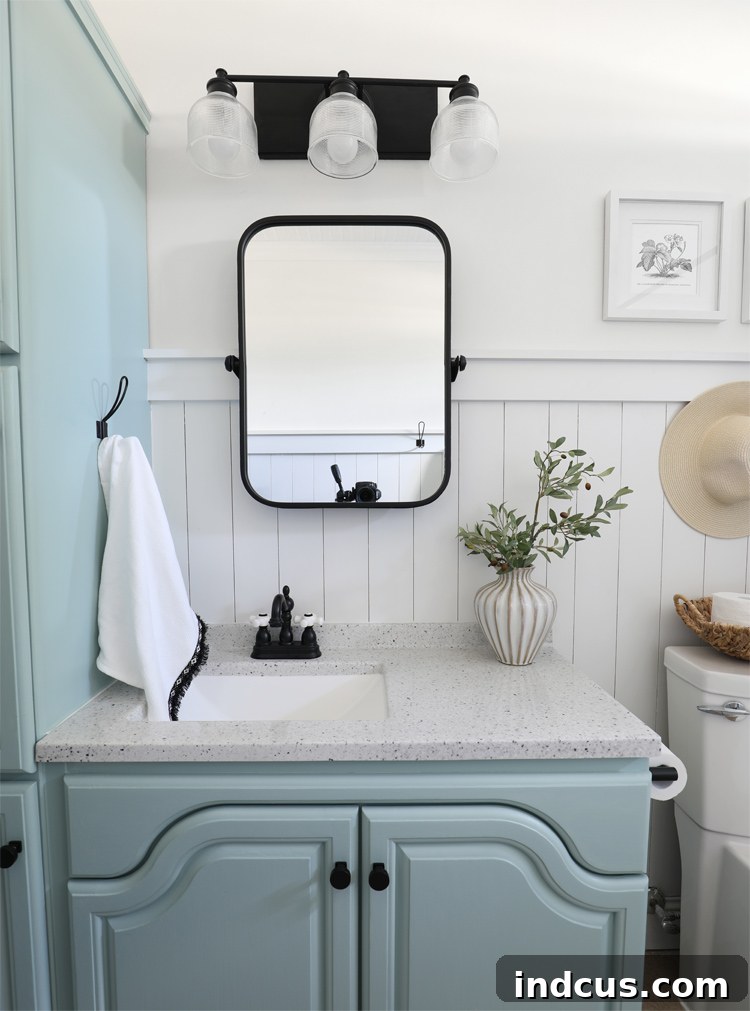
To complete the vanity’s fresh look, I switched out the old, generic faucet for this darling black and white faucet with charming vintage-inspired knobs. I am absolutely crazy about it – truly, I never imagined I could love a bathroom faucet so much, but I wholeheartedly do! It’s a small detail that makes an enormous impact, infusing the space with the perfect touch of whimsical charm and a hint of classic elegance. The contrast of the black and white, coupled with the intricate detailing of the ceramic knobs, elevates the entire vanity area, transforming it from purely functional to a captivating focal point that seamlessly ties into the room’s new aesthetic. This simple change proves that sometimes, the most dramatic transformations come from carefully selected fixtures that reflect your personal style and design vision.
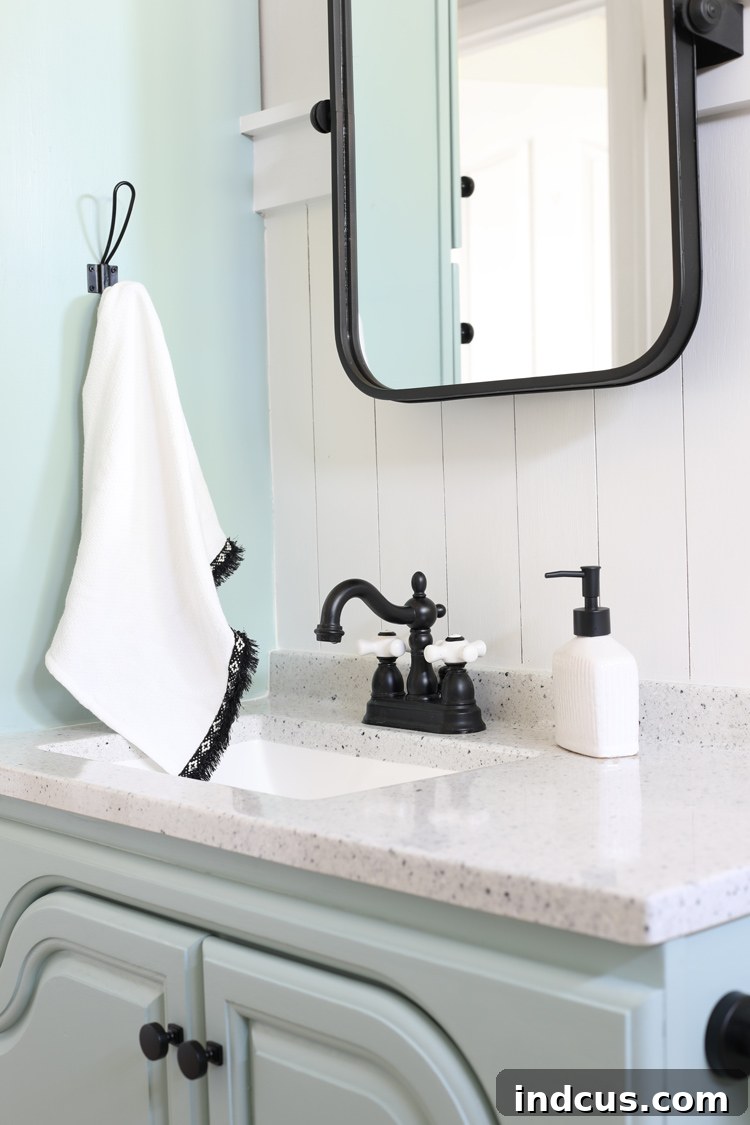
Another monumental upgrade that dramatically altered the bathroom’s character was the application of a vertical shiplap wall treatment. This design choice instantly injected a sense of coastal charm and sophisticated texture, moving far beyond the drab, outdated walls that were there before. It’s a classic look that brings warmth and a custom feel without requiring a custom budget.
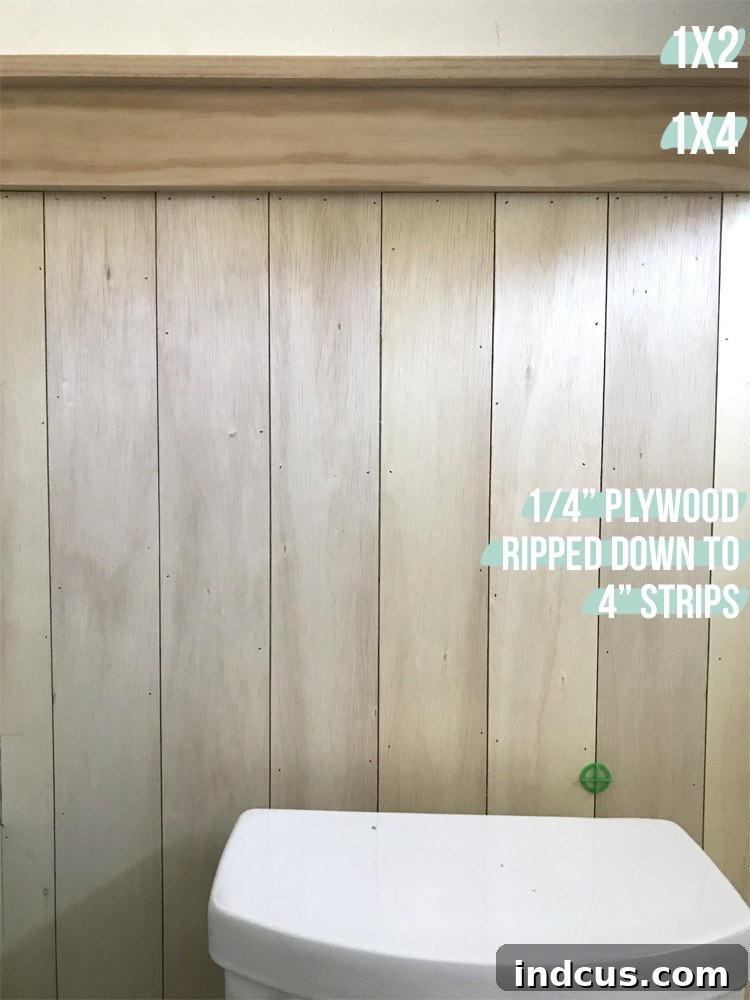
For this project, I opted for an incredibly cost-effective approach to achieve the vertical shiplap look. Instead of purchasing expensive pre-milled shiplap boards, I took a 1/4″ plywood sheet and meticulously cut it down into 4-inch wide strips using a table saw. This method significantly reduced material costs while delivering the desired aesthetic. Once the strips were prepared, I attached them to the wall using a combination of Liquid Nails adhesive for a strong, permanent bond and a pneumatic nail gun for quick and secure fastening. Each strip was precisely 4 feet long, ensuring a consistent and clean visual line. To finish the top edge of the shiplap, I created a custom trim using a 1×4 board as the base, topped with a 1×2 board turned sideways. This combination created a clean, square-angled profile that I absolutely adore; it adds so much charm and architectural interest to the bathroom, elevating it beyond a standard painted wall. Looking back, if I were to tackle this project again, my main piece of advice would be to prime and paint the plywood strips *before* installing them on the wall. This would have saved a considerable amount of time and effort in cutting in and painting around all the small gaps and edges after installation, making the process even smoother for future DIY enthusiasts.
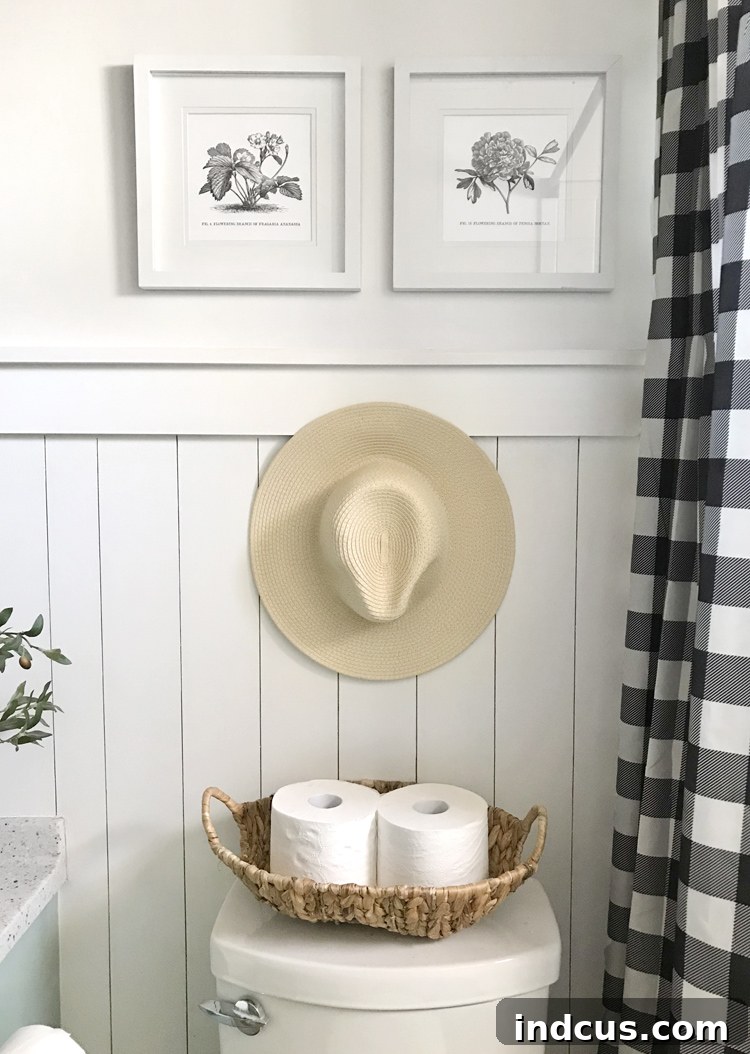
To infuse the space with personality and warmth, I carefully selected a few decorative elements. I framed two beautiful black and white botanical prints, utilizing frames I’ve happily owned for years – another excellent way to repurpose and stay within budget. These prints add a touch of timeless elegance and organic beauty to the wall, complementing the clean lines of the shiplap. Additionally, I hung a favorite hat, strategically placed to introduce a soft, personal touch and a hint of texture, making the bathroom feel more inviting and less sterile. The buffalo check shower curtain, which I’ve had for about a year, was a perfect fit for the updated scheme. Its classic black and white pattern provides a lovely contrast and visual anchor in the room, reinforcing the modern cottage aesthetic without feeling overwhelming. These carefully chosen accessories, though simple, play a crucial role in tying the entire design together, creating a cohesive and aesthetically pleasing environment.
Because I made the deliberate design choice to extend the vertical shiplap wall treatment behind the vanity, I encountered a specific challenge when it came to selecting a new mirror. The mirror needed to sit far enough away from the wall to comfortably clear the slight lip created by the shiplap trim, otherwise, it would either lean awkwardly or be unable to sit flush. This rounded corner tilting mirror proved to be the ideal solution. Its unique tilting mechanism meant it naturally projected away from the wall, providing the necessary clearance. Initially, it actually projected *too* far, but my ingenious husband, with his practical skills, skillfully trimmed the metal support pieces slightly. This minor modification ensured the mirror fit absolutely perfectly in our newly designed space, both functionally and aesthetically, proving that sometimes a little custom tweaking is all it takes to achieve perfection.
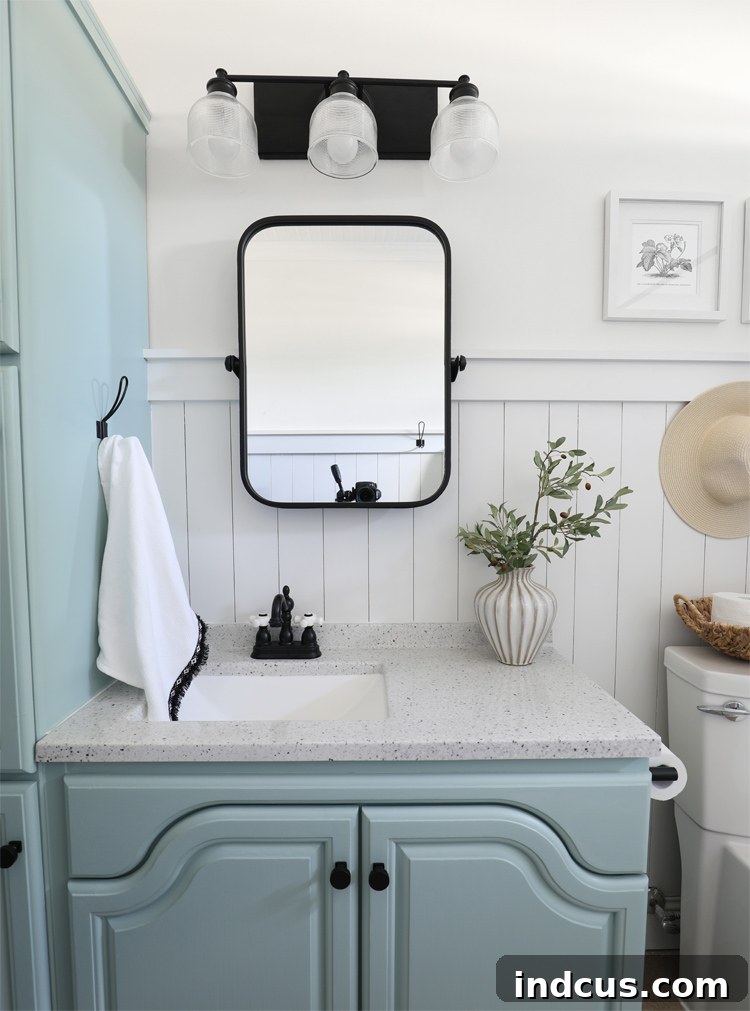
In addition to the mirror, we made a crucial upgrade to the overhead lighting, switching out the outdated fixture for a more modern and aesthetically pleasing bathroom vanity light. This change instantly elevated the room’s ambiance and functionality. To ensure the new light fixture would clear the tilting mirror and also to address the precise placement of the electrical box, I took an extra step. I routed the edges of a piece of wood, painted it a sleek matte black, and then mounted the new light fixture directly onto this custom wooden backer. This ingenious solution served a dual purpose: it ensured the light projected far enough from the wall to clear the mirror, preventing any visual obstruction. More importantly, creating this larger mount allowed me the flexibility to center the light fixture perfectly over the vanity, rather than being constrained by the exact, and often off-center, location of the existing electrical box. This thoughtful customization resulted in a more balanced and professionally finished look, highlighting the new vanity and mirror beautifully.
The final, and perhaps most impactful, structural change in the bathroom involved completely removing the old, unsightly drop ceiling and replacing it with a fresh, crisp beadboard ceiling. That old drop ceiling was truly gross, with its stained panels and dated appearance; it gave off undeniable “hotel-where-you-might-get-murdered” vibes. Ew! It contributed significantly to the room’s dreary and uninviting atmosphere, acting as a constant reminder of its age.
The new beadboard ceiling, in stark contrast, immediately transformed the overhead space. It instantly adds to the fresh, bright, and charming cottage feel that we aimed to achieve throughout the bathroom. The subtle texture and classic lines of the beadboard create visual interest without overwhelming the space, providing a clean and polished finish that ties in beautifully with the vertical shiplap and other design elements. This change alone brought an incredible sense of airiness and modernity, completely eliminating the oppressive feel of the old ceiling and significantly enhancing the overall aesthetic appeal of the entire room. It truly was the crowning glory of this budget-friendly renovation.
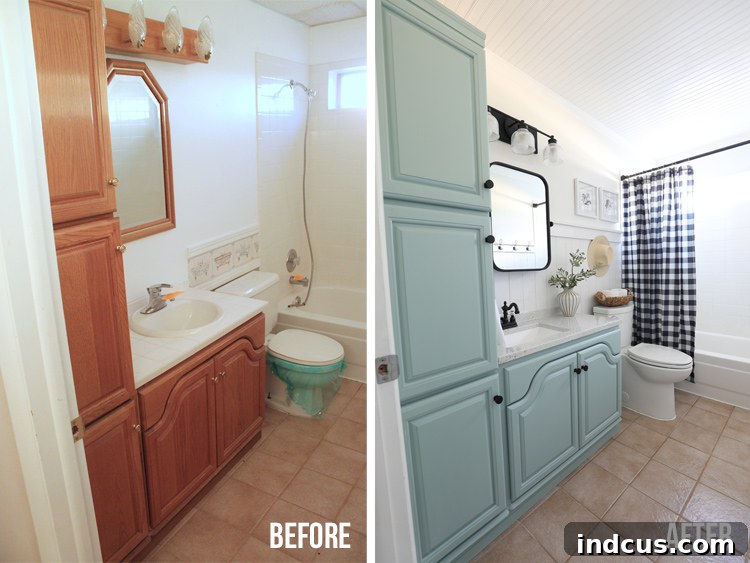
Isn’t it absolutely amazing to compare the space before and after? The transformation is truly incredible, showcasing a completely different feel and aesthetic that is both refreshing and inviting. I am so, so pleased with how every single element came together, from the smallest details like the cabinet knobs to the larger structural changes like the ceiling. This project serves as a powerful reminder that with a clear vision, a willingness to get your hands dirty, and a smart approach to budgeting, you can achieve remarkable results without breaking the bank. A huge thank you to Wayfair for providing the challenge and the motivation to push through and get this space not just done, but beautifully reimagined! This DIY journey proves that a dated bathroom can indeed become a dream bathroom with a little creativity and a lot of hard work.
Source List: Your Renovation Toolkit
- Bathroom Light in Matte Black
- Tilting Mirror
- Faucet with White Ceramic Knobs
- Vanity Paint – Color is SW Halcyon Green
- Wall Paint – SW Extra White
- Vanity Top
- Cabinet Knobs
- Toilet Paper Roll HolderMatte Black
- Towel Hooks
- Shower Curtain
Inspired by this budget-friendly bathroom transformation? Pin it so you don’t forget it and can revisit these DIY ideas for your own home!