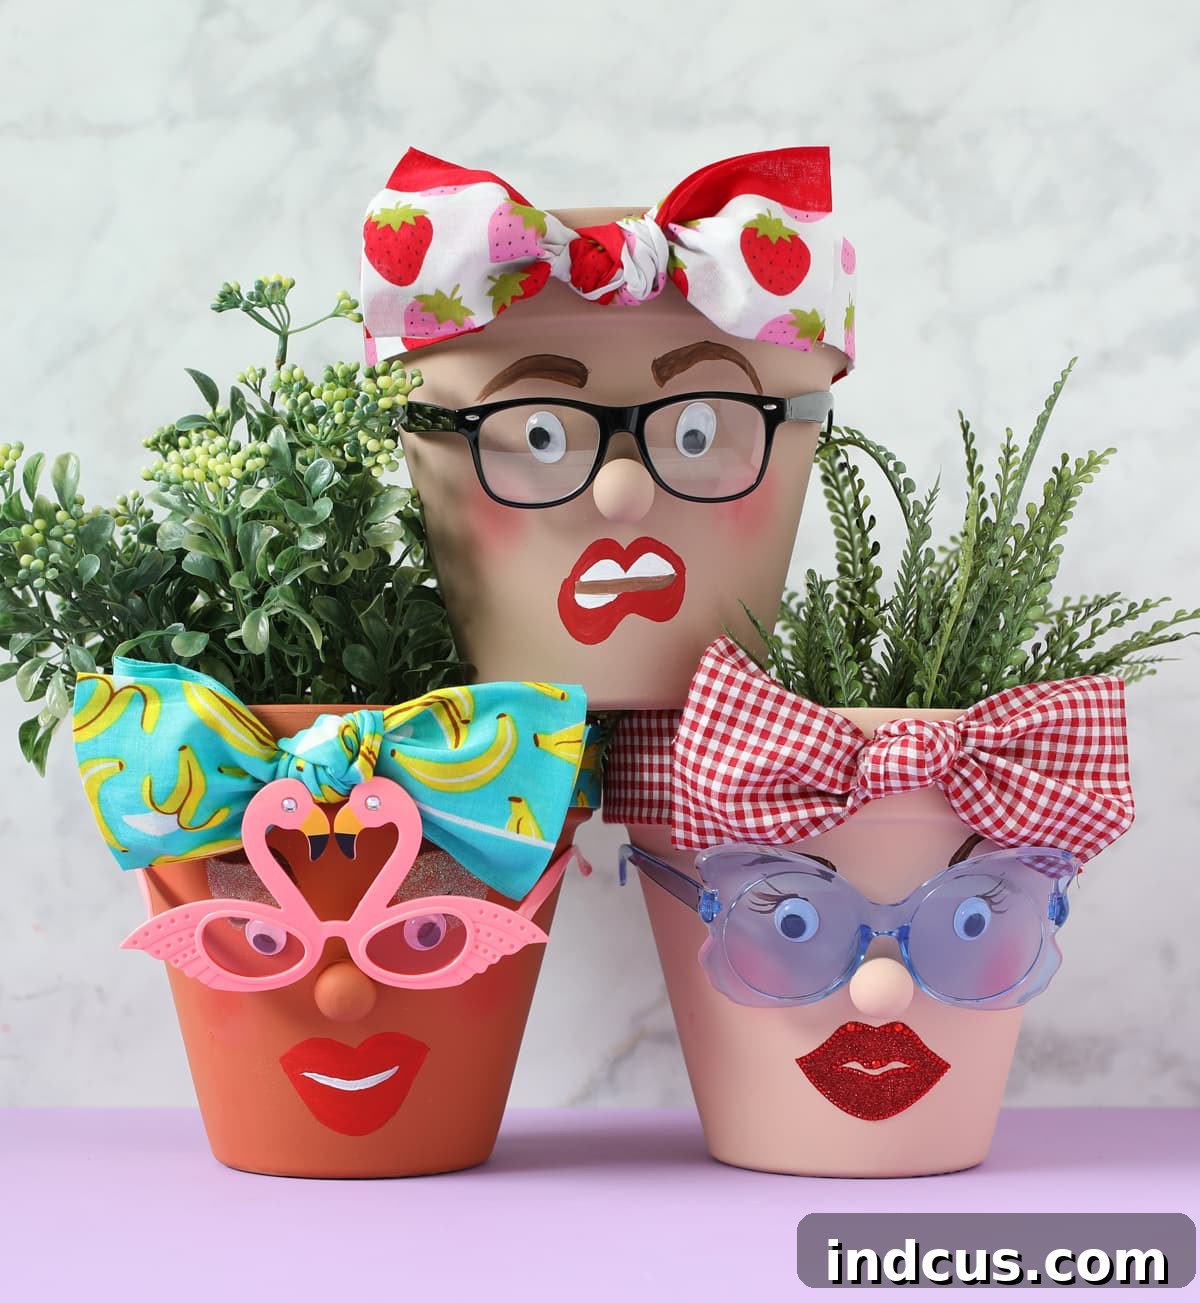
Craft Your Own Viral Pot Head Planters: A Fun & Quirky DIY Guide
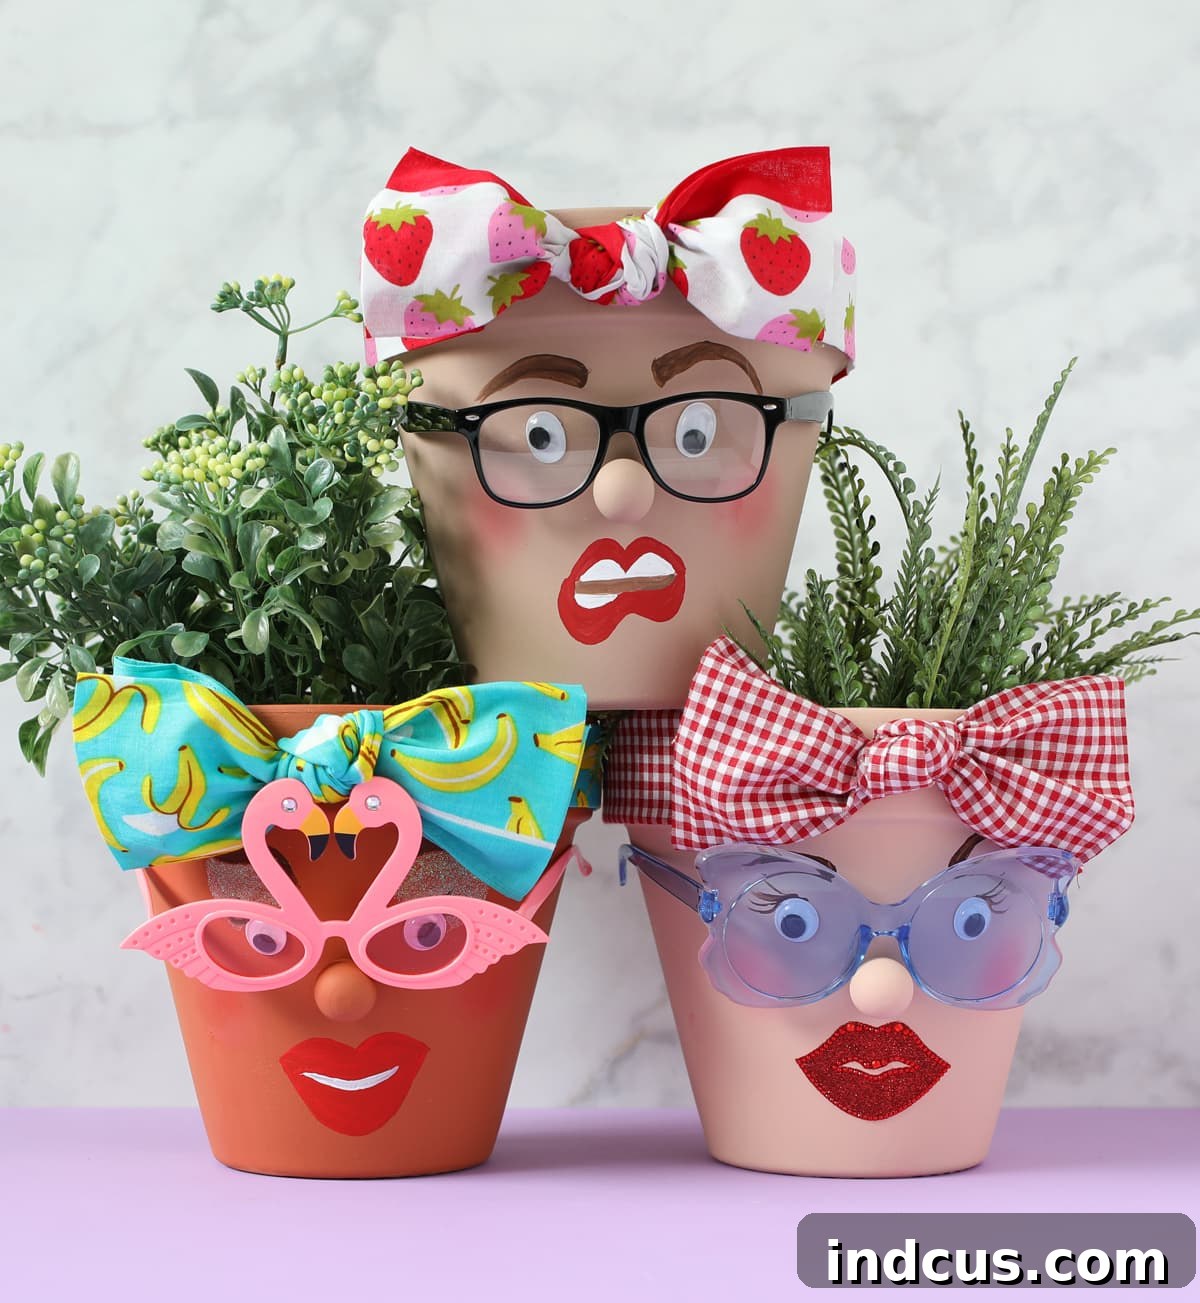
Have you been captivated by the whimsical charm of these ‘pot head’ planters that have taken the internet by storm? Featuring hilarious faces, stylish accessories, and an undeniable sense of character, these creative terracotta pot transformations have become a viral sensation. While they’ve been popping up all over online, detailed instructions for crafting your own have been surprisingly hard to find – until now!
We’ve meticulously recreated the process, documenting every step to bring you a comprehensive guide. Now, you can confidently embark on this delightful crafting journey and create your very own collection of funny face planters. Whether you’re aiming to add a unique touch to your home decor, looking for personalized gift ideas, or simply seeking a fun and engaging craft project to enjoy with friends, these charming planters are an absolute joy to make. Grab your supplies, invite your favorite crafting companions, and prepare to bring some undeniable personality to your pots!
Why You’ll Adore Creating These Unique Planters
Beyond their adorable appearance, crafting pot head planters offers a wealth of fulfilling experiences and benefits:
- Spark Your Creativity: This project is a fantastic outlet for artistic expression. From selecting vibrant skin tones and distinct facial features to choosing unique hair wraps and accessories, each step allows you to infuse your personal style into your creation. The possibilities for customization are truly endless!
- Accessible for All Skill Levels: Whether you’re a seasoned crafter or a complete beginner, the techniques involved are straightforward and forgiving. The beauty of these planters lies in their handmade charm, where slight imperfections often enhance their character, making the process enjoyable and low-pressure.
- Transformative Home Decor: These aren’t just planters; they’re expressive works of art that inject personality and whimsy into any space. Display them in your living room, kitchen, bedroom, on a windowsill, or a covered patio to instantly uplift the atmosphere and spark conversations.
- Thoughtful, Handmade Gifts: Impress your loved ones with a truly unique and heartfelt present. A personalized pot head planter, perhaps filled with a small succulent or herb, makes an unforgettable gift for birthdays, housewarmings, teacher appreciation, or any special occasion.
- Engaging Group Activity: Planning a get-together? These planters are ideal for craft nights, birthday parties, or family gatherings. Everyone can design their own quirky character, leading to shared laughter and a diverse collection of charming creations.
- Eco-Friendly Fun: Give new life to plain terracotta pots or repurpose old fabrics, glasses, and beads you might have around the house, contributing to a more sustainable crafting practice.
Essential Materials & Creative Alternatives
One of the most exciting aspects of this DIY project is the freedom to get creative with your materials. While we provide a comprehensive list, feel free to adapt and substitute items based on what you have on hand or what inspires you. Don’t hesitate to explore craft stores, dollar stores, or even your own recycling bin for hidden gems!
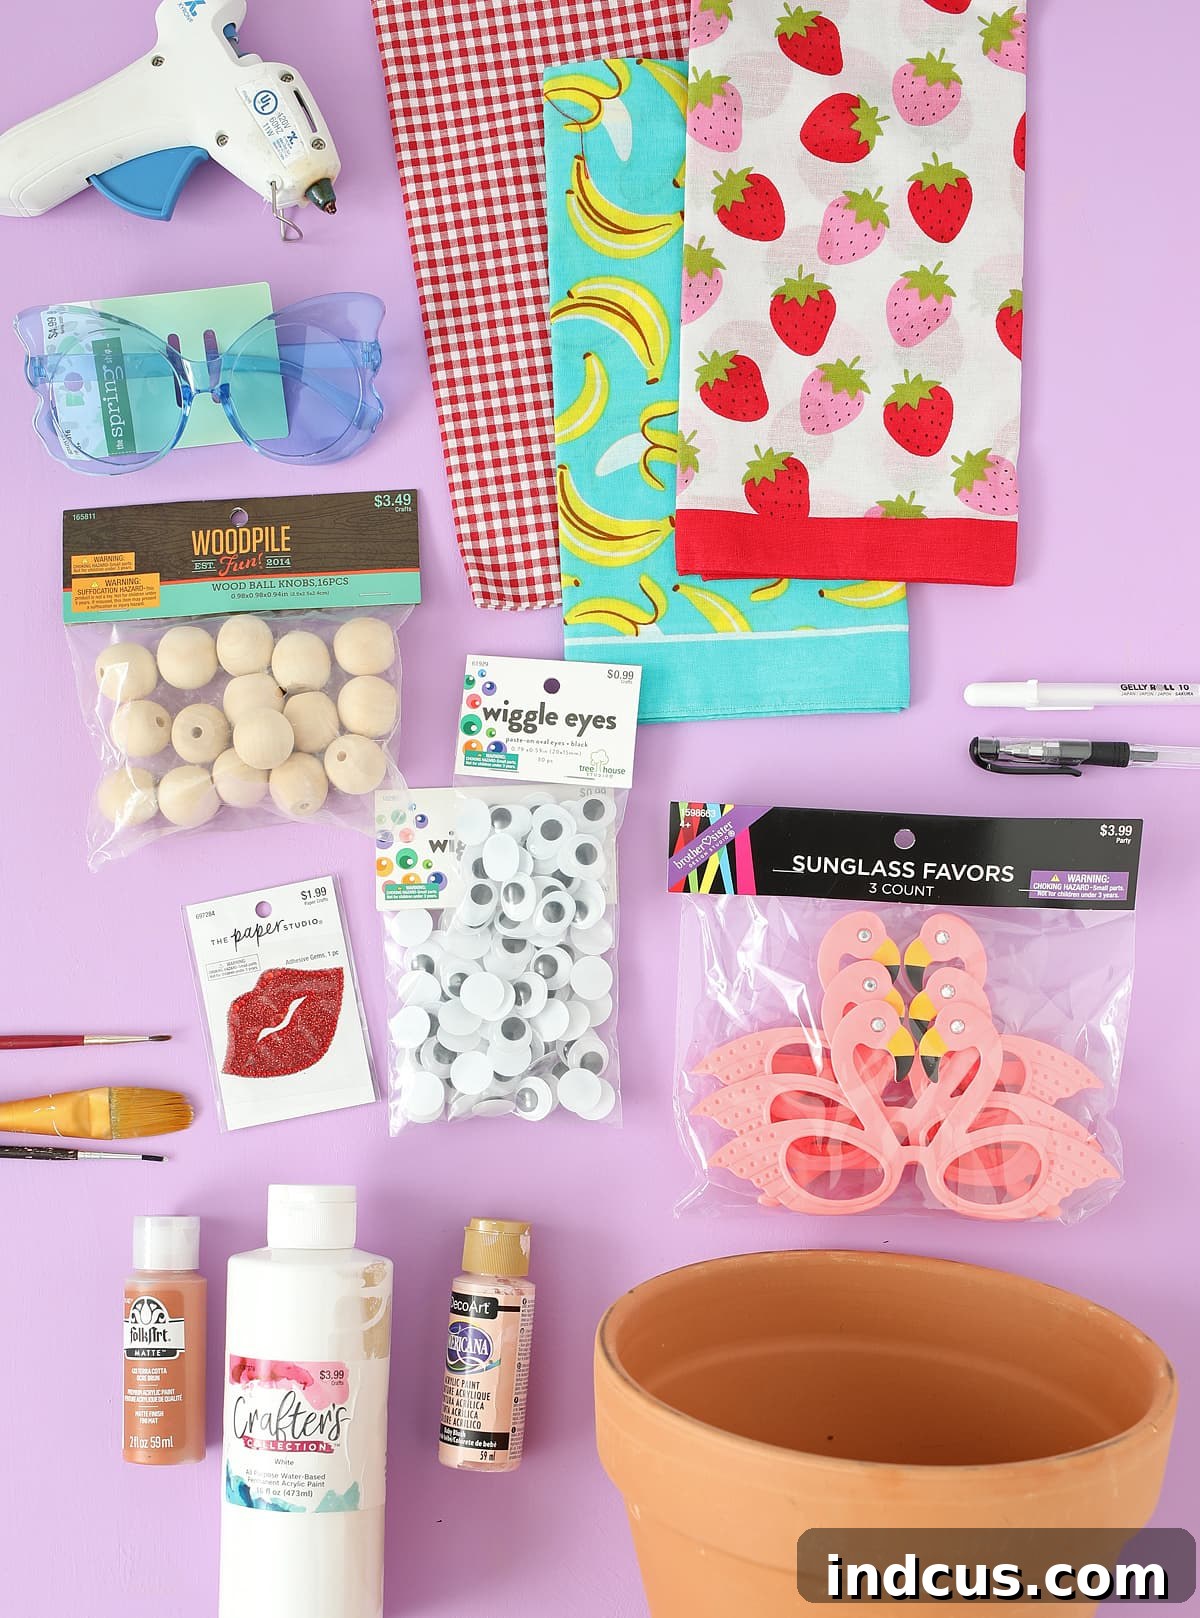
- Terracotta Flower Pots: (Medium size, around 6 to 8 inches tall, provides a good canvas, but experiment with various sizes for different “personalities.”) These traditional pots are perfect for painting due to their porous surface. You can find them at any garden center, hardware store, or craft supply retailer. Consider different shapes and rim styles for added character.
- Wood Ball Knobs: (Approximately 1 inch in size, ideally with a flat base for easy adhesion.) These small wooden components, often used for furniture, are perfect for crafting expressive noses. The flat side ensures a secure attachment. For a different look, you could use larger beads, small wooden eggs, or even sculpt a nose from air-dry clay.
- Acrylic Craft Paint: A diverse palette of colors is key. You’ll need various shades for “skin tones” (e.g., beige, peach, brown, terracotta, grey), vibrant colors for lips (reds, pinks, purples), and standard colors like white for teeth and black for outlines or pupils. Acrylic paints are easy to work with, dry relatively quickly, and come in an endless array of hues. If your planters will be outdoors, consider using outdoor-specific acrylic paints or a weather-resistant sealant.
- Paint Brushes in Various Sizes: A good assortment is essential. You’ll want a wider flat brush for applying the base coat evenly and fine-tipped brushes (like detail brushes or liner brushes) for intricate facial features such as eyebrows, eyelashes, and lip lines. A foam brush can also assist in achieving smooth paint application.
- Wiggle Eyes: (Assorted sizes will allow for a range of expressions, from wide-eyed wonder to a more demure gaze.) These classic craft eyes instantly add a playful, animated touch. They come in various sizes and colors. As an alternative, you can paint the eyes directly onto the pot, cut them from felt or vinyl, or even use small buttons for a unique, stylized look.
- Bandanas: These versatile squares of fabric provide an easy and colorful solution for “hair” or head wraps. Choose patterns and colors that enhance your planter’s personality. Other creative “hair” options include yarn, felt strips, fabric scraps, ribbon, or even artificial flowers and leaves.
- Party Glasses / Sunglasses: This is where the magic truly happens! The right pair of glasses can instantly transform your planter’s persona, making it silly, sophisticated, or sassy. Explore dollar stores, party supply sections, or your own collection for fun, oversized, or quirky frames. You can often pop out the lenses if you prefer the eyes to be visible, or keep them for a cool, mysterious effect.
- Oil Pastels + Cotton Ball: (Optional, but highly recommended for adding natural-looking blush or rosy cheeks.) Gently rub a small piece of oil pastel onto a cotton ball, then lightly dab it onto the “cheeks” of your planter in circular motions. This technique creates a soft, flushed appearance. Powder blush or a heavily diluted pink craft paint can achieve a similar effect.
- Hot Glue Gun + Glue Sticks: Your indispensable tool for quickly and securely attaching the wooden nose, wiggle eyes, bandana, and glasses. Always use caution and follow safety guidelines when operating a hot glue gun.
- Optional Embellishments: Consider rhinestones for a touch of sparkle (like a bedazzled lip sticker!), fake eyelashes for dramatic eyes, adhesive vinyl for perfectly crisp eyebrows or lips, small earrings, miniature hats, or tiny bows. Let your imagination run wild!
The more you experiment with materials and details, the more wonderfully distinctive and personal your pot head planter collection will become!
Step-by-Step Instructions: Bringing Your Planter to Life
Follow these detailed steps to transform a basic terracotta pot into a captivating character. Before you begin, ensure your pot is clean, dry, and free of dust. Protect your workspace with newspaper or a drop cloth.
Step 1: Attach the Nose & Apply Base Coat
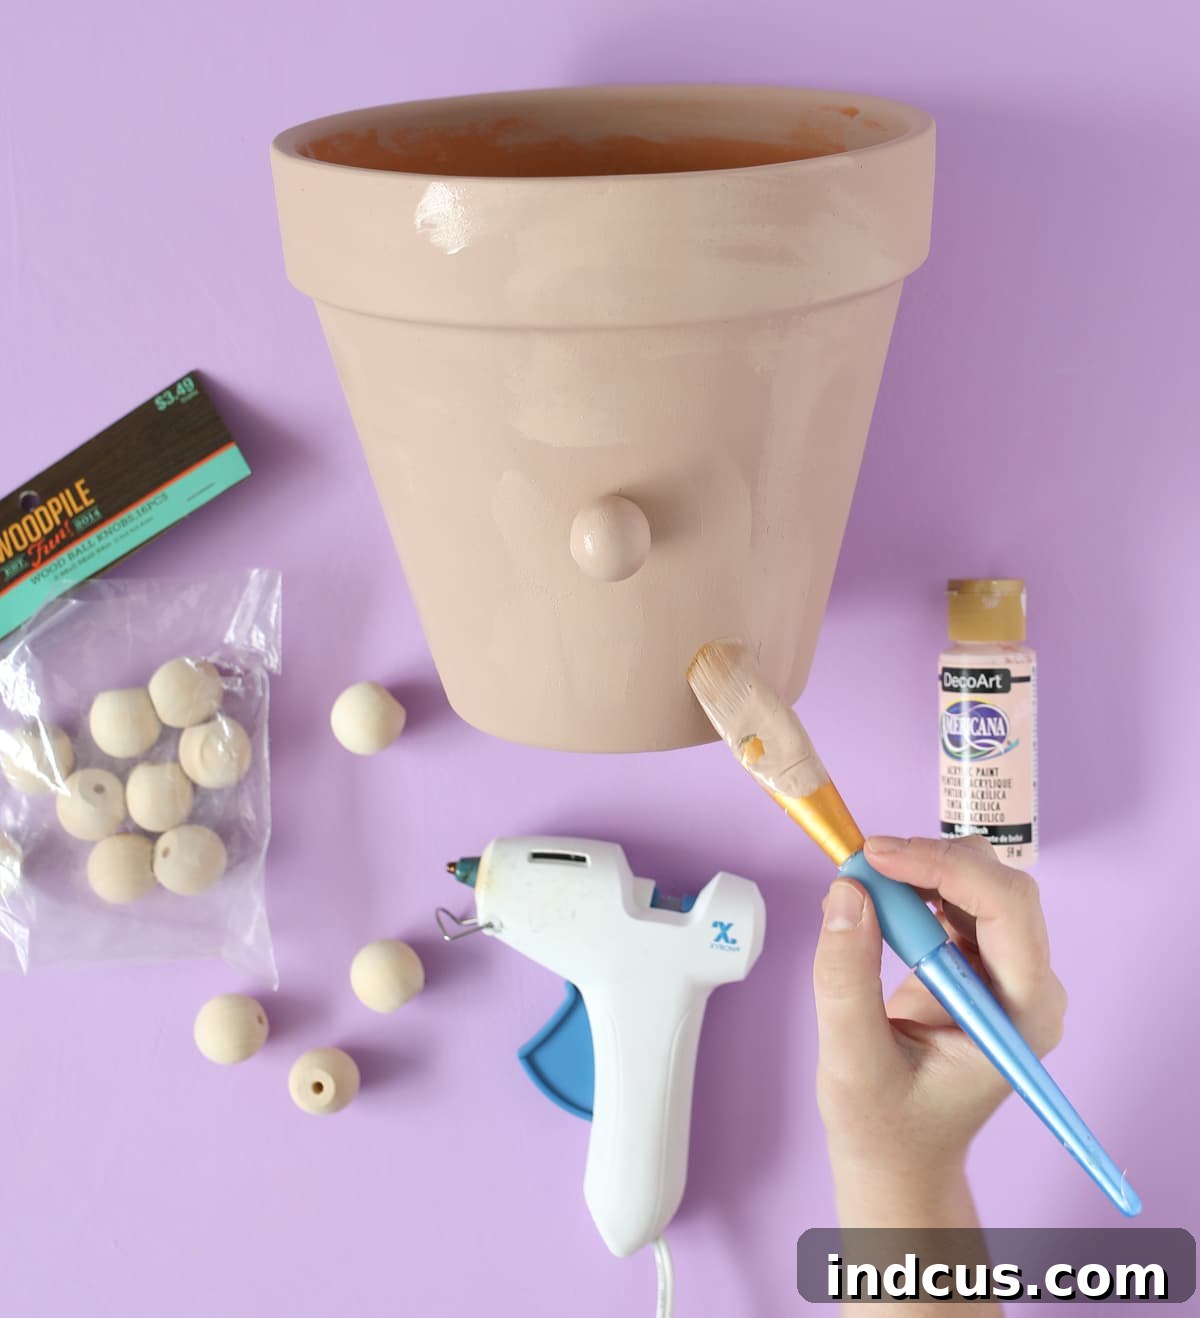
Start by securing the wooden ball knob, which will serve as your planter’s nose. Apply a generous amount of hot glue to the flat side of the bead. Carefully position it on the pot where you envision the nose to be, pressing firmly for several seconds until the glue sets completely. The flat base of the knob is crucial here for strong adhesion. Once the nose is firmly in place, it’s time to apply the base coat. Paint the entire pot (excluding the very bottom drainage hole if desired) with your chosen “skin color” acrylic paint. Apply paint evenly, ensuring full coverage. Depending on the paint’s opacity, you may need to apply a second coat after the first has dried. Allow each coat to dry thoroughly, typically 30-60 minutes, or as per the paint manufacturer’s instructions.
Step 2: Add Facial Features & Expressive Details
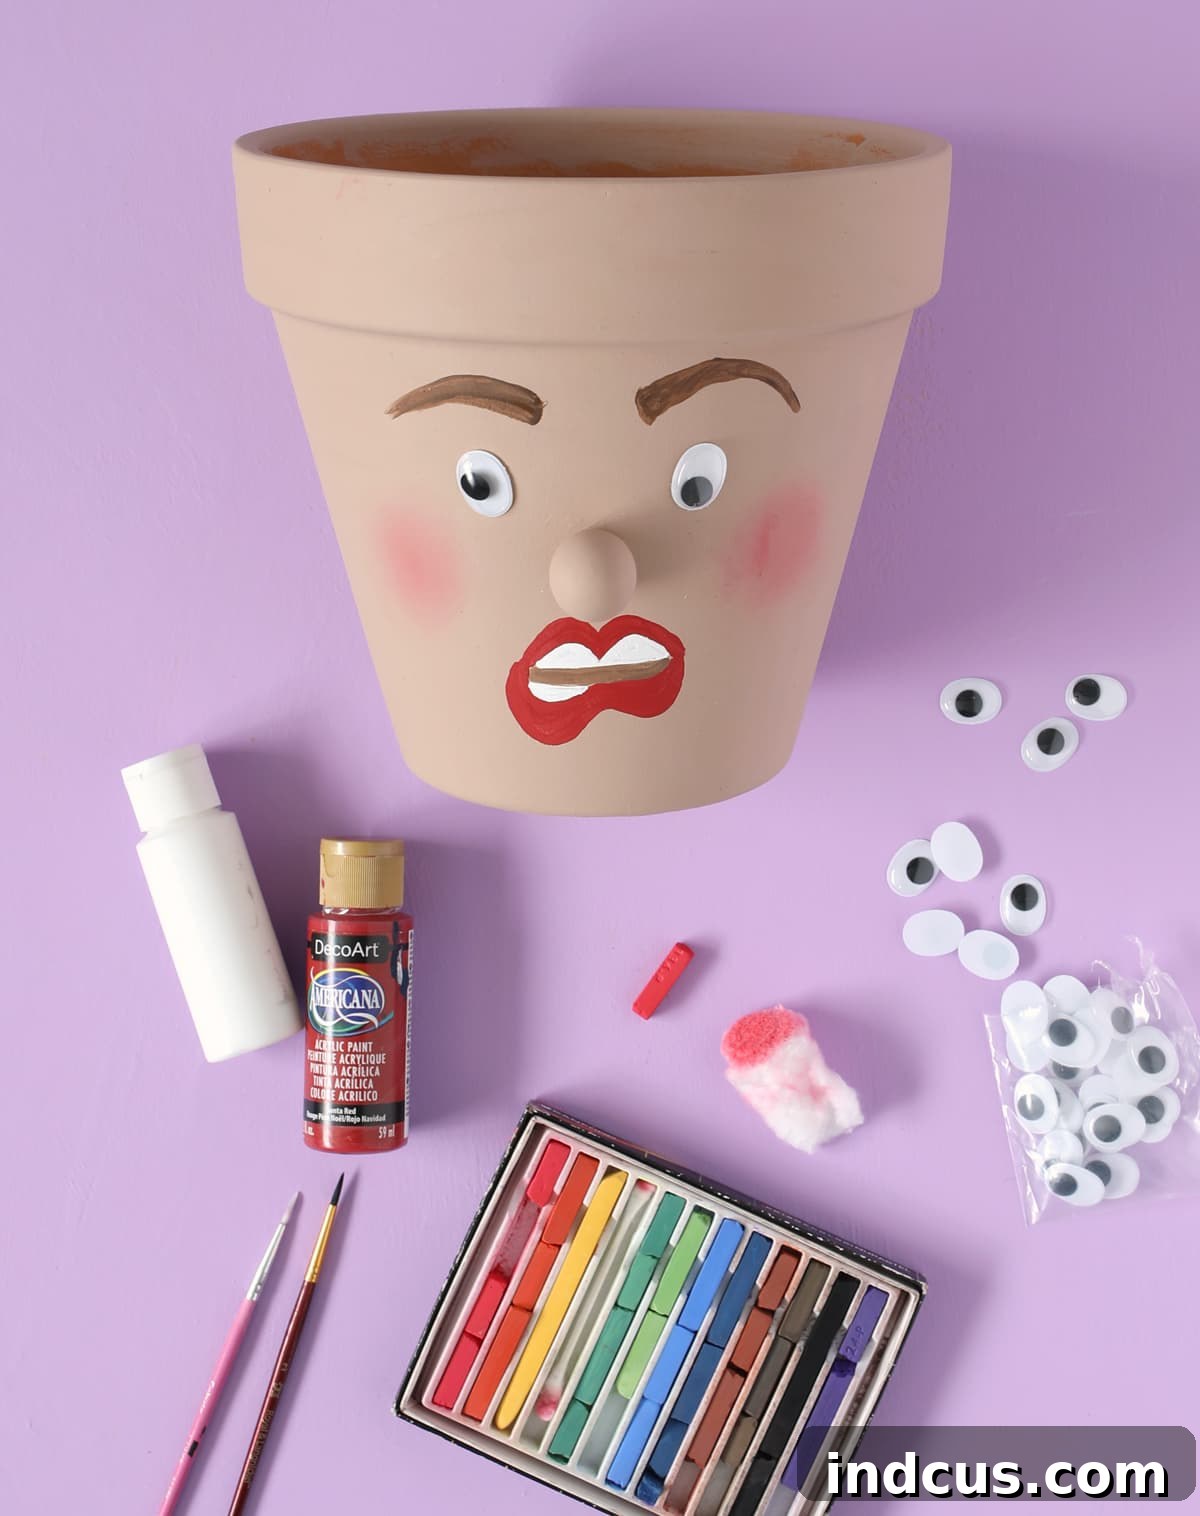
Once the base coat is completely dry, you can begin adding the facial features. Hot glue the wiggle eyes into place, positioning them just above the wooden nose. Experiment with spacing to create different expressions – closer together for an intense gaze, or wider apart for a more relaxed look. Next, using your fine-tipped brushes and craft paints, carefully paint the lips, teeth, and eyebrows. You can create various lip shapes (pouty, smiling, or a playful smirk), different eyebrow arches (curious, surprised, or serene), and even add delicate eyelashes. For a charming touch of blush, gently rub an oil pastel onto a cotton ball, then lightly dab and blend it in circular motions on the “cheeks” of your planter. This technique creates a soft, natural flush. Allow all painted details to dry thoroughly before proceeding.
Step 3: Crafting the Bandana “Hair” and Bow
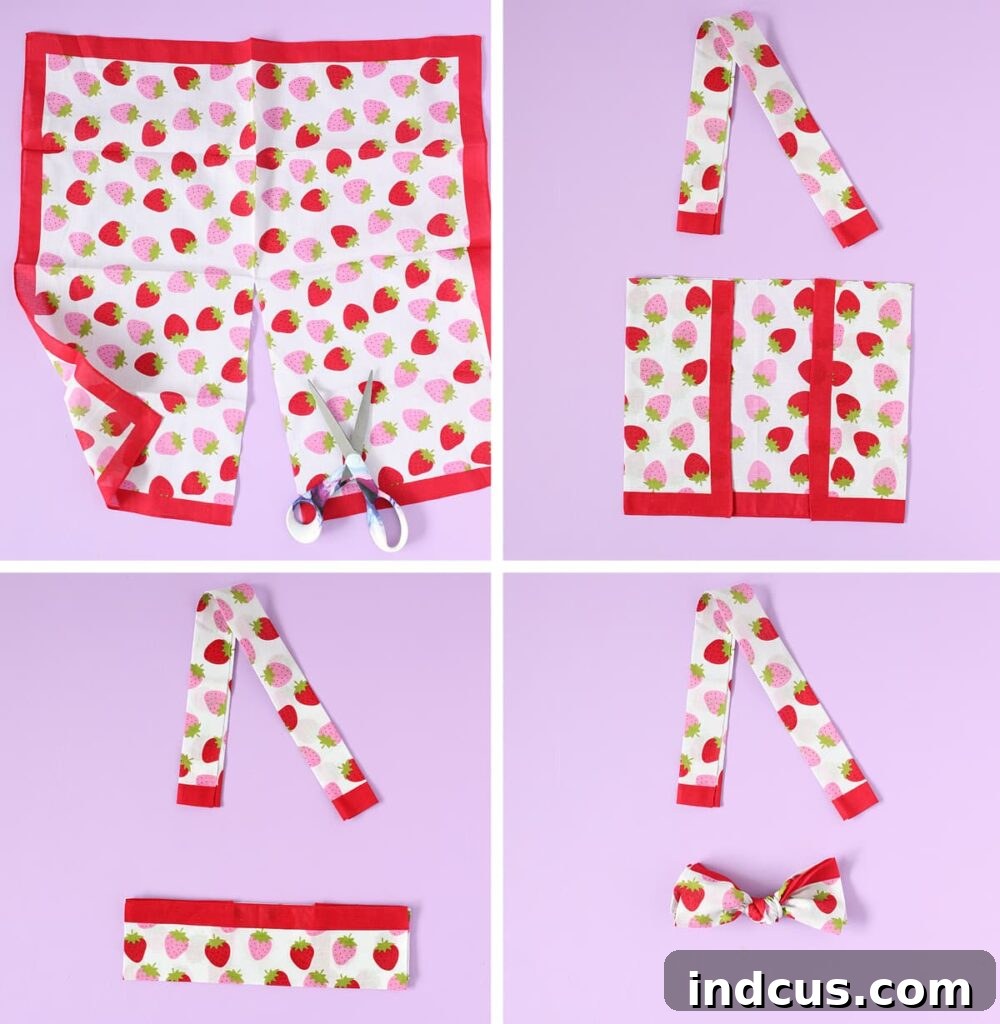
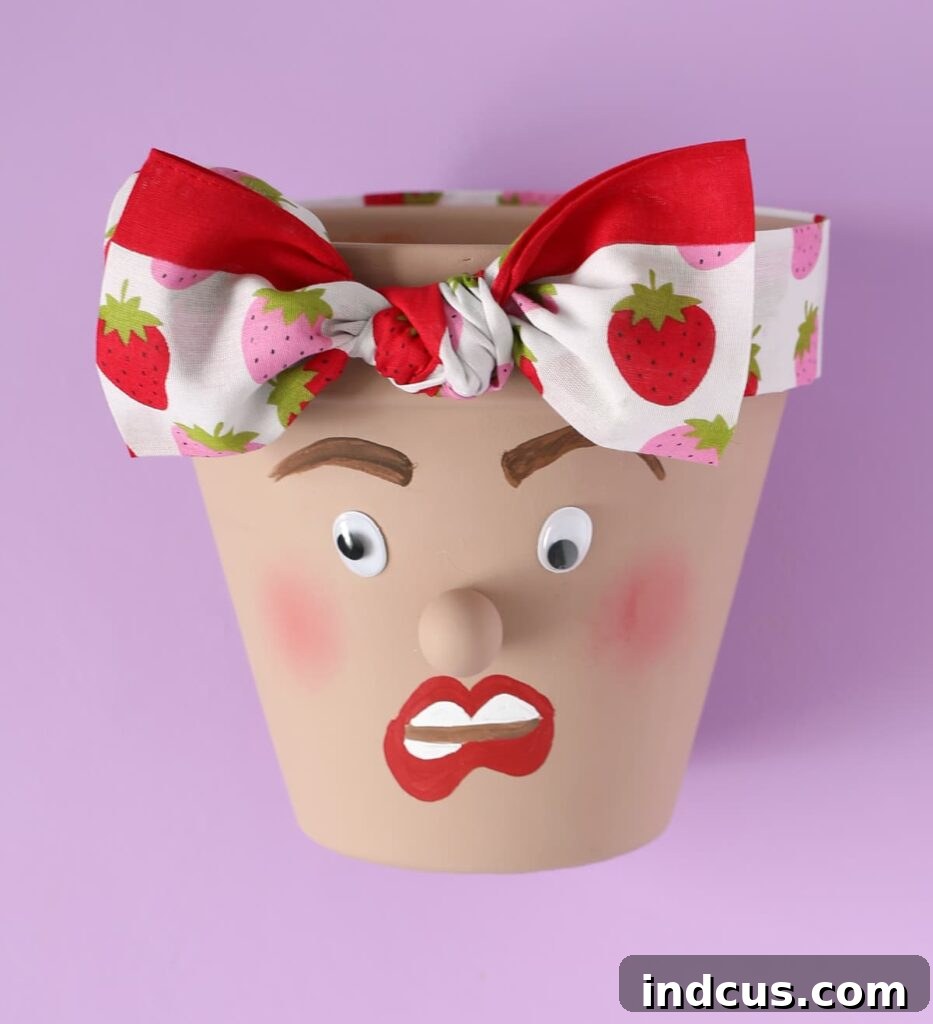
A standard bandana is typically not large enough to wrap around a medium-sized pot and tie into a substantial bow. To achieve the desired look, lay your bandana flat and cut it in half, either diagonally or straight down the middle, depending on the pattern. Take one half and tightly roll it into a long strip, ensuring any raw or fraying edges are tucked neatly inside. This strip will form the main headwrap. For the decorative bow, take the remaining half of the bandana. Fold the ends inwards towards the center, then fold the entire piece lengthwise into thirds to create a neat, compact strip. Once folded, tie this strip into a simple, attractive knot to form a perfect bow. Adjust the loops and tails until you’re satisfied with its shape and size. If using alternative materials like yarn or felt for hair, prepare them now for attachment.
Step 4: Secure the Bandana Headwrap
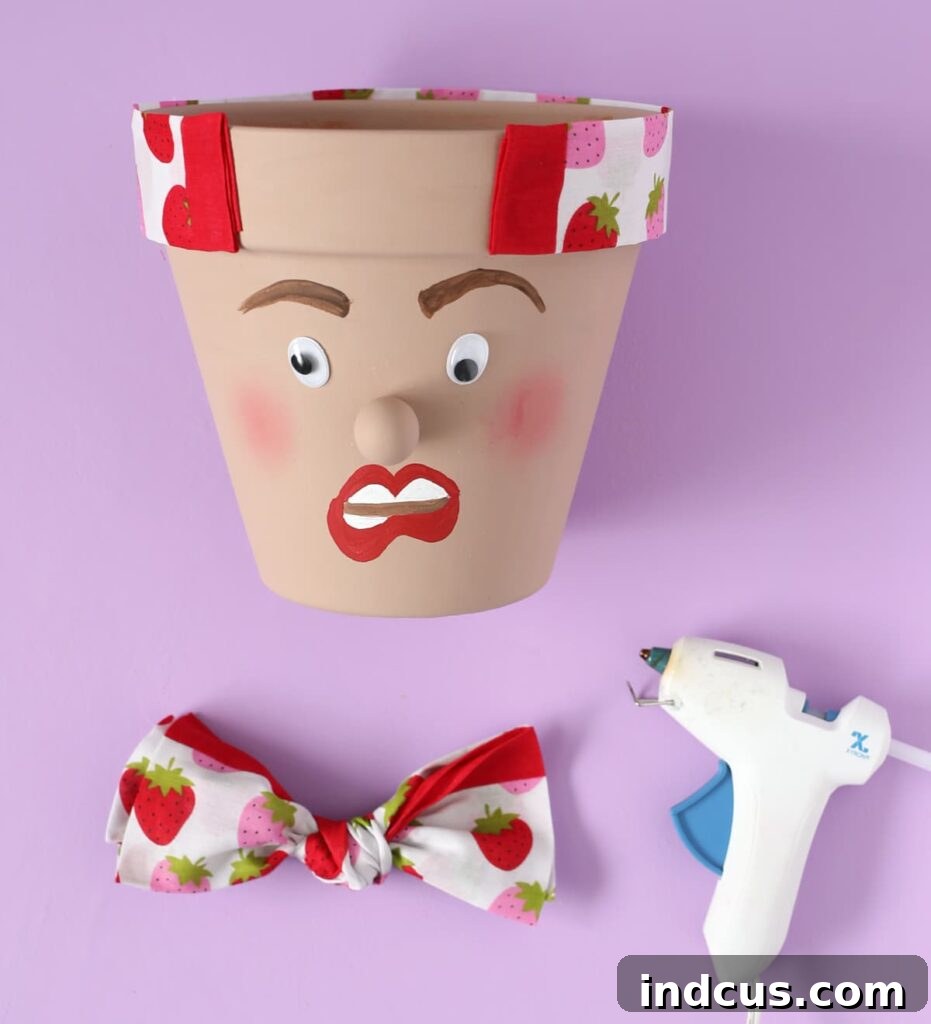
With your long, rolled-up bandana strip ready, carefully position it around the top edge of your pot, just above the facial features you’ve painted. Apply small, strategic dots of hot glue along the inner edge of the bandana strip and firmly press it onto the pot. Work in sections, securing the entire strip around the circumference of the pot, ensuring it sits snugly and evenly. This creates the “hairline” or headwrap for your planter, adding a vibrant pop of color and texture to its top. Make sure to leave a small, inconspicuous gap where the two ends of the bandana strip meet at the front; this is where your decorative bow will be placed to beautifully cover the seam and serve as a focal point.
Step 5: Attach the Decorative Bow
Now, take the perfectly tied bandana bow you prepared earlier. Position it centrally at the front of your planter, directly over the small gap where the ends of the headwrap meet. This placement not only adds a charming embellishment but also cleverly conceals any seams, giving your pot head planter a polished and intentional finish. Apply a generous amount of hot glue to the back of the bow’s knot and firmly press it onto the bandana strip and the pot. Hold it securely in place until the glue cools and sets. Feel free to fluff and adjust the bow’s loops and tails to your liking for maximum visual appeal and character.
Step 6: Don’t Forget the Glasses!
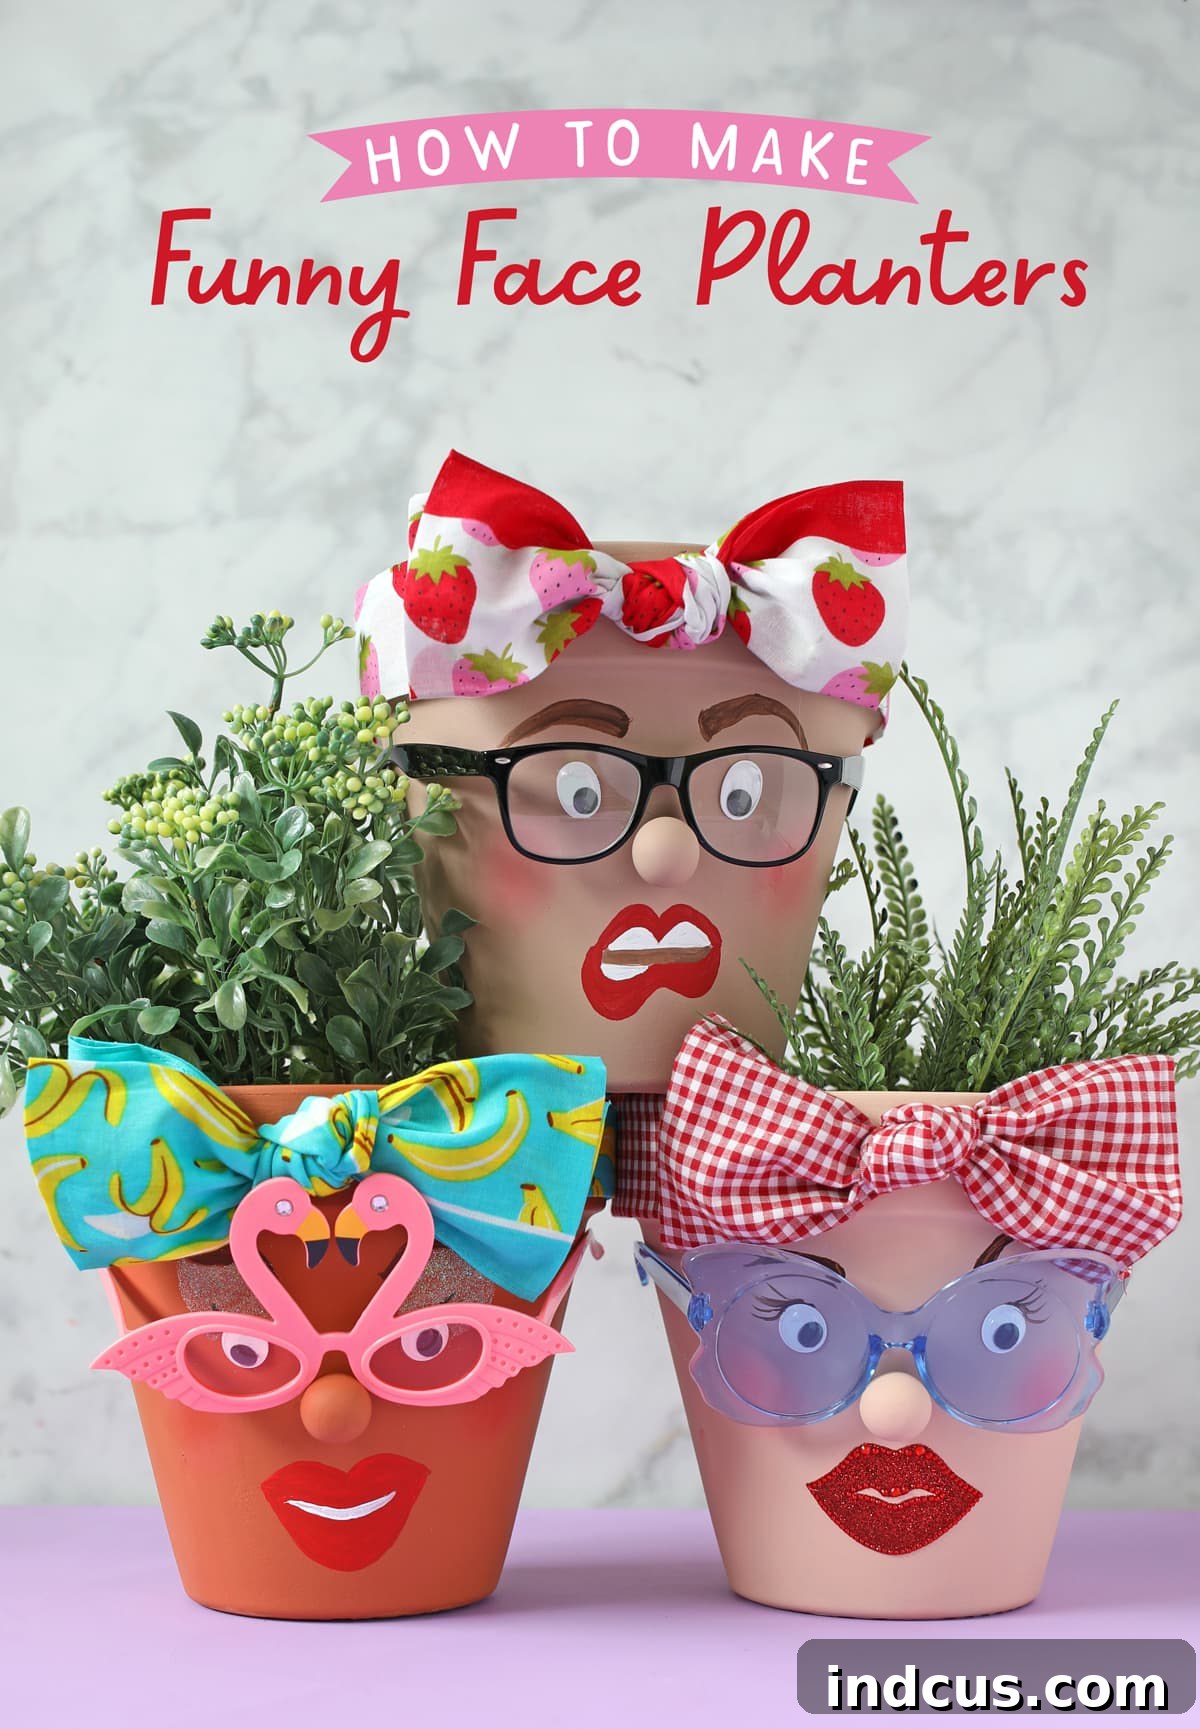
This is arguably the most transformative and exciting step, as adding glasses instantly injects personality and humor into your planter! Carefully place your chosen party glasses or sunglasses onto your planter’s face, positioning them to sit comfortably over the eyes and the wooden nose. Once you’re completely satisfied with the placement, use small, discrete dabs of hot glue to secure the arms of the glasses to the sides of the pot, and another tiny dab where the nose bridge meets the wooden nose. A few strategically placed glue points will ensure they remain firmly in place without shifting. Take a step back and admire how a simple pair of glasses can completely change the character of your creation – from scholarly to sassy, cool to comically surprised!
PRO TIP for Live Plants: Terracotta is a wonderfully porous material, which allows it to “breathe” and helps with drainage. However, this porosity also means water from the soil can seep through the clay and potentially damage your painted design or lead to mold over time. If you plan to house live plants in your pot head planters, it is crucial to seal the interior of the terracotta pot with a dedicated clay pot sealer or a water-resistant spray sealant before you even start painting. Apply the sealant according to the product instructions and allow it to cure completely before adding soil and plants.
And just like that, your incredibly charming and hilariously unique pot head planter is complete! Each one you create will undoubtedly develop its own distinct personality, making this project an endless source of creative joy. These quirky characters truly come to life and have a delightful way of bringing a smile to anyone’s face.
Unleash More Creativity: Advanced Personalization Tips
Once you’ve mastered the basics of crafting these charming pot head planters, the avenues for further customization are truly boundless. Here are some advanced tips and creative ideas to inspire your next unique creation:
- Diverse Hair Textures: Move beyond bandanas! Hot-glue strands of yarn in various colors and thicknesses to create wild, curly, braided, or sleek hairstyles. Felt can be cut into bangs, intricate updos, or even punk-rock mohawks. Raffia, twine, or even dried grasses can give a rustic, natural, or whimsical look.
- Expressive Eye Variations: Experiment with different types of eyes. In addition to wiggle eyes, you can paint detailed eyes with pupils looking in different directions for a mischievous or sleepy gaze. Attach false eyelashes for dramatic flair, or use small buttons, beads, or even googly eyes with glitter for extra sparkle.
- Unique Facial Features: Explore different nose shapes by using larger or smaller wooden balls, or sculpt a unique nose from air-dry clay. Add charming freckles with a fine-tipped brush, beauty marks, or even tiny painted “tattoos” for a truly edgy planter. Consider using adhesive vinyl for perfectly crisp eyebrows, mustaches, or lips.
- Accessorize Beyond Glasses: Embellish with miniature fabric flowers glued onto the headwrap, or create tiny earrings from beads and craft wire. A small fabric bow tie, a miniature scarf, or even a tiny crown could adorn the neck or top of the head for added personality.
- Themed Planters: Develop specific themes for your planters! Create a sophisticated professor with spectacles and a serious expression, a sun-loving diva with oversized sunglasses, a wise garden gnome, or a playful rock star. Your choice of accessories, paint colors, and facial expressions will define the theme.
- Glow-in-the-Dark Details: For a fun surprise, use glow-in-the-dark paint for the eyes, teeth, or outlines of facial features, making your planter come alive at night.
- Textured Finishes: Mix fine sand or a texturizing medium into your base paint for a unique, tactile finish on the “skin” or hair, adding depth and visual interest.
- More Dynamic Mouth Expressions: Instead of just simple lips, try painting an open mouth showing a full set of teeth, or even a whimsical tongue sticking out for a truly comical effect. That sparkly bedazzled lips sticker mentioned earlier is perfect for adding instant glam!
Care and Display of Your Unique Planters
To ensure your wonderfully unique pot head planters remain vibrant and charming for years to come, consider these simple care and display tips:
- Recommended Indoor Use: While many acrylic paints offer some outdoor durability, the embellishments like wiggle eyes, fabric bandanas, and hot glue may degrade faster when continuously exposed to harsh outdoor elements such as direct sunlight, heavy rain, or extreme temperature fluctuations. For the longest lifespan and best appearance, displaying your pot head planters indoors or in sheltered outdoor areas (like a covered porch or balcony) is highly recommended.
- Gentle Cleaning: To keep your planters looking fresh, gently dust them with a soft brush or a dry, lint-free cloth. If you need to clean a specific spot, use a very slightly damp cloth, being careful around painted areas that haven’t been sealed or around delicate embellishments.
- Watering Live Plants: If you’ve sealed your pots and planted live plants, water carefully to avoid splashing the painted face and accessories. Always allow excess water to drain completely from the bottom of the pot.
- Strategic Placement: Choose a spot where your planter’s personality can truly shine! They make fantastic focal points on windowsills, bookshelves, office desks, kitchen counters, or as quirky centerpieces on a patio table. Grouping several planters together creates an even more dynamic and delightful display, showcasing their individual characters.
Watch the Pot Head Planters Video Tutorial!
Prefer to see the crafting process in action? Our detailed video tutorial walks you through each step, offering visual guidance and additional tips. It’s a fantastic way to visualize the techniques and get inspired by the creative possibilities!
Turn a plain terracotta pot into a silly planter with a face on it.
Conclusion: Your Creative Journey Awaits!
Creating these delightful pot head planters is so much more than just a simple craft; it’s an invitation to infuse your home with personality, share moments of laughter with loved ones, and discover the immense satisfaction of bringing something truly unique to life with your own hands. From selecting the perfect pot to adding those final, comical touches with glasses, every step in this process is brimming with potential for creativity and joyous self-expression.
We sincerely hope this comprehensive guide has not only inspired you but also equipped you with the confidence and knowledge needed to embark on your own journey of crafting funny face planters. Don’t be afraid to experiment, embrace the charming imperfections that make each piece unique, and allow your imagination to lead the way. We can’t wait to see the wonderful, character-filled planters you bring into the world! Happy crafting, and remember to share your amazing creations with us!