
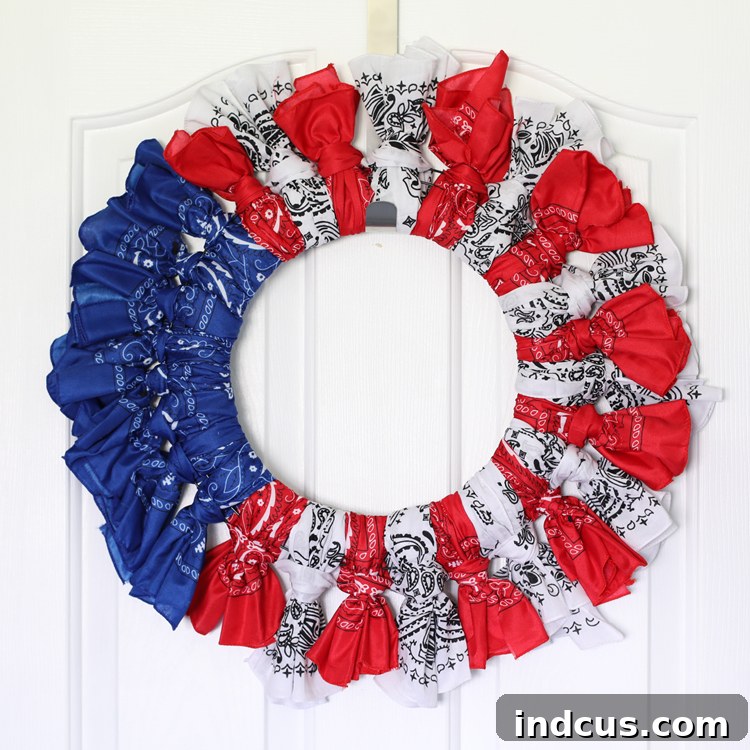
Craft a Charming Bandana Wreath: Your Ultimate DIY Guide
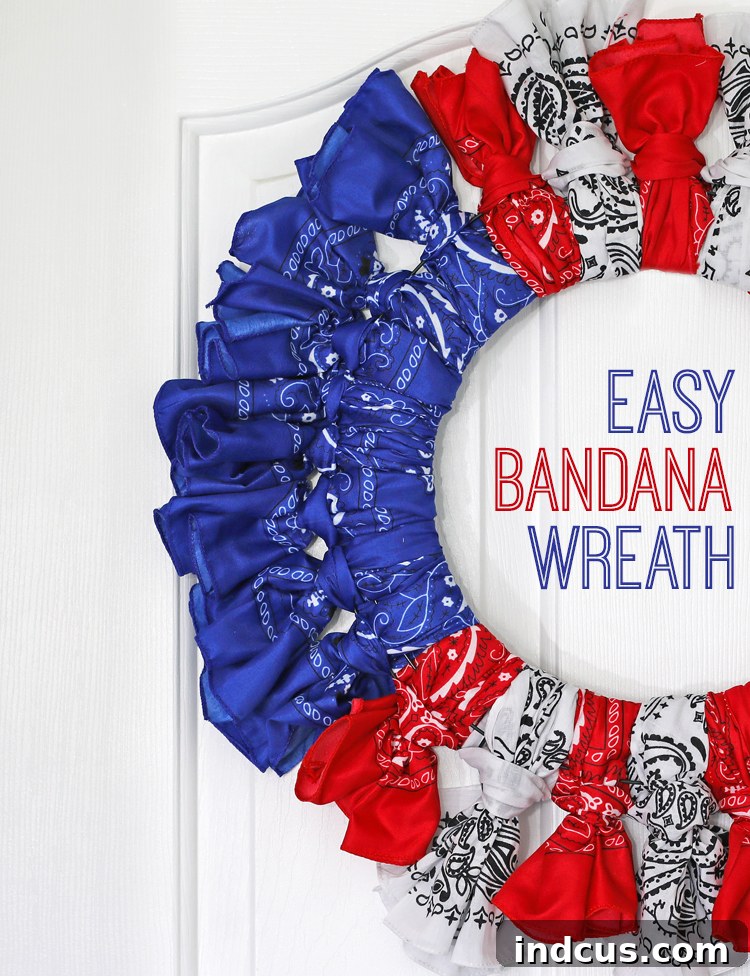
Are you searching for a delightful, budget-friendly, and effortlessly stylish way to add a splash of color to your home decor? Look no further than the charming bandana wreath! This fun and playful craft project is an absolute joy to create, perfect for anyone, from seasoned crafters to enthusiastic beginners. Whether you’re aiming to infuse some summery vibes into your space, celebrate a special holiday, or simply add a personalized touch, a handmade bandana wreath is an ideal choice. With its vibrant fabric ties, it promises to be a conversation starter and a true reflection of your creativity.
In this comprehensive guide, we’ll walk you through every step of making your very own bandana wreath. We’ll cover everything from selecting the perfect materials and mastering the simple knotting technique to offering a plethora of customization ideas that will inspire you to create a unique piece tailored to your taste. Get ready to transform ordinary bandanas into an extraordinary decorative accent that will brighten any door or wall!
As an Amazon Associate and affiliate partner, I earn from qualifying purchases made through links on this page. Some affiliate links have been used, which means I may receive a small commission if you make a purchase at no extra cost to you.
Why Choose a Bandana Wreath for Your Next Project?
Bandana wreaths have soared in popularity for several compelling reasons:
- Unmatched Versatility: While often associated with patriotic themes for events like the Fourth of July, Memorial Day, or Labor Day, bandana wreaths are incredibly adaptable. By simply changing the colors and patterns of your bandanas, you can create a wreath for any season, holiday, or even everyday decor. Think spring pastels, vibrant fall hues, spooky Halloween designs, or festive Christmas patterns.
- Budget-Friendly Craft: One of the biggest appeals of this project is its affordability. Bandanas are notoriously inexpensive, often found for a dollar or less, making this a perfect craft for those on a tight budget. Even the wreath form is typically very economical.
- Beginner-Friendly: You don’t need any prior crafting experience or special skills to make a beautiful bandana wreath. The technique is straightforward, repetitive, and incredibly forgiving, making it a fantastic project for adults and older children alike.
- Quick and Rewarding: This project can often be completed in a single afternoon, offering instant gratification. You’ll love seeing your creation come to life quickly, leaving you with a tangible piece of decor to display proudly.
- Customization Galore: Beyond just color, you can experiment with different bandana patterns (paisley, polka dots, solids), incorporate embellishments like ribbons, faux flowers, or small signs, and even vary the cutting style of your fabric strips to achieve different textures.
Essential Supplies for Your Bandana Wreath
Gathering your materials is the first exciting step! For this project, you’ll be pleased to know you only need a few basic items:
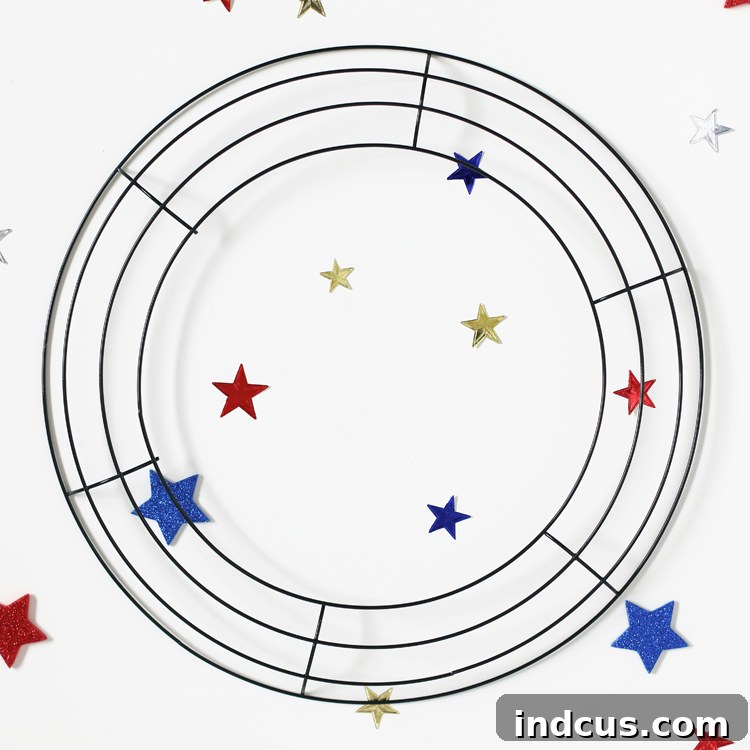
- 14-inch Wire Wreath Form: A standard 14-inch wire wreath form is a fantastic starting point for a moderately sized wreath. These are often available at craft stores, discount stores like Dollar Tree, or online. The wire frame provides a sturdy base for your bandana knots and helps maintain the wreath’s shape. If you opt for a larger wreath form (e.g., 18 or 24 inches), remember you’ll need more bandanas. Conversely, a smaller form will require fewer.
- 14 Bandanas (approximately 20-22 inches square): For the patriotic theme featured here, we recommend a breakdown of 5 white, 5 red, and 4 blue bandanas. This count is ideal for a 14-inch form. Standard bandana size is usually around 20-22 inches square; consistency in size will ensure a uniform look for your wreath.
- Sharp Fabric Scissors: While any sharp scissors will do, a dedicated pair of fabric scissors will make cutting through multiple layers of bandana fabric much easier and result in cleaner edges.
Where to Find Your Bandanas:
I often find great deals on bandanas at Dollar Tree, usually 2 for $1, making them incredibly affordable. However, stock can vary, so don’t hesitate to check other retailers. For a wider selection of colors and patterns, craft stores like Hobby Lobby or Joann Fabrics are excellent choices, typically offering bandanas for about $1 each. Online marketplaces are also a great resource if you’re looking for specific shades or bulk purchases.
Step-by-Step Guide: Crafting Your Bandana Wreath
Now, let’s get to the fun part – assembling your beautiful bandana wreath! Follow these simple steps for a perfect result.
Step 1: Preparing Your Bandanas
The first step involves preparing your bandanas to create the fabric strips that will adorn your wreath form. Accuracy here will help ensure a uniform and full appearance.
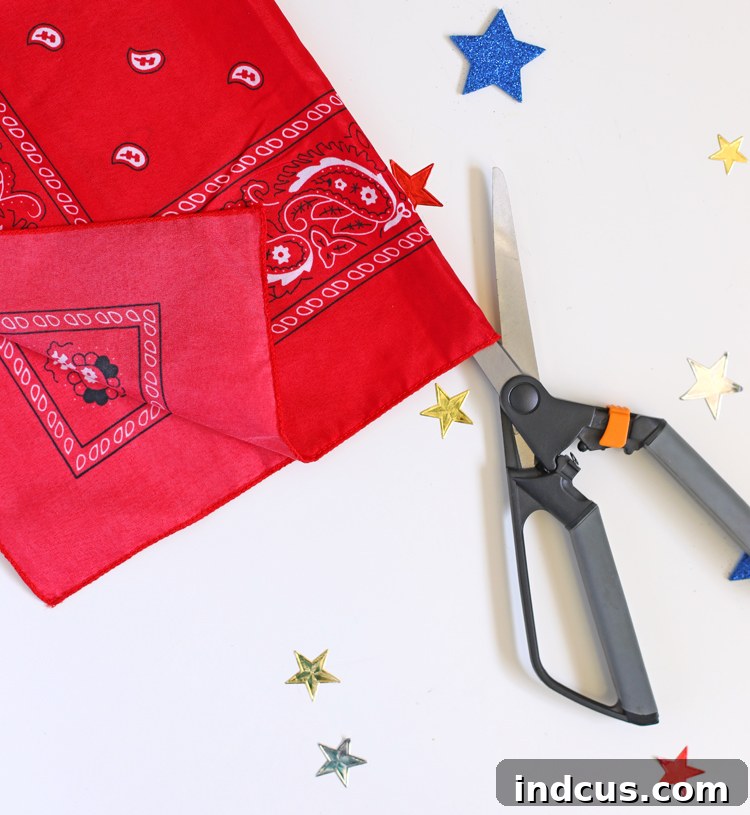
- Unfold and Flatten: Begin by completely unfolding each bandana and laying it flat on a clean surface. Smooth out any wrinkles to ensure a precise cut.
- Cut in Half: Carefully cut each bandana in half. You can cut them either diagonally from corner to corner or straight across the middle to create two long, skinny rectangular pieces. For a more traditional, fuller look, cutting straight across the middle (often resulting in strips roughly 10-11 inches wide by 20-22 inches long) is usually preferred. If you cut diagonally, you’ll get triangular pieces, which can create a different, perhaps more whimsical, texture. The key is consistency for all your strips.
- Repeat for all bandanas: Continue this process until all 14 (or however many you have) bandanas are cut into two strips each. You should now have 28 fabric strips ready for knotting.
Step 2: Mastering the Lark’s Head Knot
The Lark’s Head knot is the secret to a secure and voluminous bandana wreath. It might sound fancy, but it’s incredibly simple!
- Fold the Strip: Take one of your cut bandana strips and fold it in half lengthwise, bringing the two ends together.
- Position on Wreath Form: Place the folded strip underneath one of the wire rings of your wreath form, with the looped end pointing upwards and the two loose ends hanging below.
- Thread the Ends: Bring the looped end up and over the wire ring. Then, take the two loose ends of the bandana strip and thread them through the loop.
- Tighten the Knot: Gently pull the loose ends through the loop until the knot is snug against the wire form. You want it tight enough to hold its position but not so tight that it distorts the fabric or the wire. The knot should sit neatly on the wire, with the ends pointing downwards or outwards, creating a full, fluffy appearance.
This knot is fantastic because it’s self-securing and allows the bandana ends to flair out, adding wonderful texture and volume to your wreath.
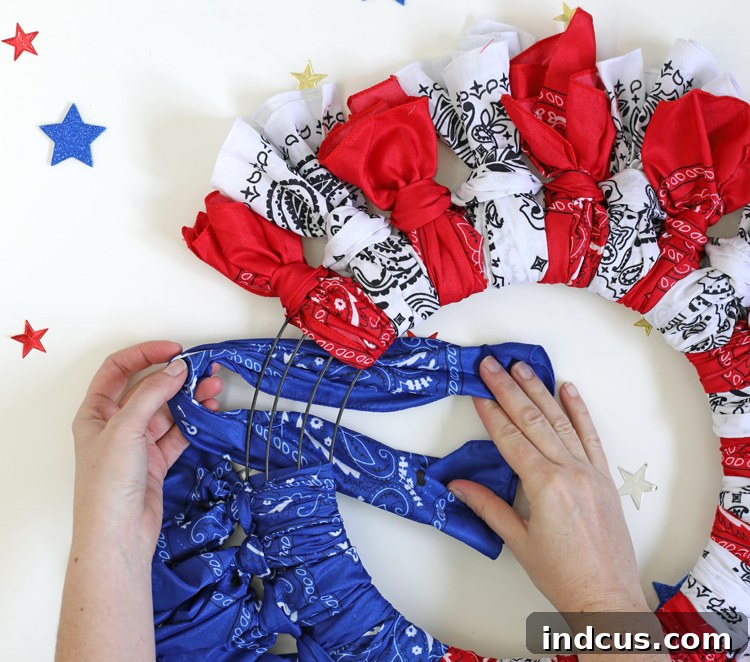
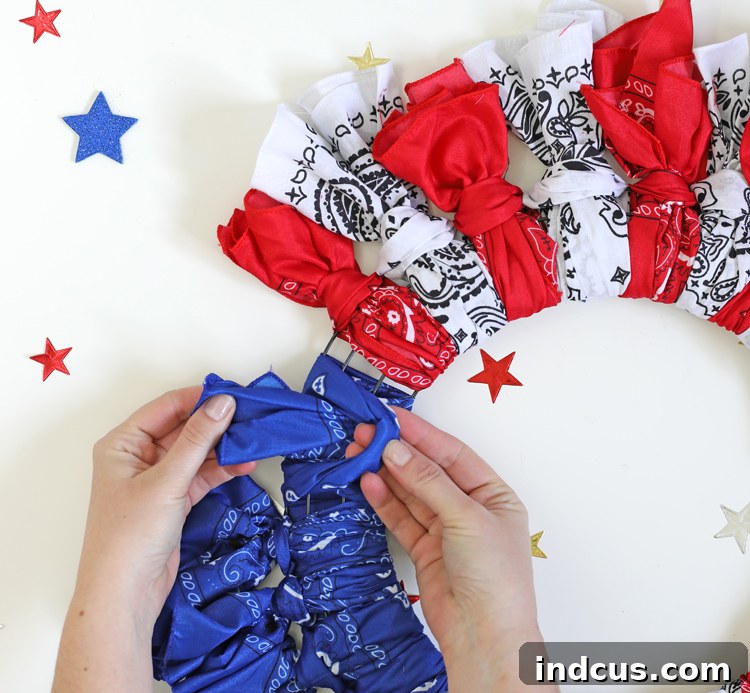
Step 3: Filling the Wreath Form with Color
With your knotting technique perfected, it’s time to fill your wreath form and watch your design come to life!
- Repeat the Process: Continue tying bandana strips onto the wire wreath form using the Lark’s Head knot. The goal is to cover the entire form densely, leaving no gaps.
- Strategic Placement: For a patriotic theme mimicking the American flag, you might choose to create a section of blue bandanas (representing the field of stars) and then alternate red and white bandanas around the rest of the wreath (representing the stripes). For example, you could dedicate about a quarter to a third of the wreath to blue, then use a pattern like red-white-red-white for the remaining section.
- Density and Fullness: To achieve a truly full and fluffy wreath, push the knots together snugly as you go. Don’t be afraid to use all your bandana strips; the more you add, the lusher your wreath will appear. You might even use two strips per wire section for extra density if your wreath form has multiple wires.
- Consistency is Key: Try to maintain consistent spacing between each knot and ensure all your knots are pulled to a similar tightness. This will contribute to a more professional and polished finished look.
Step 4: The Finishing Touches and Embellishments
You’re almost there! A few final adjustments will make your bandana wreath picture-perfect.
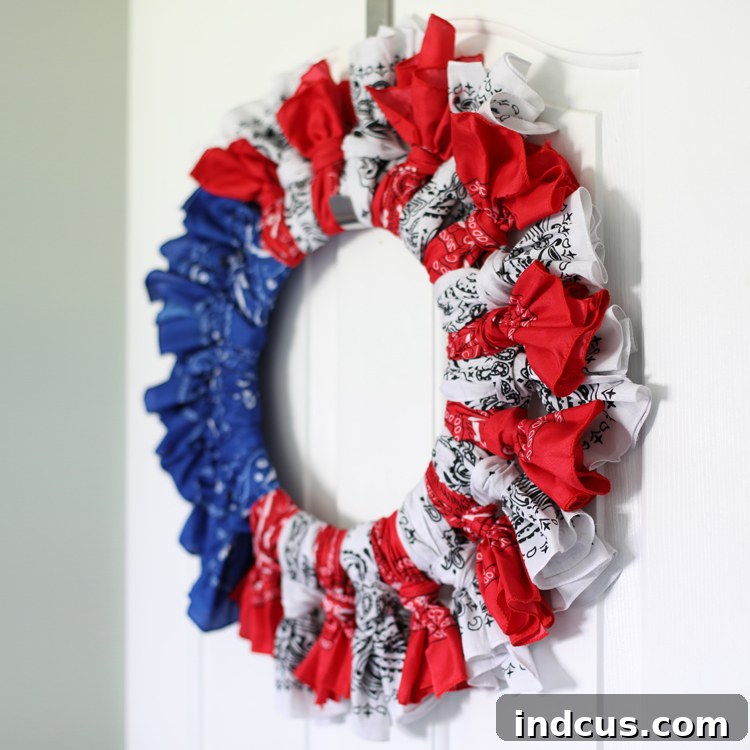
- Tighten and Fluff: Once all the bandanas are tied, take a moment to go around the wreath, gently tightening any loose knots and fluffing out the bandana ends. You want the fabric to spread out, creating maximum volume and a soft, inviting texture. Arrange the strips so they cover the wire form completely from all angles.
- Optional Security with Hot Glue: If you plan to hang your wreath outdoors, in a high-traffic area, or simply desire extra durability, you can secure each knot with a tiny dab of hot glue. Apply a small bead of glue underneath each knot where it meets the wire form. This step is not strictly necessary for indoor wreaths, as the Lark’s Head knot is quite secure, but it provides peace of mind.
- Add Embellishments: This is where you can truly personalize your wreath! Consider adding:
- A decorative bow made from complementary ribbon.
- Small faux flowers or greenery tucked into the bandanas.
- A lightweight wooden sign with a festive message (e.g., “Welcome,” “Patriotic,” “Hello Summer”).
- Small themed ornaments (e.g., mini flags for Fourth of July, tiny pumpkins for fall).
Ensure any embellishments are securely attached using floral wire, hot glue, or by tying them directly into the wreath.
- Add a Hanger: If your wreath form doesn’t have a built-in hanger, tie a loop of sturdy twine, ribbon, or floral wire to the top of the wreath for easy hanging.
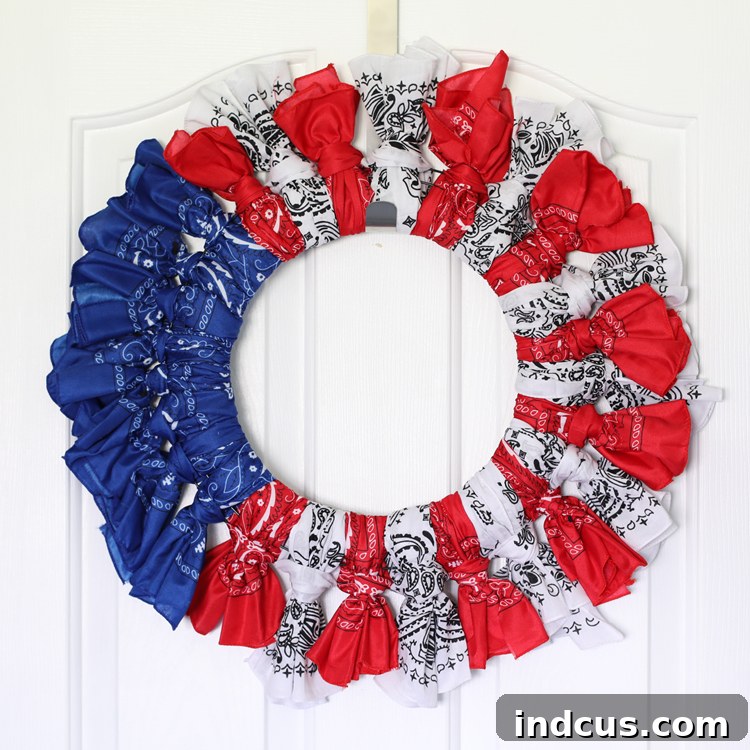
And there you have it! Your stunning, handmade bandana wreath is complete. Isn’t that a wonderfully fun and satisfying project? It’s remarkably easy, yet yields such an adorable and eye-catching result. This craft makes for a fantastic activity to enjoy with friends during a crafting session, or as an engaging project for kids at summer camp, creating lasting memories along with beautiful decor.
Creative Customization Ideas for Your Bandana Wreath
The beauty of the bandana wreath lies in its endless possibilities for personalization. Here are some ideas to inspire your next creation:
- Seasonal Themes:
- Spring: Pastel pinks, blues, yellows, and greens. Add faux tulips or small bird figurines.
- Summer: Bright neon colors, tropical patterns, or nautical themes with red, white, and blue stripes and anchors.
- Fall: Rich oranges, reds, browns, and deep greens. Incorporate small pumpkins, leaves, or burlap accents.
- Winter/Holidays: Red, green, silver, gold, and white. Plaid bandanas work wonderfully. Add small bells, pinecones, or faux berries.
- Holiday Celebrations:
- Halloween: Orange, black, purple, and green bandanas. Attach small plastic spiders, bats, or spooky eye-balls.
- Valentine’s Day: Various shades of red, pink, and white. Tuck in heart-shaped decorations.
- Easter: Soft pastels. Incorporate mini Easter eggs or bunny ears.
- Everyday Decor:
- Farmhouse Chic: Neutral tones, buffalo plaid, denim blue, or subtle patterns.
- Rustic Charm: Earthy colors, frayed edges, and natural embellishments like twine or dried flowers.
- Kids’ Rooms: Bright primary colors, bandanas with cartoon characters, or themed patterns to match their room decor.
- Varying Textures: Don’t limit yourself to just cotton bandanas. Experiment with different fabrics like linen, denim, or even small fabric scraps for a more eclectic look.
Tips for Success and Longevity
- Working in Sections: If your wreath form has multiple concentric rings, consider tying bandanas to all rings simultaneously rather than filling one ring at a time. This helps distribute the weight and fullness evenly.
- Keep it Kid-Friendly: This is a fantastic craft for children (with adult supervision for cutting). Let them choose the colors and help with the knotting. It’s great for developing fine motor skills.
- Care and Maintenance: For indoor wreaths, simply dust occasionally. If your wreath is outdoors, especially in direct sunlight or harsh weather, colors may fade over time. Consider a clear UV-protective spray for extended outdoor use, or bring it indoors during inclement weather. Bandana wreaths are generally quite durable but can get soggy in heavy rain.
- Troubleshooting:
- Gaps Appearing: If you see gaps, gently push the existing knots closer together. If that’s not enough, cut a few extra bandana strips and tuck them into the sparse areas using the same knotting technique.
- Uneven Fullness: Ensure you’re pulling each knot with similar tension and distributing the strips evenly around the form. Fluffing at the end helps disguise minor inconsistencies.
The big question is: what color of bandanas are you going to choose for your next creation? The possibilities are truly endless, and the satisfaction of creating something beautiful with your own hands is unmatched.
Looking for other easy, festive, and inspiring craft ideas? Here are a few of my favorites to get your creative juices flowing:
Easy Fourth of July Luminaries
Patriotic Mason Jar Sign







