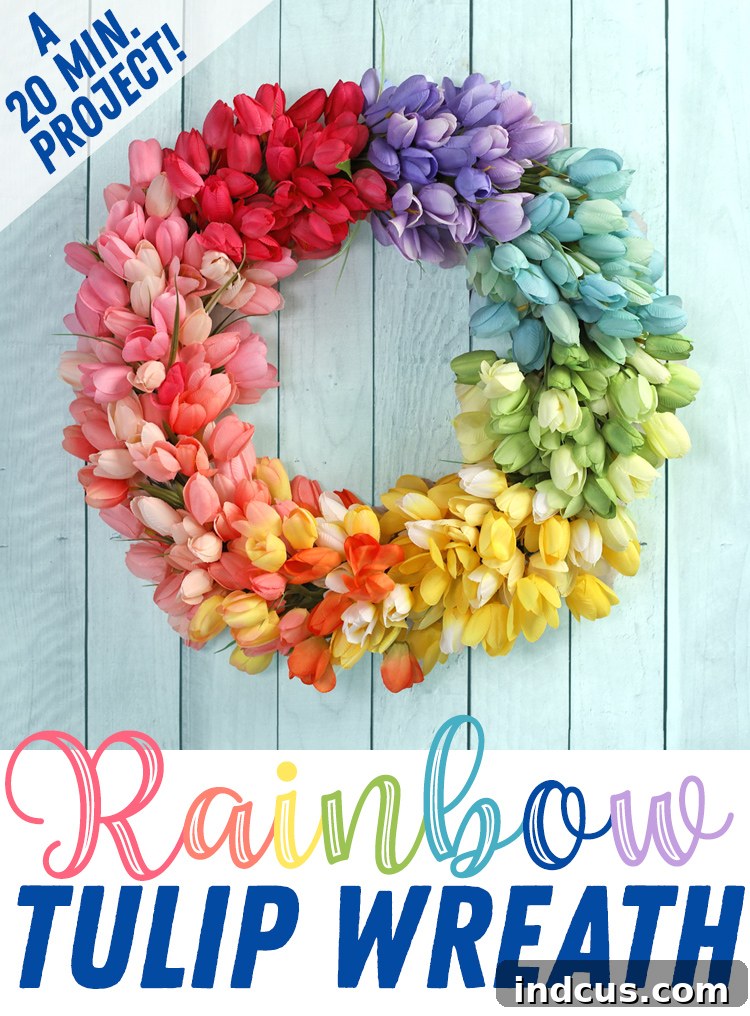
Craft a Stunning Rainbow Tulip Wreath in Under an Hour: Your Ultimate DIY Guide
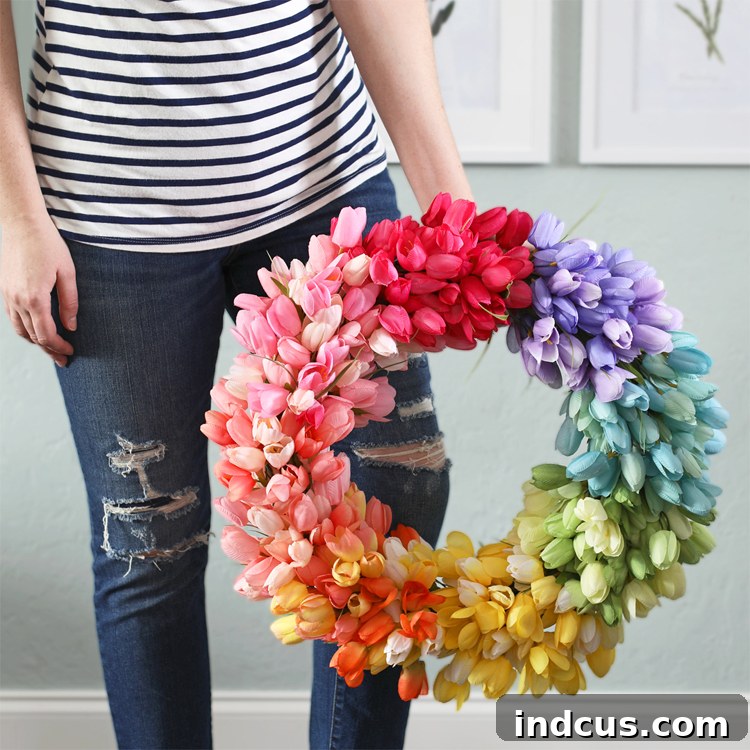
Embrace Spring with a Burst of Color: Why a Rainbow Tulip Wreath?
As the days grow longer and nature awakens from its winter slumber, there’s an undeniable urge to infuse our homes with the vibrant energy of spring. Nothing quite captures this spirit like the radiant beauty of tulips, and when arranged in a mesmerizing rainbow spectrum, they become an irresistible symbol of joy and renewal. This project isn’t just about creating a decoration; it’s about bringing a piece of sunshine and happiness right to your doorstep. I recently embarked on a quest for a new spring wreath, and upon discovering the delightful mini tulip bunches available in every shade imaginable at Michaels, I knew exactly what I had to create: a magnificent rainbow tulip wreath. It’s an easy, budget-friendly craft that promises a high-end look without the effort, and it’s guaranteed to be a conversation starter.
Forget complex crafting techniques and hours of painstaking work. This DIY tulip wreath project is, without exaggeration, one of the quickest and most satisfying crafts I’ve ever undertaken. Despite its incredibly simple construction, the finished product exudes an aura of sophistication and charm that looks far more expensive than it is. It’s a true labor of love that feels like a million bucks, radiating pure happiness. If my personality could be distilled into a single piece of decor, this vibrant, cheerful wreath would undoubtedly be it. I absolutely adore it!
Ready to add a splash of springtime brilliance to your home? Let’s dive into how you can craft your very own breathtaking rainbow tulip wreath in practically no time at all. Please note: This post may contain affiliate links, meaning if you make a purchase through my links, I may earn a small commission at no extra cost to you.
Gathering Your Essential Supplies for a Vibrant Tulip Wreath
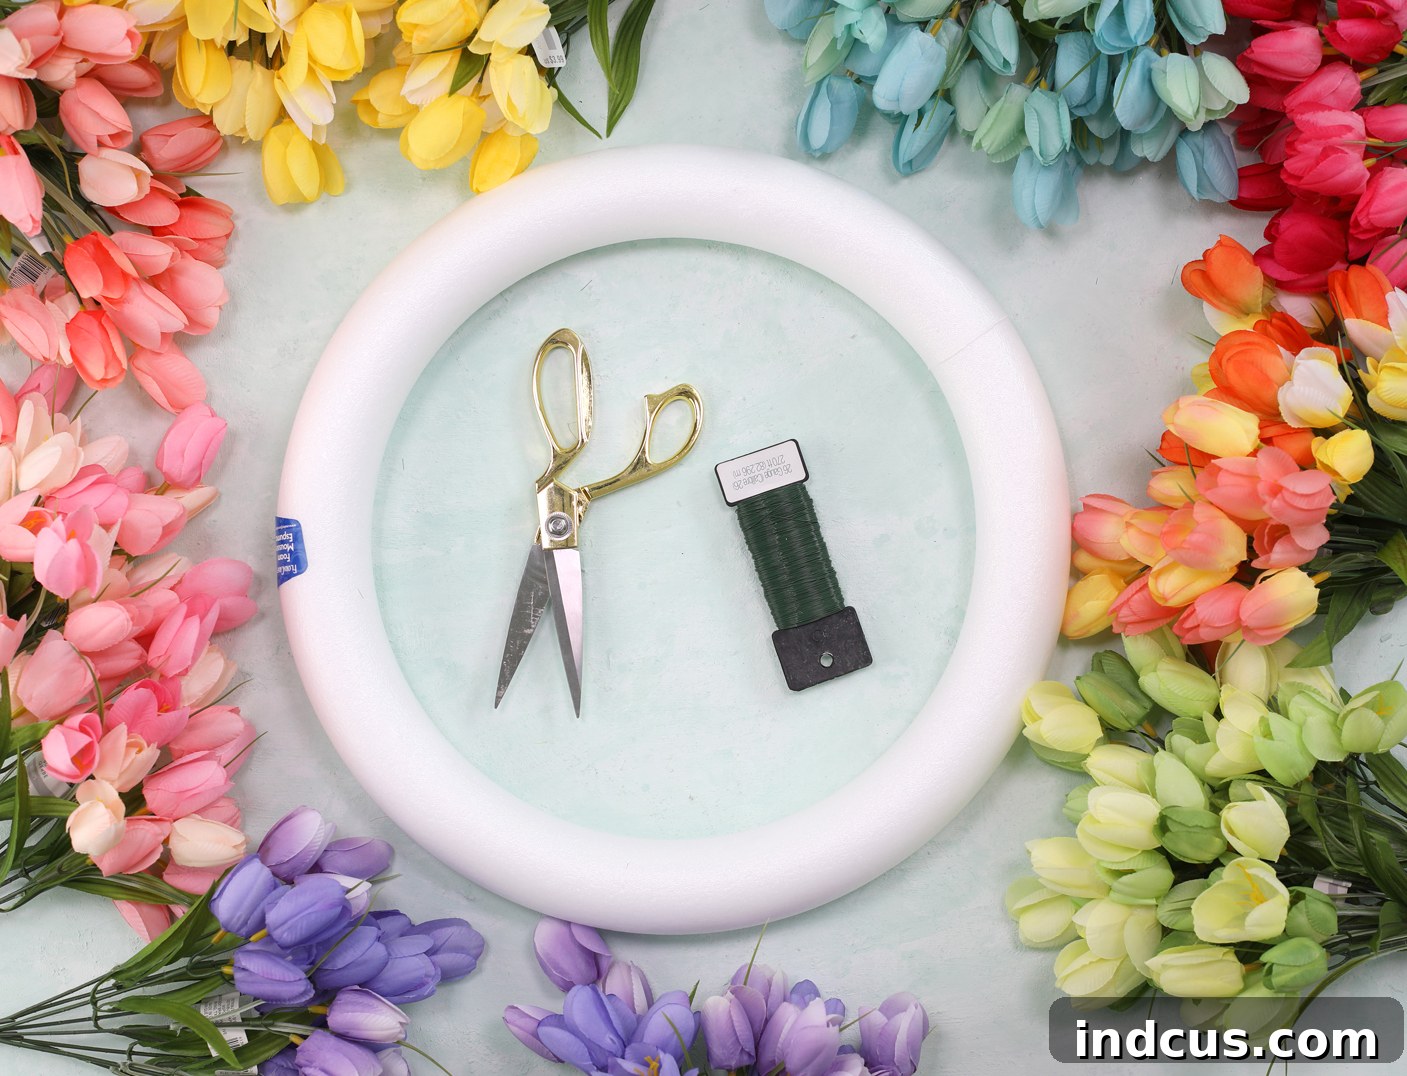
Before we begin transforming simple materials into a stunning decorative piece, it’s crucial to gather everything you’ll need. The beauty of this project lies in its simplicity and the readily available nature of the supplies. Here’s a detailed list:
- Mini Tulip Bushes: These are the stars of our show! I highly recommend opting for the smaller-sized tulip bunches, often labeled as “mini” or “artificial tulip bundles,” rather than the larger, full-sized individual tulip stems. The mini bunches provide a much fuller, more cohesive look when wired together on the wreath form. You’ll want a full spectrum of colors to create that gorgeous rainbow effect. For a lush, dense 15-inch wreath, I used two bunches of each rainbow color (red, orange, yellow, green, blue, indigo/dark purple, violet/light purple, plus often a pink to complete the vibrant palette, totaling 16 bunches). Michaels is an excellent source for these, especially during spring crafting seasons. However, similar mini tulip bunches can be found at other craft stores like Hobby Lobby or Joann Fabrics, or online retailers.
- Foam Wreath Form (15 inches): A sturdy foam wreath form provides the perfect base for our project. The 15-inch size offers a substantial presence for most front doors or interior walls. You can find these at any craft supply store. If you prefer a smaller wreath or want to economize on tulips, you could certainly use a 10-inch or 12-inch form, which would likely require only one bunch of each color for a lovely, albeit slightly less dense, arrangement. The choice of size ultimately comes down to your personal aesthetic and the desired impact.
- Floral Wire: Essential for securely attaching the tulip bunches to the wreath form. Green floral wire is ideal as it blends seamlessly with the stems, making it virtually invisible once the wreath is complete. Opt for a medium-gauge wire that is strong enough to hold the bunches but flexible enough to wrap easily. You’ll find spools of floral wire in the floral or crafting section of any hobby store.
- Sharp Scissors: A good pair of sharp scissors is necessary for snipping the floral wire and potentially trimming any stray leaves or stems for a cleaner finish. Standard craft scissors will suffice.
To give you a better idea of what to look for, here’s an in-store visual of the mini tulip bunches that worked perfectly for this project. They are compact, vibrant, and ideal for creating a dense, layered look.

Remember, while I used two bunches per color for a total of 16 bunches to achieve a truly opulent and full 15-inch wreath, you can adjust the quantity based on your wreath form size and desired density. A smaller wreath form (e.g., 10-12 inches) might only require one bunch per color, significantly reducing the material cost while still creating a beautiful, charming wreath. It’s all about personal preference and the visual statement you wish to make.
For a visual walkthrough of this simple project, make sure to scroll down and watch the video tutorial! It provides an excellent complement to these written instructions.
Step-by-Step Wreath Assembly Guide: Crafting Your Rainbow Tulip Masterpiece
Now that you have all your supplies ready, let’s assemble this stunning rainbow tulip wreath. You’ll be amazed at how quickly this beautiful piece comes together. Remember to arrange your tulip bunches by color beforehand to ensure a smooth transition through the rainbow spectrum as you work around the wreath, following the classic ROYGBIV order or your preferred vibrant sequence.
Step 1: Laying the Foundation – Attaching the First Tulip Bunch
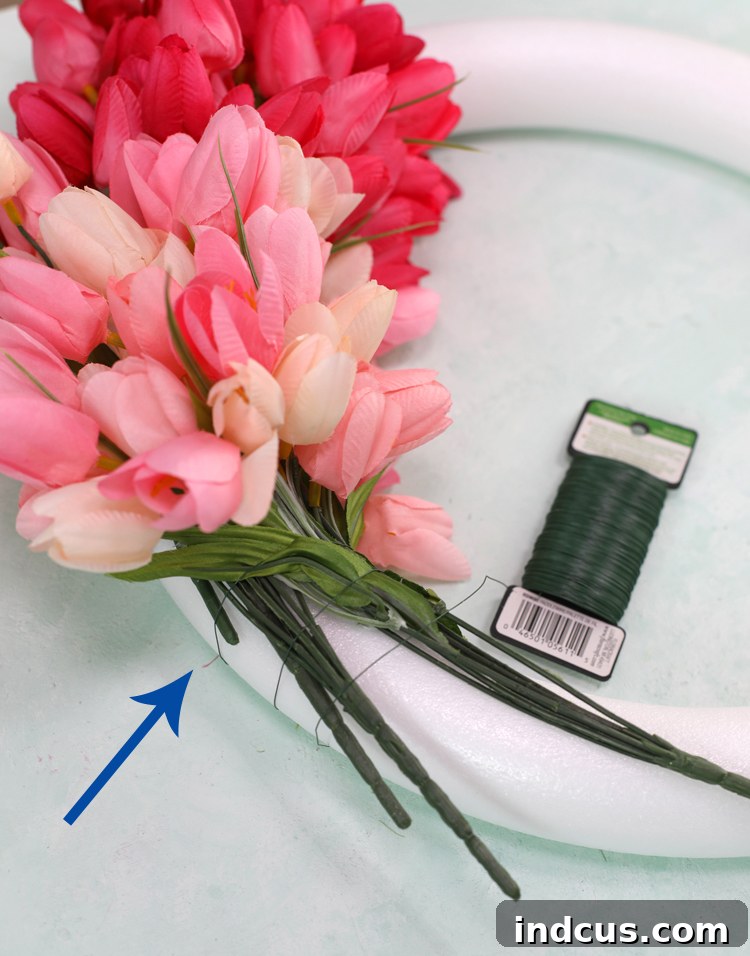
Begin by selecting your first color of mini tulip bunch. Lay one full bunch of tulips directly on top of your foam wreath form. Position it so that the flowers are pointing in the direction you want your wreath’s flow to go (typically counter-clockwise for a natural, cascading effect), with the stems extending along the wreath form. Take your floral wire and securely wrap it around the stems of the tulip bunch and the wreath form simultaneously. Aim for at least 3-4 tight wraps to ensure the bunch is firmly anchored and won’t shift. The goal here is stability and to hide the wire as much as possible beneath the leaves and flowers. Don’t worry about perfection just yet; subsequent layers will cover any minor imperfections.
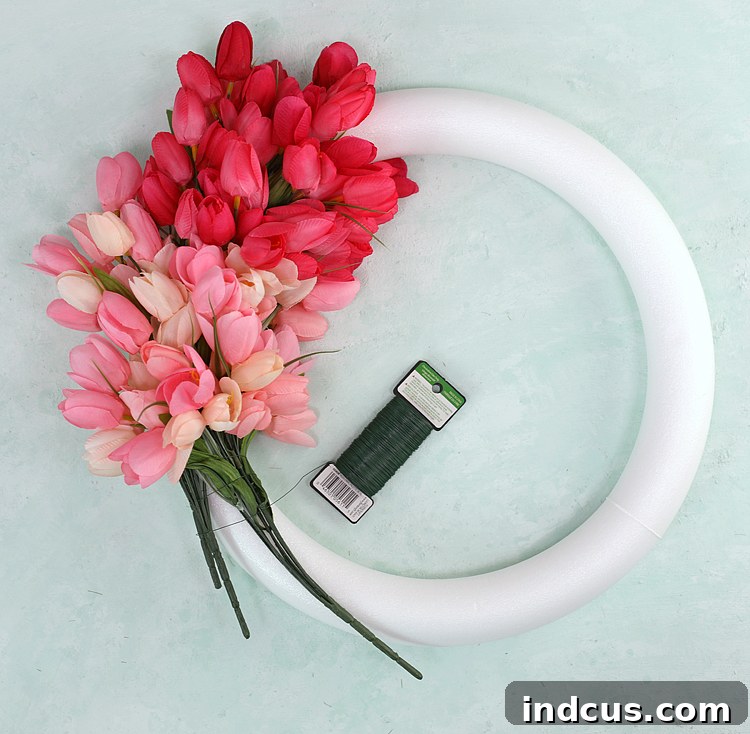
Step 2: Building the Rainbow – Layering Subsequent Bunches
Once your first bunch of tulips is securely in place, it’s time to add the next color in your rainbow sequence. Take the second bunch of tulips (your next color) and position it slightly staggered down from the first bunch, overlapping the stems of the previous bunch. This staggering technique is crucial for creating a full, lush appearance and seamlessly hiding the floral wire and stems from the prior bunch. Wrap your floral wire around the stems of this second bunch and the wreath form, ensuring you also catch and secure the ends of the stems from the previous bunch underneath. This helps to keep all the stems pushed down and creates a smooth, continuous flow of flowers around the wreath. Continue this process, adding bunches in your chosen rainbow order, ensuring each new bunch slightly overlaps the last, creating a dense, beautiful texture.
Step 3: Completing the Circle – The Seamless Finish
Continue to repeat the layering process, working your way all the way around the foam wreath form. Maintain your rainbow color progression, ensuring consistent spacing and overlap for a harmonious look. As you approach the final section, you’ll need to create a seamless connection with your very first bunch of tulips. When you reach the last bunch of flowers, carefully tuck its stems underneath the first bunch you attached. This creates a continuous, unbroken circle of vibrant tulips, making it look as though the flowers simply flow into one another. Secure this final bunch with floral wire, making sure to firmly anchor the tucked-in stems. Once you’re satisfied with the security and appearance of the final attachment, tie off the floral wire neatly and snip any excess ends close to the wreath form. Take a moment to fluff the tulips and adjust any leaves or flowers to fill in any small gaps and achieve that perfect, full rainbow display.
The result of your efforts will be an absolutely gorgeous, eye-catching rainbow tulip wreath, ready to adorn your home with unmatched springtime cheer!

TULIP WREATH VIDEO TUTORIAL: Watch the Magic Unfold!
Prefer to see the process in action? This short video tutorial provides a fantastic visual guide to complement the step-by-step instructions above. Watching the techniques demonstrated can often clarify any questions and boost your confidence in tackling this rewarding DIY project, ensuring you achieve a professional-looking result with ease.
Your Finished Masterpiece: Displaying and Caring for Your Rainbow Wreath
Congratulations! You’ve successfully created a breathtaking rainbow tulip wreath that embodies the very essence of spring. This vibrant piece is more than just a decoration; it’s a testament to your creativity and an instant mood-lifter. Its stunning array of colors makes it an ideal accent for a variety of spaces.
Displaying Your Handcrafted Tulip Wreath
- Front Door Elegance: The most popular spot for a wreath, your rainbow tulip creation will warmly welcome guests and add unparalleled curb appeal to your home. It’s perfect for spring, Easter, or simply brightening up any day.
- Interior Wall Accent: Don’t limit its beauty to the outdoors! Hang your wreath above a fireplace mantle, in a hallway, or in a child’s room to bring a cheerful pop of color indoors and enliven any living space.
- Special Occasions: This wreath also makes a wonderful centerpiece for a spring brunch table (perhaps with a vase in the middle) or a charming decoration for a baby shower or birthday party, adding a festive and personalized touch.
Caring for Your Artificial Tulip Wreath
One of the many benefits of using artificial tulips is their minimal maintenance, allowing you to enjoy their beauty year after year. To keep your wreath looking fresh and vibrant for seasons to come:
- Dusting: Periodically dust the tulips and leaves with a soft cloth, feather duster, or a gentle brush attachment on your vacuum cleaner to prevent dust buildup and maintain its fresh appearance.
- Indoor Storage: When not on display, store your wreath in a cool, dry place away from direct sunlight to prevent fading. A wreath storage bag or a sturdy box will protect it from dust, crushing, and deformation.
- Weather Protection (if outdoors): If hanging outdoors, try to place it under a covered porch or awning to protect it from harsh direct sunlight, heavy rain, or strong winds, which can diminish its vibrancy and structural integrity over time.
This simple yet impactful DIY project is a perfect way to usher in the beauty of spring and add a personal touch to your home decor. Its ease of creation combined with its stunning visual appeal makes it a must-try for any craft enthusiast. So, gather your supplies, follow these steps, and prepare to be delighted by your very own handmade rainbow tulip wreath!
Love this project and want to save it for later or inspire others? Pin this tutorial so you don’t forget it!