Craft a Memorable Halloween Countdown Calendar for Kids: A DIY Guide to Spooky Fun
As the leaves begin to turn and a crisp autumn breeze fills the air, anticipation for Halloween steadily builds. For families with children, the weeks leading up to this enchanting holiday are ripe for creating special memories and building excitement. Inspired by the cherished tradition of Christmas advent calendars, imagine extending that joyous anticipation to October with a delightful DIY Halloween countdown calendar. This project isn’t just a craft; it’s an invitation to daily moments of fun, a creative outlet, and a charming piece of handmade decor that celebrates the spirit of the season.
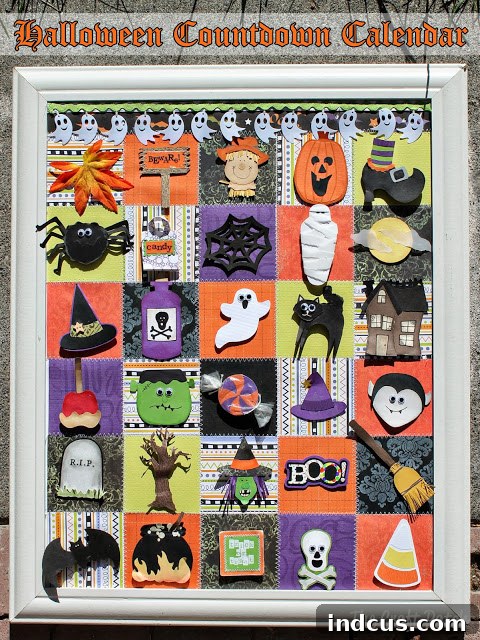
Our journey begins with a proven concept: a reusable, paper-based countdown calendar that has brought smiles and delighted shrieks for years. While the initial design and hand-cutting of intricate shapes might sound time-consuming, the enduring charm and the sheer joy it brings to children make every moment spent worthwhile. This guide will walk you through transforming simple materials into a cherished family heirloom, focusing on affordability, creativity, and lasting enjoyment.
Why a Halloween Countdown Calendar is a Must-Have Family Tradition
In a world often dominated by screens and instant gratification, a physical countdown calendar offers a refreshing, tangible way for children to engage with the passage of time. It transforms the waiting period into an active, exciting experience. Each day, moving a character or opening a flap builds a palpable sense of anticipation, helping young minds grasp the concept of “how many sleeps until…?” beyond abstract numbers.
Beyond the educational aspect, a DIY Halloween countdown calendar fosters creativity and strengthens family bonds. It encourages conversation about the upcoming festivities, from costume choices to trick-or-treating routes. It’s a daily ritual that brings everyone together, creating a unique tradition that children will look forward to year after year. Moreover, crafting your own calendar infuses it with a personal touch that store-bought versions simply can’t replicate, making it a truly special addition to your fall decorations.
Gathering Your Ghastly Good Materials
One of the most appealing aspects of this project is its foundation in repurposed and readily available materials. You don’t need expensive supplies to create something truly magical. Here’s what you’ll want to gather for your very own magnetic Halloween countdown calendar:
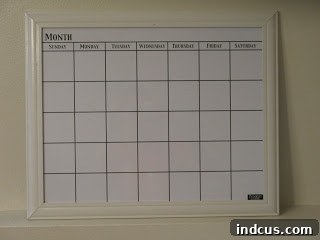
- The Base: A Magnetic Whiteboard. The original inspiration for this project came from an incredible yard sale find: a magnetic whiteboard for a mere 75 cents. Keep an eye out at thrift stores, garage sales, or even discount retailers for a similar gem. A magnetic surface is crucial for easily moving your daily countdown pieces. If a whiteboard isn’t available, consider a large picture frame with a metal backing or even a sheet of galvanized steel cut to size, though these might require additional framing.
- Assorted Halloween-Themed Scrapbook Paper. This is where your creativity truly shines! Select a variety of coordinating patterns and colors that evoke the spirit of Halloween – think classic oranges and blacks, eerie purples and greens, or even whimsical pastels. The beauty of using scrapbook paper is the endless array of designs available, allowing you to create a truly unique aesthetic.
- White Butcher Paper or Large Sheets of Plain White Paper. This will serve as the backing for your patterned papers, creating a sturdy and cohesive surface.
- Strong Adhesive. A high-quality glue stick, spray adhesive, or craft glue will be essential for securing your papers firmly. For any fabric embellishments like ric-rac, a fabric-specific adhesive or even a hot glue gun will work well.
- Decorative Embellishments (Optional). Items like ghost-themed ric-rac, ribbons, glitter, googly eyes, or Halloween-themed stickers can add extra flair and personality to your calendar.
- Cardstock or Heavy Paper. This is for creating your individual countdown characters. Using cardstock ensures durability, especially if the calendar will be handled frequently by excited little hands.
- Small Magnets. You’ll need enough small, strong magnets to attach to the back of each countdown piece, allowing them to stick securely to your magnetic base. Adhesive-backed magnets are particularly convenient.
- Tools: Sharp scissors, a paper cutter (highly recommended for straight lines), a sewing machine (optional, for the “quilt” effect), and a pencil and ruler for measuring.
- For the Countdown Pieces (Time-Saving Alternatives): If hand-cutting isn’t your preference, consider a cutting machine like a Silhouette Cameo or Cricut, or simply print Halloween clip art directly onto cardstock.
- Storage Container: A repurposed food can or a small decorative box will be perfect for holding your countdown pieces when they’re not on the board.
Step-by-Step Guide: Crafting Your Spooktacular Countdown Calendar
Follow these detailed steps to bring your Halloween countdown calendar to life. Remember, this is a creative process, so feel free to adapt it to your style!
1. Preparing Your Magnetic Base
Begin by ensuring your magnetic whiteboard is clean and free of dust or debris. If your board has an existing frame, ensure it’s secure. The beauty of using a pre-framed board is that it instantly gives your project a polished look. Should you opt for a plain metal sheet, consider building or purchasing a simple frame to encapsulate your artwork, enhancing its visual appeal and making it easier to display.
2. Designing the Festive Background
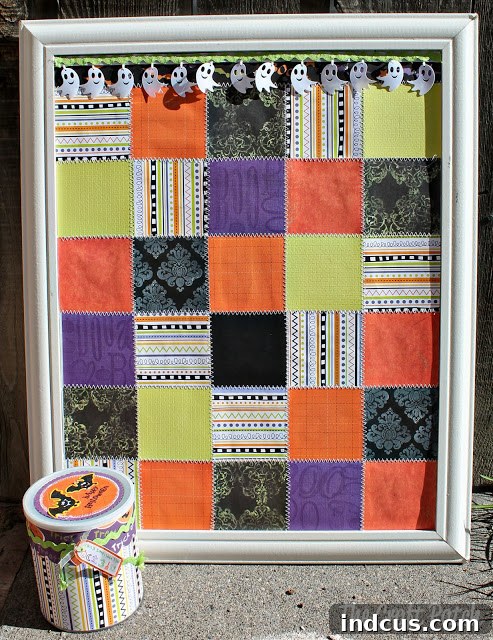
The background sets the entire tone for your calendar. Initially, a striped background was considered, but through trial and error, a grid of squares proved far more functional and visually appealing, offering a clear designated spot for each day’s countdown piece. To create this “quilted” effect:
- Measure and Cut Your Papers: Determine the dimensions of your magnetic board. Cut your white butcher paper to fit this size perfectly. Then, cut various Halloween-themed scrapbook papers into squares or rectangles. The goal is to create 30 spaces for the days leading up to Halloween. While October has 31 days, aiming for 30 evenly sized squares simplifies the design and layout considerably, making the overall aesthetic more harmonious without detracting from the fun.
- Assemble the Quilt: Arrange your cut scrapbook papers onto the butcher paper, creating a visually pleasing patchwork or grid pattern. Once satisfied with the layout, carefully glue each piece down using your chosen adhesive. Ensure there are no air bubbles and the papers are smooth.
- Add the “Stitching” (Optional but Recommended): For that charming, handcrafted quilt look, run your assembled paper background through a sewing machine, creating zig-zag stitches along all the seams where the different papers meet. This adds incredible texture and a truly unique, artisanal touch. Even if you’re not a sewing expert, a simple zig-zag stitch is easy to master and makes a huge impact.
- Affix to the Board: Once the glue is dry and stitching is complete, securely attach your finished background to the magnetic whiteboard. Spray adhesive can provide an even, strong bond across the entire surface.
- Embellish with Ric-Rac: Don’t forget those charming details! The original design incorporated ghost-themed ric-rac, which added a whimsical touch too cute to omit. Carefully glue this along the edges or designated sections of your background, further enhancing the Halloween theme.
3. Crafting the Delightful Countdown Characters
These are the stars of your calendar – the little figures that will be moved daily to mark the passage of time!
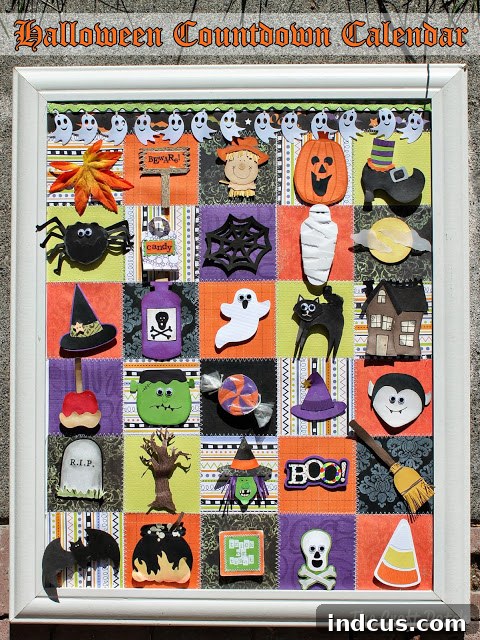
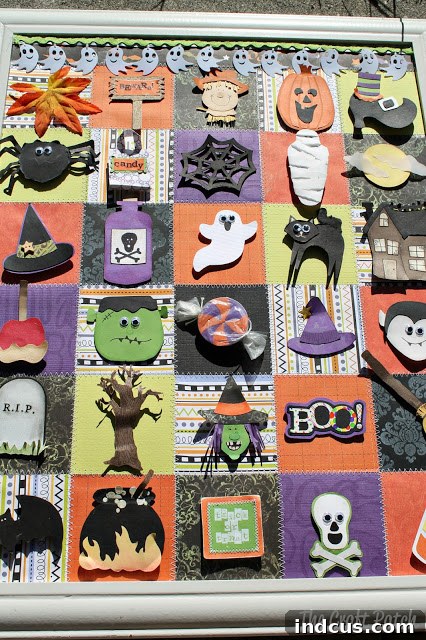
- Design Your Characters: Think of classic Halloween motifs: smiling pumpkins, friendly ghosts, whimsical witches, spooky spiders, bats, black cats, and candy corn. Draw or trace these designs onto sturdy cardstock. The original calendar featured meticulously hand-cut designs, a labor of love that yielded incredibly detailed and charming results.
- Modern Convenience (Optional but Highly Recommended!): If hand-cutting dozens of intricate shapes seems daunting, technology is your friend! Owning a cutting machine like a Silhouette Cameo or Cricut completely transforms this step. You can purchase countless adorable Halloween cut files online, load your cardstock, and let the machine do all the precise cutting in minutes. This method saves immense time and ensures perfectly consistent shapes.
- Simpler Alternative: Print and Laminate: For an even quicker approach, find charming Halloween clip art online, print it onto cardstock, cut out the images, and then laminate them. Lamination adds durability, protects against wear and tear, and gives the pieces a nice, polished finish.
- Attach Magnets: Once your characters are cut (or printed and laminated), adhere a small, strong magnet to the back of each one. Ensure they are securely fastened so they don’t fall off the board. You’ll need 30 unique characters to match your 30-day countdown grid.
4. Creating a Practical Storage Solution
To keep all your precious countdown pieces organized and protected year after year, a dedicated storage container is essential. A simple repurposed food can, thoroughly cleaned and covered with coordinating Halloween-themed paper, works wonderfully. You can decorate it with ribbons, stickers, or even paint it to match your calendar’s aesthetic. This ensures that when the calendar is packed away after Halloween, all its components are ready for next year’s festivities.
Tips for Success and Customization
- Involve the Kids: Let your children participate in age-appropriate ways. They can help choose paper patterns, glue down squares, decorate the storage can, or even draw their own character ideas to be cut out. This increases their ownership and excitement for the project.
- Beyond Just Moving Pieces: Elevate the countdown experience by writing small Halloween-themed activities on the back of each character or on slips of paper placed in small pockets near each square. Ideas include: “Read a spooky story,” “Bake pumpkin cookies,” “Visit a local pumpkin patch,” “Watch a friendly monster movie,” or “Design your Halloween costume.” This adds an interactive element that goes beyond just marking days.
- Durability is Key: Since this calendar is designed for repeated use, investing in good quality cardstock for the characters and strong adhesives will ensure it withstands the test of time and enthusiastic handling. Laminating the pieces is a game-changer for longevity.
- Personalize Your Theme: While traditional Halloween motifs are always popular, feel free to adapt the theme. Perhaps your family loves specific monsters, or prefers a “friendly ghost” aesthetic. Let your family’s personality shine through in your design choices.
The Enduring Magic of a DIY Halloween Countdown
Pulling out this handmade Halloween countdown calendar each autumn is more than just retrieving a decoration; it’s rekindling a cherished family tradition. The smiles it brings, the daily anticipation it builds, and the memories created are priceless. While the initial investment of time and creativity is real, the joy and longevity of this project far outweigh the effort. It’s a testament to the power of handmade items – unique, personal, and imbued with the love of its creator. So gather your supplies, embrace your inner crafter, and prepare to usher in a season of spooky fun, one delightful day at a time!