DIY Clay Pot Scarecrow: Your Perfect Fall Craft Project
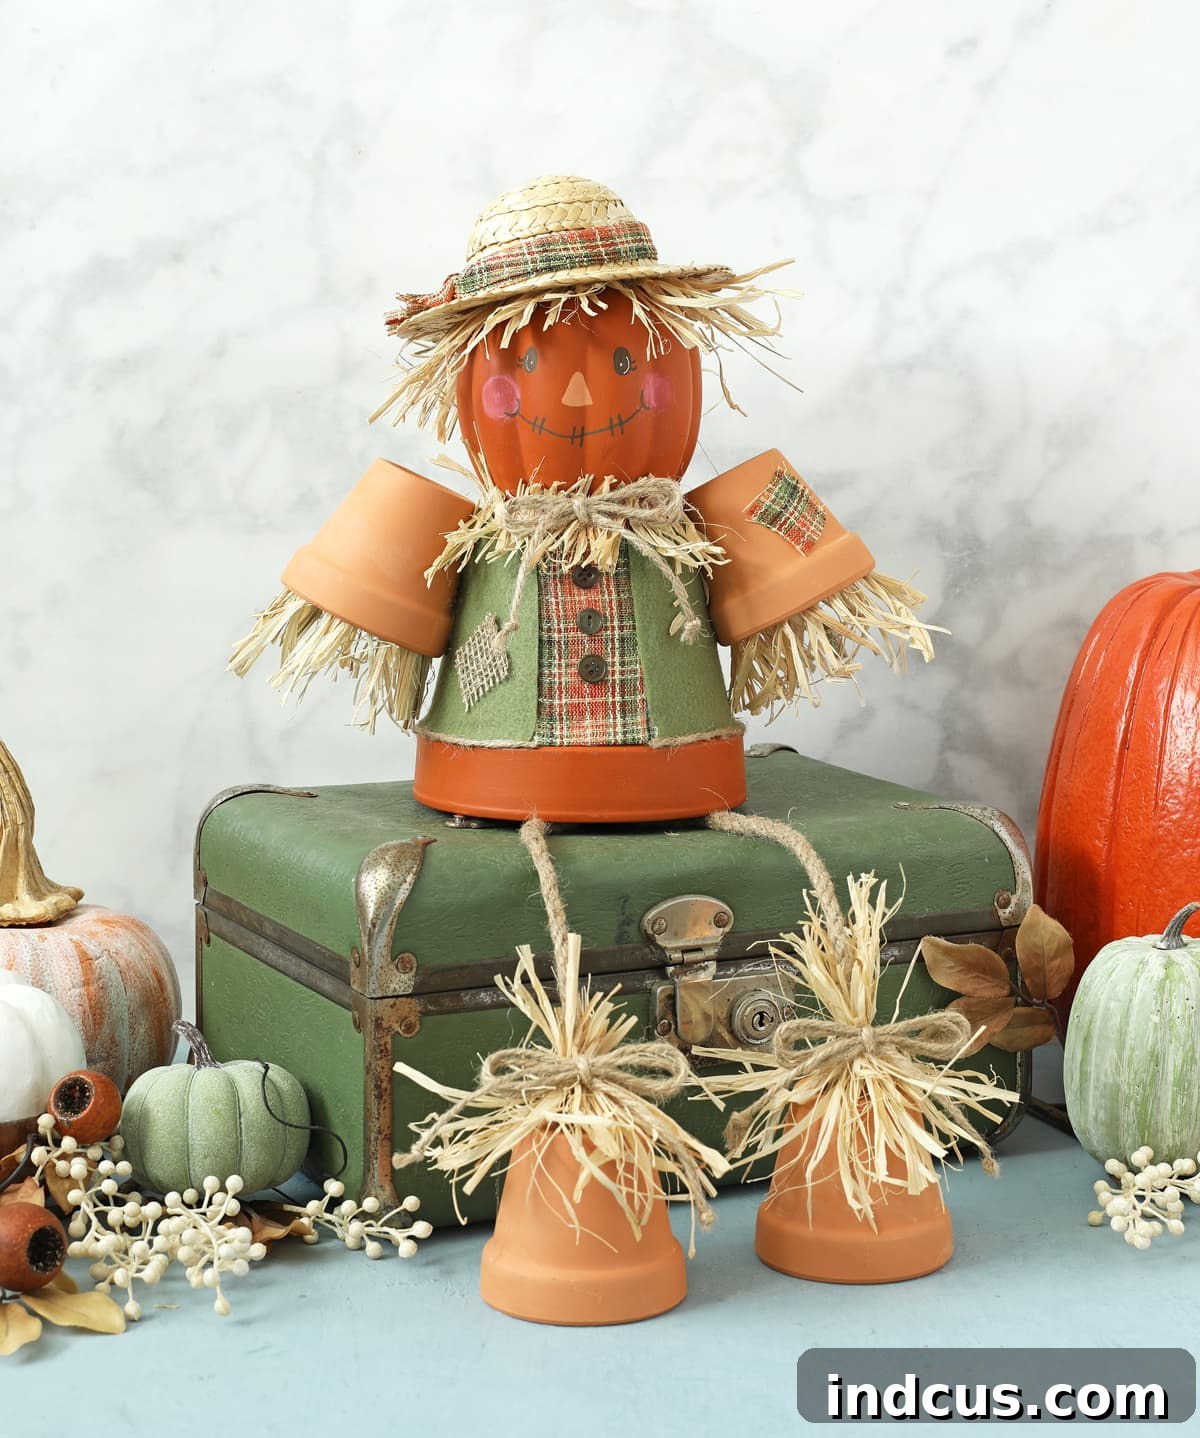
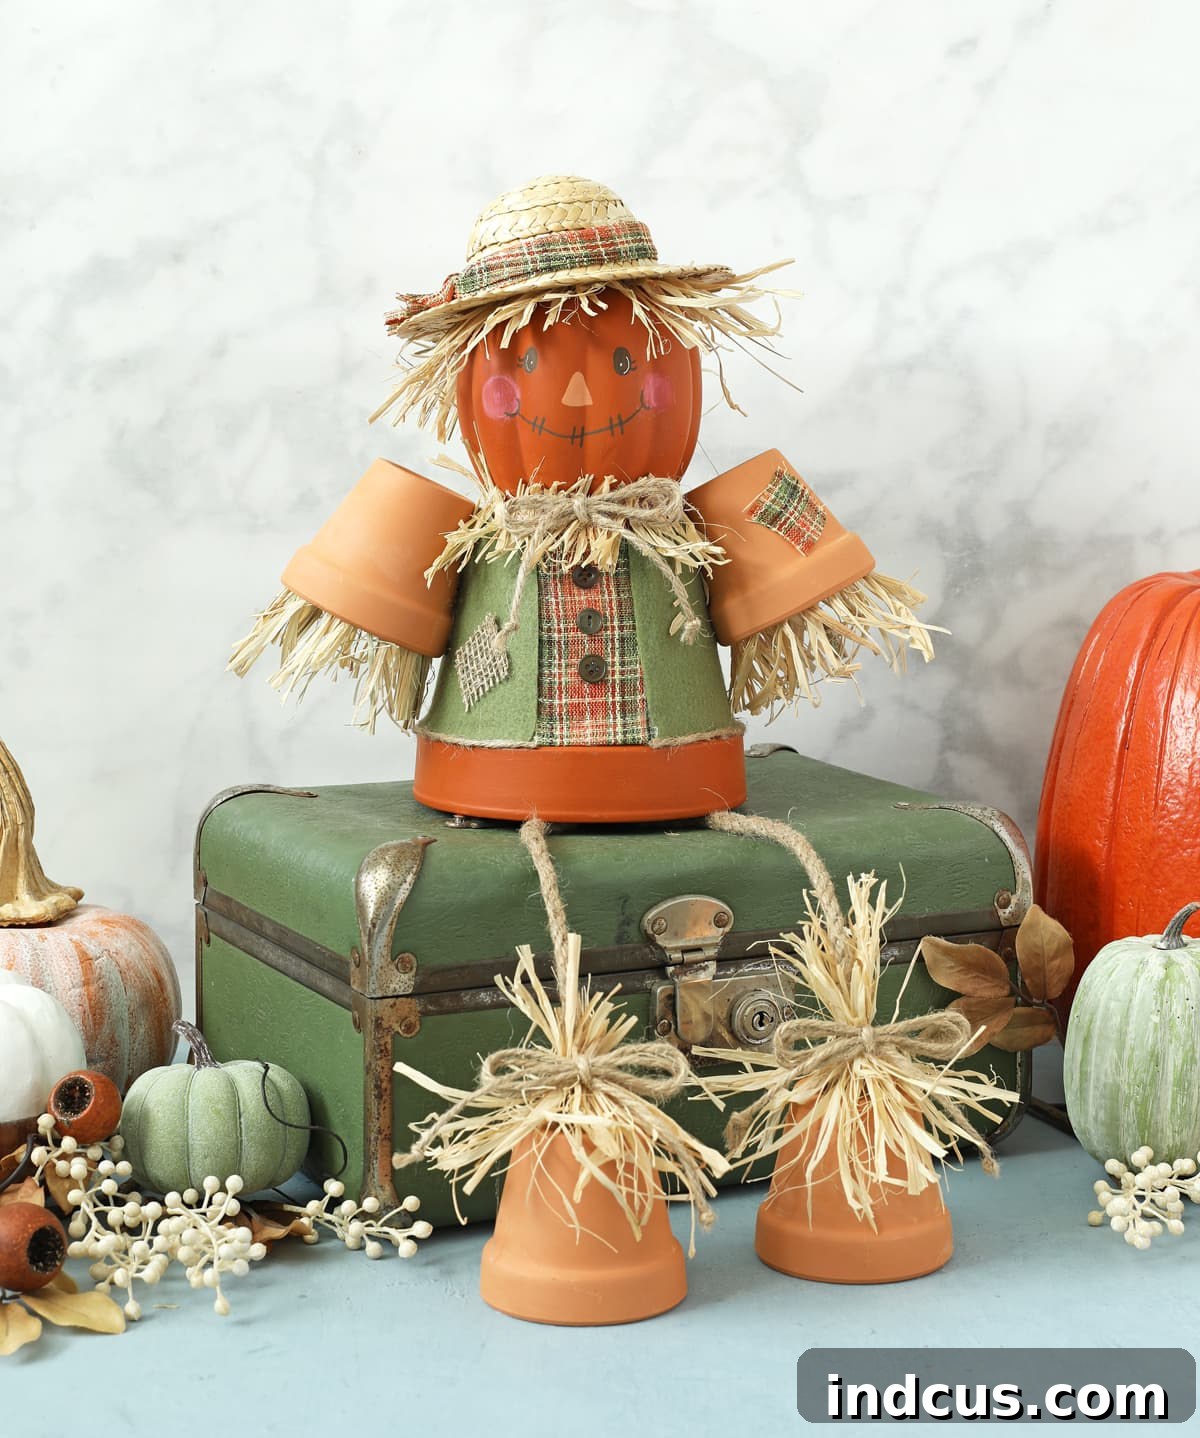
As the leaves begin to change and a crisp breeze fills the air, there’s no better time to embrace the spirit of autumn through crafting. Today, we’re thrilled to share an absolutely delightful fall craft idea that will bring warmth and charm to any corner of your home: a handmade clay pot scarecrow. This adorable little character, with its playful dangly legs, is designed to sit comfortably on a shelf, a rustic trunk, or a welcoming porch step, adding a whimsical touch to your seasonal decor. His endearing presence is guaranteed to bring smiles and a true sense of autumnal joy.
Creating your very own clay pot scarecrow is not only a rewarding artistic endeavor but also incredibly straightforward. You’ll be pleased to know that every single item needed for this project can be conveniently found at Hobby Lobby, making your crafting journey as easy as possible. This project is perfect for crafters of all skill levels, offering a fantastic opportunity to create something truly unique and personal for the fall season.
This post is proudly sponsored by Hobby Lobby, your one-stop shop for all things creative.
Gather Your Supplies: Everything You Need for Your Clay Pot Scarecrow
Before diving into the creative process, it’s essential to gather all your materials. This project utilizes readily available items, primarily terracotta pots, which serve as the foundation for your scarecrow’s body and limbs, along with various craft embellishments to bring his personality to life. The beauty of this craft lies in its simplicity and the ability to customize it to your heart’s content. Below is a comprehensive list of what you’ll need, all conveniently available at Hobby Lobby.
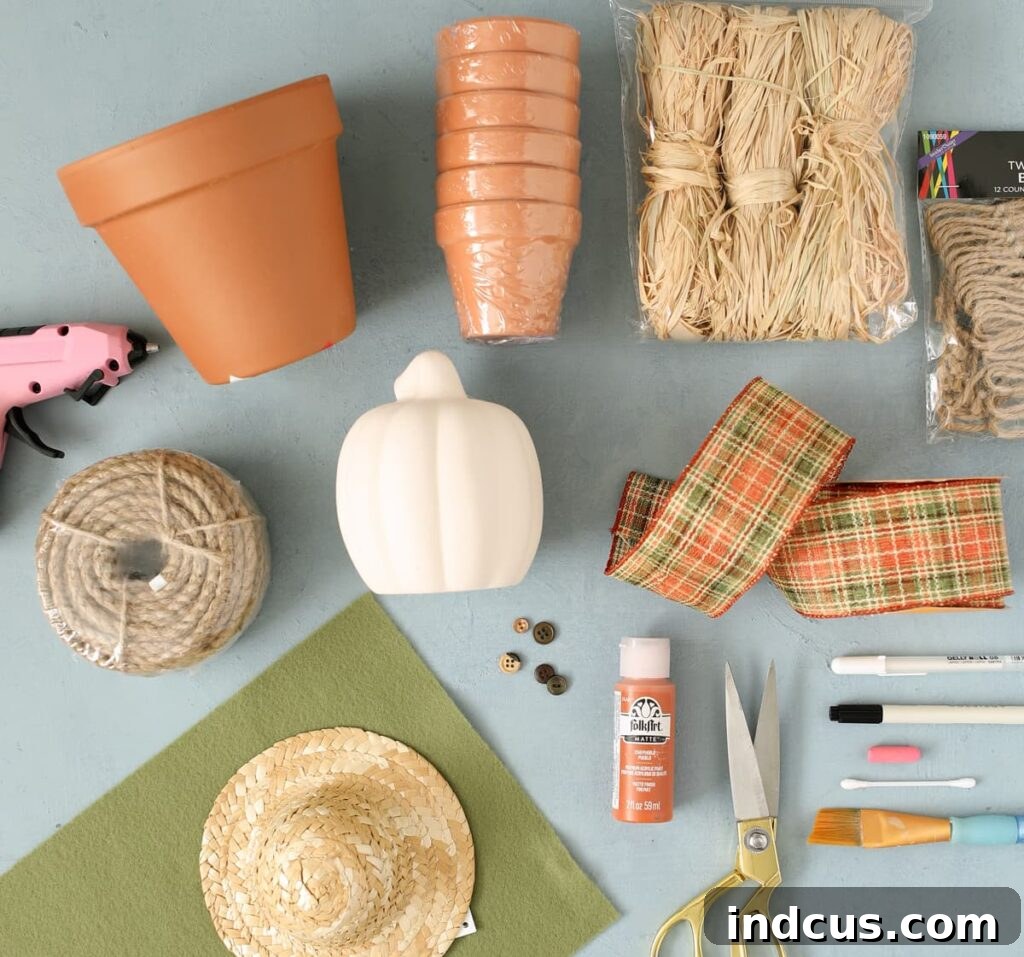
Materials List:
- One 6-Inch Terracotta Pot (This will form the main body of your scarecrow).
- Four 3-Inch Terracotta Pots (These typically come in a set of six, providing extra for future crafts or mistakes).
- Ceramic Craft Pumpkin -OR- One 4-Inch Terracotta Pot (For the head – the pumpkin offers a classic scarecrow aesthetic, but a pot provides a simpler, more uniform look).
- Raffia (Essential for creating the iconic straw-like hair and accents).
- Craft Paint (We recommend Folk Art Pueblo for a warm, rustic tone) and a Paintbrush.
- Macrame Jute Cord (For sturdy, dangling legs).
- Twist Tie Twine Bows (Small decorative touches for added charm).
- Craft Felt Sheet (Olive color is suggested for a vest, but feel free to choose other colors).
- Fall Plaid Ribbon (For the scarecrow’s “shirt” or other decorative elements).
- 6-Inch Straw Doll Hat (The quintessential scarecrow accessory!).
- Hot Glue Gun + Glue Sticks (Your primary tool for assembly).
- Paint Pens (For drawing the face and adding fine details).
- Buttons, optional (For decorative embellishments on the scarecrow’s clothing).
A wonderful aspect of this project is its scalability. If you adore the idea of a little scarecrow, consider creating a larger version by simply using bigger clay pots. Imagine a grander scarecrow greeting guests at your front door or standing proudly in your garden—it would be an absolutely charming outdoor decoration!
Step-by-Step Guide: Crafting Your Clay Pot Scarecrow
Now that you have all your materials, let’s begin the fun process of assembling your delightful clay pot scarecrow. Follow these instructions carefully, and don’t hesitate to infuse your own creative flair at each stage.
Step 1: Constructing the Head and Body
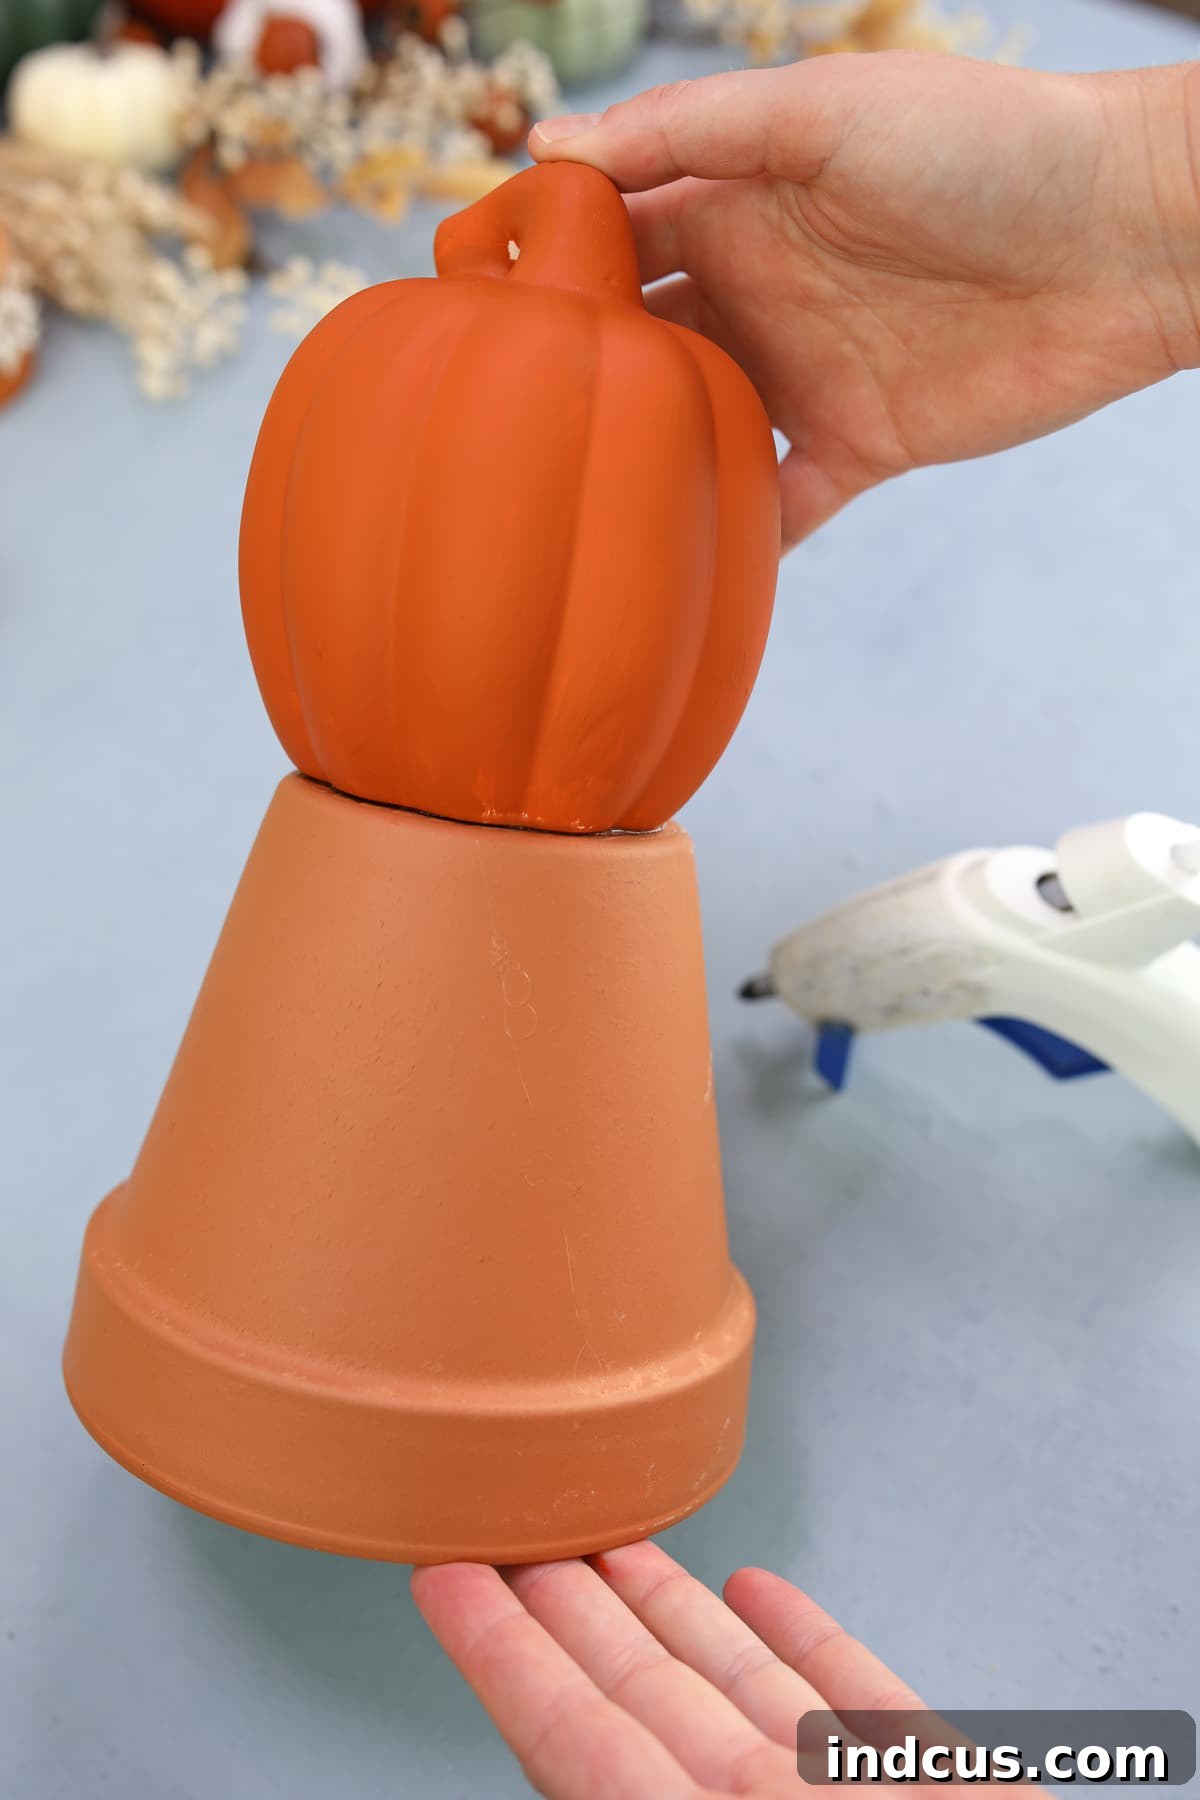
First, secure the head to the body. Take your chosen ceramic craft pumpkin (or the 4-inch terracotta pot) and hot glue it firmly to the base of the 6-inch terracotta pot. Ensure a strong bond as this forms the core structure of your scarecrow. If you’ve opted for a pumpkin, you’ll then want to paint it a warm terracotta color to match the body, or any other color that suits your vision for the scarecrow’s face and head. This initial step establishes the fundamental shape and stance of your charming fall decoration.
Step 2: Dressing Your Scarecrow
Next, it’s time to give your scarecrow some personality through clothing. While the original guide mentions gluing arms first, it’s often easier to dress the main body before attaching the arms. A strip of plaid ribbon can serve as a simple, festive “shirt” wrapped around the 6-inch pot. Then, cut a vest shape from your green craft felt and adhere it to the pot. If you’ve already glued the arms, you might find it necessary to carefully remove them temporarily to get the vest to sit just right, then reattach them. Alternatively, if you prefer not to use fabric, consider painting a clothing design directly onto the clay pot, perhaps a checkered pattern or simple overalls. Denim fabric scraps or even burlap would also create wonderfully rustic and charming attire for your scarecrow.
Step 3: Crafting the Dangly Legs and Feet
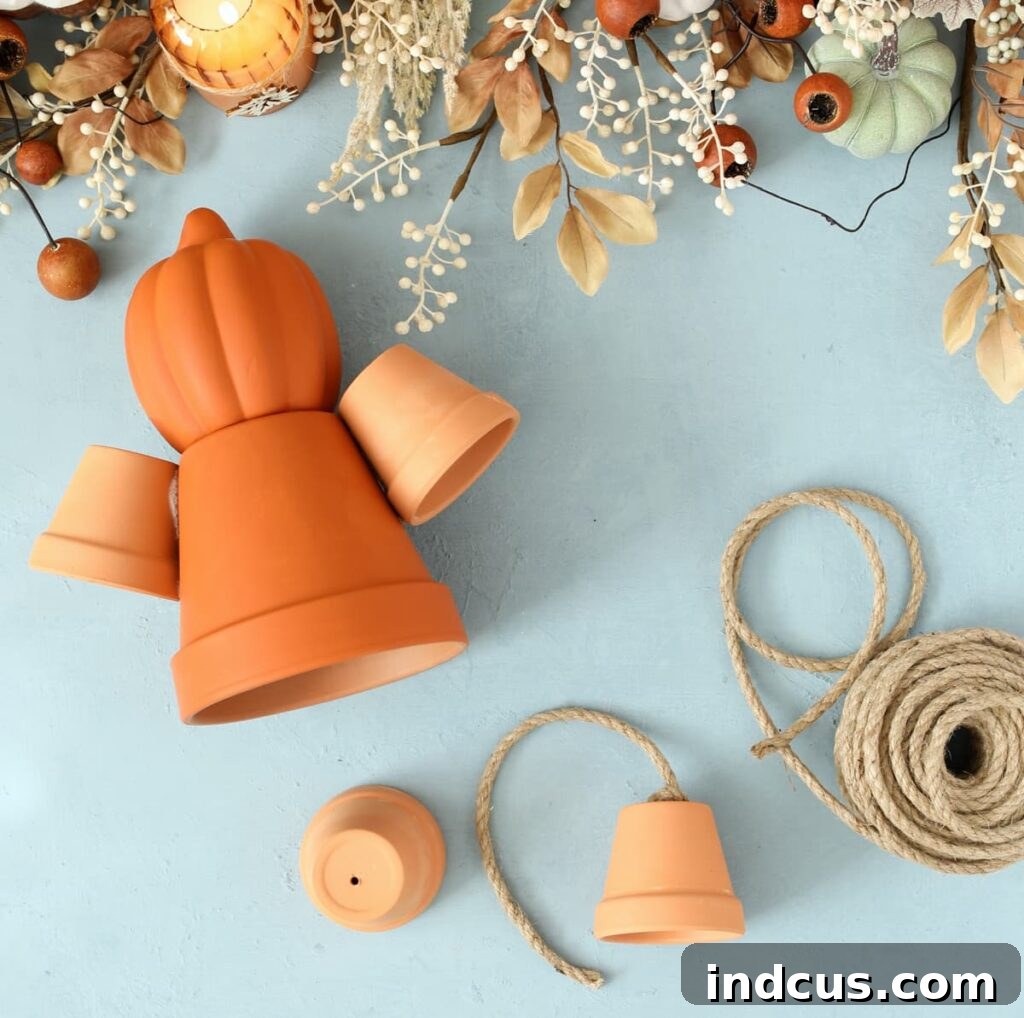
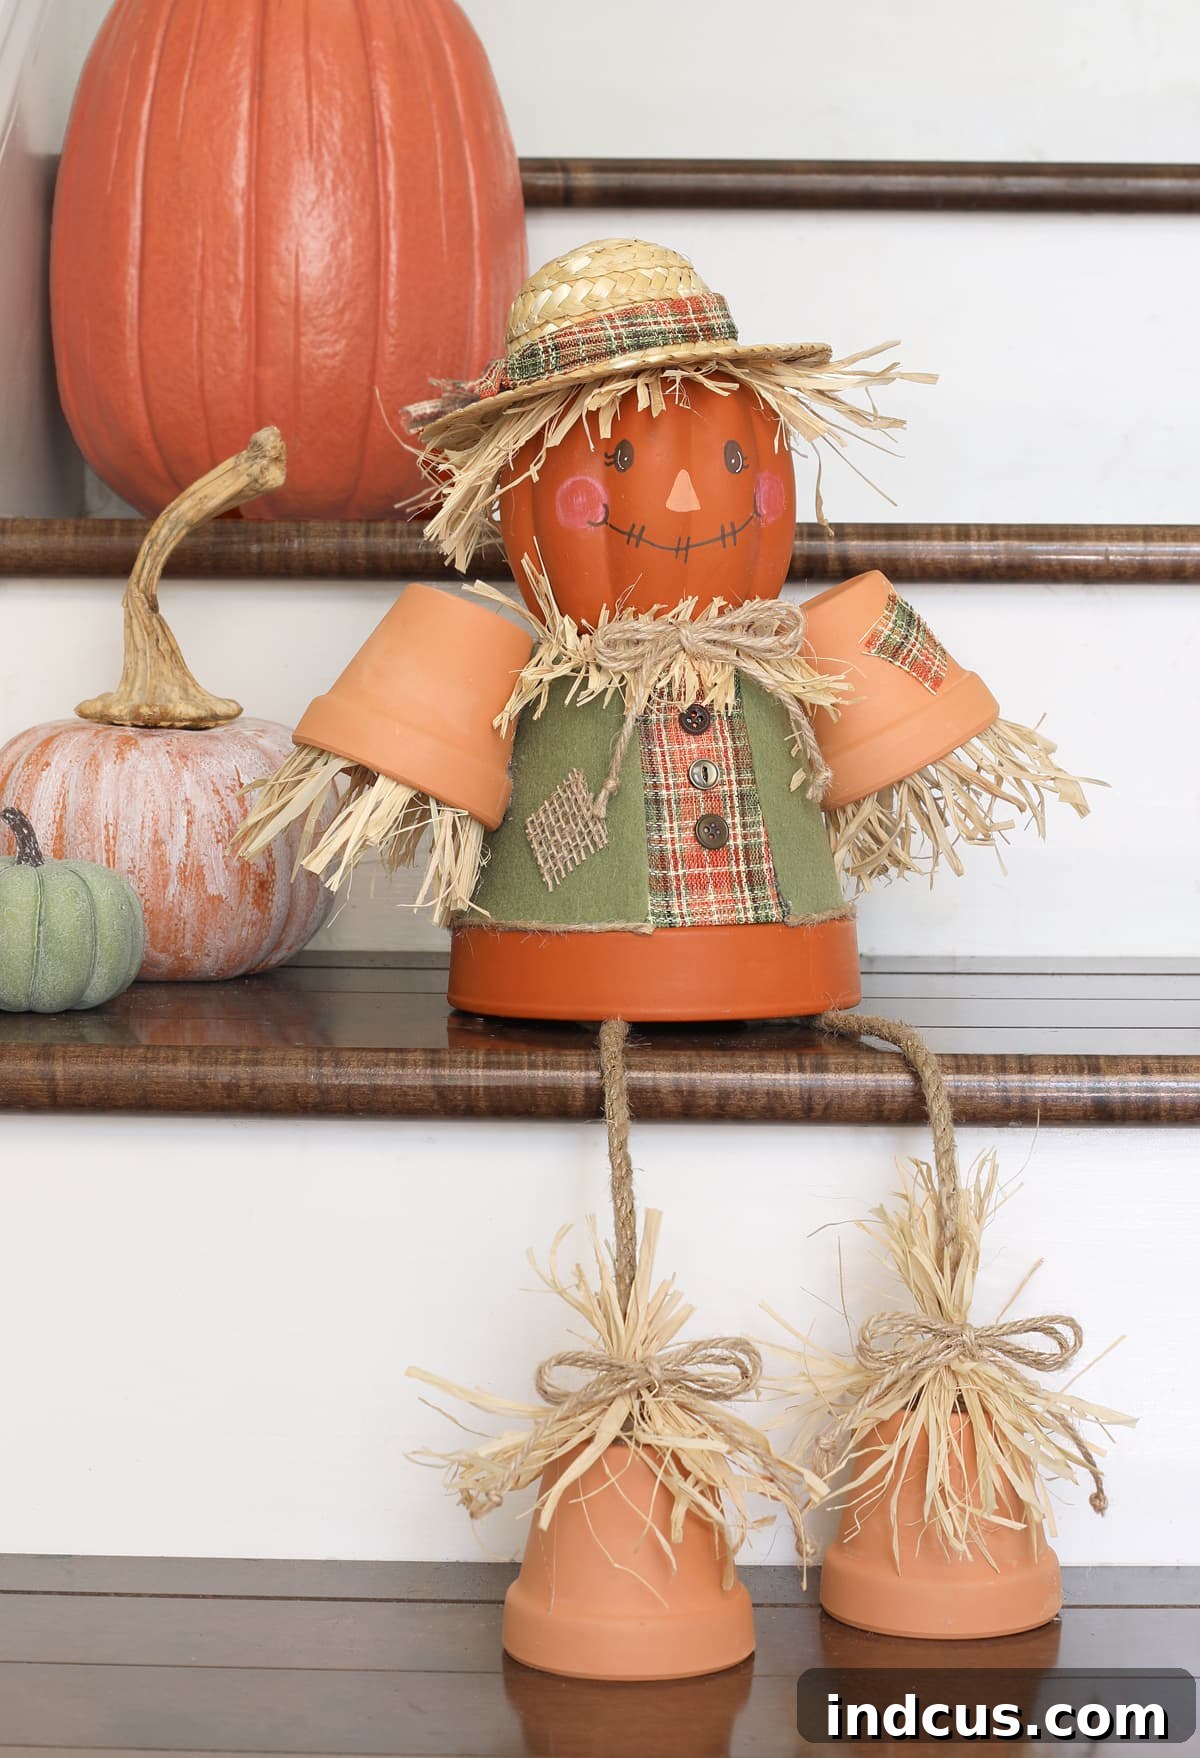
Now for the signature feature: the dangling legs! Take a piece of macrame jute cord, approximately 12 inches long (adjust based on your desired leg length). Tie a secure knot at one end of the cord. This knot will act as a stopper. Hot glue this knotted end to the inside top rim of one of the small 3-inch terracotta pots – this pot will be a “foot.” Repeat this process with a second piece of jute cord and another 3-inch pot to create the second leg. Once both legs are prepared, hot glue the unknotted ends of the jute cords to the inside front edge of the large 6-inch terracotta pot (the scarecrow’s body). Position them slightly apart to give the impression of sitting legs. This design allows your scarecrow to perch adorably on various surfaces.
Step 4: Adding Raffia for Hair and Accents
Raffia is key to giving your scarecrow its classic, straw-filled appearance. Begin by cutting several pieces of raffia into various lengths. Start gluing these pieces to the inside edges of the two remaining 3-inch terracotta pots, which will serve as the scarecrow’s arms. Don’t worry about perfect uniformity at this stage; it’s easier to glue all the raffia in place and then trim it to an even length later if desired. This layered effect will give the arms a wonderful texture.
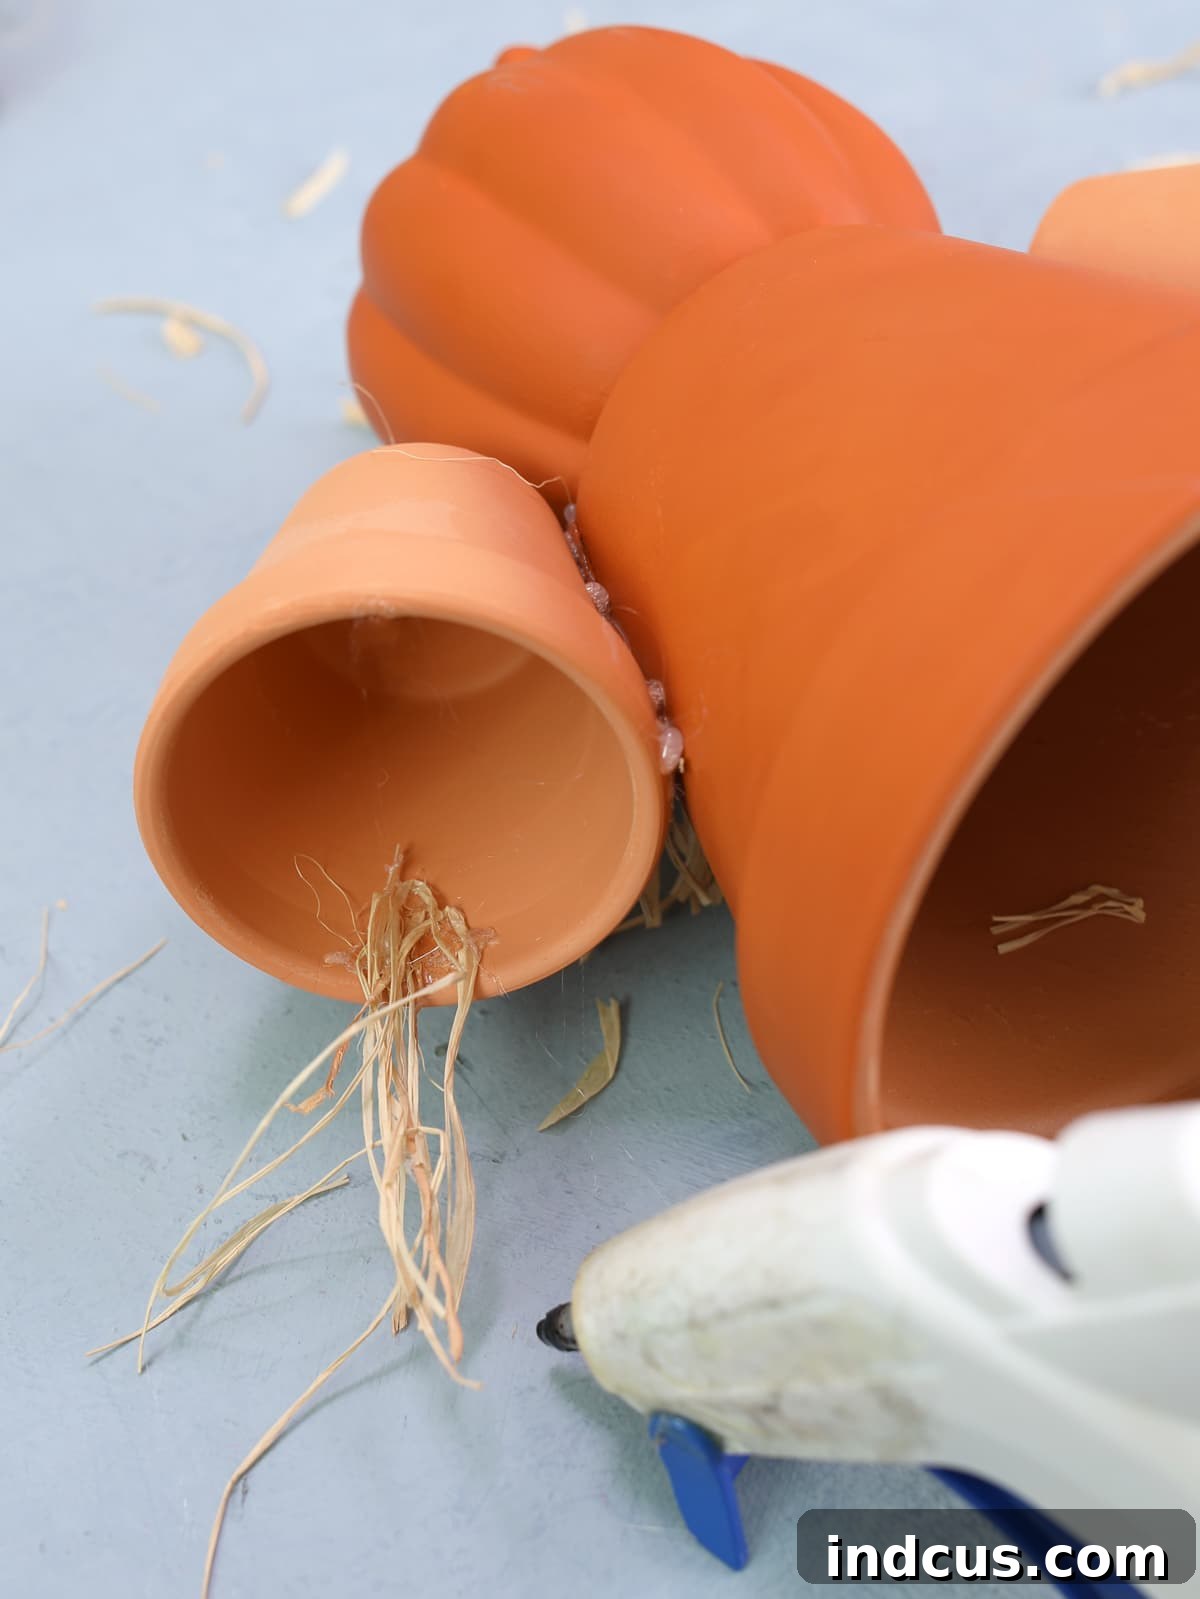
Next, enhance the “feet” by adding small bundles of raffia around the base of the small pots that form the scarecrow’s feet. This helps blend the jute cord with the pot and adds a charming rustic touch. Finally, create the scarecrow’s hair by gluing more raffia around the top of the pumpkin stem (or the opening of the 4-inch pot if you used one for the head). Let some pieces hang down to frame the face, giving your scarecrow a playful, windswept look.
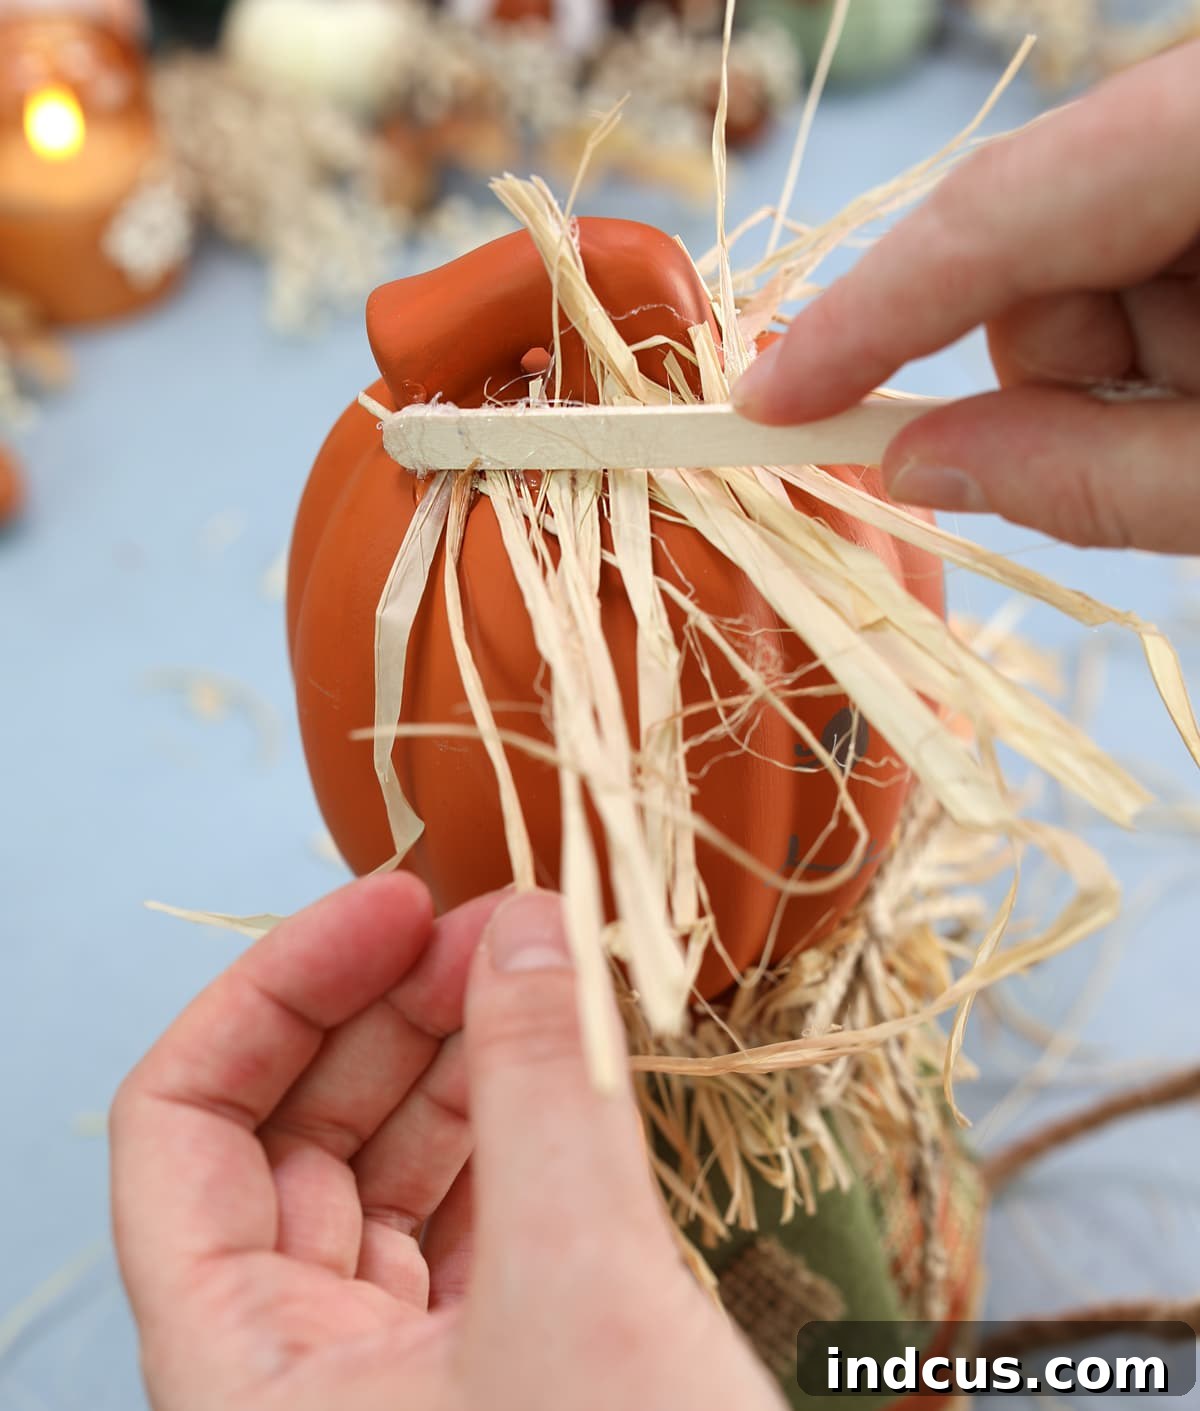
Pro Tip: When working with hot glue and raffia, use a popsicle stick or a crafting tool to gently push the raffia into the glue. This simple trick will save your fingers from accidental burns and make the process much more comfortable and safe!
Step 5: Bringing the Face to Life
This is where your scarecrow truly gains its unique personality! Using paint pens, carefully draw the scarecrow’s face. While this step can seem a bit intimidating, especially if you’re not an experienced artist, a couple of techniques can make it much easier and more enjoyable. First, always practice drawing the face to scale on a scrap piece of paper beforehand. This allows you to experiment with different expressions and refine your design. Second, lightly sketch your chosen design onto the pumpkin or pot with a pencil first. This way, you can easily erase and adjust until you’re happy with the placement and proportions before committing with paint pens. Small details like adding tiny white highlights to the eyes can make a significant difference, giving your scarecrow a spark of life and extra charm.
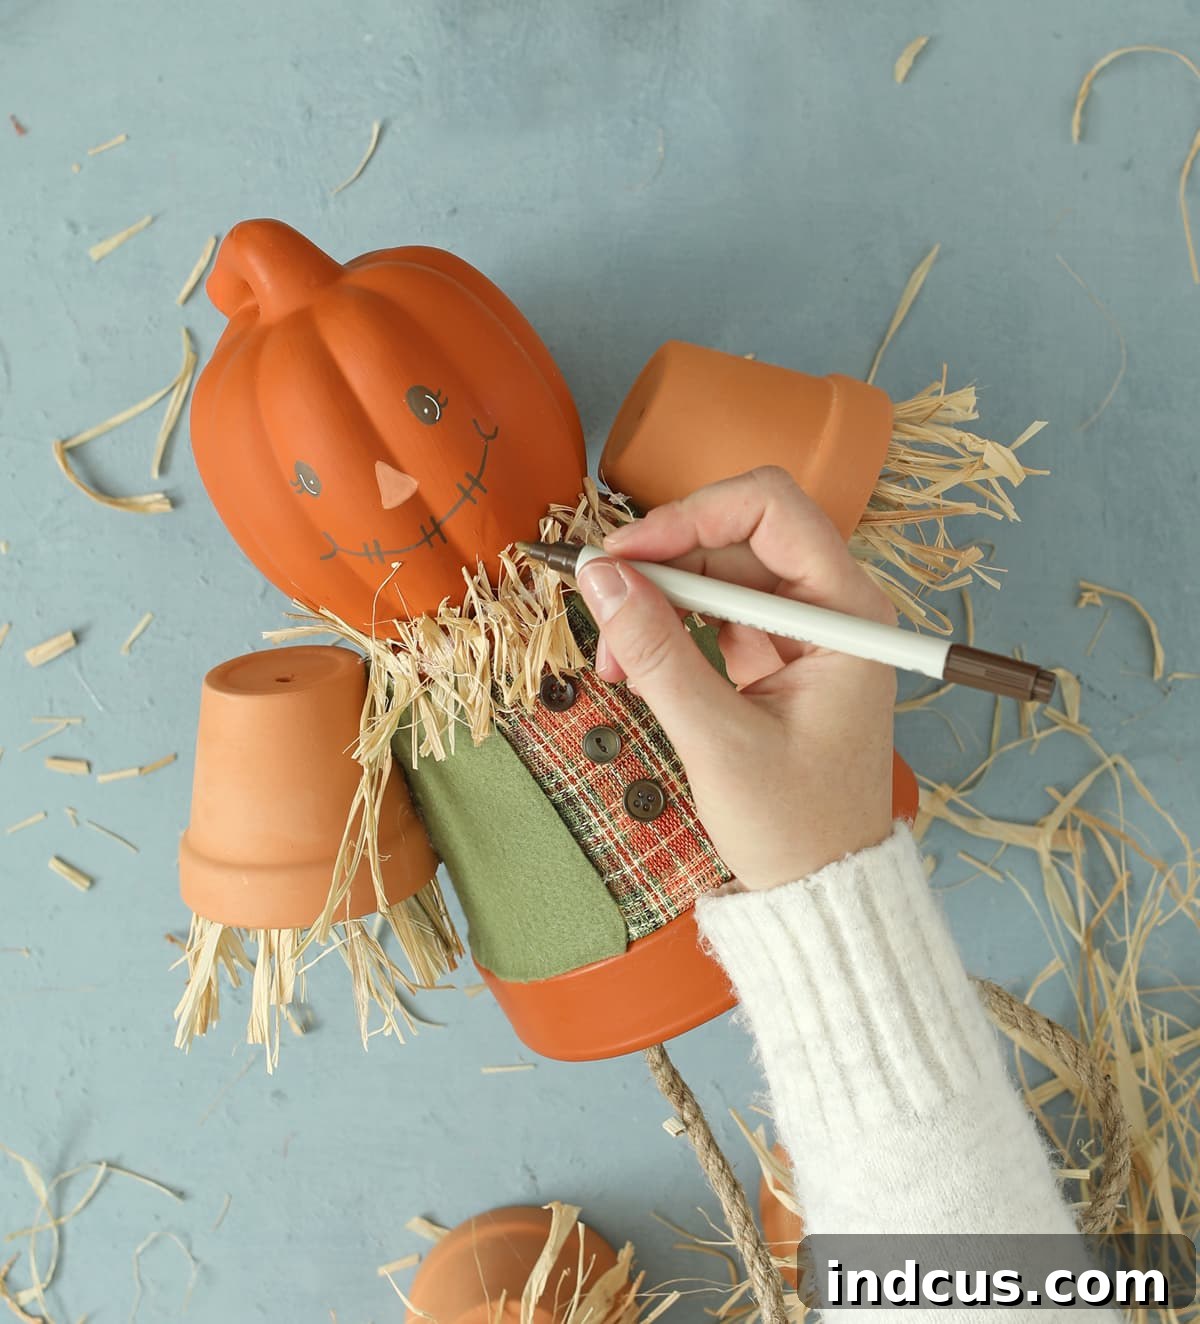
Step 6: Adding the Finishing Touches and Details
The final step is all about the little details that make your scarecrow truly special. Cut small pieces of ribbon and burlap to create decorative patches for his clothing, gluing them strategically for a worn, charming effect. Adhere a neat row of buttons down his “shirt” for a classic scarecrow look. Line the bottom edge of his shirt with a piece of twine for added texture and definition. Then, tie a few small twine bows and glue one to his neck as a tie and others to his feet for extra whimsy. And of course, the grand finale: gently place and secure the darling 6-inch straw doll hat on his head. This hat is the absolute perfect finishing touch, completing his friendly, rustic appearance.
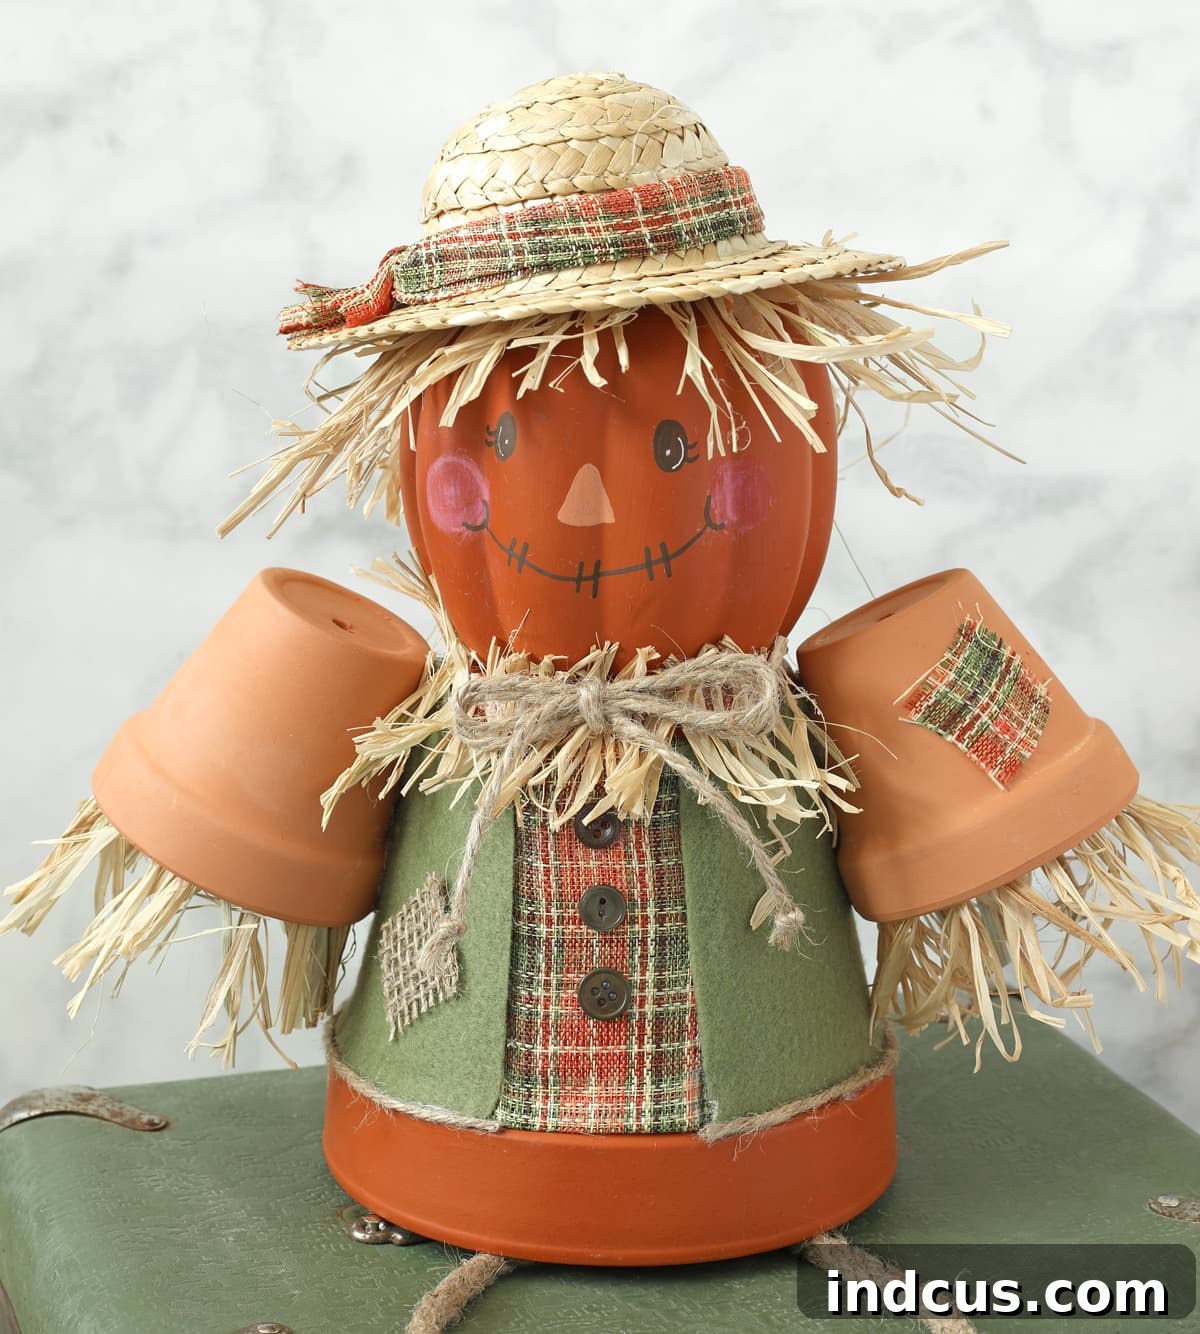
And just like that, your cute fall scarecrow craft is complete! You’ve transformed simple terracotta pots and craft supplies into an endearing piece of autumn decor, ready to brighten your home.
Displaying Your Charming Clay Pot Scarecrow
There’s immense satisfaction in seeing a project come together, and this clay pot scarecrow is no exception. We absolutely adore how this craft project unfolds, taking common, everyday items like terracotta pots and transforming them into something utterly unique and full of character. The entire creative process, from selecting materials to adding the final details, is incredibly enjoyable and a wonderful way to express your creativity. Our new scarecrow decoration looks absolutely charming perched on the porch steps, greeting visitors with his friendly demeanor. Gah! He’s utterly darling!
The versatility of this scarecrow means he can bring joy to various spots in your home. Imagine him:
- On your porch: Welcoming guests with a touch of fall cheer.
- On a mantelpiece: Adding a rustic focal point to your living room.
- Sitting on a bookshelf: Lending a whimsical note to your reading nook.
- As part of a centerpiece: Surrounded by miniature pumpkins, gourds, and fall foliage on your dining table.
- In a child’s room: A friendly, handmade companion for the autumn season.
Embrace the Joy of Fall Crafting
We truly hope this guide inspires you to set aside some time this fall to engage in the wonderful world of crafting. Autumn is undeniably our favorite season for creative projects; there’s something so inherently cozy and fulfilling about it. Turning on a good audiobook or your favorite playlist, and keeping your hands busy creating something beautiful and cute, is truly good for the soul. Crafting offers a therapeutic escape, allowing you to relax, express yourself, and ultimately, bring more beauty and personality into your living space. Dive into this project and discover the pure delight of making something with your own hands this season!
Happy crafting, and happy fall!