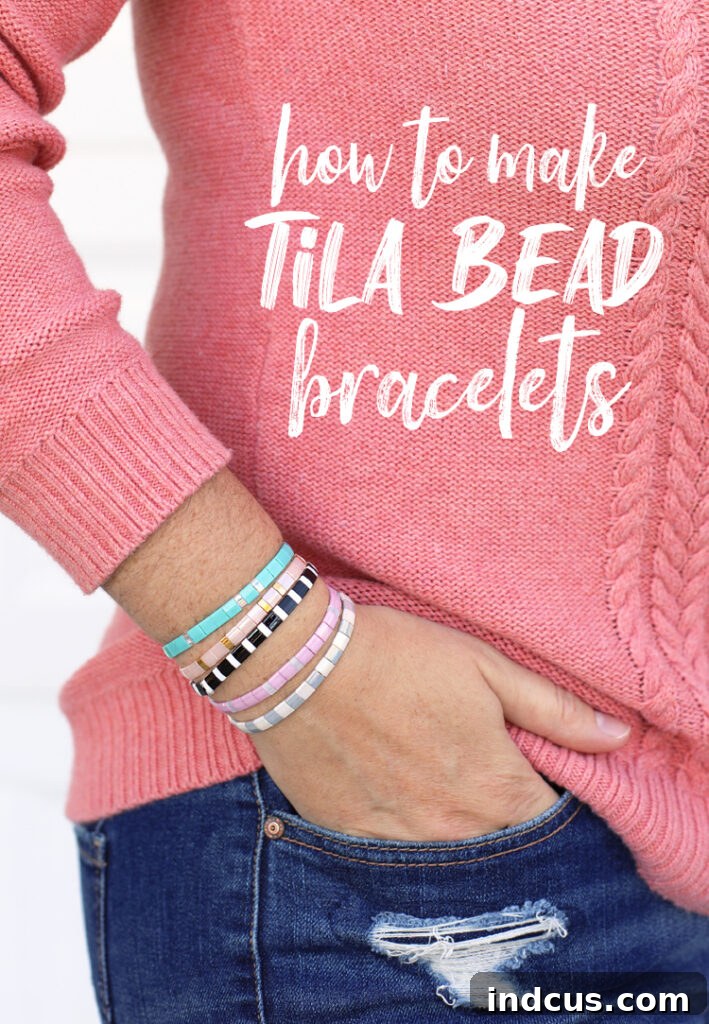
Craft Your Own Trendy Tila Bead Stretch Bracelets: A Complete DIY Guide
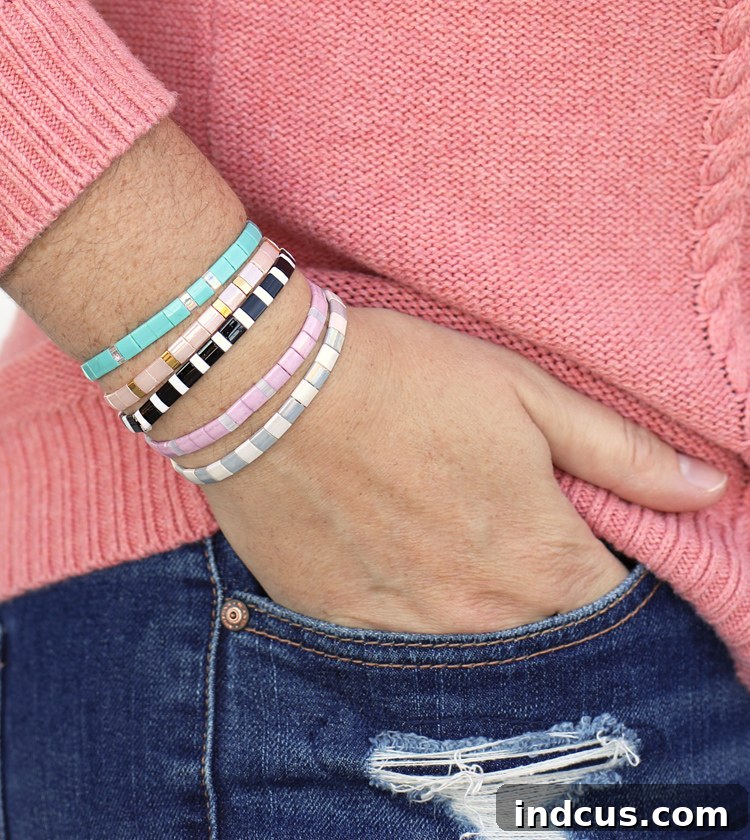
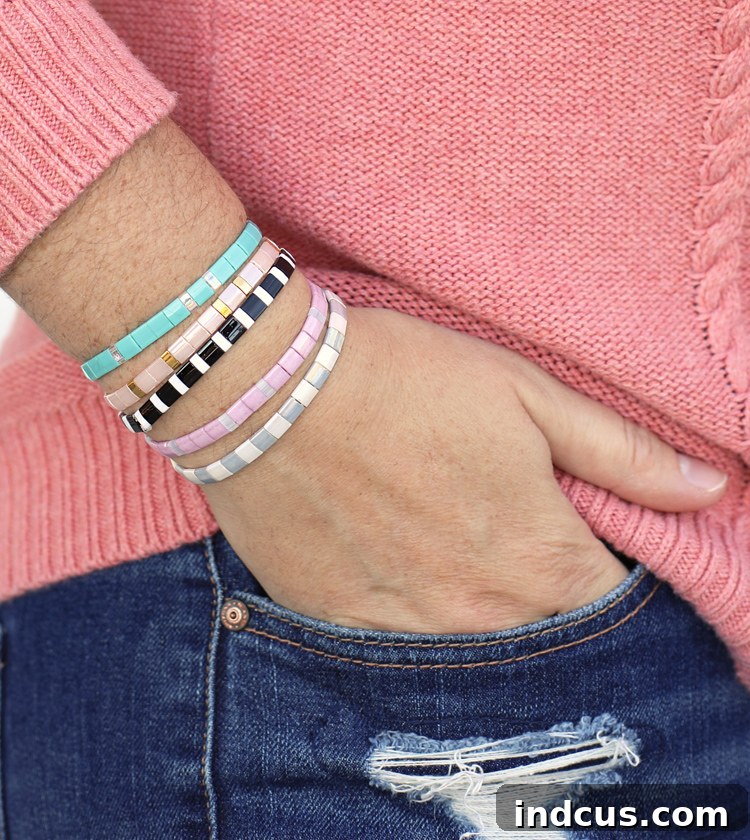
Unlock your creative potential and dive into the world of custom jewelry making with this comprehensive guide to crafting beautiful stretch bracelets using flat Tila beads. Often recognized by their alternative name, Miyuki beads, these distinctive, tile-like beads have taken the fashion world by storm, adorning the wrists of style-conscious individuals everywhere. You’ve likely spotted them in high-end boutiques and trendy apparel stores, captivating shoppers with their unique aesthetic and vibrant colors. Today, you’ll learn the simple yet rewarding process of making these darling flat bead bracelets yourself, allowing you to not only replicate those coveted designs but also unleash your imagination to create truly one-of-a-kind pieces.
Embracing the DIY approach to Tila bead bracelets offers a multitude of benefits. Beyond the immense satisfaction of wearing something you’ve made with your own hands, you gain unparalleled control over the design process. Imagine choosing the exact color palette that complements your wardrobe, selecting the perfect bead sizes to create intricate patterns, or even designing personalized gifts for friends and family. Furthermore, the cost savings are substantial. While boutique versions can command premium prices, crafting your own Tila bead bracelets typically costs just a few dollars per piece, making it an incredibly budget-friendly way to expand your jewelry collection. Get ready to transform simple beads and string into stylish, wearable art!
What Are Tila Beads? Discover the Allure of Miyuki’s Flat Glass Beads
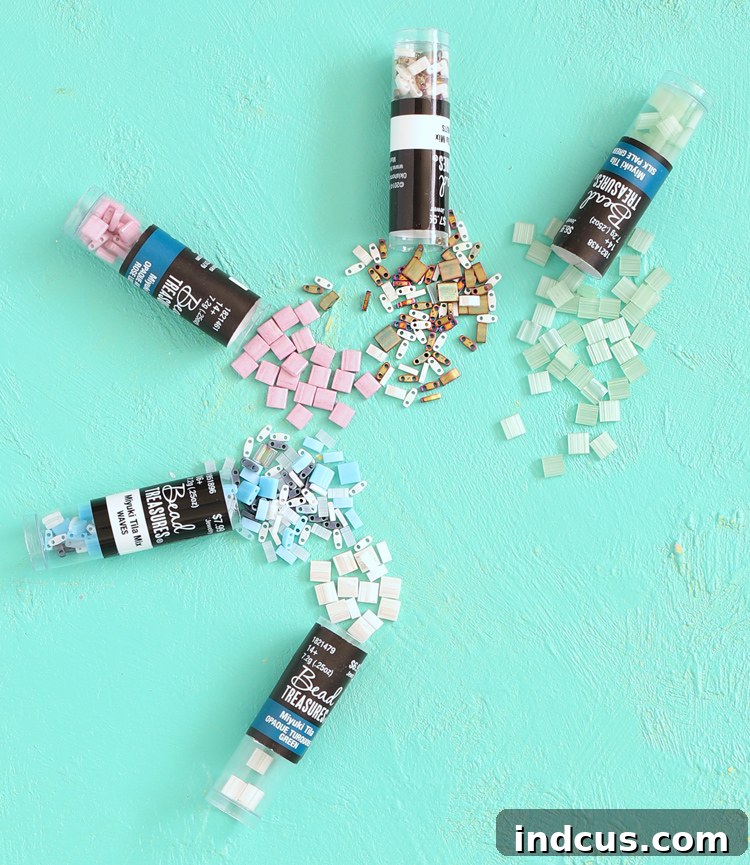
Tila beads, renowned for their exceptional quality and consistency, are a specific type of glass bead manufactured by Miyuki, a Japanese company famous for its precision-made seed beads. These small, flat, tile-like beads are characterized by having two parallel holes, a feature that distinguishes them from most other bead types and enables unique stringing patterns. This dual-hole design is key to their stability and how they sit beautifully flush against each other, forming a smooth, tiled surface when strung.
Tila beads come in various sizes, offering versatility for different design aesthetics. The most common full squares measure 5mm x 5mm, providing a bold, uniform look. For more delicate designs or to introduce textural variations, half squares measuring 2.5mm x 5mm are popular, and even smaller, thinner variations exist, allowing for truly intricate work. What truly sets Tila beads apart is their incredible array of colors, textures, sheens, and finishes. From matte and opaque to metallic, iridescent luster, or shimmering AB (aurora borealis) coatings, the possibilities for creating visually stunning bracelets are endless. This vast selection empowers crafters to perfectly match their designs to any mood, season, or outfit, ensuring each bracelet is a distinct statement piece.
Why Choose Tila Beads for Stretch Bracelets?
The unique properties of Tila beads make them an ideal choice for stretch bracelets. Their flat, square shape allows them to lie perfectly next to each other, creating a smooth, comfortable surface that won’t dig into your skin. This flat profile also means they stack beautifully, making them perfect for creating layered looks that are currently very on-trend. The two-hole design not only provides extra stability but also ensures that the beads sit uniformly, preventing them from twisting or turning awkwardly on the wrist. Furthermore, their sturdy glass construction makes them durable enough for everyday wear, while the vast range of finishes ensures your bracelets will always stand out. Stretch bracelets, by their nature, offer unparalleled ease of wear – simply slip them on and off without fumbling with clasps, adding to their appeal as a practical yet fashionable accessory. Combining this ease with the distinct beauty of Tila beads creates a winning formula for handmade jewelry.
To embark on your Tila bead bracelet-making journey, gather the following essential supplies:
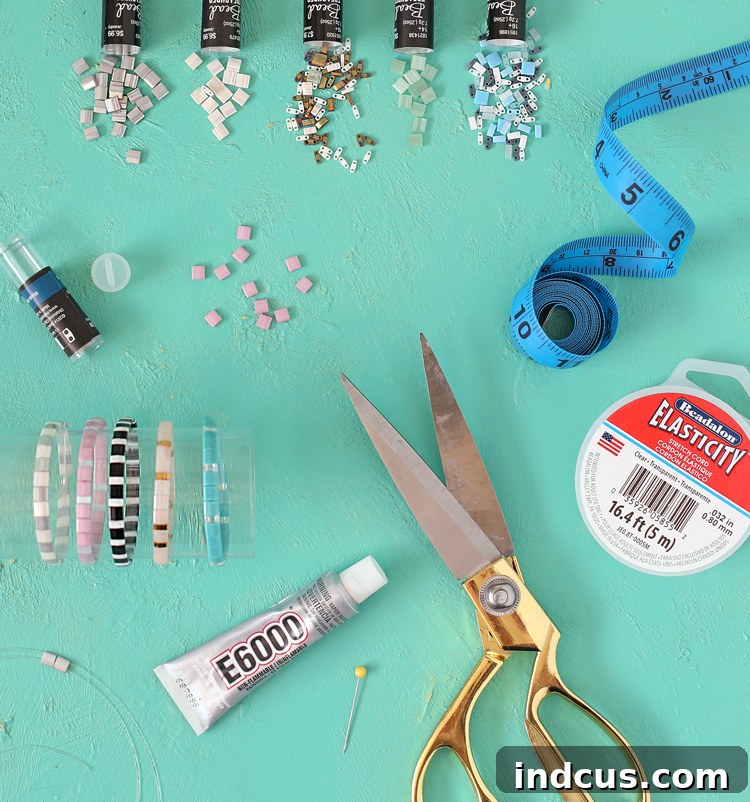
Essential Materials & Tools for Tila Bead Bracelets
This post contains affiliate links, which means I may earn a small commission if you make a purchase through them, at no extra cost to you.
- Tila Beads: The stars of our project! Choose a variety of colors and finishes to truly customize your designs. Consider starting with a few full squares (5mm x 5mm) and a complementary set of half squares (2.5mm x 5mm) for added design flexibility.
- Stretch Bracelet String (Elastic Cord): The foundation of your stretch bracelet. Opt for a high-quality cord to ensure durability and longevity. We’ll discuss types and thicknesses in detail below.
- Bracelet Glue or E6000 Glue: A strong, flexible adhesive is crucial for securing your knots. E6000 is a popular choice among crafters for its industrial strength and clear-drying finish.
- Straight Pin: Essential for precise application of glue to the knot, preventing excess.
- Sharp Scissors: For clean, precise cuts of your elastic cord, minimizing fraying.
- Measuring Tape: To accurately measure your wrist and the length of your elastic cord, ensuring a perfect fit.
- Optional: Bead Mat or Tray: While not strictly necessary, a bead mat prevents beads from rolling away and helps in organizing your design.
- Optional: Bead Stoppers: Small clips that temporarily secure beads on one end of the cord while you’re stringing, preventing them from sliding off.
- Optional: Needle-Nose Pliers: Useful if you decide to incorporate crimp covers for a professional finish.
Where To Buy Tila Beads: Your Go-To Sources for Miyuki Delights
Finding the right Tila beads is the first step to creating stunning bracelets. Fortunately, these popular beads are widely available from various retailers, both online and in physical stores.
- Hobby Lobby: A great starting point for many crafters, Hobby Lobby often carries a decent selection of Miyuki Tila beads. Their frequent 50% off sales make it an incredibly cost-effective option, allowing you to stock up on your favorite colors without breaking the bank. The beads featured in the accompanying photos are excellent examples of what you can find there.
- Amazon: For an even wider variety and the convenience of online shopping, Amazon is an excellent resource. You’ll find countless sellers offering Tila beads in an astonishing array of colors, sizes, and finishes. Look for reputable sellers with good reviews to ensure quality. I’ve often found great value in larger assortment packs, perfect for building a diverse collection.
- Mack & Rex: If you’re seeking a truly unparalleled selection, Mack & Rex is a specialized bead shop that caters to serious beaders. They boast an incredible inventory of every type of Tila bead imaginable, including unique colors and expertly curated combo packs. While their prices might be a little higher, the breadth of their collection and the quality of their offerings are unmatched, making it a favorite among enthusiasts looking for specific or rare finds.
When shopping, consider looking for “Miyuki Tila beads bulk” or “Tila bead assortment” to discover great deals and expand your creative options.
Choosing the Best Stretch Bracelet String for Durability and Comfort
The quality of your stretch bracelet string is paramount to the longevity and comfort of your finished piece. Investing in good string is always worthwhile, as it prevents easy breakage and ensures your handmade bracelets stand the test of time.
Stretch cord generally comes in various thicknesses, typically ranging from 0.5mm to 1mm. The choice of thickness impacts both the durability and the ease of threading. For these Tila bead bracelets, I personally recommend using 0.8mm clear stretchy bracelet cord. This thickness strikes a good balance, offering robust strength without being too difficult to thread through the two holes of the Tila beads. You can find excellent 0.8mm clear elasticity stretch cord at craft stores like Hobby Lobby, or similar highly-rated options on Amazon.
While thinner 0.5mm string is stretchier and often easier to thread, its reduced thickness means it’s inherently less durable and more prone to snapping over time, especially with frequent wear. Conversely, a 1mm cord might offer maximum durability but can be quite challenging to thread through smaller bead holes, particularly when using a double strand as we will for Tila beads. Always prioritize quality over initial cost to avoid disappointment later.
Calculating Cord Length: For each bracelet you plan to make, you will need approximately 24 inches of stretch cord. This generous length provides ample room for stringing beads and tying secure knots without feeling rushed or running short. Knowing this measurement will help you calculate how many bracelets you can make from each spool or pack of string you purchase.
Step-by-Step Instructions: Crafting Your Perfect Tila Bead Bracelet
Step 1: Prepare Your Elastic Cord
Begin by taking your chosen stretch cord and cutting two separate pieces, each measuring approximately twelve inches in length. The unique two-hole design of Tila beads means you will be stringing the entire bracelet with two distinct strands of elastic cord, one for each row of holes. Before you add any beads, it’s a crucial step to give each string a good, firm stretch. Gently pull and release the cord a few times. This pre-stretching helps to “break in” the elastic, preventing the bracelet from stretching out excessively and becoming loose after a few wears. This simple action significantly improves the long-term durability and fit of your finished bracelet.
Step 2: Design and String Your Tila Beads
Now comes the fun part: designing your bracelet! You have a couple of approaches here. If you’re aiming for an intricate, specific pattern or a symmetrical design, it’s often helpful to lay out your entire bead sequence on a bead mat or tray beforehand. This allows you to visualize the finished product and make any adjustments before committing to stringing. However, if, like me, you appreciate the organic beauty of a more spontaneous creation, simply make two piles of your chosen Tila beads and start stringing them onto the cords. The beauty of Tila beads is that even a random mix creates a captivating texture.
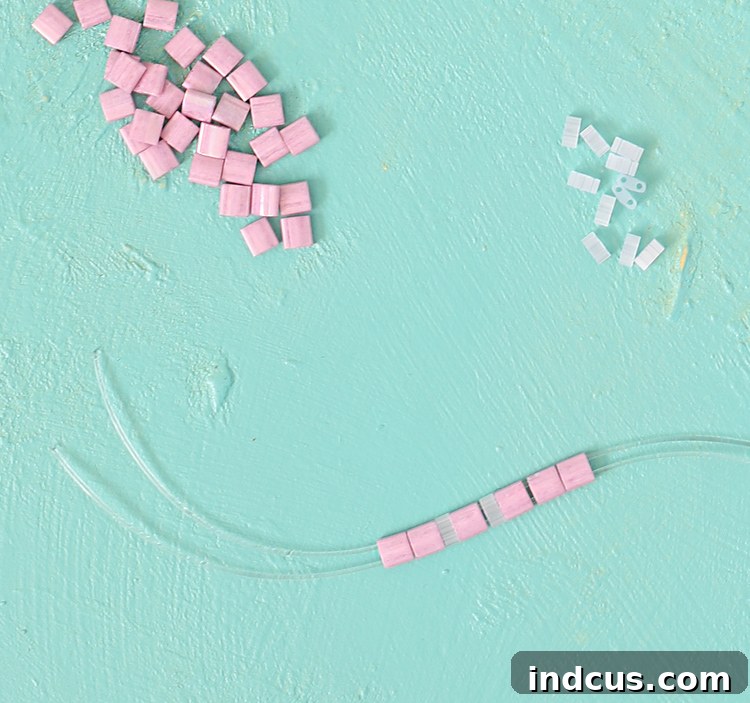
Carefully thread one cord through the top hole of each Tila bead, and the second cord through the bottom hole of the same bead. Ensure both cords pass through smoothly without tangling. Continue adding beads in your desired pattern or random sequence until the bracelet reaches the appropriate size for your wrist. A good rule of thumb is to measure the bracelet against your wrist, allowing for a slight overlap to accommodate the knot you’ll tie. For most women, wrist sizes typically range from 6 to 7.5 inches.
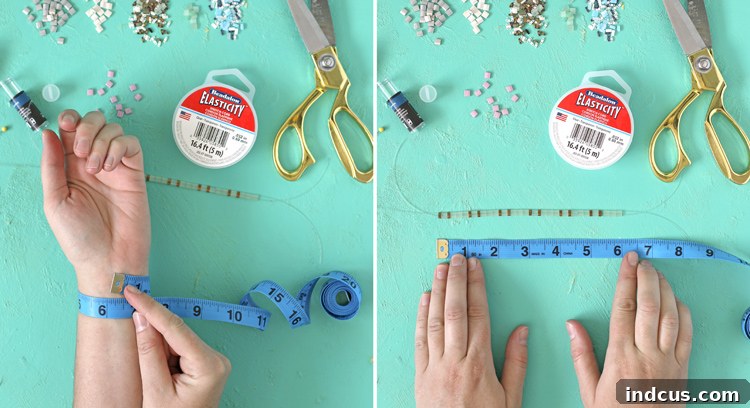
Step 3: Secure Your Bracelet with a Surgeon’s Knot
Once you’ve strung all your beads and are satisfied with the length, it’s time to tie a truly sturdy knot that will hold your bracelet together securely. For stretch bracelets, the surgeon’s knot is highly recommended due to its exceptional strength and reliability. It’s a simple knot to master, and once you get the hang of it, you’ll use it for all your stretch jewelry projects. If you’re new to this knot, the super short, ad-free video below provides a clear visual demonstration:
You will tie this knot twice, once for each of the two strings you used to thread the beads. It is absolutely critical that you tie each individual string to itself, forming two separate knots that cinch together. Do not tie the two strings to each other in one single knot. This method provides superior security. Pull each knot as tightly as possible without breaking the elastic, ensuring there are no gaps between the beads.
Step 4: Reinforce and Finish Your Knots
To give your surgeon’s knots maximum security and prevent them from coming undone over time, a touch of adhesive is essential. Dip the tip of a straight pin into your E6000 glue, picking up just a tiny amount. Carefully dab this small bead of glue directly onto each knot. The straight pin allows for precise application, minimizing excess glue and keeping your bracelet tidy.
A Crucial E6000 Warning: If you’ve never used E6000 glue before, heed this warning: DO NOT SQUEEZE THE BOTTLE! This powerful adhesive can turn into a “glue volcano,” squirting out uncontrollably and creating a sticky mess. Instead, gently use the pin to extract the glue from the nozzle. If you know, you know; if you don’t, consider yourself warned! Once the glue is completely dry (which can take several hours depending on humidity), use your sharp scissors to carefully trim off the excess elastic string as close to the knot as possible, without cutting into the knot itself.
Optional Step: Elevate Your Finish with Crimp Covers
For an even more polished and professional finish, some crafters prefer to conceal the knots using a crimp cover. A crimp cover is a small, C-shaped metal bead designed to fit neatly over a knot. To use one, simply slip the crimp cover over your glued and dried knot, then gently clamp it closed using needle-nose pliers. This creates a neat, metallic bead-like appearance, effectively hiding the knot and giving your bracelet a seamless look. Crimp covers are a very common jewelry finding and can be found in the jewelry aisle of almost any craft store in a variety of metallic finishes.
Whether you choose to use a crimp cover is entirely up to your personal preference. I often find that with a well-tied and glued surgeon’s knot, the knot itself is discreet and blends into the bracelet, creating a more seamless, minimalist aesthetic. However, a crimp cover can add a lovely decorative touch. Here are examples of both methods, allowing you to decide which style best suits your taste:
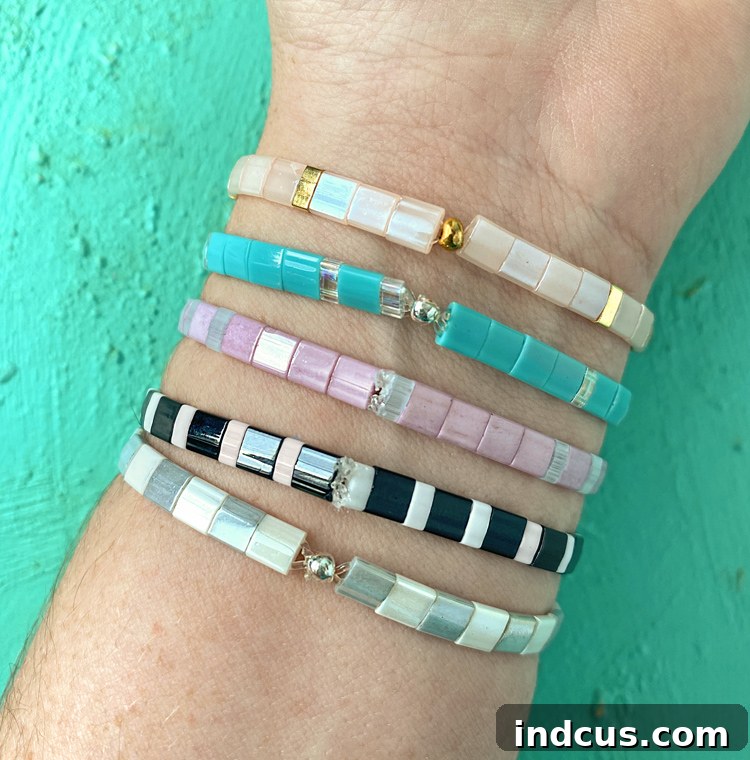
Another popular technique for finishing a stretch bracelet is to hide the knot *inside* one of the beads. While this is often my personal favorite method, it can be challenging with Tila beads and thicker elastic cord. The 0.8mm stretch cord, once tied into a surgeon’s knot, is generally too thick for the knot to fit neatly inside the small holes of Tila beads. However, if you opt for a thinner cord (such as 0.5mm) and manage to tie very tiny, compact knots, you might successfully employ this discreet finishing method. Always test with your specific beads and cord before committing to this technique.
FREQUENTLY ASKED QUESTIONS About Tila Bead Bracelets
How Many Tila Beads Are In A Gram?
Understanding bead count can help you plan your projects and purchases. On average, there are approximately 12 full-size (5mm x 5mm) Tila beads per gram. This means that a standard tube of beads, often containing around 7 to 7.5 grams, will hold about 86 beads. This quantity is usually sufficient to make two average-sized bracelets, depending on your design and wrist size.
How Many Beads Do I Need To Make A Bracelet?
The number of beads required depends on the desired length of your bracelet and the size of your Tila beads. As a general guideline for full-size Tila beads, plan on using approximately 5 beads per inch of bracelet length. For example, a 6-inch bracelet would require about 30 beads, while a 7-inch bracelet would use around 35 beads. Most women’s wrists fall within a range of 6 inches to 7.5 inches. To get the most accurate fit, it’s always best to measure the wearer’s wrist directly and add a small allowance for comfort and the knot.
Are Tila Beads Durable?
Yes, Miyuki Tila beads are known for their exceptional durability. Made from high-quality glass, they are designed to withstand regular wear and maintain their color and finish over time. However, like all glass beads, they can chip or break if subjected to extreme impact or pressure. Proper care, such as avoiding harsh chemicals and excessive stretching, will help prolong the life of your Tila bead bracelets.
How Do I Clean My Tila Bead Bracelet?
To clean your Tila bead bracelet, simply use a soft, damp cloth with a mild soap if necessary. Gently wipe the beads and the elastic cord. Avoid harsh chemical cleaners, as these can damage the bead finishes or weaken the elastic cord. Allow the bracelet to air dry completely before wearing or storing.
What’s the Difference Between Tila and Half-Tila Beads?
Tila beads are square-shaped, typically measuring 5mm x 5mm, with two parallel holes. Half-Tila beads are rectangular, measuring 2.5mm x 5mm, also with two parallel holes. They are essentially half the width of a full Tila bead. Half-Tilas are excellent for creating more delicate patterns, filling in gaps, or adding textural contrast to designs that feature full Tila beads.
Caring for Your Tila Bead Stretch Bracelets
To ensure your beautiful handmade Tila bead bracelets last for years to come, a little care goes a long way. Avoid exposing your bracelets to harsh chemicals, such as cleaning agents, perfumes, or lotions, as these can degrade the elastic cord and potentially damage the bead finishes. While stretch bracelets are designed for flexibility, try not to overstretch them unnecessarily, as this can weaken the elastic over time. When not wearing them, store your bracelets flat or hanging, away from direct sunlight and extreme temperatures, to prevent the elastic from drying out or becoming brittle. By following these simple tips, your Tila bead creations will continue to bring you joy and style.
Creative Variations & Design Inspirations
The versatility of Tila beads opens up a world of design possibilities. Don’t limit yourself to single-color bracelets; experiment with combining different shades and finishes to create stunning ombré effects, bold color blocks, or intricate mosaic-like patterns. Try mixing full-size Tila beads with half-Tila beads to introduce interesting textures and dimensions into your designs. Tila beads also pair beautifully with other small beads, such as seed beads or tiny round beads, which can be used as spacers or accent pieces. Consider adding a small charm to your bracelet for a personalized touch, or create a collection of coordinating Tila bead bracelets to stack and layer for a truly bohemian-chic look. The only limit is your imagination!
Tila Bead Bracelet Video Tutorial
Found this project inspiring? Pin it to save it for later and share the crafting joy!