
Craft a Magical Christmas Countdown: Your Printable DIY Sticker Advent Calendar
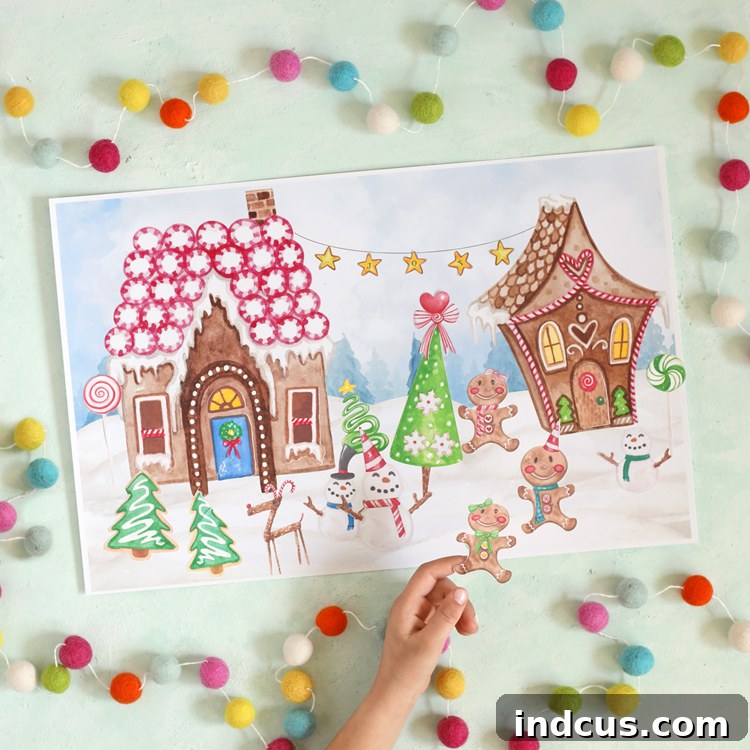
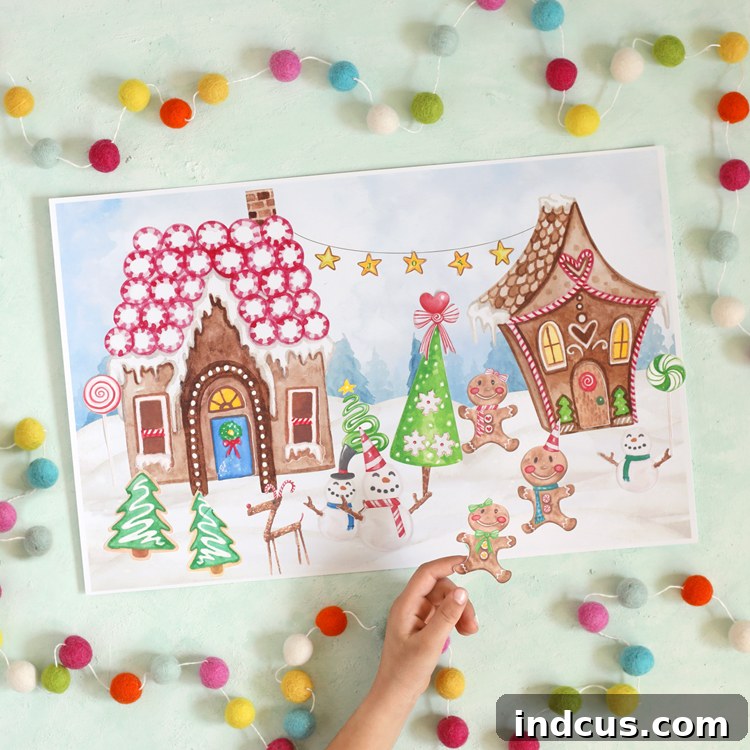
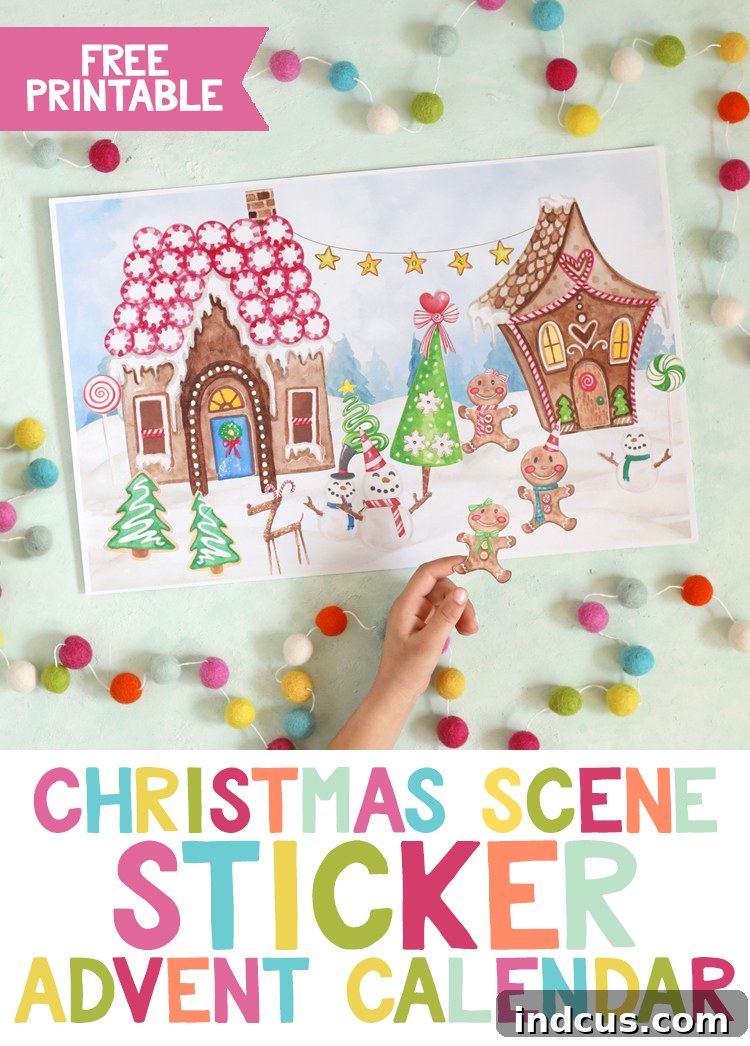
The enchanting holiday season is upon us, and what better way to build excitement than with a personalized DIY Advent Calendar? For many, the anticipation of Christmas morning is almost as magical as the day itself. If your children are captivated by the simple joy of stickers, then you’re in for a treat! We’ve crafted an utterly charming and interactive sticker advent calendar that promises daily delight as you count down to December 25th. This isn’t just any countdown; it’s a creative journey that transforms a blank gingerbread village scene into a festive wonderland, one sticker at a time.
Imagine the smiles each morning as your little ones discover the day’s designated sticker, peel it with eager fingers, and place it carefully on their evolving gingerbread landscape. Our unique calendar features a large 11″x17″ printable gingerbread village backdrop, accompanied by two sheets brimming with delightful stickers. From adding whimsical windows and charming doors to the cozy houses, to populating the scene with festive Christmas trees, jolly gingerbread people, cute snowmen, and a host of other adorable details, every day brings a new element to life. It’s an incredibly fun and engaging activity that fosters creativity, develops fine motor skills, and builds cherished family memories.
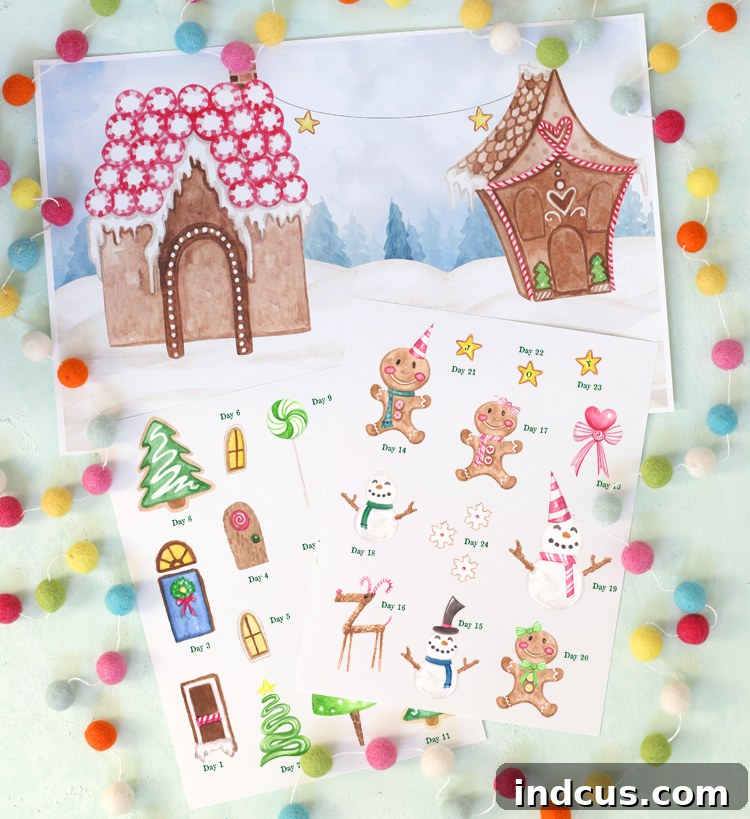
Thanks to our wonderful partners at OnlineLabels.com, we’re thrilled to offer you the complete set of printable files for this delightful project. This means you can easily recreate this enchanting Christmas countdown craft right from the comfort of your home. Get ready to embark on a festive crafting adventure that will bring joy and anticipation throughout the holiday season!
Why Choose This DIY Sticker Advent Calendar for Your Family?
In a world filled with endless options for holiday decorations and countdowns, our printable sticker advent calendar stands out as a truly special and memorable experience. It offers a unique blend of creativity, engagement, and traditional holiday spirit, making it an ideal choice for families looking to create lasting memories.
Engaging & Interactive Daily Fun
Unlike traditional advent calendars that simply involve opening a door to reveal a small treat or picture, this sticker calendar provides an active, hands-on experience. Each day, children are challenged to find the correct numbered sticker and decide where it fits best within the evolving gingerbread village scene. This daily interaction transforms the countdown into a playful scavenger hunt and a creative decorating session, keeping excitement levels high throughout December.
Fosters Creativity and Fine Motor Skills
The act of peeling and precisely placing stickers is an excellent exercise for developing fine motor skills and hand-eye coordination in young children. Furthermore, as they fill their village, kids can express their creativity by arranging elements in their own unique way. While the overall scene is guided, the specific placement of individual gingerbread men, snowmen, and festive decorations allows for personal artistic expression, making each calendar truly one-of-a-kind.
Builds Anticipation and Teaches Patience
The magic of Advent lies in the build-up to Christmas. This calendar brilliantly captures that essence, fostering a sense of anticipation and teaching children the value of delayed gratification. Each sticker added is a tangible step closer to Christmas, reinforcing the concept of time and patience in a fun, visual way. It establishes a beautiful daily ritual that families can look forward to together.
Affordable & Accessible Holiday Crafting
Creating memorable holiday experiences doesn’t have to break the bank. This printable DIY advent calendar offers a budget-friendly alternative to many expensive store-bought options, without compromising on charm or engagement. With readily available materials and free printable files, it’s an accessible craft for almost any household, allowing more families to enjoy the festive fun.
A Wonderful Family Tradition
Imagine this project becoming a cherished part of your annual Christmas preparations. This sticker advent calendar is more than just a craft; it’s an opportunity for family bonding. Spending a few minutes each day together, sharing stories about the stickers, or simply admiring the growing village can create heartwarming holiday traditions that children will remember fondly for years to come.
Essential Materials: What You’ll Need to Create Your Enchanting Scene
Gathering your supplies is the first exciting step in bringing this festive project to life. Fortunately, the material list is short and sweet, making it an easy craft to prepare for. We’ve partnered with OnlineLabels.com because of their exceptional quality products that make DIY crafting a breeze.
High-Quality Sticker Paper is Key
For this project, the quality of your sticker paper truly makes a difference. We highly recommend using Matte White Sticker Paper from OnlineLabels.com. Here’s why it’s our top choice:
- Ease of Use: This paper is incredibly user-friendly for both printing and cutting. Its matte finish prevents smudging and ensures your printer ink adheres beautifully, resulting in vibrant, crisp sticker designs.
- Durability: The stickers need to withstand daily handling by excited little hands. This matte paper offers excellent durability, ensuring the stickers peel cleanly and stick firmly to your background scene without tearing or fading.
- Value: OnlineLabels.com offers great value, allowing you to purchase exactly what you need – whether that’s a few sheets or in bulk for future projects. Plus, the convenience of having it shipped directly to your door saves you time and effort during the busy holiday season.
Additional Supplies:
- A Reliable Printer: Ensure your home printer is in good working order and has sufficient ink. Most inkjet and laser printers are compatible with the recommended sticker paper.
- Thick White Cardstock: For printing your large gingerbread village background scene. We suggest 110lb white cardstock for its sturdy feel, which will prevent the scene from wrinkling or tearing with daily sticker additions.
- Silhouette Cutting Machine: While not strictly essential if you prefer to hand-cut, a Silhouette machine (or similar electronic cutting machine like a Cricut) will provide precise, professional-looking cuts for your intricate stickers, saving you a significant amount of time and effort.
- Cutting Mat: Standard for use with your Silhouette machine.
Having these materials ready ensures a smooth and enjoyable crafting experience, allowing you to focus on the fun of assembly and the joy this calendar will bring.
Step-by-Step Guide: Crafting Your Printable Sticker Advent Calendar
Now that you have all your materials ready, let’s dive into the fun part: assembling your magical gingerbread village advent calendar! Follow these detailed instructions for a smooth and rewarding crafting experience.
Step 1: Print the Grand Gingerbread Village Background
The heart of your advent calendar is the charming 11″x17″ gingerbread village scene. For optimal results and a truly professional finish, we highly recommend sending this large background file to a local print shop. They can easily print it on sturdy 110lb white cardstock, which is crucial for durability and a premium feel. This heavy cardstock will prevent the scene from creasing or tearing as stickers are applied daily. Many print shops offer this service for a very modest cost and quick turnaround, making it a hassle-free option. If a print shop isn’t feasible, you could technically print the scene in tiled sections at home and carefully assemble them, but a single, large print is ideal for seamless visual appeal.
Step 2: Prepare Your Sticker Paper for Printing
Next, it’s time to print your two sheets of delightful stickers. Load two pieces of your chosen sticker paper (we recommend Matte White Sticker Paper) into your home printer. This step is crucial: ensure the sticker paper is loaded correctly, with the printable side facing the right direction for your specific printer model. Most printers have an icon or instructions near the paper tray indicating the correct loading orientation (often print-side down for bottom trays, or print-side up for top trays). A quick test print on plain paper can help verify this before you use your valuable sticker sheets.
Step 3: Prepare and Print Sticker Designs with Silhouette Studio
Open the two sticker design files in your Silhouette Studio software. Before printing, double-check that the registration marks are clearly visible on your screen but that the corresponding hatch mark areas do not overlap any of your printed sticker designs. These registration marks are essential for your Silhouette machine to accurately detect where to cut. When you’re ready to print, select “Print” and ensure your printer settings are adjusted to a “Best Quality” or “Photo Quality” mode. This will guarantee crisp, vibrant colors and sharp details for your stickers, making them even more appealing.
Step 4: Load Sticker Page onto Cutting Mat
Carefully attach one of your freshly printed sticker pages, design-side up, to a clean cutting mat. Ensure it is securely placed and aligned with the grid on your mat. Gently feed the loaded cutting mat into your Silhouette cutting machine. Take your time with this step to ensure proper alignment, as this directly impacts the precision of your sticker cuts.
Step 5: Adjust Silhouette Cut Settings for Precision
In Silhouette Studio, navigate to the “Send” panel to adjust your cut settings. We found the cleanest and most precise cuts were achieved using the “Sticker Paper, White” preset. From there, slightly adjust the blade depth to 3. This setting provides the perfect balance for cutting through the sticker layer without cutting through the backing paper, creating easy-to-peel stickers. Always perform a small test cut on a corner of your sticker sheet first if you’re unsure, to fine-tune the settings for your specific machine and paper.
Step 6: Initiate Cutting and Repeat for Second Page
Once your settings are dialed in, hit the “SEND” button, and watch your Silhouette machine magically cut out all your intricate Christmas stickers! The precision of the machine will transform your printed sheets into individual, ready-to-peel designs. Once the first page is complete, carefully remove it from the cutting mat and repeat Steps 4 and 5 for the second sticker page. In no time, you’ll have a complete collection of festive elements ready for your daily Christmas countdown!
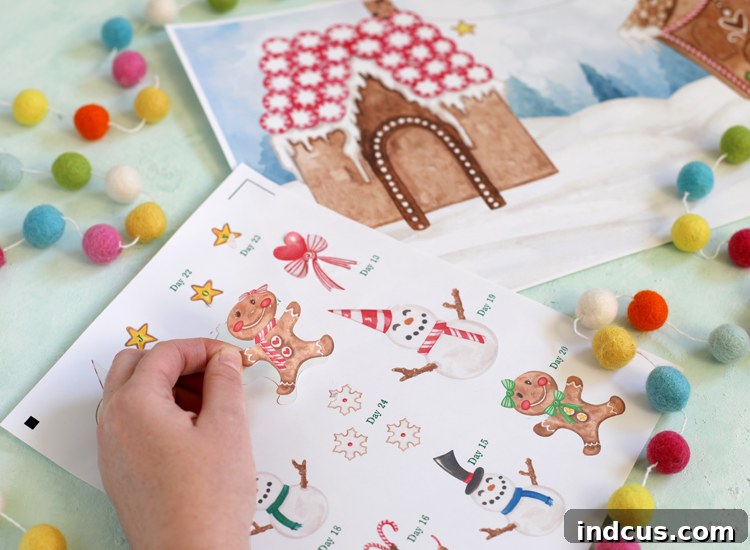
And just like that, your DIY sticker advent calendar is complete! This project is surprisingly quick and simple to execute, yet yields incredible results. The joy on a child’s face as they add each sticker is truly priceless. My six-year-old was absolutely thrilled to help assemble a sample, reinforcing just how engaging and rewarding this craft is for little ones. It truly feels like a win for holiday crafting!
Watch the Magic Unfold: Sticker Scene Christmas Countdown Video Tutorial
Sometimes, seeing is believing! To give you an even clearer idea of how simple and enjoyable this DIY sticker advent calendar project is, we’ve prepared a helpful video tutorial. Watch as the gingerbread village comes to life, step by step, and get a closer look at the delightful stickers and the ease of the crafting process.
Video: This free printable DIY advent calendar includes a blank gingerbread village scene and coordinating stickers to add each day leading up to Christmas.
Make This Christmas Unforgettable with a DIY Sticker Advent Calendar!
As the holiday season approaches, the quest for meaningful traditions and engaging activities for children becomes paramount. Our printable DIY sticker advent calendar offers a perfect solution, blending the excitement of a daily countdown with the joy of creative expression. It’s an inexpensive, easy-to-make project that yields immeasurable smiles and creates cherished family memories.
From the meticulous preparation of the sticker sheets with your Silhouette machine to the shared laughter as each sticker finds its place on the enchanting gingerbread village, this calendar is more than just a craft—it’s an experience. It fosters patience, ignites imagination, and builds anticipation for the most wonderful time of the year. We encourage you to download the files, gather your materials, and embark on this delightful holiday journey with your loved ones.
Loved this charming holiday project? Don’t let these festive ideas get lost! Pin it to your favorite Christmas or DIY boards on Pinterest so you can easily find it year after year, and share the joy with friends and family!
This post is proudly sponsored by OnlineLabels.com. All opinions expressed are genuinely our own, reflecting our sincere appreciation for their quality products.







