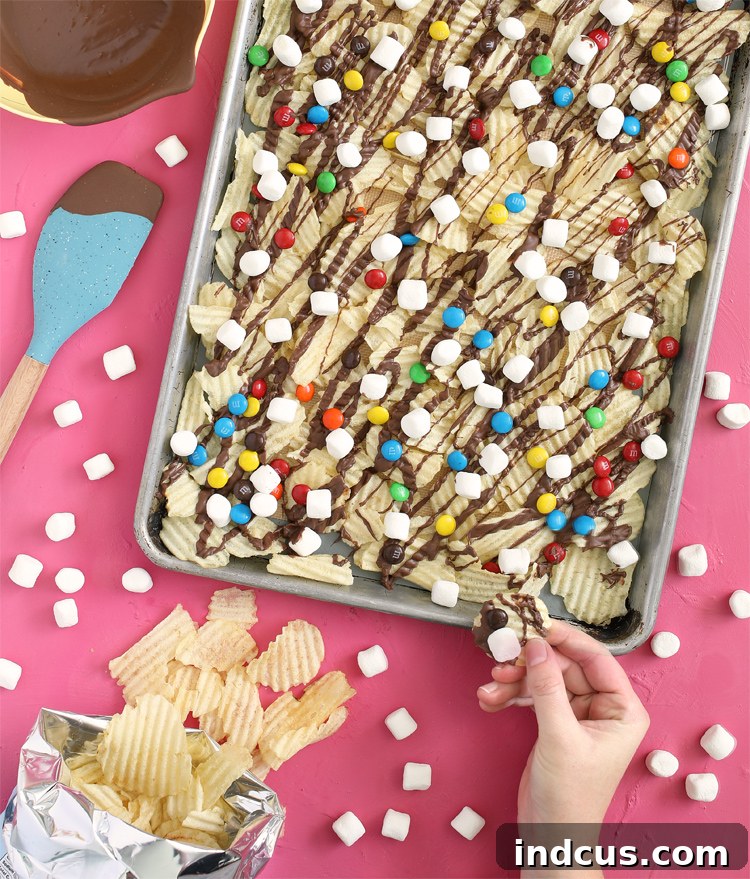
Irresistible Chocolate Covered Potato Chips: The Ultimate Sweet and Salty Snack
Experience the Perfect Blend of Crunchy, Buttery Chips with Decadent Chocolate and Fun Toppings
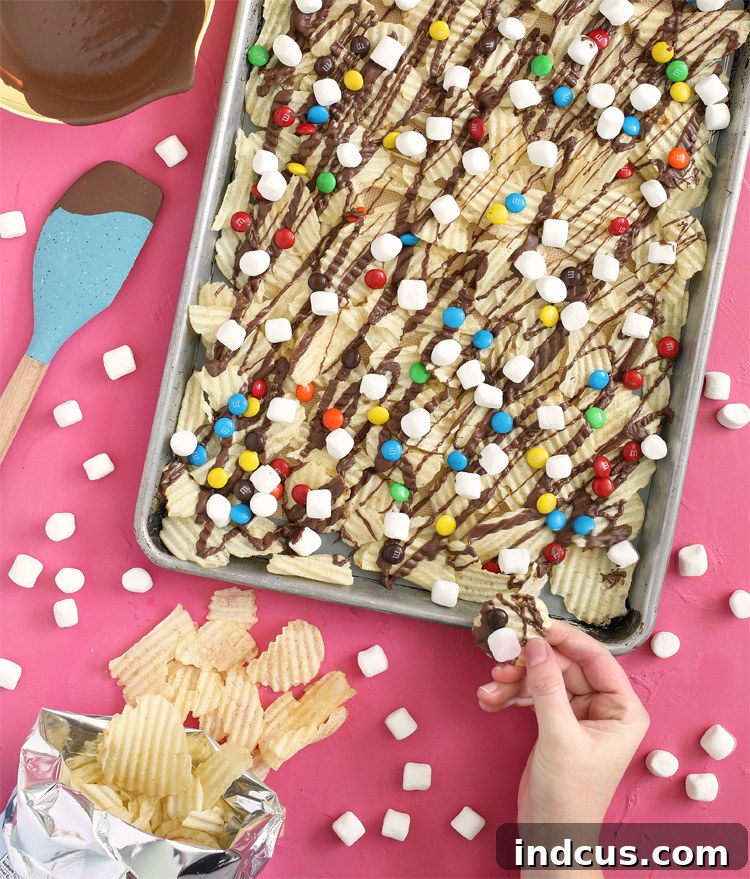
In the expansive and delicious world of snacks, few combinations command as much universal adoration as the perfect marriage of sweet and salty. There’s an undeniable magic in the interplay of these contrasting flavors, creating a sensation that truly dances on your palate. Today, we’re diving headfirst into a culinary creation that not only embodies this delectable duality but elevates it to an art form: **Chocolate Covered Potato Chips**. Forget intricate baking or lengthy preparations; this no-bake, incredibly easy, and supremely customizable treat is poised to become your new favorite for everything from casual family movie nights to impressive, eye-catching party platters.
My own household, much like countless others, operates under the happy philosophy that the ideal snack frequently involves both a delightful sugary kick and a satisfying savory crunch. It was this guiding principle that led me to experiment in the kitchen recently, resulting in a glorious batch of these chocolate-drizzled crisps. Adorned with cheerful M&M’s and fluffy mini marshmallows, the outcome was nothing short of an instant sensation! Every single member of the family, from the most discerning palates to the notoriously picky eaters, absolutely adored them. It possesses that perfect balance of textures and tastes that makes it seriously addicting – the kind of snack that vanishes almost as quickly as you can assemble it, leaving everyone craving just one more delicious piece.
Beyond its status as a beloved family indulgence, these homemade chocolate-covered potato chips are a guaranteed show-stopping addition to any social gathering. Imagine a vibrant, artfully arranged tray of these at your next party, potluck, or holiday celebration! Their undeniable visual appeal, coupled with their universally loved taste, makes them an instant conversation starter and a memorable highlight of any event. The true genius of this simple recipe lies in its remarkable adaptability. With a mere swap of toppings, you can effortlessly transform this delightful snack to perfectly suit any theme, season, or special occasion. Envision festive red and green candies for a heartwarming Christmas treat, whimsical candy corn for a spooky Halloween delight, or patriotic red, white, and blue sprinkles for a spirited Fourth of July celebration. The creative possibilities are genuinely endless, allowing your personal flair and imagination to shine through while consistently delivering a crowd-pleasing, unforgettable treat.
Unlock Your Creativity: Endless Topping Ideas for Your Chocolate Potato Chips
While classic M&M’s and mini marshmallows offer a playful and universally loved touch, the true adventure begins when you start exploring the vast and exciting array of topping possibilities. This simple recipe serves as a magnificent blank canvas, eagerly awaiting your culinary imagination. Don’t hesitate to experiment with different textures, colors, and flavors to craft your own unique signature snack. Here’s an expanded list of fantastic ideas to inspire your next batch of homemade chocolate potato chip bark, ensuring every bite is a delightful surprise:
Popular and Creative Topping Suggestions:
- Chopped Nuts: Elevate the crunch factor and add a layer of sophisticated flavor with finely chopped almonds, pecans, walnuts, cashews, or even exotic pistachios. For an enhanced aroma and deeper taste, lightly toast your nuts before sprinkling.
- Candy Corn: A quintessential seasonal favorite, particularly around Halloween, candy corn provides a distinct sugary sweetness and a delightful chewy texture that creates an appealing contrast with the crisp chips and smooth chocolate.
- Peanut Butter Cups or Reese’s Pieces: For an irresistible combination that peanut butter and chocolate enthusiasts adore, finely crumble mini peanut butter cups or scatter vibrant Reese’s Pieces. These additions deliver an intense burst of nutty flavor and a satisfying chew.
- Caramel Bits: These soft, buttery morsels partially melt into the warm chocolate, creating luscious, gooey pockets of rich caramel goodness. Their sweetness and chewiness are a perfect counterpoint to the saltiness of the chips.
- Crushed Heath Candy Bars (or Toffee): For an exceptional toffee crunch, finely crush Heath bars or any similar chocolate-covered toffee candy. The buttery, caramelized notes of the toffee add an exquisite dimension of flavor and a delightful snap.
- Melted Peanut Butter Chips or White Chocolate: Go beyond milk chocolate! Drizzle melted peanut butter chips for a rich, nutty twist, or use melted white chocolate for a sweeter, creamier profile. You can even create beautiful marbled patterns by alternating chocolate and peanut butter drizzles.
- Sprinkles: A simple yet incredibly effective way to infuse color and fun! Select sprinkles to perfectly match any holiday, party theme, or simply choose a vibrant rainbow mix for a burst of cheerful festivity. They’re always a hit, especially with younger snackers.
- Crushed Pretzels: For an even more intense salty-crunchy experience, coarsely crushed pretzels can be an outstanding addition, transforming your bark into a delightful “kitchen sink” type of treat with layers of texture.
- Dried Fruits: Introduce a touch of fruity chewiness and a hint of tartness with finely chopped dried cranberries, cherries, apricots, or even golden raisins. Their vibrant colors and chewy texture beautifully balance the sweetness of the chocolate.
- Shredded Coconut: Whether lightly toasted to bring out its nutty essence or left plain, shredded coconut adds a delightful tropical note and a lovely, delicate texture to your chocolate bark.
- Flaky Sea Salt: If you’re using unsalted potato chips or simply wish to amplify the sweet and salty contrast, a delicate sprinkle of flaky sea salt (like Maldon) over the wet chocolate just before it sets is absolutely divine.
- Mini Chocolate Chips: An obvious but effective choice, adding more chocolatey goodness and a slight textural variation.
- Gummy Bears or Worms (Chopped): For a truly whimsical and chewy addition, finely chop colorful gummy candies. This adds a playful element and a burst of fruity flavor.
Remember, there are absolutely no strict rules when it comes to customizing this snack. Mix and match your favorite flavors and textures, combine different candies, and let your imagination run wild to create a truly personalized and unforgettable treat!
The Art of Melting Chocolate: Tips for a Perfectly Smooth Drizzle
Melting chocolate might appear to be a straightforward task, but employing a few simple techniques can guarantee a perfectly smooth, glossy, and pourable finish for your chocolate-covered potato chips. It’s vital to remember that overheating chocolate can lead to undesirable results, such as seizing (where it becomes thick, grainy, and clumpy) or even burning, which imparts a bitter taste. Therefore, patience, gentle heat, and careful stirring are paramount to achieving chocolate perfection. Here are two highly reliable methods to melt your chocolate:
Microwave Method (Our Preferred Quick and Easy Technique):
This is my personal go-to method for its unparalleled speed and convenience. The key to success here is to use a clean, dry, microwave-safe bowl (glass or ceramic works best) and to proceed with short, controlled bursts of heat:
- Place your desired quantity of chocolate chips (or finely chopped chocolate) into a clean, dry microwave-safe bowl. It’s crucial to ensure that no water or moisture comes into contact with the chocolate, as even a tiny drop can cause it to seize.
- Microwave on high power for an initial 30 seconds.
- Remove the bowl from the microwave and stir the chocolate vigorously with a rubber spatula, even if it appears that very little has melted. The residual heat within the chocolate will continue the melting process.
- Return the bowl to the microwave for another 15 seconds. Stir thoroughly again.
- Continue repeating this 15-second microwaving and stirring process until the chocolate is completely smooth and fully melted. For approximately one cup of chocolate chips, this typically requires less than one minute of total microwave time. The objective is to melt the chocolate gently, allowing the stirring action to evenly distribute the heat and finish the melting.
Important Caution: Always stir diligently between each heating interval. If you observe any small lumps, keep stirring; they will often melt away with the accumulated residual heat. Only return the bowl to the microwave if absolutely necessary. It’s always better to slightly under-microwave and let stirring complete the process than to overheat, which can quickly ruin the chocolate’s texture.
Double Boiler Method (Gentle and Controlled Melting):
For those who prefer a more controlled melting process, especially when working with larger quantities or more delicate types of chocolate, the double boiler method is an excellent and foolproof option:
- Fill a medium-sized saucepan with about one to two inches of water and bring it to a gentle simmer over medium heat on your stovetop.
- Place a heat-proof bowl (such as a glass or stainless steel mixing bowl) over the saucepan. Ensure that the bottom of the bowl does not touch the simmering water. The chocolate will melt from the indirect heat of the steam.
- Add your chocolate chips or finely chopped chocolate to the bowl.
- Stir the chocolate constantly with a rubber spatula as it slowly melts from the gentle steam. This method provides indirect, consistent heat, significantly reducing the risk of burning or seizing the chocolate.
- Once the chocolate is mostly melted and appears smooth, remove the bowl from the heat entirely and continue stirring until it is completely smooth and free of any lumps.
Whichever melting technique you choose, aim for a fluid, glossy, and pourable consistency that will beautifully coat your potato chips without being too thick or clumpy.
Assembling Your Sweet and Salty Masterpiece: Step-by-Step
With your chocolate perfectly melted and ready, the assembly portion of this delicious snack is both quick and incredibly enjoyable. Proper arrangement of your potato chips is a crucial step to ensure that every single chip receives its fair share of delightful chocolate and mouth-watering toppings.
Choosing and Arranging Your Potato Chips for Optimal Coverage:
- Potato Chip Selection: While virtually any plain potato chip will work for this recipe, I’ve found that ruffled potato chips offer the best canvas. Their distinctive ridges are perfectly designed to hold onto the melted chocolate and a generous amount of toppings more effectively, providing a more robust and satisfying bite. Kettle-cooked chips also perform wonderfully, lending an extra firm crunch, but it’s generally best to avoid heavily flavored chips that might clash with the sweetness of the chocolate. Opt for classic plain or lightly salted varieties.
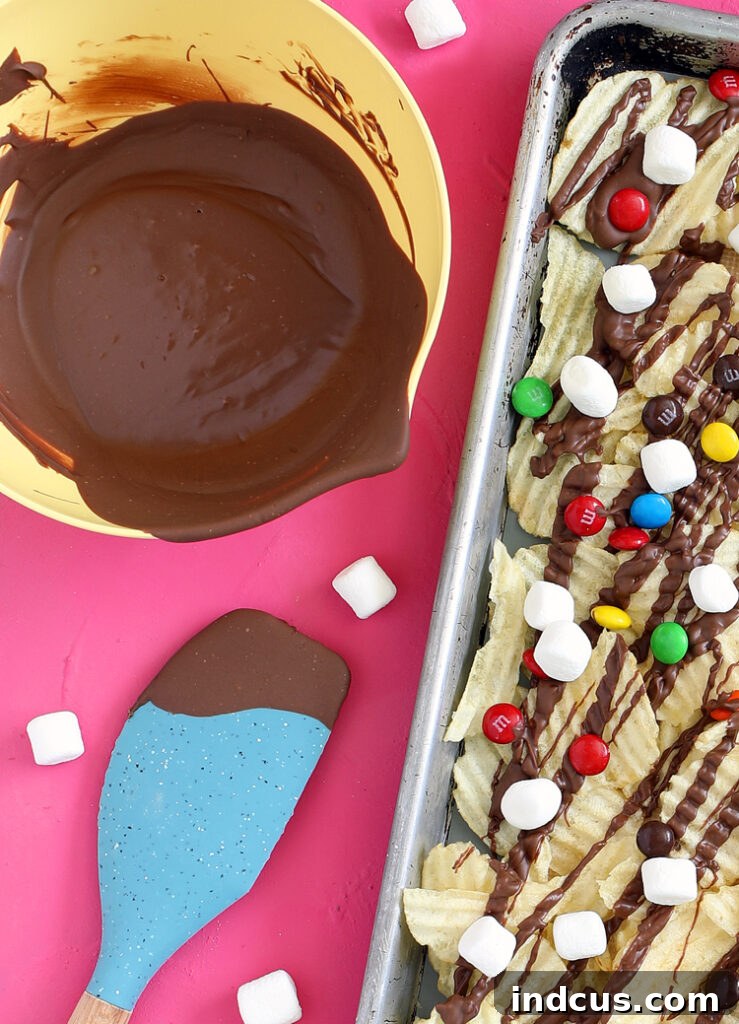
- The “Nacho” Concept for Spreading: The key to success here is maximum surface area! Spread your chosen potato chips out on a large baking sheet, a spacious serving platter, or a cutting board generously lined with parchment paper. The most critical step is to arrange them in a single, even layer. Think of it like preparing a tray of nachos – you want broad, expansive coverage rather than a deep, unmanageable pile. This strategic arrangement guarantees that every single chip is easily accessible for thorough drizzling and even topping distribution, preventing any sad, soggy, or untopped chips from being left behind at the bottom.
- No Baking Required: Since these are wonderfully no-bake treats, you don’t need to concern yourself with using heat-proof platters if you plan to serve them almost immediately. However, using a parchment-lined cookie sheet is always an excellent idea for effortless cleanup and makes transferring the chips (especially if you decide to chill them) incredibly simple.
Choosing the Right Chocolate for Every Palate:
I typically find myself gravitating towards classic milk chocolate chips for their creamy texture and familiar, comforting sweetness, which creates a delightful and well-loved contrast to the inherent saltiness of the potato chips. However, don’t feel limited to just one type! The diverse world of chocolate offers numerous exciting possibilities, each bringing a unique character to your snack:
- Dark Chocolate: For those who appreciate a richer, more intense chocolate flavor with reduced sweetness, dark chocolate (ranging from 60% to 70% cacao) is an outstanding choice. Its subtle bitterness beautifully complements and enhances the saltiness of the chips, creating a more sophisticated flavor profile.
- White Chocolate: A sweeter, incredibly creamy, and vanilla-infused option, white chocolate pairs wonderfully with tart toppings such as dried cranberries, chopped dried apricots, or even a hint of citrus zest. Be especially attentive when melting white chocolate, as it tends to be more prone to seizing if overheated.
- Semi-Sweet Chocolate: This is a versatile and widely appealing middle-ground, offering a perfectly balanced sweetness that appeals to a broad range of tastes and complements almost any topping.
- Flavored Chips: Dare to experiment with different flavored chips like butterscotch, peanut butter, or even mint chocolate chips for truly unique and exciting flavor profiles that will surprise and delight your guests!
The Final Drizzle and Topping Application:
Once your chips are meticulously laid out and your chosen chocolate is melted to a perfect, glossy consistency, it’s time for the true magic to unfold! Generously drizzle the melted chocolate evenly over all the arranged potato chips. Don’t be shy; aim for good, comprehensive coverage, but avoid completely submerging the chips, as you still want their crisp texture to shine through. The crucial next step is to immediately, without delay, sprinkle your chosen toppings liberally over the wet chocolate. The warmth and stickiness of the freshly melted chocolate will act as a delicious adhesive, ensuring that your M&M’s, miniature marshmallows, chopped nuts, or festive sprinkles adhere perfectly as the chocolate begins to cool and set.
Quick Set, Storage, and Serving Tips
One of the most appealing aspects of this irresistible sweet and salty snack is how quickly and effortlessly it comes together and sets. You won’t need to fire up your oven; just a touch of patience while the chocolate firms up is all that’s required.
- Natural Setting Time: The chocolate will naturally harden at room temperature. Depending on the ambient temperature and humidity in your kitchen, this process can take anywhere from 30 minutes to a full hour. It’s important to ensure it’s fully set before handling to prevent mess.
- Speed It Up: If you’re eager to dig in without delay or need to serve your treats quickly for an event, you can significantly accelerate the hardening process. Simply place the cookie sheet, with the chocolate-covered chips, into the refrigerator for approximately 10 to 15 minutes. The chocolate will firm up much faster. While the freezer can also work, it’s generally best to avoid it, as extreme cold can sometimes cause chocolate to “bloom” (develop a whitish, powdery film on the surface), though this doesn’t affect its safety or taste.
- Serving Suggestions: Once the chocolate is completely firm and brittle, you can easily break the large sheet of chocolate-covered chips into smaller, more manageable, and delightful bite-sized pieces. Arrange these artfully on a serving platter for an elegant presentation, or simply pile them generously into a decorative bowl for a more casual and inviting feast.
- Storage Advice: To maintain their optimal crispness and flavor, store any leftover chocolate-covered potato chips in an airtight container at room temperature. They will typically remain fresh and delicious for up to one week. If your kitchen tends to be particularly warm or humid, you might prefer to store them in the refrigerator. However, for the very best texture and flavor experience, allow them to come to a slightly warmer temperature (closer to room temperature) for a few minutes before serving.
The No-Fuss Recipe: Chocolate Covered Potato Chips
This incredibly simple and straightforward recipe delivers maximum flavor with absolute minimal effort. It truly embodies a “measure with your heart” philosophy, allowing for generous flexibility with quantities and inspiring endless opportunities for customization. Get ready to create a snack that will have everyone reaching for more and eagerly asking for your secret recipe!
Chocolate Covered Potato Chips
The perfect harmony of sweet and salty in an addictive, easy-to-make treat!
Ingredients
- Approximately 1/2 bag (about 8-10 ounces) plain ruffled potato chips (or your preferred plain variety)
- 1 cup (about 6 ounces) chocolate chips (milk, dark, semi-sweet, or a mix)
- Approximately 10 ounces M&M’s (or 1 cup of your chosen candy/topping mix)
- 1 cup miniature marshmallows (or other soft toppings)
Instructions
- Melt the Chocolate: Carefully melt the chocolate chips in a clean, dry, microwave-safe bowl. Microwave on high for 30 seconds, then stir vigorously. Repeat with 15-second intervals, stirring after each, until the chocolate is completely smooth and pourable. Alternatively, use a double boiler for a gentler melting process.
- Prepare the Chips: Line a large baking sheet (or a spacious serving platter) with parchment paper. This prevents sticking and makes cleanup a breeze.
- Arrange Chips: Spread the potato chips evenly across the prepared sheet in a single layer. Ensure there’s enough space for chocolate and toppings to adhere to each chip.
- Drizzle Chocolate: Generously drizzle the melted chocolate evenly over all the potato chips. Work quickly, ensuring good coverage, before the chocolate begins to set.
- Add Toppings: Immediately sprinkle your chosen toppings, such as M&M’s and miniature marshmallows, over the wet chocolate. Press them lightly if necessary to ensure they stick well.
- Set and Serve: Allow the chocolate-covered chips to cool and harden completely. This can take 30-60 minutes at room temperature, or you can expedite the process by placing the sheet in the refrigerator for 10-15 minutes.
- Once the chocolate is firm, break the large piece into smaller, snackable segments. Serve immediately and enjoy your irresistible sweet and salty creation!
Notes
All measurements provided are approximate and are designed to be highly customizable. Feel absolutely free to adjust ingredient amounts and topping choices according to your personal preferences and the size of your gathering. This recipe is all about flexibility, fun, and creating a treat that’s uniquely yours!
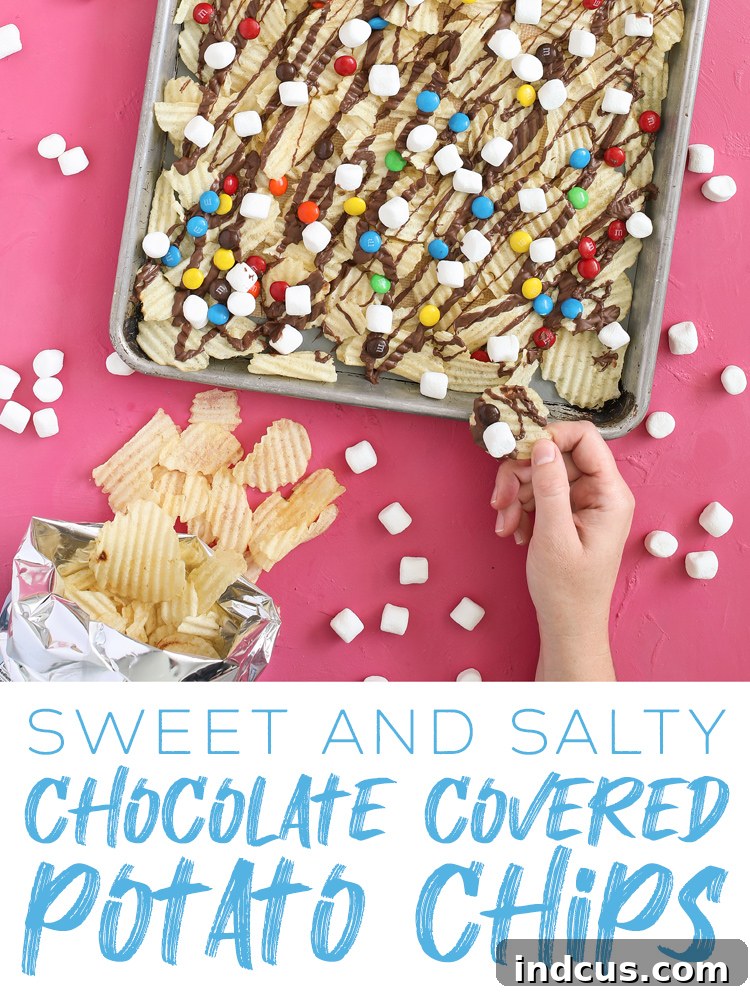
Don’t let this incredible recipe slip away! Pin it now so you can easily find it whenever that irresistible sweet and salty craving strikes!
Why These Chocolate Covered Potato Chips Are a Must-Try
In a culinary landscape often saturated with complex recipes and intricate techniques, these chocolate-covered potato chips brilliantly stand out as a shining beacon of simplicity, pure indulgence, and undeniable ingenuity. They serve as compelling proof that you absolutely do not need a pantry brimming with exotic ingredients or hours slaving away in the kitchen to create something truly spectacular and memorable. Here’s a comprehensive look at why this delightful recipe unquestionably deserves a permanent and cherished spot in your regular snack rotation:
- Effortlessly Delicious and Accessible: The preparation process is so remarkably straightforward and intuitive, making this recipe perfect for novice bakers, busy parents juggling multiple tasks, or anyone simply looking for a quick yet profoundly satisfying treat. The best part? No oven is required, minimizing both effort and cleanup!
- Incredibly Budget-Friendly: Crafted using readily available and often inexpensive ingredients found in any grocery store, this snack is wonderfully kind to your wallet without ever compromising on its rich, satisfying taste. It’s proof that gourmet-level flavor doesn’t have to come with a gourmet price tag.
- A Fun and Engaging Activity for All Ages: Children absolutely adore helping with the exciting process of drizzling the melted chocolate and liberally sprinkling their favorite toppings. This transforms the recipe into a delightful and interactive activity for the entire family, creating cherished memories. And, of course, they’ll be utterly thrilled to devour their delicious, handmade creations!
- A Guaranteed Crowd-Pleaser: The unique and harmonious combination of sweet, salty, crunchy, and smooth textures and flavors rarely fails to impress even the most diverse palates. This makes it an absolute guaranteed hit at parties, potlucks, casual gatherings, or any event where you want to offer a snack that everyone will talk about.
- Unleash Your Inner Culinary Artist: The potential for customization with this recipe is truly immense. From tailoring toppings to match specific seasonal themes to incorporating personal favorite candies and flavors, you have the creative freedom to adapt each batch to suit any mood, occasion, or craving. It’s like creating delectable, edible art with every tray!
- The Ultimate Craving Satisfier: When that inevitable and powerful sweet and salty craving strikes—a sensation many of us know all too well—this recipe emerges as your ultimate culinary superhero. It flawlessly satisfies both desires in one perfectly balanced, irresistible bite, leaving you utterly content.
Whether you’re in search of a lightning-fast dessert solution, an engaging and fun holiday project to share with loved ones, or simply a delightful pick-me-up to brighten your day, these chocolate-covered potato chips are nothing short of a culinary revelation. So, go ahead and grab your favorite bag of crispy chips, some high-quality chocolate, and unleash your wildest topping ideas. Get ready to embark on a snack-making experience that will undoubtedly delight your senses, impress everyone you graciously share it with, and leave a lasting impression of pure, unadulterated deliciousness.