Unleash Your Creativity: 3 Delightful Washi Tape Craft Projects for Every Occasion
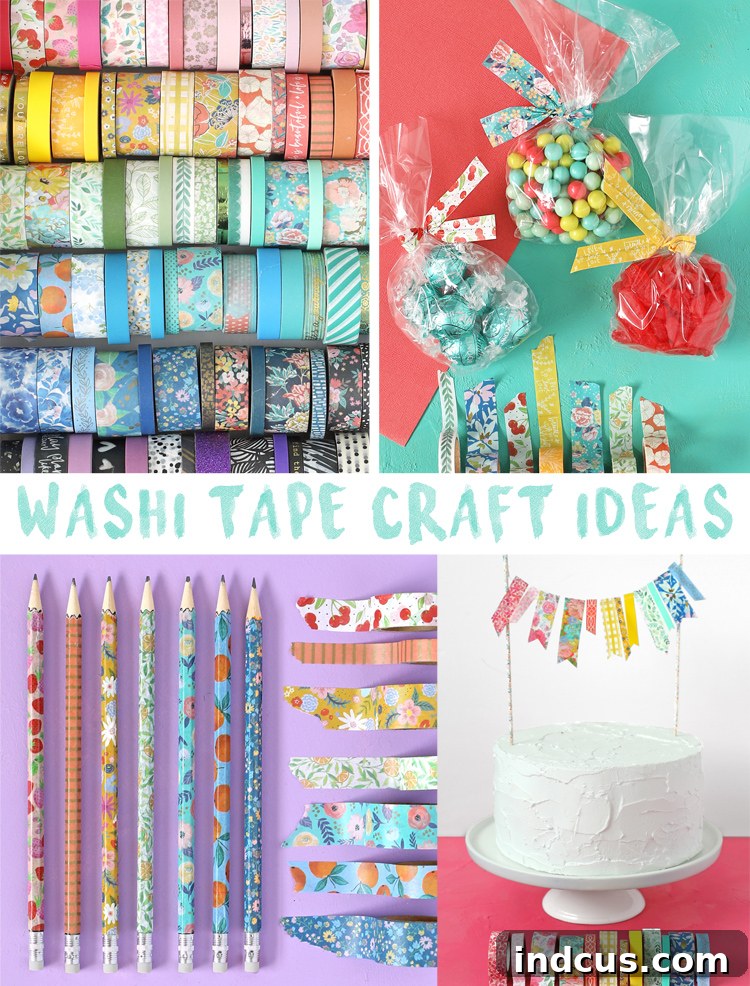
Washi tape, a Japanese decorative masking tape, has taken the crafting world by storm, and for good reason! Its vibrant patterns, ease of use, and incredible versatility make it a go-to material for adding a touch of personalized charm to virtually anything. Whether you’re looking to organize your home, customize your stationery, or elevate your party decor, washi tape offers endless possibilities for creative expression. In this comprehensive guide, we’ll dive into three fantastic DIY washi tape projects: making your own patterned twist ties, transforming plain pencils into stylish stationery, and crafting an adorable washi tape cake topper garland. Get ready to discover how simple and rewarding it is to infuse everyday items with your unique artistic flair!
DIY Patterned Washi Tape Twist Ties: Organize with Style
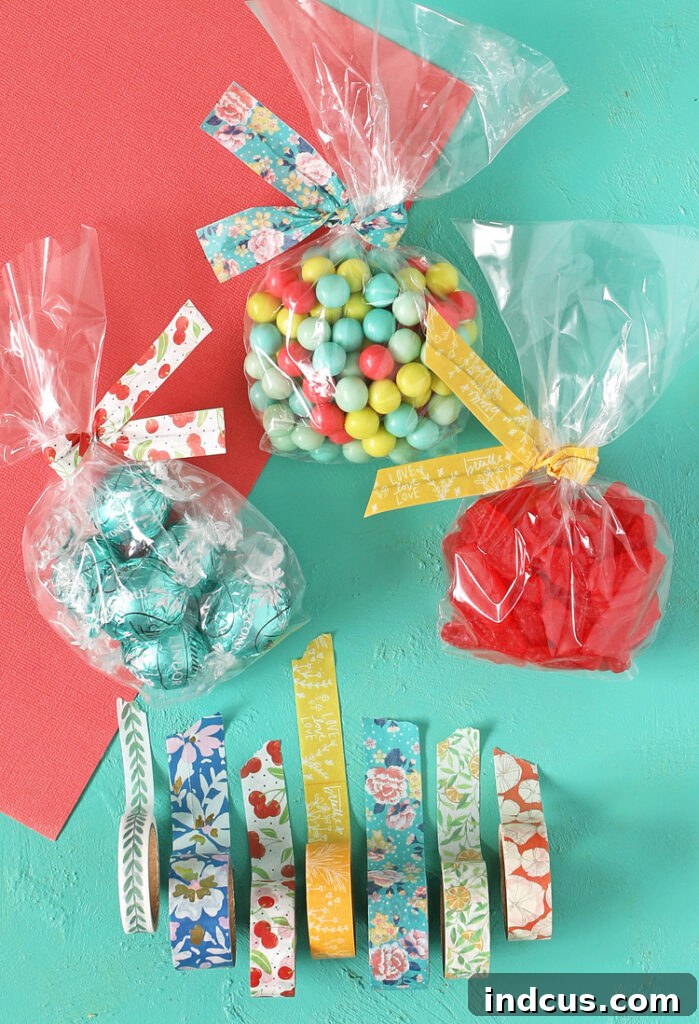
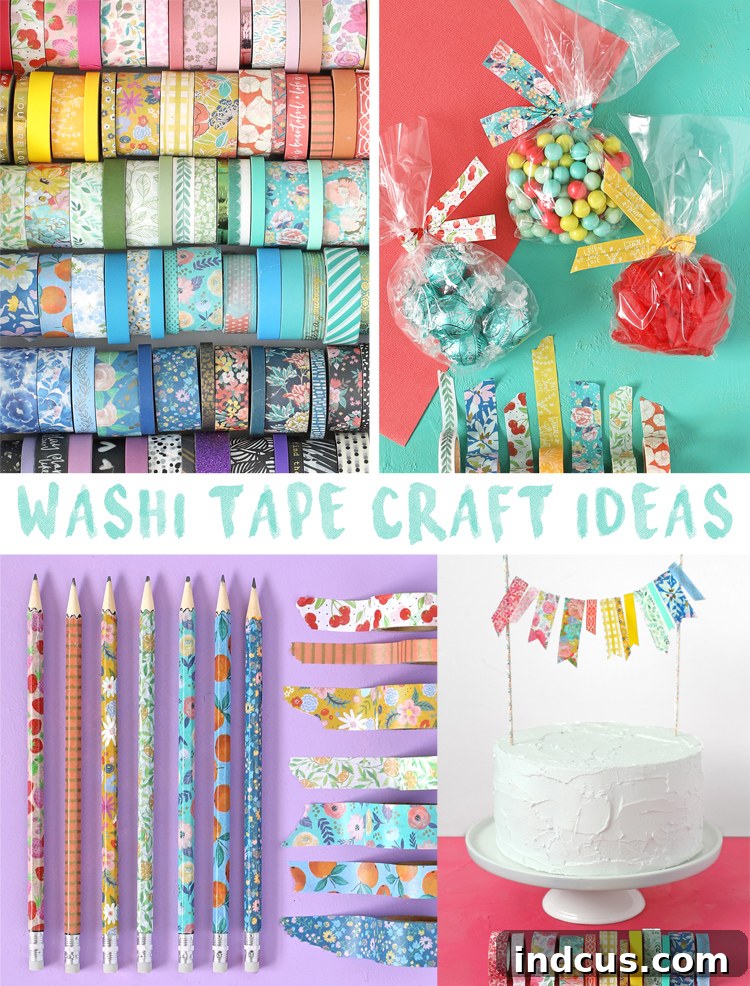
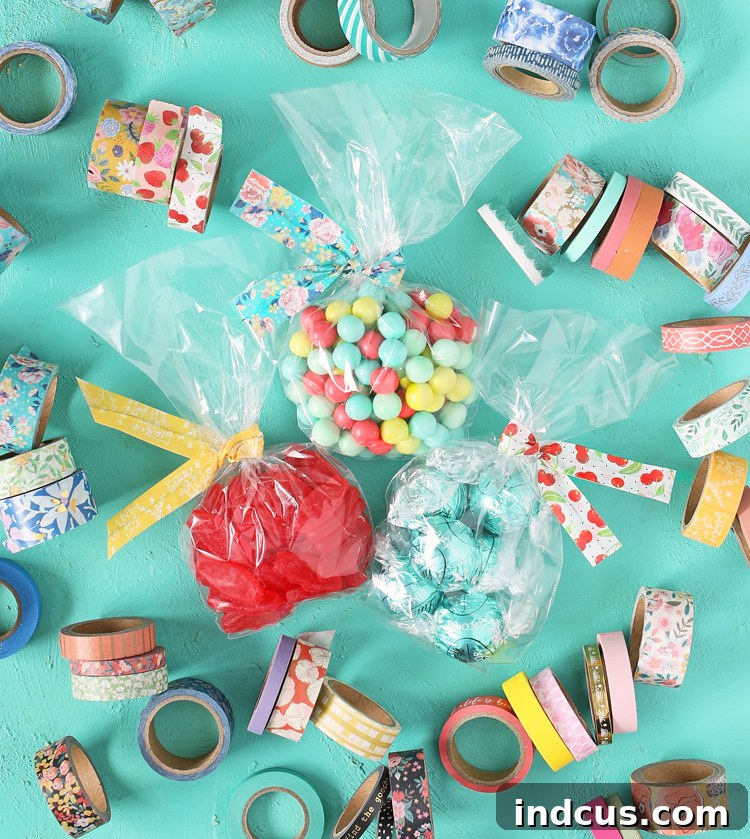
Forget boring, plain twist ties! Did you know you can easily craft your own custom, patterned twist ties using washi tape and florist wire? These aren’t just practical for keeping bags sealed or cables tidy; they’re also incredibly cheerful and add a delightful pop of color to your everyday life. Imagine organizing your pantry with ties that match your kitchen decor, or sealing a homemade treat bag with a tie that perfectly complements the gift. Let me walk you through the simple steps to create these charming and functional DIY washi tape twist ties that are sure to bring a smile to your face.
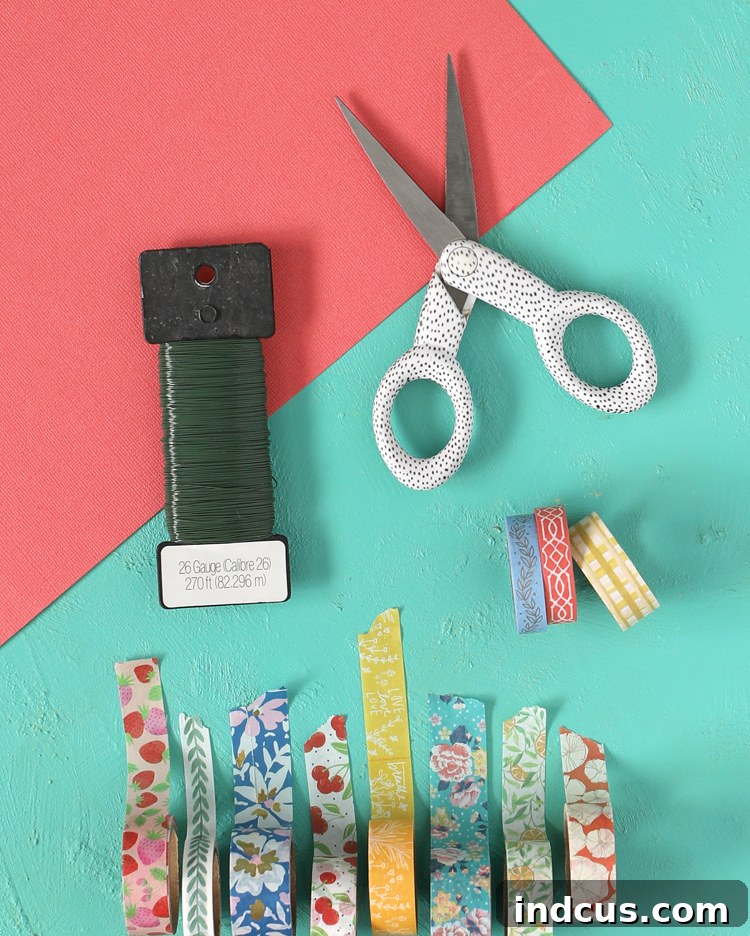
Materials Needed for Washi Tape Twist Ties
- Washi Tape: Choose your favorite patterns and colors. Washi tape comes in a vast array of designs, from floral and geometric to whimsical and minimalist, allowing for endless customization.
- Florist Wire (26 Gauge): This thin, pliable wire is perfect for twist ties as it holds its shape well but is easy to bend and cut. The 26 gauge is ideal for striking a balance between flexibility and sturdiness.
- Scissors: A good pair of sharp scissors will ensure clean cuts for both the tape and the wire.
For convenience, I sourced all my supplies for these adorable washi tape twist ties from Hobby Lobby. Their extensive selection of washi tape in the paper crafts section is truly inspiring. I personally found a set with delightful floral patterns that added just the right touch of happiness to my finished ties.
Instructions for Making Washi Tape Twist Ties
Step 1: Prepare Your Washi Tape Strips
Begin by cutting a piece of washi tape to your desired length. A standard size of 6-8 inches works well for most applications, like sealing small bags or bundling cords. However, feel free to customize the length based on your specific needs – shorter for tiny bundles, longer for larger items. Carefully lay the cut piece of washi tape on your clean work surface, ensuring the sticky side is facing upwards. Smooth it out gently to prevent any wrinkles or bubbles, creating a flat and even base for the next step.
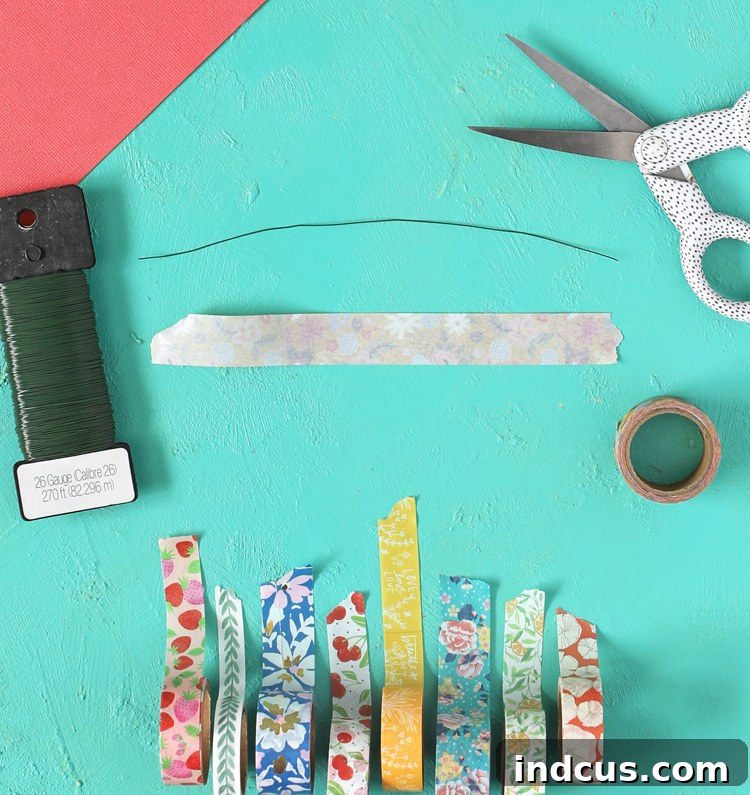
Step 2: Position the Florist Wire
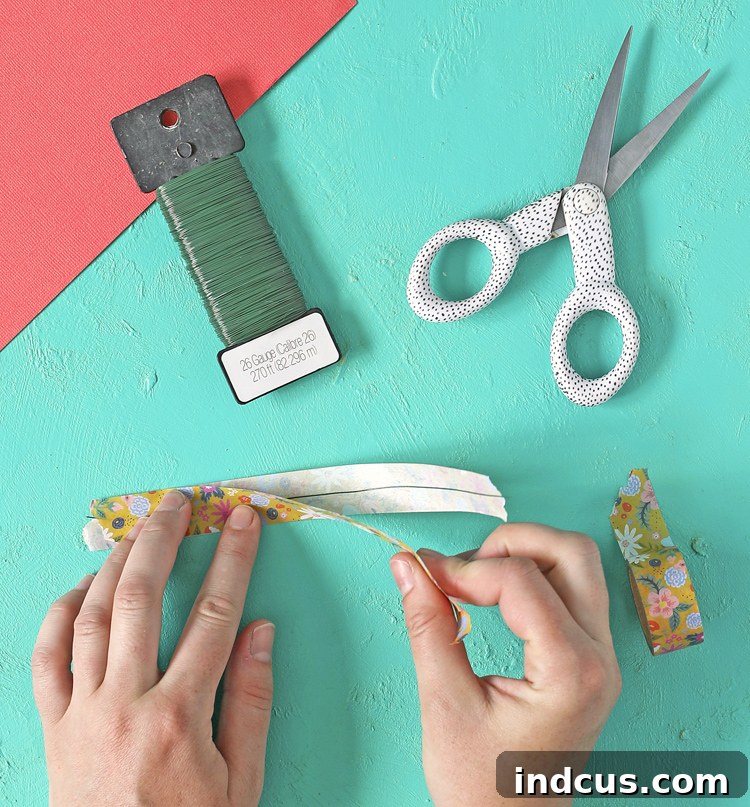
Next, cut a piece of florist wire to exactly the same length as your washi tape strip. Precision here ensures a neat finish. Carefully place the wire down the absolute center of the sticky washi tape strip. Take your time to align it perfectly straight. The goal is to embed the wire securely so that it’s evenly covered by the tape, providing the core structure for your twist tie.
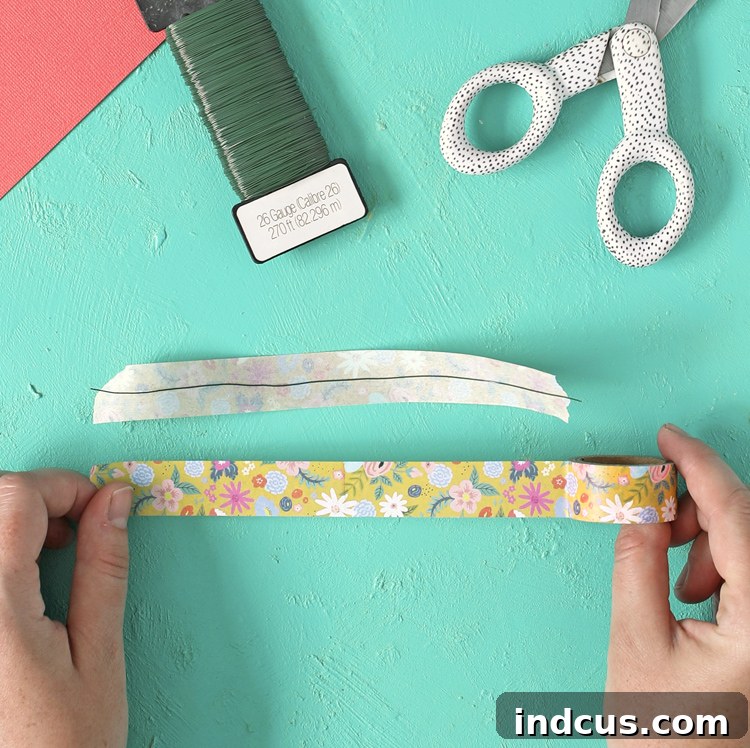
Step 3: Encapsulate the Wire with a Second Tape Layer
Now, cut an identical second piece of washi tape, matching the size of your first strip. Carefully align this second piece directly on top of the first, sticky side down, sandwiching the florist wire securely in between the two layers of tape. Press down firmly along the entire length of the tape, paying special attention to the edges and around the wire, to ensure both pieces of tape adhere completely and smoothly. This creates a strong, durable, and double-sided patterned twist tie.
Step 4: Finish with Decorative Trimming
With your twist tie constructed, the final step is to trim the ends. You can opt for a simple, straight cut to neaten everything up, or get creative by cutting decorative edges. Think about mimicking the V-shape of a ribbon end, a scalloped edge, or even a pointed flag design. This small detail can add a significant amount of charm and personality to your finished twist ties. The choice is entirely yours, allowing for further customization and fun!
It’s truly astonishing how such a simple craft can yield such delightful and practical results! I’m completely captivated by these personalized twist ties and now find myself eager to create goodie bags and organize every conceivable item just so I can adorn them with these charming washi tape creations. They’re perfect for gift wrapping, organizing office supplies, sealing snack bags, or even tying up small bunches of flowers. The possibilities are endless, and the joy they bring is immense!
Patterned Pencils: Elevate Your Stationery with Washi Tape
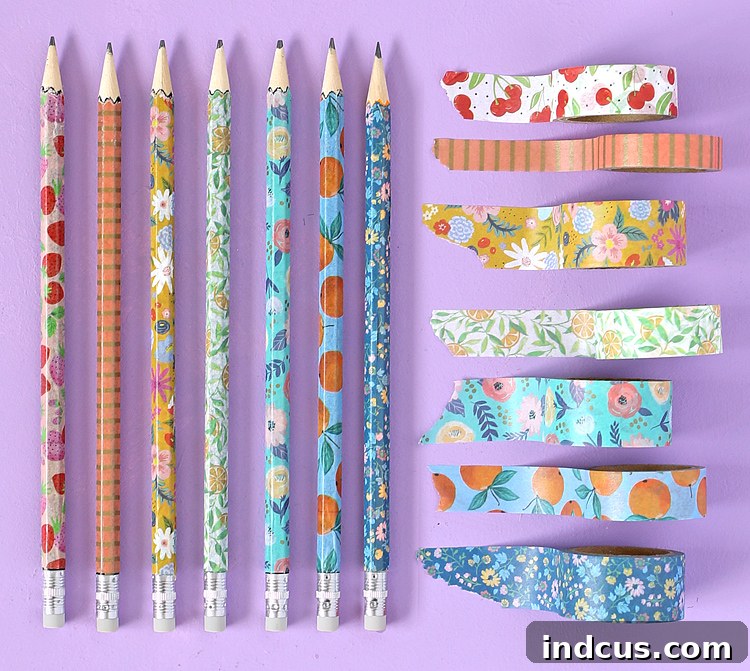
Transforming ordinary pencils into personalized works of art is incredibly easy with the magic of washi tape. This simple craft allows you to add a burst of color and personality to your stationery collection, making every writing or drawing task a little more joyful. Whether you’re preparing for back-to-school, looking for unique party favors, or simply want to brighten up your desk, these patterned pencils are a fantastic DIY project. And don’t worry about functionality—these stylish pencils sharpen just like normal, ensuring they’re as practical as they are pretty!
Here’s everything you’ll need to make your own set of captivating washi tape pencils:
Materials Needed for Washi Tape Pencils
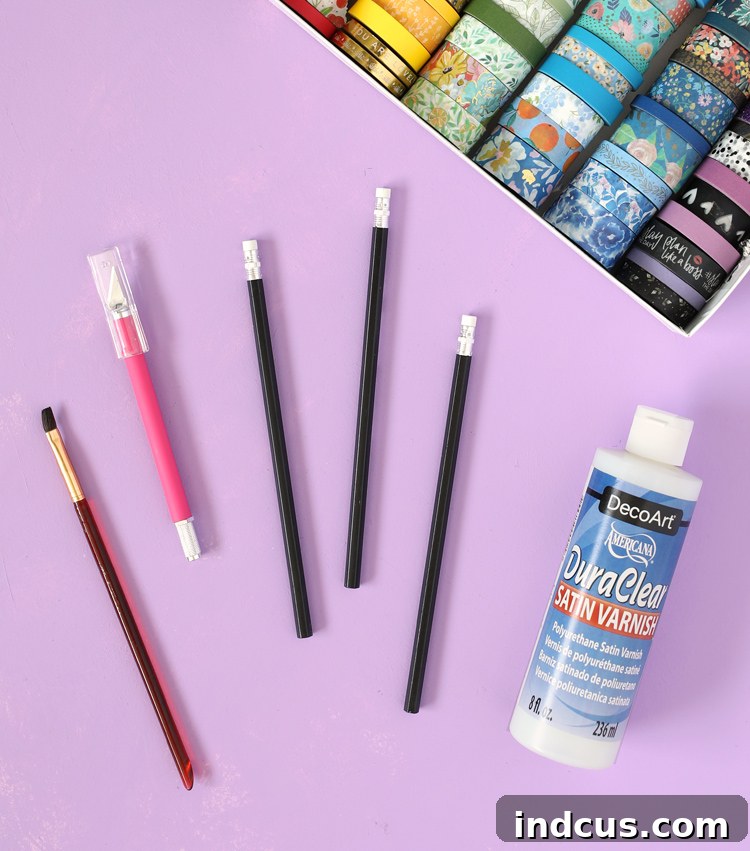
- Pencils: Any standard wooden pencil will work. You can use new ones or give a second life to old, plain pencils you have lying around.
- Washi Tape: Select a variety of patterns and widths to create diverse and eye-catching designs. Consider mixing solid colors with intricate patterns for an appealing contrast.
- DuraClear Varnish: This is a crucial ingredient for making your washi tape pencils durable. The varnish acts as a sealant, protecting the tape from peeling, wear, and moisture, ensuring your decorated pencils last through regular use and sharpening.
- Paint Brush: A small, soft-bristled brush is ideal for applying an even, smooth coat of varnish without leaving brush marks.
- Craft Knife: A sharp craft knife (like an X-Acto knife) is essential for making precise and clean cuts around the eraser and pencil tip.
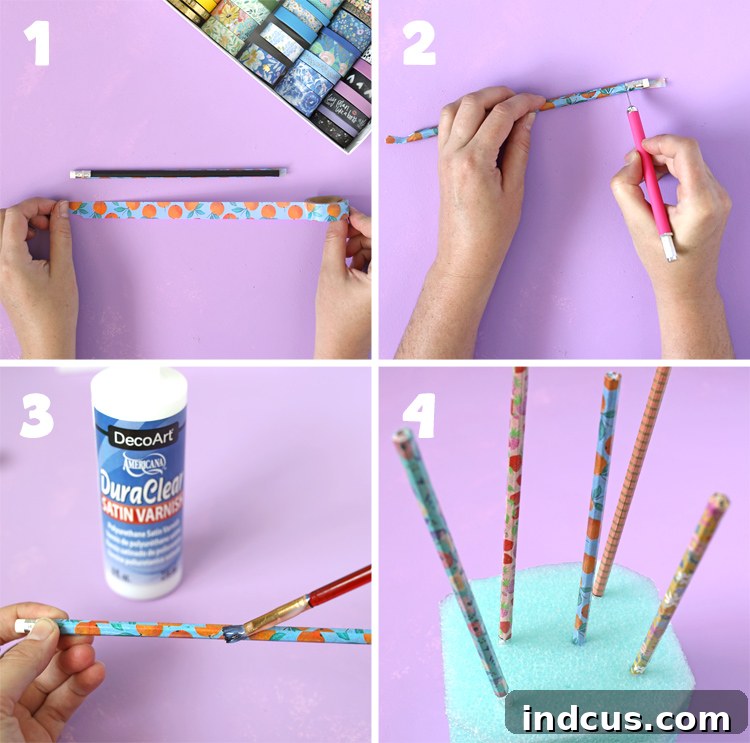
Instructions for Decorating Pencils with Washi Tape
Step 1: Apply Washi Tape to the Pencil Body
Start by wrapping your chosen washi tape around the pencil. I found it easiest and most aesthetically pleasing to run the tape in strips along the length of the pencil. Begin at the eraser end, carefully aligning the edge of the tape with the metal ferrule. Slowly unroll the tape, pressing it firmly onto the pencil as you go, working your way towards the tip. If a single strip of tape doesn’t fully wrap around the circumference of the pencil, simply layer another piece, overlapping slightly, until the entire wooden barrel is covered. The key here is to press the tape down very firmly, ensuring there are no air bubbles, creases, or edges sticking up. A smooth, well-adhered surface is vital for the next steps.
Step 2: Trim Excess Tape for a Clean Finish
Once the pencil is fully covered with washi tape, it’s time to refine the edges. Using a very sharp craft blade, carefully trim any excess tape around the eraser and the very bottom of the pencil where the lead emerges. This step requires a steady hand and a sharp blade to achieve a clean, professional finish. Precision here ensures that the eraser remains fully functional and the pencil can be sharpened without any tape interference.
Step 3: Seal and Protect with Varnish
This is where your washi tape pencils truly transform from a temporary craft to a durable piece of stationery. Brush an even, thin coat of DuraClear Varnish over all of the applied tape. The varnish acts as a protective shield, sealing the paper tape, preventing it from peeling off, and making it resistant to everyday wear and tear, moisture, and smudges. This protective layer ensures your beautifully decorated pencils can withstand regular use and repeated sharpening. Allow the first coat to dry completely, and if desired, apply a second thin coat for extra durability and a glossier finish.
Step 4: Dry and Prepare for Use
After applying the varnish, you’ll need to let your pencils dry thoroughly. A great way to do this is to gently poke the eraser ends of the wet pencils into a piece of floral foam, a styrofoam block, or even a piece of cardboard with small holes punched into it. This allows the varnish to dry evenly on all sides without sticking to any surfaces. In my experience, the pencils typically take about an hour to dry completely to the touch, though drying times can vary based on humidity and varnish thickness. Once fully dry, your vibrant, patterned pencils are ready to be sharpened and enjoyed!
Washi Tape Cake Topper Garland: A Festive Touch for Any Celebration
Washi tape is an exceptionally versatile tool for creating cohesive and charming party decor. Its wide range of patterns and colors allows you to easily coordinate various elements, from invitations and gift tags to paper cups and napkins. No surface is safe from a touch of washi tape magic! For a quick and effortless way to elevate any celebration, I crafted a delightful washi tape cake topper garland. This simple addition instantly transforms a plain cake into a cheerful centerpiece, perfectly complementing your party’s theme and adding a handmade touch that guests are sure to adore.
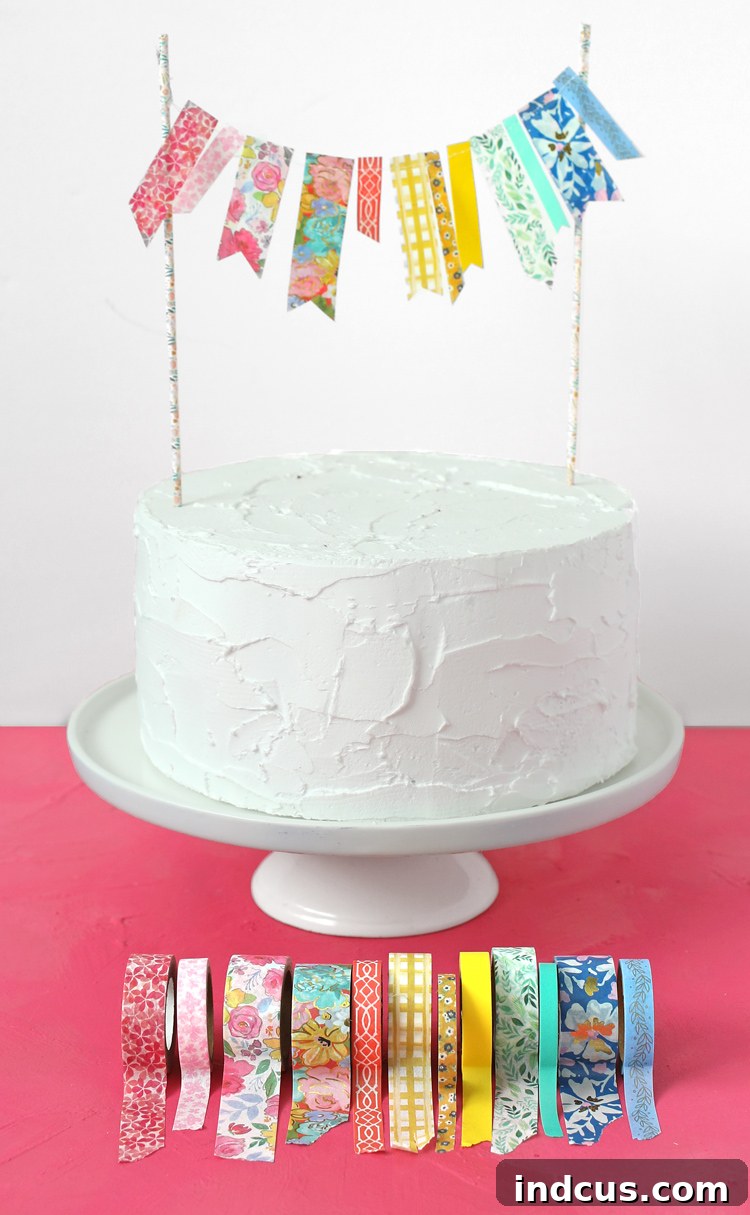
To create your own festive washi tape cake topper garland, you will need just a few basic supplies:
Materials Needed for Washi Tape Cake Topper
- Washi Tape: Select several complementary patterns or colors to create a visually interesting garland. Thicker tapes can create more substantial flags, while thinner tapes offer delicate details.
- White Thread: Strong yet subtle, white thread is perfect for stringing your washi tape flags together. Baker’s twine or even fishing line can be alternatives if you don’t have thread.
- Bamboo Skewers: Two sturdy bamboo skewers will form the upright supports for your garland. Choose skewers that are long enough to stand tall in your cake while still allowing the garland to drape nicely.
- Scissors: Essential for cutting both the washi tape and the thread cleanly.
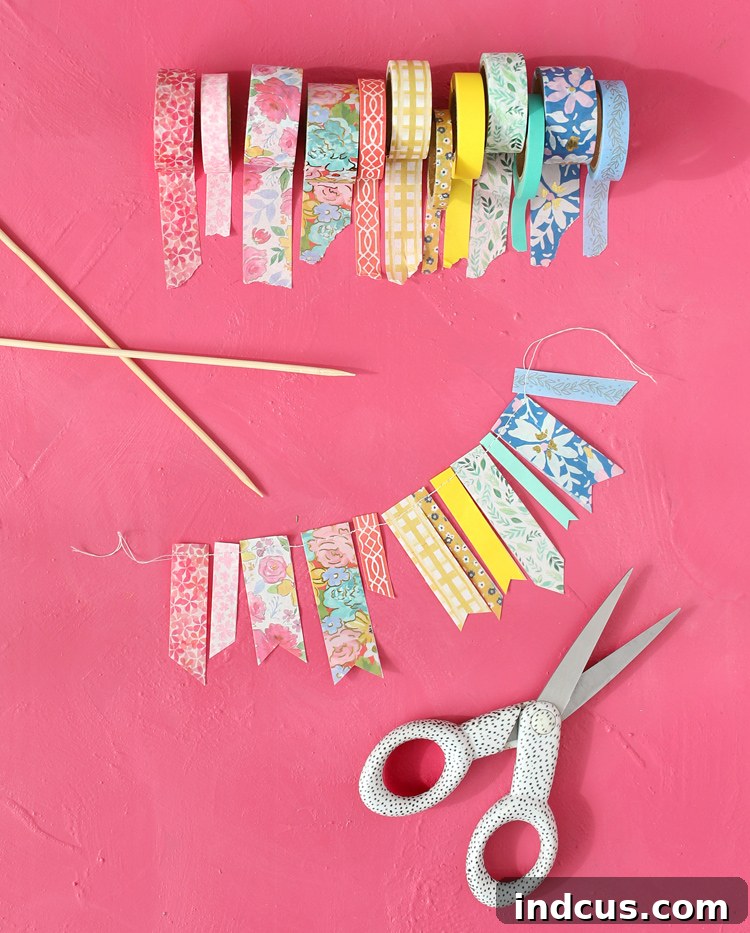
Instructions for Assembling the Washi Tape Cake Topper Garland
Step 1: Create Your Washi Tape Flags
Take a strip of washi tape, roughly 2-3 inches long (adjust based on your desired flag size), and fold it over onto itself, sticky sides together, creating a double-sided flag. Press firmly to ensure the tape adheres well. Once folded, use your scissors to trim the ends. You can opt for a straight cut, a playful triangular “V” shape (like a traditional banner flag), or a swallowtail cut for a more elegant look. Consistency in size and shape will give your garland a polished appearance. Repeat this process until you have enough flags to create your desired garland length.
Step 2: Assemble the Garland
Now it’s time to connect your washi tape flags. The quickest method is to run all the washi tape pieces through a sewing machine, creating a delicate stitched line that connects them together. Use a straight stitch with a moderate length. If you don’t own a sewing machine, fear not! You can easily achieve a similar effect by folding each washi tape flag over a piece of white thread or baker’s twine, pressing the tape firmly to secure it around the string. Leave enough extra thread at both ends of the garland for tying it to the skewers.
Step 3: Prepare and Attach to Skewers
To make your cake topper even more cohesive, wrap your two bamboo skewers with coordinating washi tape. This adds a nice decorative touch and helps them blend seamlessly with your garland. Once the skewers are wrapped, carefully attach the ends of your washi tape garland string to the top of each skewer. You can secure the string by simply wrapping it around the skewer and then using a small piece of washi tape to tape the ends in place. Ensure the garland has a slight, pleasing drape between the two skewers.
Step 4: Position on the Cake and Admire
With your garland assembled, gently poke the unwrapped ends of the bamboo skewers into the top of your cake. Adjust the depth and spacing of the skewers until your washi tape garland sits at the perfect height and tension, creating a beautiful arch over your dessert. And voila! You’ve just created an effortlessly charming and utterly cute cake topper that will undoubtedly be a conversation starter and a highlight of your celebration!
There you have it – three wonderfully creative, simple, and impactful ways to harness the charm and versatility of washi tape. From practical twist ties that bring organization and joy, to personalized pencils that brighten up your workspace, and a festive cake topper that adds sparkle to any party, washi tape truly empowers you to infuse your world with handmade beauty. These projects are not only easy to make but also offer endless opportunities for customization with different patterns and colors, making them perfect for crafters of all skill levels. If you’re eager to explore even more imaginative washi tape crafts, don’t miss out on the wealth of ideas in the Hobby Lobby Decorative Tape Creations project sheet. Happy crafting!
Loved these creative washi tape ideas? Pin this post to save these fantastic craft projects for later inspiration!