Transform Your Home: Crafting a Reversible Candy Corn and Christmas Tree Wood Decor Piece
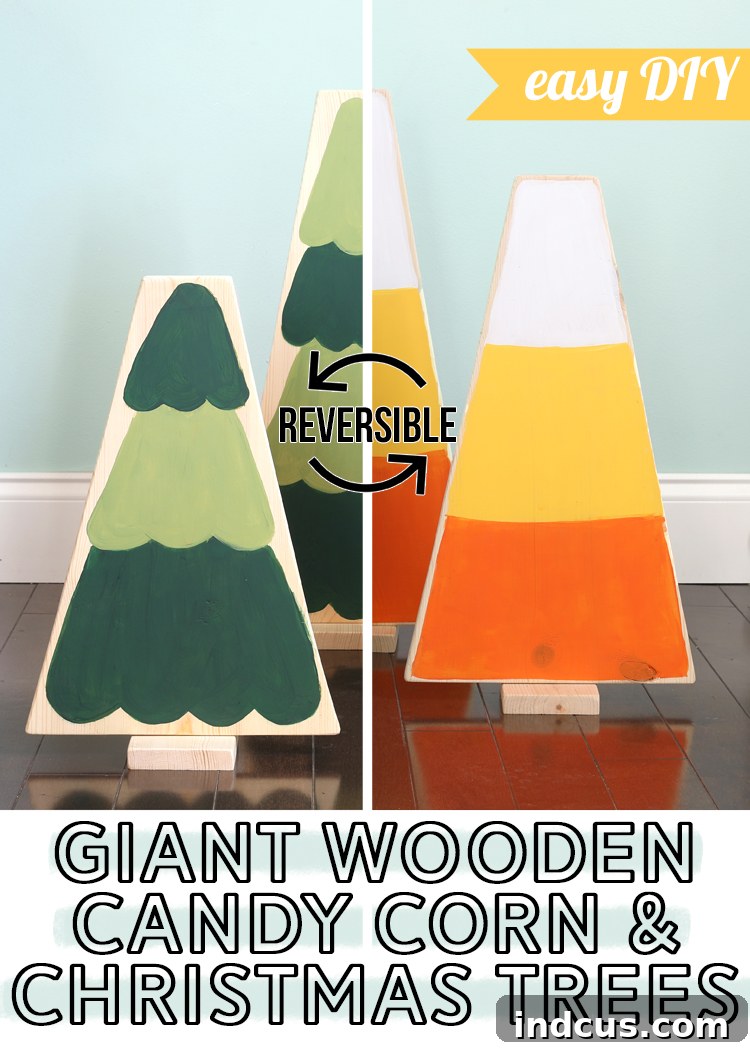
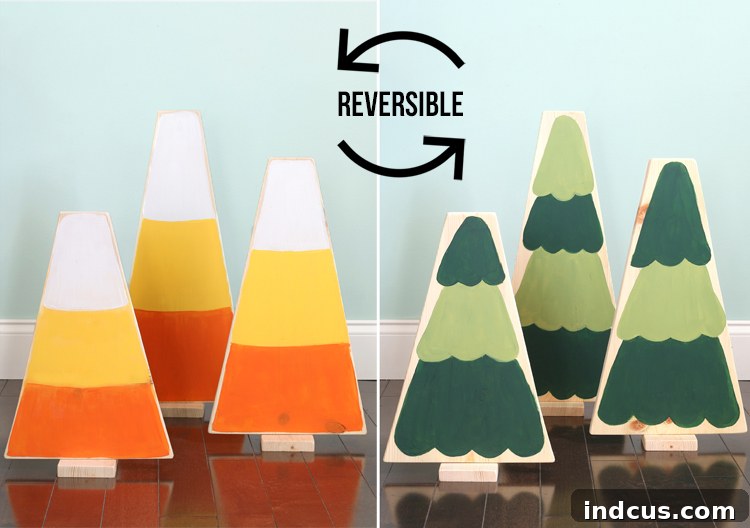
Are you looking for a creative, budget-friendly, and versatile way to spruce up your home decor for both fall and winter? Look no further! This engaging DIY project guides you through creating adorable reversible wood signs that transition seamlessly from festive candy corn for autumn to charming Christmas trees for the winter holidays. Imagine crafting one decoration that beautifully adorns your space for several months, celebrating two beloved seasons with a simple flip!
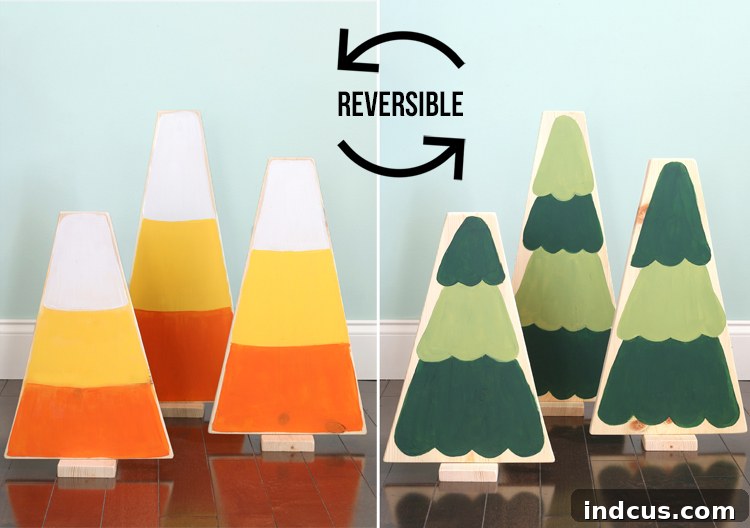
The popularity of reversible crafts, like our previous reversible pumpkin and snowman design, truly highlights the desire for smart, multi-functional home accents. These projects not only save storage space by combining two themes into one item but also offer incredible value. Today, we’re thrilled to share how you can craft a set of three impressive wooden signs that stand tall, first as delightful candy corn and then as festive Christmas trees. It’s an ingenious way to extend the life of your seasonal decor!
One of the most appealing aspects of this particular wood craft is its incredible cost-efficiency. You’ll only need to purchase a single 1×12 wood board to complete all three reversible decorations. This makes it an incredibly affordable DIY project, perfect for crafters on a budget or anyone looking to maximize their materials. We sourced our board from a local home improvement store for a modest price, proving that stunning holiday decor doesn’t have to break the bank. Let’s gather our supplies and get ready to create something truly special!
Materials Needed for Your Reversible Holiday Wood Signs
Before diving into the fun of cutting and painting, ensure you have all your materials ready. The beauty of this project lies in its simplicity, requiring basic woodworking tools and common craft supplies. Remember, safety first! Always use appropriate protective gear, such as safety glasses, when working with power tools.
- 1 in x 12 in x 6 ft Common Pine Board: This single board will be the foundation for all three of your reversible signs. Pine is a great choice for its affordability and ease of working.
- Saw (Circular Saw or Jigsaw): Essential for cutting the wood into precise shapes. A circular saw is great for straight cuts, while a jigsaw offers more maneuverability for curves, though for this project, mostly straight cuts are needed.
- Clamps: Crucial for securing your wood to a workbench, ensuring stability and safety during cutting.
- Tape Measure: For accurate measurements to achieve symmetrical and well-proportioned signs.
- Straight Edge: To draw perfectly straight lines for cutting, ensuring crisp edges for your candy corn and trees.
- Drill: Necessary for attaching the base pieces securely.
- Countersink Bit and Phillips Drill Bit: The countersink bit creates a conical hole that allows the screw head to sit flush or below the surface of the wood, providing a cleaner finish and stronger joint. The Phillips bit is for driving the screws.
- Power Sander or Sandpaper (various grits): To smooth out all cut edges and surfaces, making them ready for paint and pleasant to touch. An orbital sander significantly speeds up this process.
- (3) 1.5-2 Inch Screws: To firmly attach the base to each triangular sign, allowing them to stand upright.
- Craft Paint in White, Orange, Yellow, Dark Green and Light Green: These vibrant acrylic paints will bring your candy corn and Christmas trees to life. Feel free to choose shades that best suit your aesthetic.
- Paint Brush: A selection of brushes will be helpful for applying larger sections of color and detailing.
- Matte Finish Clear Coat Spray (optional, but recommended for outdoor decorations): This protective layer seals the paint and shields your craft from the elements, extending its life if displayed outdoors.
While these are the tools and materials that worked best for this tutorial, always feel empowered to use what you have on hand. Adaptability is a key trait of a successful DIYer!
Step-by-Step Instructions: Crafting Your Reversible Wood Signs
Let’s get started on bringing these delightful decorations to life. Follow these detailed steps for a smooth and enjoyable crafting experience.
Step 1: Prepare Your Wood Board by Cutting the Main Pieces
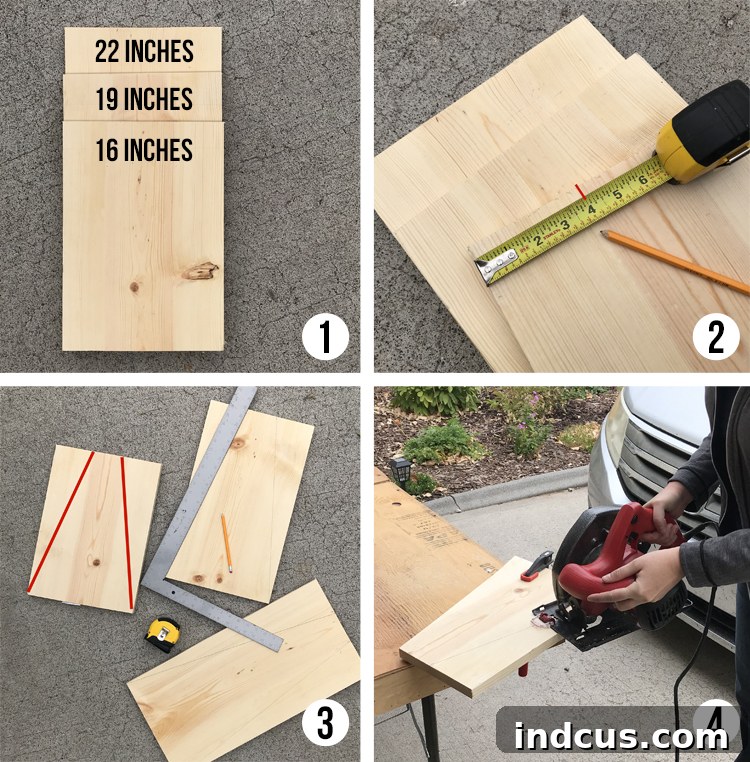
Begin by cutting your 1x12x6 ft common pine board into three separate pieces. Measure and cut one piece to 16 inches long, a second to 19 inches long, and the third to 22 inches long. These varied lengths will create a visually appealing set of candy corn and Christmas trees, adding depth and interest to your display. Always use clamps to secure the board firmly to your workbench before making any cuts with your saw to ensure safety and precision.
Step 2: Mark Your Cutting Lines for the Triangular Shape
To achieve the classic triangular shape for both your candy corn and Christmas trees, you’ll need to mark specific points on each board. On the top edge of each cut board, measure 4 inches inward from the left side and make a pencil mark. Repeat this process, measuring 4 inches inward from the top right side of each board and making another mark. These two marks will define the top width of your triangle, allowing for a balanced and stable design.
Step 3: Draw the Outline for Your Reversible Signs
Now, connect the dots! Take your straight edge and a pencil. Draw a straight line from the 4-inch mark on the top left side down to the bottom left corner of the board. Then, draw another straight line from the 4-inch mark on the top right side down to the bottom right corner of the board. These two lines will form the precise triangular outline you will follow with your saw. Double-check your lines for accuracy before proceeding to the next step.
Step 4: Cut the Triangular Shapes from Your Wood
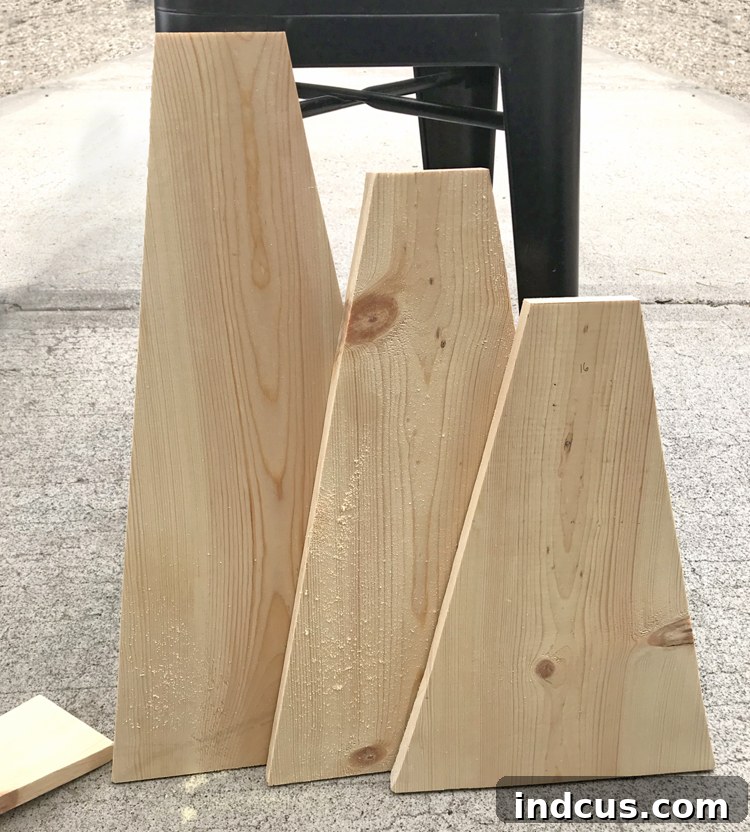
With your lines clearly drawn, it’s time to cut out the shapes. Firmly clamp one of the boards to a sturdy work table. Carefully use your circular saw or jigsaw to cut along the pencil lines you just drew. Take your time, moving slowly and steadily to ensure clean, straight cuts. Repeat this process for all three boards. Once completed, you will have three distinct wooden triangles, each ready to be transformed into your reversible holiday decor.
Step 5: Prepare the Base Pieces for Standing Stability
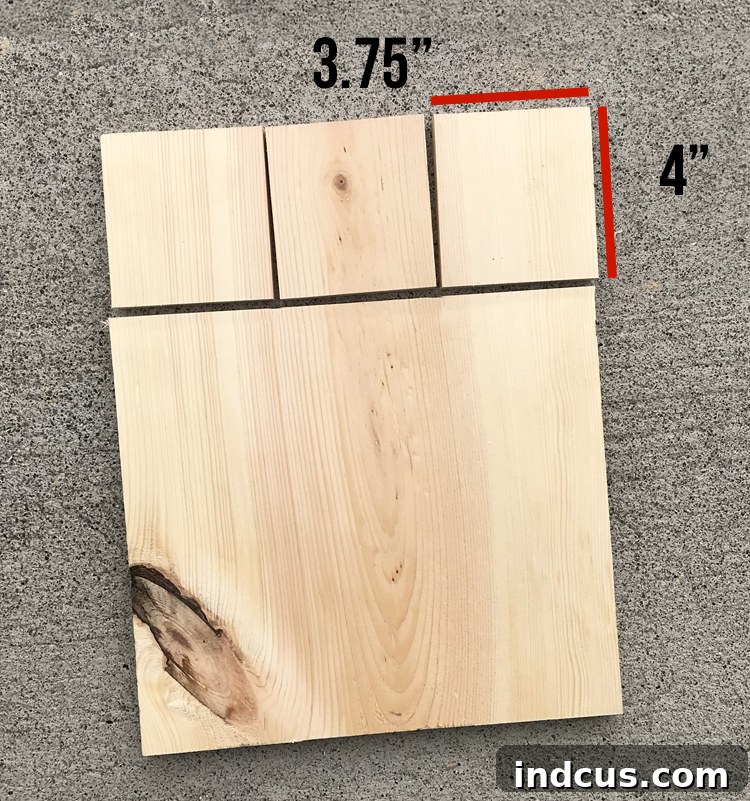
Don’t discard the remaining piece of your 1×12 board! This leftover wood is perfect for crafting the bases that will allow your decorations to stand independently. From this piece, cut a 4-inch wide strip. Then, take this 4-inch strip and cut it equally into three smaller pieces. These three smaller rectangular blocks will serve as the stable bases for each of your candy corn/Christmas tree signs. Their sturdy design ensures your decorations remain upright and secure, whether indoors or out.
Step 6: Sand All Wood Pieces for a Smooth Finish
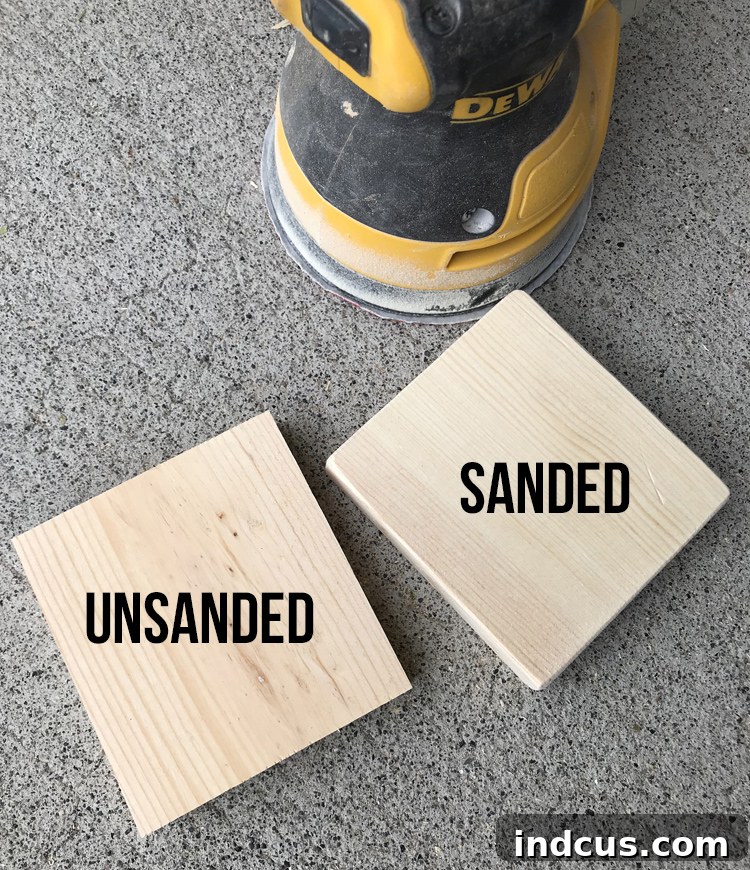
Sanding is a crucial step that prepares your wood for painting and makes the final product safe and pleasant to handle. Using a power sander (like an orbital sander) or sandpaper, smooth out all surfaces and edges of both your triangular signs and base pieces. Pay special attention to the freshly cut edges, rounding them out slightly. This not only eliminates splinters but also gives the signs a softer, more professional, and less harsh appearance. If you frequently work with wood, investing in an orbital sander is highly recommended for its efficiency and ease of use.
Step 7: Paint the Candy Corn Side
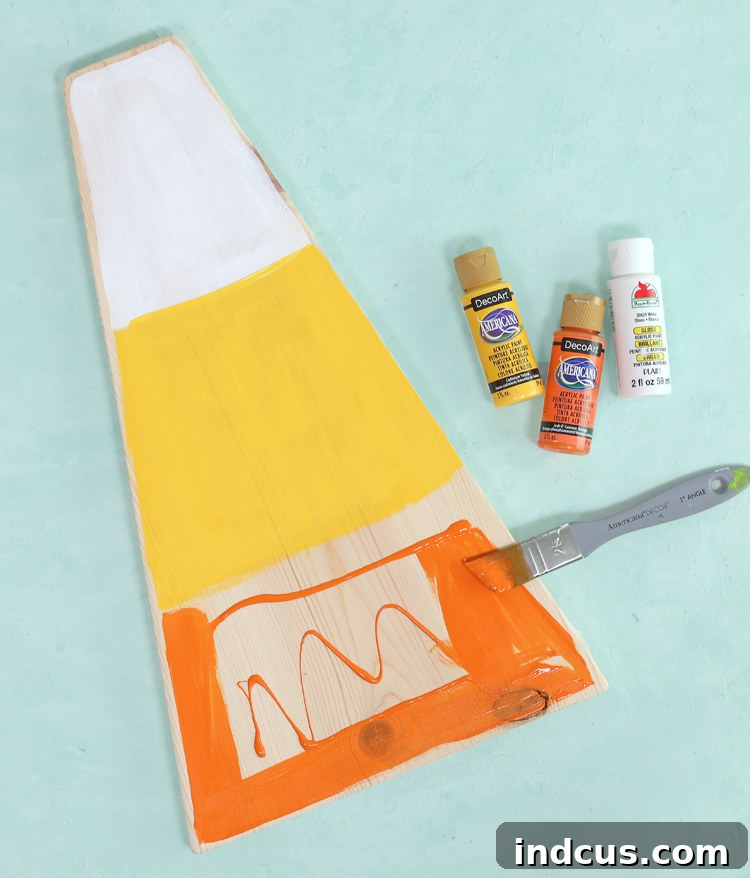
Now for the artistic part! Choose one side of each sanded triangular wood piece to become your vibrant candy corn. Using white, orange, and yellow craft paint, carefully paint the classic striped design. Typically, the top section is white, the middle is orange, and the bottom is yellow. For crisp lines, you can use painter’s tape to mask off sections as you go, ensuring each color is distinct. Apply at least two coats of paint for each color to achieve rich, opaque coverage and truly bring out the festive fall spirit of the candy corn.
Step 8: Paint the Christmas Tree Side
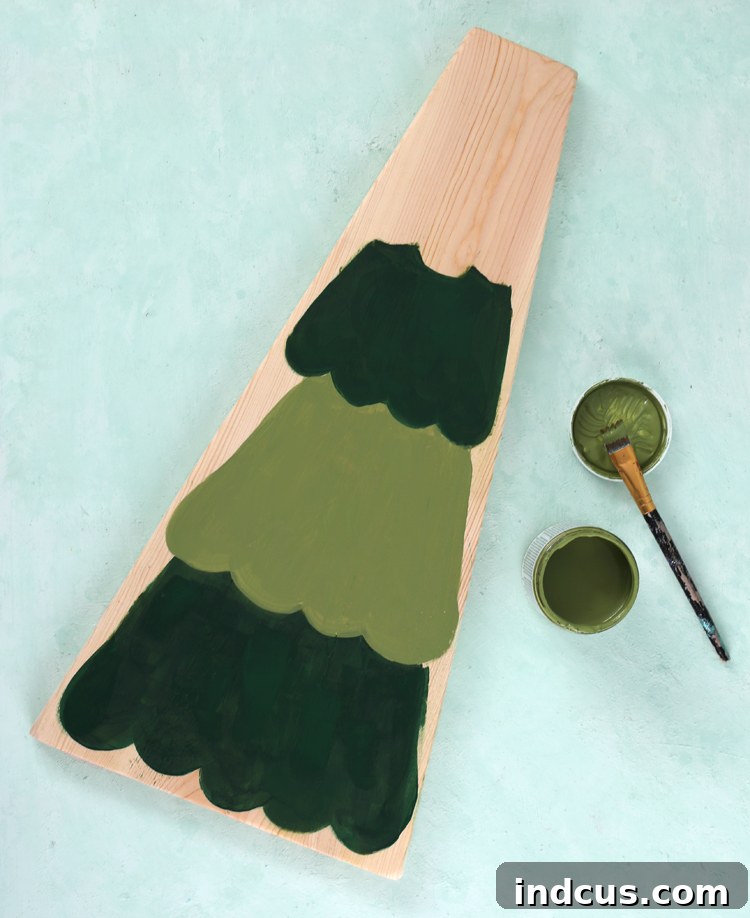
Once the candy corn side is completely dry, flip the wood pieces over to paint the reverse side as charming Christmas trees. For this design, we found it most effective to start painting the lowest section of the tree first, then moving upwards to layer the next sections of color. This technique creates a natural, layered appearance, mimicking the branches of an actual tree and adding depth to your painted design. Use your dark green and light green craft paints, perhaps blending them slightly or using different shades for distinct sections to enhance the visual texture of the tree. Let your creativity flow!
Pro Tip for Outdoor Display: If you intend to display these delightful decorations outdoors on a porch or in your garden, a protective clear coat is highly recommended. Once all paint is dry, spray each sign with a matte finish clear coat. This will seal the paint, protect against moisture, UV rays, and general wear and tear from the elements, ensuring your reversible decor remains vibrant and beautiful throughout the seasons.
Step 9: Prepare the Wood for Base Attachment
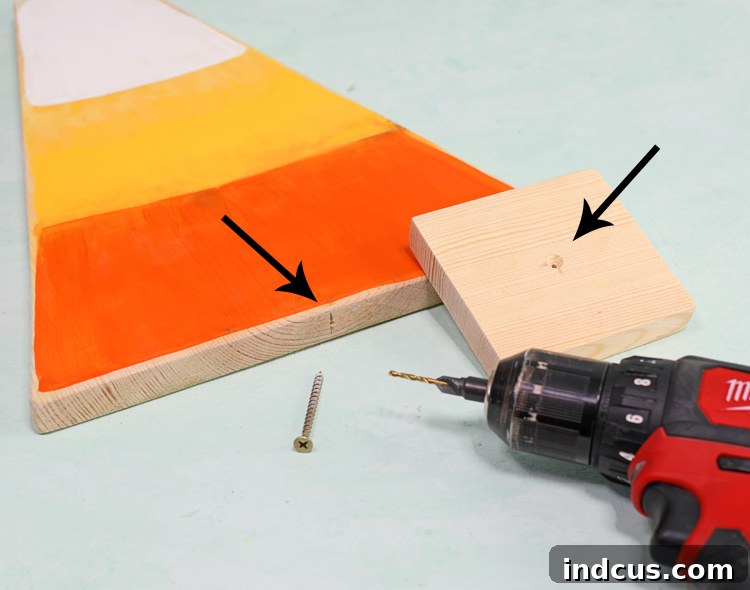
With all your painting complete and fully dry, it’s time to attach the base pieces so your signs can stand freely. First, find and mark the center of one of your rectangular base pieces. Next, mark the exact center of the bottom edge of one of your painted triangular signs. Using your drill fitted with a countersink bit, create a small pilot hole at both of these marked points. The countersink bit is vital here, as it widens the top of the hole, allowing the screw head to sit flush with or slightly below the wood surface. This prevents the screw from splitting the wood and creates a much cleaner, more professional finish, making your signs stable and attractive from all angles.
Step 10: Securely Attach the Base to Each Sign
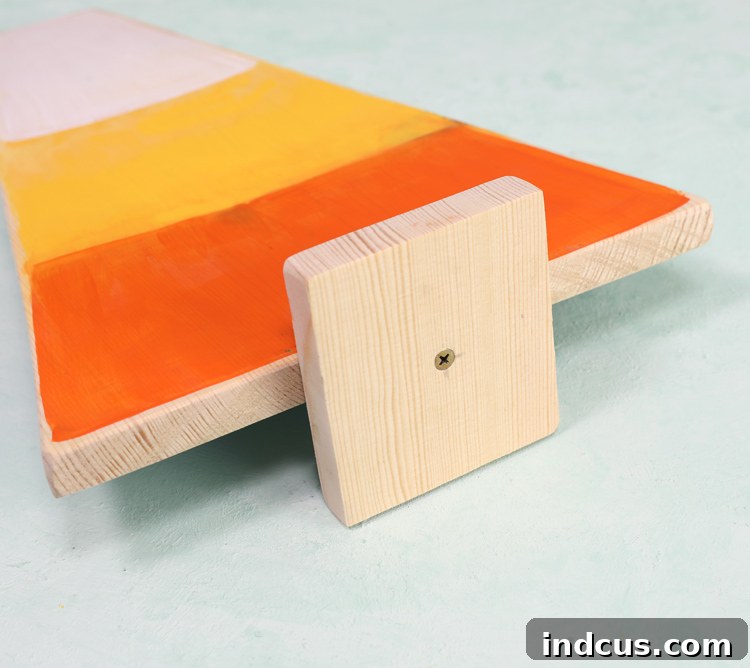
Finally, it’s time to bring your pieces together. Insert one of your 1.5-2 inch screws into the countersunk pilot hole of the base piece. Begin to drill it in gently until the tip of the screw just starts to poke through the opposite side of the base. This pre-drilling step helps ensure proper alignment. Then, carefully align the exposed tip of the screw with the pilot hole you drilled in the bottom center of the triangular sign. Screw the base and the sign together firmly but gently, being careful not to overtighten and strip the wood. Repeat this process for all three signs, and just like that, you’ll have a complete set of reversible holiday decorations, ready to display!
Personalize Your Reversible Fall and Winter Decorations
Congratulations, you’ve mastered the main craft! Now comes the truly fun part: adding your personal touch. While these signs are charming on their own, accessorizing them can elevate their festive appeal. For the Christmas trees, imagine gluing small red pom-poms to resemble ornaments, or even delicate mini bows for a touch of elegance. For a magical nighttime glow, consider wrapping battery-powered fairy lights around the tree side; the warm sparkle would be absolutely enchanting on a chilly winter evening.
Beyond these ideas, think about incorporating glitter for a snowy effect, using stencils to add festive words like “Joy” or “Welcome,” or even painting small stars on top of the trees. For the candy corn side, you could add subtle glitter dust for a sugary texture or draw playful faces. The possibilities are endless, allowing you to tailor these signs to perfectly match your unique home decor style and the specific holiday mood you wish to create. Get creative and make them truly yours!
We absolutely love how these reversible signs add a vibrant, welcoming touch to our porch. Seeing those cheerful candy corns as we pull up to the house instantly brings a smile to our faces. It’s such a simple project that yields impressive and long-lasting results, making your home feel cozy and festive throughout the changing seasons.
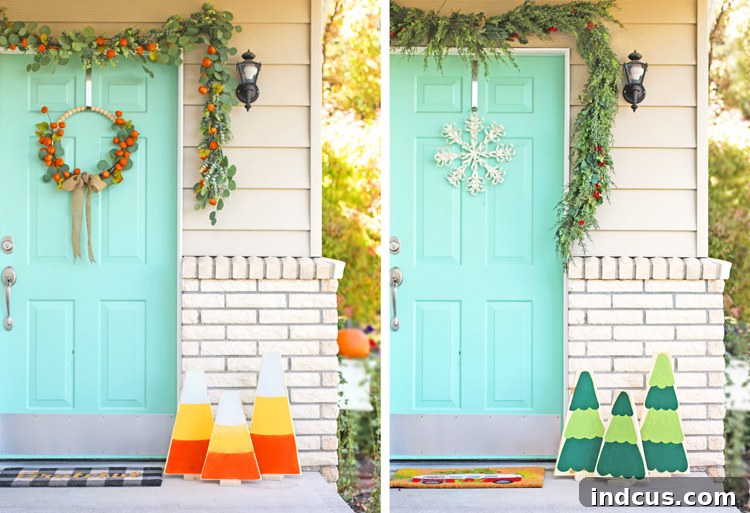
Reversible Candy Corn Christmas Trees Video Tutorial
For those who prefer a visual guide, watch our comprehensive video tutorial. It walks you through each step, from cutting the wood to adding the final painted details, ensuring you can confidently complete this delightful reversible holiday craft.
Loved this project? Pin it to save for later and share with fellow crafters!