Craft Enchanting Gingerbread House Treat Boxes for Unique Christmas Gifting
The holiday season, with its crisp air and festive decorations, ushers in one of the most heartwarming traditions: the exchange of gifts. Beyond the excitement of receiving, there’s immense joy in giving, especially when those gifts are thoughtful, homemade, and beautifully presented. This year, elevate your festive treats from simple delights to unforgettable gestures with our adorable gingerbread house treat boxes.
Imagine the smiles on faces as friends, family, neighbors, co-workers, or even your children’s beloved teachers receive a charming, miniature gingerbread house, each one a testament to your holiday spirit and crafting prowess. These aren’t just containers; they are an integral part of the gift itself, adding a bespoke, handcrafted touch that truly stands out from store-bought packaging.
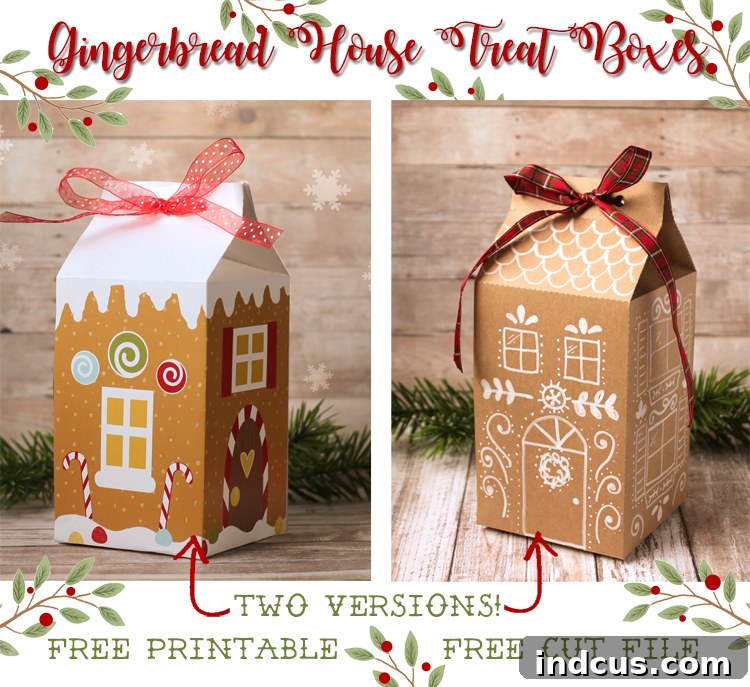
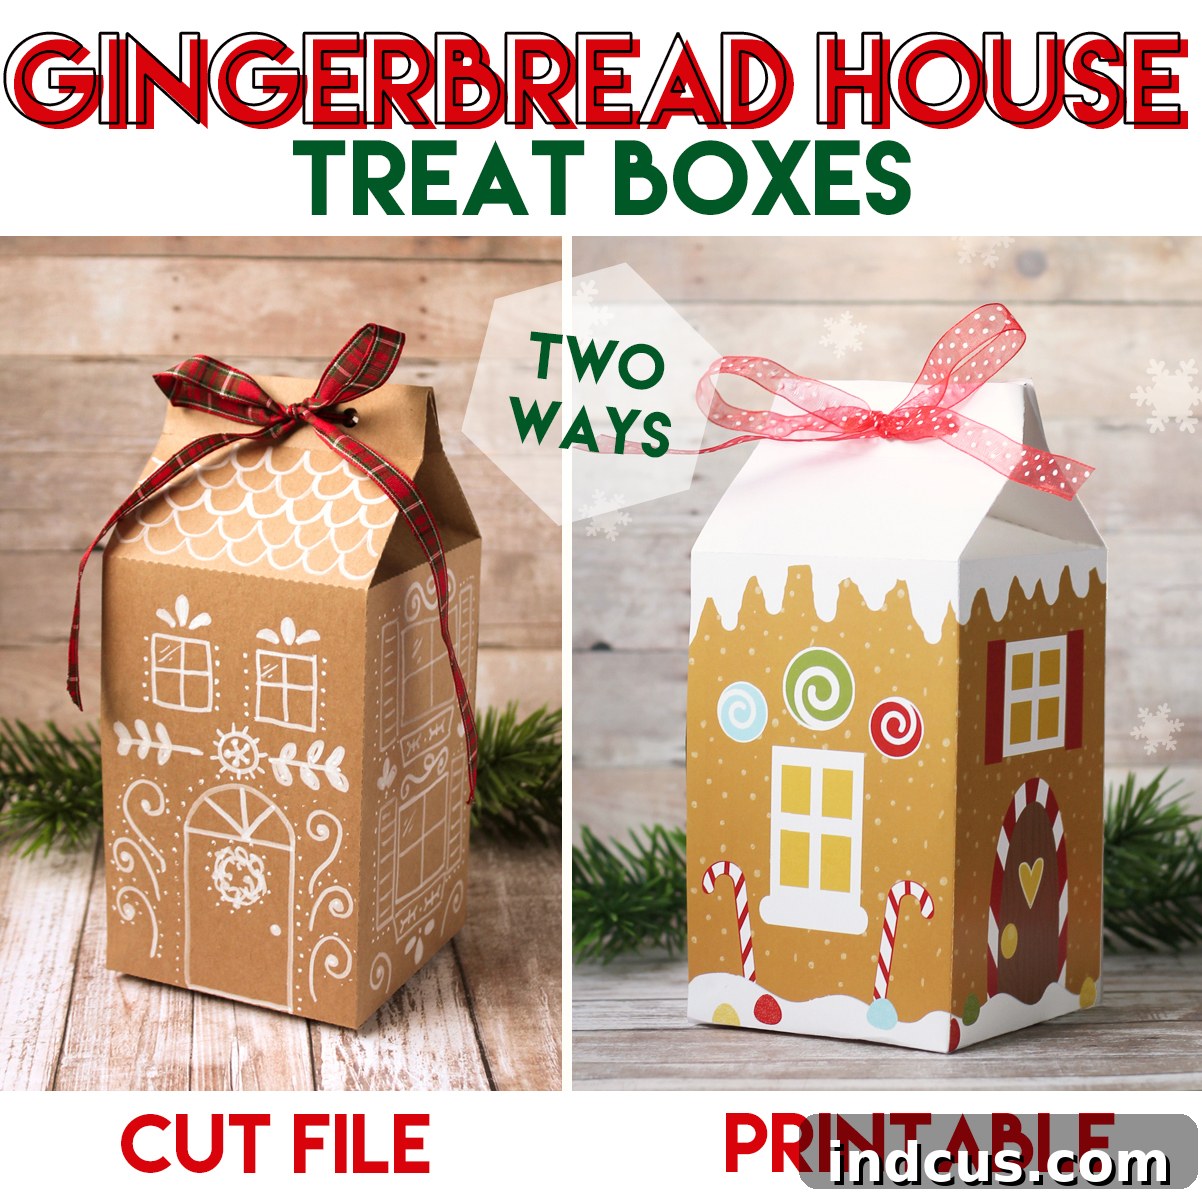
We’re thrilled to share two distinct versions of these delightful gingerbread house treat boxes, designed to cater to different crafting preferences and skill levels. Whether you’re a seasoned crafter with a cutting machine or prefer the simple satisfaction of cutting with scissors, we have a perfect project for you.
Why Choose Gingerbread House Treat Boxes This Christmas?
In a world of mass-produced goods, a homemade gift wrapped in unique packaging speaks volumes. These gingerbread house treat boxes are more than just a vessel for your delicious cookies, candies, or small gifts; they are a miniature piece of holiday art. Here’s why they’re the perfect choice for your Christmas gifting:
- Unforgettable Presentation: Move beyond generic bags and plastic containers. These charming houses instantly capture the magic of the holidays, making your gift memorable before it’s even opened.
- Personal Touch: Handcrafting these boxes adds a personal touch that store-bought packaging simply can’t replicate. It shows you’ve invested time and care into every detail of your gift.
- Versatility: Perfect for a wide array of recipients – from friendly neighbors and helpful colleagues to dedicated teachers and beloved family members. They’re also fantastic for school parties or as unique party favors.
- Festive Decor: Long after the treats are enjoyed, the little gingerbread house box can serve as a sweet miniature decoration, reminding the recipient of your thoughtful gesture.
- Easy Customization: While we provide the base designs, you can easily add your own flair with glitter, twine, small ornaments, or personalized tags to make each box truly unique.
Dive into the details of both versions below and discover how simple it is to bring these adorable creations to life, adding an extra sprinkle of magic to your holiday season.
One of the versions offers a rustic charm, perfect for those who love the natural aesthetic and have access to a craft cutting machine. The other is a vibrant, pre-designed option that you can simply print and cut by hand, making it incredibly accessible for everyone.

Crafting the Rustic Kraft Paper Gingerbread House Treat Box (SVG Cut File)
This version is designed for crafters who own a Silhouette or Cricut machine, allowing for precise cuts and a clean finish. The natural kraft cardstock provides a wonderful rustic backdrop, against which your hand-drawn details will pop, giving each house a unique, artisanal feel. It’s an ideal choice for creating multiple boxes with consistent quality while still allowing for individual artistic expression in the decoration phase.
Materials Needed
- Kraft Cardstock (two 8.5×11″ pieces per box for structural integrity)
- White Paint Pen or Chalk Marker (for drawing details)
- Gingerbread House SVG Cut File (all downloadable files are conveniently located at the bottom of this post)
- Standard Hole Punch
- Strong Craft Glue or Adhesive (for secure assembly)
- Festive Ribbon or Twine (for closing the box and adding decoration)
Step-by-Step Instructions for the Kraft Paper Version
Follow these detailed steps to create your beautiful kraft paper gingerbread house treat boxes. Take your time, and enjoy the creative process!
Step 1: Prepare Your Cut Files and Cardstock
Begin by downloading the kraft paper gingerbread house SVG cut file. Load this file into your Silhouette, Cricut, or other compatible craft cutting machine software. Ensure your machine settings are adjusted for cutting cardstock to achieve clean, crisp edges. You will need to cut the shape twice from two separate pieces of 8.5×11 inch kraft cardstock for each complete treat box. This dual-piece design ensures a sturdy and well-structured final product.
Step 2: Fold Along the Perforated Lines
Once both pieces are perfectly cut, carefully remove them from your cutting mat. You’ll notice subtle perforated lines on each piece – these are your guides for folding. Gently fold along all of these lines, ensuring your creases are sharp and precise. This meticulous folding will lay the groundwork for a perfectly shaped house. Repeat this process for the second cut piece of cardstock, ensuring consistency between both halves.
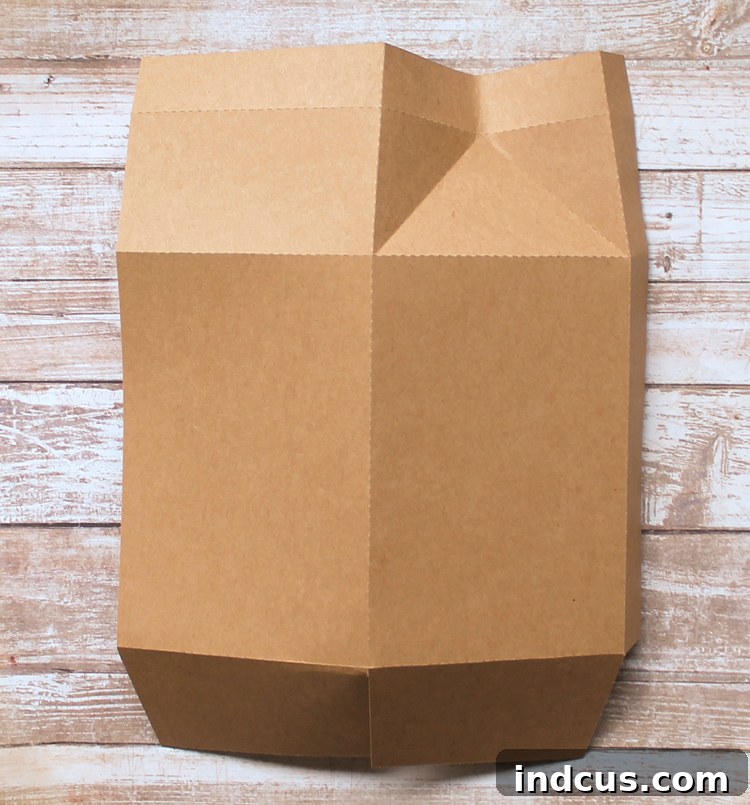
Step 3: Add Charming Hand-Drawn Details
This is where the true charm of the kraft paper version comes to life! Before assembling, take your white paint pen or chalk marker and begin to draw delightful windows, intricate doors, whimsical roof lines, or any other gingerbread-inspired details onto the kraft cardstock. Don’t strive for absolute perfection; slight imperfections add to the handmade appeal and character of each little house. Let your creativity flow and make each box uniquely yours.
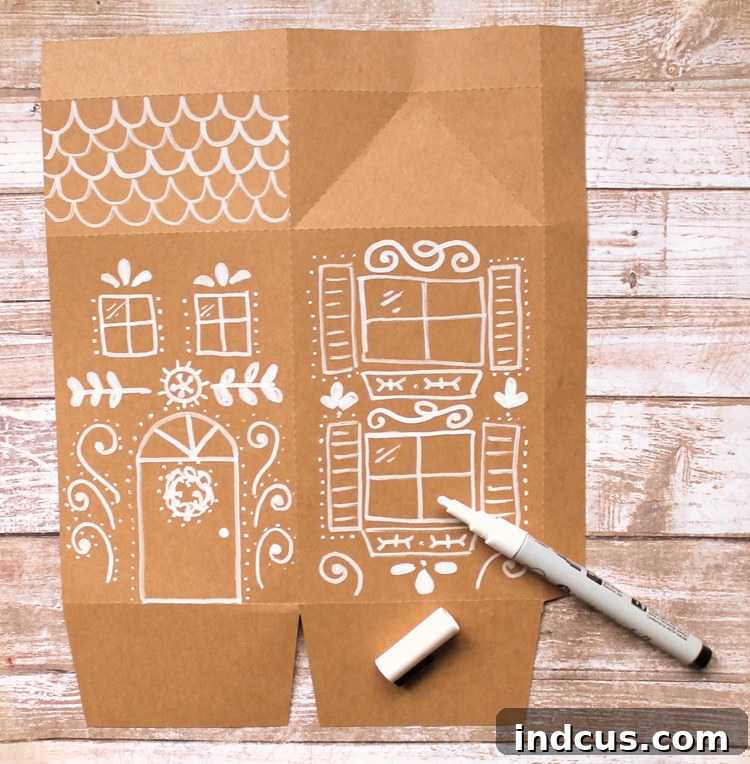
Step 4: Connect the Two Halves of the House
Now, it’s time to bring your two flat pieces together to form the initial structure. Take one piece and apply a thin, even line of strong craft glue along the small vertical flap located on its right-hand side. Carefully align this glued flap and slide it underneath the left-hand edge of the second piece. Press firmly to ensure a strong bond. This step connects the two identical cut-outs, forming a longer, unfolded shape.
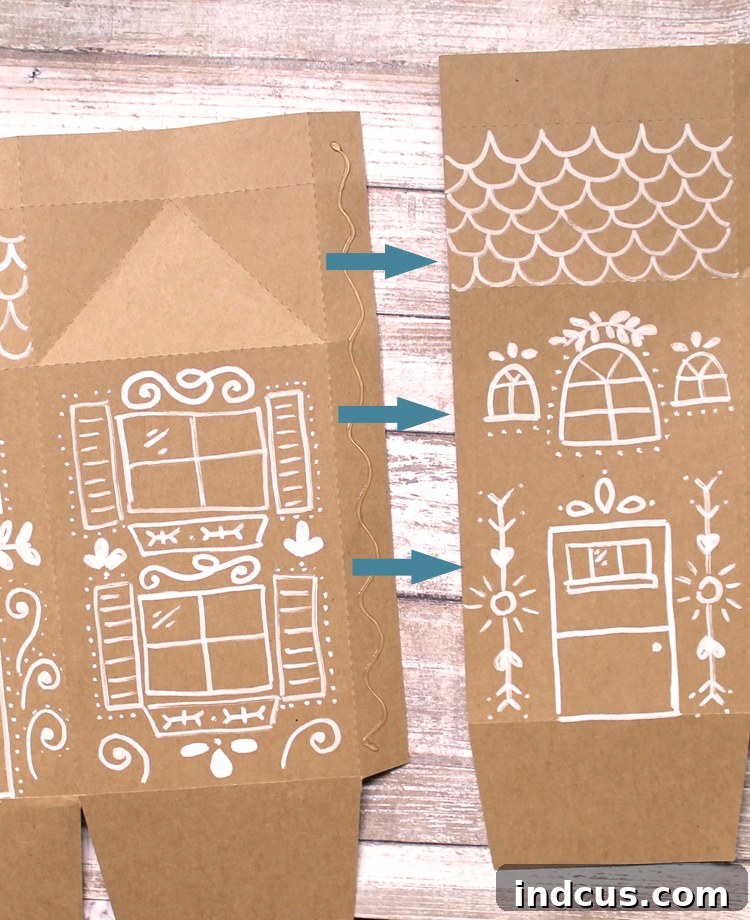
Step 5: Form the Cube Base
With the two pieces now connected, you’ll find another small flap at the end. Apply a line of glue to this remaining flap. Carefully bring the opposite edge of your now-extended cardstock shape to meet this flap, slipping it underneath to create a continuous, four-sided structure. Press down firmly until the glue sets. At this point, your treat box should resemble an open-ended cube or a milk carton without its top and bottom sealed.
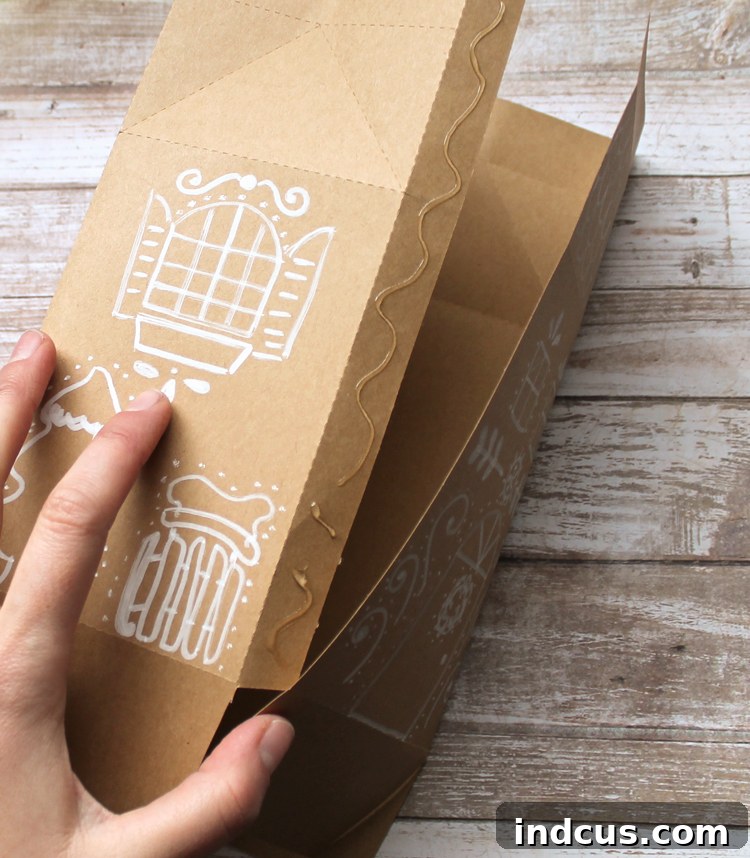
Step 6: Secure the Bottom Flaps
Flip your partially assembled house upside down. You’ll see a series of flaps at the bottom designed to interlock. Apply glue to each of these bottom flaps, one by one, and press them together firmly until the base of your gingerbread house is completely sealed and secure. This creates a sturdy foundation for your treats.
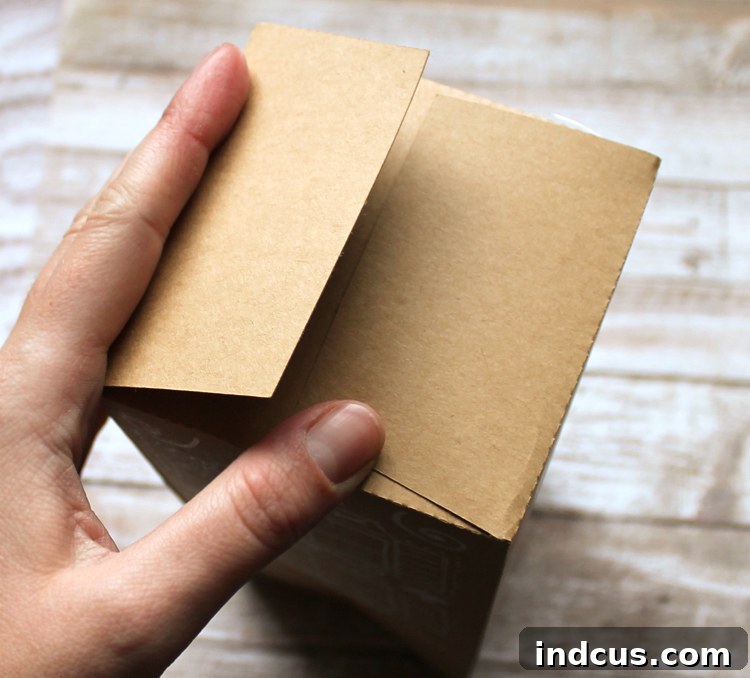
Step 7: Shape the Iconic Gable Roof
Now, for the distinctive gingerbread house roof! Gently pinch the top sides of your box inward. As you do this, the pre-folded triangular sections at the top will naturally bend and come together, forming the classic gable roof shape. Take care to ensure the folds are neat and symmetrical, creating a pleasing peak.
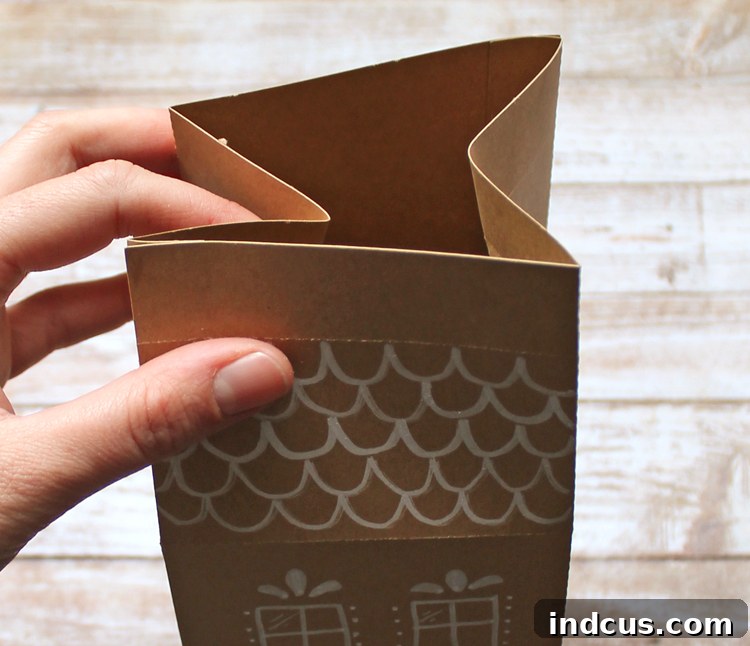
Step 8: Punch Holes and Add Ribbon
With the roof shaped, you’ll notice a flat ridge formed at the very top. Using your hole punch, carefully create two holes along this ridge, spaced evenly apart. These holes will serve as the closure mechanism for your treat box. Thread your chosen festive ribbon or twine through these holes, tying a charming bow to keep the box securely closed and add a final decorative flourish.
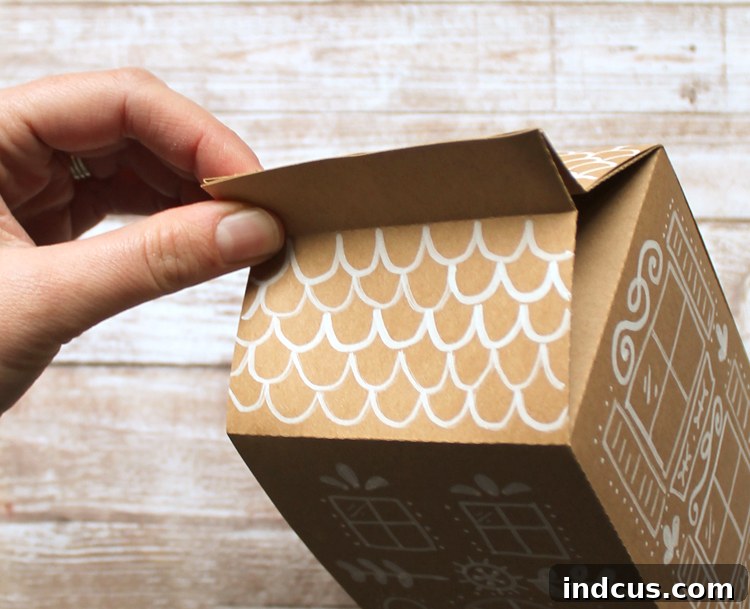
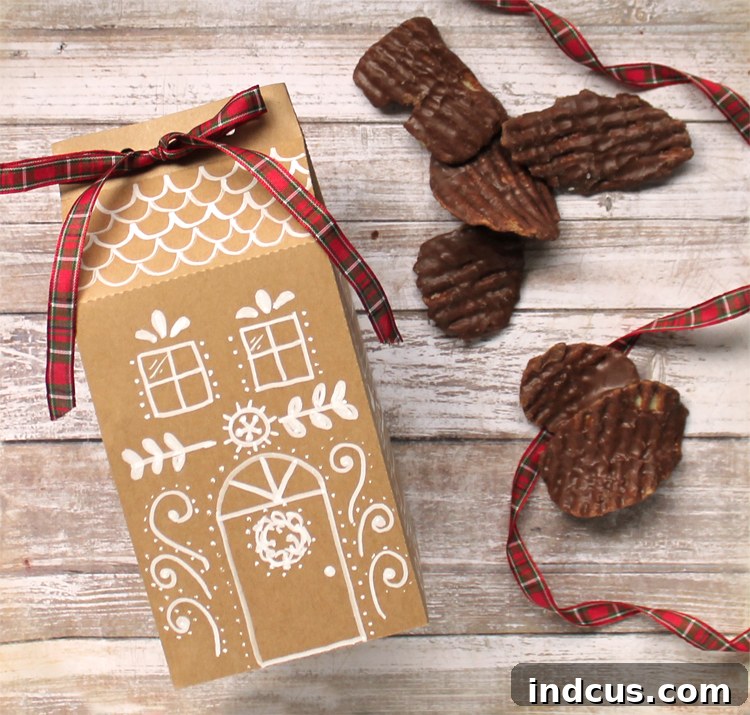
And there you have it! Your very own rustic kraft paper gingerbread house treat box, ready to be filled with homemade Christmas delights. Isn’t it just the cutest and most unique packaging you’ve ever seen?
The Cheerful Printable Gingerbread House Treat Box (No Cutting Machine Needed!)
For those who prefer a less rustic, more vibrant look, or simply don’t have a cutting machine, our printable version is an absolute delight! This option comes with pre-designed windows, doors, and festive candy accents, so all you need to do is print, cut with scissors, and assemble. It’s incredibly accessible and yields a wonderfully whimsical result that’s sure to bring cheer.
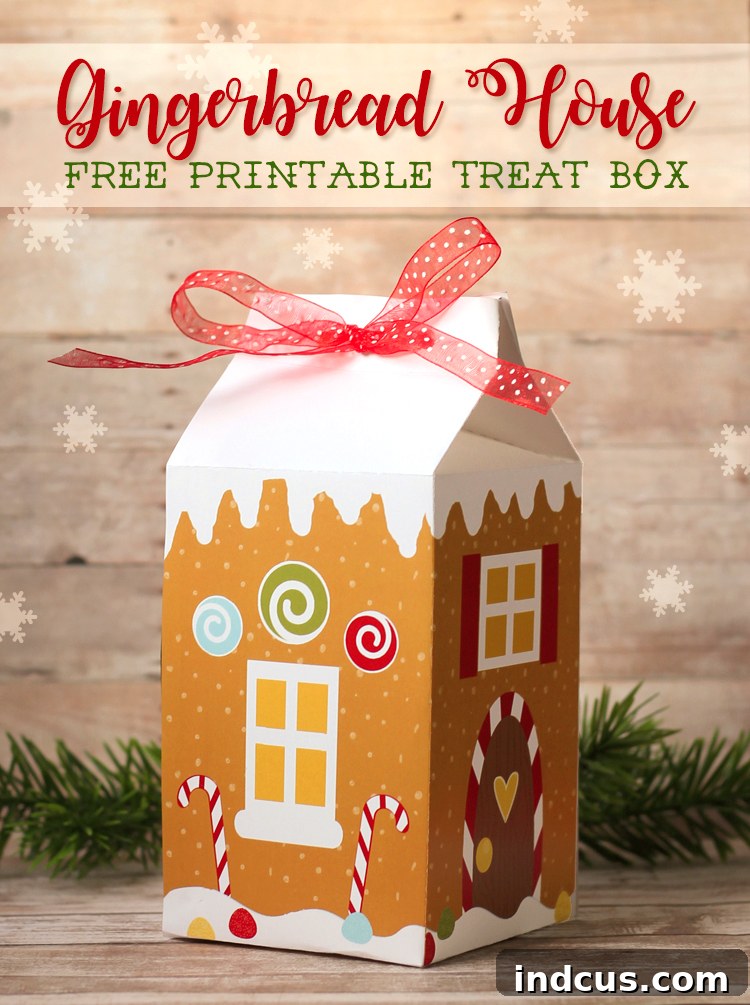
We absolutely adore the cheerful and whimsical design of this printable version! The pre-applied details save you time and effort, ensuring a consistent, festive look across all your treat boxes. It’s perfect for a quick crafting session or for involving younger family members in the holiday preparations.
Printable Gingerbread House Treat Box
Materials Needed
- White Cardstock (two pieces per house for optimal durability and vibrant print quality)
- Sharp Scissors (for clean cutting)
- Ruler (essential for accurate scoring and folding)
- Bone Folder or Knitting Needle (optional, but highly recommended for crisp folds)
- Hot Glue (for fast, strong bond) or a School Glue Stick (for an easier, kid-friendly option)
Step-by-Step Instructions for the Printable Version
This version follows a very similar assembly process to the kraft paper box, with a crucial preliminary step for hand-cut precision.
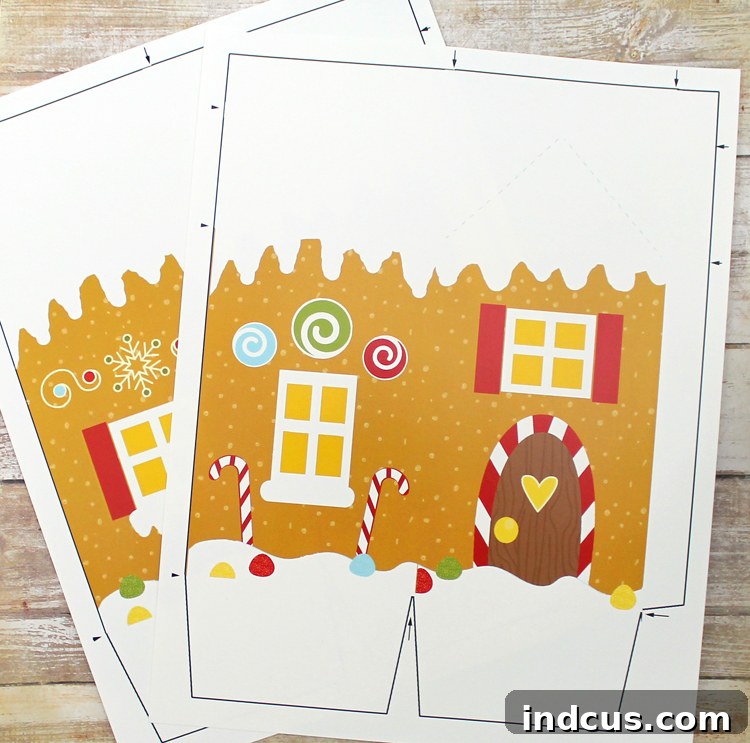
First, download the two printable house pieces (also found at the bottom of this post). Print them onto your chosen white cardstock.
The folding and gluing process is almost identical to the kraft paper version described above. However, there’s one key difference in preparation: notice the tiny arrow markings strategically placed around the outside of the cut lines on the printable template? These are your precise folding guidelines, ensuring that even with hand-cutting, your folds are accurate.
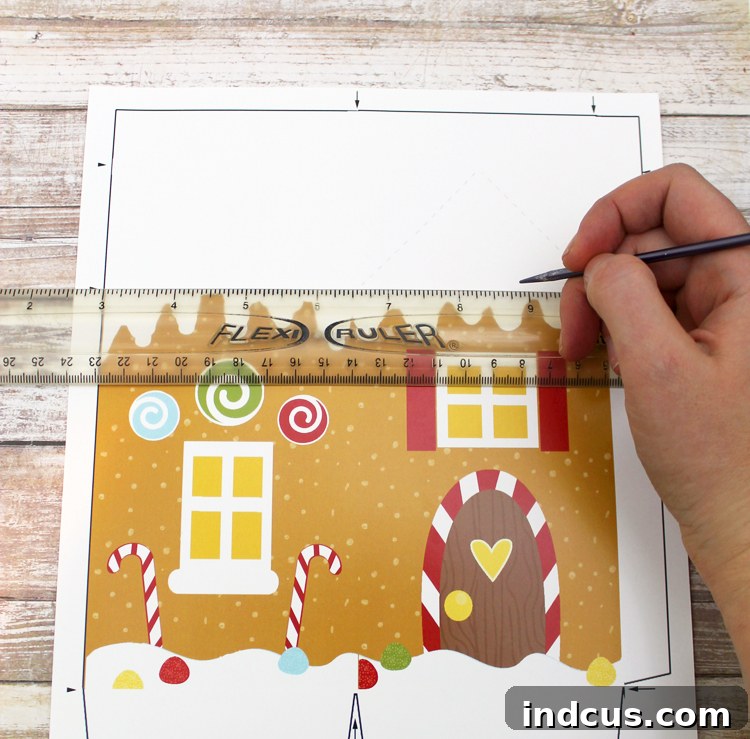
Before you cut, take a ruler and carefully align it from one arrow to the arrow directly across from it. Using a scoring tool (like a bone folder, a dried-out pen, a knitting needle, or even the back of a dull knife or the tip of a pair of scissors – be gentle!), gently score a line into the cardstock. The goal of scoring is to create a faint indentation, a guide line, that helps the paper fold crisply and neatly, preventing cracks and uneven creases. Repeat this scoring process for all indicated fold lines. If you need a visual reference for how your folds should look, feel free to scroll back up to the first tutorial photo in the kraft paper section.
Once all your scoring lines are in place, carefully cut just inside the black outline all the way around each piece. Precision here will lead to a cleaner final product. After cutting, proceed with the assembly instructions (Steps 4 through 8) from the kraft paper version above. The structure and method of gluing the pieces together, sealing the bottom, forming the roof, and adding ribbon are exactly the same.
Pro Tip for Hybrid Crafters: If you happen to have a craft cutting machine but still prefer the vibrant design of the printable version, you’re in luck! You can easily open both the SVG cut file and the free printable designs in your Silhouette Design Studio (or similar software). Align the printable design onto the cut file’s outline and use your machine to cut the shape precisely, bypassing the need for scissors. This gives you the best of both worlds – pre-designed charm with machine-cut accuracy!
Visual Learner? Watch the Video Tutorial!
If you’re still picturing how these delightful boxes magically come together, we’ve got you covered! Sometimes seeing is believing, especially when it comes to crafting. Watch our short, comprehensive video tutorial below, where we demonstrate the entire assembly process step-by-step. This visual guide will clarify any lingering questions and boost your confidence to start crafting.
GINGERBREAD TREAT BOX VIDEO TUTORIAL
Important Information Regarding Your Free Downloadable Files
We’ve poured our creativity and effort into designing these free files for you to enjoy. Please remember that these files are intended for personal use only. We kindly ask that you respect this by not using them for commercial purposes or redistributing them. Your cooperation helps us continue to create and share wonderful crafting resources!
If you encounter any difficulties accessing the files, it might be due to network restrictions at your school or workplace. Many institutions block access to file-sharing sites. We recommend trying to download the files again from a personal computer with an unrestricted internet connection. Happy crafting!
Don’t Forget to Pin It!
Loved this project? Make sure you don’t lose track of these adorable gingerbread house treat boxes! Pin this tutorial to your favorite Christmas craft or DIY gift idea board on Pinterest. It’s the perfect way to save it for later, share it with friends, and inspire others to create their own festive holiday packaging. Happy pinning!
Share Your Creations!
We absolutely love seeing your handmade creations! Once you’ve crafted your charming gingerbread house treat boxes, don’t hesitate to share them with us on social media. Tag us and use the hashtag #GingerbreadTreatBoxes – we’d be thrilled to feature your festive packaging and see how you’ve personalized your holiday gifts this season. Let’s spread the Christmas crafting joy together!