DIY Accordion Fold Paper Christmas Tree Pencil Toppers: A Charming and Inexpensive Holiday Craft for All Ages
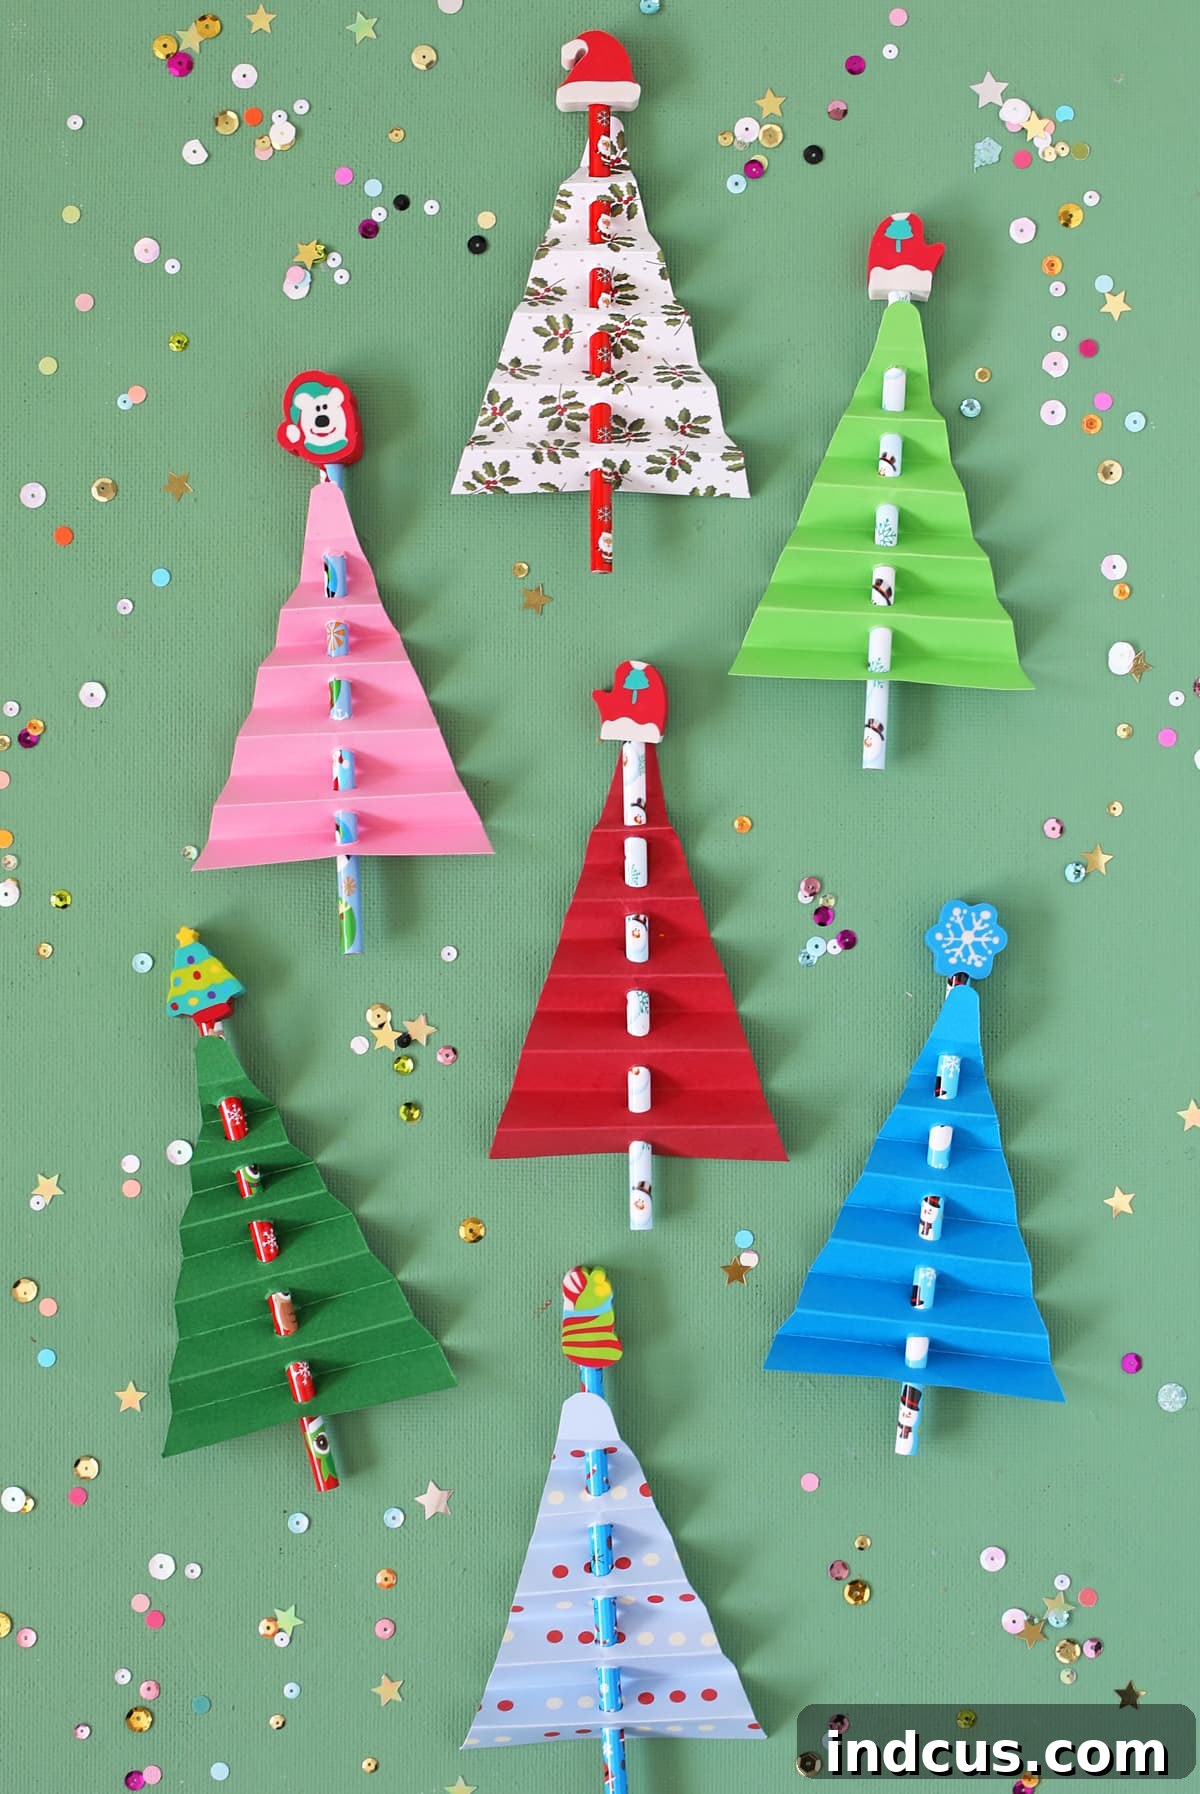
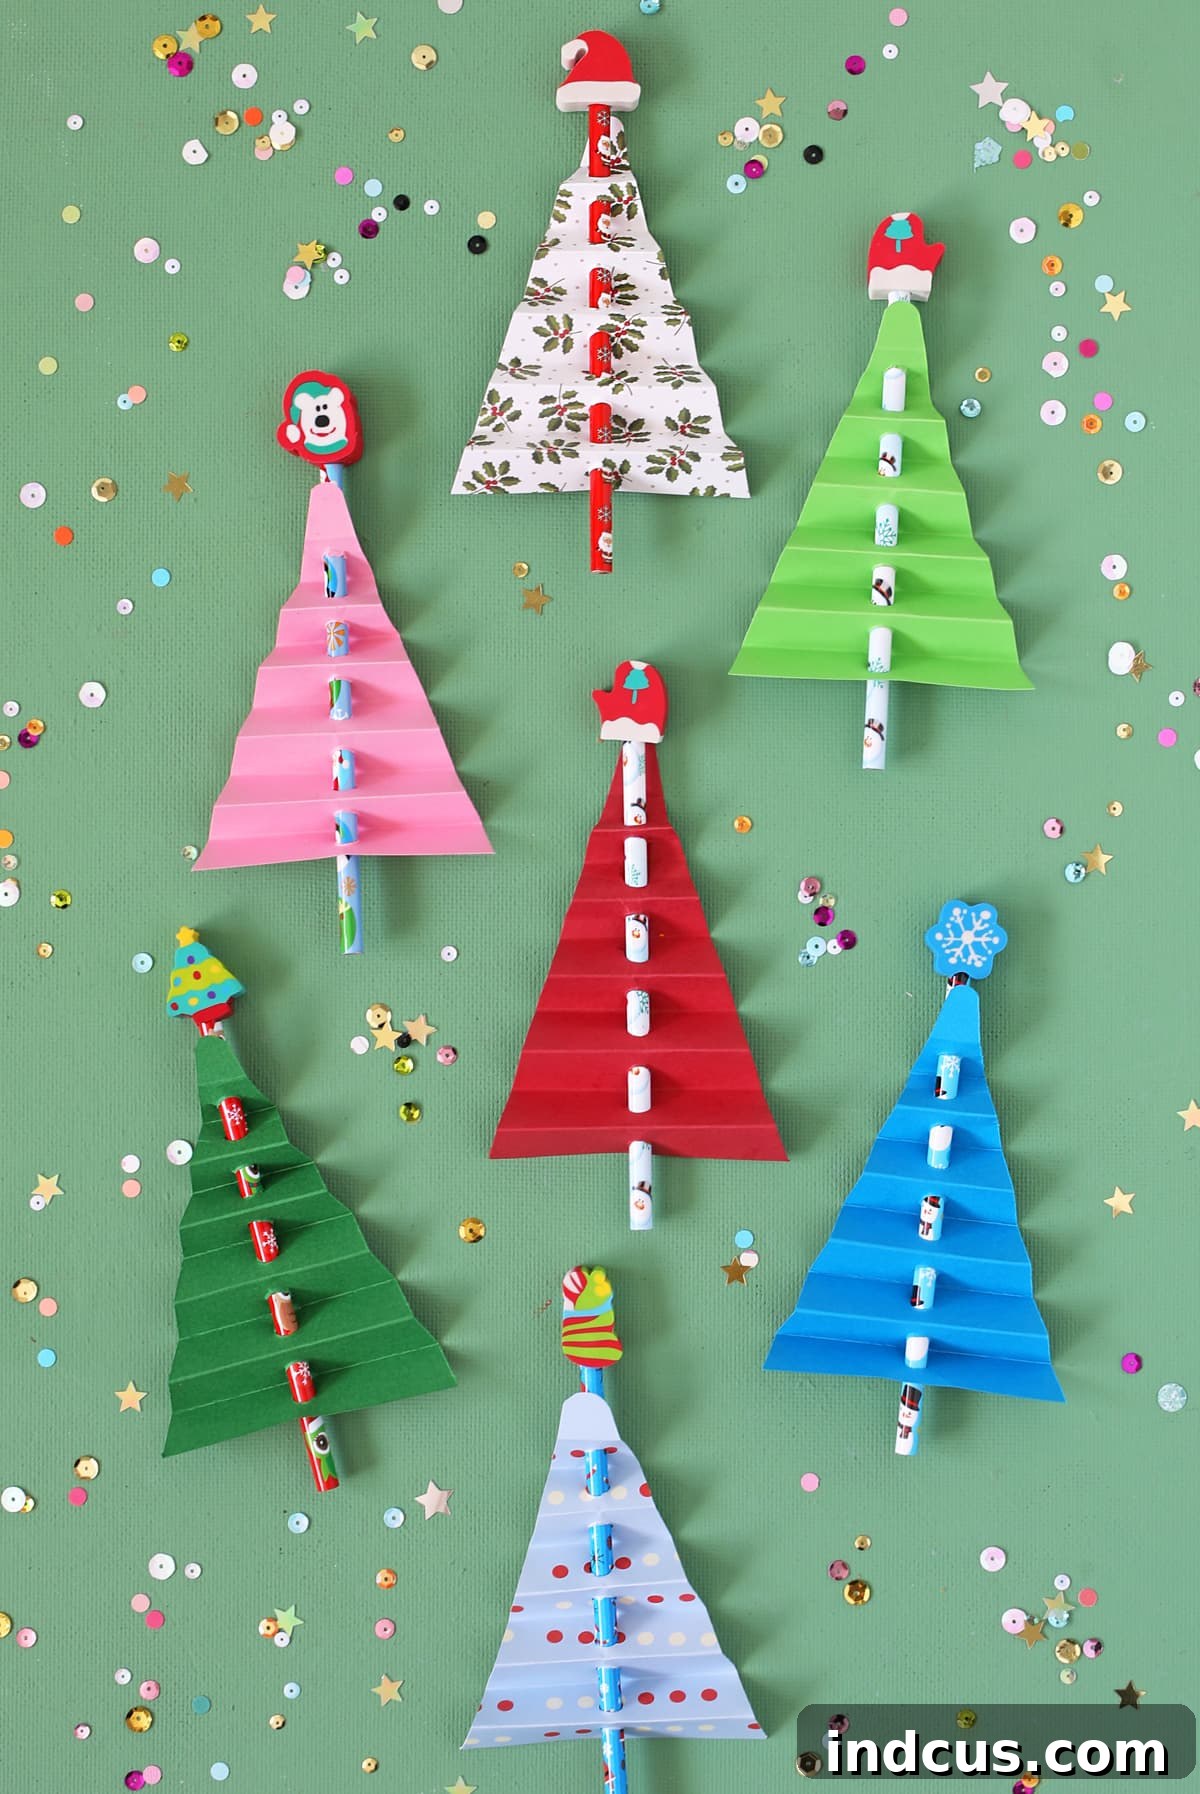
Welcome to a world of festive creativity! The holiday season is synonymous with joy, giving, and heartwarming crafts. If you’re searching for an activity that combines simplicity, affordability, and undeniable charm, look no further. This delightful tutorial will guide you through making accordion-folded paper Christmas trees that attach neatly to pencils. These aren’t just any ordinary pencil toppers; they are miniature works of art, bursting with holiday spirit!
Imagine the smiles these handmade treasures will bring. They are an ideal project for elementary school-aged children, perfect for crafting together at a class party, creating thoughtful gifts for friends, or even as unique stocking stuffers. This easy Christmas craft offers a wonderful opportunity for kids to engage their creativity, practice fine motor skills, and experience the satisfaction of making something beautiful with their own hands. Let’s dive into creating these festive decorations!
Why Choose This Festive DIY Christmas Tree Craft?
In a season often filled with elaborate preparations, sometimes the most memorable moments come from simple, heartfelt activities. This paper Christmas tree pencil topper craft stands out for several compelling reasons, making it a favorite among parents, teachers, and craft enthusiasts alike:
- Budget-Friendly Fun: This is an incredibly inexpensive Christmas craft, primarily requiring cardstock and pencils – items you might already have on hand or can easily purchase without breaking the bank. It’s the perfect solution for creating numerous gifts or party favors on a tight budget.
- Effortless & Engaging: Designed with simplicity in mind, this DIY Christmas tree project is accessible for crafters of all skill levels, especially younger children. The steps are straightforward, making it an excellent introduction to paper crafting and accordion folding techniques.
- Versatility in Gifting: Beyond personal enjoyment, these charming paper Christmas trees make fantastic handmade gifts. They can be given to classmates, teachers, friends, or family members. They also serve as unique party favors for holiday gatherings or delightful additions to Christmas stockings.
- Ideal for Group Activities: Looking for a fun and manageable craft for a school party, a scout troop meeting, or a family gathering? The repetitive yet rewarding nature of this craft makes it perfect for groups, allowing everyone to create their own festive masterpiece.
- Customization Galore: While beautiful in their basic form, these little trees are a blank canvas for personalization. Encourage creativity by suggesting additions like glitter, small stickers, sequins, or different colored cardstock to make each tree truly unique.
Gather Your Essential Craft Supplies
Before embarking on this delightful DIY Christmas project, ensure you have all your materials ready. A well-prepared workspace makes for a smooth and enjoyable crafting experience. Here’s a list of what you’ll need to create your charming accordion fold paper Christmas tree pencil toppers:
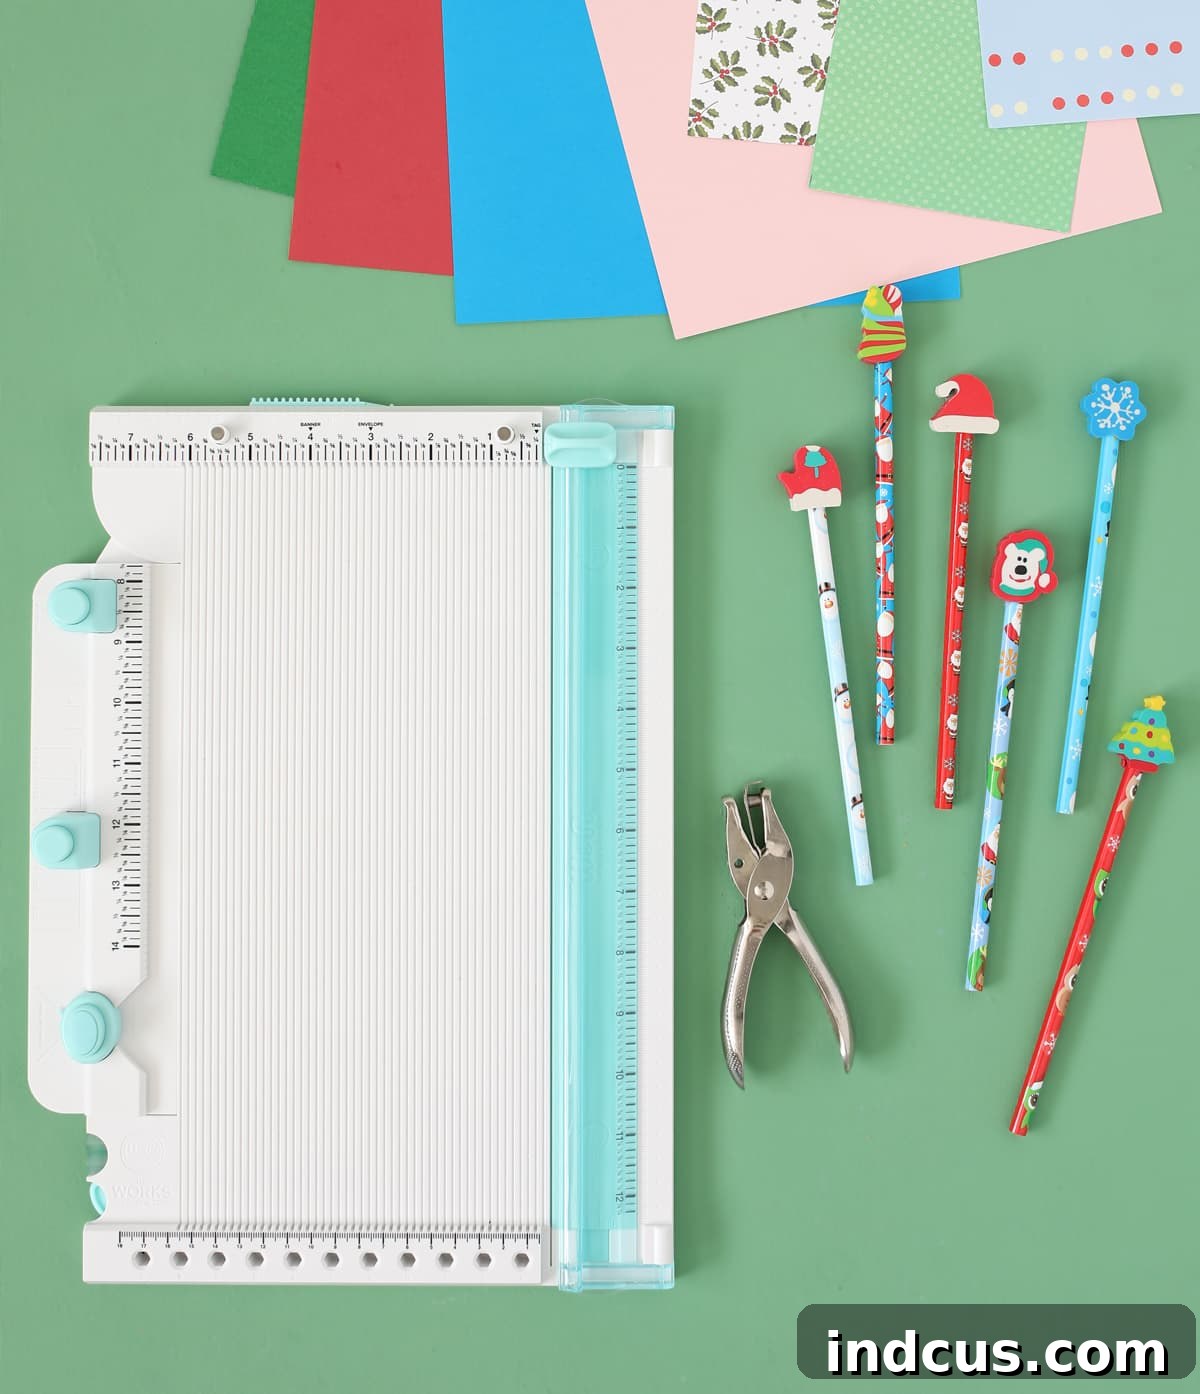
Materials Needed:
Click on any highlighted item in the supply list for more information. Affiliate links may be used.
- Cardstock: Choose green cardstock for a classic Christmas tree look, or experiment with other festive colors like red, silver, or even patterned designs. Standard 65lb or 80lb cardstock works best for its durability and ease of folding.
- Pencils with Eraser Tops: Any standard pencil will work, but those with festive designs or brightly colored erasers can add an extra touch of holiday cheer. Ensure they are standard size to fit the holes you’ll punch.
- Paper Cutter and Scorer: (Optional, but highly recommended for precision and efficiency) A paper cutter ensures perfectly straight edges, and a scoring tool creates crisp, professional-looking folds. If you don’t have one, a ruler and a pair of sharp scissors, along with a dull knife or scoring stylus for scoring, will suffice.
- Hole Punch: A standard single-hole punch is all you need. Consider one with a comfortable grip for repeated use.
- Optional Embellishments: Glitter glue, small star stickers for the top, mini sequins, or even a fine-tip marker for drawing tiny ornaments can elevate your trees from cute to absolutely stunning.
Step-by-Step Instructions: Crafting Your Paper Christmas Tree Pencils
Now that you have all your materials, let’s begin the fun process of transforming simple cardstock into adorable Christmas tree pencil toppers. Follow these detailed steps carefully, and you’ll soon have a collection of festive creations ready to spread holiday cheer.
Step 1: Preparing Your Cardstock Canvas
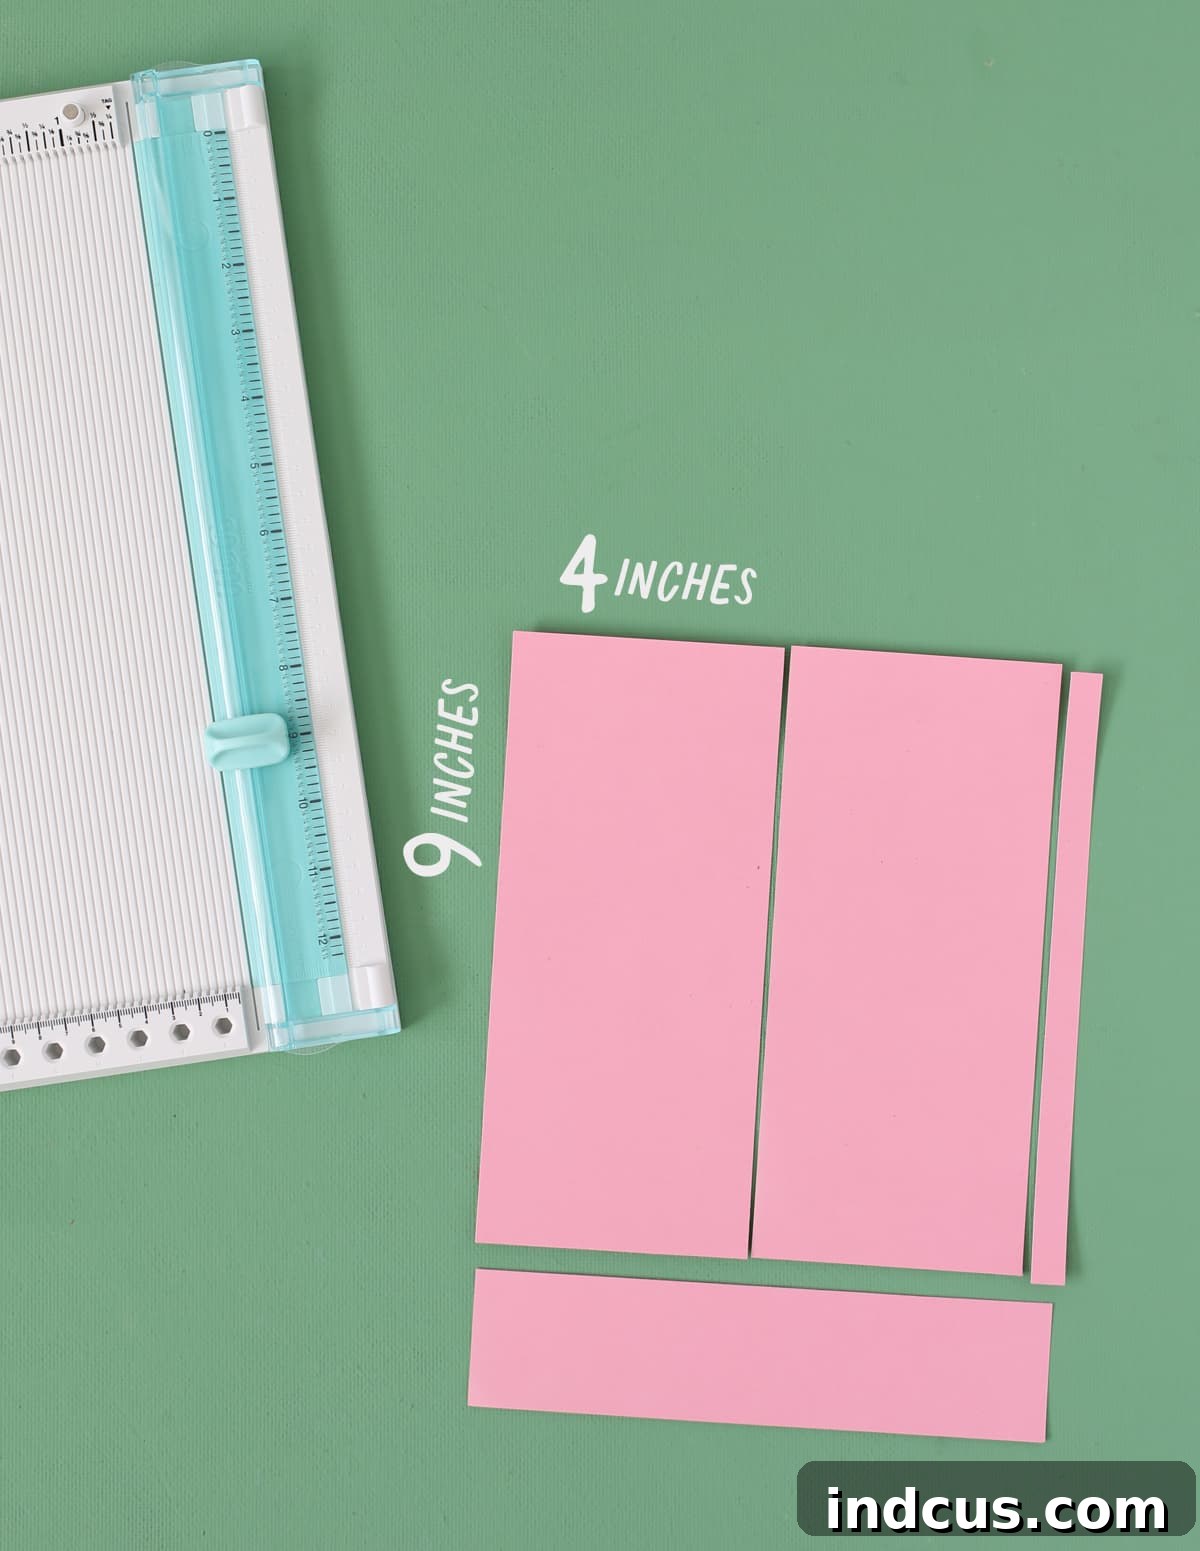
Begin by cutting your cardstock. For each Christmas tree, you will need one rectangular piece of cardstock measuring 9 inches by 4 inches. Standard letter-sized paper (8.5 x 11 inches) or A4 paper will yield two such rectangles with minimal waste. Precision here is key for a well-proportioned tree, so using a paper cutter is highly recommended. If using scissors, carefully measure and mark your lines with a ruler and pencil before cutting to ensure straight edges.
Step 2: Crafting the Iconic Tree Shape
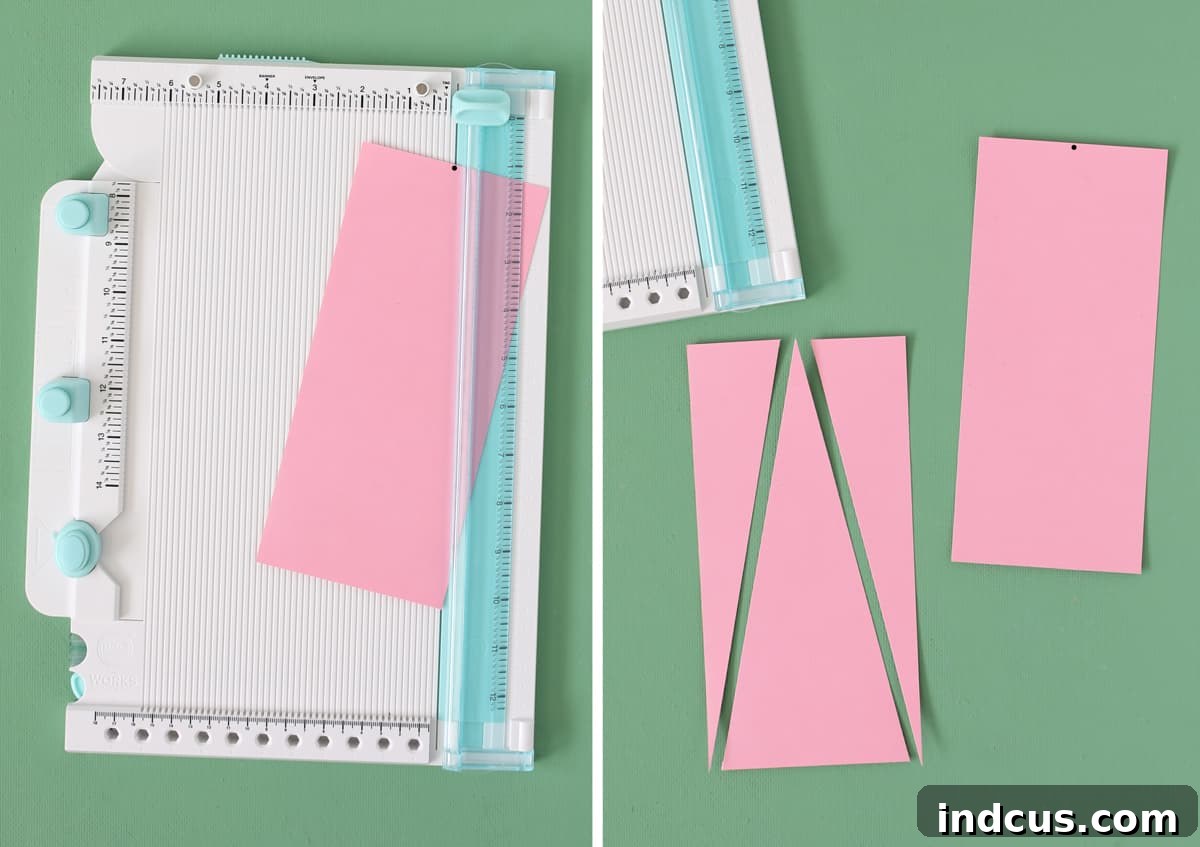
Next, transform your rectangle into a triangular Christmas tree shape. On the 4-inch side, find and mark the exact center point (at 2 inches). Then, using your ruler and pencil, draw a line from the bottom corner of the 9-inch side up to the center mark you just made. Repeat this process on the other bottom corner, drawing another line up to the same center mark. Carefully cut along these two diagonal lines. This will create a symmetrical isosceles triangle, perfectly mimicking the classic Christmas tree silhouette. Discard the two small corner pieces. The resulting triangle will be approximately 9 inches tall and 4 inches wide at its base.
Step 3: The Art of Scoring for Perfect Folds
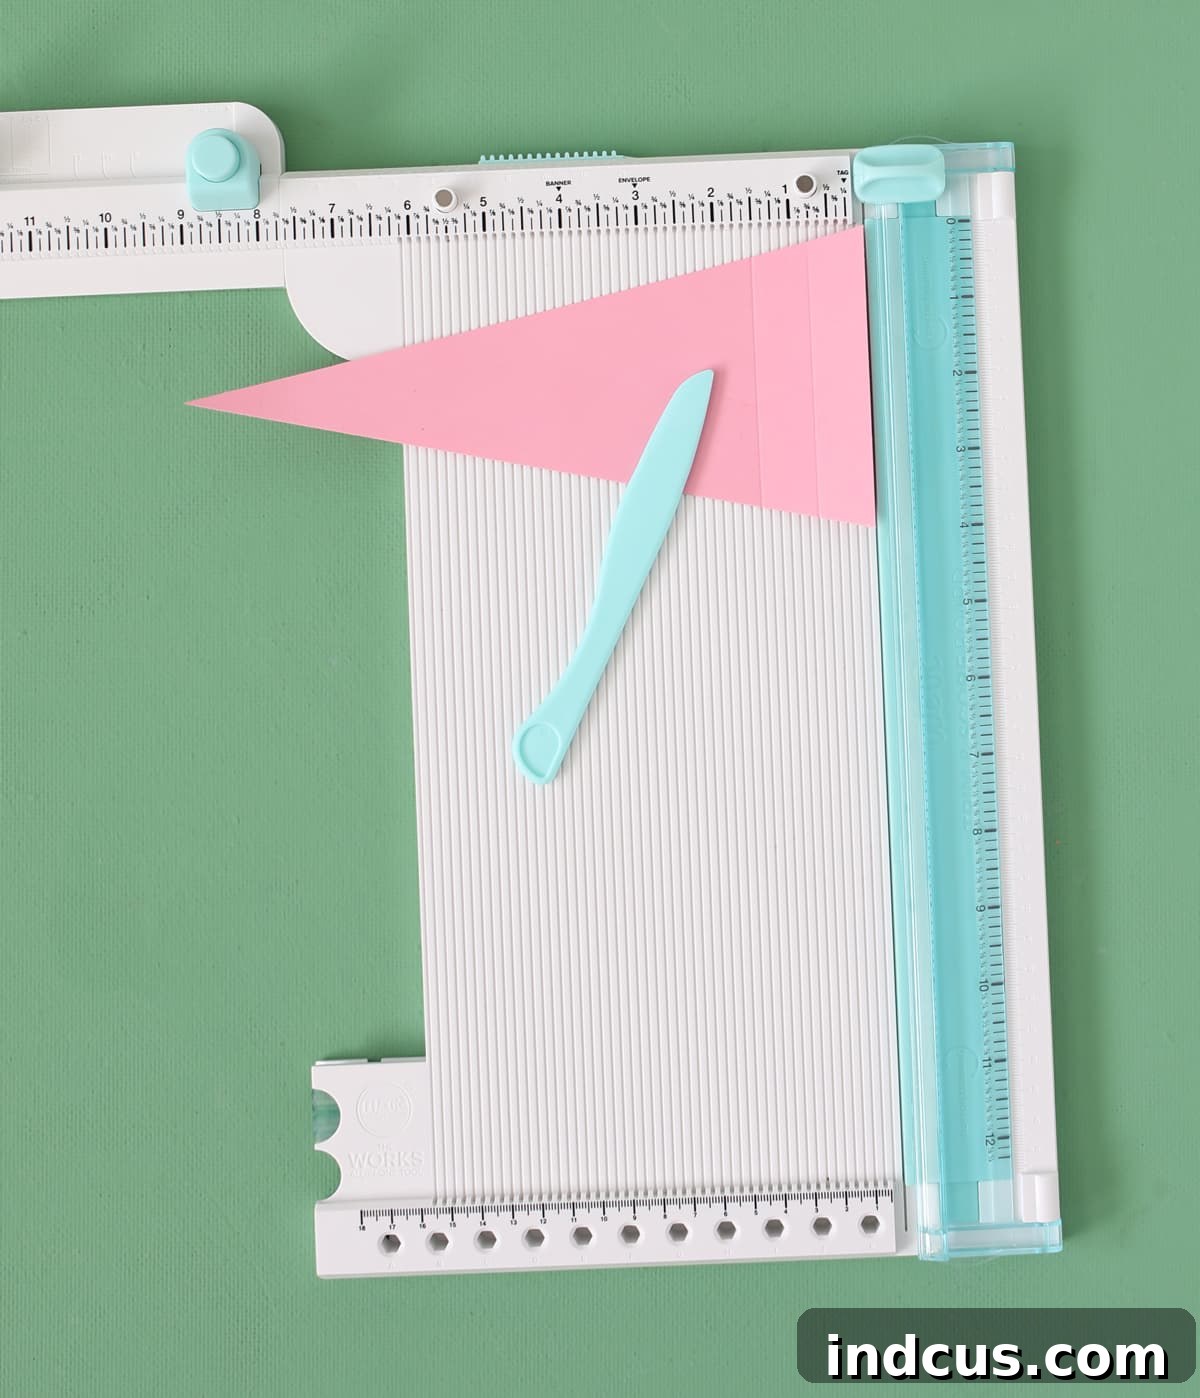
Now, it’s time to prepare your paper for accordion folding by scoring. Place your paper triangle onto a scoring board. Make score lines every 3/4 inch across the entire width of the tree, from the base all the way to the tip. Consistent scoring is crucial for creating neat, crisp accordion folds. If you don’t have a scoring tool, you can carefully mark the 3/4 inch intervals with a ruler and pencil, then use a dull knife (like a butter knife) or the back of a crafting blade with light pressure along a ruler to create the score lines. This step ensures your folds are sharp and uniform, giving your tree that beautiful, textured look.
Step 4: Shaping the Tip and Preparing for the Pencil
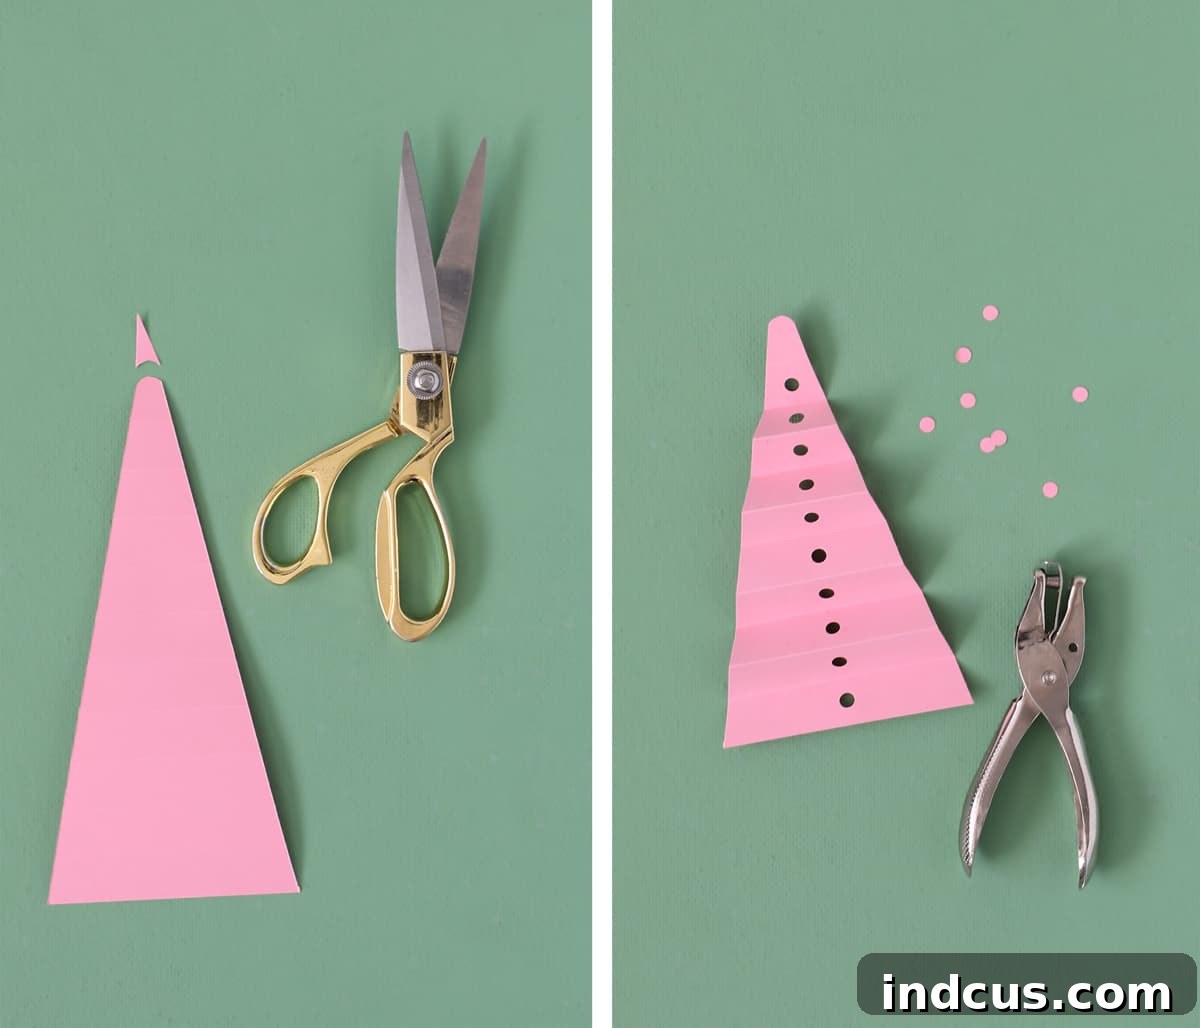
With your score lines in place, let’s refine the tree’s tip and prepare for the pencil. First, use your scissors to gently round off the very top point of the triangle. This softens the appearance and gives it a more organic, tree-like finish. Next, carefully fold your scored paper along the lines, creating an accordion fold. Once folded, punch holes down the very center of the folded tree. This is where your pencil will eventually go. A common challenge with thicker cardstock is that a standard hole punch may struggle to go through all the layers at once. The trick is to fold a small section at a time, punch a hole, then unfold slightly, use the previously punched hole as a guide, and punch through just a few layers at a time. Work your way down the entire length of the tree, ensuring the holes are perfectly aligned down the center.
Step 5: Bringing Your Tree to Life – Attaching to the Pencil
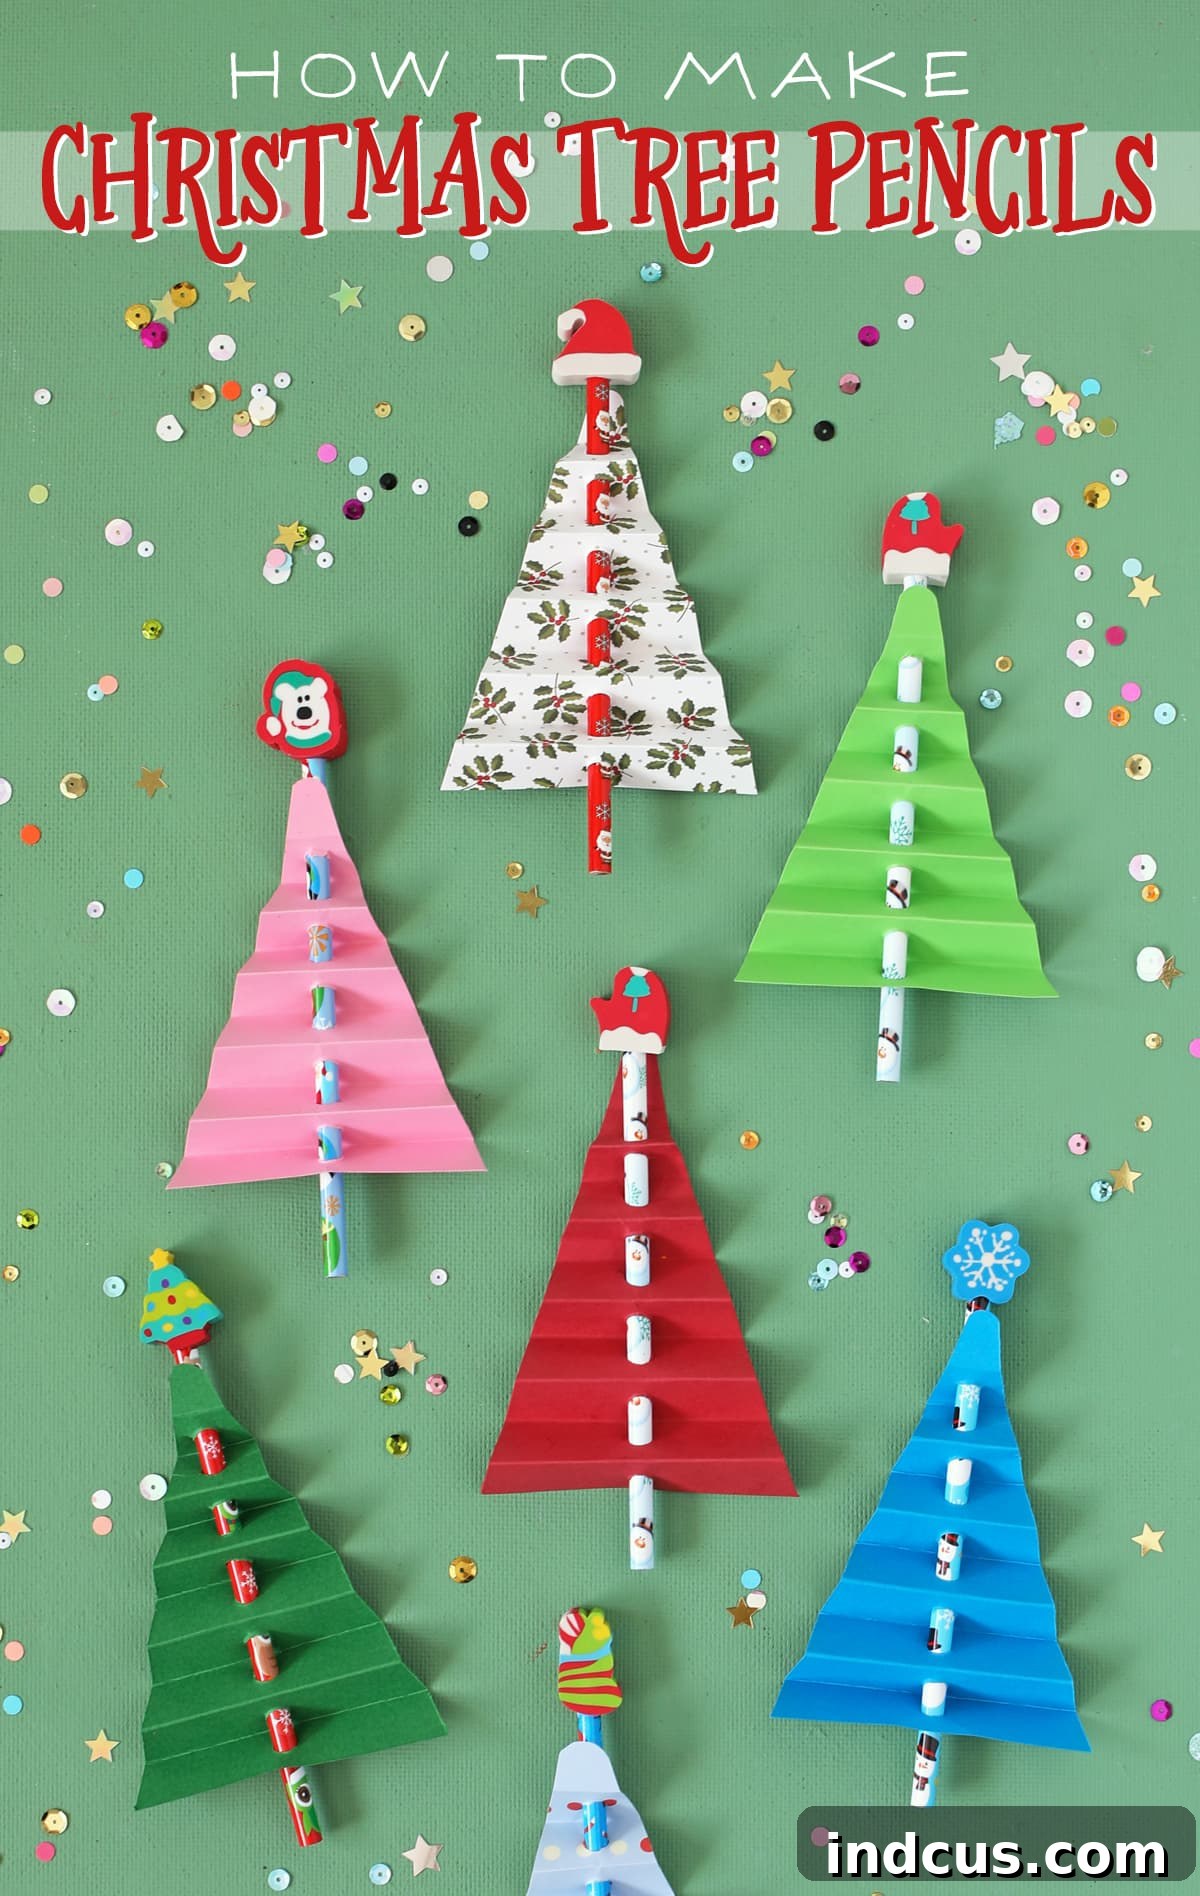
The final step is to bring your folded tree and pencil together! Standard hole punches typically create holes that are a bit too small for a pencil to comfortably slide through. To rectify this, take a sharpened pencil (or even a thin dowel or skewer) and carefully push it into each hole, gently widening them without tearing the paper. Take your time with this step to avoid damaging your perfectly folded tree. Once the holes are sufficiently widened, carefully slide your chosen pencil through the series of holes, starting from the base of the tree and working your way upwards. As you slide it through, gently arrange the accordion folds to fan out evenly, creating a full, bushy Christmas tree effect around the pencil. Adjust the folds until you are satisfied with the shape and symmetry. And just like that, you’ve created the cutest little pencil Christmas tree!
Tips for Success and Creative Variations
To make your crafting experience even more enjoyable and to unleash your inner artist, here are some expert tips and exciting variations to consider for your paper Christmas tree pencil toppers:
Tips for a Flawless Finish:
- Practice Makes Perfect: If it’s your first time trying accordion folds or working with cardstock, consider doing a quick practice run on a scrap piece of paper. This helps you get a feel for the scoring and folding without risking your final project.
- Keep Your Tools Sharp: Ensure your scissors are sharp for clean cuts and your hole punch is in good working order. Dull tools can lead to ragged edges and frustration.
- Use a Bone Folder: For extra crisp folds, especially after scoring, a bone folder can be incredibly useful. It helps to press down firmly along the fold lines, giving them a professional finish.
- Adult Supervision: While this is an easy craft for kids, younger children should always have adult supervision when using scissors or hole punches to ensure safety.
- Storage: If making these ahead of time, store them carefully in a box to prevent the folds from getting crushed or bent before gifting or use.
Creative Variations to Explore:
- Embellish Your Trees: This is where the magic happens!
- Sparkle and Shine: Apply glitter glue or spray adhesive followed by fine glitter for a snowy or shimmering effect.
- Mini Ornaments: Use tiny stickers, self-adhesive rhinestones, or even draw small ornaments with metallic markers.
- Star Topper: Cut out small yellow or gold cardstock stars and glue one to the very top of each tree for a classic touch.
- Experiment with Paper: Don’t limit yourself to plain green cardstock. Try:
- Patterned Paper: Festive plaid, polka dots, or striped cardstock can add a unique flair.
- Different Shades: Use various shades of green to create a forest of trees, or opt for unexpected colors like blue or white for a winter wonderland theme.
- Adjust the Size: You can easily scale this project up or down.
- Mini Trees: Reduce the initial rectangle size for smaller, delicate trees perfect for tiny pencils or gift tags.
- Larger Decorations: Increase the dimensions for bigger trees that can stand alone as desk decorations or be attached to thicker dowels.
- Beyond Pencils: These charming trees aren’t just for pencils!
- Gift Toppers: Attach them to wrapped gifts for an extra handmade touch.
- Bookmarks: Slide them onto a ribbon for a unique festive bookmark.
- Ornaments: Add a loop of string to the top and hang them directly on your Christmas tree.
Conclusion: Spread Holiday Cheer with Handmade Creations
There you have it – a wonderfully simple, inexpensive, and utterly charming DIY Christmas craft that promises endless fun and festive results. These accordion-folded paper Christmas tree pencil toppers are more than just a craft; they are tiny vessels of holiday cheer, perfect for brightening someone’s day, decorating a classroom, or adding a personal touch to your gift-giving this season. The joy of creating something by hand, especially during the holidays, is truly incomparable.
Whether you’re making a single tree or an entire forest of them, each one carries a piece of your creativity and effort. We hope this comprehensive guide has inspired you to gather your supplies and embark on this delightful journey. So, grab your cardstock, sharpen your scissors (or power up your paper cutter!), and let the festive crafting begin! Share your beautiful creations with friends and family, and most importantly, enjoy the magic of the holiday season.