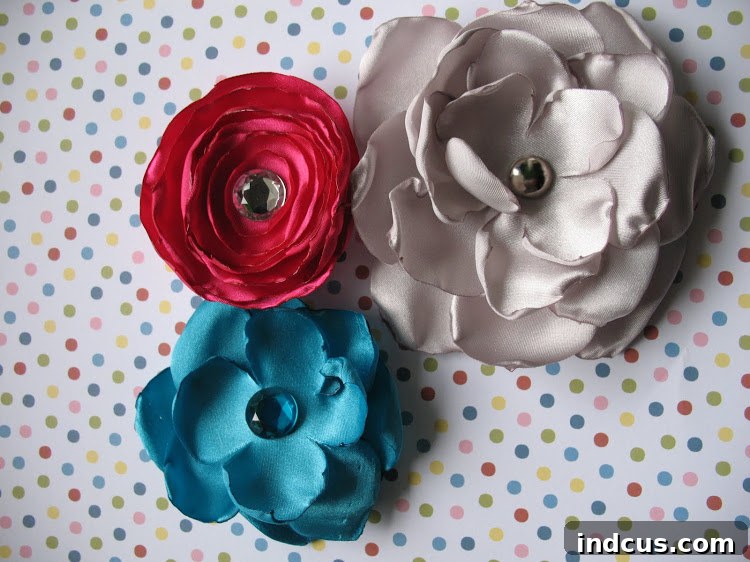
DIY Melted Edge Satin Flowers: Create Stunning Hair Bows, Brooches & More
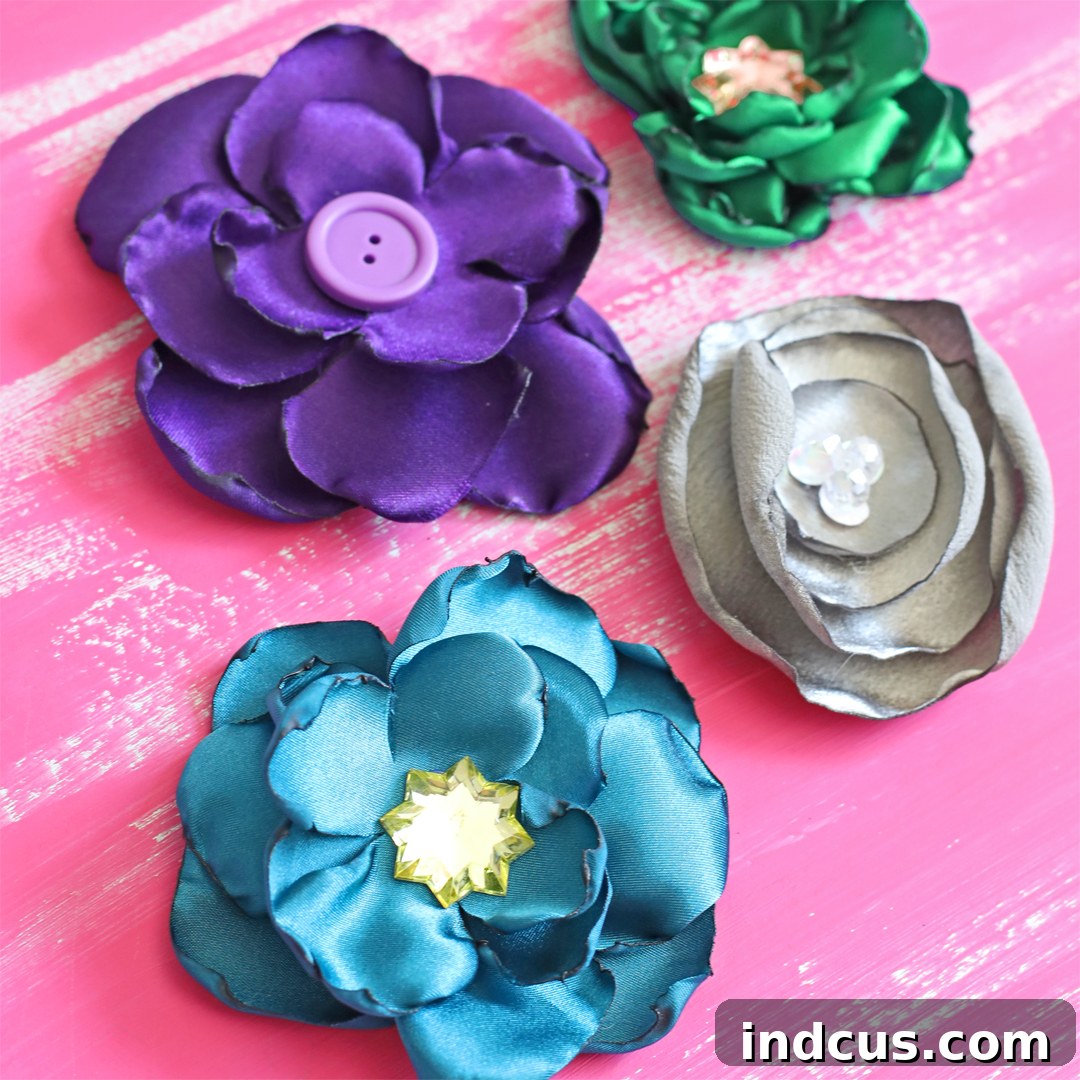
Unleash your creativity and add a touch of timeless elegance to your accessories with these breathtaking melted edge satin flowers. Crafted from luxurious yet affordable satin fabric, these DIY blooms are not only stunningly beautiful but also incredibly easy to make. Whether you envision them adorning hair bows, transforming into chic brooches, or becoming unique embellishments for virtually anything you can imagine, this comprehensive guide will walk you through every step of creating your own exquisite fabric flowers.
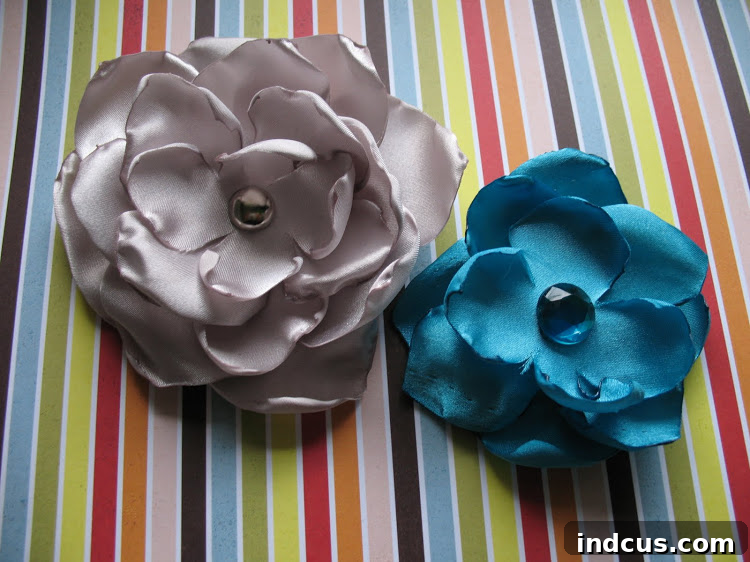
The inherent sheen and smooth texture of satin lend an unparalleled sophistication to these handmade flowers. We’ve personally crafted numerous versions into charming hair bows for our daughters, and they consistently draw compliments and admiration. The delicate, subtly curled edges, achieved through a simple melting technique, give each petal a realistic and organic feel, making these flowers look far more intricate than they actually are to create.
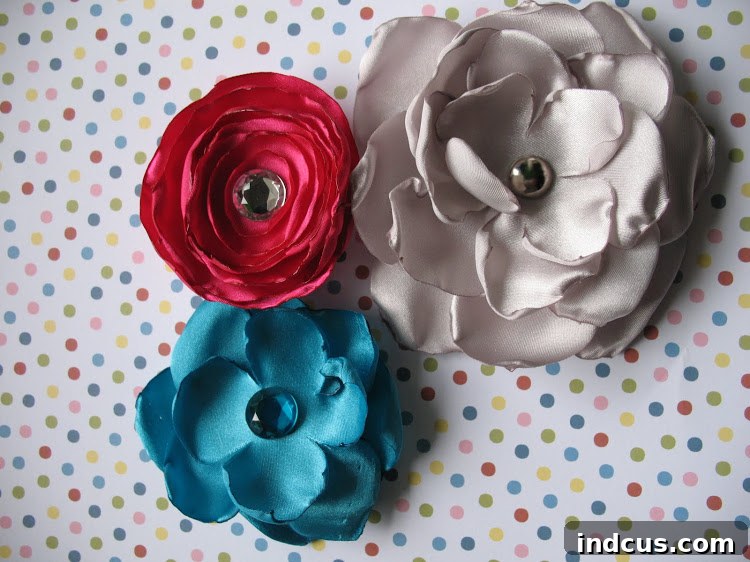
This detailed written tutorial provides all the information you need to master the art of making satin flowers. If you prefer a visual learning experience, a video tutorial is also available further down the page to guide you through the process step-by-step.
Why Choose DIY Satin Flowers for Your Craft Projects?
Crafting your own satin flowers offers a myriad of benefits beyond just their aesthetic appeal. It’s a highly rewarding endeavor that combines creativity with practicality:
- Cost-Effective Elegance: High-quality floral embellishments can be surprisingly expensive. By making them yourself, you utilize inexpensive fabric, significantly cutting down on costs while achieving a designer look.
- Unmatched Customization: Store-bought flowers often come in limited colors and sizes. DIY allows you to choose any shade, pattern, and dimension of satin, perfectly matching your specific project, outfit, or decor theme.
- Personalized Touch: Handmade gifts and accessories carry a unique sentiment. A satin flower crafted by your own hands adds a deeply personal and thoughtful touch to any item.
- Versatile Applications: From fashion accessories to home decor, the uses for these flowers are virtually endless. They can elevate a simple dress, beautify a gift package, or even become part of a larger floral arrangement.
- Therapeutic Crafting: Engaging in creative hobbies like fabric flower making can be a wonderful way to relax, de-stress, and channel your artistic energy into something tangible and beautiful.
Popular Applications for Your Handmade Satin Flowers
Once you’ve mastered the technique, you’ll find countless ways to incorporate these lovely satin blooms into your life and crafts. Here are just a few ideas to spark your imagination:
- Hair Accessories: Transform them into elegant hair clips, secure them onto headbands, or attach them to hair elastics for charming ponytail holders.
- Fashion Embellishments: Pin them to jackets, scarves, or blouses as unique brooches. Use them to accent bags, hats, or even personalize plain shoes.
- Wedding & Event Decor: Create stunning boutonnieres, corsages, or even a unique bouquet for a non-traditional wedding. They can also enhance centerpieces, chair decorations, or favor boxes.
- Home Decor Accents: Add a soft, romantic touch to throw pillows, curtains (as tie-backs), or simply arrange them in a vase for a lasting floral display.
- Gift Wrapping: Elevate your gift presentations by using a satin flower instead of a traditional bow, making your present extra special.
- Scrapbooking & Card Making: Incorporate smaller satin flowers into your paper crafts for beautiful three-dimensional embellishments.
Essential Materials You’ll Need to Craft Your Satin Flowers
Gathering your supplies is the first exciting step in creating your beautiful fabric flowers. Fortunately, the list is short, inexpensive, and easy to find:
- Polyester Satin Fabric: This is the star of our project. Polyester satin is crucial because, unlike natural fibers or some other synthetic blends, it melts cleanly and creates those beautiful, gently curled edges we’re aiming for. Look for it at your local craft or fabric store, often labeled as “costume satin” or “poly satin.” It’s incredibly affordable, and a quarter yard is usually more than enough for several flowers, as they don’t consume much fabric. For a vibrant selection, consider a satin fat quarter bundle which offers a wide array of colors for endless creative possibilities.
- Lighter: A long-handled utility lighter is highly recommended over traditional pocket lighters. It provides a safer distance from the flame and makes the melting process more controlled and comfortable.
- Embellishments for Flower Centers: This is where you can truly personalize your blooms. Think beads, rhinestones, pearl accents, buttons, small cabochons, or even a tiny fabric rosebud.
- Backing for Your Flower: Depending on its intended use, you’ll need a way to attach your flower. Common options include a hair clip (alligator clips or barrettes), a brooch pin, or a corsage pin.
- Sharp Scissors: For clean, precise cuts of your satin fabric.
- Hot Glue Gun and Glue Sticks: Essential for securely layering petals and attaching embellishments and backings.
- Felt Circles (Optional but Recommended): Small felt circles provide a neat, sturdy base on the back of your flower, concealing any glue and providing a strong surface for attaching clips or pins.
Step-by-Step Instructions: Crafting Your Square Petal Satin Flowers
Follow these detailed steps to create stunning satin flowers with distinct, elegant square petals. Remember to work in a well-ventilated area and exercise caution when using a flame.
1. Prepare Your Fabric Squares
Begin by cutting your polyester satin fabric into a series of progressively smaller squares. The number of layers and their sizes will determine the fullness and overall dimension of your finished flower. For a four-layer flower like the beautiful silver example, you might start with a 4-inch square as the largest base, followed by a 3.5-inch square, then a 3-inch square, and finally a 2.5-inch square for the top layer. You can adjust these measurements based on your desired flower size – for smaller flowers, reduce the starting size and the increments. Ensure your cuts are as straight as possible for a consistent look.
2. Create the Petal Slits
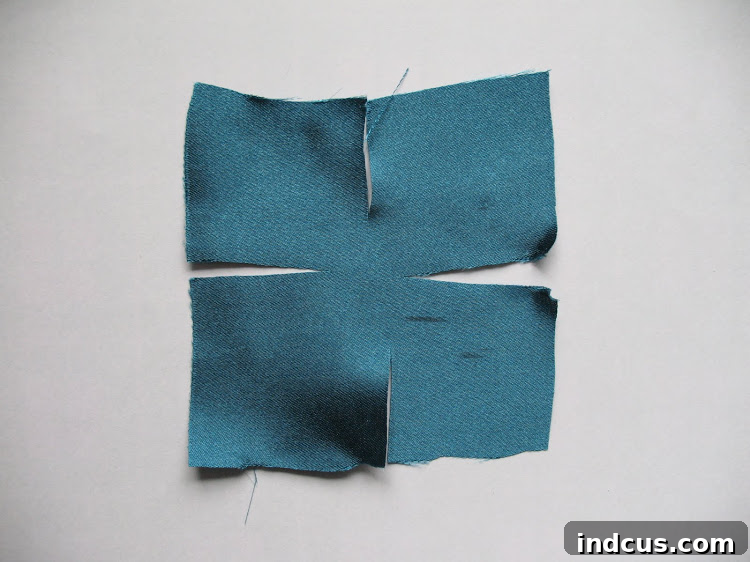
Once your squares are cut, it’s time to define the individual petals. Take each square and carefully cut slits inward from each of its four sides, stopping about 1/2 to 3/4 inch from the center. These slits do not need to be perfectly straight; slight variations can add to the organic look of your petals. The depth of your cuts will influence how pronounced your petals appear after melting. This step is crucial for giving the square flower its unique, multi-petal appearance.
3. Master the Melted Edge Technique
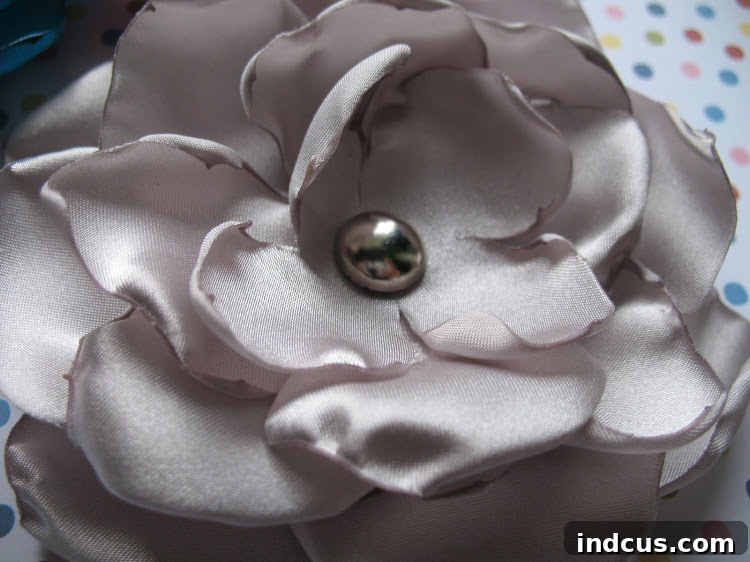
This is the magical part where your flat fabric transforms into delicate petals. Using your long-handled lighter, carefully pass the flame along all the raw edges of each square – this includes the four outer edges and all the edges created by your inner slits. Hold the fabric a small distance from the flame; you want to melt the polyester, not burn it. The fabric will subtly shrivel and curl inwards, creating a beautiful, organic texture. Move the flame quickly and consistently to prevent over-melting or scorching. Practice on a scrap piece first to get a feel for the right distance and speed. The goal is a gentle curl and shrivel, enhancing the petal’s realism and preventing fraying.
4. Assemble Your Flower Layers
Once all your layers have perfectly melted edges, it’s time to assemble your flower. Start with the largest square at the bottom and stack the progressively smaller squares on top, ensuring they are centered. Apply a small dab of hot glue in the very center of each layer before placing the next one. Press down gently to secure each layer. This creates a multi-dimensional, full-bodied flower.
5. Add a Felt Backing for a Professional Finish
To give your satin flower a neat and durable finish, hot glue a coordinating felt circle to the very back of the largest fabric layer. This not only conceals any glue or raw edges from the underside but also provides a sturdy foundation for attaching your chosen backing.
6. Attach Your Desired Backing
Now, secure your chosen attachment to the felt circle. Whether it’s an alligator hair clip, a barrette, or a brooch pin, apply a generous amount of hot glue to the felt circle and firmly press your backing into place. Hold it for a few seconds until the glue sets completely. Ensure the clip or pin is oriented correctly for its intended use.
7. Embellish the Center for a Personal Touch
The final step is to add a charming embellishment to the center of your flower. This is your chance to really make it shine! Hot glue a beautiful bead, a sparkling gem, an antique button, a cluster of pearls, or any other small decorative element that complements your flower’s color and style. Don’t be afraid to be creative – anything goes!
Creating Elegant Circular Satin Flowers: A Simple Variation
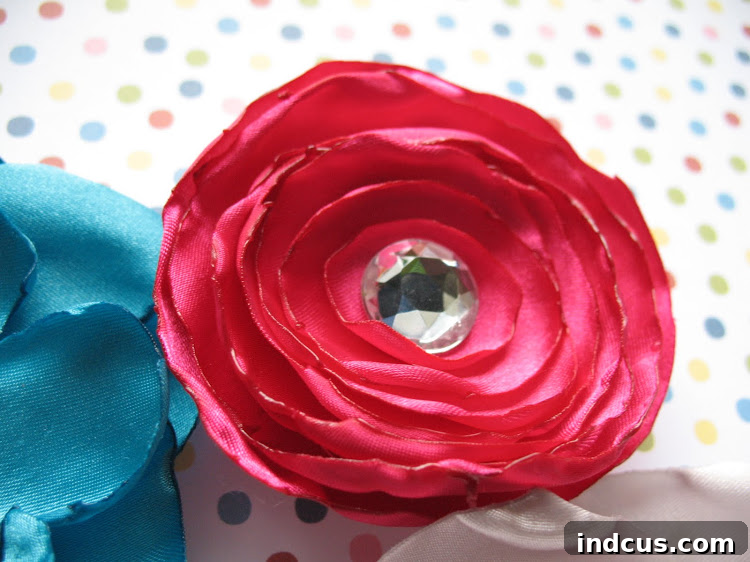
If you love the softer, more traditional look of rounded petals, creating circular satin flowers is even simpler! The core technique remains the same, but with a slight modification:
- Cut Concentric Circles: Instead of squares, cut your polyester satin fabric into a series of progressively smaller circles. Again, the number and size of your circles will dictate the final flower’s appearance. You can experiment with different sizes and even try cutting wavy or scalloped edges for unique petal textures.
- Melt Edges (No Slits Needed!): With circular petals, there’s no need to cut inner slits. Simply use your lighter to carefully melt the entire outer edge of each circle. The heat will cause the fabric to curl gently inwards, forming natural-looking petals. Remember to move the flame consistently for an even curl.
- Stack and Glue: Once all your circles are melted, stack them from largest to smallest, securing each layer with a dab of hot glue in the center, just as you would with the square petals.
- Finish and Embellish: Add a felt backing and your chosen attachment (clip, pin, etc.), then adorn the center with your preferred embellishment to complete your beautiful circular satin flower. So incredibly easy and endlessly versatile!
Tips for Success & Safety When Crafting Melted Edge Flowers
To ensure your crafting experience is both enjoyable and safe, keep these valuable tips in mind:
- Always Use Polyester Satin: As reiterated, polyester is key for the melting technique. Other fabrics may burn, fray excessively, or simply not achieve the desired effect.
- Practice Makes Perfect: If you’re new to the melting technique, practice on small scrap pieces of satin first. This will help you get a feel for how the fabric reacts to the flame and how to achieve your desired curl.
- Work in a Well-Ventilated Area: Burning fabric can release fumes. Ensure you’re working in a space with good airflow to disperse any smoke or odors.
- Safety First with Flames: Always be cautious when working with a lighter. Keep a small bowl of water or a fire-resistant surface nearby, just in case. Never leave a flame unattended.
- Use Tweezers for Small Pieces: If you’re working with very small fabric squares or circles, using a pair of crafting tweezers can help you hold the fabric safely and precisely away from your fingers while melting.
- Control the Flame: Don’t hold the flame directly on the fabric for too long. A quick, continuous pass is usually all that’s needed to achieve the melting and curling effect. Vary the distance to achieve different degrees of curl.
- Experiment with Colors and Layers: Don’t limit yourself! Try combining different shades of satin for a multi-tonal flower, or vary the number of layers for different levels of fullness.
- Store Your Fabric Properly: Keep your satin fabric flat to avoid creases, which can sometimes be difficult to remove without damaging the delicate material.
Satin Flower Video Tutorial
For those who prefer to see the process in action, you can watch our comprehensive video tutorial. It visually guides you through each step, making it even easier to create your beautiful satin flowers.
You can find the video tutorial for these beautiful satin flowers here: Watch the Satin Flowers Video Tutorial
Conclusion: Unleash Your Inner Crafter
Creating melted edge satin flowers is a rewarding and accessible craft that allows you to produce stunning, professional-looking embellishments with minimal effort and expense. Whether you’re enhancing your wardrobe, personalizing gifts, or adding bespoke touches to your home decor, these versatile fabric blooms are sure to impress. With this comprehensive guide, you now have all the tools and knowledge to embark on your own satin flower-making journey. So grab your fabric and lighter, and prepare to be amazed by what you can create!
Don’t forget to share your beautiful creations with us in the comments below, or tag us on social media! Happy crafting!