
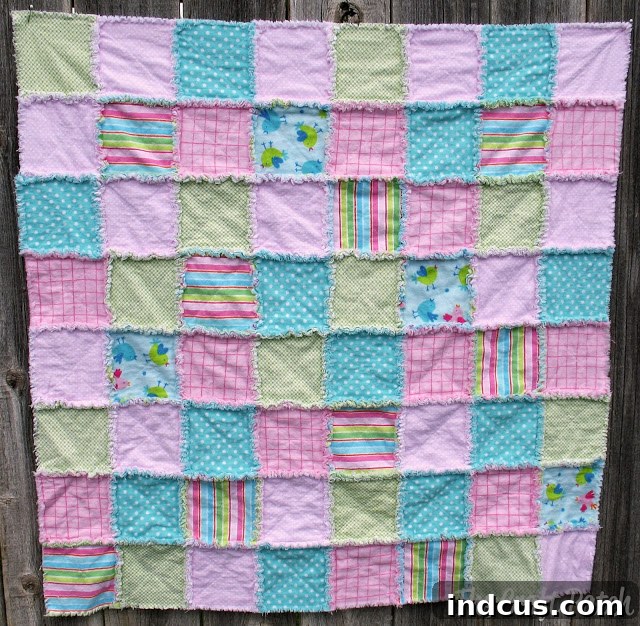
The Ultimate Guide to Crafting a Cozy Rag Quilt: A Perfect Handmade Baby Gift
There’s a special kind of magic in the air, isn’t there? Perhaps it’s the changing seasons, or maybe it’s just the delightful anticipation, but it truly feels like a time of new beginnings and joyous arrivals. The world seems to be celebrating new life, and for those of us who love to create, it sparks an incredible desire to craft something beautiful and heartfelt for these precious little ones. It reminds me of a sweet tune from a classic musical, a melody that perfectly captures the bustling excitement surrounding new life:
To ensure the survival of each brand new arrival.
Each nest is twitterin’,
They’re all baby-sitterin’,
Spring, Spring, Spring!
That timeless charm of creation and nurturing perfectly encapsulates the spirit of making a rag quilt. These aren’t just blankets; they are tangible expressions of love, comfort, and warmth, destined to become cherished keepsakes. Whether you’re an experienced quilter or picking up a needle for the very first time, crafting a rag quilt is an incredibly rewarding experience, especially when it’s destined for a new baby.
Why a Rag Quilt Makes the Perfect Handmade Baby Gift
The journey of creating a rag quilt often begins with inspiration. For many, it’s a personal connection – a treasured gift received, or the desire to bestow a similar comfort upon someone else. I vividly recall the rag quilt my sister-in-law made for me when I was pregnant with my first child. It quickly became one of my absolute favorite baby blankets. Its unique texture, perfect weight, and convenient size made it ideal for everything: tucking into the car seat, stashing in the diaper bag, or draping over the stroller. It was a blanket imbued with love, and its practicality was unmatched. This cherished memory inspired me to create one for a dear friend who is also expecting, a testament to the enduring appeal and heartfelt nature of these beautiful creations.
Rag quilts stand out as exceptional handmade gifts for several compelling reasons:
- Unrivaled Softness: When properly washed and frayed, a rag quilt becomes incredibly soft and cuddly, perfect for a baby’s delicate skin.
- Durability and Longevity: Made with multiple layers of fabric and robust stitching, these quilts are built to withstand countless washes and years of use, growing with the child.
- Ease of Care: Unlike some delicate quilts, rag quilts are designed to be machine washable and dryable, making them incredibly practical for busy parents. In fact, washing is part of the process that gives them their signature look!
- Versatility: They are wonderfully adaptable, serving as a car seat blanket, stroller cover, playmat, tummy time prop, or simply a comforting snuggle blanket.
- Unique Aesthetic: The fluffy, exposed seams give rag quilts a distinctive, rustic charm that is both stylish and comforting.
- Beginner-Friendly: As we’ll discuss, they are incredibly forgiving, making them an excellent first quilting project.
If you’re eager to embark on this creative journey and craft your very own rag quilt, whether for a baby, a loved one, or even yourself, you’re in the right place. While this article provides invaluable tips and insights, we also have a comprehensive, step-by-step guide ready for you:
CLICK HERE FOR A MORE DETAILED RAG QUILT TUTORIAL
Getting Started: The Simplicity and Charm of Rag Quilts
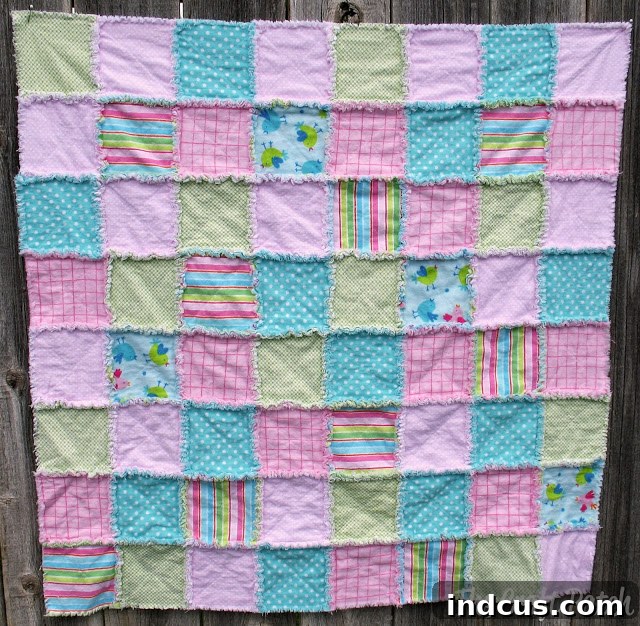
One of the most appealing aspects of rag quilts is their inherent simplicity, making them an ideal beginner project in the quilting world. Unlike traditional quilts that often require precise batting placement and intricate binding techniques, rag quilts cleverly sidestep these complexities. Their ‘ragged’ edges are not a mistake but a feature, created by intentionally snipping the seam allowances and then washing the quilt to encourage delightful fraying. This forgiving nature means that minor imperfections often blend seamlessly into the overall rustic charm, reducing the pressure on novice sewers.
While there are numerous excellent tutorials available (and we highly recommend exploring different resources to find a method that resonates with you, such as this easy, thrifty, pretty rag quilt tutorial), the true art of rag quilting lies in mastering a few key techniques and understanding common pitfalls. Over the years, through trial and error and the joy of creating many of these cozy blankets, I’ve gathered some essential tips and tricks that can significantly enhance your rag quilt making experience. These insights will help you achieve a professional-looking, wonderfully soft, and durable quilt, while minimizing frustration along the way.
Essential Tips for Crafting Your Perfect Rag Quilt
1. Precision in Snipping: Safeguarding Your Seams
The characteristic frayed edges of a rag quilt are achieved by snipping the seam allowances. However, nothing can ruin your meticulous work faster than accidentally snipping past the seam line. This seemingly small error can create an unsightly hole in your blanket, compromising its integrity and warmth. To avoid this dreaded mishap, approach your snipping with utmost care and a steady hand. Aim to snip approximately every 1/2 to 3/4 inch, being vigilant not to cut through the stitching itself. Consider using a fabric marker or a small ruler to guide your snips, ensuring they stop just before the seam. This precision guarantees beautifully frayed edges without weakening the quilt structure. Remember, slow and steady wins the race when it comes to snipping!
2. The Magic of the First Wash: Unlocking the Fray
After all the snipping is done, the next crucial step is washing the blanket. This is where the magic truly happens! The agitation of the washing machine, combined with the hot water (or warm/cold, depending on your fabric and desired outcome), will encourage all those tiny snips to fray and bloom into the soft, fluffy edges that define a rag quilt. However, be prepared for an explosion of lint and loose threads! The initial wash will shed a significant amount of fabric fibers. For this reason, it is absolutely essential to wash your rag quilt entirely by itself for the first few cycles. Washing it with other laundry items will result in everything being covered in a layer of fabric fuzz. Be prepared to clean out your washing machine’s lint trap and your dryer’s lint filter multiple times during and after the drying process. A good shake outdoors before drying can also help reduce the amount of lint that ends up in your dryer.
3. Embracing the Snip-a-thon: Time and Technique
Do not underestimate the time commitment involved in making all those little snips along the edges of your rag quilt. This task, while simple, is repetitive and can be quite tiring for your hands. It truly feels like it takes forever! Investing in a good pair of spring-loaded scissors or rag quilt snips can significantly reduce hand strain and speed up the process. These specialized scissors are designed to open automatically after each cut, saving your hand muscles from extra work. While it may be tempting to space your snips further apart, resisting this urge is key. Making the snips closer together (around every 1/2 inch) will result in a much denser, fluffier, and ultimately cuter fray once the quilt is washed. To make this marathon task more enjoyable, I highly recommend breaking it up into smaller sessions. Put on your favorite podcast, queue up a few episodes of your favorite TV show, or listen to an audiobook. Turning it into a relaxing, mindful activity makes the time fly by, and the effort will undeniably be worth it for the stunning finished look.
4. The Post-Wash Finishing Touches: Taming the Fuzz
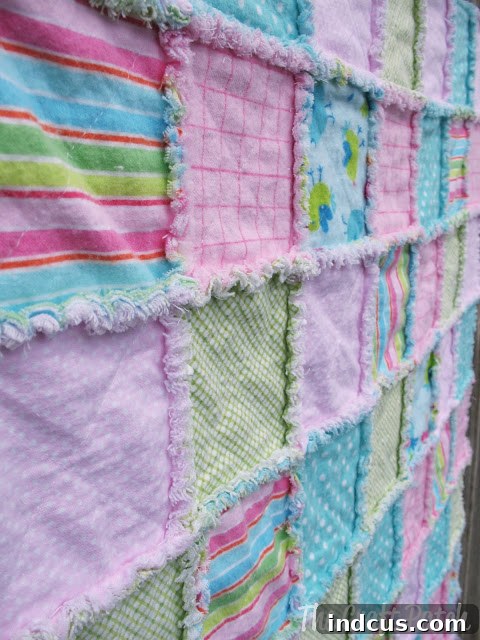
After your rag quilt has been thoroughly washed and dried, you’ll likely notice quite a bit of loose threads and fuzz balls clinging to the fabric. While the initial washing gets rid of the majority of the shedding, some cleanup will still be necessary to achieve a polished look and ensure the quilt is baby-safe. I typically go through and carefully trim any particularly long or stubborn loose threads with a pair of sharp scissors. For the smaller fuzz balls, you can use a lint roller, a fabric shaver, or even gently pick them off by hand. This can be a fun, light activity to involve older children in – my kids always enjoy helping me pick off the fuzz! This final grooming step not only makes the quilt look neater but also ensures there are no loose fibers that could potentially pose a hazard to a baby.
5. Fabric Selection: The Heart of Your Rag Quilt
While you can certainly use a variety of fabrics for a rag quilt, my absolute preference, especially for baby quilts, is flannel. Flannel is a dream to work with for rag quilts for several reasons: its inherent softness makes for the most comforting blanket, and its woven structure frays beautifully, creating incredibly fluffy and inviting rag edges. The warmth of flannel is also perfect for keeping little ones cozy. Other excellent options include 100% cotton, which offers a vast array of prints and patterns and is also very durable, and sometimes even minky for an extra luxurious feel, though minky can be trickier to work with due to its stretch. When selecting fabrics, always consider pre-washing them to prevent any future shrinkage or dye bleeding. Keep an eye out for sales at your local fabric stores; Joann’s, for example, frequently puts their flannel on sale, making it possible to get high-quality fabric for a very good price. Don’t be afraid to mix and match patterns and solids to create a visually interesting and unique design!
6. The Foundation of Precision: Accurate Cutting
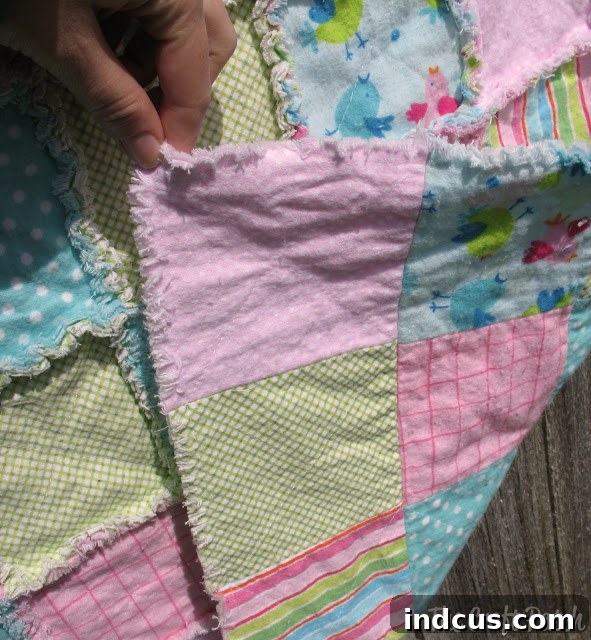
This tip holds true for virtually any quilting project, but it is especially paramount when creating a rag quilt with distinct squares: cutting is where the battle is truly won or lost. Precise cutting forms the foundation of a well-made quilt. If your squares are uneven or irregularly sized, your seams will not line up properly, leading to frustrating puckering and a less aesthetically pleasing finished product. To ensure accuracy and save yourself immense time and effort, invest in and utilize a rotary cutter, a self-healing cutting mat, and a clear quilting ruler. This trio will allow you to cut multiple layers of fabric quickly, accurately, and with perfectly straight edges. The precision achieved with these tools will make the sewing process significantly smoother and ensure that your quilt blocks line up beautifully, leading to a much more professional and satisfying result.
 |
Beyond the Baby Blanket: The Versatility of Rag Quilts
While rag quilts are undeniably perfect for babies, their charm and comfort extend far beyond the nursery. The techniques learned for creating a baby rag quilt can easily be scaled up to make cozy throws for your couch, warm lap quilts for a chilly evening, or even durable and soft pet beds for your furry companions. The beauty of the rag quilt lies in its adaptability and the satisfying process of seeing simple fabric squares transform into something so wonderfully tactile and inviting. It’s a skill that opens up a world of creative possibilities, allowing you to personalize gifts and add handmade warmth to any home.
Embark on Your Rag Quilt Journey
Crafting a rag quilt is more than just a sewing project; it’s an act of love, a creative endeavor that yields a beautiful and practical result. From the initial selection of soft flannel fabrics to the satisfying snipping of seams and the magical transformation in the wash, each step is imbued with personal care. The tips shared here are designed to guide you through the process, helping you avoid common pitfalls and ensuring your first (or twentieth!) rag quilt is a resounding success. The joy of presenting a handmade rag quilt, knowing the comfort and warmth it will bring, is truly unparalleled. So, gather your fabrics, set up your sewing machine, and prepare to create something truly special. Happy quilting!







