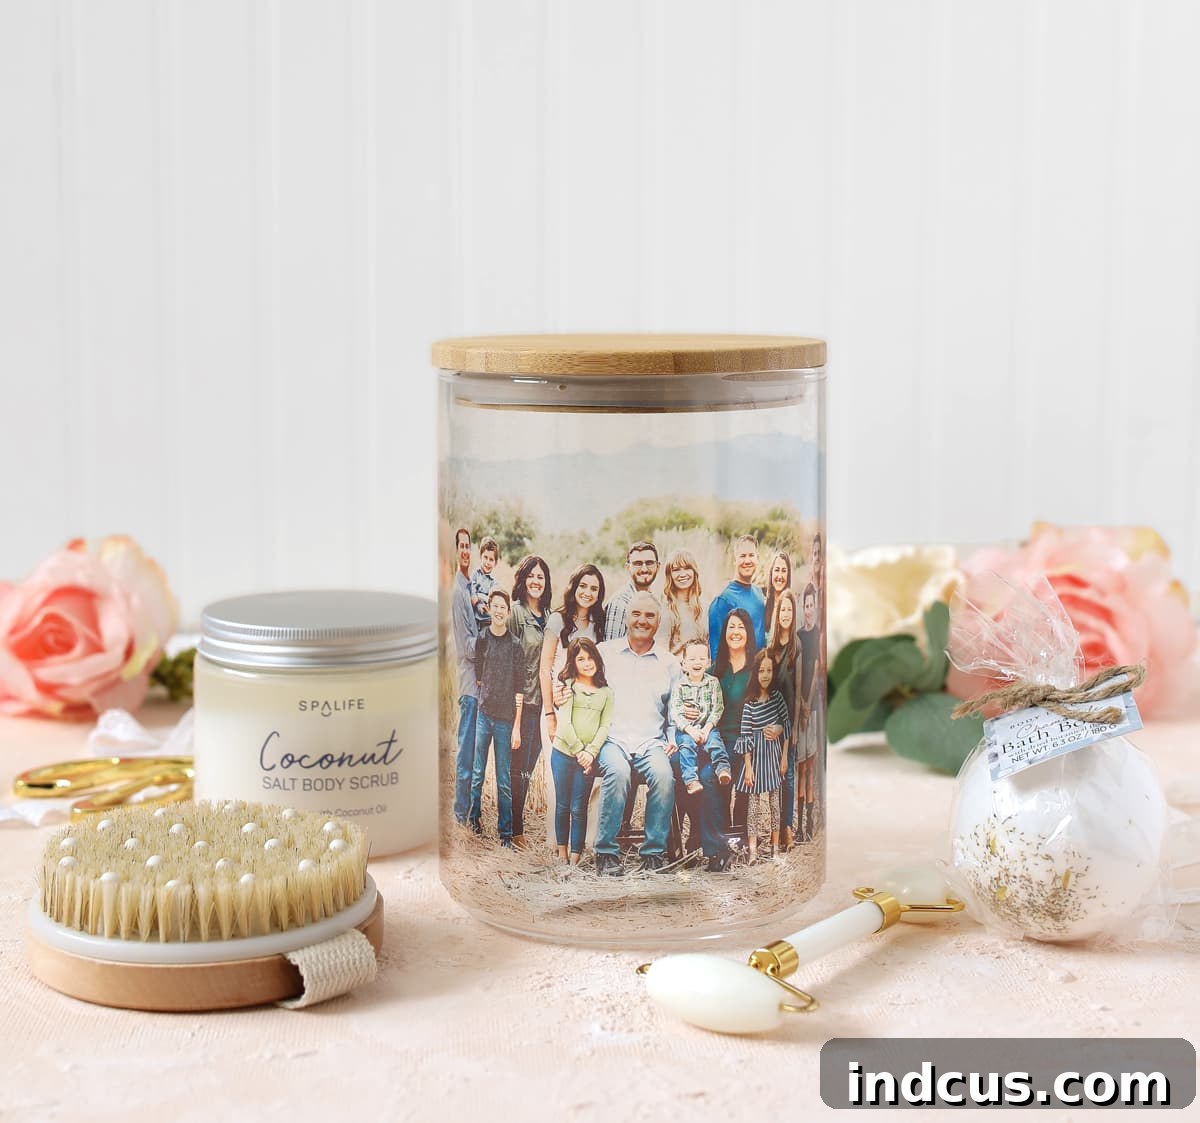
Crafting a Sentimental Photo Jar: The Ultimate DIY Mother’s Day Gift
Mother’s Day is fast approaching, and there’s no better way to show appreciation than with a heartfelt, handmade gift. This year, move beyond generic presents and create something truly unique and memorable: a personalized photo jar. Imagine a beautiful glass jar, elegantly adorned with a cherished photo, and filled with pampering delights, her favorite treats, or thoughtful essentials. It’s a gift that perfectly blends sentimentality with practicality, demonstrating the effort and love you’ve poured into celebrating the special women in your life.
This post is proudly sponsored by Hobby Lobby, bringing you creative inspiration for every occasion.
What makes this DIY Mother’s Day gift truly stand out? It hits two crucial targets for an exceptional present: it’s deeply sentimental, evoking precious memories every time she sees it, and it’s incredibly useful, filled with items she genuinely desires or needs but might not splurge on herself. It’s a thoughtful gesture that goes beyond a simple card, offering a tangible token of affection that she can cherish and use daily.
Ready to embark on this rewarding crafting journey and create an unforgettable gift for Mom? Let’s dive into the simple steps!
Essential Supplies You’ll Need
Gathering the right materials is the first step to a successful project. Here’s everything you’ll need to create your stunning personalized photo jar:
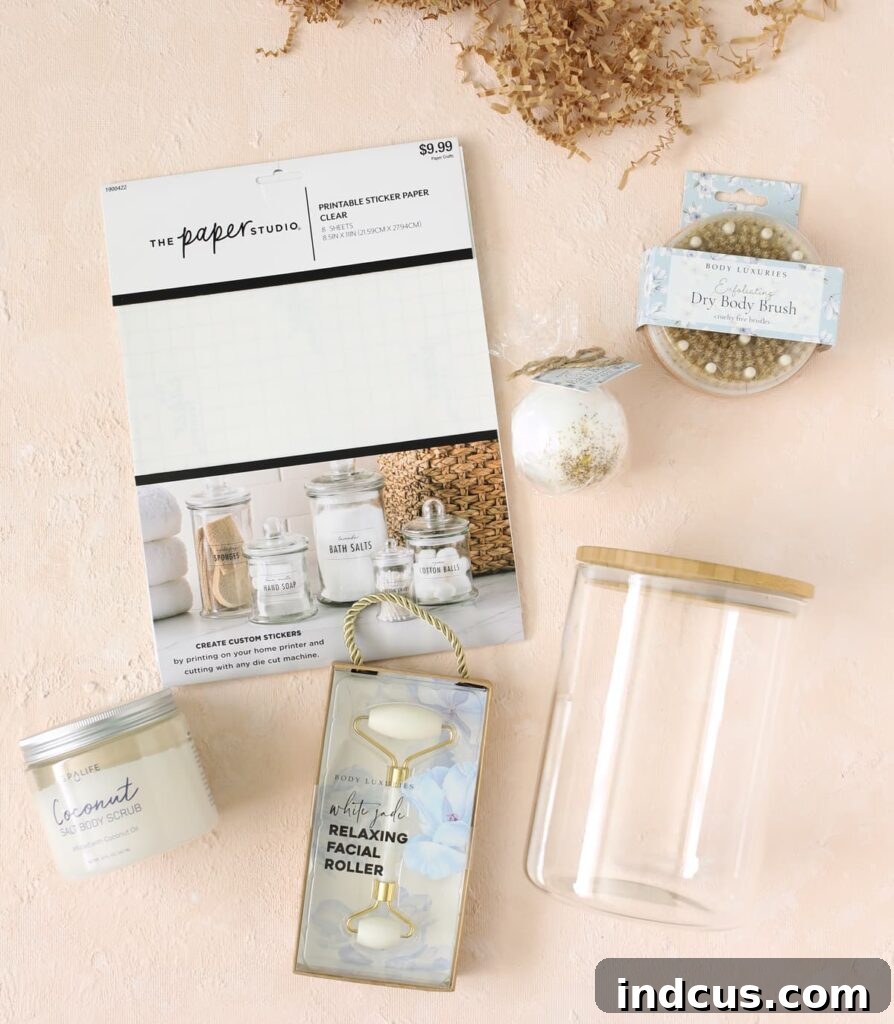
- Printable Clear Sticker Paper: Essential for achieving that beautiful translucent photo effect on your jar.
- Glass Jar with Wood Lid: A stylish and versatile container, perfect for this project. Choose a jar with smooth, flat sides for easier sticker application.
- Coconut Salt Body Scrub: A luxurious treat for a spa-themed jar.
- Relaxing Bath Bomb: Adds a touch of indulgence to her self-care routine.
- White Jade Facial Roller: A trendy and beneficial tool for skincare.
- Exfoliating Dry Body Brush: Another fantastic item for a complete spa experience.
- Decorative Paper Shreds (Optional): Perfect for cushioning the contents and adding a professional, elegant touch to the presentation.
- Mini Fairy Lights (Optional): Transform your photo jar into a magical, glowing luminary, especially beautiful in the evening.
Step-by-Step Instructions for Your Personalized Photo Jar
Follow these detailed steps to create a flawless and heartwarming gift that Mom will adore.
Step 1: Precise Jar Measurement
Begin by accurately measuring the dimensions of your chosen glass jar. The specific jar I linked is approximately 17 inches in circumference (diameter) and about 6.5 inches tall. When applying the photo sticker, it’s crucial to ensure it only adheres to the flat, straight sections of the jar. Avoid letting the sticker extend onto any curved edges, particularly near the bottom, as this can lead to wrinkles, bubbles, or peeling. To guarantee a perfect fit and smooth application, size your photo slightly less than the total height of the flat surface – for instance, aim for a photo height of around 6.3 inches if your jar is 6.5 inches tall. This small margin will make a significant difference in the final look of your DIY photo jar.
Step 2: Photo Selection, Sizing, and Printing
This is where the magic truly begins! Choose a favorite family photograph that holds special meaning – perhaps a cherished memory, a delightful snapshot of all the grandkids, or any picture you know Mom will absolutely adore. The emotional impact of the photo is paramount, so pick one that brings a smile to her face. Once selected, adjust the photo’s dimensions to fit your jar. For my jar, I printed the photo at 6.3 inches tall by 11 inches wide. While this doesn’t fully wrap around the entire jar, 11 inches is often the maximum width for printable sticker paper, and I wanted to avoid the complication of piecing together multiple sticker sections. If your jar is wider, consider printing two complementary photos or using a single photo as a focal point. Before printing, adjust your printer settings for “glossy paper” and “photo quality” to ensure the best possible resolution and color vibrancy. Carefully load the printable clear sticker paper into your printer tray, making absolutely sure it’s facing the correct direction to print on the adhesive side. Then, press PRINT, and prepare to be amazed by the quality!
Step 3: Preparing the Sticker for Application
Once your photo is printed and dry, carefully peel back just one edge of the clear sticker paper’s backing. Aim to peel back approximately one inch, revealing a small, manageable strip of the sticky adhesive side. This incremental approach is key to achieving a bubble-free application, giving you precise control over the initial placement.
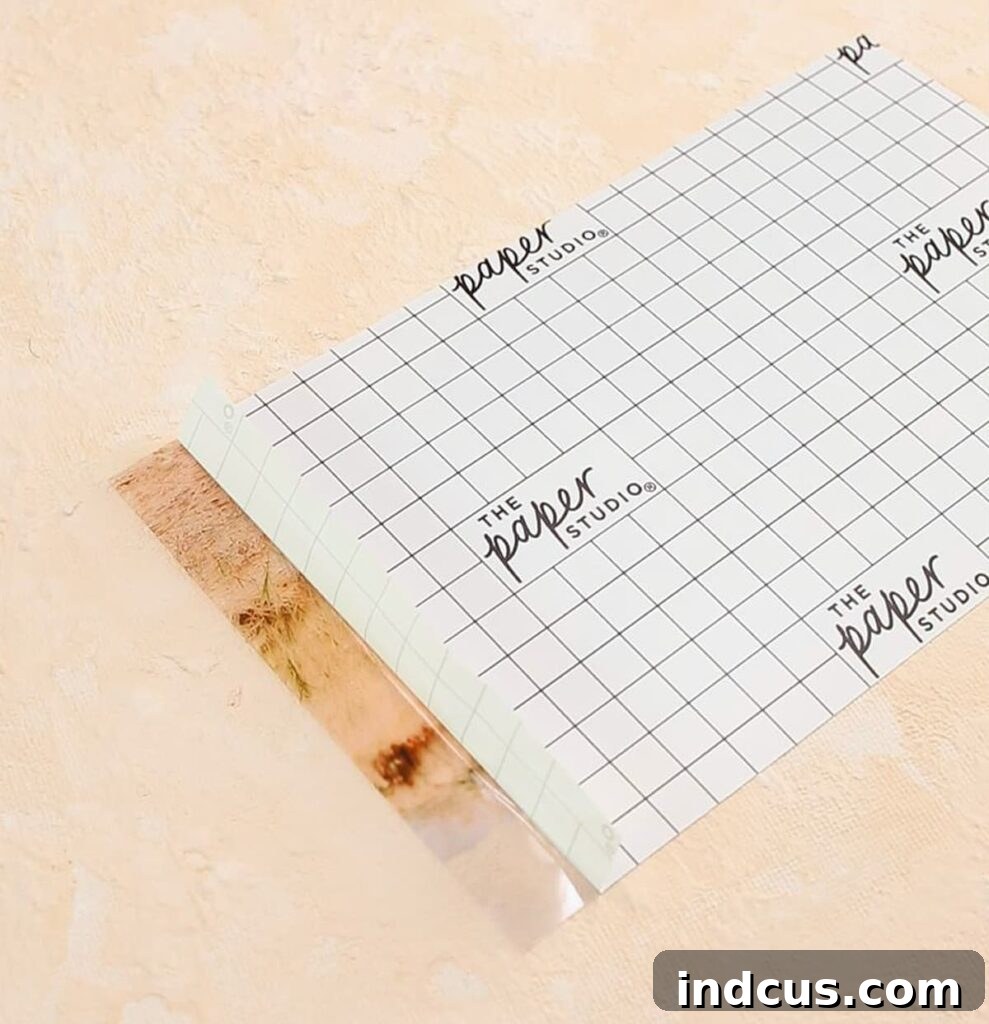
Step 4: Smooth Sticker Application
With the small strip of adhesive exposed, carefully line up the sticker on your glass jar. Ensure it is perfectly straight and level before pressing the exposed edge firmly into place. Once the initial strip is secured and aligned, slowly and steadily continue to peel back the paper backing with one hand, while simultaneously smoothing the sticker onto the glass surface with your other hand. Use a credit card or a squeegee to gently press out any air bubbles as you go, working from the center outwards. This gradual, controlled method is by far the most effective way to apply a large sticker without trapping unsightly bubbles, resulting in a perfectly smooth, professional finish.
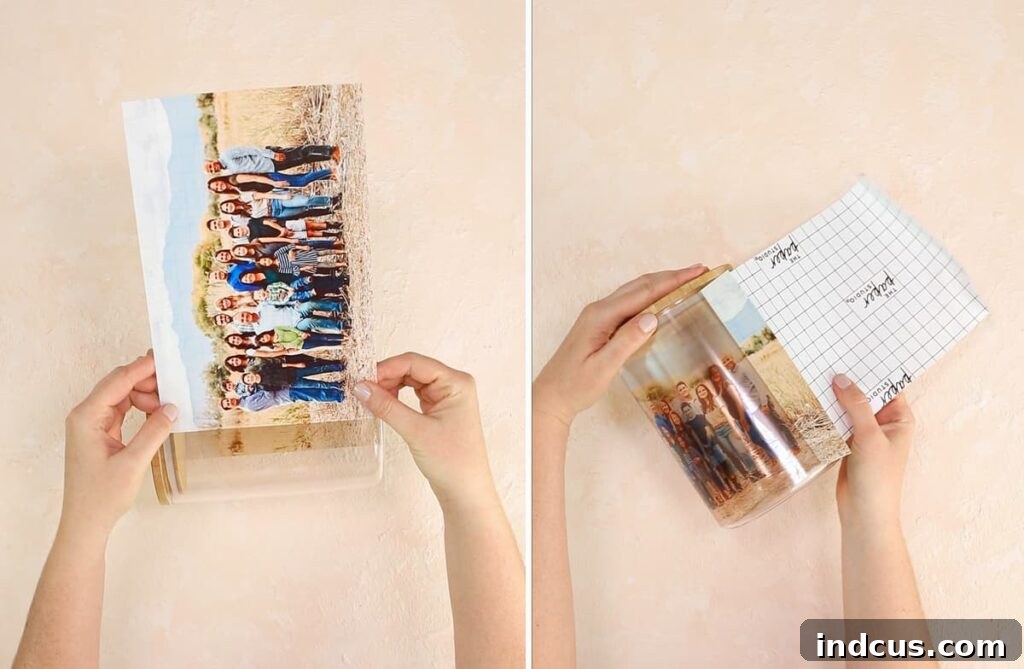
Step 5: Filling Your Personalized Jar with Thoughtful Treasures
Now that your photo is beautifully adhered, it’s time for the exciting part: filling the jar! Start by lining the bottom of the jar with some soft decorative paper shreds. This not only adds a touch of elegance but also cushions the contents, preventing them from shifting or breaking. Next, artfully arrange your chosen goodies inside. For a luxurious spa theme, consider items like fragrant bath bombs, invigorating body scrubs, a soothing facial roller, or an exfoliating dry body brush. I recently discovered Hobby Lobby’s new spa-themed collection, and the items are so beautifully designed and high-quality, I couldn’t resist. That gold and white facial roller, in particular, is an absolute must-have!
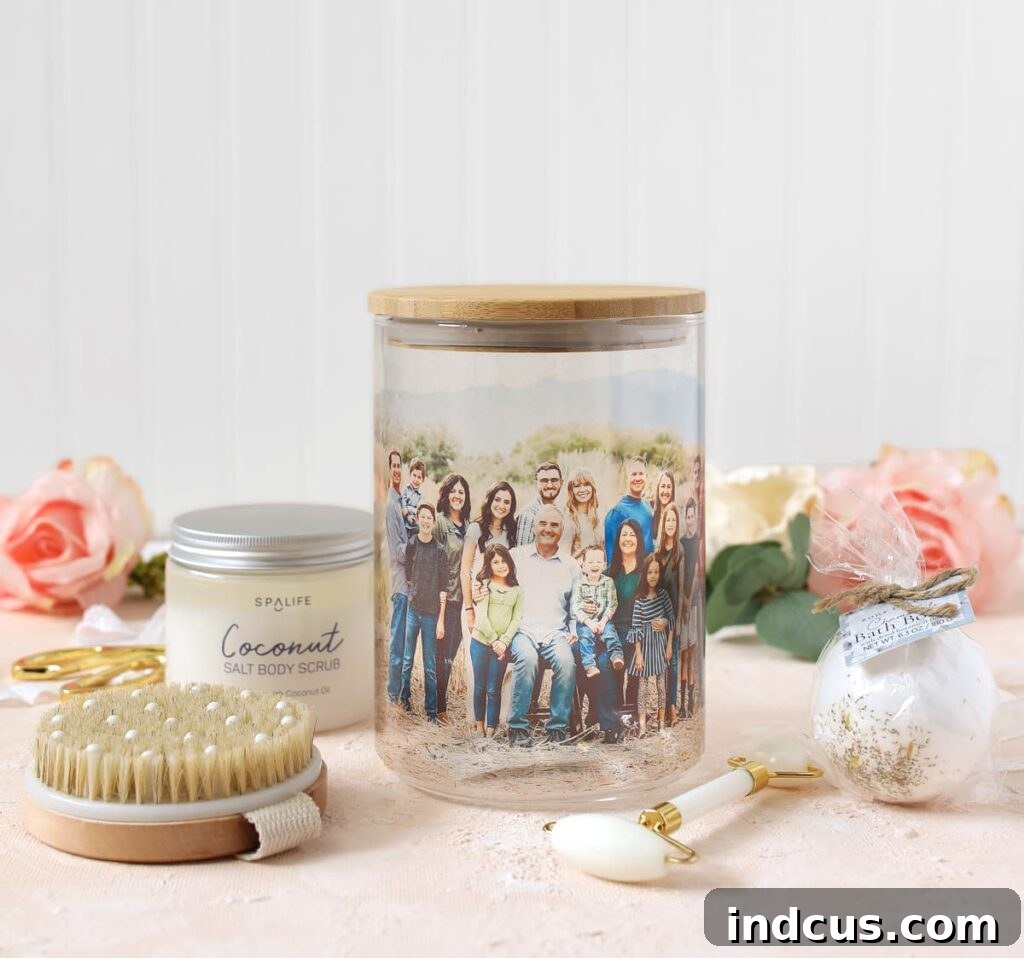
The beauty of this gift is its incredible versatility. You can customize the contents to perfectly match your mom’s unique personality and preferences. Here are just a few ideas for what to fill her personalized photo jar with:
- For the Self-Care Enthusiast: Beyond what’s listed, think luxurious hand creams, scented candles, soft fuzzy socks, or even a silk eye mask.
- For the Foodie Mom: Gourmet coffee beans, exotic tea bags, artisanal chocolates, her favorite candies, homemade cookies, or a selection of gourmet spices.
- For the Green Thumb: Seed packets for her favorite flowers or herbs, miniature gardening tools, decorative plant markers, or stylish gardening gloves.
- For the Crafty Mom: A selection of colorful yarn skeins, embroidery floss, craft beads, small paintbrushes, or a mini sketchbook with pencils.
- For the Book Lover: Elegant bookmarks, a small journal, a high-quality pen, or a portable LED reading light.
- For the Cozy Comfort Seeker: Her favorite blend of instant hot cocoa, a selection of specialty tea bags, a small, plush throw blanket, or a pair of warm, comfortable slippers.
No matter what you choose, arranging it aesthetically inside the jar will create a gorgeous presentation that will undoubtedly elicit gasps of delight and “oohs” and “aahs” from Mom.
Elevate Your Gift with Enchanting Fairy Lights
To take your personalized photo jar to the next level, consider adding a string of delicate fairy lights inside. This simple addition instantly transforms the jar from a beautiful container into a magical, glowing luminary. When illuminated, the soft twinkle lights cast a warm, inviting glow, making the translucent photo appear even more ethereal and captivating. It creates a stunning ambiance, turning the jar into a decorative piece that can brighten any room, especially during the evening. Imagine the joy of seeing her favorite photo beautifully illuminated, becoming a beacon of cherished memories.
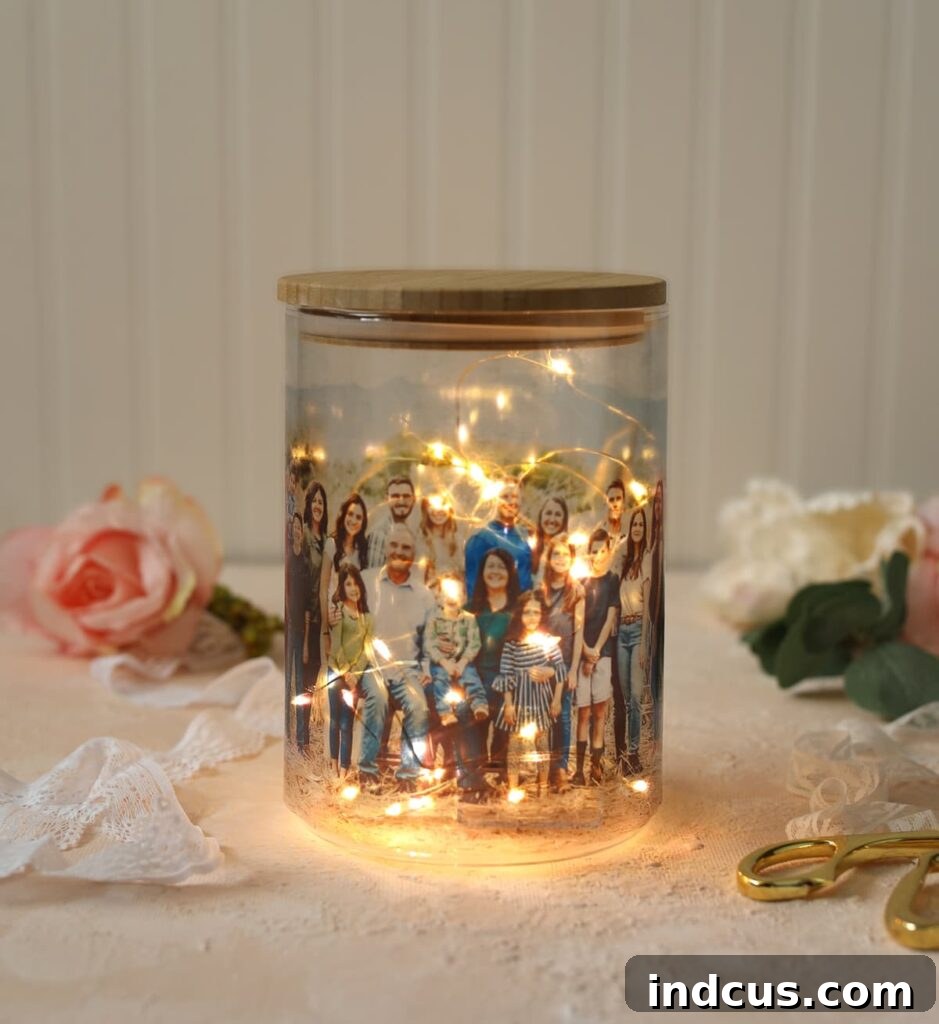
Don’t the twinkle lights make the photo look absolutely gorgeous and add a truly magical touch? It’s a detail that truly enhances the sentimental value of this unique Mother’s Day gift!
Finishing Touches and Heartfelt Messages
Once your photo jar is complete and filled with delightful treasures, it’s time to add the final flourishes that make your gift truly exceptional. Presentation is key! For a sophisticated look, I wrapped my gift with clear cellophane, secured it with a delicate lace ribbon, and adorned it with a pretty faux flower for an elegant touch. Alternatively, for a quicker but equally charming presentation, you could simply slide the beautifully crafted jar into a cute gift bag, perhaps with some tissue paper peeking out.
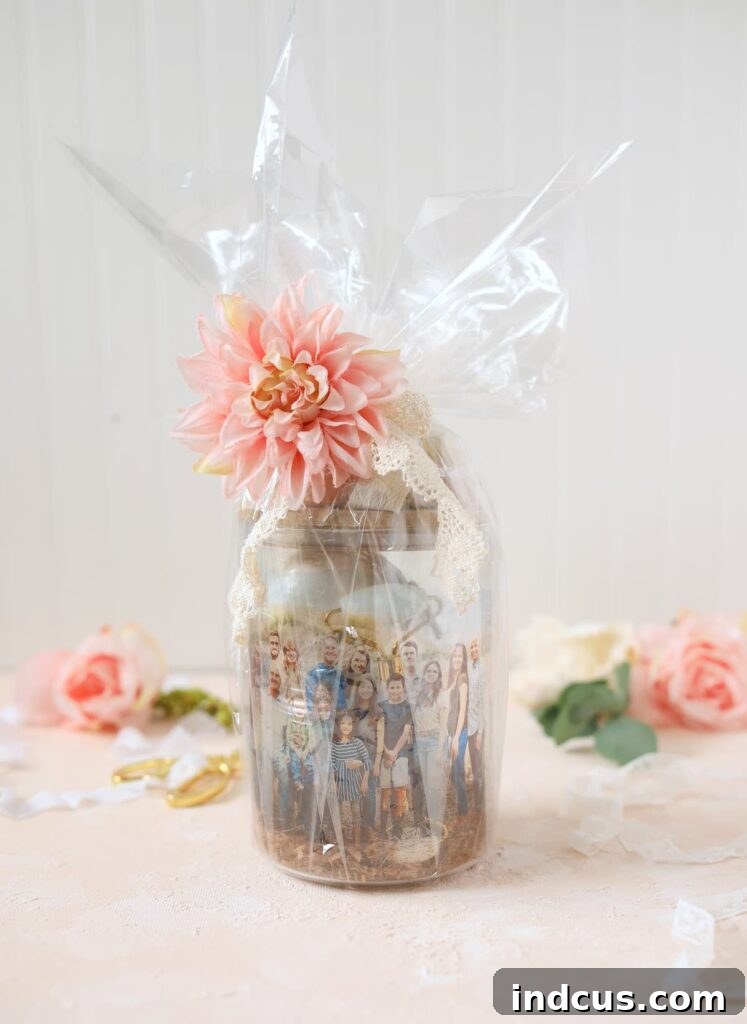
And let’s not forget the most crucial element: a heartfelt card! While this photo jar is incredibly thoughtful, a personal, handwritten note adds immeasurable value. Take the time to write a gushing love note to Mom, expressing your gratitude, sharing cherished memories, and thanking her for all her endless love, support, and for putting up with you all these years. Moms truly appreciate the words of affirmation and the genuine sentiment behind them. It’s the perfect complement to your beautiful handmade gift!
Why Choose a DIY Photo Jar for Mother’s Day?
In a world of mass-produced gifts, a DIY present stands out. Crafting this personalized photo jar offers several unique advantages:
- Personalized Touch: A carefully chosen photo transforms a simple jar into a cherished keepsake, reflecting memories and love.
- Cost-Effective: You can create a luxurious-looking gift without breaking the bank, especially when compared to store-bought alternatives.
- Unforgettable Impression: The effort and thought you put into a handmade gift speak volumes, creating a lasting impression that a generic item simply cannot match.
- Versatility: The contents can be tailored precisely to your mom’s tastes, making it genuinely useful and enjoyable for her.
- Joy of Giving: There’s immense satisfaction in creating something beautiful with your own hands, knowing it will bring joy to someone you love.
Tips for Success and Troubleshooting
- Practice Makes Perfect: If you’re nervous about applying the sticker, consider printing a test image on regular paper and practicing the peel-and-smooth technique on an old glass jar first.
- Bubble Removal: Should you find a small air bubble after application, try gently piercing it with a fine needle and smoothing the area with your finger or a soft cloth.
- Photo Quality: For the best results, use high-resolution images. Blurry or pixelated photos will not look as sharp when printed on clear sticker paper.
- Cleaning the Jar: Before applying the sticker, ensure your glass jar is perfectly clean and free of dust, grease, or fingerprints. Use glass cleaner and allow it to dry completely.
- Jar Care: Once the sticker is applied, the jar can be gently hand-washed. Avoid dishwashers or harsh scrubbing directly on the sticker to preserve its longevity.
Ultimately, this personalized photo jar is more than just a gift; it’s a heartfelt expression of love, a beautiful vessel for cherished memories, and a practical collection of items designed to pamper and delight. It’s a fun, creative project that truly delivers on all fronts: useful, deeply sentimental, and spoils Mom just a little. All the perfect ingredients for a truly unforgettable Mother’s Day gift!
This post was sponsored by Hobby Lobby. All ideas and opinions expressed are authentically my own.