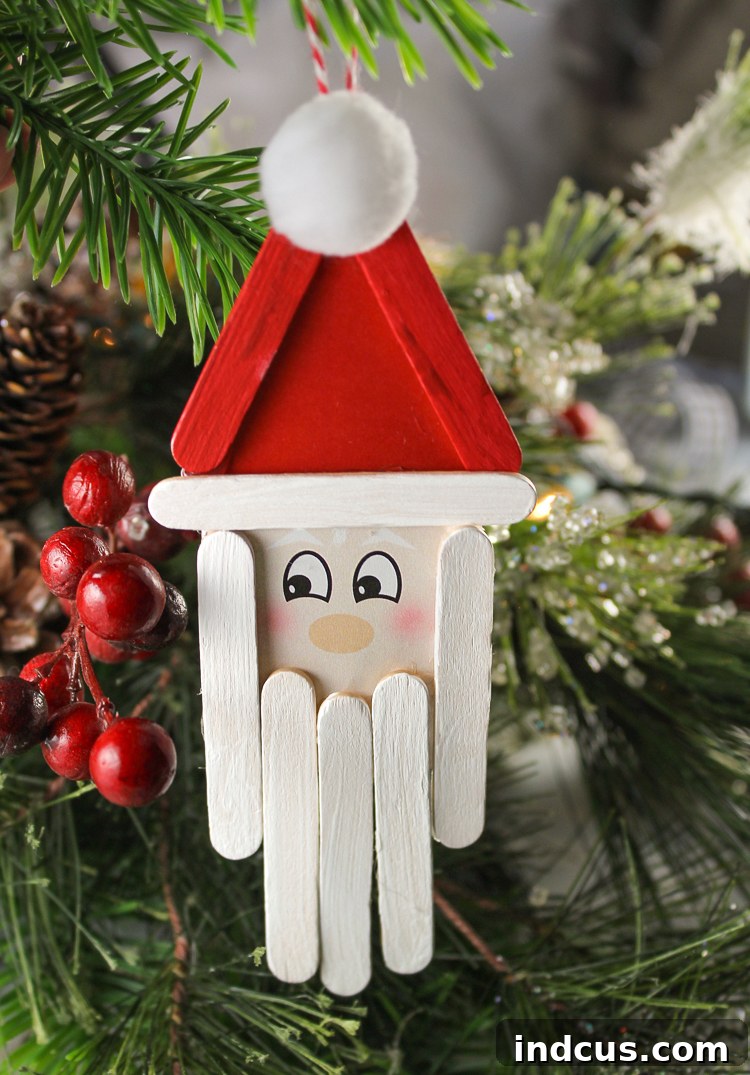
DIY Popsicle Stick Santa Ornaments: A Magical Christmas Craft for Kids
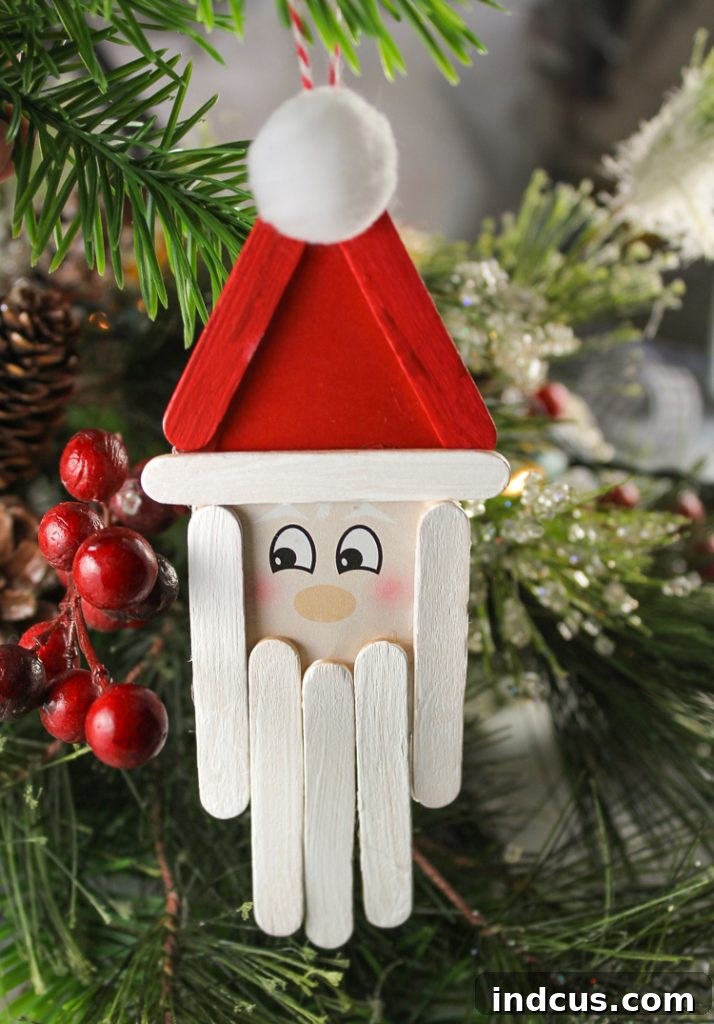
The holiday season is just around the corner, and what better way to get into the festive spirit than with a heartwarming Christmas craft? This year, ditch the store-bought decorations and create cherished memories with our incredibly fun and easy DIY Popsicle Stick Santa Ornament project. Perfect for children of all ages, this craft transforms simple wooden sticks into adorable Santa Claus figures, ready to adorn your Christmas tree or delight as thoughtful handmade gifts.
Throughout the coming weeks, we’ll be unwrapping a sleigh-full of Christmas craft ideas to inspire your holiday creativity. Our goal is to provide you with ample time to choose your favorite projects, gather your supplies, and truly savor the joy of crafting throughout December. This particular Santa ornament is a fantastic starting point, offering a delightful blend of simplicity and charm that even younger crafters can master with a little guidance.
Looking for an engaging Christmas activity for school-aged children? These delightful Santa Claus ornaments made from popsicle sticks are absolutely perfect! They make a wonderful classroom party activity, a fun project for scout troops, or a cozy afternoon craft session at home. Not only do they foster creativity and fine motor skills, but they also result in a tangible keepsake that will be treasured for years to come. Imagine the pride on a child’s face as they hang their very own handmade Santa on the family tree!
Let’s gather our supplies and get ready to bring these charming wooden Santas to life. You’ll be amazed at how quickly and easily these festive decorations come together, making them an ideal choice for busy families or large group crafting sessions.
Materials Needed for Your Popsicle Stick Santa Ornament
Crafting these adorable homemade Santa ornaments requires just a few readily available and budget-friendly supplies. Most of these items can be found at your local craft store, dollar store, or conveniently ordered online, ensuring you can start your festive crafting adventure without delay.
- Mini Wooden Craft Sticks (also known as popsicle sticks or craft sticks) – You’ll need 8 sticks per ornament to create Santa’s iconic hat and beard.
- White Craft Paint – Essential for Santa’s fluffy beard and the brim of his hat. Acrylic craft paint works perfectly.
- Red Craft Paint – For Santa’s classic red hat. Ensure it’s a vibrant, festive shade!
- White Pom Poms – A small, fluffy white pom pom (around 1/2 inch to 1 inch) adds the perfect finishing touch to Santa’s hat.
- Bakers Twine, Ribbon, or String – For creating a hanging loop so your ornament can dangle beautifully from your Christmas tree. Choose a festive color like red, green, or gold.
- Printable Santa Claus Craft Background (download link provided below) – This essential template guides the placement of your popsicle sticks and gives Santa his cheerful face. Printing on cardstock is highly recommended for durability.
- Hot Glue Gun and Glue Sticks or White School Glue (like Elmer’s) – Hot glue offers quick adhesion and is ideal for adult supervision, while white school glue is safer and perfect for younger children, though it requires longer drying times.
Having all your materials organized before you begin will make the crafting process even smoother and more enjoyable. Let’s move on to the step-by-step instructions to create your very own craft stick Santa!
Step-by-Step Instructions: Crafting Your Festive Popsicle Stick Santa
Follow these simple steps to bring your charming Santa ornament to life. Remember, the key to a successful craft project, especially with kids, is patience and a willingness to embrace imperfection – that’s where the unique character of handmade items truly shines!
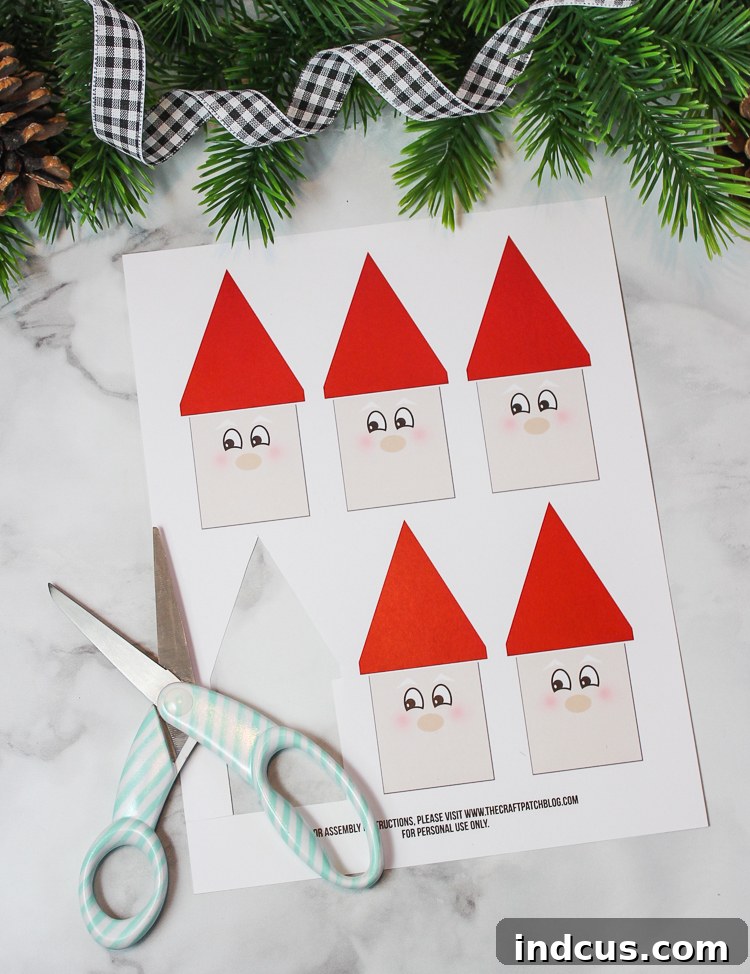
1. Prepare Santa’s Face: Download and Cut Your Printable Background.
Begin by accessing the free printable Santa Claus face template. You’ll find the download button conveniently located at the bottom of this post. Once downloaded, print the template onto sturdy cardstock. Cardstock provides a firm foundation for your popsicle sticks and prevents the paper from buckling. Carefully cut out each Santa face following the provided outline. This will be the cheerful base for your entire ornament.
2. Paint Your Popsicle Sticks: Santa’s Colors.
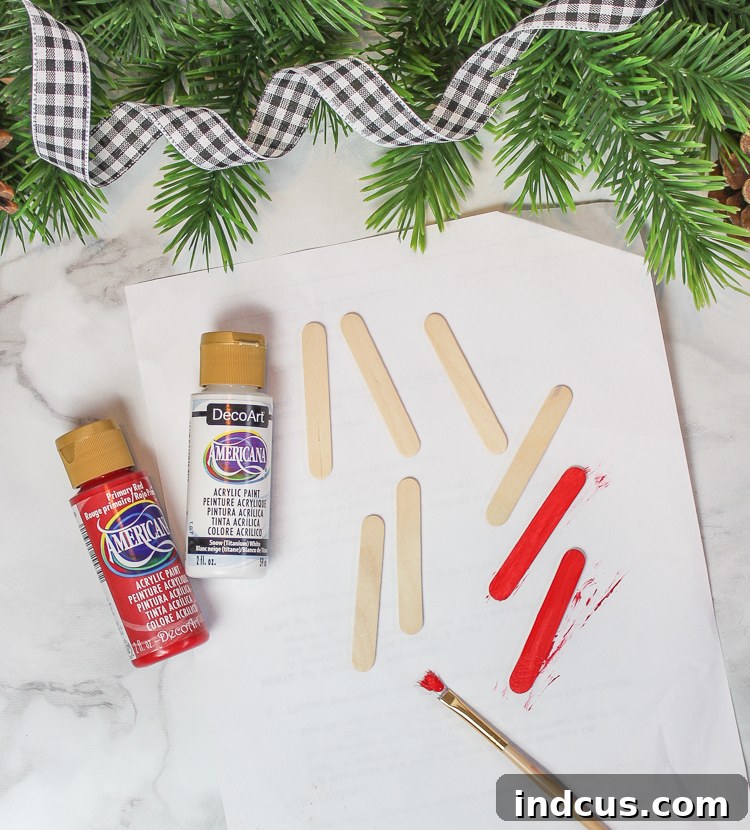
For each Santa ornament you plan to create, you’ll need a total of eight mini wooden craft sticks. Take two of these sticks and paint them a vibrant red – these will form Santa’s iconic pointed hat. The remaining six sticks should be painted a crisp white, destined to become his bushy beard and the fluffy brim of his hat. Ensure even coats of paint for a polished look. Set the painted sticks aside in a well-ventilated area to dry completely. Drying time will vary depending on the type of paint and humidity, but typically takes 20-30 minutes for acrylic craft paints.
3. Assemble Your Santa: Gluing Sticks to the Background.
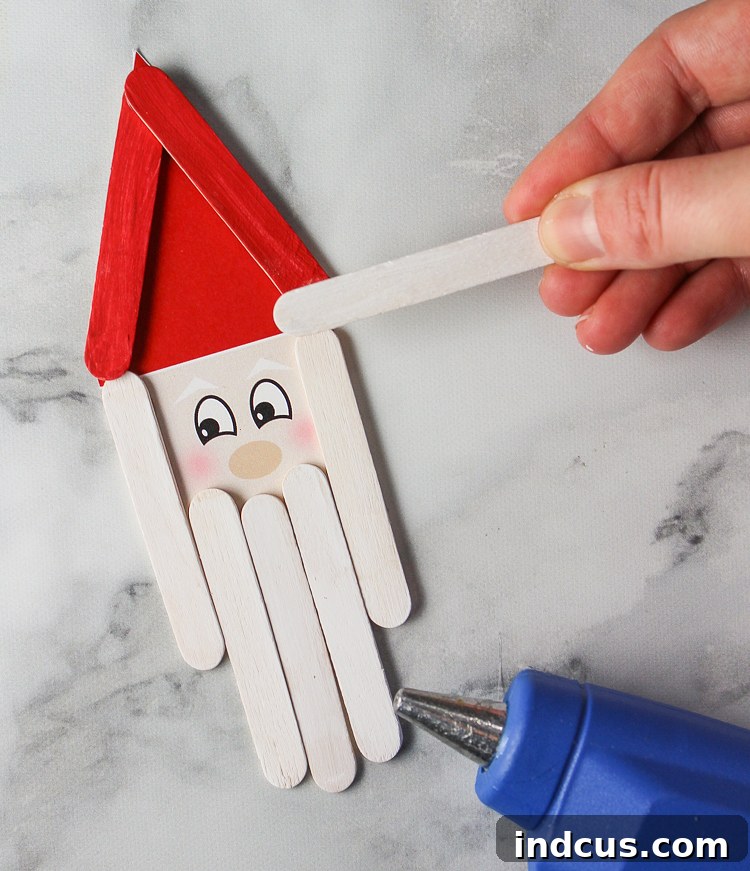
Once your painted sticks are thoroughly dry, it’s time for assembly. Using either a hot glue gun (for quick drying and adult use/supervision) or white school glue (perfect for kids, though requiring more drying time), carefully attach the sticks to the cardstock background. The printable template provides clear guidelines for placement. Start by positioning the two red sticks at the top to form Santa’s hat. Next, place the white sticks below the hat, creating his full, jolly beard. Finally, attach one white stick horizontally across the base of the red hat to form the fluffy brim. Press each stick firmly into place for good adhesion.
4. The Finishing Touches: Pom Pom and Hanging Loop.
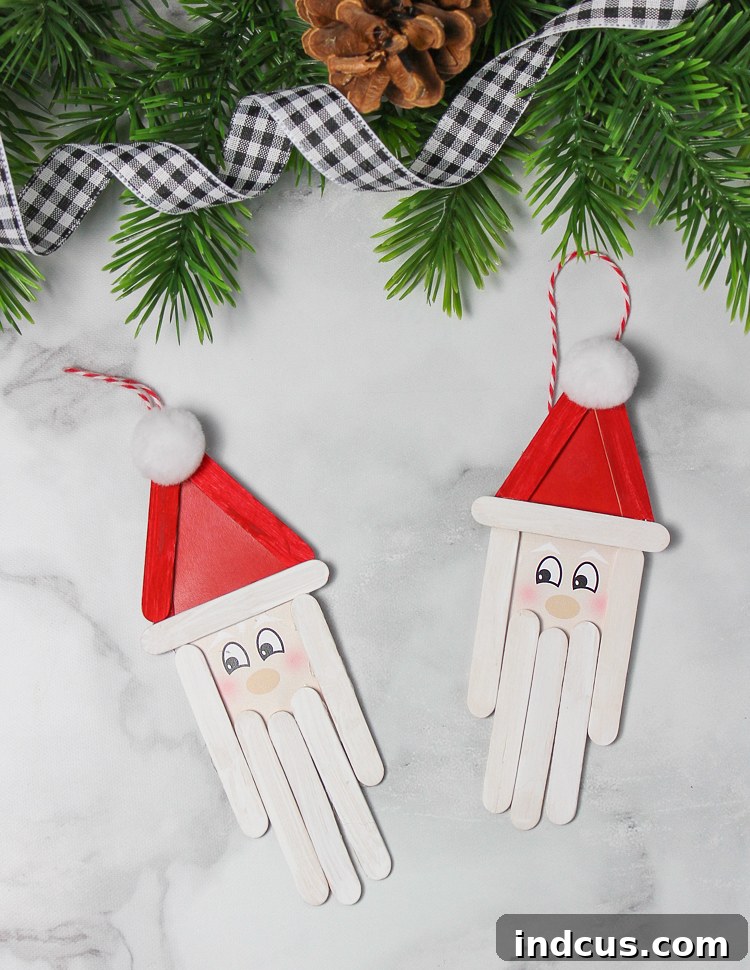
Almost done! To complete Santa’s classic look, glue a soft white pom pom to the very tip of his red hat. This adds a wonderful three-dimensional quality and makes him even cuter. For the final step, cut a piece of bakers twine, ribbon, or string about 6-8 inches long. Form it into a loop and secure the ends to the back of the Santa ornament using a dab of hot glue or strong white school glue. Make sure the loop is firmly attached and centered so your ornament hangs evenly.
And just like that, your charming homemade Santa ornament is complete! This is a wonderfully simple craft, which is precisely why it’s an ideal project for kids. Its straightforward nature ensures that little hands can achieve success and feel a great sense of accomplishment, fostering a love for crafting and holiday traditions.
Why Choose This Easy Christmas Craft for Kids?
Engaging in holiday crafts like these popsicle stick Santa ornaments offers numerous benefits beyond just creating a festive decoration. For children, crafting is a powerful tool for development:
- Boosts Fine Motor Skills: Holding brushes, cutting paper, and carefully placing sticks all contribute to developing precision and dexterity.
- Encourages Creativity: While there are instructions, kids can still personalize their Santas with different expressions, glitter, or unique string choices.
- Fosters Patience and Focus: Following steps, waiting for paint to dry, and careful gluing teach children valuable lessons in patience and attention to detail.
- Sparks Holiday Spirit: Hands-on creation is a fantastic way to immerse children in the magic and traditions of Christmas, building excitement for the season.
- Creates Cherished Memories: Crafting together as a family provides bonding opportunities and creates treasured keepsakes that will evoke fond memories year after year.
This project is also incredibly budget-friendly, making it accessible for everyone. The primary materials are inexpensive, and you might even have many of them already on hand.
Tips for Crafting Success and Variations
To make your DIY Christmas ornaments experience even more enjoyable and successful, consider these helpful tips:
- Preparation is Key: Lay down newspaper or a plastic tablecloth to protect your workspace from paint and glue. Have wet wipes or a damp cloth handy for quick clean-ups.
- Adult Supervision: While this is a simple craft, hot glue guns should always be handled by adults or older children with supervision. For younger kids, stick to white school glue.
- Drying Time: Ensure sticks are fully dry before gluing them to the background. Rushing this step can lead to smudged paint or weakened adhesion.
- Personalize Your Santa: Encourage kids to add their own flair! They could draw small rosy cheeks on Santa’s face, add glitter to his hat, or even use different colored pom poms (e.g., a green one for an elf hat variation!).
- Display Ideas: These charming Santa ornaments aren’t just for the Christmas tree! They can be tied onto holiday gifts as festive tags, strung together to create a mini garland, or even used as a unique centerpiece decoration for your holiday table.
This easy holiday craft is wonderfully adaptable, allowing for endless creativity. Imagine an entire collection of unique Santas, each with its own special charm, crafted by loving hands!
Frequently Asked Questions About This Santa Craft
Here are answers to some common questions you might have about making these delightful ornaments:
- How long does this craft take?
The active crafting time is relatively short, about 15-20 minutes per ornament once materials are prepped. However, you’ll need to factor in drying time for the paint (20-30 minutes) and white school glue if used (up to an hour or more). Hot glue significantly speeds up the process. - What if I don’t have mini popsicle sticks?
You can use regular-sized craft sticks, but you might need to adjust the printable background size or arrange them slightly differently to fit the Santa face. The mini sticks offer a perfect scale for the ornament size. - Can I use a different type of glue?
Yes, any strong craft glue that adheres wood to paper will work. Fabric glue or tacky glue are good alternatives to hot glue or traditional white school glue, often providing a good balance of quick drying and child-friendliness. - Is this craft suitable for preschoolers?
With significant adult help for painting and gluing (especially cutting the printable), preschoolers can definitely enjoy assembling these Santas. The simple shapes and clear steps are easy for them to follow, but they will need more hands-on assistance. - Can we make other characters using this method?
Absolutely! The concept of gluing painted craft sticks onto a printed background can be adapted for many other holiday characters, like snowmen, reindeers, or even elves. Just design a new printable face and adjust your paint colors!
We hope you have an absolutely wonderful time crafting these adorable popsicle stick Santa ornaments! They are a testament to the joy of handmade creations and a beautiful way to personalize your holiday decorations. From our crafting corner to yours, Happy Crafting and Merry Christmas!