
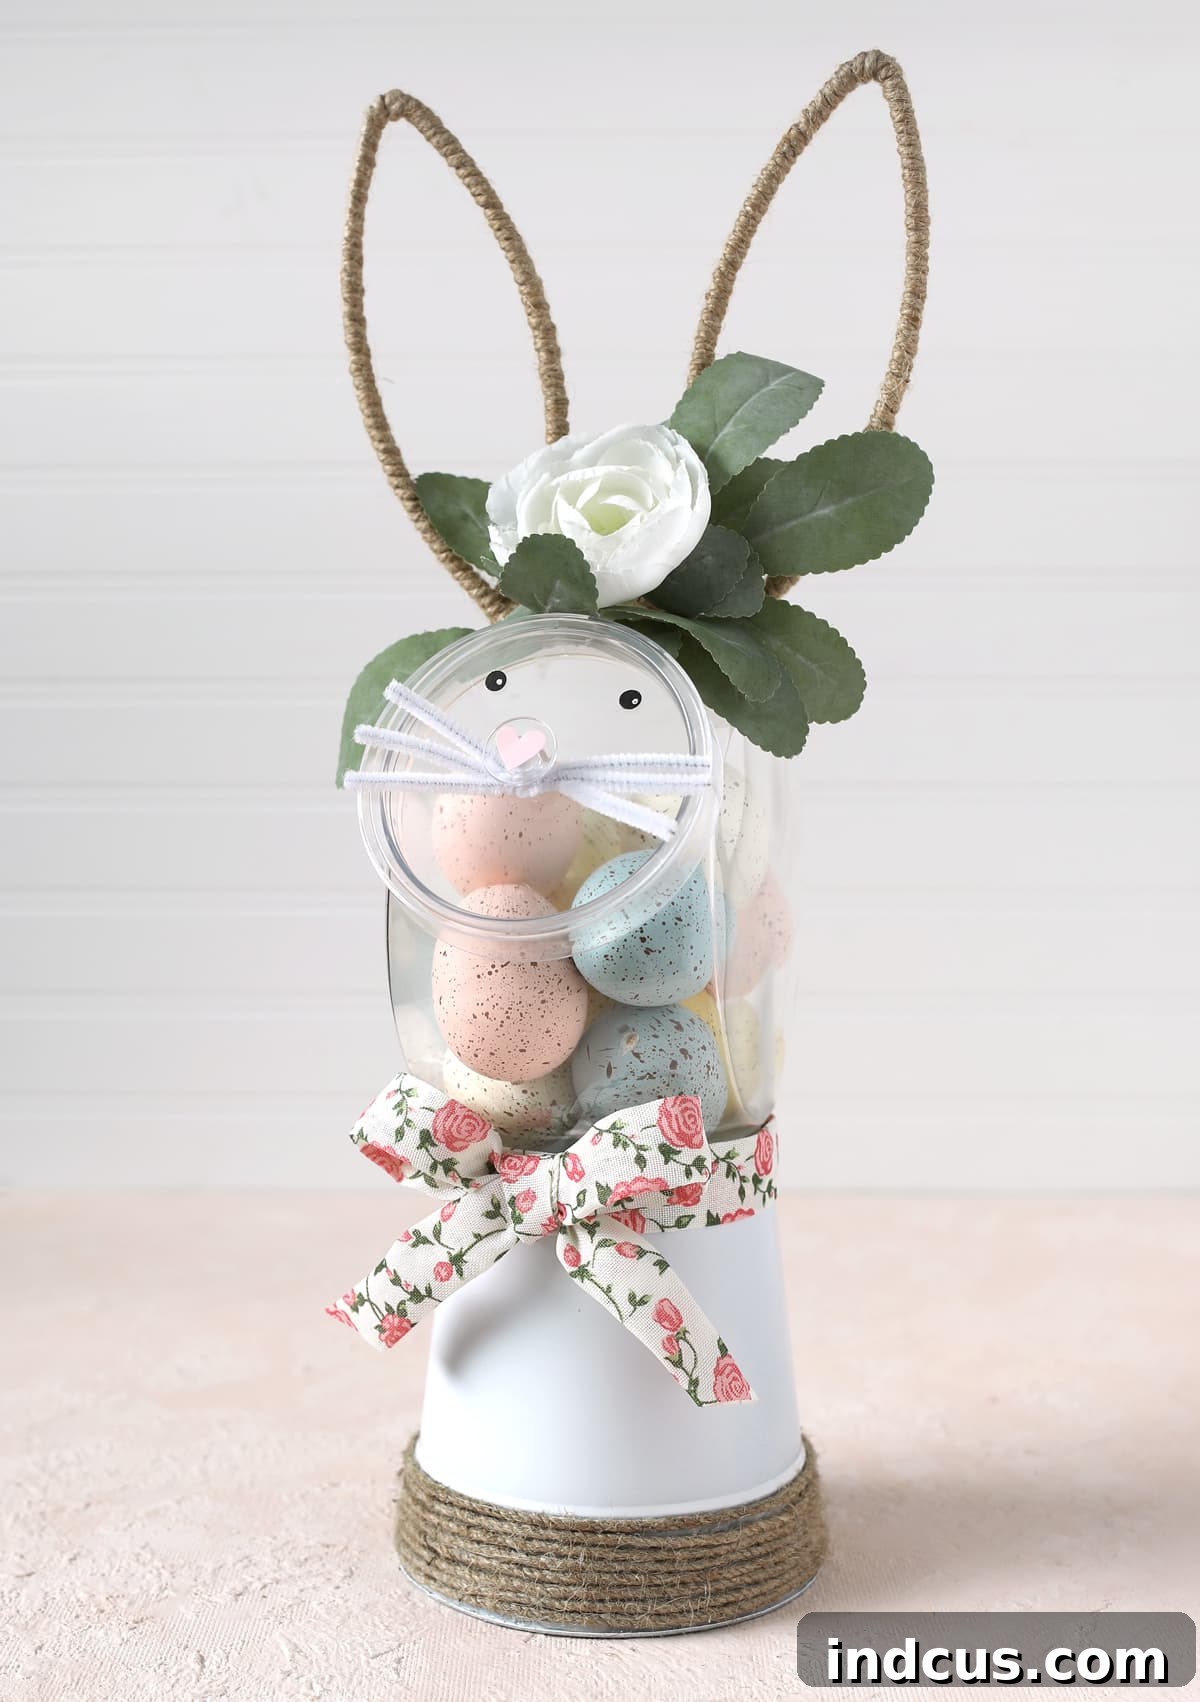
Craft Your Own Adorable Easter Bunny Candy Jar: A Delightful Spring DIY Project
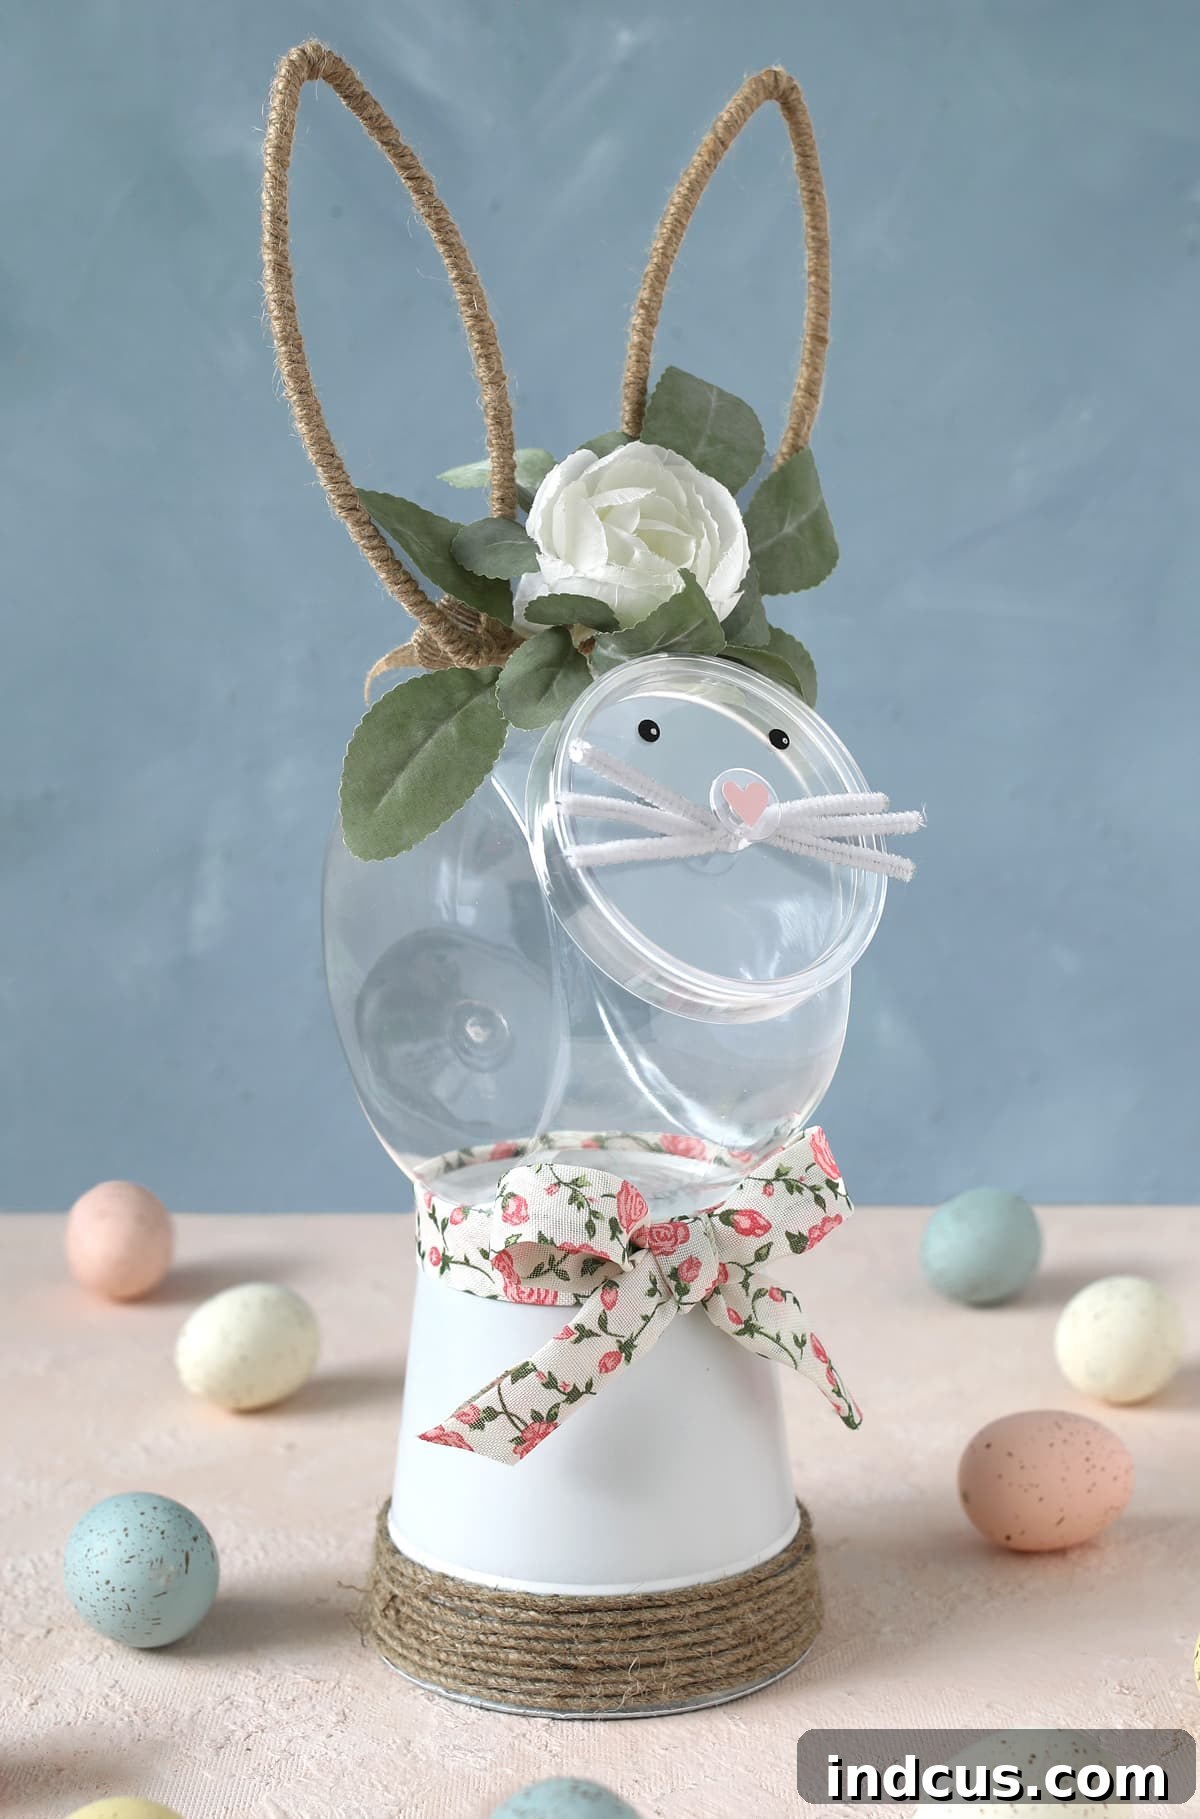
Welcome to a truly delightful crafting adventure today! As the days grow longer and the spirit of spring fills the air, there’s no better time to infuse your home with festive cheer. We’re diving into a fun and surprisingly simple DIY project: transforming a basic candy jar into an irresistibly charming Easter bunny candy jar. This isn’t just a craft; it’s a piece of seasonal decor that promises to bring smiles and a touch of whimsy to any space. Imagine it gracing your Easter table, adorning a mantel, or delighting guests as a unique centerpiece!
This idea has been hopping around in my mind for a while – the vision of a candy jar that captures the playful essence of an Easter bunny. After gathering a few budget-friendly supplies and dedicating some time to experimentation, I’m thrilled to share a creation that truly exceeded my expectations. While my journey to this adorable bunny jar involved a few creative detours – a paint mishap here, a ribbon re-think there, and even a quick finger band-aid – these learning curves only perfected the process for you. Rest assured, I’ve ironed out all the wrinkles, so you can enjoy a smooth and rewarding crafting experience!
Crafting your own Easter bunny candy jar is not only a fantastic way to personalize your holiday decor but also a wonderful activity for crafters of all skill levels. It’s an inexpensive project that yields a high-impact result, perfect for adding a touch of handmade charm to your home or creating a thoughtful, personalized gift. Let’s gather our materials and bring this adorable bunny to life, ready to hold all your favorite Easter treats!
Why You’ll Love This DIY Easter Bunny Candy Jar Project
Before we jump into the fun, let’s explore why this particular DIY Easter decoration is a must-try for your spring crafting list:
- Budget-Friendly: Many of the supplies can be found at dollar stores or craft stores, making this an economical way to spruce up your Easter decor.
- High Impact, Low Effort: Despite its charming appearance, this project is surprisingly simple. With clear instructions, you’ll achieve professional-looking results without hours of complicated work.
- Perfect for All Skill Levels: Whether you’re a seasoned crafter or just starting, the steps are straightforward and easy to follow.
- Customizable: The design offers endless possibilities for personalization. Choose different colors, ribbons, or bunny ear styles to match your existing decor or create a unique look.
- Versatile Decoration: Beyond holding candy, this bunny jar can store small craft supplies, serve as a cute planter for faux flowers, or simply stand alone as a festive spring accent.
- Delightful Gift Idea: Fill it with treats and present it to a friend, family member, or teacher for a thoughtful, handmade Easter gift.
My Crafting Journey: Learning Through the Process
Every successful DIY project often has a story of trial and error behind it, and this Easter bunny candy jar is no exception! My initial attempts taught me some valuable lessons that will undoubtedly save you time and frustration:
- The Right Paint Matters: I first tried using acrylic craft paint on the metal bucket, thinking it would be an easy solution. However, it didn’t adhere well and resulted in a streaky, uneven finish. This highlighted the importance of using spray paint, which provides superior coverage and adhesion on metal surfaces, ensuring a smooth, professional look.
- Patience with Adhesion: Attaching the bunny ears required a bit of finesse. My first few tries resulted in wobbly ears! I learned that applying a generous amount of hot glue and holding the ears firmly in place until the glue completely cooled was crucial for a secure and lasting bond.
- Trust Your Tools: Cutting the metal stem from the bunny ear pick seemed daunting at first. Through trial, I discovered that floral stem cutters or strong wire cutters, combined with a bit of leverage and gentle bending, make this step much easier and safer than struggling with regular scissors.
- Ribbon and Proportions: My initial vision for the ribbon involved a large, dramatic bow. However, once applied, a 2.5-inch ribbon completely overshadowed the delicate features of the bunny. This emphasized the importance of choosing a ribbon size (like the recommended 7/8-inch) that complements the overall scale of the project, ensuring all elements work harmoniously.
- Embrace the “Oopsie”: I initially removed the twine from the metal bucket, only to realize later that its natural texture was exactly what I wanted! Learning to cover the twine with painter’s tape instead of removing it was a small “woopsie” that streamlined the painting process immensely.
These experiences are all part of the creative process, and I’m happy to share them so you can avoid similar pitfalls and enjoy a seamless crafting experience from start to finish!
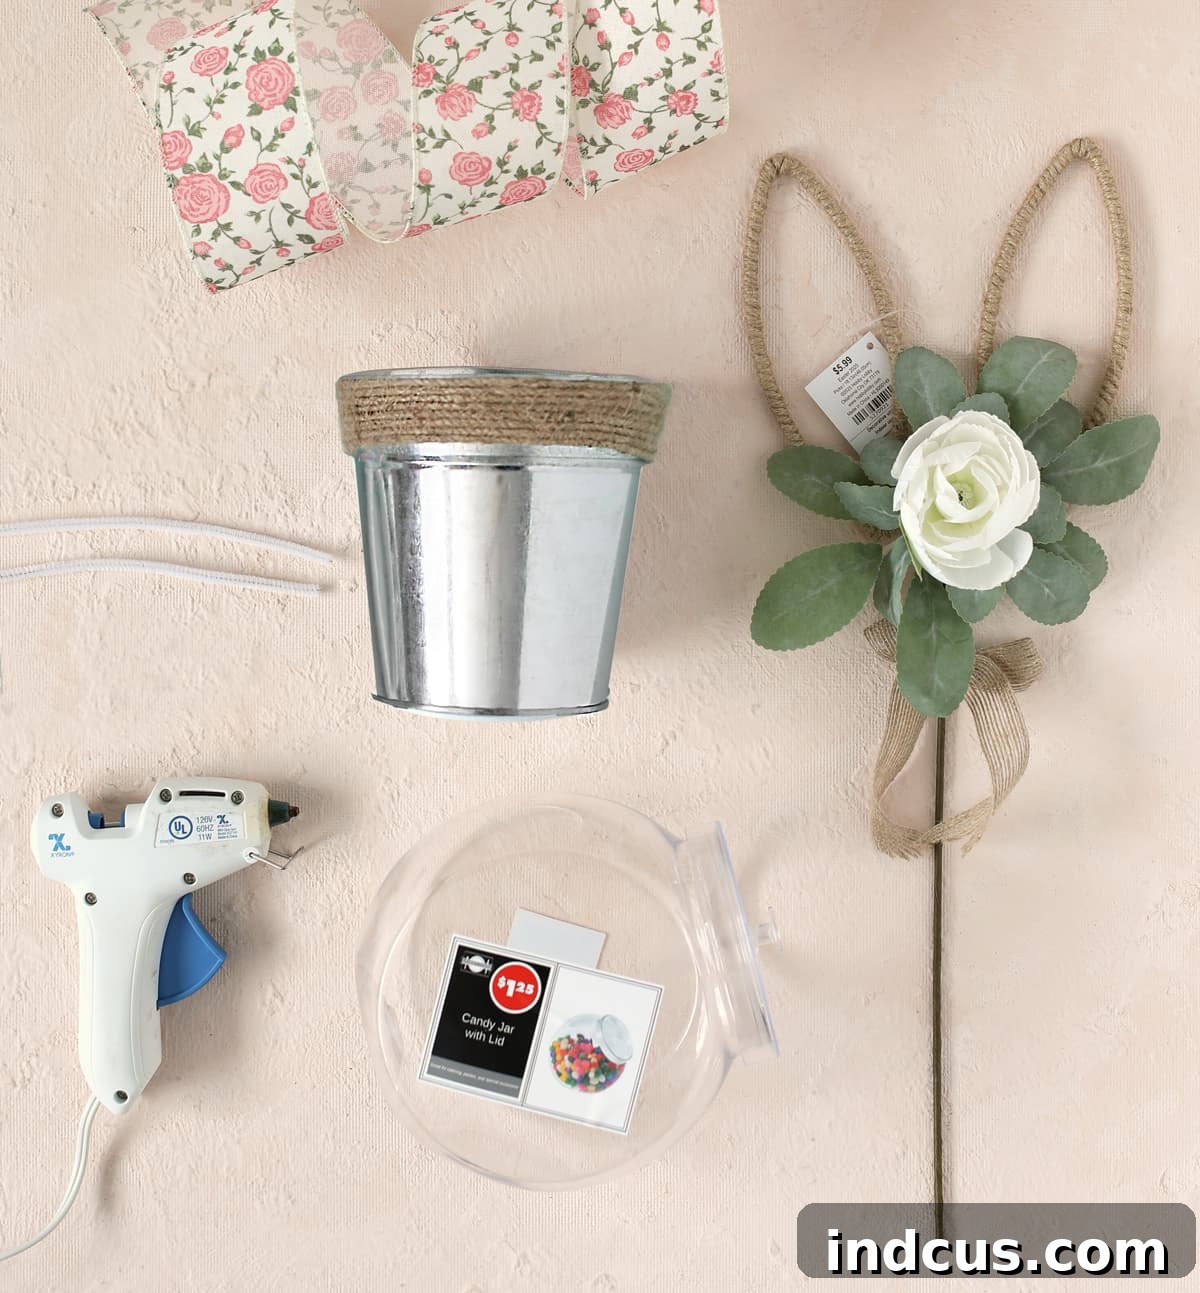
Materials You Will Need
To embark on this delightful DIY Easter bunny candy jar project, gather the following supplies. Most items can be found at your local dollar store, craft store, or through the provided links, ensuring this remains a cost-effective craft:
- Dollar Tree Candy Jar with Lid (A 55oz plastic jar is ideal, but a similar-sized glass jar can also be substituted for a different aesthetic.)
- Dollar Tree Metal Bucket (The 5.5-inch size with rope accents works perfectly for the base of our bunny.)
- Bunny Ears Pick (Look for a decorative pick featuring white or natural-toned bunny ears, ideally with some jute or floral accents for added charm.)
- Spray Paint – White or Heirloom White (A good quality spray paint designed for metal will ensure even coverage and a durable finish.)
- White Pipe Cleaner (Standard craft pipe cleaners are perfect for creating the bunny’s whiskers.)
- Spring Ribbon – I highly recommend a 7/8″ size (A pastel or spring-themed wired-edge ribbon adds a lovely finishing touch. Avoid overly wide ribbons to maintain proportion.)
- White Pom Pom 1.5 inch (A fluffy white pom pom will make the perfect bunny tail.)
- Scrap Colored Cardstock: Black and Pink (Small pieces are needed for the eyes and nose.)
- Paper Hole Punch (For neat, round eyes.)
- Scissors (Essential for cutting ribbon, cardstock, and other small elements.)
- Floral Stem Cutter or Wire Cutter (Crucial for safely and effectively trimming the metal stem from the bunny ears.)
- Hot Glue Gun + Gluesticks (Your best friend for securely assembling all the components of your bunny jar.)
While various bunny ear headbands from stores like Dollar Tree can also be adapted for this project, I found that the natural elegance of the jute and eucalyptus ears on the pick added a truly special touch, making them my preferred choice for this particular design.
Step-by-Step Instructions to Create Your Bunny Candy Jar
Follow these detailed steps to craft your beautiful Easter bunny candy jar. Remember to work in a well-ventilated area when using spray paint and always supervise children if crafting together.
Step 1: Prepare and Paint the Metal Bucket
Begin by preparing your metal bucket. If your bucket has a decorative twine or rope handle that you wish to keep, carefully cover this portion with painter’s tape. This will protect it from the spray paint and save you the hassle of reattaching it later. Once taped, take your bucket to a well-ventilated outdoor or garage area. Place it on a protected surface (like an old sheet or cardboard). Apply a thin, even coat of white or heirloom white spray paint to all exposed metal surfaces. Ensure you also paint the bottom of the bucket, as it will become the top of your bunny’s head when inverted. Allow the first coat to dry completely according to the manufacturer’s instructions, then apply a second thin coat if necessary for full, opaque coverage. Avoid applying thick coats, as this can lead to drips. Spray paint is highly recommended over acrylic craft paint for metal surfaces, as it provides far superior adhesion and a smooth, streak-free finish.
Step 2: Attach the Candy Jar to the Painted Base
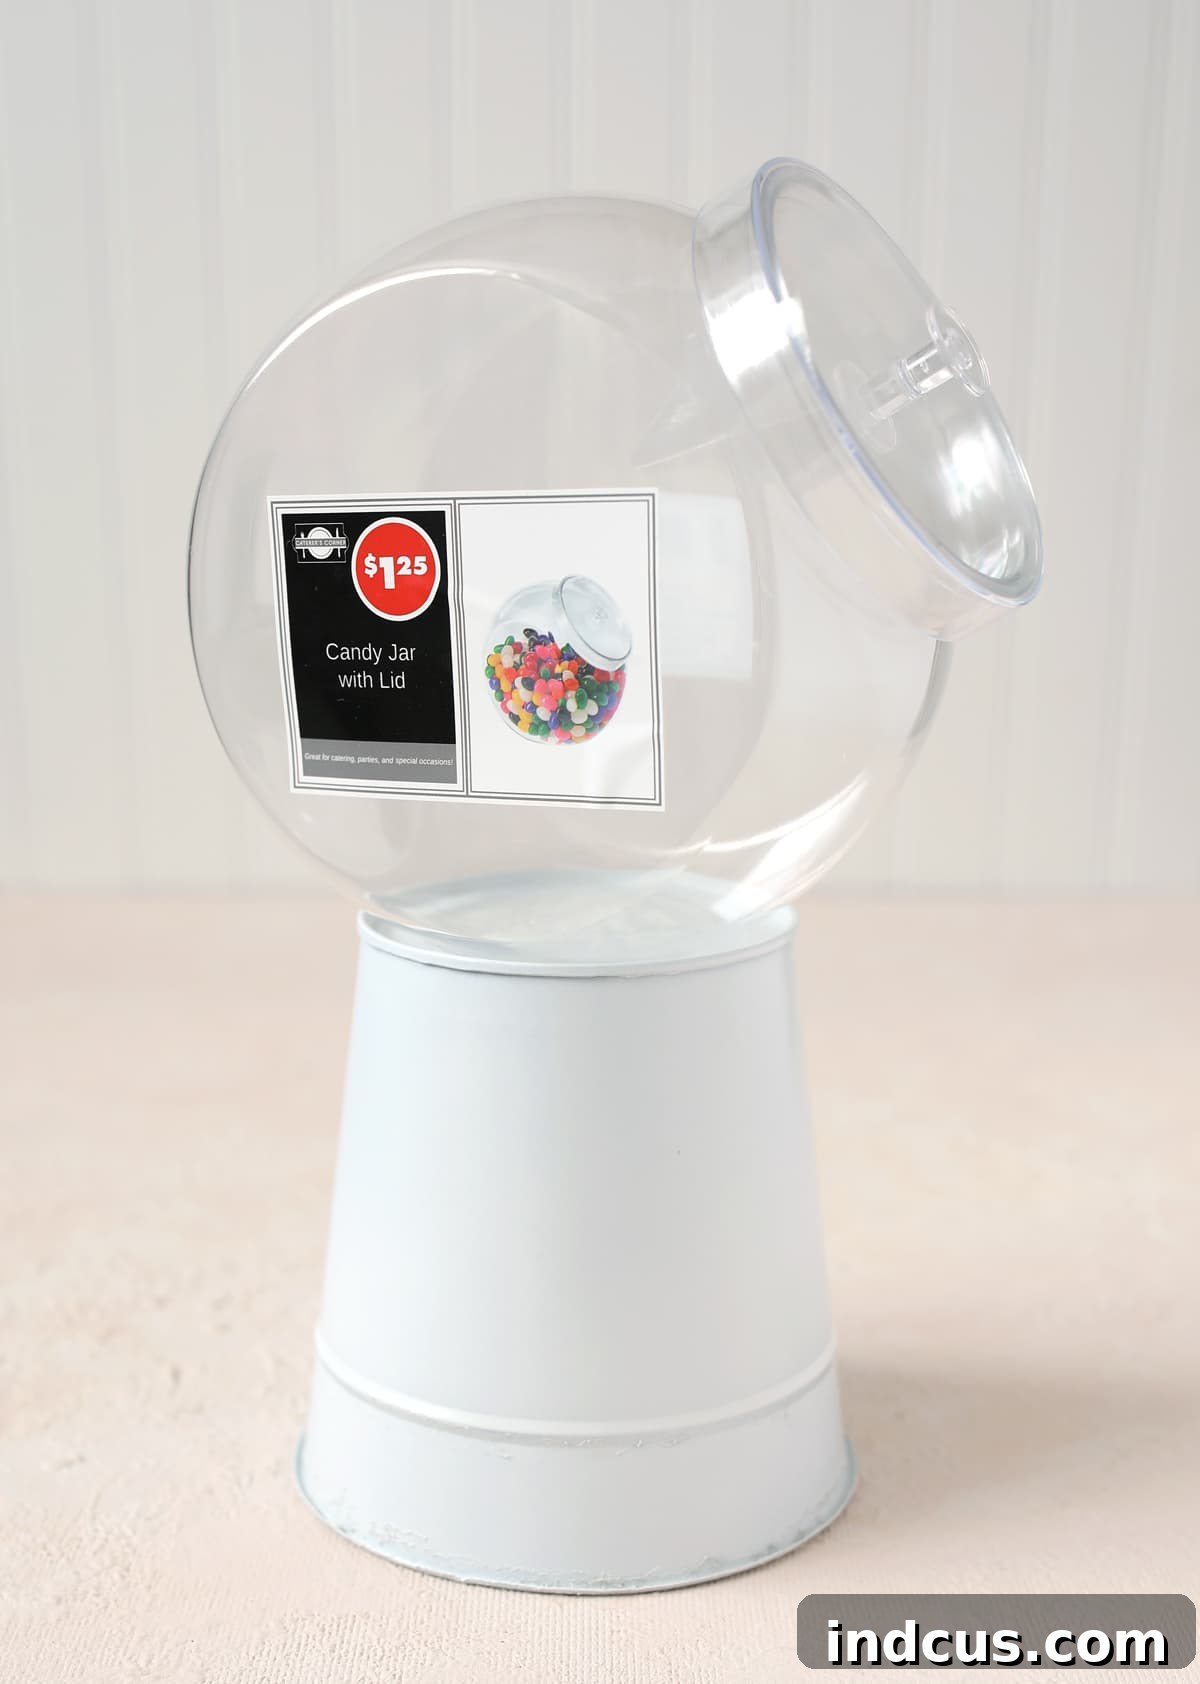
Once your painted metal bucket is thoroughly dry, flip it upside down. This painted bottom will now serve as the platform for your candy jar. Take your clear candy jar and apply a generous bead of hot glue around the rim of the jar’s base (the part that sits on a flat surface). Carefully center the candy jar on the upside-down metal bucket and firmly press it down. Hold it in place for a minute or two, allowing the hot glue to cool and create a strong, secure bond. You want the candy jar to be well-attached as it will eventually hold your treats.
Step 3: Prepare the Bunny Ears Pick
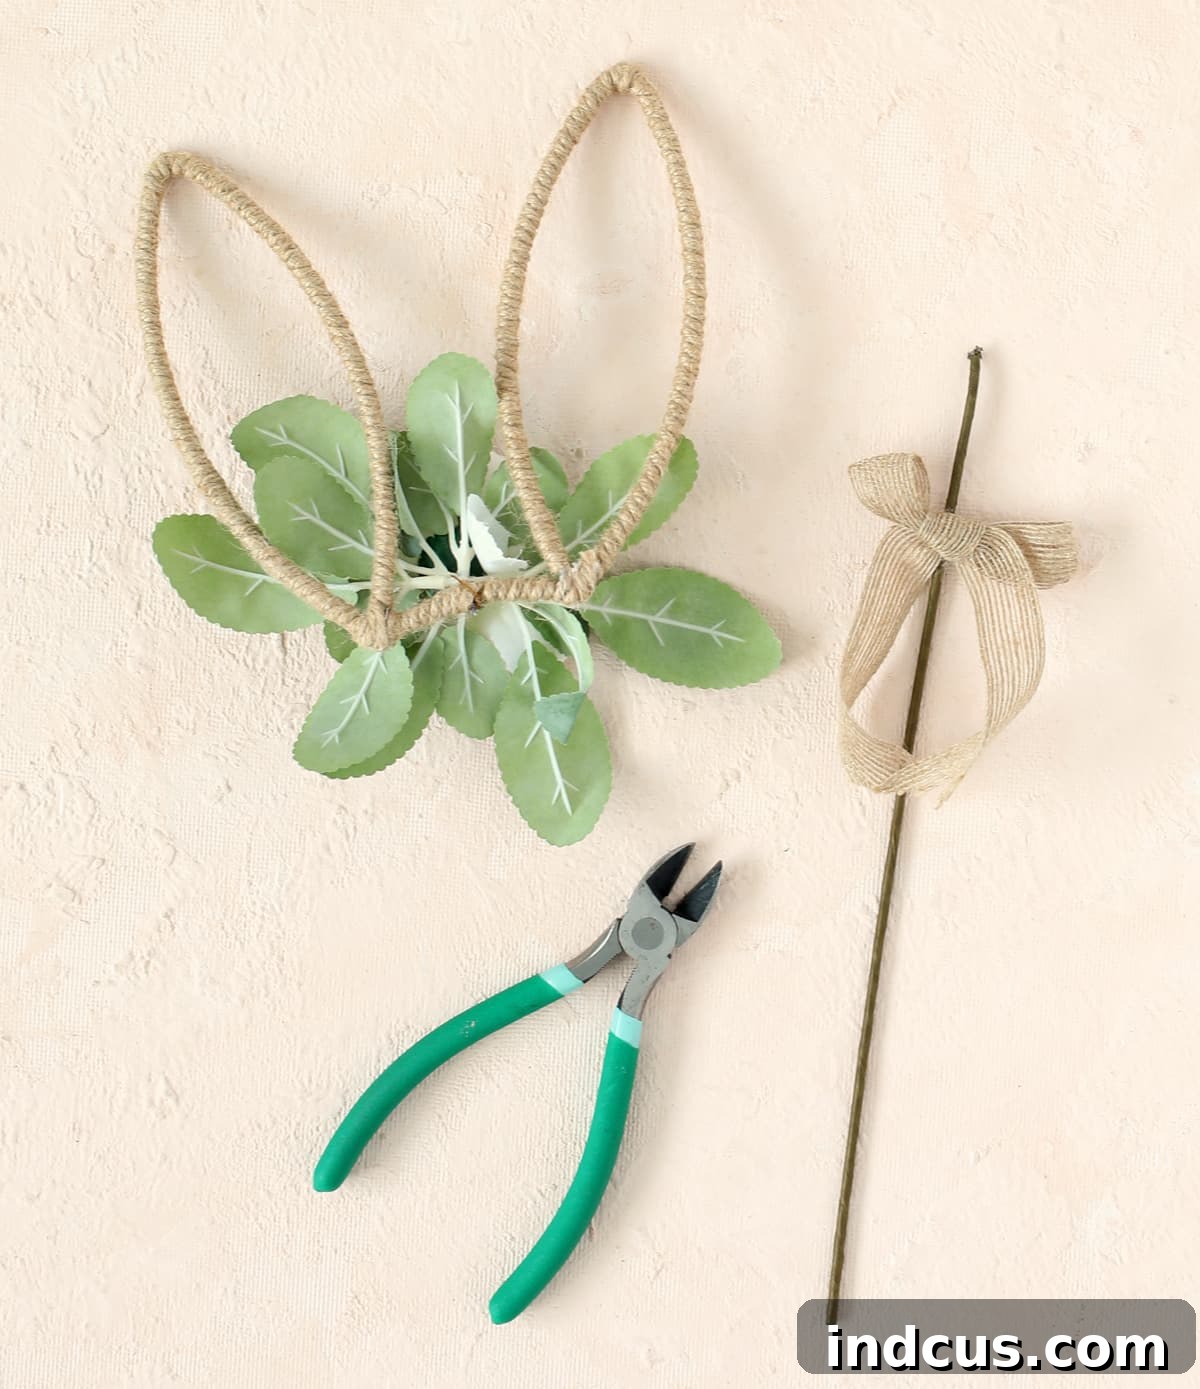
Next, it’s time to prepare your bunny ears. Take your bunny ear pick and use floral stem cutters or strong wire cutters to carefully snip off the metal stick from the bottom of the pick. This step might require a bit of force and possibly bending the metal back and forth a few times until it cleanly breaks away. Always exercise caution when using cutting tools and ensure your fingers are clear of the blades.
Step 4: Secure the Bunny Ears
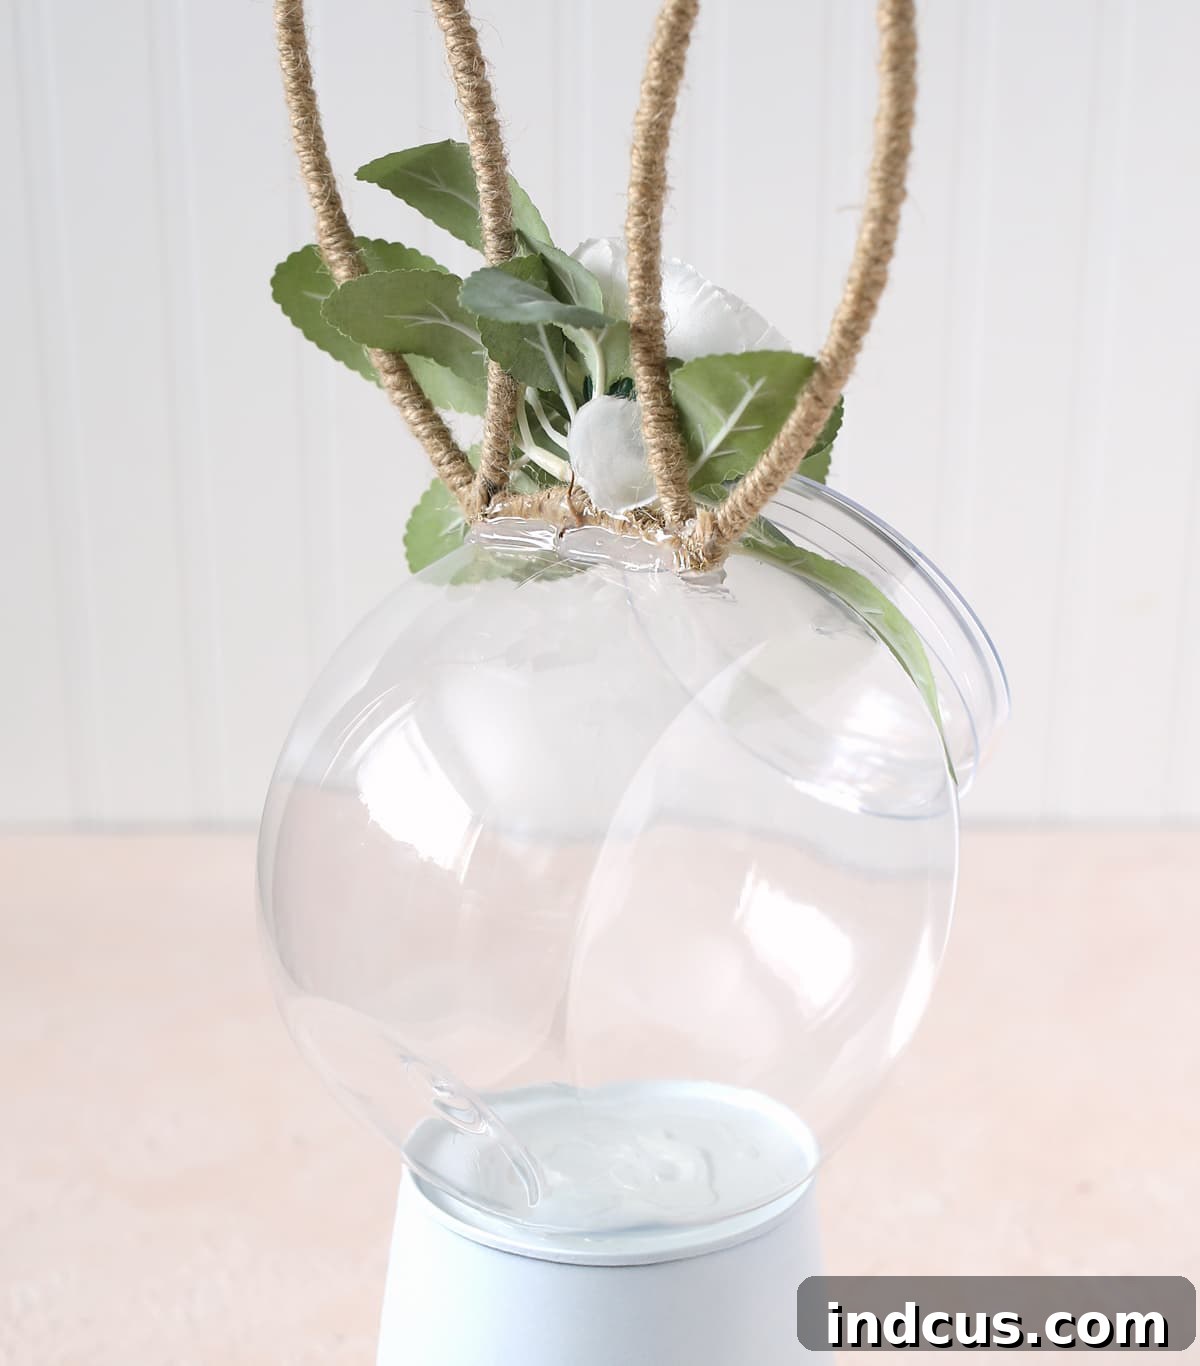
Now, attach the bunny ears to the top of your candy jar. This is where the bunny truly starts to take shape! Apply a substantial blob of hot glue to the very top center of the candy jar lid. Press the base of the bunny ears firmly into this glue. To ensure maximum stability, add more hot glue around the edges of the ear base, creating a reinforced bond. It’s crucial to hold the ears steadily in place for a good few minutes until you are absolutely certain the hot glue has completely cooled and set. A strong adhesion here will prevent wobbly ears and ensure your bunny stands proud.
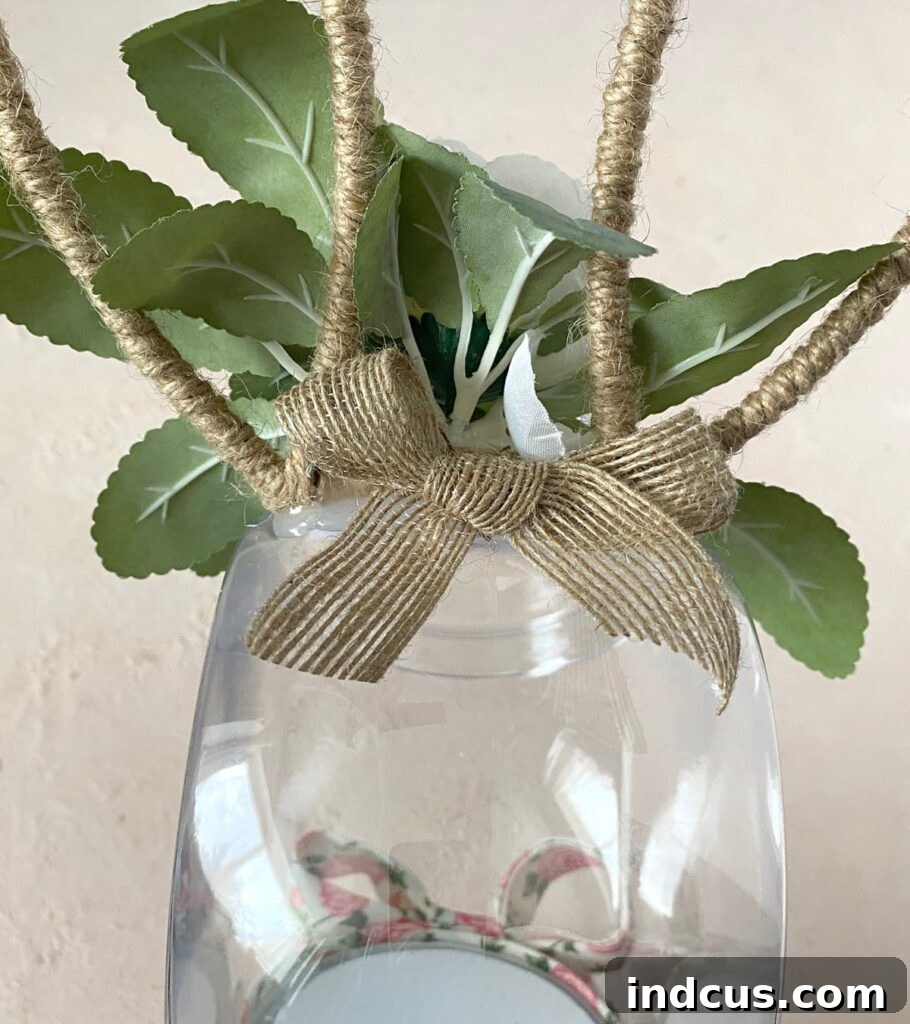
Don’t fret if the hot glue appears a bit unsightly at this stage; we have a clever trick to conceal it. Locate the jute bow that likely came attached to your bunny ear pick. Gently slip it off any remaining metal rod. Apply a dab of hot glue to the back of this bow and carefully affix it to the back base of the bunny ears, covering the previously applied glue. This simple addition not only tidies up the appearance but also adds another layer of charm to your bunny!
Step 5: Create the Adorable Bunny Face
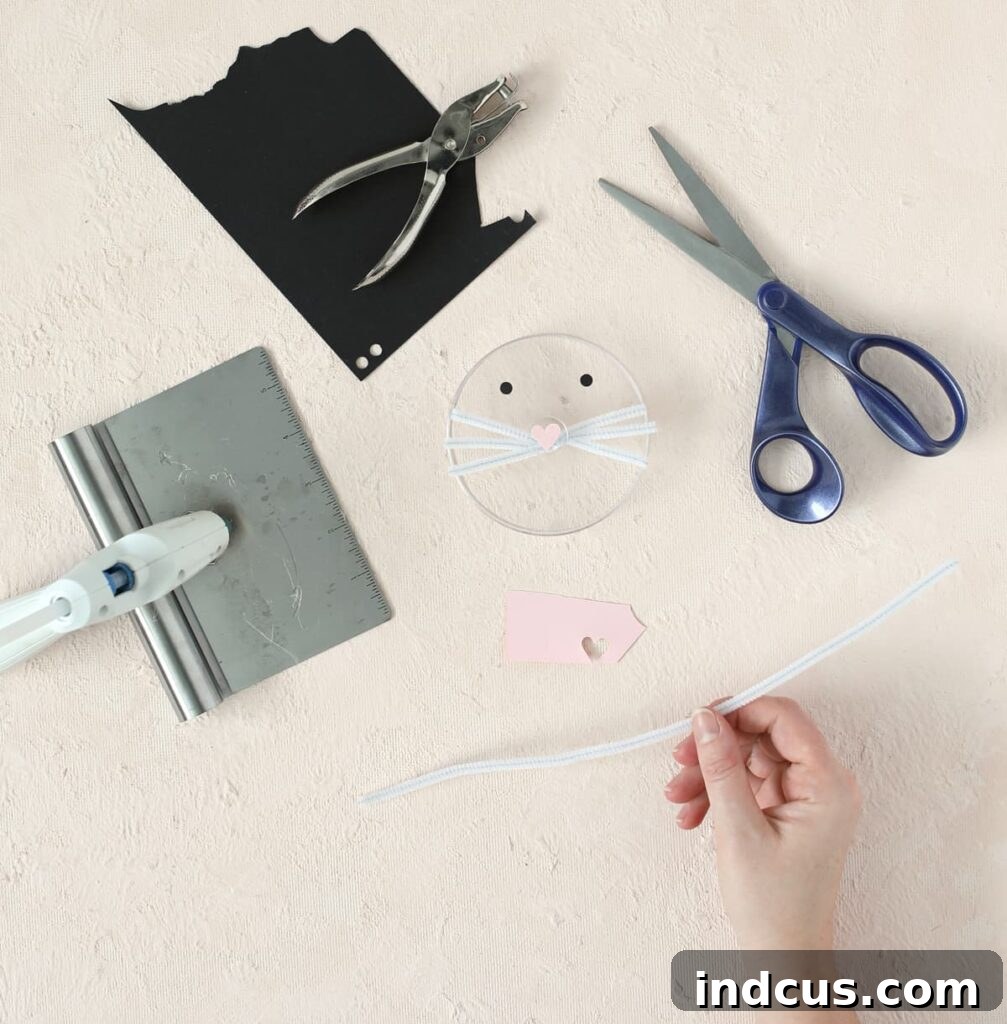
With the ears in place, it’s time to give our bunny some character! Remove the lid from the candy jar. For the whiskers, cut a white pipe cleaner into three equal pieces. Twist these three pieces together at their centers to form a fan shape. Apply hot glue to the twisted center and adhere it firmly under the knob on the lid. This positioning creates the illusion of playful whiskers extending from the bunny’s face.
For the eyes, use a paper hole punch to create two black cardstock circles. Once glued into place above the whiskers, you can add small white dots to each black circle with a paint pen or a dab of white paint and a toothpick to give them a lively sparkle. Finally, cut a small heart shape from pink cardstock. This will be our darling bunny nose. Apply a tiny amount of hot glue to the back of the pink heart and affix it to the top of the lid’s knob, centered between the eyes. These details will bring your bunny’s personality to life!
Step 6: Add the Fluffy Tail and Decorative Ribbon
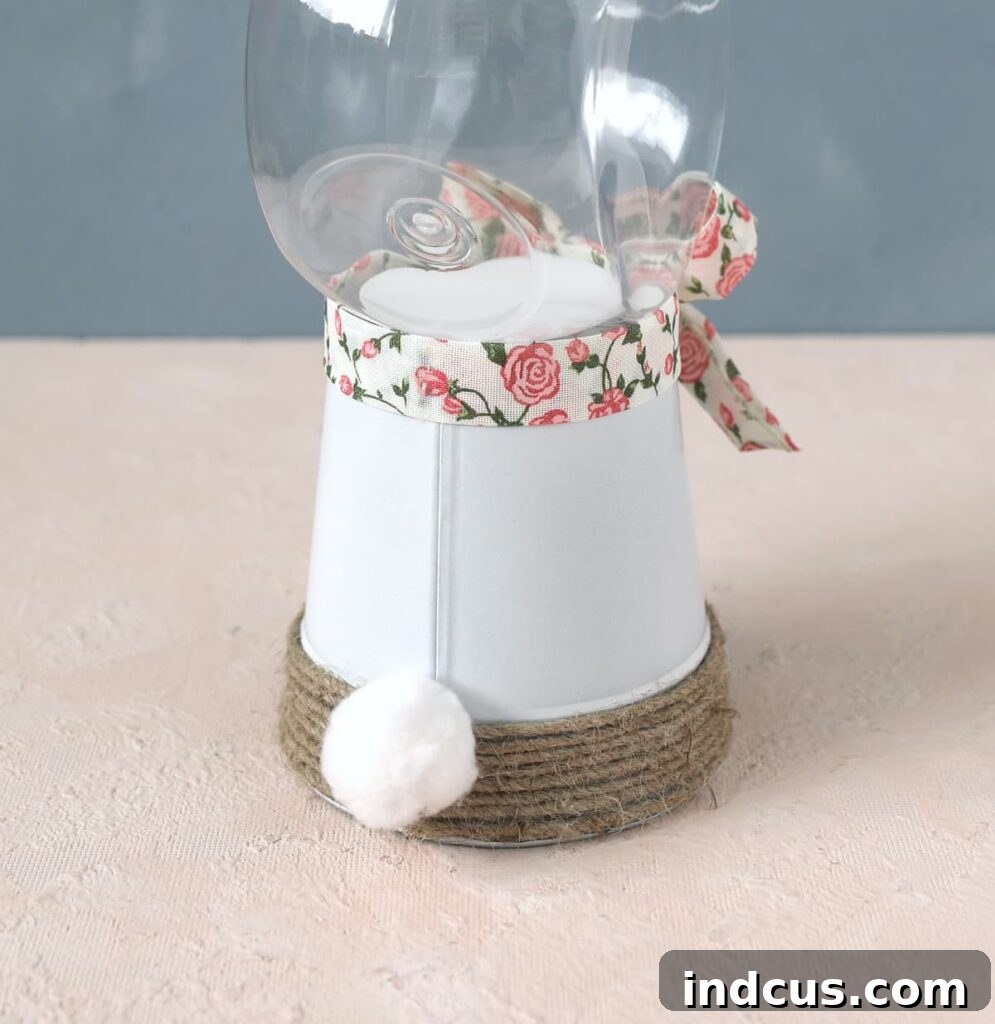
No bunny is complete without a fluffy tail! Take your 1.5-inch white pom pom and apply a generous dollop of hot glue to one side. Carefully attach the pom pom to the back of the candy jar, ensuring it’s centered and positioned at the base where the jar meets the metal bucket. Press firmly and hold until the glue sets completely.
To add a final touch of elegance, select your spring ribbon. Tie a beautiful bow around the middle section of the candy jar, where the clear glass meets the painted metal bucket. As a tip from my own experience, a 7/8-inch ribbon often provides the best proportion for this project, adding charm without overwhelming the bunny’s features. If you only have wider ribbon (like 2.5-inch), you can often fold it in thirds lengthwise to create a narrower, more suitable appearance.
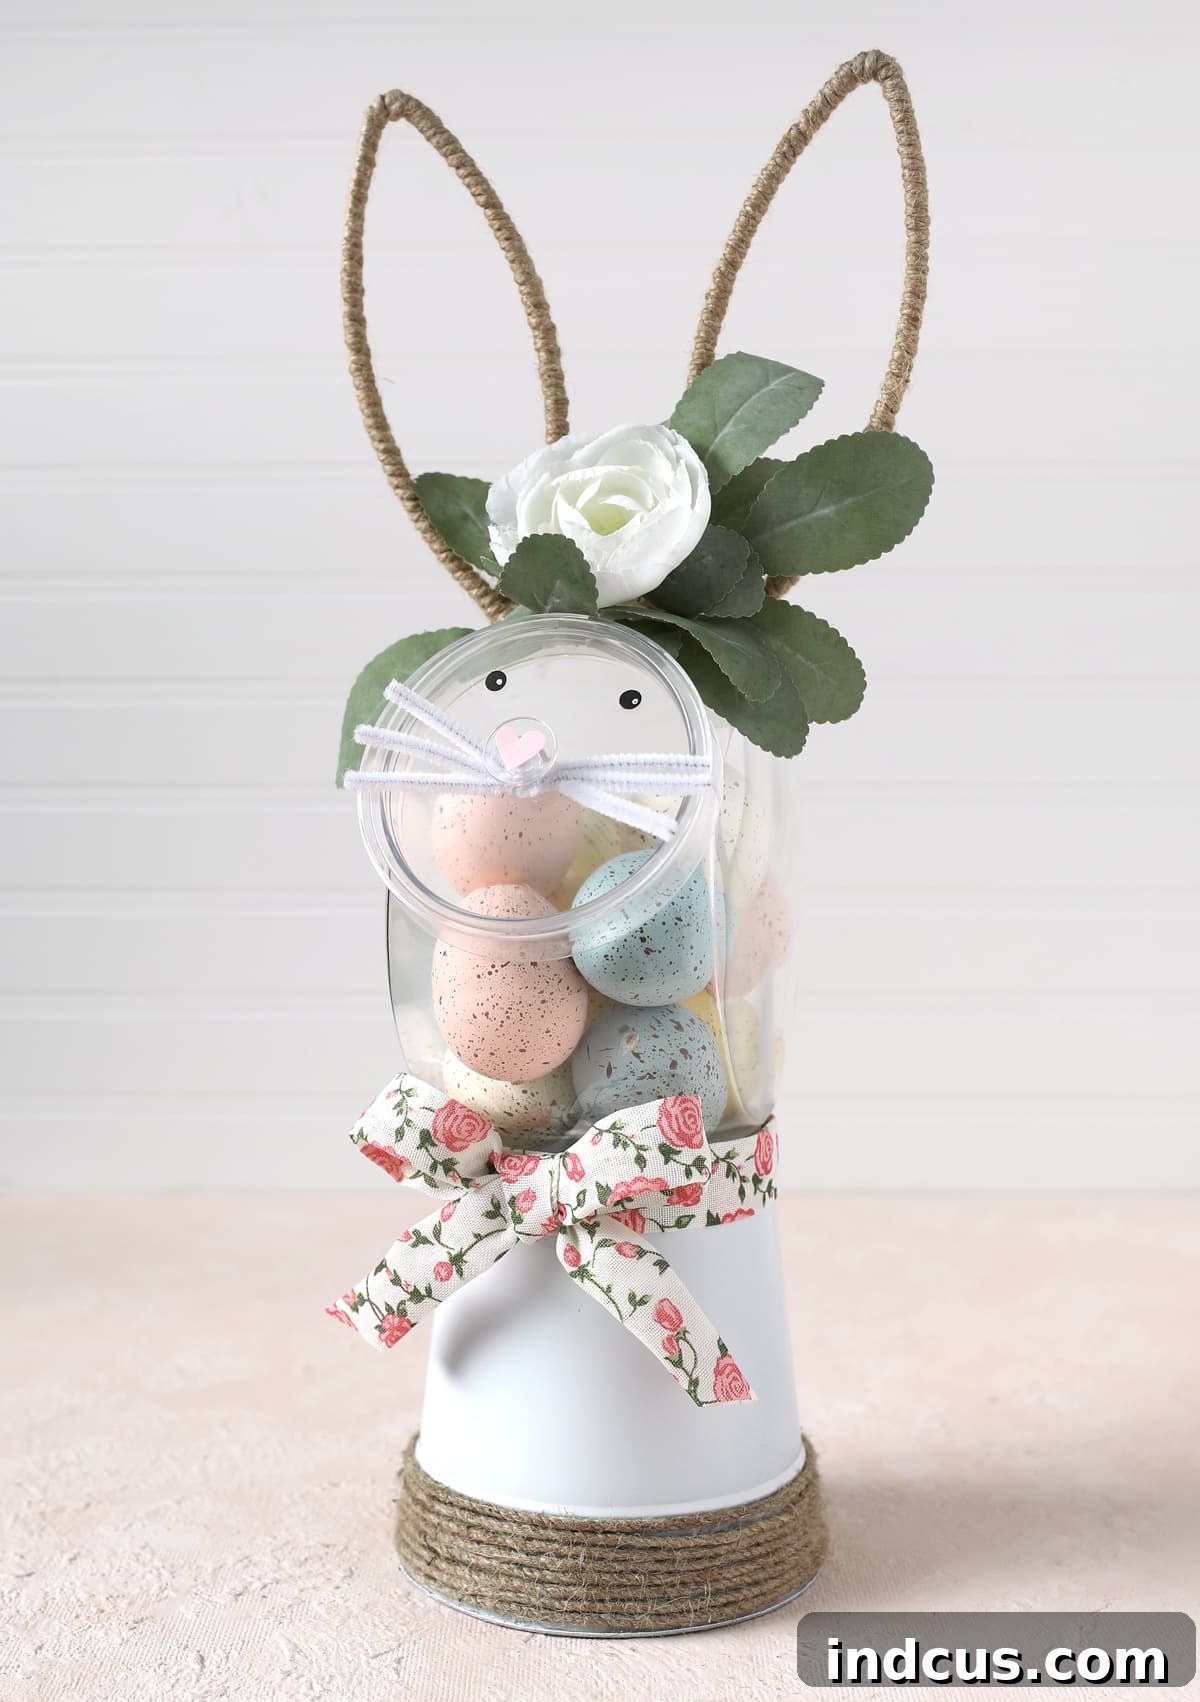
Voila! Step back and admire your beautifully crafted Easter bunny candy jar! Isn’t it absolutely charming and full of personality? This delightful creation is now ready to bring a touch of spring magic into your home.
Filling and Displaying Your Festive Creation
Now that your adorable Easter bunny candy jar is complete, it’s time for the fun part: filling and displaying it! The possibilities are endless, allowing you to tailor it perfectly to your home or as a thoughtful gift.
- Sweet Treats: Naturally, candy is a popular choice! I’ve initially filled mine with decorative faux eggs, but as Easter approaches, it will undoubtedly be brimming with Cadbury Mini Eggs – a seasonal treat I simply cannot resist! Other excellent options include jelly beans, chocolate eggs, pastel-colored M&Ms, or individually wrapped candies. Just be sure to wait until closer to the holiday if you have a sweet tooth like mine, or they might disappear prematurely!
- Non-Candy Fillers: For a healthier option or a non-food display, consider filling your jar with small decorative items. Faux flowers, pastel-colored beads, mini plastic eggs, potpourri, or even small bundles of dried lavender can create a beautiful and aromatic display.
- Craft Supplies: If you’re a crafter, this bunny jar can serve as a charming organizer for buttons, beads, pom-poms, or other small supplies.
- Gift Packaging: This bunny jar makes a truly special homemade gift. Fill it with a personalized selection of treats, small toys, or even a gift card, and present it to a loved one for a memorable Easter surprise.
As for display, this Easter bunny candy jar is incredibly versatile. Place it as a delightful centerpiece on your dining table, a welcoming accent on your entryway console, or a cheerful addition to a shelf or mantel. Its whimsical charm will instantly elevate your spring decor.
Personalizing Your Bunny Jar: Endless Creative Possibilities
One of the greatest joys of DIY is the ability to infuse your personal style into every project. This Easter bunny candy jar offers a fantastic canvas for creativity! Here are some ideas to inspire your unique design:
- Color Palette: Don’t limit yourself to white! Paint the metal bucket in a soft pastel shade like robin’s egg blue, mint green, or blush pink. You could even use a metallic gold or silver for a sophisticated touch.
- Bunny Ears Variety: Explore different types of bunny ear picks. Look for ones with glitter, different floral accents, or even fabric ears for a softer look. You could also create your own ears from felt or wire and faux fur.
- Ribbon Embellishments: Experiment with various ribbons – burlap for rustic charm, satin for elegance, or polka dots for a playful vibe. Consider layering two different ribbons for added depth.
- Face Expressions: Get creative with the bunny’s face! Use different colored cardstock for the eyes (e.g., blue or green), or draw eyelashes for a more whimsical look. You can also try cutting the nose into a small circle or triangle instead of a heart.
- Floral Accents: Hot glue small silk flowers, greenery sprigs, or tiny berries around the base of the bunny ears or at the ribbon knot for an extra touch of spring.
- Texture Play: Add faux fur to the bunny’s face or even a small patch on the back for a tactile element.
- Glitter and Sparkle: A touch of glitter glue around the eyes or on the ears can add a magical shimmer, perfect for catching the spring light.
These customization options ensure that your Easter bunny candy jar will be truly one-of-a-kind, reflecting your individual taste and creative flair. Don’t be afraid to experiment and make it your own!
Troubleshooting Common Crafting Challenges
Even with the clearest instructions, sometimes unexpected things happen during crafting. Here are a few common issues you might encounter and how to resolve them:
- Paint Streaks or Uneven Coverage: If your spray paint looks streaky, it’s likely due to applying too thick of a coat or not shaking the can enough. Allow the paint to fully dry, then lightly sand any rough areas with fine-grit sandpaper. Apply another thin, even coat, holding the can about 6-8 inches away and moving it in steady, sweeping motions.
- Wobbly Bunny Ears: If the ears feel loose, don’t panic. Gently pry them up (if possible without damage), clean off excess glue, and reapply a generous amount of hot glue. Hold them firmly in place for an extended period (2-3 minutes) until the glue is completely rigid. You can also add small supports like additional hot glue beads around the base or even small wooden dowels hidden behind the ears for extra stability.
- Hot Glue Strings: Hot glue can sometimes leave fine, wispy strings. Once the glue is cool, these can often be easily removed by gently rubbing them off with your fingers or a clean cloth. A hairdryer on a low setting can also melt them away, but be careful not to overheat other materials.
- Ribbon Doesn’t Look Right: If your ribbon feels too bulky or sparse, try adjusting its size or style. A narrower ribbon generally works best for this project. If you have a wired ribbon, you can shape it to give it more body and a neater bow.
- Candy Jar Not Centered: If you notice your candy jar is slightly off-center after gluing, you might be able to gently twist it before the hot glue fully sets. If it’s already set, you might need to carefully warm the glue with a hairdryer (on low heat) to soften it enough to adjust, then hold it in the correct position until it cools again. Proceed with caution to avoid melting plastic or damaging paint.
I hope you have an absolutely wonderful time crafting this delightful Easter bunny candy jar! It’s a project that truly embodies the joy and creativity of the spring season. Happy crafting!







