Transform Your Christmas Tree into a Dazzling Masterpiece: A Pro-Level Decorating Guide for Everyone
Year after year, the question echoes: “How do you make your Christmas tree look so stunning?” For too long, the answer remained unwritten. But this year, the wait is over! Dive into our comprehensive guide, packed with practical tips and ingenious tricks, designed to empower even the newest decorator to create a breathtaking holiday centerpiece. This isn’t just a list of steps; it’s a deep dive into the underlying principles that professional decorators use, adapted for every home and every style.
Whether you dream of a traditional, whimsical, minimalist, or rustic tree, the universal techniques we’re about to unveil can be seamlessly applied. We’ve meticulously analyzed the art of Christmas tree decoration, distilling years of observation and hands-on experience into an accessible formula. Get ready to elevate your holiday decor and impress your guests with a tree that truly sparkles!
Before any festive embellishments touch your tree, two crucial, albeit less glamorous, tasks await. First, dedicate ample time to **fluffing every single branch**. This transforms a sparse, compact tree into a full, lush canvas, providing the essential foundation for your decorations. Second, if your tree isn’t pre-lit, **string your lights with care**. For pre-lit trees, ensure all existing lights are fully functional. These initial steps, while seemingly boring, are absolutely critical for achieving that coveted full and radiant look. They set the stage for all the magic to come.
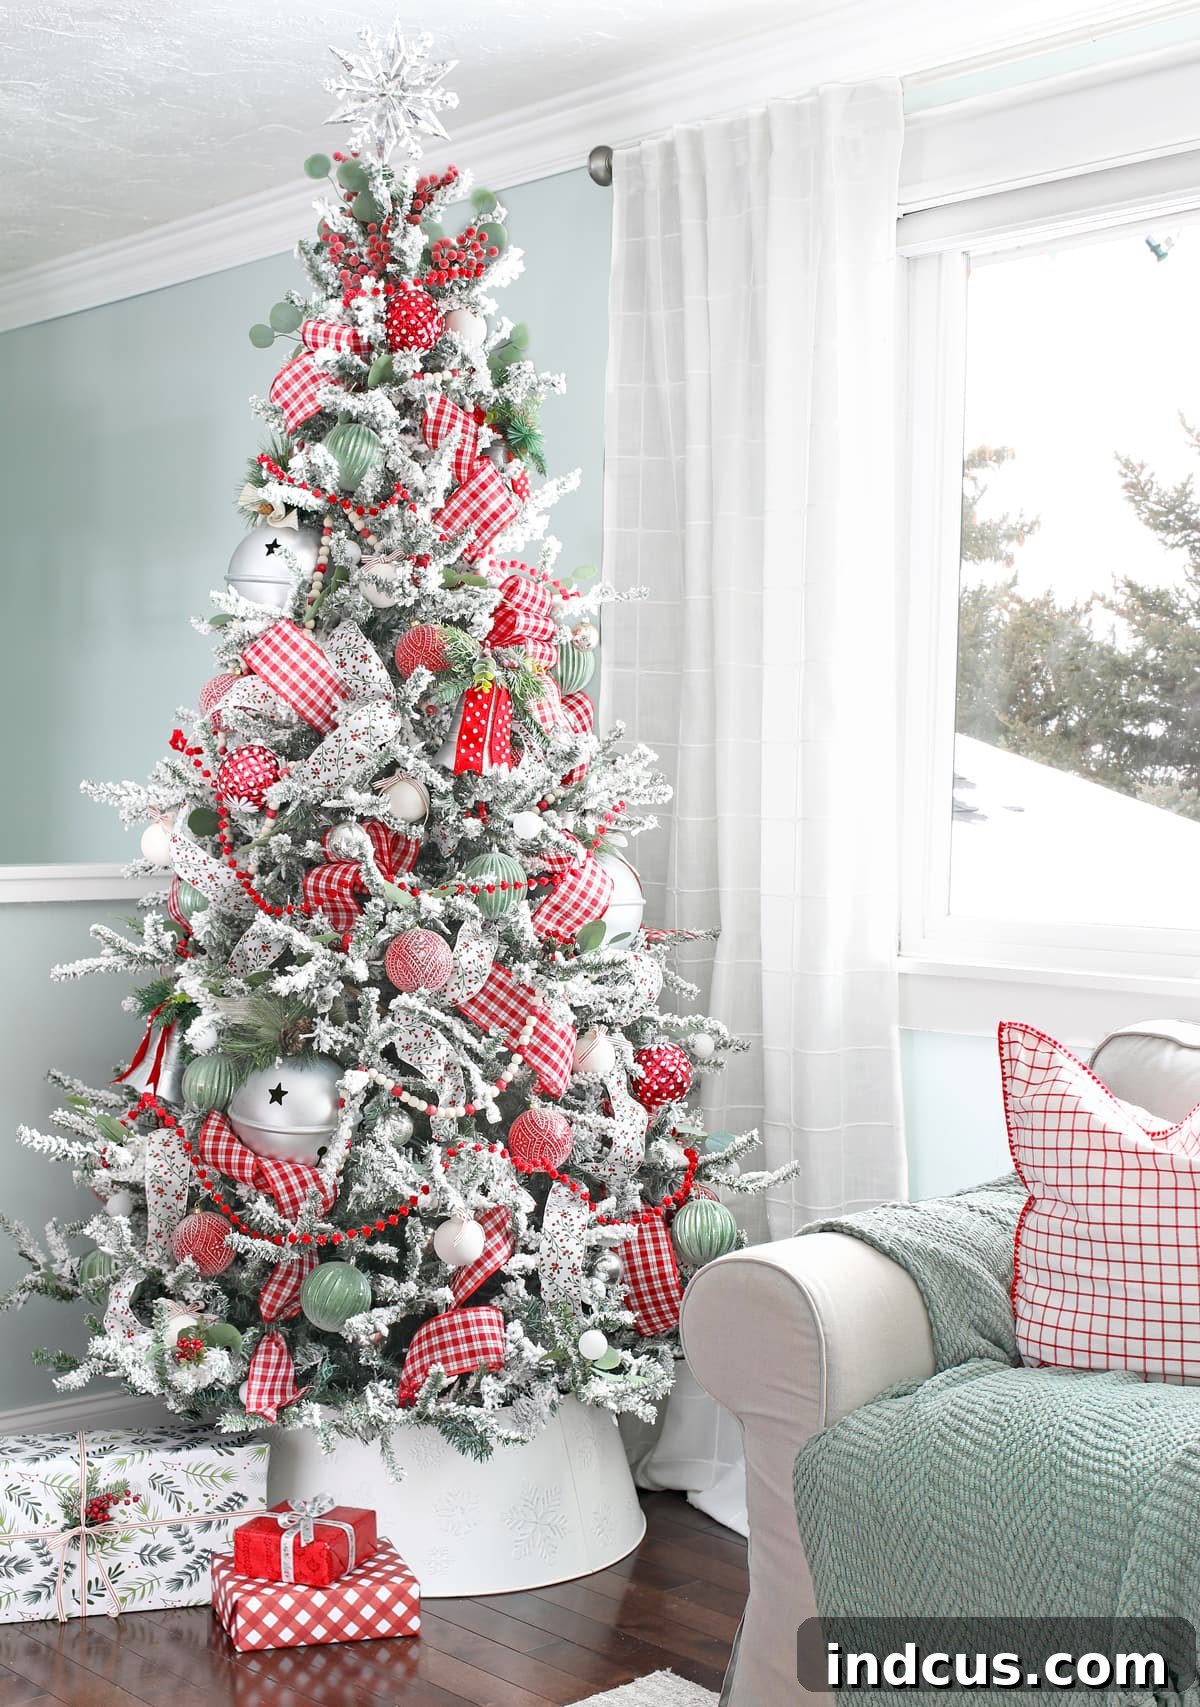
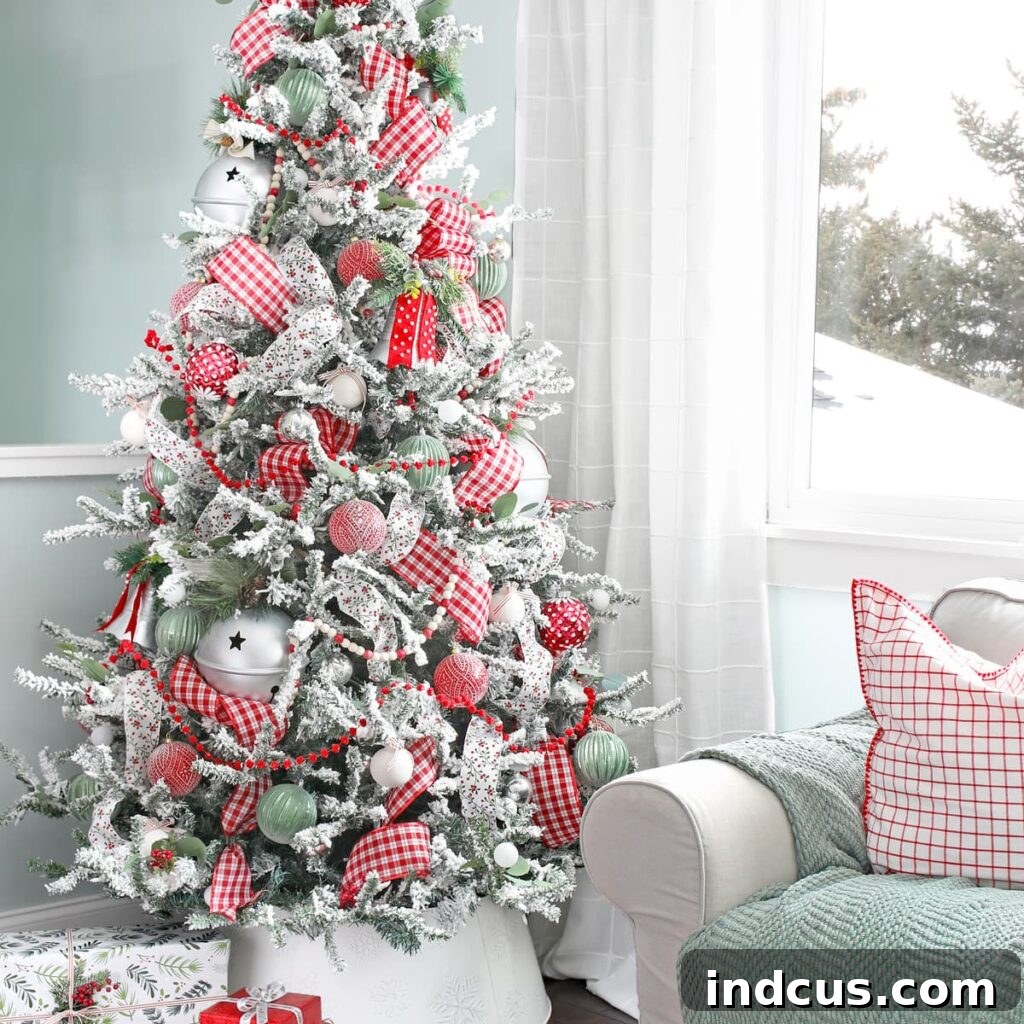
For those curious, the magnificent tree featured in our examples is a 7.5-foot flocked white spruce, adorned with 700 warm white lights. We particularly love its natural, varied branch lengths, which lend it a less rigid, more organic silhouette compared to a perfectly triangular shape. This natural variance adds to its charm and provides excellent opportunities for creative decorating. You can find a similar flocked white spruce tree via this link.
Step 1: Master the Art of Garland Placement
Garland serves as a foundational layer, adding texture and depth deep within your tree’s branches. Whether you opt for classic beaded strands, playful pom-pom garlands, natural popcorn strings, elegant fabric ribbons, or rustic pinecone chains, this is your very first decorating step. A common mistake is to wrap garland in a continuous spiral, which can often create a “strangled” appearance and make the tree look constrained. Instead, we advocate for a more organic, zig-zag pattern.
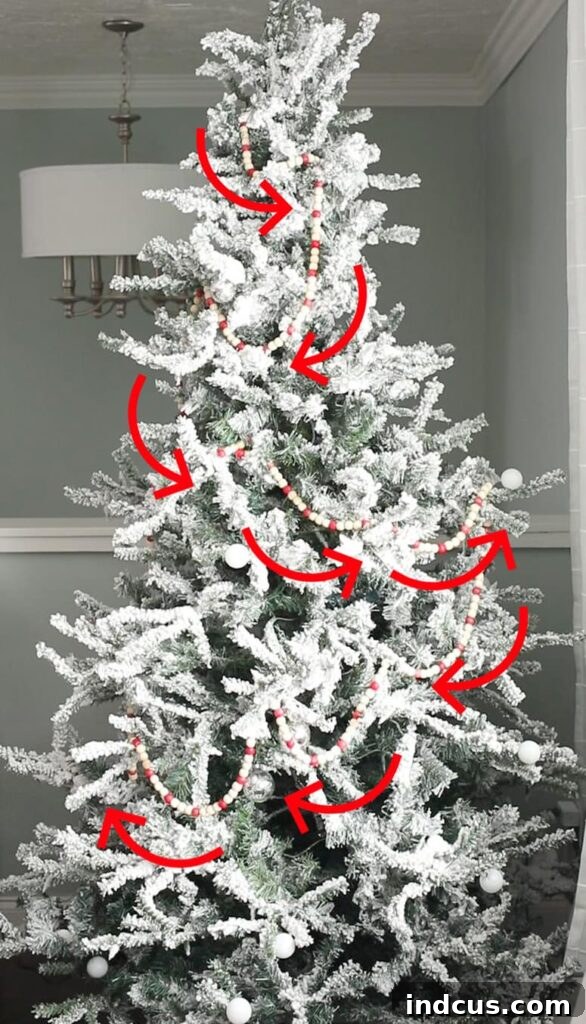
To achieve this, take a section of garland and drape it across a portion of your tree, tucking it into the branches at various points to create soft, undulating waves. Instead of wrapping it around the entire tree in one go, work in vertical or diagonal sections, moving around the tree as you complete each area. This method prevents tangles, provides better coverage, and allows the garland to nestle more deeply into the tree, creating a rich, multi-dimensional effect. Consider using different types of garland – a heavier, textured garland can go deeper, while lighter, more delicate strands can sit closer to the surface, adding layers of interest.
Note on exceptions: While this order is a general rule, design is about creativity. If a particular garland is meant to be a prominent feature, almost an ornament itself, you might choose to add it later in the process. However, for most garlands designed to fill the tree, placing them first ensures they become an integral part of the tree’s overall fullness and depth.
Step 2: Elegantly Incorporate Ribbon for Flourish and Volume
Adding ribbon is often cited as the most challenging step in tree decorating, and we understand why! Many attempts result in stiff, linear lines that can make the tree look stiff or, as commonly described, “strangled.” The secret to achieving a flowing, professional look lies in abandoning the idea of wrapping one continuous, giant ribbon around the tree. This method not only looks unnatural but is also incredibly difficult to execute gracefully.
Instead, embrace a more strategic approach by cutting your ribbon into various lengths and employing several techniques to integrate it artfully. This allows for controlled placement, creating varied textures and depths that enhance the tree’s visual appeal. Here are seven distinct methods we love for adding ribbon to a Christmas tree:
- Single Loop: Cut an 18-inch piece of ribbon. Tuck one end deep into a tree branch, allowing the ribbon to form a graceful loop before tucking the other end into an adjacent branch. This creates soft, individual pockets of ribbon throughout the tree.
- Twist & Tuck: For this technique, use a longer piece of ribbon, perhaps 3 to 5 feet. Begin by tucking one end into a branch. Loop the ribbon to another branch, then twist the ribbon a full 360 degrees before tucking that twisted section into a nearby branch. Continue this pattern of looping, twisting, and tucking, creating a serpentine flow. This method adds dynamic movement and a more complex layered look. Observe the white ribbon in the photo for a clear example of three consecutive loops.
- Faux Bow: Achieve the look of an elaborate bow without the fuss. Form two or three loops of ribbon, leaving a short tail on one end. Secure these layers together with a staple or floral wire. Gently “smoosh” this creation into a gap in the Christmas tree, then fluff out the loops and tail. The result is a charming, full-bodied bow that adds instant elegance.
- Single Loop with Tail: Similar to the Single Loop, but with an added flourish. Cut a piece of ribbon about 24 inches long. Create your loop, tucking both ends into branches, but intentionally leave one end extending outward as a decorative tail. This variation adds playful charm and visual interest.
- Florist Wire Twist: When stubborn ribbon refuses to cooperate, florist wire is your secret weapon. As detailed in our garland decorating tutorial, this method works wonders for trees too. Tie a piece of florist wire securely around the center of a ribbon segment. Use the wire to attach the ribbon firmly to a tree branch, then gently tuck the two loose ribbon ends into other branches. This technique is especially useful for maintaining fluffy loops and tails, as seen in method number 4.
- Droopy Bows: Perfect for adding a soft, elegant touch, especially with non-wired ribbons. Tie a classic bow with gracefully long tails. You can either gently perch it atop the tip of a sturdy tree branch or, for added security, slip a piece of floral wire through the back of the knot and wire the bow into place. This look is particularly stunning with velvet, satin, or grosgrain ribbons, which drape beautifully and offer a luxurious feel.
- The Curly Q: Inject a playful, whimsical element with the Curly Q. Implement either the Twist & Tuck or Single Loop method, but before tucking the ribbon into the branch, twirl it tightly around your finger or a pencil. This creates a delightful spiral or curl, adding unique texture and movement to your tree.
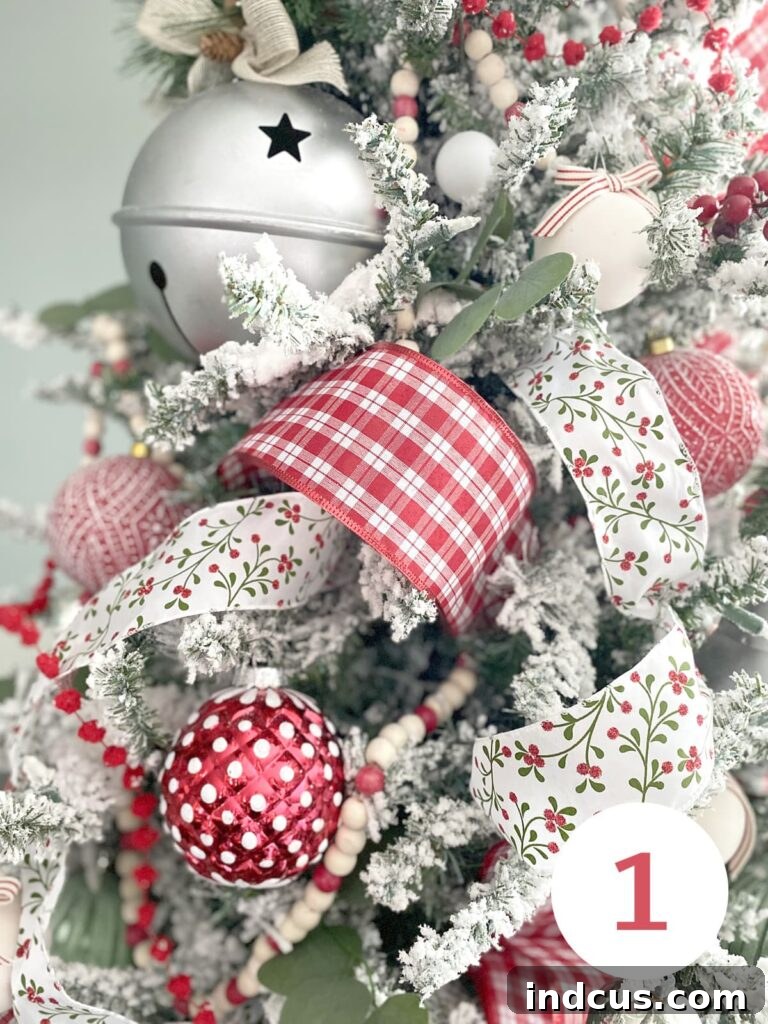
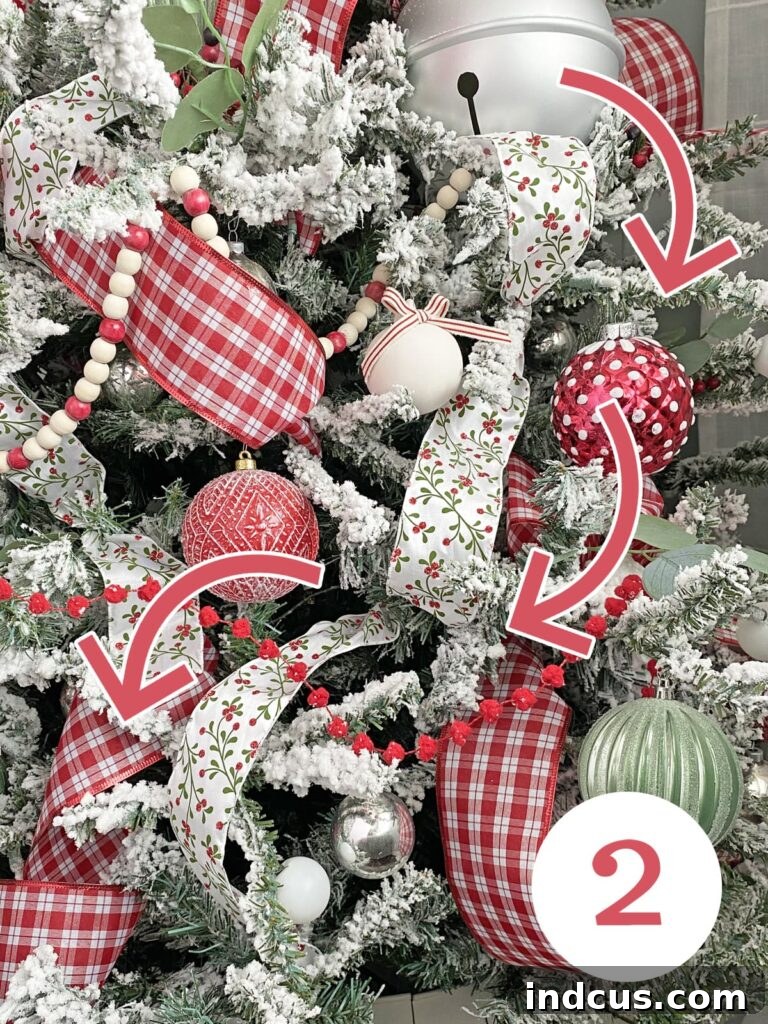
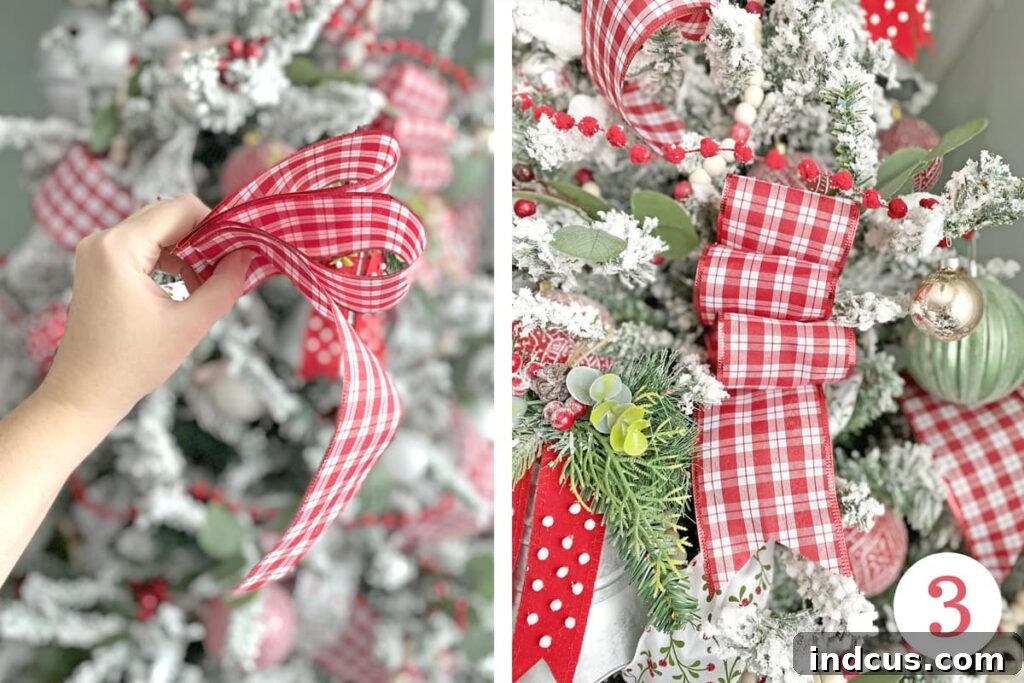
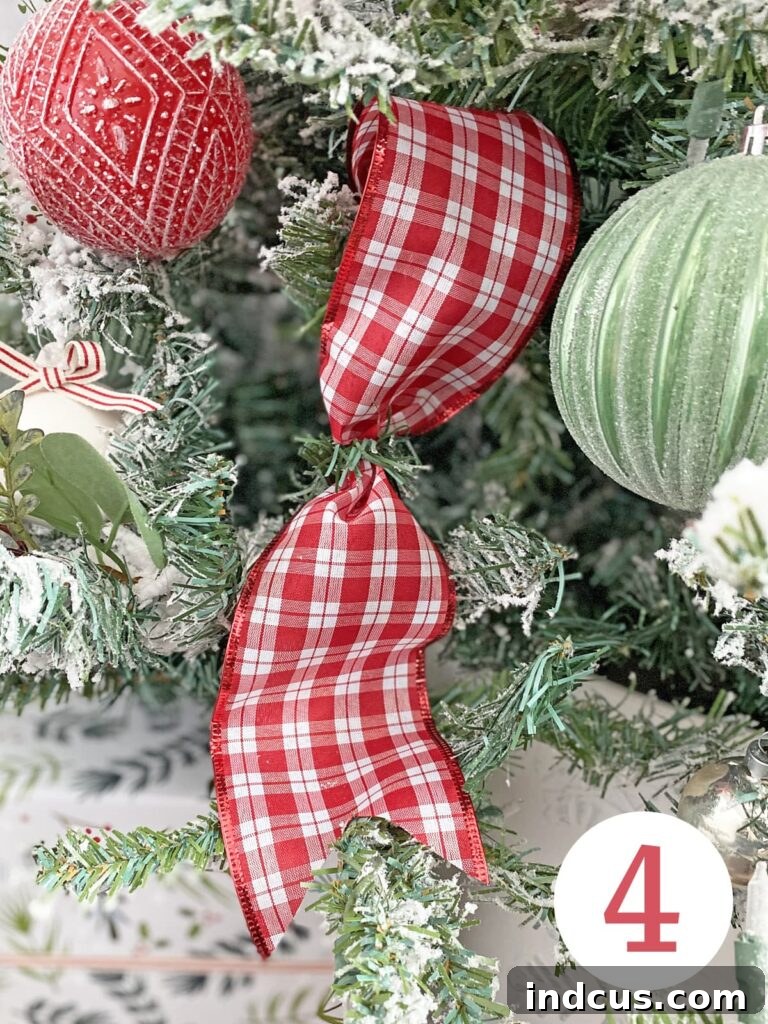
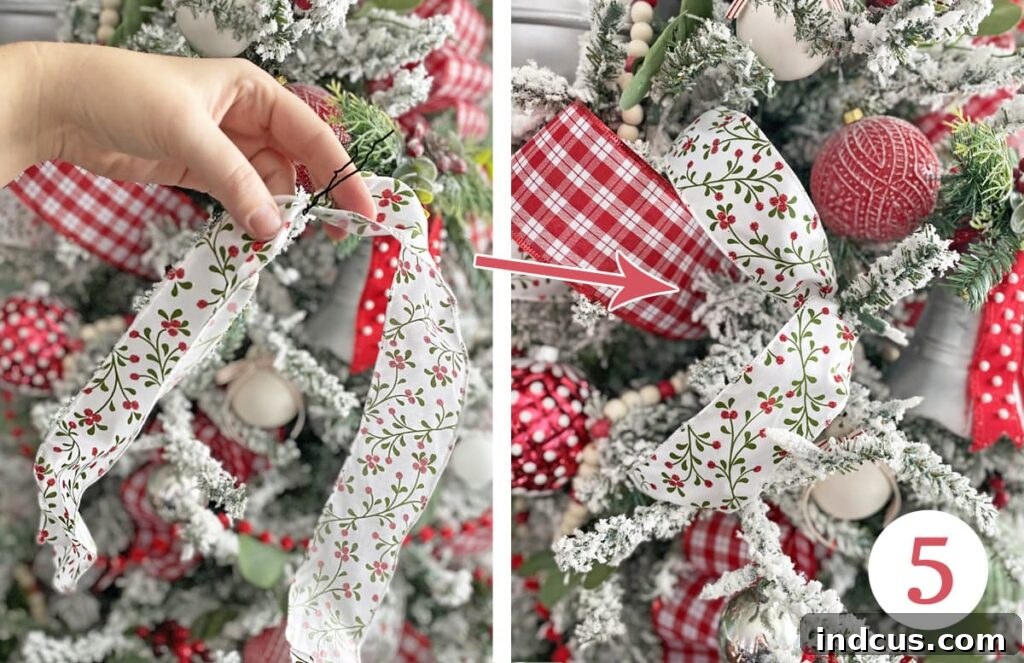
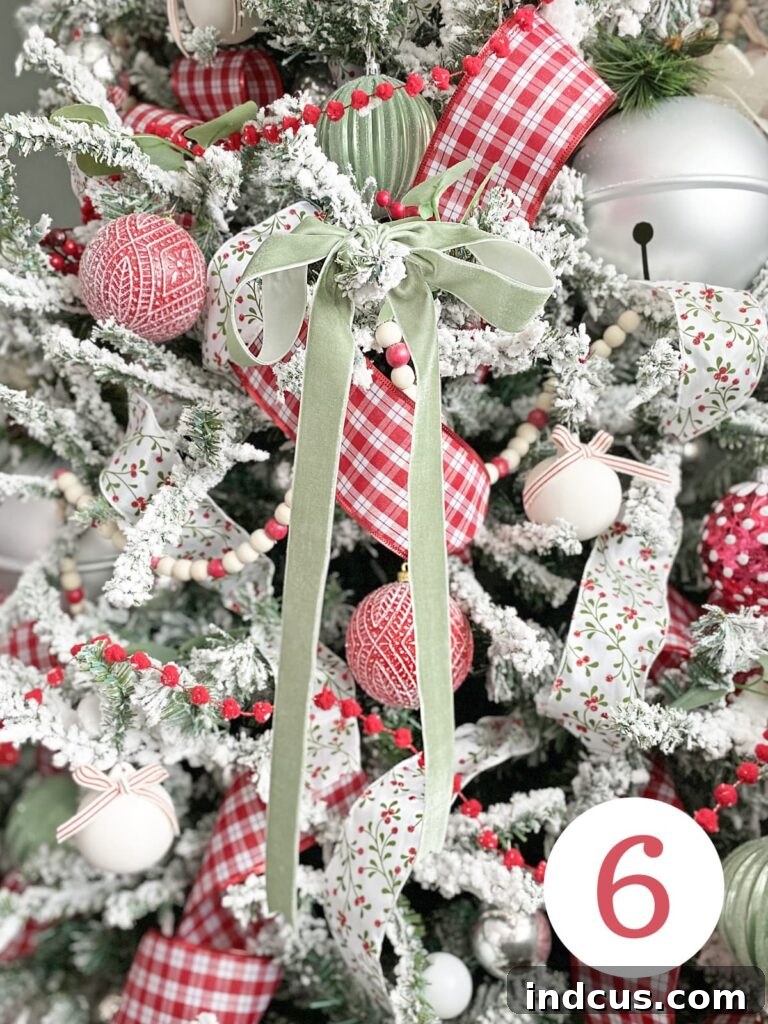
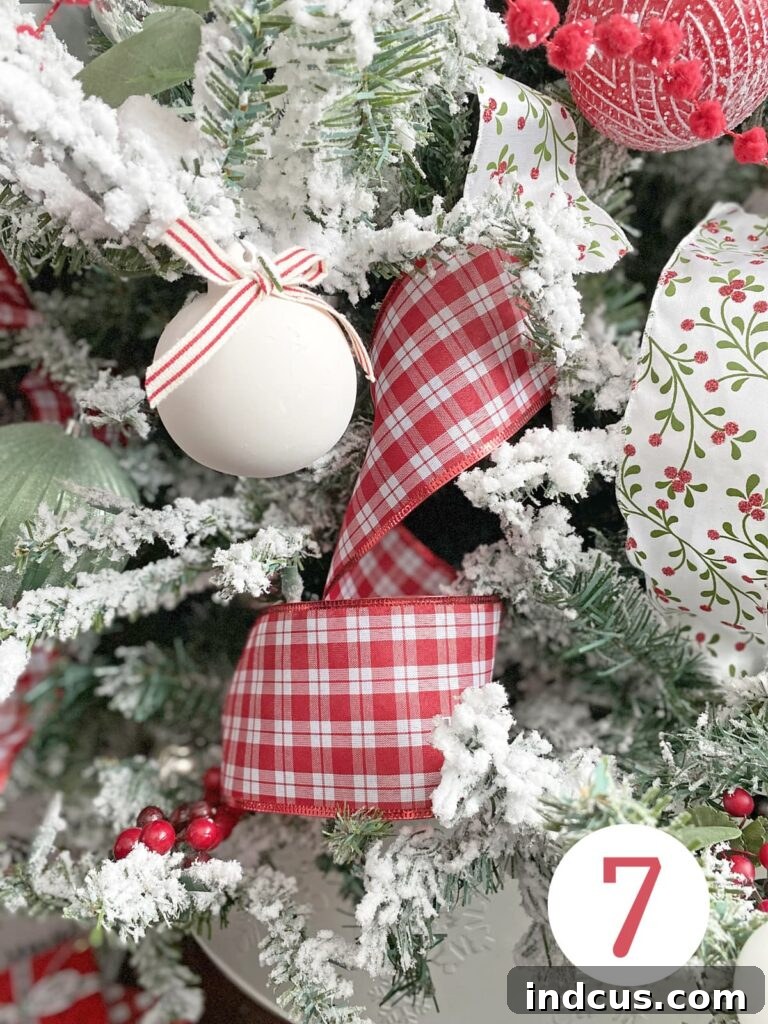
A visual demonstration of all these ribbon techniques is available in the video tutorial at the conclusion of this guide, providing invaluable clarity.
Now, let’s discuss the overarching strategy for ribbon placement. The goal is to create a dynamic, varied arrangement that looks like “organized randomness.” This means intentionally staggering heights, varying directions, and mixing techniques to ensure no single ribbon element dominates or creates harsh lines. The visual effect should be one of organic flow and abundant texture. You can see this general shape illustrated below:
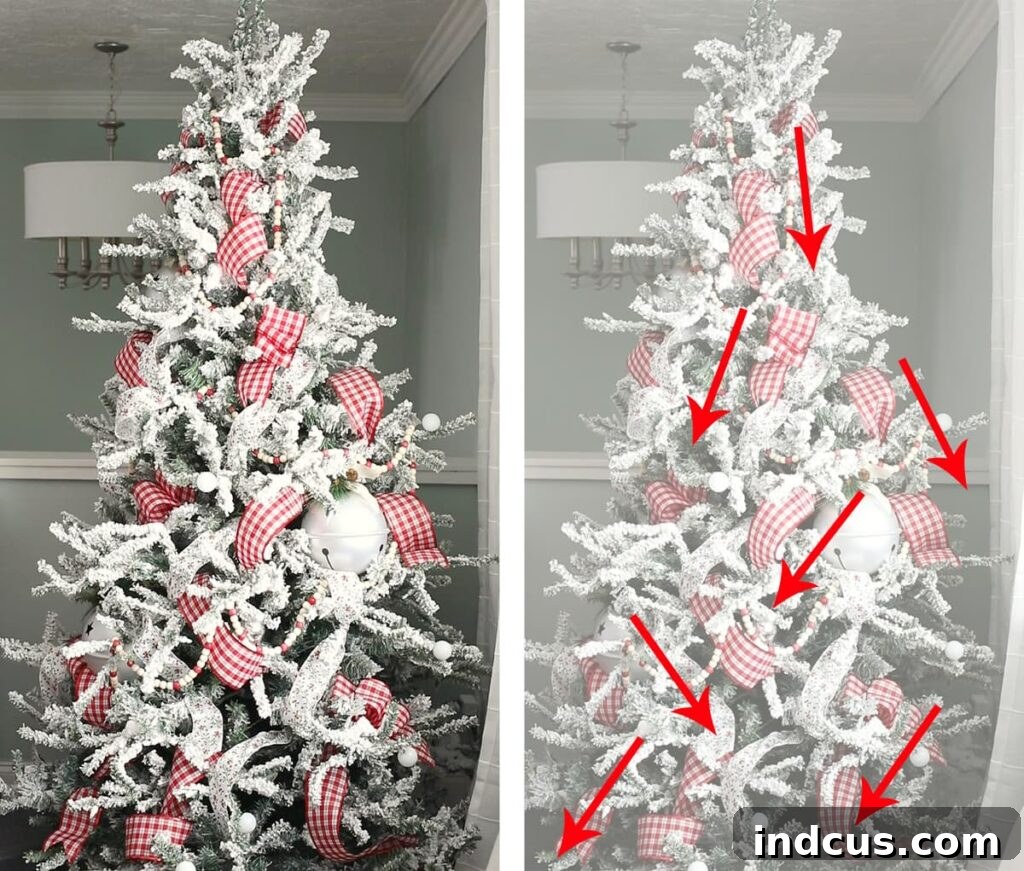
On the example tree, we’ve utilized a combination of all the methods listed above, excluding the droopy bows. This blend of techniques contributes to the rich, layered appearance. Remember, if you prefer a more uniform look where all your ribbon flows in a singular direction, these methods can still be adapted to achieve that equally charming aesthetic.
Helpful Ribbon Tips for a Flawless Tree
- Prioritize Bold Ribbons: Always begin with your most dominant ribbon – typically the thickest, widest, or brightest color. Since this ribbon will capture the most attention, placing it first allows you to position it perfectly, ensuring it forms the backbone of your ribbon design. In our example, the thick, red gingham ribbon was placed first due to its eye-catching nature.
- Embrace Wired Ribbon: For nearly all the techniques described above (with the exception of droopy bows), wired ribbon is your best friend. Its pliable edges allow you to mold and hold perfect curves, loops, and twists, ensuring your ribbon maintains its shape and volume throughout the holiday season.
- Stock Up Generously: You will almost always need more ribbon than you initially anticipate. We recommend purchasing at least two large rolls of each ribbon type you plan to use. If your tree is positioned against a wall or in a corner, you might get away with slightly less, but it’s always better to have extra than to run out mid-decoration.
- Layer for Pizazz and Savings: Incorporating two or more contrasting ribbons adds significant visual interest and depth. Beyond aesthetics, ribbon is often one of the most cost-effective decorating elements. By filling out your tree with varied ribbons, you can create a fuller, more luxurious look without needing to invest in as many expensive ornaments, thereby saving money.
- Let Ribbon Dictate Its Flow: Most ribbons, especially wired varieties that have been tightly rolled on spools, have a natural tendency to curl or move in a particular way. Instead of fighting it, work with the ribbon’s inherent direction. This “go with the flow” approach will result in a more natural, graceful, and beautifully draped appearance.
Step 3: Strategically Place Your Large Ornaments
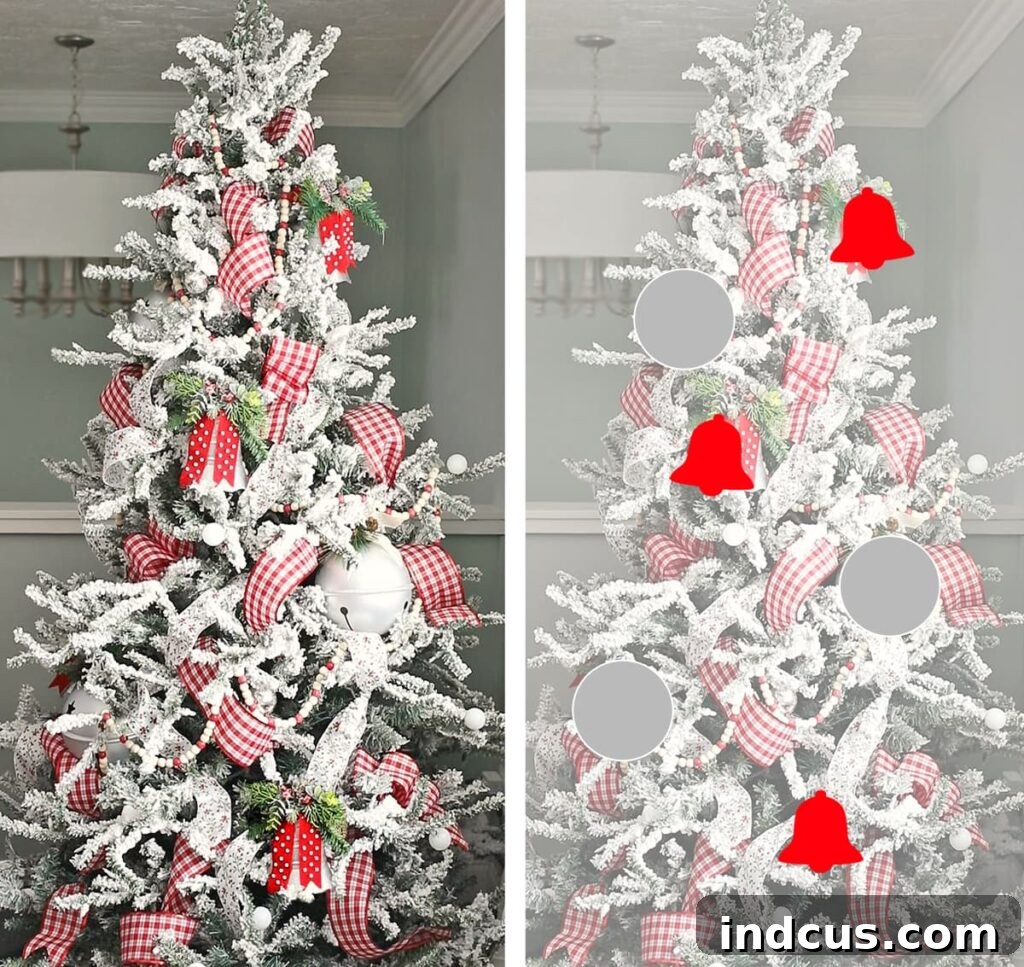
With your garlands and ribbons gracefully in place, it’s time to introduce your largest ornaments. These substantial pieces serve as anchors, creating visual weight and drawing the eye. On our tree, we feature striking giant jingle bells and charming smaller church bells. With only three of each, strategic placement is key. We aim to distribute them in a subtle triangle pattern across the tree, varying their heights to prevent a static look. Crucially, these large ornaments are nestled deep within the branches, filling natural gaps and adding a robust layer of dimension rather than merely hanging on the surface. Look for voids that your largest pieces can naturally fill, enhancing the tree’s perceived fullness.
Step 4: Create Depth and Sparkle with Medium and Small Ornaments
This is the stage where your Christmas tree truly comes alive, gaining its vibrant character and sparkling charm. We recommend using a diverse collection of medium and small ornaments to infuse your tree with a rich palette of color, texture, and shimmer. Our tree incorporates classic red ornaments from Walmart, verdant green ones from Hobby Lobby, and an assortment of unique silver ornaments discovered at thrift stores. This demonstrates that stunning decor doesn’t require a hefty budget; beautiful pieces can be found affordably, especially during off-peak seasons.
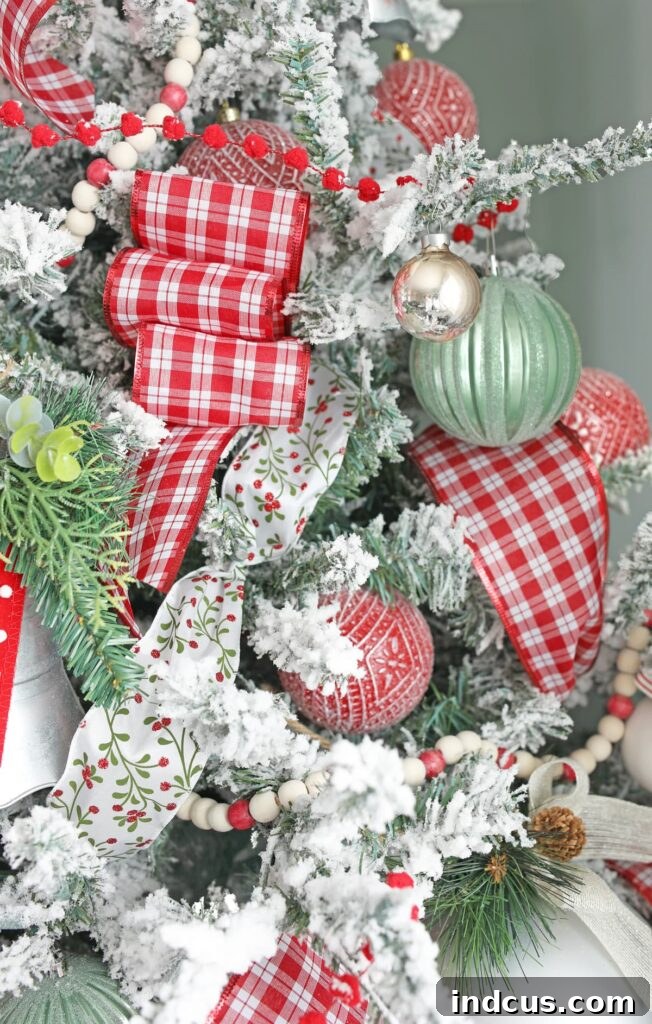
The key to making these ornaments shine is to hang them at varying depths within the tree. Place some smaller ornaments delicately on the very tips of the branches to catch the light and add sparkle. Conversely, push other ornaments, particularly reflective or mirrored ones, deep into the tree’s interior. These hidden gems will bounce light from within, creating incredible depth, visual intrigue, and a magical glow that makes the tree appear much fuller and more enchanting.
While our example tree primarily features traditional ball ornaments alongside the large bells, consider diversifying your collection with different shapes. Incorporating stars, miniature houses, delicate snowflakes, or whimsical figures can add an extra layer of narrative and unique personality to your tree, moving beyond a uniform look. A thoughtful mix of shapes and sizes creates a more captivating and memorable display.
Step 5: Infuse Organic Beauty with Natural Elements
To truly elevate your Christmas tree beyond traditional decorations, introduce natural elements. These organic touches bring an authentic, living quality to your display, echoing the beauty of the outdoors. We love to tuck in berry sprigs and soft eucalyptus leaves, but the possibilities are endless. Observing high-end Christmas boutiques reveals their masterful use of mixed greenery, a technique you can easily replicate.
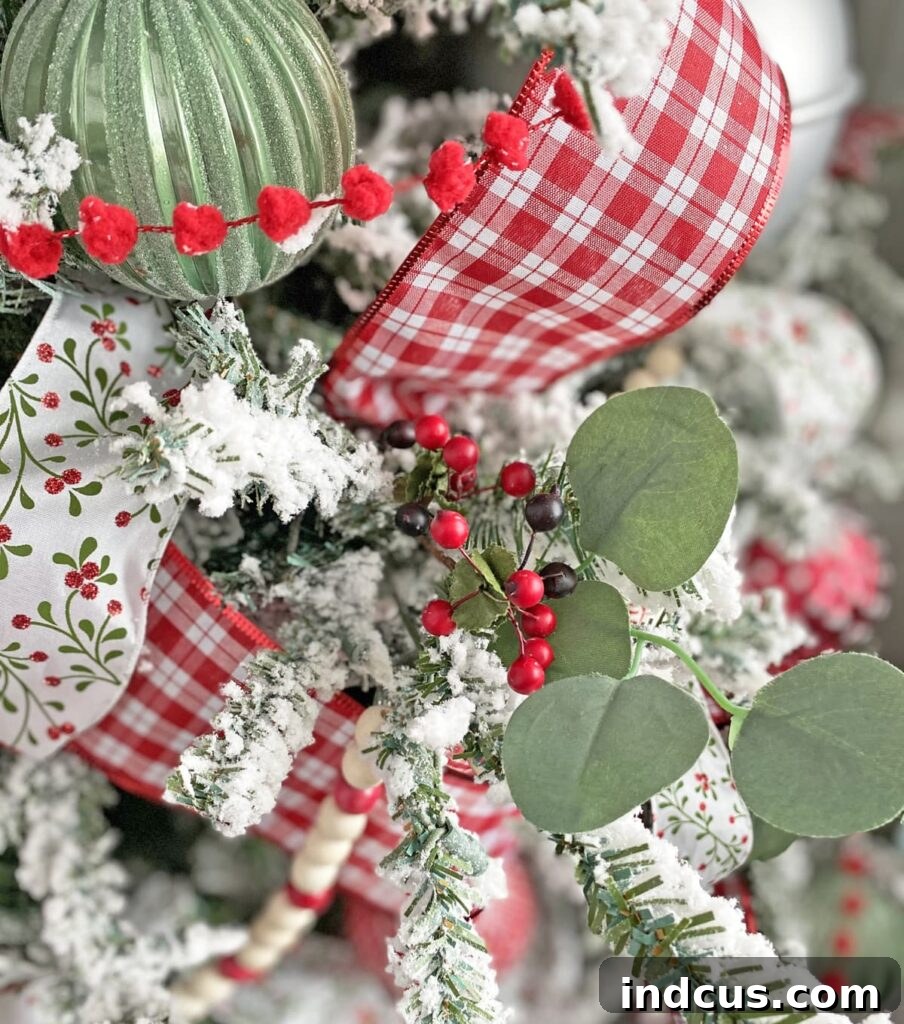
Consider adding sprigs of cedar, magnolia leaves, olive branches, holly, lamb’s ear for softness, delicate maidenhair fern, dusty miller for a silvery touch, or fragrant juniper. Beyond store-bought options, foraging your yard for interesting twigs, dried branches, or evergreen clippings can add a uniquely rustic and personal touch without any cost. These natural textures and varied greens provide striking contrast to the manufactured ornaments, making your tree appear more sophisticated, layered, and utterly captivating.
Step 6: The Grand Finale – Finishing Touches
No Christmas tree is complete without its crowning glory and foundational elegance. The final step involves adding your chosen tree topper – whether it’s a traditional star, an angel, a whimsical bow, or a unique sculptural piece – and ensuring a beautiful tree skirt or collar is in place at its base. These elements frame your masterpiece, bringing visual closure and a polished finish.
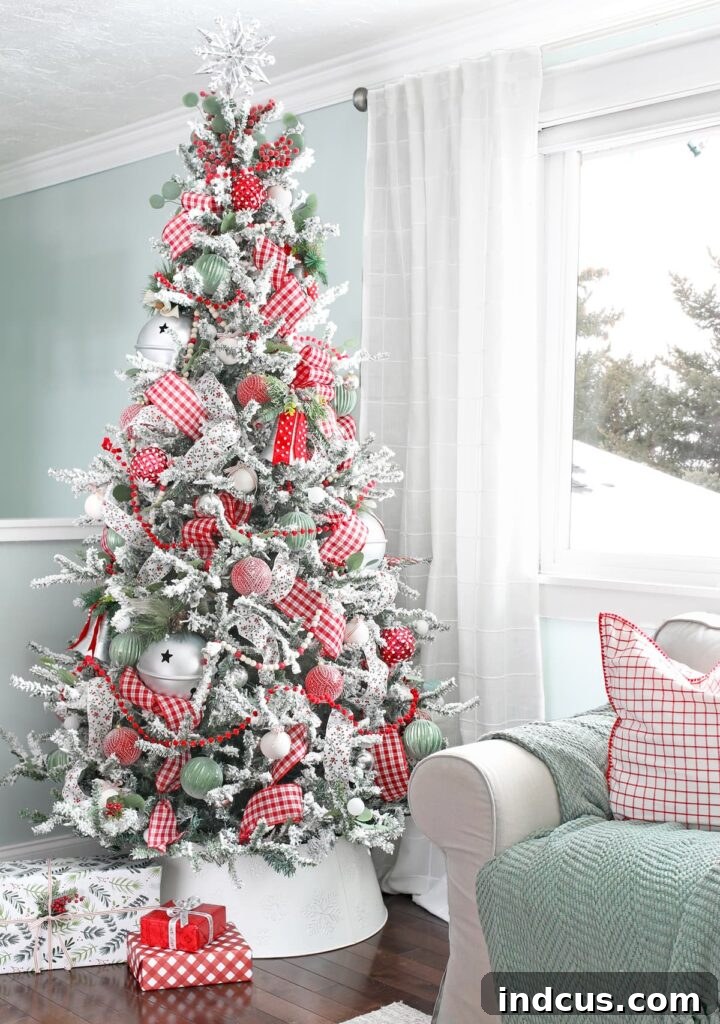
We highly recommend waiting to illuminate your tree until every decoration is perfectly placed, all boxes are cleared, and any loose flocking or debris is tidied up. Turning on the lights then becomes a truly magical moment – your little reward for all your hard work, transforming the room with a sudden, enchanting glow. And for those who truly embrace “extra” (which we absolutely adore here!), consider wrapping all your gifts in coordinating paper and placing them beneath the tree. This final touch creates a cohesive, breathtaking tableau that extends the tree’s beauty into the entire room.
More Essential Christmas Tree Decorating Tips for a Flawless Display
- Establish a Theme or Color Scheme: A unified vision is paramount for a professional-looking tree. Whether you choose a classic red and green, a sophisticated silver and gold, a rustic woodland theme, or a whimsical candy-land concept, adhering to a defined color scheme or theme will ensure every element works in harmony, creating a cohesive and polished display that tells a story.
- Embrace the “More is More” Philosophy: Do not be afraid to layer! A truly magnificent tree is built up with multiple layers of decorations. Each step in this tutorial adds another dimension, building depth, texture, and visual interest. Continue adding elements until your tree feels abundant and lavish, stepping back frequently to assess the balance.
- Step Back for Perspective: It’s easy to get lost in the details when decorating close-up. Regularly step away from your tree – across the room, or even from another room – to observe it from different angles. This crucial step helps you identify sparse spots, unbalanced sections, or areas that need more attention, allowing you to make adjustments for overall balance and harmony.
- Budget-Friendly Brilliance: A stunning Christmas tree doesn’t have to break the bank. Get creative by foraging natural materials (pinecones, branches, berries), crafting your own unique ornaments, or finding hidden treasures at thrift stores and antique shops, especially during the off-season. Building your collection gradually over years, or simply updating one or two elements annually, is a sustainable and enjoyable way to evolve your tree’s style without replacing everything.
- Add Secondary Lighting: Beyond your primary tree lights, consider incorporating an additional type of illumination to dramatically enhance your tree’s glow and visual interest. Whether it’s delicate mini fairy lights for a subtle twinkle, larger globe bulbs for a bold statement, or even color-changing LED strands, these secondary lights add incredible depth and magic. You might have noticed globe lights in our photos; we have a clever DIY hack for creating them affordably.
Christmas Tree Decorating Video Tutorial
So, what are your thoughts? Did this comprehensive guide spark any new ideas or techniques you’re eager to try this holiday season? We confess, explaining these concepts in words was a significant undertaking, and we now recall why we’ve postponed writing this post for so long! Nevertheless, we sincerely hope you found it incredibly helpful and inspiring. If you utilize these instructions to transform your Christmas tree, we would be absolutely thrilled to see your dazzling results! Please don’t hesitate to send us a picture via email or direct message – we can’t wait to admire your creativity!
A final, heartfelt thought: In our home, we celebrate with two distinct Christmas trees. The beautiful, “fancy” tree detailed in this guide graces our upstairs, admired for its aesthetic perfection. However, downstairs, in our family room, stands a tree that, for us, holds immeasurable value. It’s a treasure trove of memories: handmade ornaments from my grandmother, crafted every year since 1994; unique keepsakes collected from our travels; and the charming, often slightly misshapen, ornaments proudly made by our children, complete with their adorable school pictures. If your tree is a sentimental tapestry of cherished memories, a delightful “hodgepodge” that fills your heart with joy, then rest assured – that is, without a doubt, the very best tree of all.
Merry Christmas and happy crafting to you and yours!