Craft a Whimsical World: Your Guide to Building a Sturdy DIY Duck Tape A-Frame Play Tent
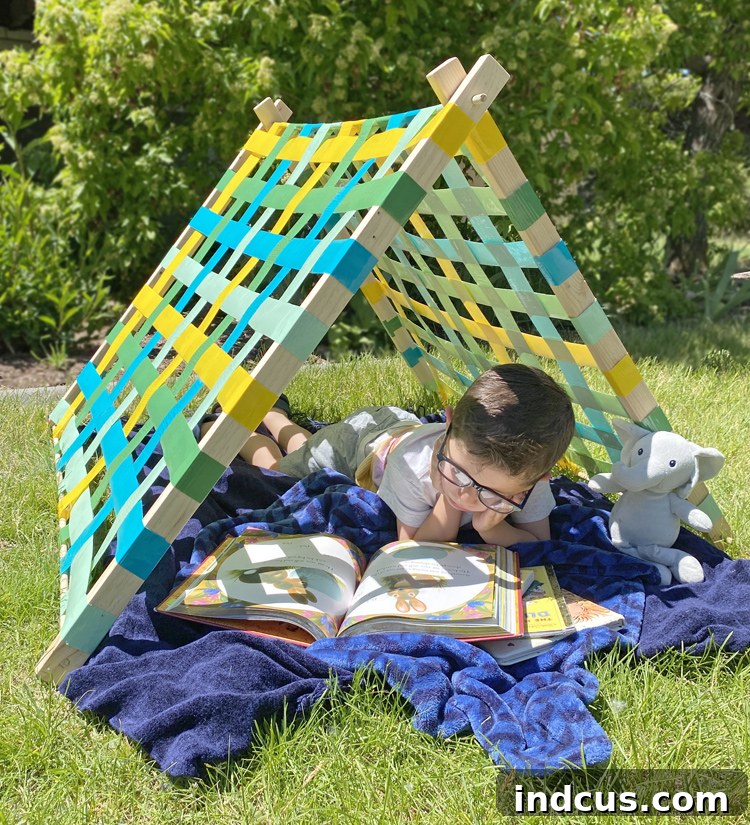
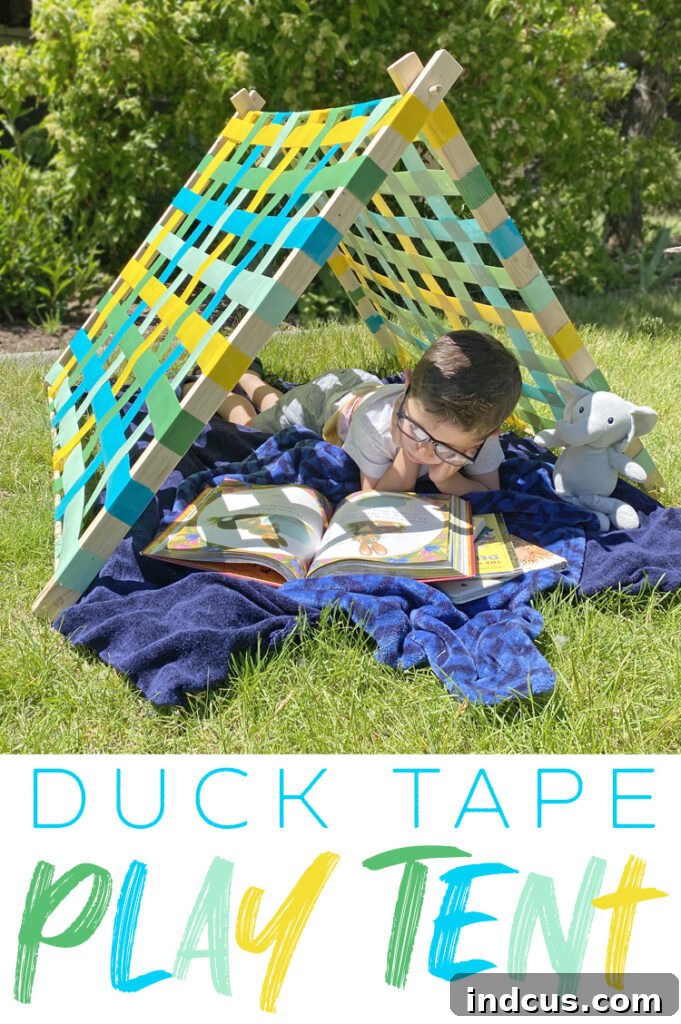
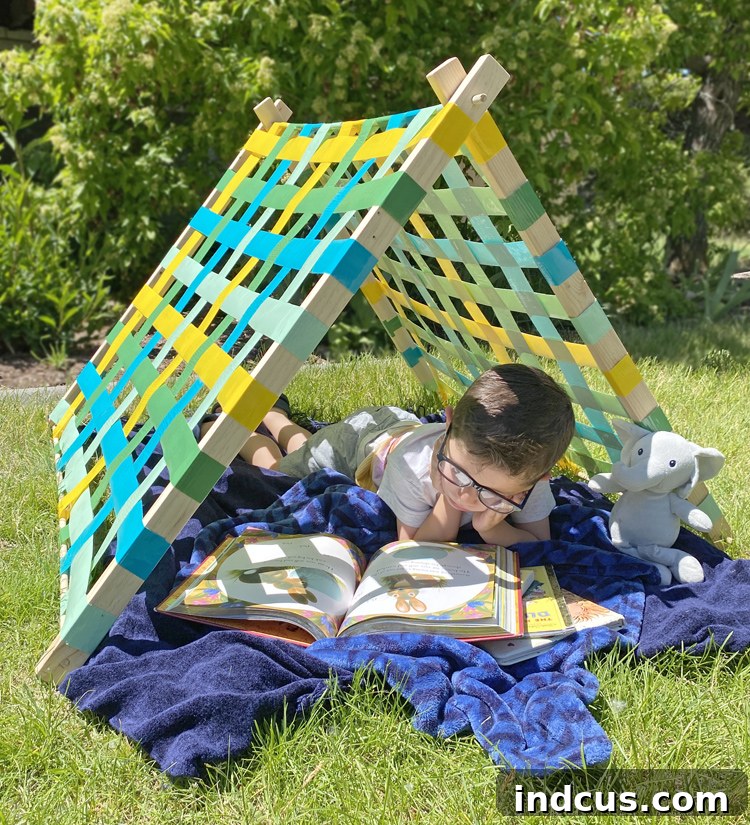
Transform a simple afternoon into an unforgettable adventure for your little ones by crafting a charming and durable A-frame play tent. This comprehensive guide will walk you through creating a unique DIY toddler play tent using an innovative Duck Tape weaving technique. Perfect for fostering imagination, providing a cozy reading nook, or serving as a secret hideaway, this homemade tent is not only incredibly sturdy but also a joy to personalize.
If you’re seeking a creative, budget-friendly project that delivers immense satisfaction, look no further. This Duck Tape play tent is designed to be simple enough for beginners, even those new to basic woodworking, and robust enough to withstand the enthusiastic play of toddlers. Get ready to unleash your inner DIY enthusiast and build a magical space your child will adore!
This post is proudly sponsored by Duck Brand, bringing you innovative craft solutions.
Unleashing Creativity with Duck Tape Weaving: A Unique Approach to Tent Building
The concept of weaving Duck Tape together has long fascinated me, offering a unique texture and robust finish that traditional fabrics often can’t match without specialized sewing skills. For this project, I decided to harness this intriguing technique to construct a playful A-frame tent, perfectly sized for my toddler. The result is a wonderfully cozy spot, ideal for quiet story times or imaginative play sessions. While designed with a toddler in mind, the beauty of this DIY project lies in its complete customizability. Easily adjust the dimensions of the wood pieces to create a larger tent for older children, ensuring years of enjoyment.
Beyond its structural integrity, Duck Tape offers an incredible palette for personalization. With an expansive array of colors, patterns, and even glitter options, your creativity can truly shine. Choose vibrant hues to create a rainbow tent, opt for a sophisticated single color, or mix and match patterns for a truly unique aesthetic. The possibilities are endless, making each tent a reflection of your child’s personality and your crafting flair.
Perhaps the most appealing aspect of this project for many is its accessibility. If the idea of woodworking feels daunting, or if you’re entirely new to power tools, this project is an excellent starting point. The steps are straightforward, requiring only basic cuts and drilling, and I can attest to its simplicity—I completed the entire build without any assistance, feeling a real sense of accomplishment. If I can do it, so can you! This project is a fantastic confidence booster for aspiring DIYers, proving that impressive creations are within reach for everyone.
Essential Materials for Your Duck Tape Play Tent
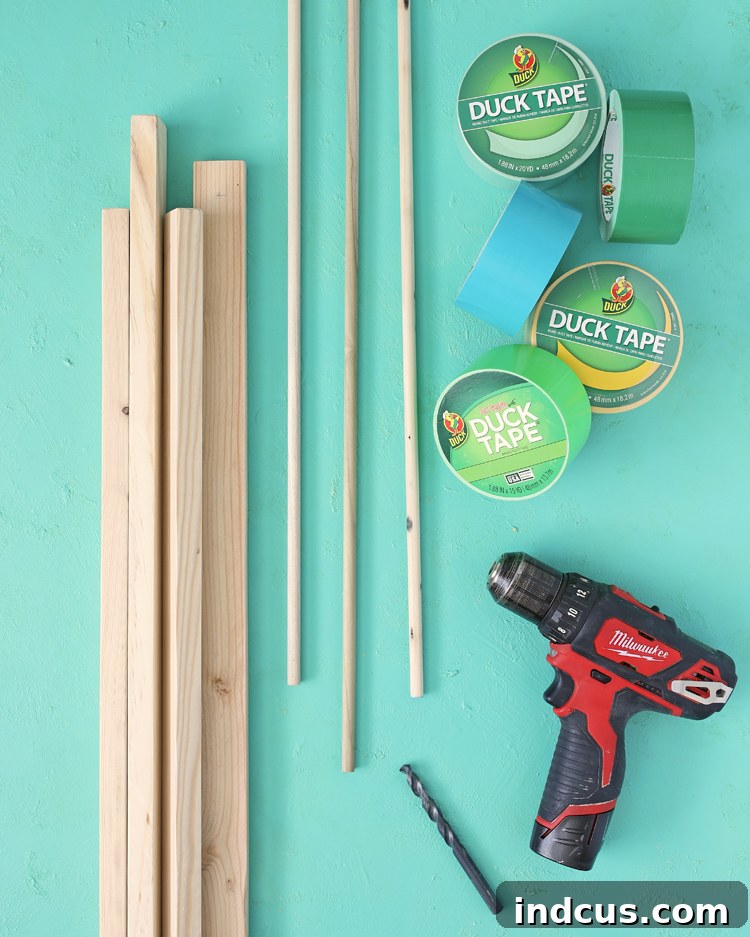
Gathering the right materials is the first step towards a successful DIY project. Here’s a detailed list of what you’ll need to construct your robust and charming play tent:
- Wood Boards: (4 Count) 1″x4″ Wood Boards, each cut to 33″ long. These will form the main legs of your A-frame. Opt for straight, knot-free pieces for the best structural integrity.
- Wood Dowels: (3 Count) 3′ Wood Dowels, 3/8″ thickness. These dowels will connect the wood boards, creating the tent’s frame.
- Drill Bit & Power Drill: A 3/8″ drill bit is crucial for creating holes that perfectly accommodate your dowels. Ensure your power drill is fully charged and you’re familiar with its safe operation.
- Duck Tape, Assorted Colors: This is the star of our show! You’ll need several rolls in your chosen colors and patterns. The more variety, the more vibrant your woven tent will be.
- EasyLiner Adhesive Laminate: This ingenious material is key to simplifying the Duck Tape weaving process, providing a non-stick backing that makes handling the tape strips much easier.
Important Note on Dowels: Reflecting on the project, I would strongly recommend using thicker dowels if you embark on this project. The 3/8″ dowels I initially used were adequate but prone to slight warping and felt less sturdy than desired. Opting for a 1/2″ or even 3/4″ thickness would significantly enhance the overall stability and longevity of your tent frame, especially for active play. Remember, if you choose thicker dowels, ensure you also acquire a drill bit of the corresponding size for a snug and secure fit. A sturdy frame is paramount for a safe and durable play space.
Step-by-Step Instructions: Crafting Your Duck Tape A-Frame Tent
Step 1: Precision Cutting Your Wood Boards for the Tent Frame
Begin by preparing your 1″x4″ wood boards. If they are not already, cut each of the four boards down to a precise length of 33 inches. Accuracy here is vital for a symmetrical and well-balanced tent structure. Use a tape measure and a straight edge to mark your cuts, and employ a miter saw or a circular saw for clean, straight edges. Always prioritize safety when operating power tools: wear safety glasses and ensure your workspace is clear and stable.
Step 2: Marking and Drilling Holes for Frame Assembly
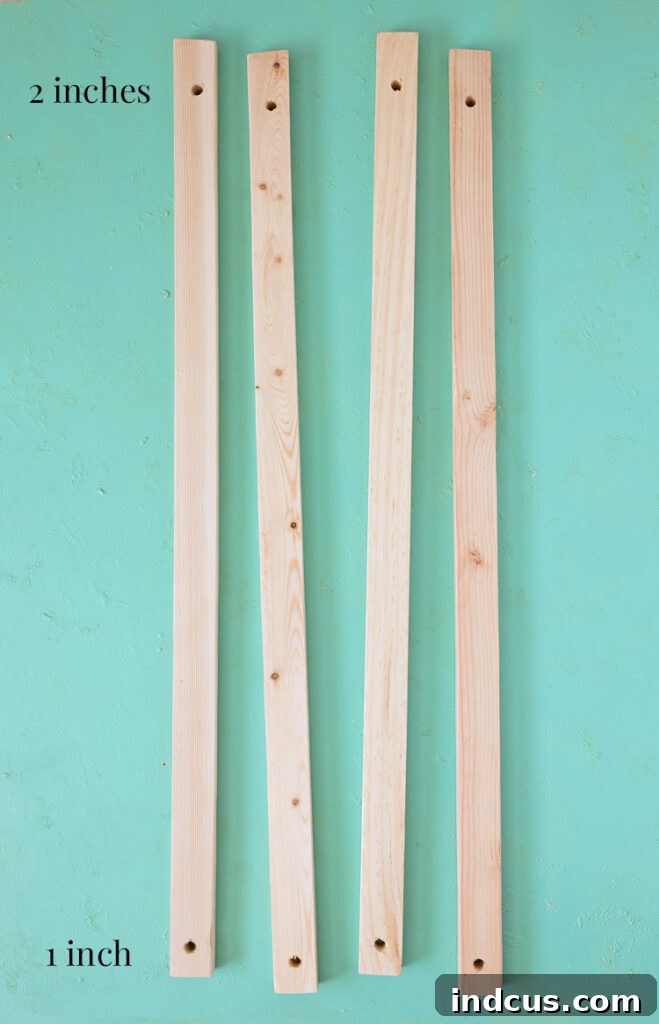
With your boards cut, it’s time to mark the drilling points for the dowels. On each of the four 1″x4″ boards, measure and mark two inches in from one end – this will be the top of your tent. On the opposite end, measure and mark one inch in – this will form the bottom of the tent. These specific measurements ensure the A-frame can pivot correctly at the top and provides stability at the base. Carefully, using your power drill and the 3/8″ drill bit (or your chosen dowel size), drill a clean hole at each of these marks. Ensure the holes are straight and smooth to allow the dowels to slide through easily. It’s helpful to place a scrap piece of wood underneath your board while drilling to prevent splintering.
Step 3: Assembling the Pivoting Top A-Frame Structure
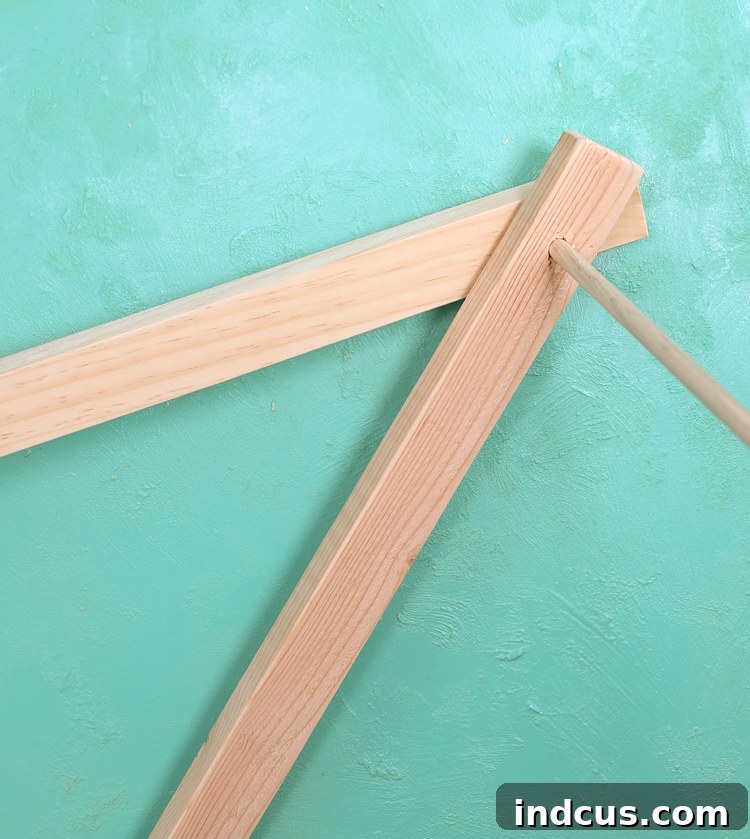
Now, let’s bring the frame to life. Take one of your 3-foot wood dowels. Slip this dowel through the two-inch mark hole of one wood board, and then immediately through the two-inch mark hole of another board. This clever design creates the characteristic ‘A’ shape of the tent and allows the two boards to pivot at the top, enabling the frame to fold flat for easy storage when not in use. Repeat this process with the remaining two boards and a second dowel. The dowel essentially becomes the top ridge line, connecting two sets of tent legs. Ensure the fit is snug but allows for smooth movement.
Step 4: Securing the Base and Stabilizing the Frame
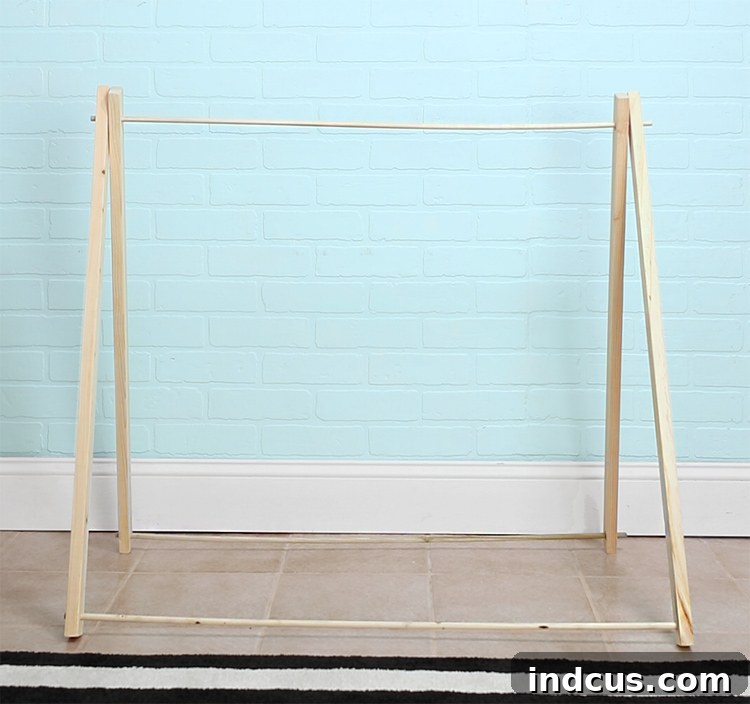
With the top pivots in place, it’s time to secure the base of your A-frame. Take your final 3-foot dowel and attach it to the bottom of the tent legs. This involves slipping the dowel through the holes drilled one inch from the bottom of each leg. This bottom dowel serves a crucial function: it not only provides stability to the entire structure, preventing the legs from splaying outwards, but also creates the necessary tension points for attaching and weaving your Duck Tape panels. Once assembled, gently spread the legs until the frame stands upright and stable, forming the complete skeleton of your play tent.
Step 5: Preparing Your Duck Tape Strips – The Game-Changing Technique
This step is where the magic of Duck Tape weaving truly begins, and it comes with a valuable tip born from experience! You’ll need to cut all your Duck Tape pieces to specific lengths. For the vertical elements, cut 16 strips, each 36 inches long. For the horizontal weaving elements, cut another 16 strips, each 40 inches long. These lengths ensure ample material for wrapping around the dowels and weaving across the frame with some overlap for secure attachment.
My original plan involved sticking two long strips of Duck Tape together, sticky sides facing inwards, to create double-sided, non-stick strips. However, this proved incredibly challenging in practice. It was nearly impossible to align the strips perfectly, leading to frustrating bunching and crooked lines. I almost abandoned the project entirely!
Then, a brilliant solution emerged: instead of trying to stick Duck Tape to itself, adhere the sticky side of your Duck Tape strips directly to the sticky side of the EasyLiner Adhesive Laminate. Once the tape is firmly adhered, simply trim off the excess laminate around the edges of the Duck Tape strip. This method works like a dream! The EasyLiner laminate provides a stable, non-stick backing, making the Duck Tape strips significantly easier to handle, cut, and weave without curling or sticking to themselves. This technique transforms a potentially frustrating step into a smooth and enjoyable process, ensuring beautifully finished tape strips ready for weaving.
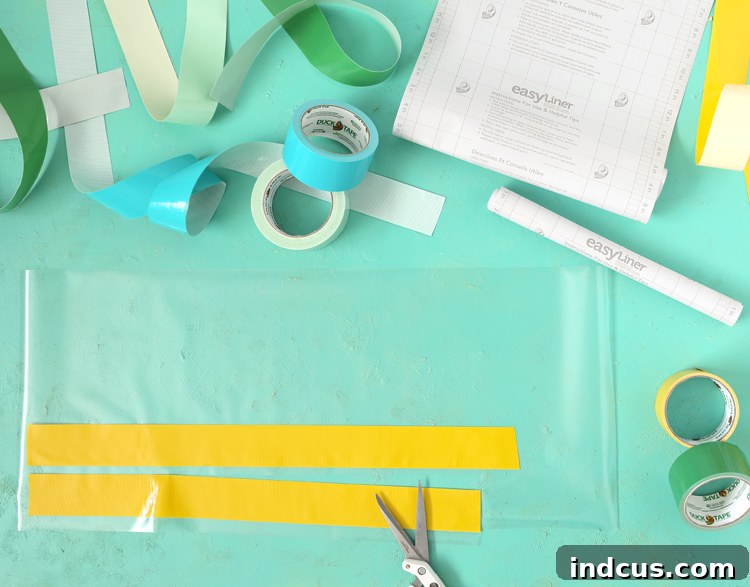
Step 6: Installing the Vertical Duck Tape Panels on the Frame
Now it’s time to begin forming the walls of your tent. Take your prepared 36-inch vertical Duck Tape strips. For each strip, loop one end around the top dowel (the one connecting the two top points of your A-frame) and the other end around a bottom dowel (the one at the base of the tent legs). Secure each end firmly in place with a small, additional piece of Duck Tape, ensuring the loop is tight and the strip is taut. You will use eight vertical strips on each side of the tent. To create a visually appealing and structurally sound weave, I recommend staggering the pieces along the top edge. This means alternating where each vertical strip starts, ensuring an even distribution and creating the foundation for your intricate woven design. Maintain consistent spacing between each vertical strip to ensure a neat appearance for the subsequent weaving.
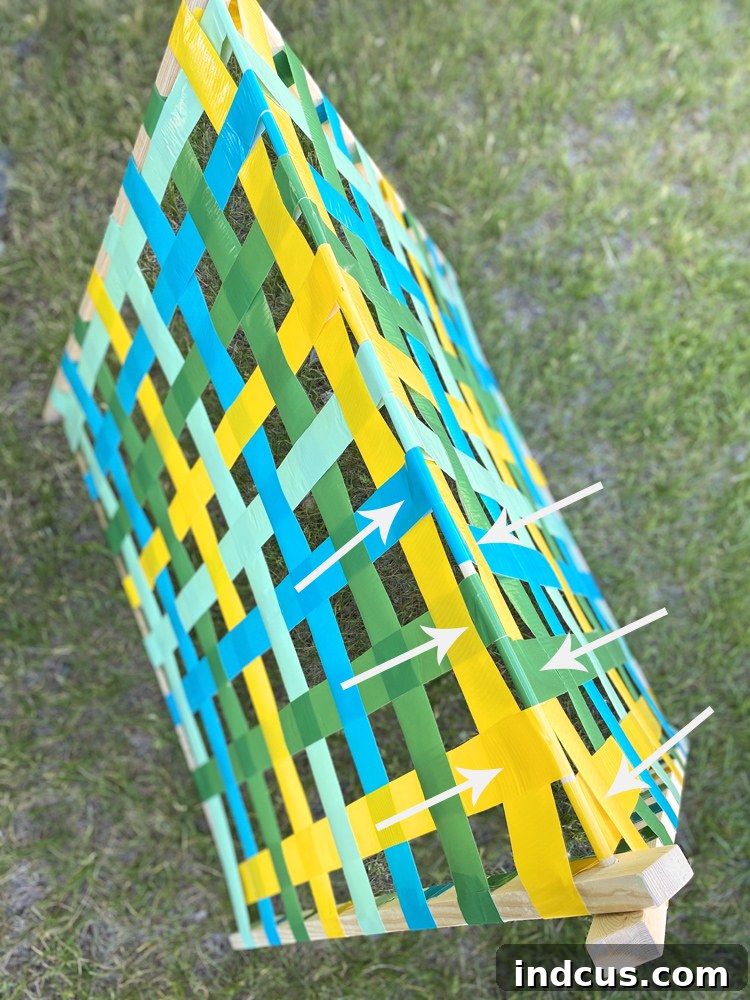
Step 7: The Art of Weaving: Attaching Horizontal Duck Tape Strips
This is where your play tent truly takes shape! Take one of your 40-inch horizontal Duck Tape strips. Attach one end securely to one of the vertical wood boards (the tent leg). Now, begin weaving the strip through the vertical Duck Tape pieces you just installed. For your first horizontal strip, follow an “over, under, over, under” pattern, alternating as you move across the tent opening. Once you reach the opposite vertical wood board, secure the other end of the horizontal strip firmly to it with another small piece of Duck Tape, ensuring the strip is taut and evenly spaced.
For the next horizontal strip, you must reverse the weaving pattern: “under, over, under, over.” This alternating pattern is crucial for creating a true, strong, and visually appealing weave, much like traditional fabric weaving. Continue this process, alternating the “over/under” starting pattern with each new horizontal strip. To ensure perfectly even spacing between your horizontal strips, I found it incredibly helpful to use a scrap piece of Duck Tape as a spacer. This simple trick guarantees uniformity and a professional finish to your woven panels. Maintain a consistent tension as you weave to prevent sagging and create a neat, robust surface. The completed weave will create a vibrant, durable, and surprisingly strong wall for your toddler’s new play space!
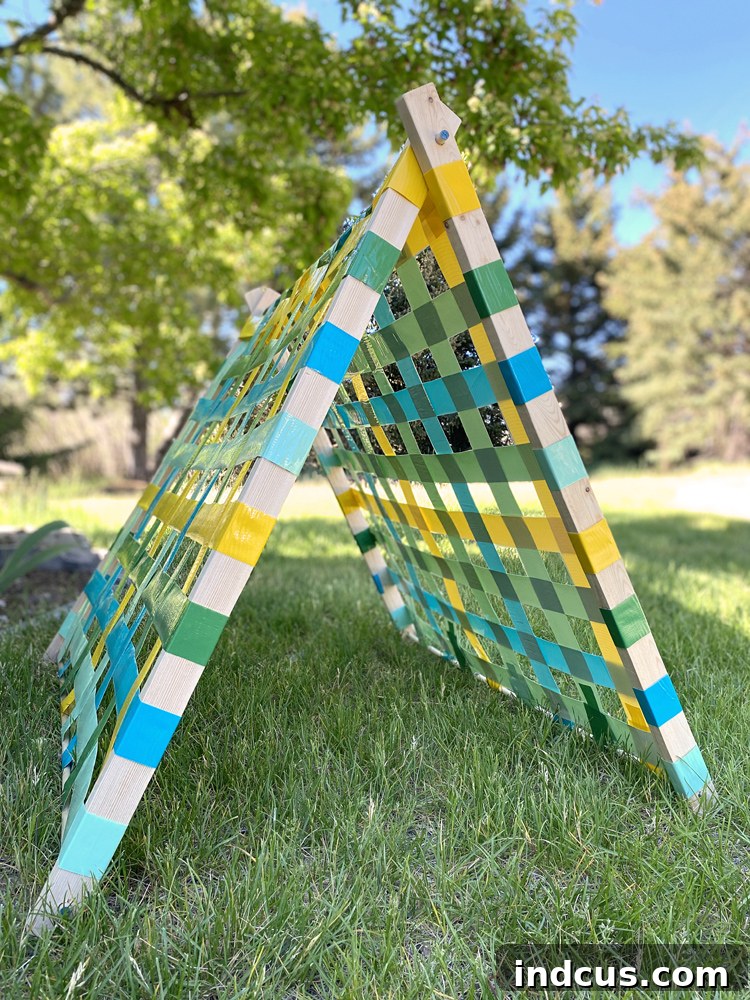
See Your Duck Tape Play Tent Come to Life!
Witness the entire crafting process firsthand and gain valuable visual insights by watching our concise tutorial video. It’s a fantastic way to grasp the weaving technique and assembly steps more clearly, ensuring your project goes smoothly.
The Benefits of a DIY Duck Tape Play Tent
Building your own Duck Tape play tent offers a wealth of advantages beyond just providing a fun toy. Firstly, it fosters a sense of accomplishment and pride for the crafter, especially for those new to DIY woodworking. For children, a personalized play tent sparks endless imaginative adventures, transforming their playroom into a castle, a spaceship, or a cozy reading nook. It offers a designated quiet space for contemplation or focused play, crucial for a child’s development.
Furthermore, the use of Duck Tape makes this tent incredibly durable and easy to clean. Spills and messes can often be wiped away, ensuring a hygienic play environment. Its unique folding design allows for convenient storage, making it perfect for smaller living spaces. This customizable project not only saves money compared to store-bought options but also provides a unique, handcrafted item that carries sentimental value. It’s an investment in imaginative play and a testament to creative DIY solutions for kids’ spaces.
Maintenance and Care for Your Duck Tape Creation
Keeping your Duck Tape play tent in pristine condition is remarkably simple. Thanks to the inherent properties of Duck Tape, most spills and dirt can be easily wiped clean with a damp cloth. For more stubborn marks, a mild soap solution can be gently applied, followed by a clean wipe. Avoid harsh chemical cleaners as they might affect the tape’s adhesive or color. Regularly check the connections around the dowels to ensure everything remains secure. When not in use, the A-frame design allows the tent to fold flat, making it easy to store under a bed, behind a door, or in a closet, preserving its lifespan and keeping it ready for the next adventure.
Ready to Create Your Own Duck Tape Masterpiece?
This DIY Duck Tape A-frame play tent project offers a fantastic opportunity to create something truly special for the children in your life. It’s a journey from simple materials to a beloved play space, all while building confidence in your crafting abilities. Embrace the versatility of Duck Tape, enjoy the process, and delight in the joy your handcrafted tent brings.
Like this creative project? Don’t forget to Pin it to your favorite DIY or Kids’ Craft boards so you can easily find it again later! Share your creations with us!