
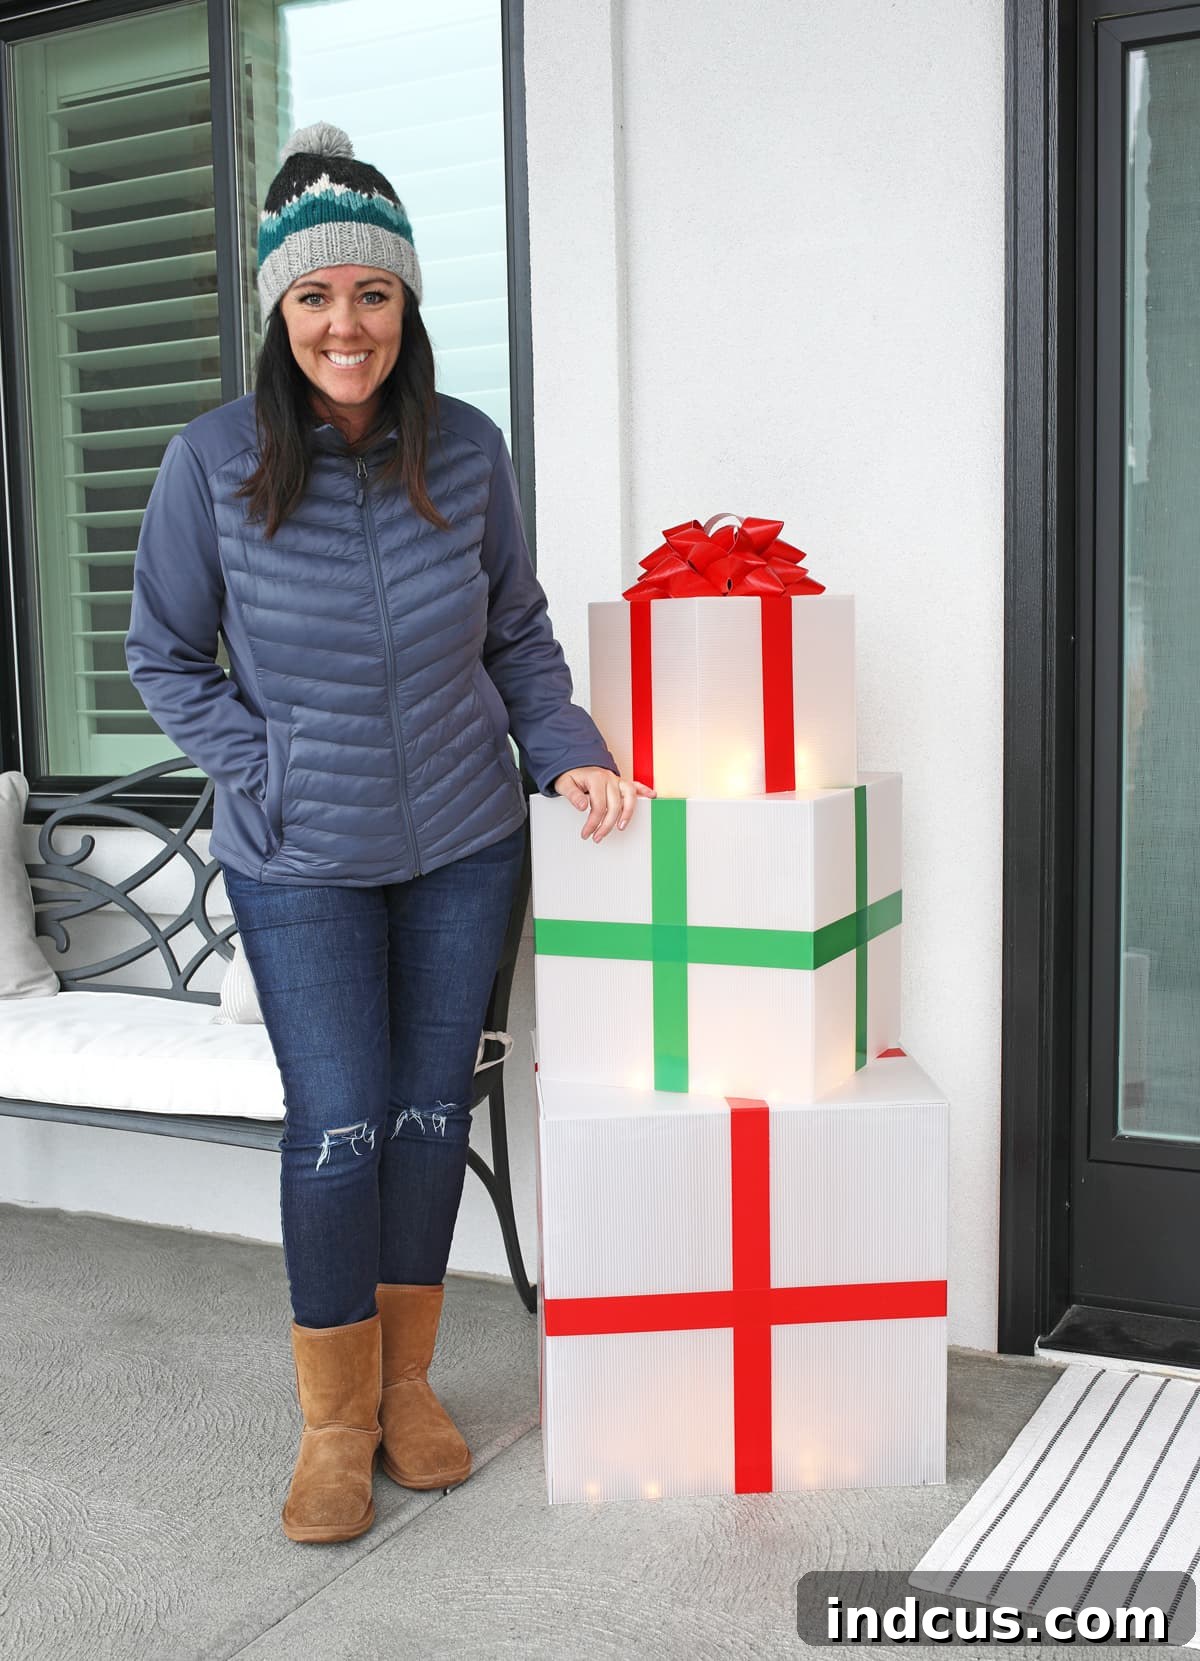
DIY Giant Light-Up Outdoor Christmas Presents: Waterproof & Stunning Holiday Decor
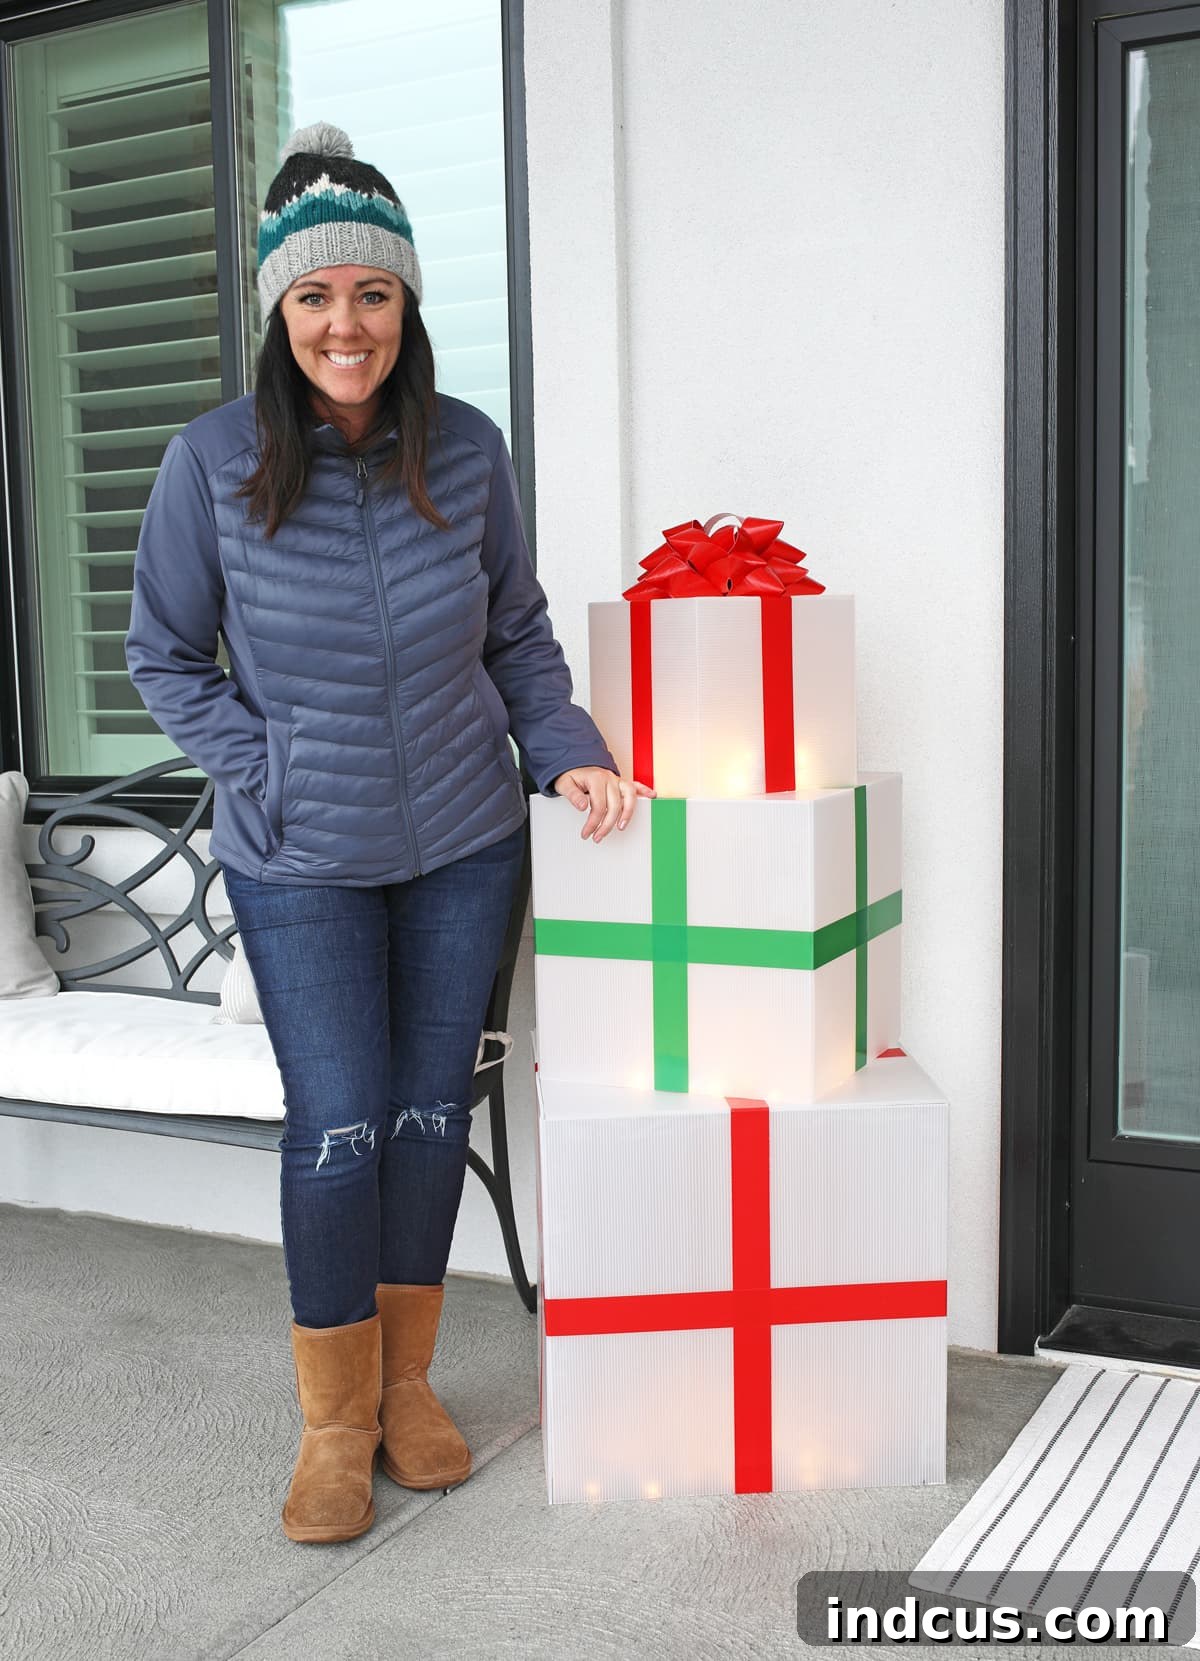
Transform your outdoor space into a magical winter wonderland this Christmas season with these incredible DIY giant light-up presents! There’s an undeniable joy in decorating your home’s exterior for the holidays, creating a festive welcome for guests and passersby alike. I’ve always dreamed of crafting a towering stack of illuminated Christmas presents to adorn my yard, but the challenge was finding a solution that could bravely withstand the elements – heavy rain, relentless snow, and frosty winds. After much experimentation, I’m thrilled to share a method that delivers not only stunning visual impact but also unparalleled durability. Say goodbye to soggy cardboard boxes and hello to vibrant, waterproof, and glowing decorations that will last for seasons to come!
This post is sponsored by Duck Brand, celebrating creativity and durability. All ideas and opinions are genuinely my own, born from a passion for unique holiday crafting.
Today, I’m excited to guide you through the process of creating these truly awesome outdoor Christmas decorations. Stacked together, they reach an impressive height of approximately four feet, making a grand statement in any setting. The secret lies in their internal lighting, which casts a warm, inviting glow at night, transforming your yard into a captivating spectacle. The final result is simply enchanting – prepare to be delighted by how cute and impactful they turned out!
Materials & Tools for Your Festive Creation
Embarking on this rewarding DIY project requires a thoughtful selection of materials and tools. Choosing the right components is key to ensuring your giant presents are not only beautiful but also robust enough to endure the outdoor environment throughout the holiday season.
Essential Materials
- Color Duck Tape® (Red, Green, Silver, and/or Gold) – The vibrant “ribbons” for your gifts, offering both decoration and weather resistance.
- Transparent Corrugated Plastic Board (8 boards total recommended) – The foundation of your waterproof presents. This material is a game-changer for outdoor durability.
- Duck Max Strength® Packing Tape – Clear – Your go-to for strong, secure, and weatherproof assembly.
- White LED Christmas Lights x 3 Strands * – For that magical, internal glow. Ensure they are suitable for outdoor use.
Required Tools
- Utility Knife – Essential for precise and clean cuts on the corrugated plastic. A sharp blade is crucial.
- Ruler – For accurate measurements, ensuring your boxes are perfectly square and symmetrical.
- Stapler – A standard stapler will be surprisingly useful for securing elements of your giant bow.
The transparent corrugated plastic board is truly a discovery for outdoor DIY projects. I initially stumbled upon it at Michaels a few years ago and have been eagerly searching for the perfect excuse to craft something magnificent with it ever since. This material is genuinely impressive! It boasts a thick, corrugated structure, much like traditional cardboard, but is ingeniously made from plastic, rendering it completely weatherproof. It’s typically available in white, black, and transparent options. I highly recommend waiting for a sale to purchase it, as it can be an investment, but one that pays off in durability and visual appeal.
* Important Safety Note: Please ensure you exclusively use LED Christmas lights, and under no circumstances use incandescent lights. LED lights generate significantly less heat, which is vital for preventing potential overheating issues within your enclosed plastic presents. Safety first, especially when combining lights and enclosed materials!
Step-by-Step Guide: Crafting Your Dazzling Outdoor Presents
Get ready to unleash your creativity! This detailed guide will walk you through each stage of constructing your waterproof, light-up Christmas presents. Follow these steps carefully for the best results and a truly spectacular holiday display.
Step 1: Prepare Your Corrugated Plastic Boards
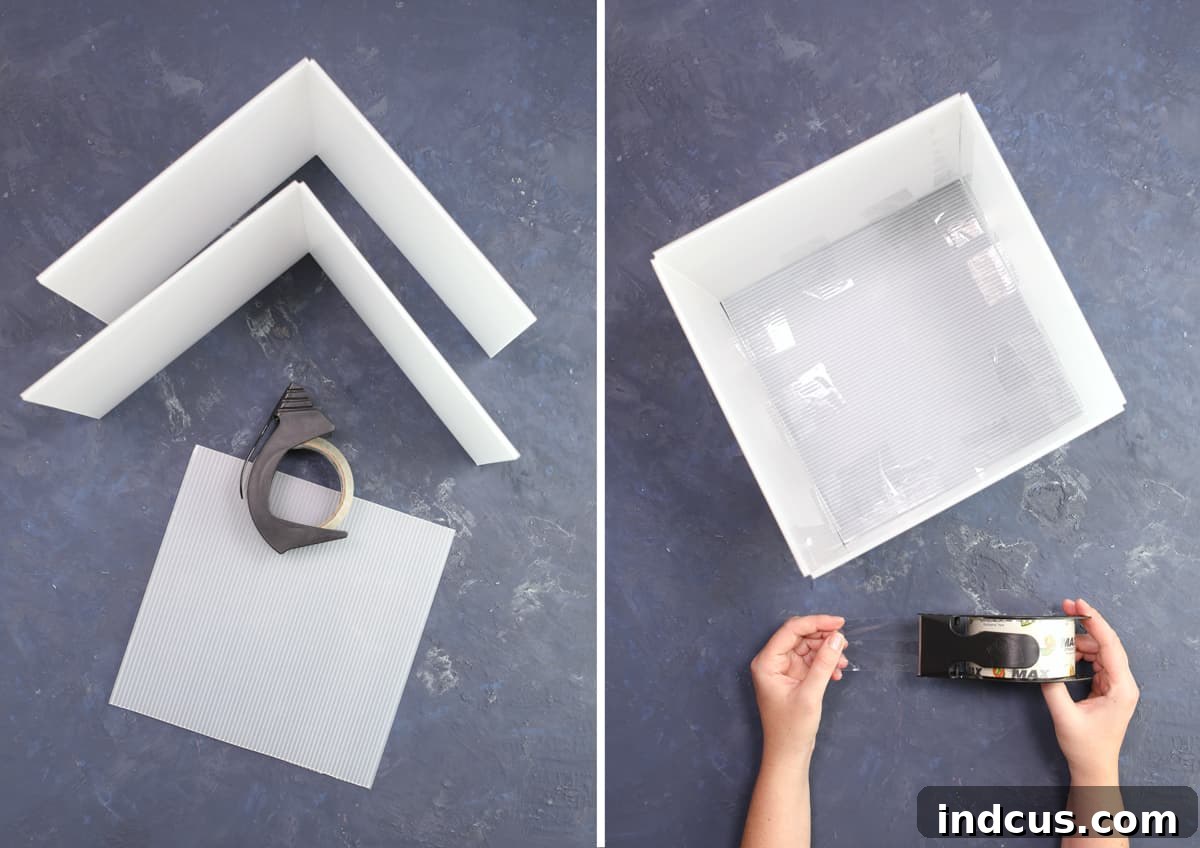
Begin by meticulously cutting your transparent corrugated plastic boards to the required dimensions. For each present box, you will need five identical square pieces. The standard board size is typically 20″x30″. To create a charming stacked effect, I designed three different box sizes: the largest box will be 20″x20″, the middle box 15″x15″, and the smallest box 10″x10″. When cutting the largest squares, strategically save any excess pieces. These can often be repurposed to form the smaller squares, which significantly helps in minimizing the number of boards you need to purchase and reduces material waste. Use your utility knife and ruler to ensure precise, straight cuts – accuracy here will lead to neater final boxes.
Step 2: Assemble the Gift Boxes
With your squares cut, it’s time to form the gift box structures. Take five equal squares for each present and use the clear Duck Max Strength® Packing Tape to securely attach them together. Your goal is to create a cube with one side remaining open. This open side will serve as the bottom of your present, allowing access for lighting and easy stacking. I absolutely loved working with the Max Strength tape; its adhesive power is exceptional, ensuring a robust and weather-resistant seal for your outdoor decorations. Repeat this assembly process for all three cubes, ensuring each is firmly constructed.
Step 3: Decorate with Duck Tape Ribbons
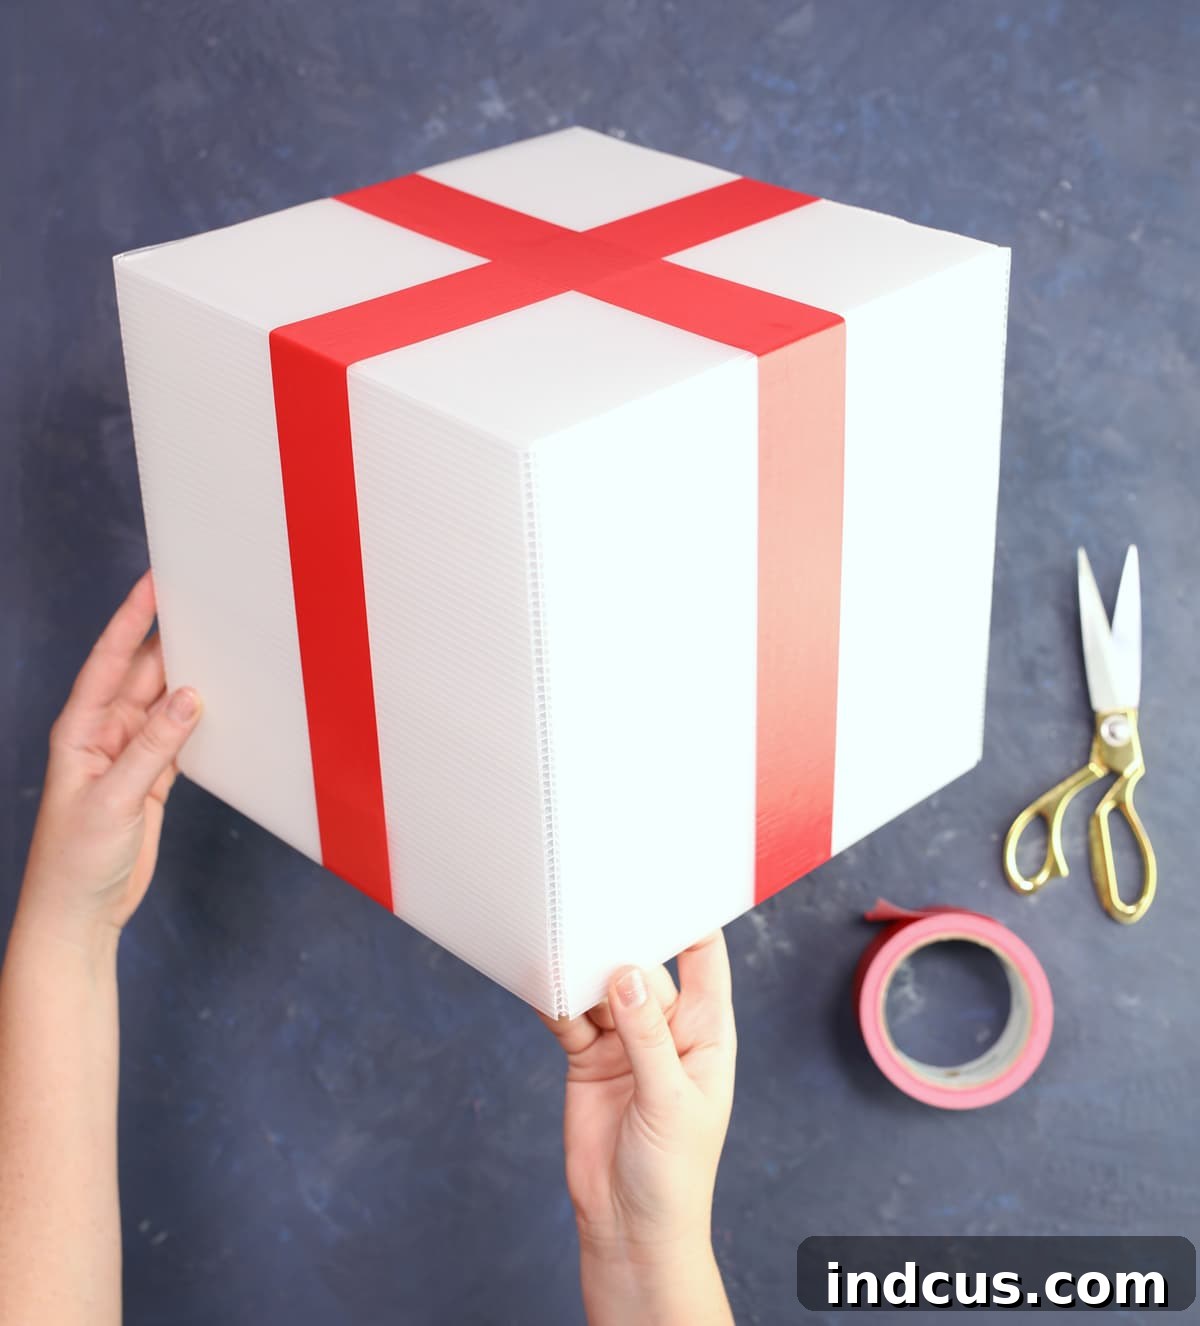
Now for the fun part of making your cubes truly resemble festive gifts! Select your desired colors of Duck Tape (red, green, silver, gold, or a combination for visual interest) and carefully wrap strips around each side of your assembled cubes to mimic decorative ribbons. You can create a classic cross pattern or get creative with multiple vertical or horizontal stripes. To achieve a clean, polished look, tuck any loose ends of the tape neatly into the inside of the cube. This not only hides raw edges but also helps to further secure the “ribbons” against the elements, ensuring they look pristine throughout the holiday season.
Step 4: Crafting the Iconic Giant Bow – Part 1 (Tape Strips)
This is arguably the most exciting part – fabricating a magnificent, oversized bow to crown your largest present! You’ll begin by creating double-sided Duck Tape strips. Cut strips of your chosen bow color and then carefully sandwich two strips together, sticky sides facing inward. This creates a sturdy, non-sticky strip perfect for shaping. You will need to prepare the following sizes and quantities for your multi-layered bow, ensuring each strip is precise:
- 23 inches long (quantity 3) – These will form the largest loops of your bow.
- 21 inches long (quantity 3) – For the second layer of loops.
- 19 inches long (quantity 3) – Creating the third, slightly smaller layer.
- 17 inches long (quantity 3) – The smallest loops, adding depth.
- 20 inches long (quantity 1) – This single strip will become the central loop of your bow.
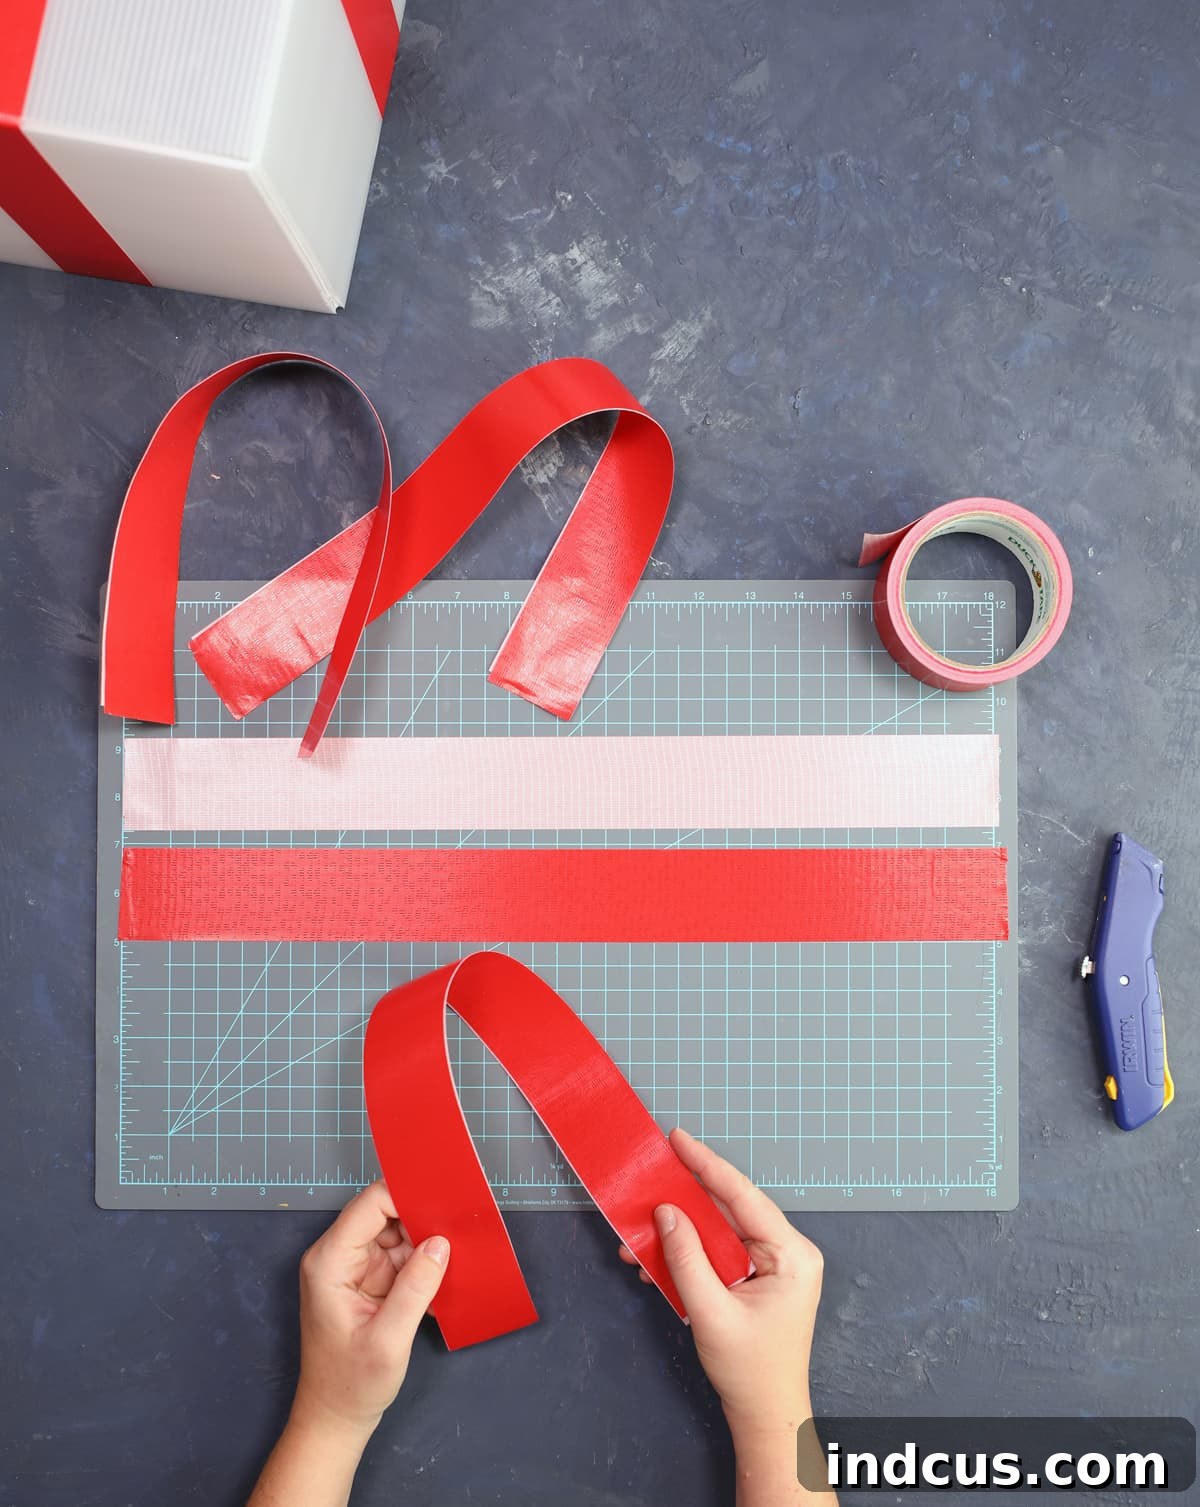
Step 5: Crafting the Iconic Giant Bow – Part 2 (Forming Loops)
Now, let’s transform these double-sided strips into elegant bow loops. Take one completed double-sided strip (any length except the 20-inch one) and carefully fold it in half to create a distinct crease line at its midpoint. Next, gently twist both ends of the strip to form neat, tapered points. Overlap the twisted ends of the “ribbon” by about half an inch, then firmly tape them together to create a secure loop. Crucially, center these joined ends over the crease line you made earlier. Rotate the ribbon slightly so that the tips are perfectly pointy, leaving no large, unsightly gaps. Finally, staple through the very center of the overlapping ends to firmly hold the loop in place. Repeat this precise process for all the double-sided strips, excluding the single 20-inch piece.
Step 6: Crafting the Iconic Giant Bow – Part 3 (Assembling Layers)
With all your loops formed, it’s time to build the impressive structure of your giant bow. Begin with the largest size loops you created (the 23-inch ones). Arrange these three loops together to form a beautiful six-point star shape. To secure them, use small loops of Duck Tape underneath each individual piece, pressing firmly to bond them to one another. Once the first layer is stable, proceed to add the next size down (the 21-inch loops) in the same star pattern, layering them on top of the first. Continue this process, adding the 19-inch and then the 17-inch loops, until all four layers are securely attached, creating a rich, dimensional bow.
Step 7: Crafting the Iconic Giant Bow – Part 4 (The Center Loop)
The final touch for your magnificent bow is its central loop. Take the remaining 20-inch double-sided strip and form it into a large, elegant loop. This loop will provide the perfect finishing flourish. Carefully attach it into the very center of your layered bow using strong tape. Congratulations! You now have a truly giant, waterproof, and absolutely stunning gift bow, ready to crown your stack of impressive outdoor presents.
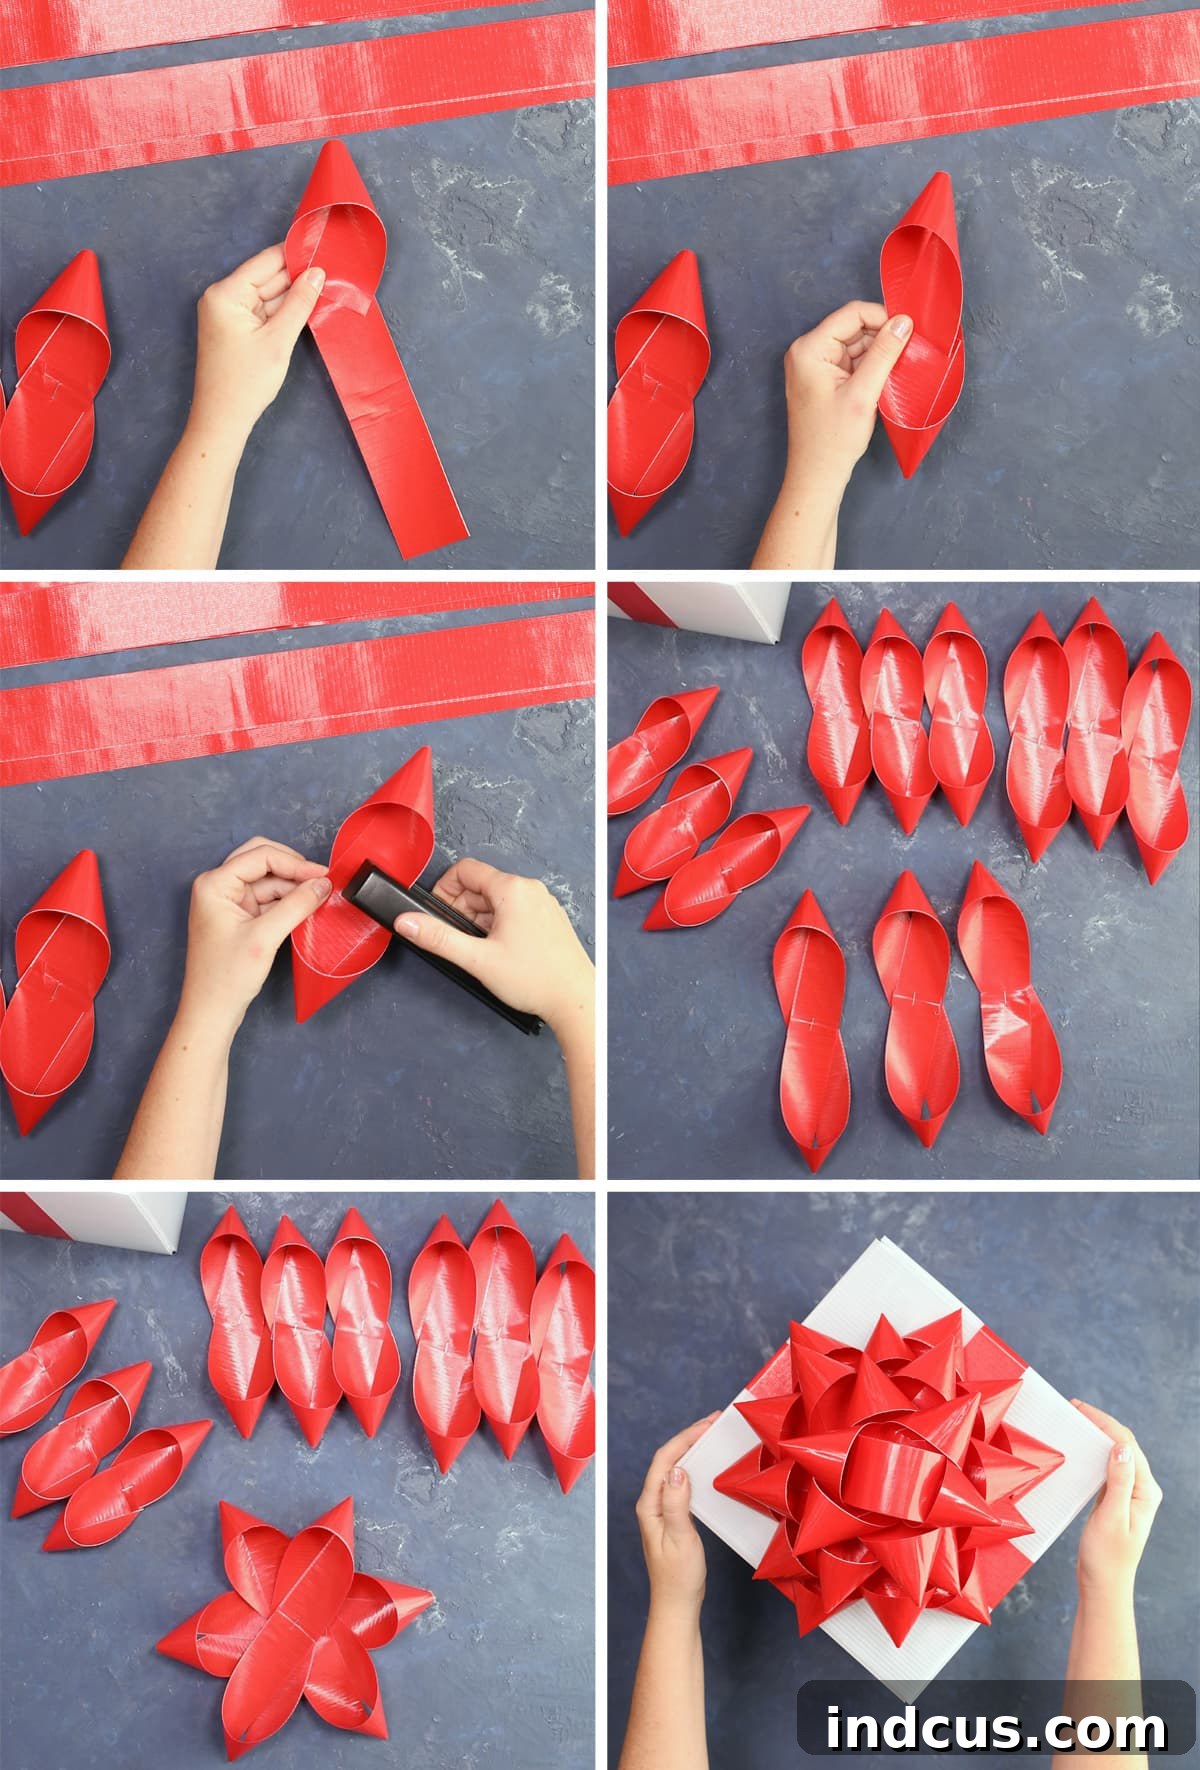
Should any of these bow-making steps seem a bit intricate, remember that sometimes visualizing the process makes all the difference. Many online resources offer video tutorials for Duck Tape bows, which can be immensely helpful!
Step 8: Illuminate Your Creations
The final, magical step is to bring your presents to life with light! Carefully cut a small, neat hole in the top center of both your large and medium-sized present boxes. These strategically placed holes will allow you to thread your outdoor LED Christmas light strands through all three gifts, illuminating them from within. You can opt to secure the light strands in place using small pieces of packing tape on the inside of the boxes if desired, ensuring an even distribution of light and preventing the strands from shifting. Once your lights are securely positioned, simply plug them in and prepare to marvel at your gorgeous new outdoor light-up Christmas presents! The radiant glow they emit is truly captivating and will transform your holiday display into something extraordinary.
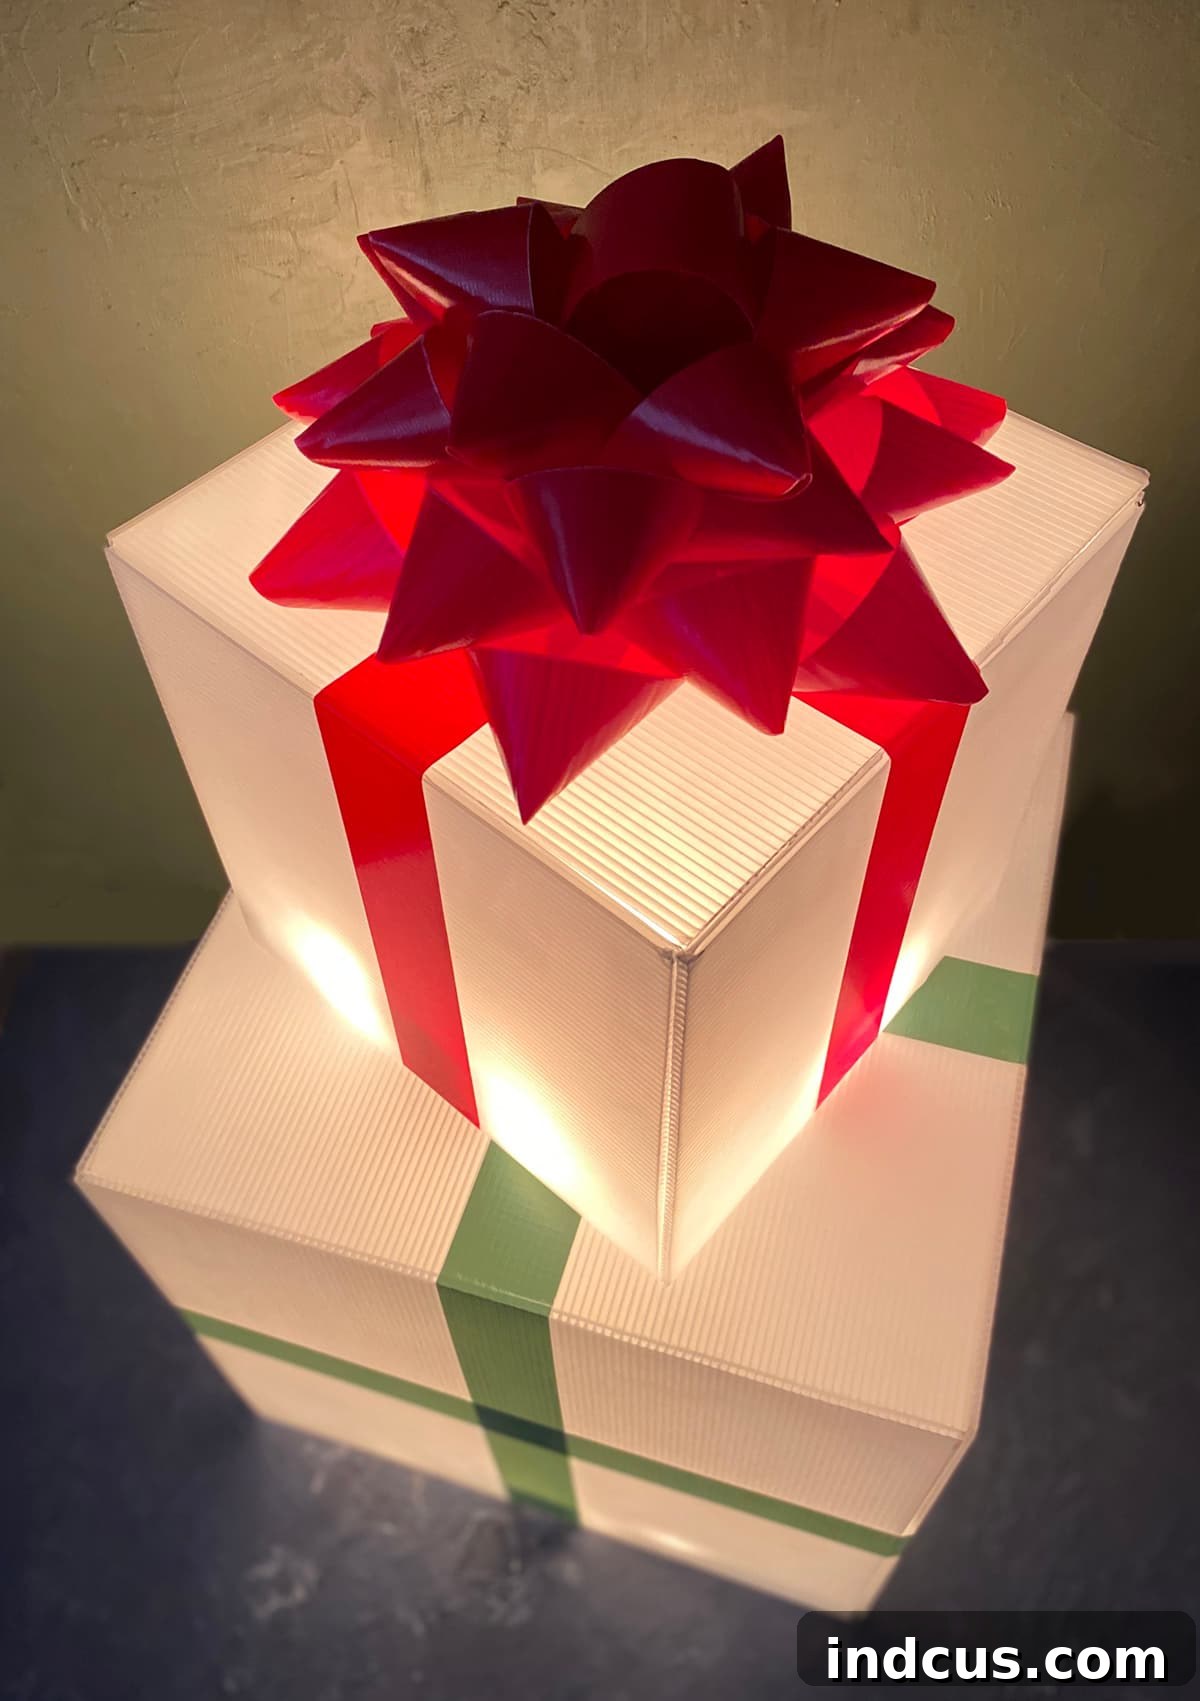
Displaying Your Festive Masterpieces: Tips and Ideas
Once completed, these giant light-up presents create an undeniable impact, especially nestled charmingly on a front porch or strategically placed in your garden. Their significant size ensures they are easily visible and admired from the street as cars drive by, instantly enhancing your home’s curb appeal. They possess a unique beauty, captivating observers both during the day with their vibrant colors and at night with their enchanting, soft glow. Truly, they are a super cool and unique addition to any holiday setup.
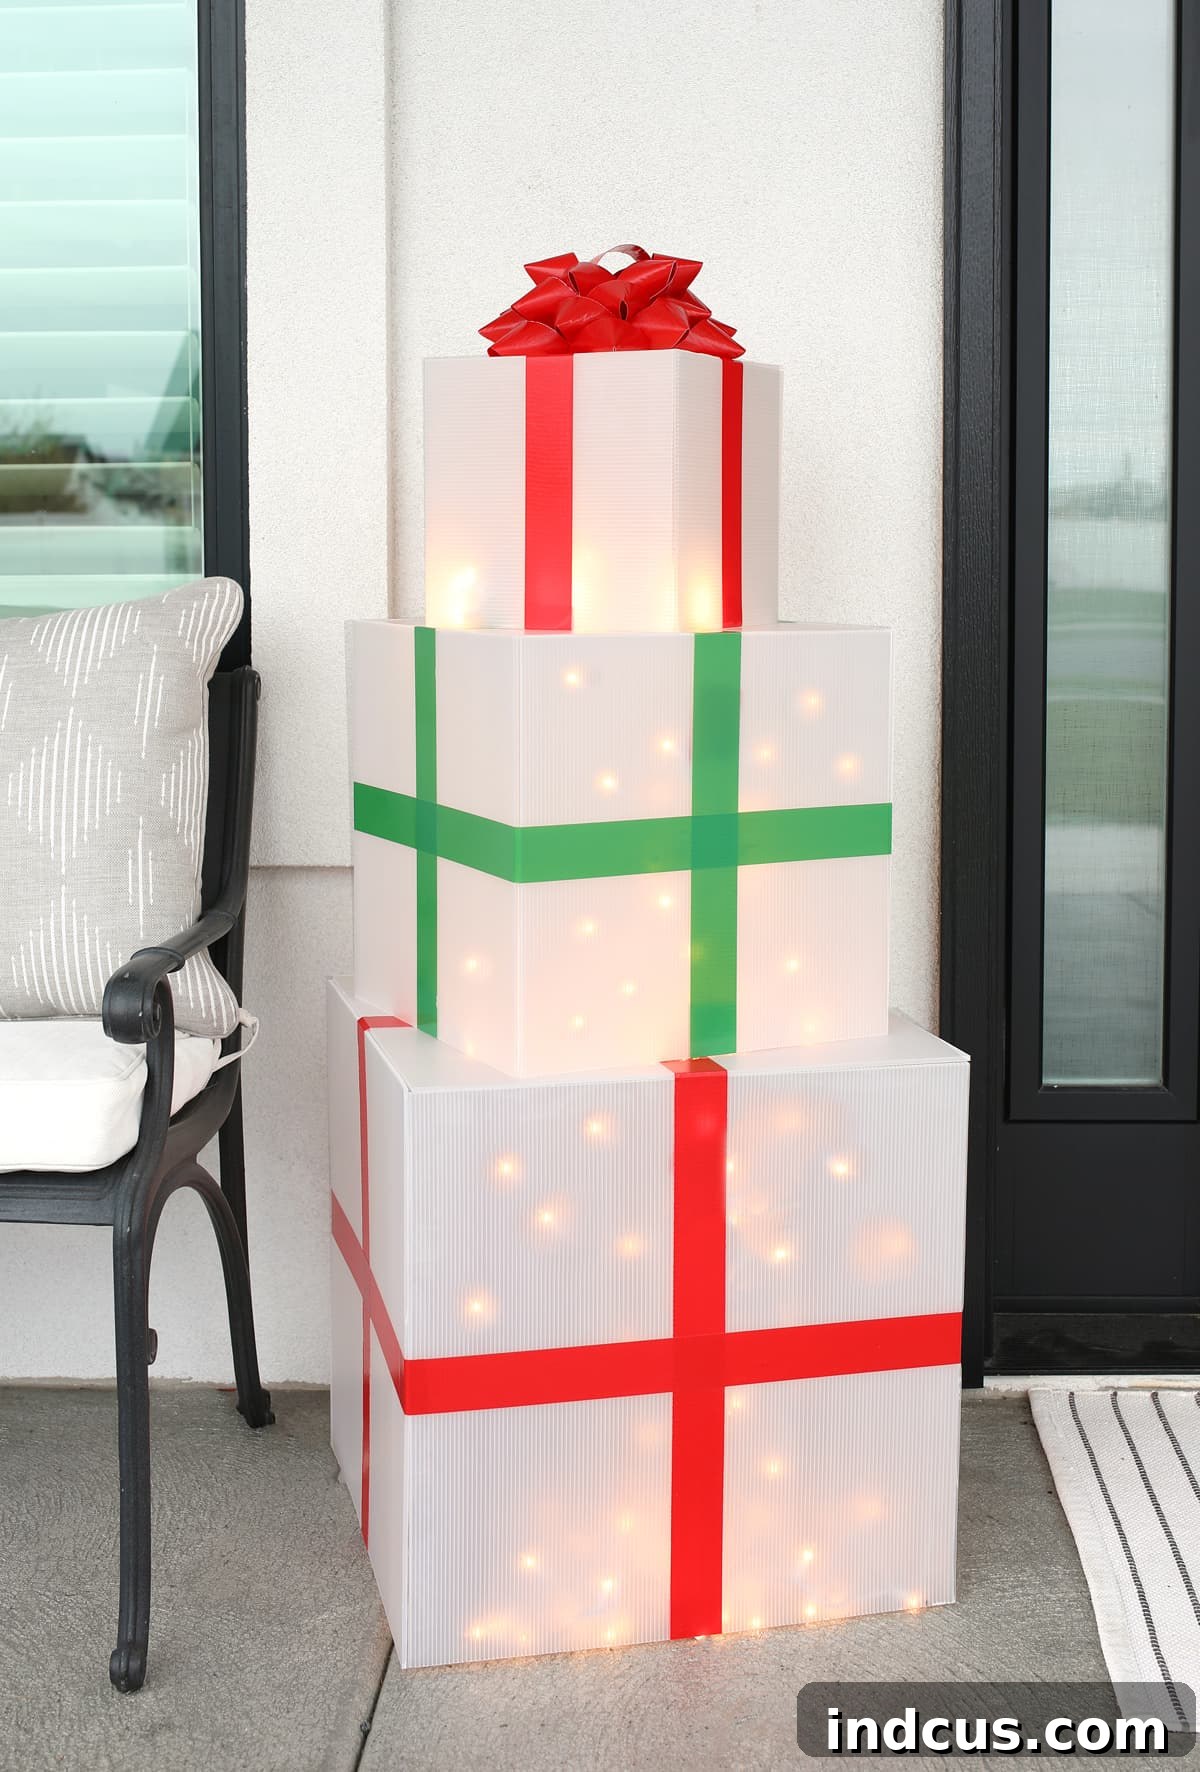
The beauty of DIY lies in the endless possibilities for customization. Beyond a stacked arrangement, consider making several smaller presents to beautifully adorn planters, window boxes, or even as decorative elements along a garden path. Imagine how charming that would be! You have complete freedom to personalize the colors, sizes, and even ribbon patterns to perfectly match your existing decor theme or to create a completely new, cohesive look. This flexibility is what makes handmade holiday decorations so special and allows your personal style to shine through.
Why Choose This DIY Project for Your Holiday Season?
This DIY giant light-up Christmas present project offers a multitude of benefits that elevate it beyond typical holiday crafting. Firstly, their **unmatched durability** means you’re investing in decorations that will withstand harsh winter weather, year after year, saving you money and effort in the long run. Secondly, the **stunning visual impact** they create, both day and night, is simply unparalleled. They become an instant focal point, drawing admiration and spreading holiday cheer. Finally, the **joy of creation** and the ability to customize every detail allows for a truly personal and unique expression of your festive spirit. These aren’t just decorations; they’re handcrafted statements of holiday magic that you’ve brought to life.







