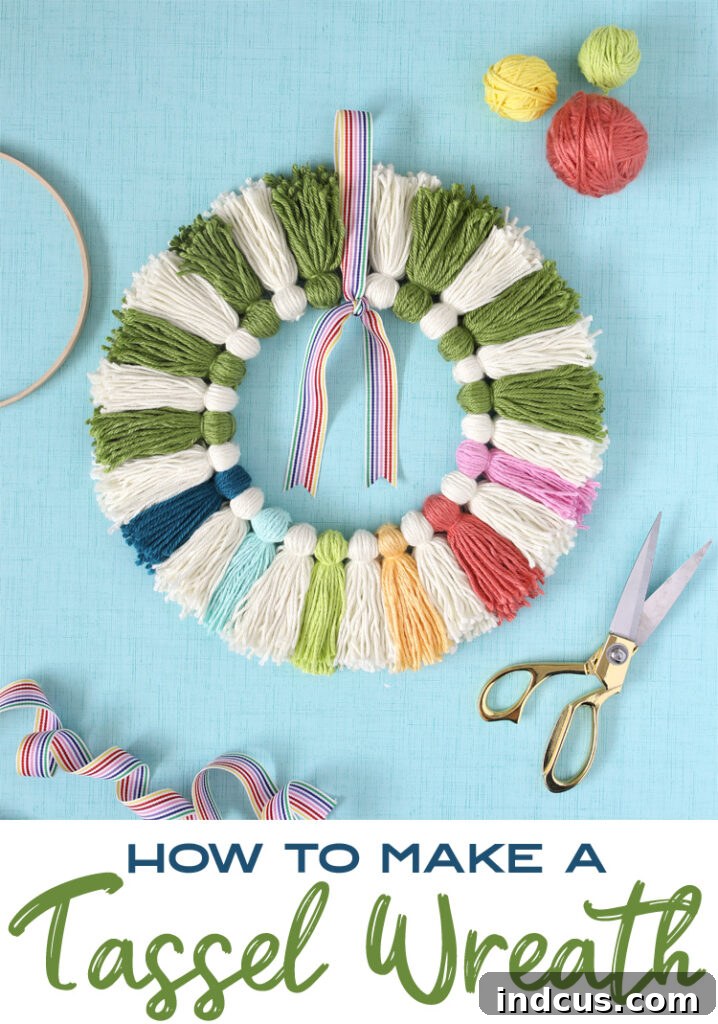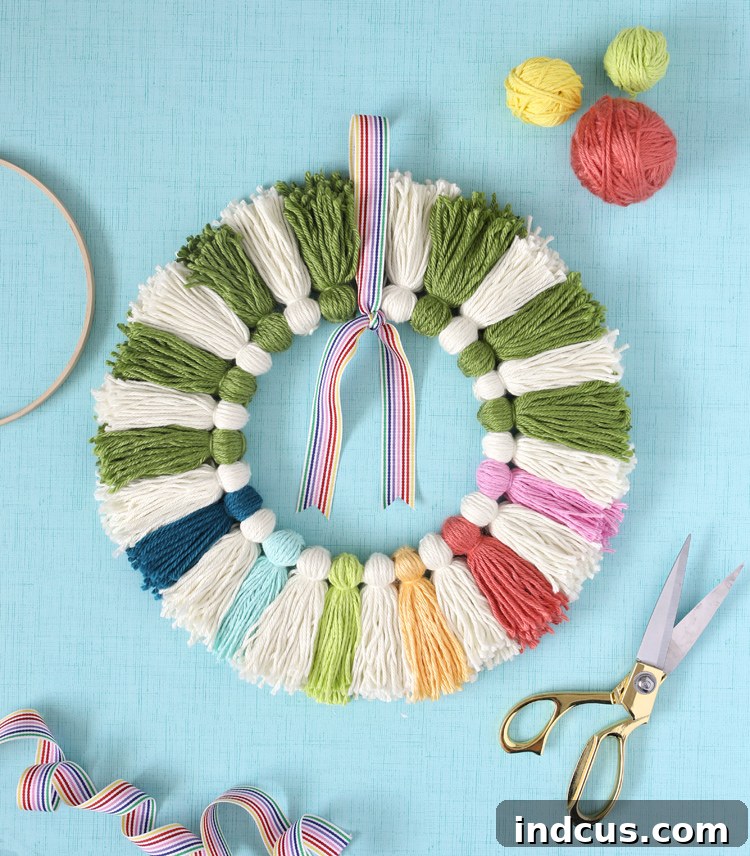
Craft Your Own Charming Tassel Wreath: A Fun & Easy DIY Guide
Are you looking for a delightful and budget-friendly way to add a personal touch to your home decor? Look no further! This comprehensive guide will walk you through creating a beautiful tassel wreath from scratch, using just yarn and a simple wooden embroidery hoop. It’s a craft that’s not only incredibly fun and relaxing to make but also endlessly customizable to fit any holiday, season, or aesthetic you desire. Whether you’re a seasoned crafter or just starting, you’ll find joy in bringing this project to life.
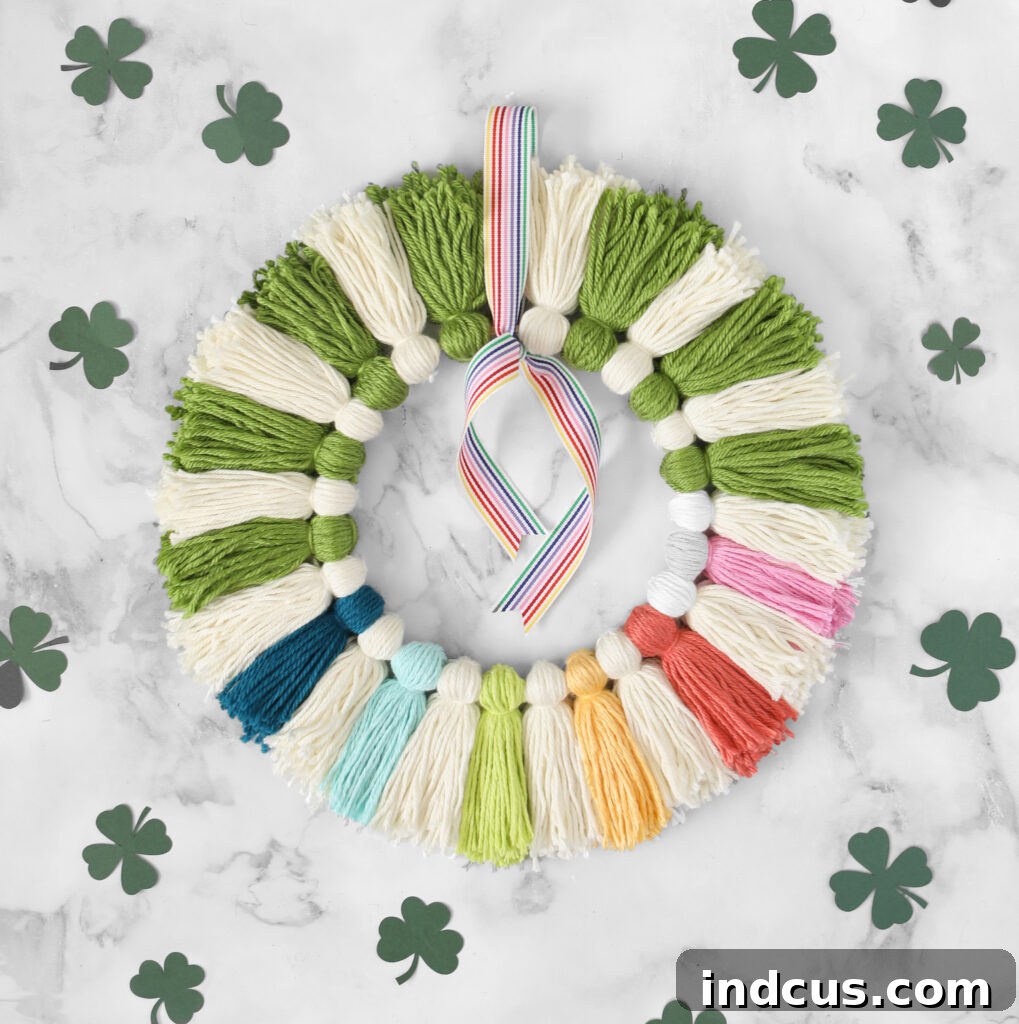
The beauty of the tassel wreath lies in its incredible versatility. Imagine a vibrant spring wreath with pastel shades, a spooky Halloween wreath in oranges and blacks, or a classic holiday wreath adorned with reds and greens. For this tutorial, we’ve crafted a festive St. Patrick’s Day inspired wreath using cheerful greens, crisp whites, and a delightful touch of rainbow yarn. The result is a charming piece that brings a burst of color and personality wherever it’s displayed. Once you master the basic technique, you’ll be inspired to create a collection for every occasion!
Why You’ll Love Crafting a Tassel Wreath
- Incredibly Simple: The steps are straightforward, making it perfect for crafters of all skill levels, even beginners.
- Highly Customizable: Change the yarn colors, add embellishments, or adjust tassel length to match any theme or decor style.
- Budget-Friendly: Made with inexpensive materials, this craft won’t break the bank.
- Quick to Make: You can complete a beautiful wreath in just a couple of hours, making it an ideal weekend project.
- Charming Home Decor: Add a handmade touch to your front door, nursery, living room, or any space that needs a little cheer.
- Therapeutic & Relaxing: The repetitive motion of making tassels can be quite meditative and stress-relieving.
Gathering Your Crafting Essentials
Before diving into the fun of making tassels, let’s ensure you have all the necessary supplies ready. One of the best aspects of this craft is that it requires very few specialized tools, making it accessible and easy to start right away.
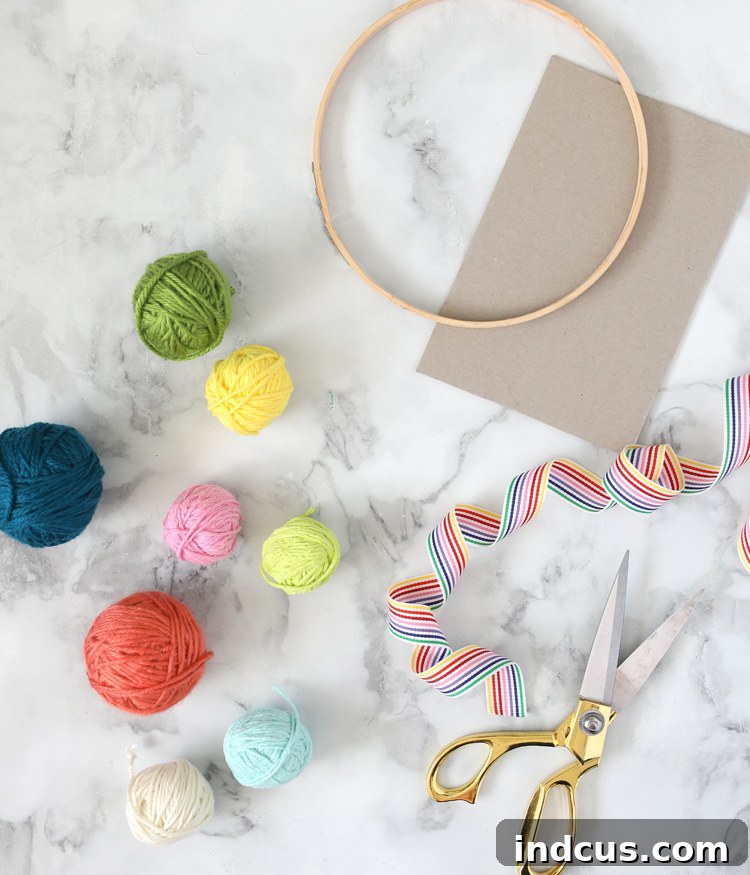
Materials Needed:
- Yarn: Surprisingly, the stiffer, scratchier, and less expensive acrylic yarn often works best for this project! Its structural integrity helps the tassels hold their shape beautifully. Don’t be afraid to mix colors and textures for added visual interest. You’ll need enough to cover your hoop – plan for at least 2-3 skeins depending on the size of your hoop and the fullness you desire.
- 7 or 8 Inch Wooden Embroidery Hoop: The hoop serves as the sturdy base for your wreath. These sizes are ideal for a manageable and charming wreath, but feel free to experiment with larger hoops for a grander statement piece. Ensure it’s a wooden hoop for easy attachment of the yarn tassels.
- Cardboard or Chipboard (7-8 Inches Wide): This acts as your tassel-making template. A piece of sturdy cardboard from an old box or a rigid piece of chipboard works perfectly. The width will determine the length of your tassels, so choose a size that appeals to your desired aesthetic.
- Sharp Scissors: A good pair of sharp scissors is crucial for clean cuts, especially when trimming numerous yarn loops. This will ensure your tassels have a neat and professional finish.
- Ribbon for Hanging (Optional, but Cute): A coordinating ribbon adds a lovely decorative touch and provides an easy way to display your finished wreath. Choose a ribbon that complements your yarn colors and adds a bit of flair.
Step-by-Step Guide to Crafting Your Tassel Wreath
Now that you have all your materials, let’s get started on the fun part: making and assembling your charming tassel wreath!
Instructions:
Step 1: Create Your Yarn Tassels
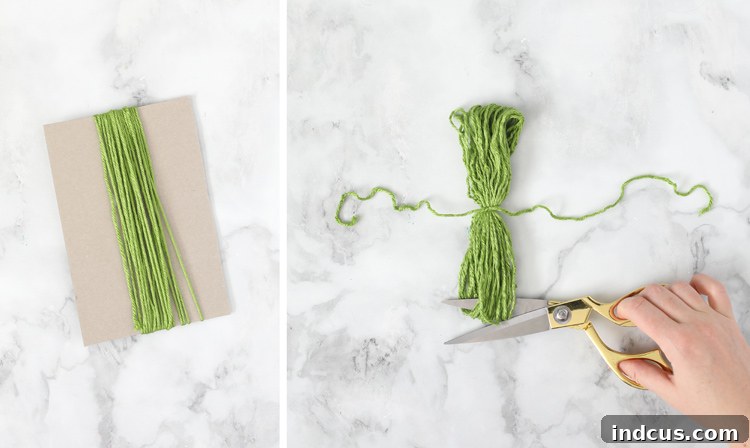
Begin by taking your chosen yarn and wrapping it around the 7-8 inch wide piece of cardboard or chipboard. The number of wraps will dictate the thickness and fullness of your individual tassels. For a plush, robust tassel, we recommend wrapping your yarn approximately 25 times. Maintain a consistent tension as you wrap to ensure all your tassels are uniform in size and appearance. If you want thinner tassels, reduce the number of wraps; for extra voluminous tassels, increase them.
Step 2: Secure and Cut the Tassel Loops
Once you’ve completed your wraps, carefully slide the entire bundle of yarn off the cardboard. Try to keep the loops as intact as possible. Take a separate, short piece of yarn (about 6-8 inches long) and tie it very tightly around the center of your yarn bundle. This central tie is critical for holding the tassel together. After securing the center, take your sharp scissors and cut through all the yarn loops on both ends of the bundle. You’ll now have a loose, fluffy yarn bundle that’s beginning to resemble a tassel.
Step 3: Attach the Tassel to the Hoop – Part 1
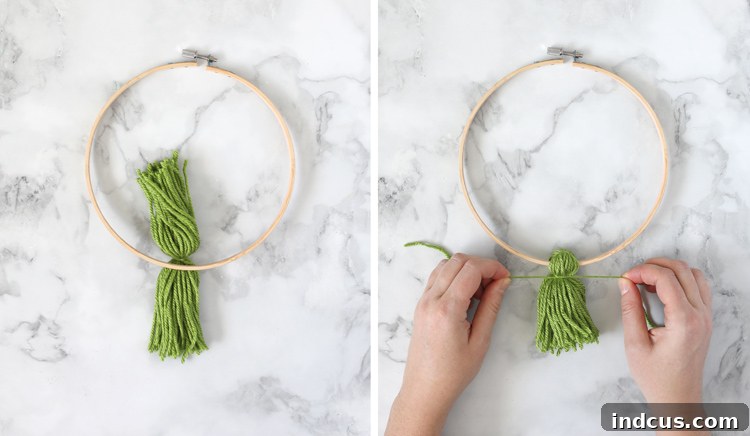
Take one of your newly formed yarn bundles. Position the tied center of the bundle directly under your embroidery hoop. Then, gently bring both ends of the yarn bundle up and over the front of the hoop. The goal is to align all the cut ends neatly at the bottom, creating a uniform “skirt” for your tassel that hangs over the hoop. This ensures a clean, flowing appearance once the tassel is fully formed on the wreath.
Step 4: Attach the Tassel to the Hoop – Part 2
Once the yarn bundle is draped over the hoop as described in Step 3, take another short piece of yarn or string. Tightly tie this string around the yarn bundle, just below the embroidery hoop. This second tie will gather the yarn and create the distinct “head” of the tassel, firmly attaching it to the hoop. Pull it as tight as you can without breaking the yarn to ensure the tassel remains securely in place and maintains its shape.
Step 5: Fill the Hoop with Tassels and Trim
Continue repeating steps 1 through 4, making and attaching more tassels until the entire embroidery hoop is covered. You can push the tassels snugly together to create a full, lush wreath, or space them slightly for a more airy look. Feel free to alternate yarn colors as you go to create patterns or gradients. Once all your tassels are attached, take a moment to carefully inspect the wreath. Use your sharp scissors to trim any uneven yarn ends that might be sticking out, ensuring all tassels are roughly the same length and have a polished finish. This step is crucial for a professional-looking result.
Step 6: Add a Ribbon for Hanging (Optional)
If you wish to add a hanging ribbon, now is the time! Simply scoot a couple of tassels apart at the top of the hoop to reveal a small section of the wooden frame. Tie your chosen ribbon securely around the hoop at this point. You can create a simple loop for hanging, or tie a decorative bow for extra charm. This ribbon not only provides a convenient way to display your wreath but also adds another layer of customization and style.
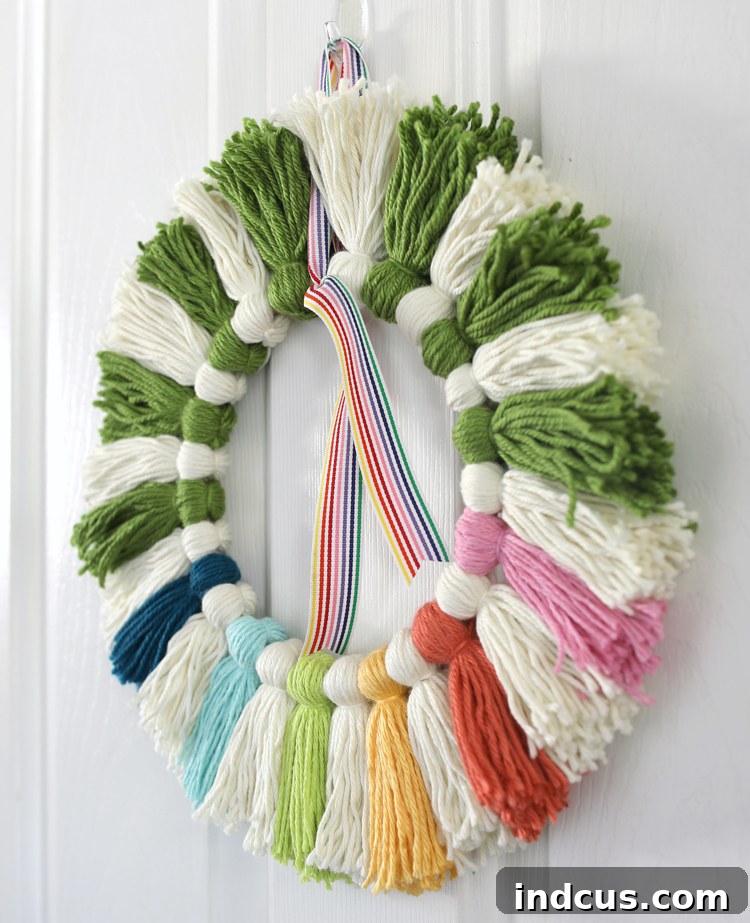
And there you have it! Six simple and enjoyable steps to create your very own charming and inexpensive tassel wreath. It’s a truly rewarding project that yields a beautiful piece of decor!
Pro Tips for a Flawless Tassel Wreath
- Yarn Choice Matters: While soft, luxurious yarns are tempting, the “cheap, scratchy” acrylic yarn is genuinely your best friend for this project. Its inherent stiffness helps the tassels hold their distinct shape and prevent them from looking limp over time.
- Maintain Uniformity: Strive for consistency in the number of wraps and the tightness of your ties. This ensures that all your tassels are uniform in size and density, contributing to a more professional and visually appealing wreath.
- Combat Floppiness: If you find your tassels aren’t standing out as straight as you’d like, especially after a while, you can lightly spray them with fabric stiffener or spray starch. Allow them to dry completely, and they will hold their form much better. Keeping your tassels shorter also naturally helps them maintain their structure.
- Mix and Match: Don’t be afraid to combine different colors, and even slightly different textures of yarn, to create a unique and dynamic wreath. Variegated yarns can also add interesting depth without extra effort.
- Consider Embellishments: Beyond just yarn, you can hot glue small artificial flowers, mini ornaments, felt cutouts, or even small battery-operated fairy lights to your finished wreath for extra sparkle.
Unleash Your Creativity: Customizing Your Tassel Wreath
The beauty of this DIY project is its incredible adaptability. Once you understand the basic technique, the possibilities for customization are truly limitless. Here are some ideas to spark your imagination:
- Seasonal & Holiday Themes:
- Christmas: Use reds, greens, whites, and gold yarn. Add mini pinecones or jingle bells.
- Halloween: Black, orange, purple, and lime green. Maybe even some googly eyes or spider web accents.
- Easter/Spring: Pastels like lavender, baby blue, mint green, and soft yellow. Attach small artificial eggs or bunny cutouts.
- Fall: Rich oranges, deep reds, browns, and golds. Incorporate tiny artificial leaves or berries.
- Summer: Bright blues, yellows, and pinks for a vibrant, sunny feel.
- Nursery or Kids’ Room Decor: Match the yarn colors to the room’s palette. You can even use specialty yarns like chunky chenille or glitter yarn for a playful touch.
- Everyday Home Decor: Choose colors that complement your existing interior design. A neutral palette of creams, grays, and subtle pastels can add texture and warmth to any room without overwhelming it.
- Different Sizes: Experiment with larger embroidery hoops for a more substantial wreath, or tiny hoops for mini ornaments or gift toppers.
- Vary Tassel Length: While uniform tassels are classic, consider making some longer or shorter for a more organic, layered look.
Frequently Asked Questions About Tassel Wreaths
- Q: How much yarn do I need for a 7-8 inch wreath?
- A: This depends on the fullness you desire and the thickness of your yarn. Generally, 2-3 standard skeins (around 100-200 yards each) should be sufficient to cover a 7-8 inch hoop densely. It’s always better to have a little extra than to run out midway through!
- Q: Can I use different types of hoops?
- A: Wooden embroidery hoops are ideal because they offer a good grip for the yarn and are easy to tie around. Metal or plastic hoops might be too slick, making it harder to secure the tassels tightly. If using a different type, you might need extra adhesive to ensure stability.
- Q: My tassels are falling flat. What can I do?
- A: Ensure you’re using stiffer yarn, as mentioned. Also, keep your tassels relatively short. If they are still floppy, a light spray of fabric stiffener or spray starch, allowed to dry completely, will work wonders.
- Q: How do I clean my tassel wreath?
- A: Tassel wreaths are best spot cleaned. Use a damp cloth to gently dab any soiled areas. For dust, a soft brush or a hairdryer on a cool, low setting can help dislodge particles.
- Q: Can I make this with kids?
- A: Absolutely! This is a fantastic craft for older children and teens, with adult supervision, especially for the cutting steps. Kids will love choosing colors and wrapping the yarn.
Final Thoughts on Your DIY Tassel Wreath Journey
Creating a tassel wreath is more than just a craft; it’s an opportunity to infuse your personality and creativity into your living space. The satisfaction of seeing your handmade decoration adorn your wall or door is truly unmatched. We hope this detailed tutorial has inspired you to pick up some yarn and an embroidery hoop and embark on your own wreath-making adventure.
Don’t be afraid to experiment with colors, add your unique embellishments, and make this project truly your own. The possibilities are endless, and the result is always a charming, one-of-a-kind piece that brings warmth and character to your home.
Loved this creative idea? Be sure to pin it to save for later and share with your crafting friends!