Sew a Beautiful Fabric Notebook Cover: Transform Your Journal into a Personalized Masterpiece
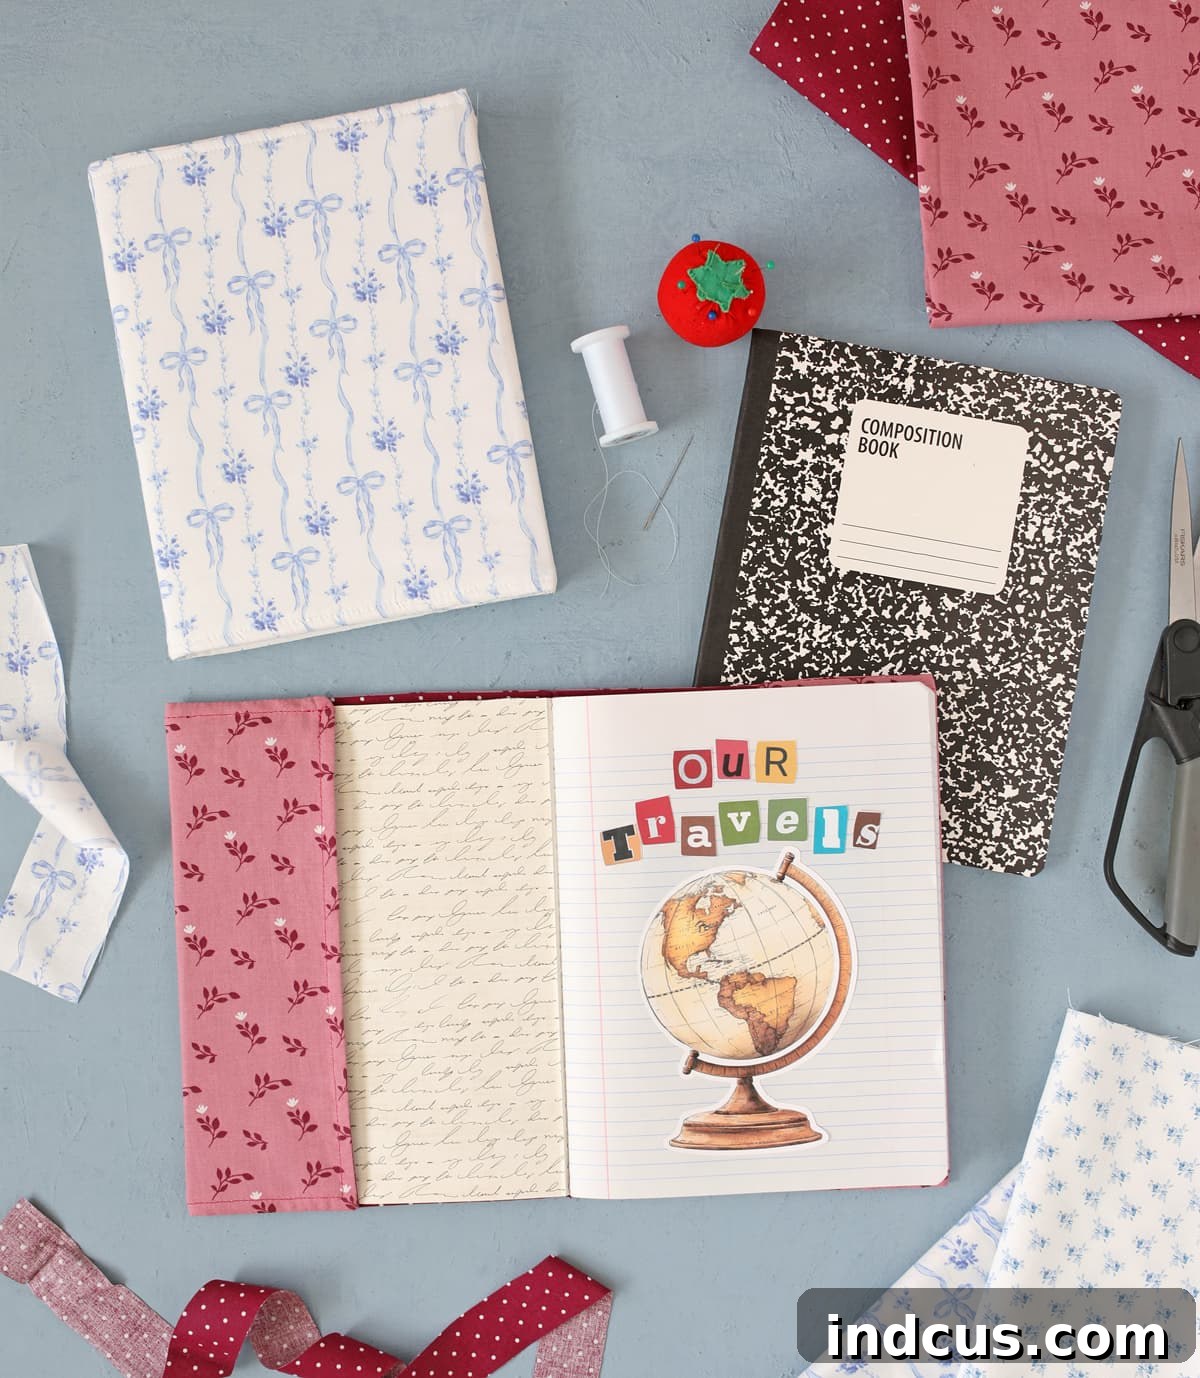
In a world of mass-produced goods, there’s a unique joy in creating something truly special with your own hands. Today, we’re diving into a delightful sewing project that will transform an ordinary composition notebook into a cherished scrapbook, a functional junk journal, or simply a beautifully personalized daily planner. Imagine a bespoke cover, sewn from your favorite fabrics, protecting your precious notes and memories. This comprehensive guide will walk you through every step of sewing a simple yet elegant fabric book cover, perfect for beginners and seasoned crafters alike.
This post is proudly sponsored by Hobby Lobby, your one-stop shop for all crafting essentials.
Why Sew Your Own Fabric Notebook Cover?
Beyond the simple act of covering a book, crafting a fabric notebook cover offers numerous benefits. Firstly, it provides unparalleled protection for your notebooks, shielding them from wear and tear, spills, and the general chaos of daily life. Fabric covers are durable and washable, ensuring your journals stay pristine for years to come.
Secondly, it’s an incredible opportunity for personalization. Forget generic store-bought covers; with fabric, you can express your unique style, match your décor, or create a themed journal. Whether you prefer vibrant florals, subtle geometrics, or a cozy quilted design, the possibilities are endless. This personalization makes your journal not just a book, but an extension of yourself.
Thirdly, it’s a sustainable choice. Instead of buying new notebooks when covers wear out, you can simply refresh your fabric cover. It also encourages creative reuse of fabric scraps, contributing to a more eco-conscious crafting practice.
Lastly, for those embracing the “junk journaling” trend, a fabric cover sets the perfect tone. Junk journaling is about collecting memories, ephemera, and personal reflections in a visually rich, tactile way. A handmade fabric cover enhances this experience, adding a layer of warmth, texture, and personal touch that mass-produced items simply can’t replicate. It transforms a humble composition book into a treasure chest for your most valued thoughts.
Gathering Your Supplies: A Trip to Hobby Lobby
Every great creative project begins with the right materials. For this simple sewing project, you’ll need just a few items, readily available at your local Hobby Lobby. Think of this as your creative adventure kicking off in the fabric aisle!
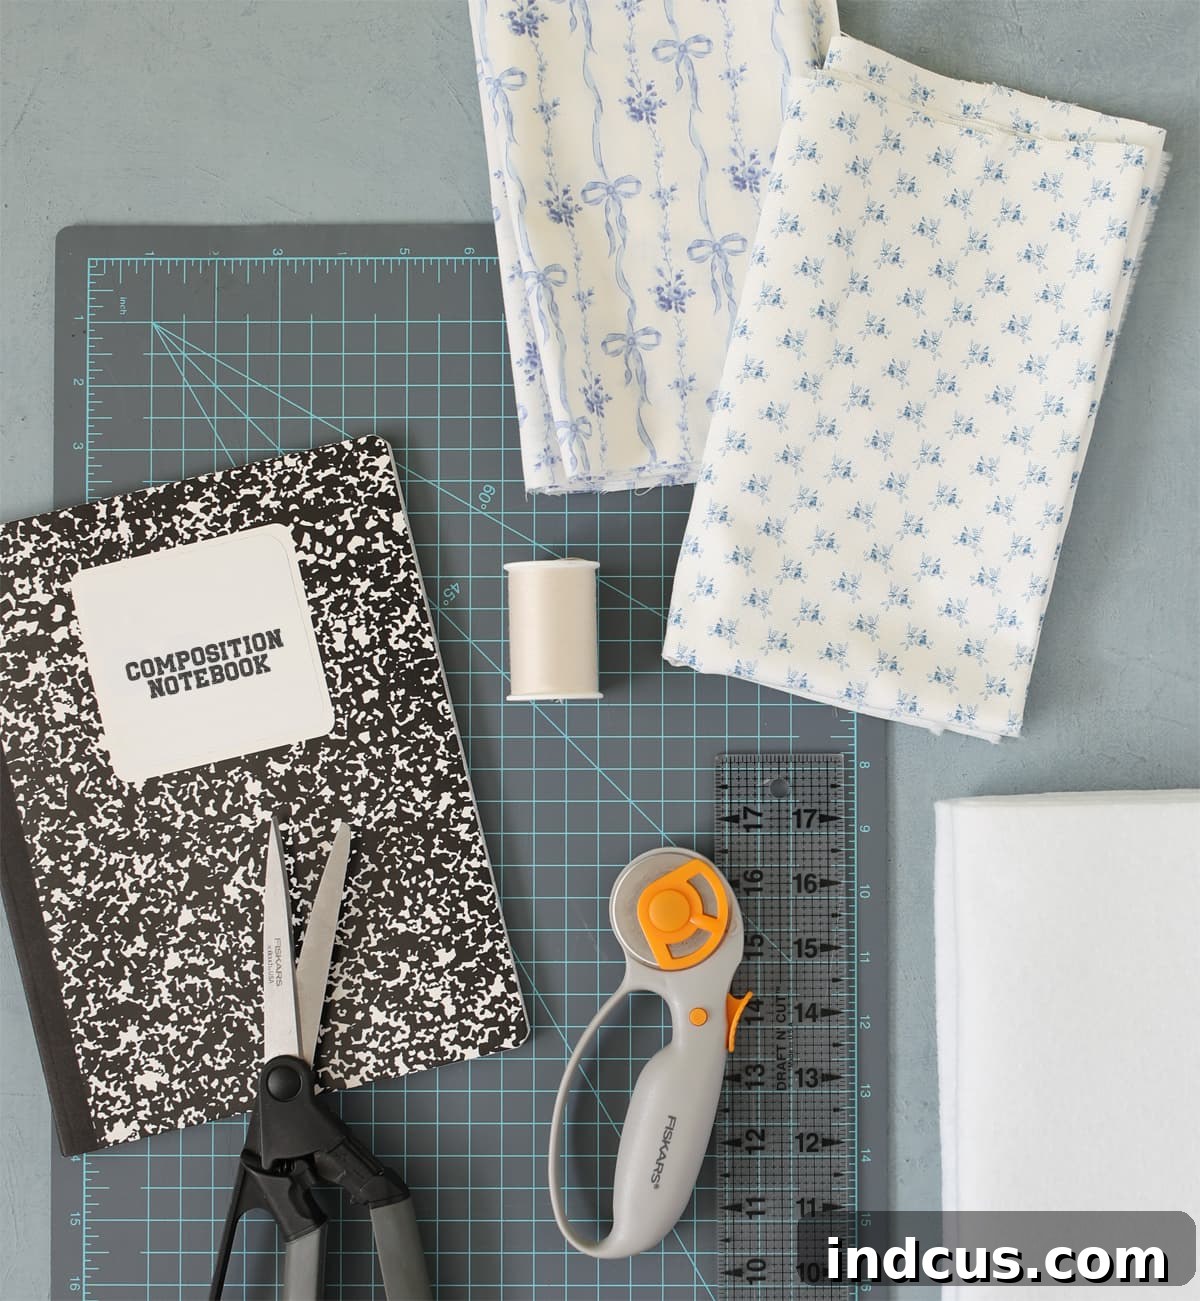
Materials Needed
- Cotton Quilting Fabric: Select 1/3 yard each of two coordinating prints. Cotton quilting fabric is ideal because it’s easy to work with, holds its shape well, and comes in an incredible array of beautiful patterns and colors. Choosing two coordinating prints adds visual interest and allows for a lovely interior lining.
- White Felt: You can purchase a CRAFT PACK or 1/3 yard of Felt Fabric. The felt acts as an interlining, providing structure, durability, and a slight padding to your cover, making it feel more substantial and protective.
- Coordinating Thread: Choose an all-purpose polyester thread that matches or complements your chosen fabrics.
- Fabric Scissors: Sharp fabric scissors are essential for clean, precise cuts.
- Quilting Mat, Ruler, and Step-by-Step Sewing Tutorial: Crafting Your Notebook CoverThese instructions and measurements are specifically tailored for standard-sized composition notebooks. However, don’t fret if your book is a different size; we’ll provide a simple formula at the end of this guide to help you customize your cover for any notebook or book.Step 1: Prepare Your Fabric PiecesThe foundation of any sewing project is accurate cutting. Take your two coordinating cotton fabrics and cut each piece to an exact dimension of 11 inches by 23 inches. For the felt interlining, cut one piece to 10 inches by 15 inches. Using a rotary cutter, mat, and ruler will ensure perfectly straight edges, which are vital for a clean, professional-looking finished product. Double-check your measurements before making the final cut.Step 2: Sew the Fabric ExteriorPlace your two fabric pieces together, ensuring their “right sides” (the pretty, patterned sides) are facing each other. Align all edges carefully. Using a sewing machine, stitch around the perimeter of the rectangle with a 1/2-inch seam allowance. As you sew, remember to leave a gap of approximately 3-4 inches along one of the longer sides. This opening is crucial for turning your fabric right side out later. Secure your stitches at the beginning and end of this opening with a few backstitches.Step 3: Turn and Press for PerfectionOnce your stitching is complete, carefully clip the corners of your fabric, cutting diagonally close to the stitching line without snipping the stitches. This step reduces bulk in the corners, ensuring they lay flat and sharp. Now, reach into the opening you left and gently pull the fabric right side out. Use a point turner or a dull pencil to carefully push out all four corners, creating crisp, defined angles. Take your fabric to the ironing board and press all seams flat with a warm iron. Pay special attention to the opening, pressing the raw edges inward so they align with the sewn seam. This gives your cover a smooth, professional appearance.Step 4: Insert the Felt InterliningCarefully insert the cut piece of felt into the fabric sleeve you’ve just created. The felt should be centered inside the fabric, touching the top and bottom sewn seams. There should be an equal “empty” space of fabric on both the left and right sides of the felt. The felt acts as a sturdy core, giving your cover structure and durability. Take your time to smooth out any wrinkles and ensure the felt lies perfectly flat within the fabric layers.Step 5: Secure the Felt and TopstitchOnce the felt is perfectly centered, use pins to hold it securely in place, preventing it from shifting as you sew. Now, find the exact center of your fabric cover (lengthwise). Draw a faint line with a fabric marker or simply eyeball it. Stitch a straight line through all layers of fabric and felt along this center line. This stitch serves two important purposes: it anchors the felt firmly in place and creates the “spine” of your notebook cover. Next, topstitch all the way around the entire perimeter of the fabric cover, approximately 1/8 to 1/4 inch from the edge. This topstitching not only gives your cover a crisp, finished look but also permanently closes the opening you used for turning. If you find your sewing machine struggling with the thickness of the felt, a walking foot attachment can be incredibly helpful for even fabric feeding.Step 6: Create the Side PocketsThis is arguably the most crucial step for the functionality of your notebook cover. Lay your cover flat. Take the raw edges of the fabric on both sides and fold them inward until they reach the edge of the felt interlining inside. These folded flaps will form the pockets that hold your notebook covers. Align the folded edges neatly, ensuring they are even, and press them firmly with your iron to create crisp creases. Pin these flaps in place securely. Now, using an invisible stitch (also known as a ladder stitch or blind stitch), hand-sew these flaps down to the main fabric body. This stitch is virtually undetectable from the outside, giving your pockets a clean, seamless finish. A quick search for “invisible stitch tutorial” on YouTube will provide excellent visual guidance if you’re new to this technique (likethis video tutorial). This step is essential; if not done correctly, your notebook won’t fit snugly into the cover. For those who prefer a machine stitch, you could carefully topstitch these pocket flaps down, but the invisible stitch provides a cleaner look.Congratulations! Your beautiful, handmade fabric notebook cover is now complete. Simply slip the front and back chipboard covers of your composition notebook into the newly formed side flap pockets, and you’re ready to fill your journal with dreams, doodles, and memories.Customizing Your Notebook Cover for Any Size BookHow To Make A Notebook Cover For Any Size NotebookOne of the best features of this design is its adaptability. Whether you have a tiny pocket notebook, a standard spiral-bound, or an oversized art sketchbook, you can create a custom-fit fabric cover with this simple formula:For the Height:Measure the height of your notebook and add one inch (Height + 1 inch). This extra inch accounts for seam allowances.For the Width:Measure the width of your notebook all the way around – this means measuring the front cover, the spine, and the back cover while the book is closed. To this total measurement, add 9 inches (Total Width + 9 inches). This additional length allows for the creation of the essential interior pockets that secure your book.So, your fabric pieces will be cut to:(Notebook Height + 1 inch) x (Notebook Total Width + 9 inches). For the felt, simply use the exact height of your book and subtract about 2-3 inches from the total width to allow for the side flaps to fold over it. Always double-check your measurements before cutting!Elevate Your Design: The Quilted Notebook CoverIf you’re like us, “extra” is a compliment, especially when it comes to crafting! Why stop at a simple fabric cover when you can create a stunning quilted version? A quilted cover adds incredible texture, warmth, and a unique artisan feel to your journal. It’s a wonderful way to utilize smaller fabric scraps and showcase your sewing skills.To make a quilted cover, the process begins before Step 1 of our main tutorial. You’ll need to create a quilted panel that is larger than the final dimensions needed for your cover (11 x 23 inches for a composition notebook). Gather a beautiful assortment of darling fabric scraps from Hobby Lobby – this is where those charm packs or fat quarter bundles shine! Cut out numerous tiny fabric squares (e.g., 2.5-inch squares work well for a patchwork look) and piece them together following basic quilting techniques, such as chain piecing and careful seam pressing. This step might bring back fond memories of high school sewing classes, just like mine with Mrs. Grow!Once you’ve assembled a quilted panel that is slightly larger than your required fabric dimensions, you can then trim it down to 11 x 23 inches (or your custom size). From this point, you will follow all the same steps (Step 1 through 6) outlined above. The result is a truly magnificent, heirloom-quality notebook cover that feels incredibly cozy and heartfelt. I created a giant quilted cover for an 11×14 sketchbook, and the result was simply breathtaking.The quilted cover isn’t just visually appealing; it also offers enhanced protection and a delightful tactile experience. I haven’t quite decided what momentous entries will fill my large quilted sketchbook, but I’m leaning towards making it a killer scrapbook. Whatever its purpose, it demands to be filled with something truly special. Do you have any brilliant ideas for what to put inside? I’d love to hear them!Care and Maintenance for Your Fabric CoverTo keep your beautiful fabric notebook cover looking its best, occasional cleaning may be necessary. For most cotton fabrics, spot cleaning with a damp cloth and mild soap is often sufficient. If a more thorough cleaning is required, you can gently hand wash the cover in cool water with a mild detergent. Lay it flat to air dry to help maintain its shape and prevent shrinking. Avoid harsh chemicals or excessive scrubbing, especially if your fabric has delicate prints or embellishments. With proper care, your handmade cover will last for many projects and journals to come.Creative Uses and Thoughtful Gift IdeasThis DIY fabric notebook cover project offers immense versatility, making it perfect for various uses and thoughtful gifts:Junk Journals & Scrapbooks:Elevate your memory-keeping with a cover that feels as personal as the content within.Art Sketchbooks:For the artist in your life, a custom cover for a beautifulsketchbookis a gift they will truly adore and cherish. It protects their creative space and inspires them to fill its pages.Recipe Journals:Create a beautiful, durable cover for a blank notebook to be filled with family recipes.Personal Planners:Transform a simple planner into a stylish accessory for daily organization.Student Notebooks:A handmade cover can add a touch of personality and durability to school notebooks, making studying a little more enjoyable.Both my young adult and teenage daughters immediately claimed the blue and white bow notebook cover, which is a testament to its undeniable charm! This project truly makes for a heartfelt and much-appreciated gift, showcasing your time and talent. Think of birthdays, holidays, teacher appreciation, or just a sweet “thinking of you” gesture.DIY Fabric Notebook Cover Video TutorialYour browser does not support the video tag.Watch this video tutorial for a visual guide to each step, making the sewing process even easier to follow. It’s especially helpful for understanding the invisible stitch in Step 6!We hope you have a fantastic time bringing your creative vision to life with this project. Happy crafting, and enjoy turning an ordinary notebook into an extraordinary personal statement!