Craft Your Own Heirloom: DIY Felt Advent Calendar Wall Hanging
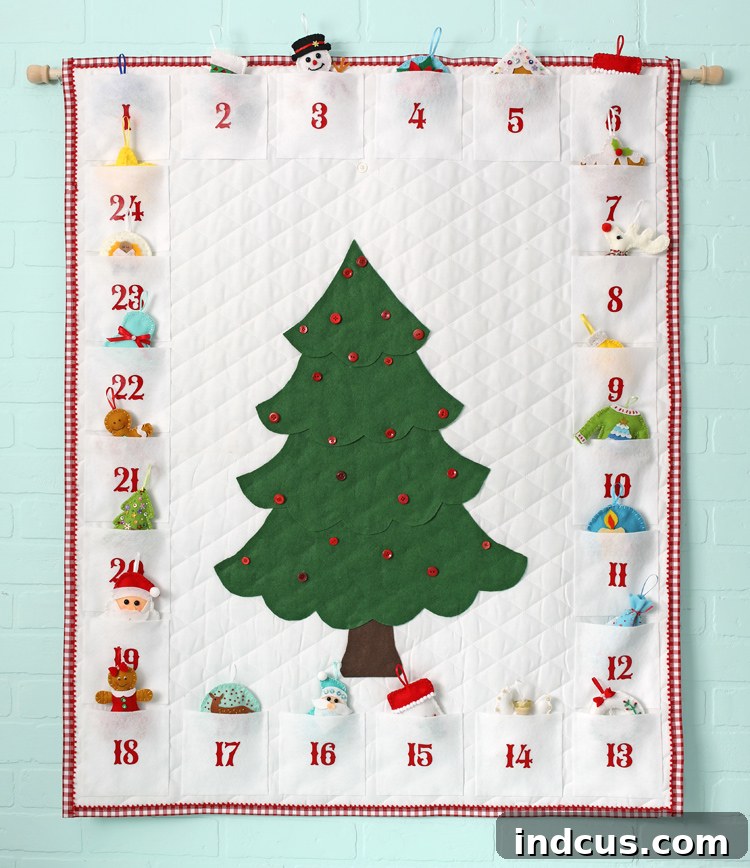
There’s a special magic that fills the air as Christmas approaches, a time for traditions, family, and creating cherished memories. What better way to build anticipation for the holidays than with a personalized advent calendar? Today, I’m thrilled to share a project that’s more than just a craft; it’s an heirloom in the making: a delightful DIY felt advent calendar wall hanging, adorned with 24 exquisite hand-stitched felt ornaments.
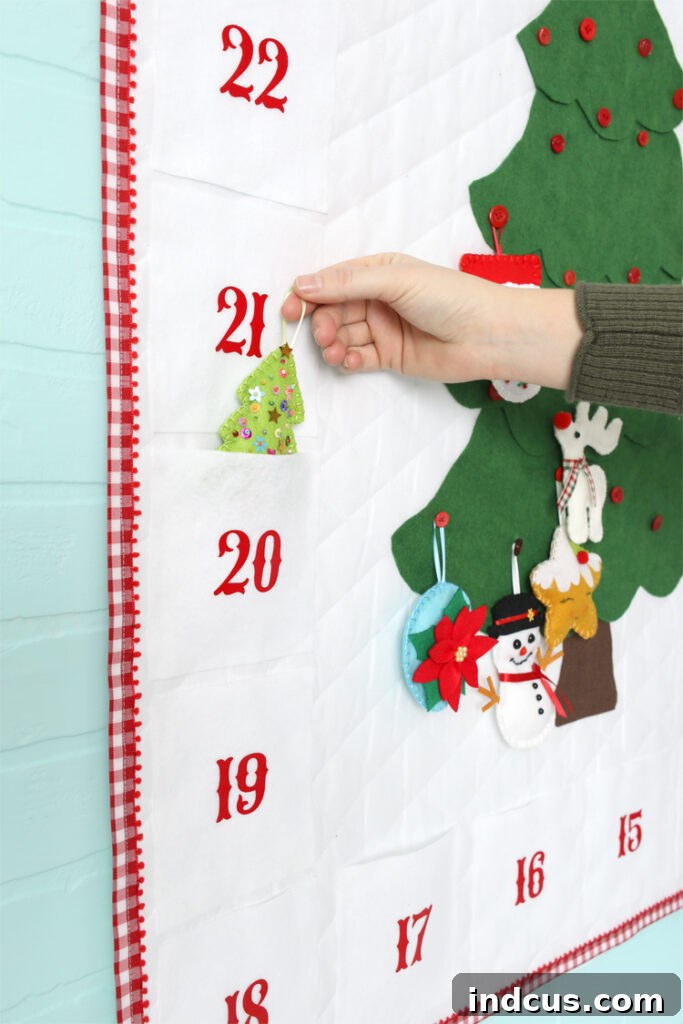
This project transforms the daily countdown into a captivating visual display. Each day in December, a new, uniquely crafted ornament is retrieved from its numbered pocket and hung on a festive felt Christmas tree. Children and adults alike will love the daily surprise and the joy of watching the tree gradually fill with beautiful decorations, bringing the spirit of Christmas to life one ornament at a time.
While this project does require a dedicated investment of time, the reward is immeasurable. Think of it not just as a seasonal decoration, but as a family heirloom—a treasured piece that will be brought out year after year, passed down through generations, holding countless memories within its stitches. It’s a labor of love, certainly, but one that yields a priceless family tradition. If you’re embarking on this creative journey, I recommend allowing yourself at least a month to work on it, savoring each step of the process.
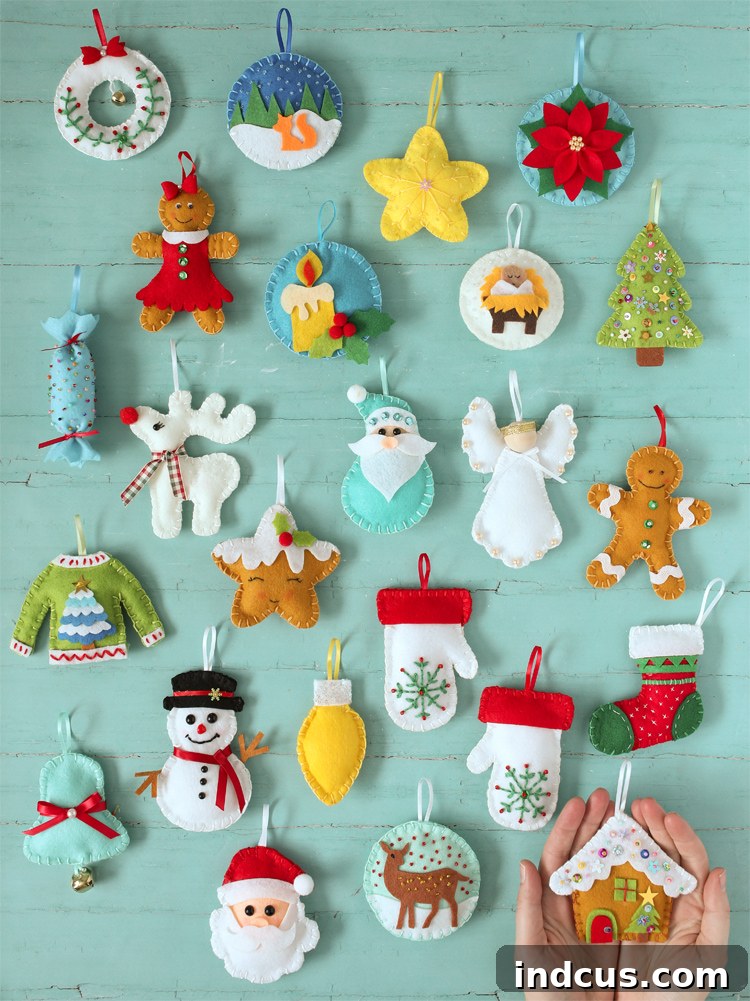
The first time I created a similar advent calendar, I meticulously designed each ornament from scratch, drafted paper patterns, and painstakingly cut every tiny felt piece before stitching them together. This time, however, I discovered a wonderful shortcut that saved a tremendous amount of effort: a pre-cut felt ornament kit. These kits come complete with all the necessary pieces, embroidery floss, beads, trim, eyes, and other embellishments required for each ornament. It was an invaluable purchase, well worth the cost for the time and precision it provided.
As an Amazon Associate, I earn from qualifying purchases. This post contains affiliate links, which means I may receive a small commission if you make a purchase through my links, at no extra cost to you.
Materials & Tools for Your DIY Felt Advent Calendar
Crafting this unique advent calendar requires a selection of quality materials that will ensure its durability and beauty for years to come. Here’s what you’ll need to gather:
Essential Materials
Click on any highlighted item in the supply list for more information or to find purchasing options.
-
Felt Ornament Kit – This is a game-changer for saving time and ensuring beautiful, consistent ornaments. These kits can fluctuate in availability throughout the year, so if it’s out of stock, check back regularly.
- This Felt Ornament Kit offers another fantastic selection of 25 distinct ornaments.
- This Felt Ornament Kit is adorable but only includes 12 designs. Consider purchasing two kits if you wish to create 24 unique ornaments without repetition.
- White Quilted Fabric: This will form the sturdy background of your wall hanging. Its quilted nature adds body and a lovely texture, preventing the calendar from sagging.
- White Felt (Large Format from the Fabric Section): Essential for crafting the ornament pockets. Ensure you get a large enough piece to cut 24 uniform squares.
- Green Felt (Large Format from the Fabric Section): This will be used to create the central Christmas tree. Choose a vibrant, classic green to make your tree stand out.
- Red Iron-On Vinyl or Red Felt: For creating the numbers 1-24 on your pockets. Iron-on vinyl offers a crisp finish, while hand-cut felt numbers provide a charming, artisanal touch.
- Fabric Bias Fold Tape or Quilt Binding: To finish the edges of your wall hanging neatly. Alternatively, a decorative ribbon can be used for a unique flair.
- Fabric Glue (I highly recommend Aleene’s Fabric Fusion): An excellent choice for attaching felt elements without visible stitches, particularly for the pockets and tree.
- Assorted Red Buttons + Thread: For hanging the felt ornaments on the tree. Choose buttons that are sturdy enough to hold the ornaments securely and complement your festive theme.
- Wooden Dowel + Decorative Dowel Ends: For hanging the completed advent calendar. The dowel provides structure and a professional finish, while decorative ends add elegance.
Note on Binding: For my calendar, I was captivated by a charming gingham ribbon with pompom edges from Hobby Lobby. While not traditional binding, I made it work by ironing it in half, inserting fusible webbing, ironing it in place, and then stitching over it. Sometimes, you just *have* to make that perfect ribbon a part of your project, even if it means a little extra effort! Remember, there are always simpler ways, but sometimes creativity calls for a personal touch.
Step-by-Step Guide: Crafting Your Heirloom Advent Calendar
Step 1: Craft Your Felt Ornaments
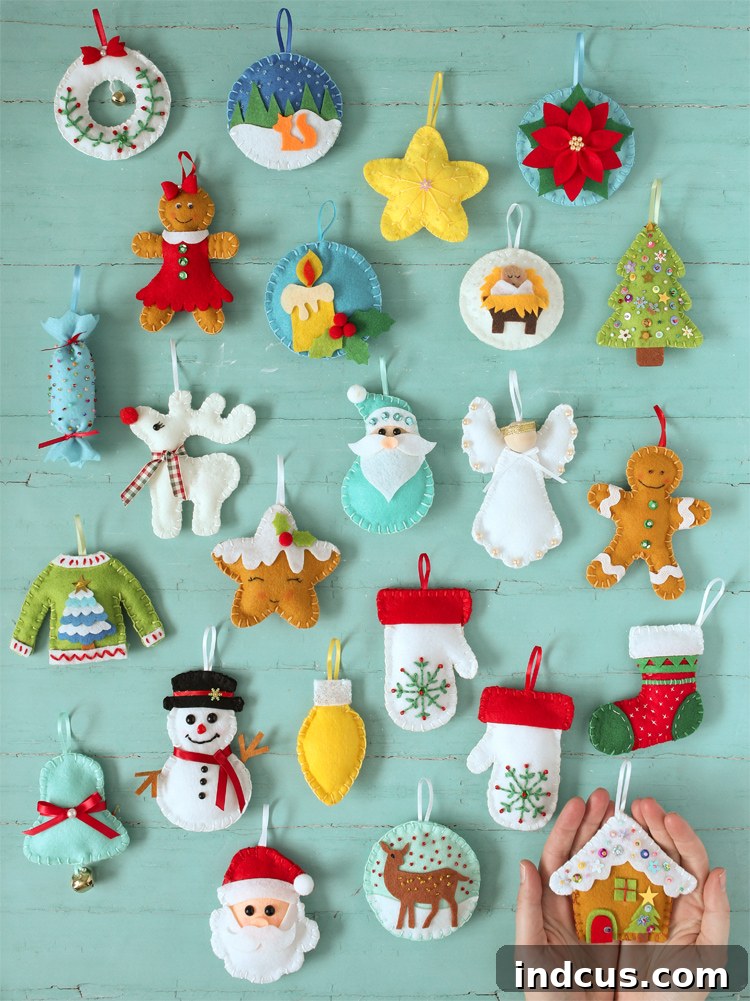
Begin by making 24 beautiful felt ornaments following the detailed instructions provided in your chosen kit. Most kits, like mine, come with more than 24 designs (I had 36), allowing you to select your favorite 24 unique ornaments for the calendar and save the rest for other festive projects or future additions.
This phase is arguably the most time-consuming, yet for many, it’s also the most enjoyable and meditative. I found immense pleasure in settling down with a movie or podcast and stitching a few ornaments each day. This approach prevents burnout and allows you to truly appreciate the intricate details of each little creation. Over a couple of weeks, you’ll accumulate a charming collection of miniature, hand-stitched treasures, each one a testament to your craft and anticipation of the holidays.
Step 2: Prepare the Quilted Background Fabric
Carefully cut your white quilted fabric into a large rectangle. A good starting size is approximately 42 inches by 52 inches, but feel free to adjust these dimensions to best suit your desired wall space. Precision is key here; use a large ruler and a fabric marker to ensure your corners are perfectly square. This attention to detail will provide a professional and neat foundation for your entire advent calendar.
Step 3: Cut the Felt Pockets
From your large sheet of white felt, cut 24 identical 5-inch squares. The most efficient and accurate way to achieve perfectly uniform squares is by using a rotary cutter and a self-healing cutting mat. This method ensures clean, straight edges, which are crucial for a tidy-looking finished product.
Step 4: Number Your Pockets
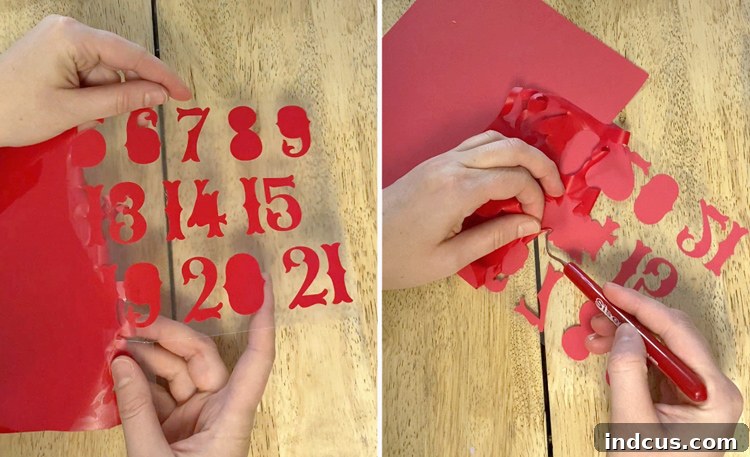
Now it’s time to add the daily countdown numbers to your felt squares. If you have an electronic cutting machine (like a Cricut or Silhouette), use it to cut numbers 1 through 24 from red iron-on vinyl. Remember to mirror the image before cutting so the numbers appear correctly once ironed on. After weeding away the excess vinyl, carefully iron each number onto its respective felt square. If you don’t have a cutting machine, you can achieve a similar look by hand-cutting numbers from red felt or using stencils and fabric paint for a charming, rustic aesthetic.
Step 5: Arrange and Attach the Pockets
Lay out your quilted background fabric and carefully arrange the numbered felt squares onto it. I chose to create a border effect, placing my pockets neatly around the outer edge of the calendar. Use a ruler to ensure consistent spacing and alignment for a balanced and professional appearance. Once satisfied with the arrangement, attach three sides of each square to the background fabric—the bottom and two side edges—leaving the top edge open to form functional pockets. You have the option to use fabric glue for a seamless finish where no stitching lines show on the back, or to sew them for extra durability. The choice between glue and sewing is entirely up to your preference and comfort level.
Step 6: Create the Felt Christmas Tree
From your large sheet of green felt, cut out a prominent Christmas tree shape. You can either print out a tree image you like from online sources to use as a template, or if you’re feeling artistic, sketch a tree shape directly onto the felt with white chalk and then cut it out. Ensure the tree is scaled appropriately to the size of your background fabric, leaving enough space around it for the hanging ornaments.
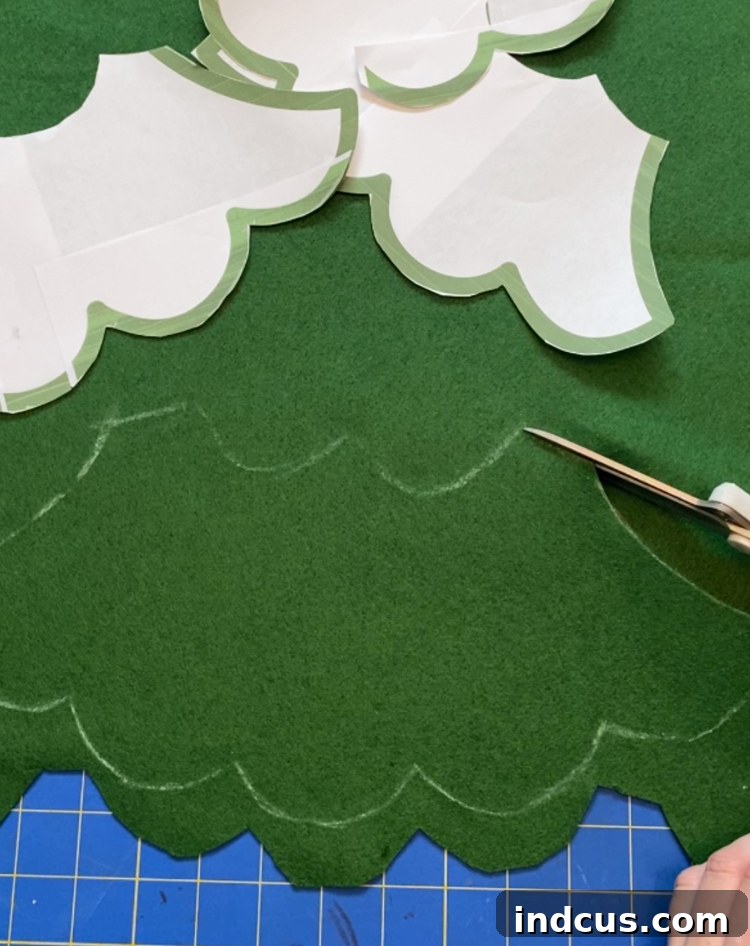
Step 7: Sew Buttons and Attach the Tree
Carefully sew 23 assorted red buttons onto your green felt tree. These buttons will serve as the hanging points for your daily ornaments. Position them creatively to mimic a decorated Christmas tree, ensuring they are securely attached. After the buttons are in place, either glue or sew the entire felt tree onto the quilted background fabric. For the final, special touch, sew one clear or white button a few inches directly above the very tip of the tree. This strategically placed button is exclusively for hanging the star ornament, ensuring it rests perfectly at the treetop, completing your festive display.
Step 8: Finish with Binding
To give your advent calendar a polished, durable finish, sew binding around all the outside edges of the quilted background fabric. This step not only enhances the appearance but also protects the raw edges of the fabric. If you’re new to binding or need a refresher, this excellent quilt binding tutorial provides clear, helpful instructions. Take your time with this step, as a well-applied binding makes a significant difference to the overall quality and longevity of your project.
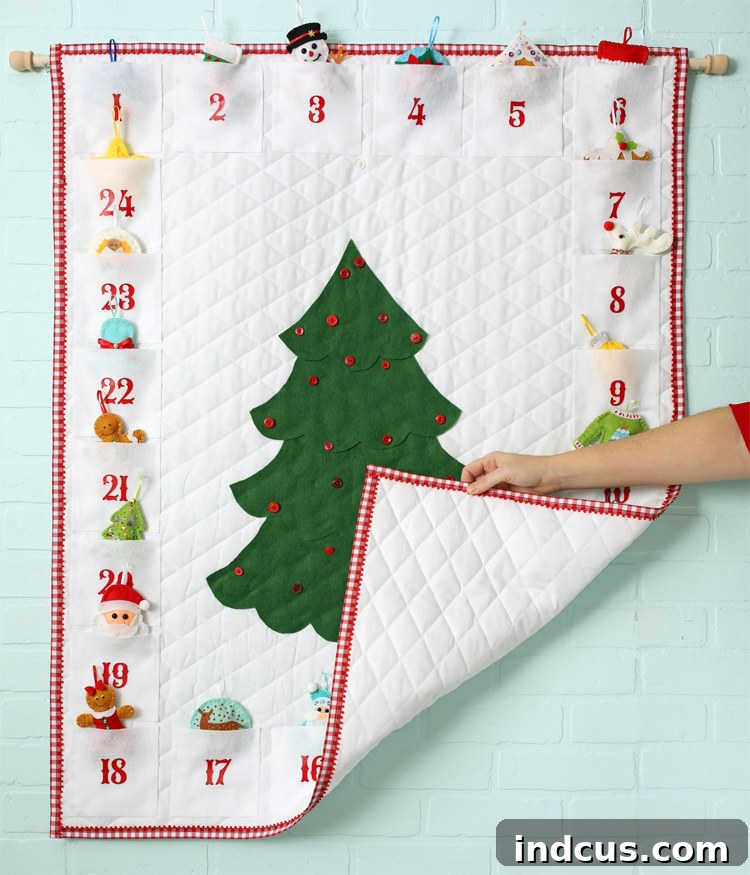
Step 9: Create the Dowel Hanging Pocket
To prepare your advent calendar for hanging, use fabric glue to attach a long strip of felt along the top backside of the wall hanging. This felt strip will form a sleeve or pocket for your wooden dowel. Critically, only glue the top and bottom edges of the felt strip down, leaving the two side ends open. This creates a channel through which you can easily slide your dowel, allowing the calendar to hang smoothly and evenly.
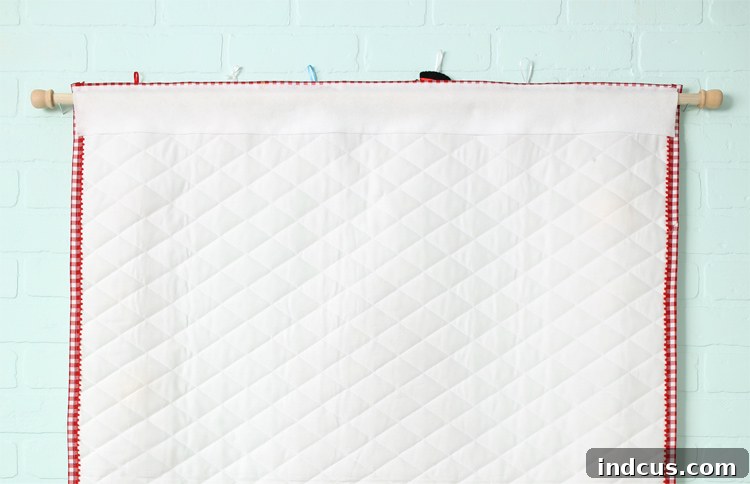
Step 10: Final Assembly and Hanging
Before inserting the dowel, consider painting or staining your wooden dowel and its decorative ends to match your holiday decor or personal preference. I opted for a clear wax sealer to protect the wood while maintaining its natural beauty. Once the dowel is dry, simply slide it through the felt pocket you created in Step 9. Attach the decorative dowel ends, and your magnificent DIY advent calendar is complete and ready to be proudly displayed!
Tips for Success & Customization
- Work in Batches: Especially for the ornaments, breaking down the task into smaller, manageable batches makes the project less daunting and more enjoyable.
- Quality Over Quantity: Invest in good quality felt and fabric. It will significantly impact the look, feel, and longevity of your heirloom piece.
- Personalize It: Consider embroidering a family name or the year onto the back of the calendar, or even adding a special 25th pocket for a Christmas Day surprise.
- Alternate Numbers: If iron-on vinyl isn’t your style, consider embroidering the numbers directly onto the felt pockets for a truly handmade touch, or use fabric paint with stencils.
- Tree Variations: Experiment with different shades of green felt for your tree, or even a whimsical white felt tree for a snowy effect.
- Ornament Themes: While kits offer variety, you could also choose a specific theme for your ornaments, like forest animals, gingerbread figures, or classic Christmas symbols.
Caring for Your Heirloom Advent Calendar
To ensure your DIY felt advent calendar lasts for generations, proper care and storage are essential. When the holiday season ends, gently remove all ornaments and store them carefully in a small box to prevent crushing or damage. Lightly dust or vacuum the main wall hanging with a soft brush attachment. If cleaning is needed, spot clean with a damp cloth and mild soap. Avoid harsh chemicals or machine washing, as this could damage the felt and glue. Once clean and dry, roll the advent calendar around its dowel and store it in a breathable garment bag or box in a cool, dry place. This will protect it from dust, light, and humidity, keeping it beautiful for countless Christmases to come.
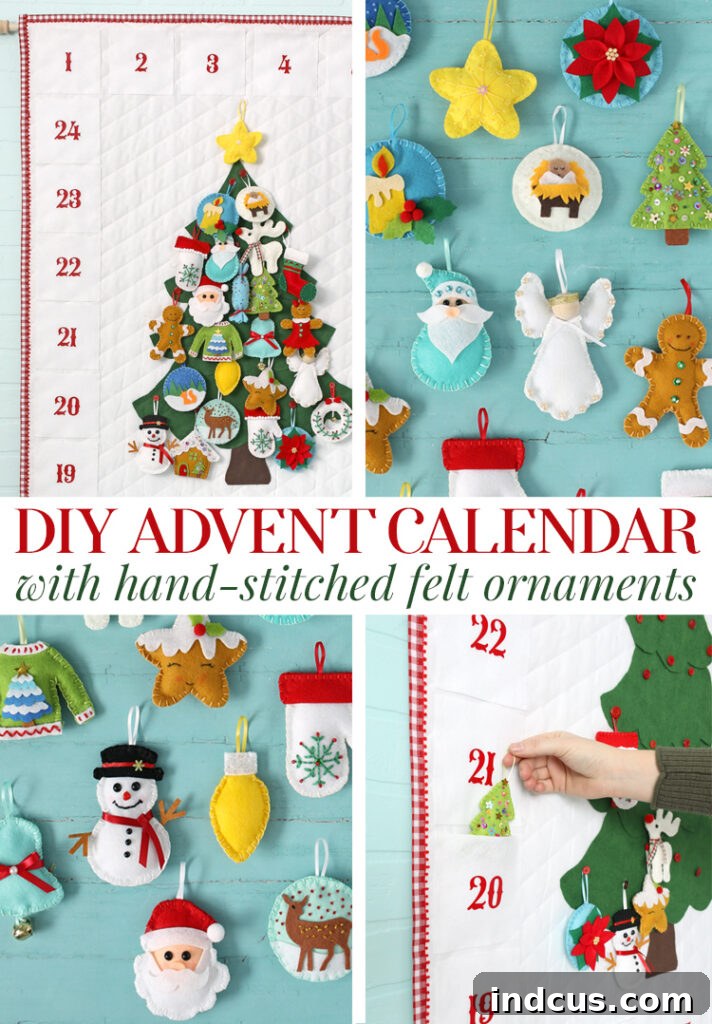
Love this rewarding project? Be sure to pin it for later inspiration and sharing!
Looking for a Quicker Advent Calendar Idea?
If you’re seeking a less time-intensive advent calendar project that can be completed in an afternoon, be sure to check out this charming matchbox advent calendar tutorial. It’s a wonderful alternative for a last-minute festive craft!