
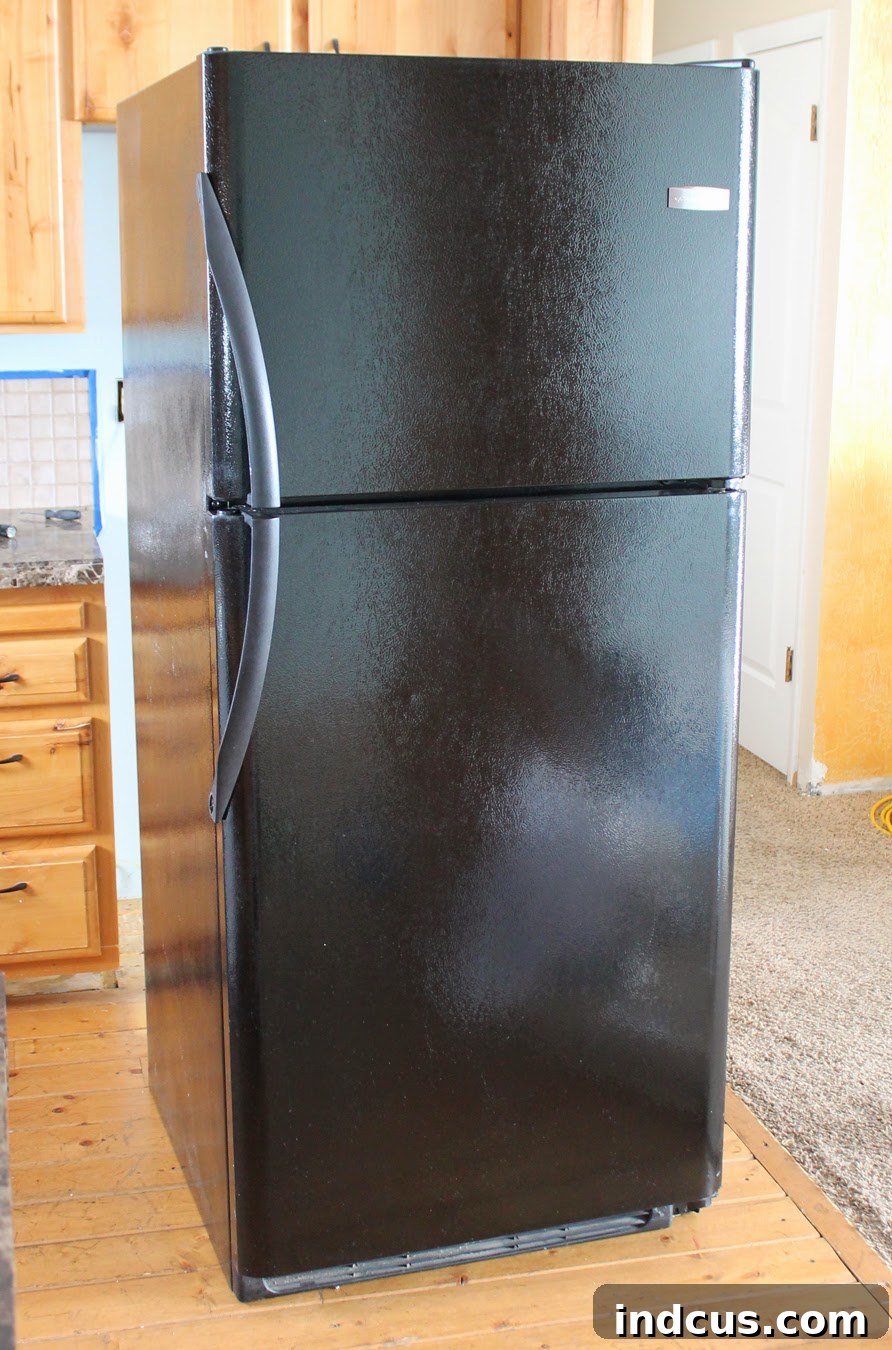
Welcome to our journey of transforming a mismatched kitchen into a cohesive, modern space without breaking the bank. Many homeowners find themselves in a similar situation: a collection of functional appliances that simply don’t align aesthetically. In our case, the kitchen was a patchwork of finishes – a stark black refrigerator, a pristine white dishwasher, an oven that sported a jarring black and white combination, and a conspicuous empty space where a built-in microwave should have resided. This visual disarray, while not impacting performance, certainly detracted from the overall appeal of our home.
The quest for a unified kitchen began with the realization that new appliances, particularly those gleaming stainless steel models, come with a hefty price tag. As someone who hadn’t previously ventured into appliance purchasing, the cost was a significant shock. “$1000 for a stainless steel fridge, and that’s *on sale*?” The thought alone sent shivers down my spine. Such an expenditure was simply not in our budget, yet the desire for a sophisticated, uniform look persisted, especially with the impending purchase of a new microwave, which I envisioned in stainless steel.
The dilemma was clear: how to achieve the coveted stainless steel aesthetic without introducing a third, fourth, or even fifth finish into an already chaotic mix? This question sparked an intensive research phase. I scoured the internet, looking for creative, cost-effective solutions to upgrade our kitchen appliances. It was during this search that I stumbled upon a product that promised to be a game-changer: Liquid Stainless Steel.
Intrigued but naturally skeptical, I immersed myself in testimonials and product demonstrations. The company’s YouTube video became my go-to resource, watched and re-watched countless times until I felt confident enough to take the next step. I decided to reach out to the company, hoping they would be willing to provide a review kit for our blog, allowing us to put their claims to the test and share an authentic experience with our readers. To my delight, they graciously agreed, sending me both a refrigerator kit and a dishwasher/range kit. This generous offer was thrilling, yet simultaneously nerve-wracking. The reality of painting our perfectly functional appliances set in, bringing with it a wave of apprehension. What if I made an irreversible mistake? What if the outcome was less than ideal? These anxieties were certainly palpable.
However, with the Liquid Stainless Steel kits already en route, there was no turning back. I took a deep breath, embraced the challenge, and committed to giving this innovative product a fair shot. Looking back, I can confidently say that decision was one of the best I’ve made for our home. The transformation, despite a few hiccups, was nothing short of remarkable. It proved that a stylish, cohesive kitchen is achievable even on a tight budget, with a little courage and a willingness to embrace DIY.
Before diving into the intricate details of the transformation, let’s take a moment to appreciate the “before” state of our appliances – a testament to their mismatched charm (or lack thereof). These images capture the initial disarray that inspired our ambitious project:
Preparing for the Ultimate Appliance Makeover with Liquid Stainless Steel
The success of any DIY project often hinges on meticulous preparation, and this appliance transformation was no exception. I diligently followed the comprehensive instructions provided with the Liquid Stainless Steel kit. The initial, and arguably most crucial, step involved thoroughly scrubbing every single surface that was to be painted. This wasn’t a superficial wipe-down; it was a deep clean to remove any grease, grime, or residue that could compromise the paint’s adhesion and overall finish. A clean surface ensures a smooth, even application and a durable, long-lasting result. Once clean, surfaces were allowed to dry completely.
Next came the careful disassembly of various components. For instance, the refrigerator’s faceplate and any removable handles or knobs were taken off. This step is vital for two reasons: it prevents paint from getting on parts that aren’t meant to be painted, and it allows for a seamless, professional-looking finish around edges and joints. Leaving these parts on would inevitably lead to messy lines and an unprofessional appearance.
With removable parts out of the way, the focus shifted to masking. Using high-quality painter’s tape, I meticulously taped off any areas I wanted to protect from the paint, such as rubber seals, control panels, and interior edges. Precision in this step is paramount, as any crooked lines or missed spots will be glaringly obvious once the paint is applied. Taking the extra time here saves a lot of corrective work later.
During disassembly, especially when dealing with multiple screws and small parts, organization is key to preventing loss. I employed a simple yet effective trick: placing all the tiny pieces, screws, and hardware onto a strip of duct tape. This ingenious method kept everything securely in place, preventing any frustrating searches for runaway components later on. It’s a small step that makes a huge difference in streamlining the reassembly process.
The Transformation Unfolds: My Experience with Liquid Stainless Steel
The Refrigerator: From Black to Brilliant
With all the preparation complete, it was time for the moment of truth: applying the Liquid Stainless Steel paint. The process involved three coats of the metallic paint, followed by three protective top coats. Each layer was applied with careful attention to detail, keeping an eye out for potential drips (more on that later). The instructions emphasized patience and adherence to drying times, which I tried my best to follow. After the final top coat dried, the reveal was nothing short of spectacular.
The transformation of our black refrigerator was truly breathtaking! The metallic sheen immediately elevated its appearance, making it look far more expensive and contemporary than its original state. The before and after comparison truly highlights the dramatic change, creating a sense of unity and elegance that was previously absent in our kitchen. The immediate visual impact was thrilling, providing a significant boost to the kitchen’s overall aesthetic.
In person, the paint exhibits an even greater sparkle and depth, a quality that can be challenging to fully capture in photographs. A closer look reveals the intricate metallic particles that give it its realistic stainless steel effect. While it’s important to note that the texture of the original fridge shows through, meaning it doesn’t have the perfectly smooth surface of genuine stainless steel, the color and metallic shimmer are incredibly convincing. For a product that costs only $79 for the refrigerator kit, it offers an astonishingly good alternative to shelling out over $1000 for a brand-new appliance. The slight textural difference is a small compromise for such significant savings and a dramatically improved kitchen aesthetic.
The Dishwasher’s Dilemma: A Work in Progress
The dishwasher’s transformation is still a work in progress, a testament to the ongoing decisions involved in a kitchen overhaul. I successfully painted the bottom panel, achieving the desired stainless steel look, which blends beautifully with the newly painted fridge. However, the top part of the dishwasher remains unpainted, a deliberate pause due to a bout of indecisiveness. The question lingers: should I commit to a full stainless steel finish for the entire unit, or would a contrasting black panel on the top create a more interesting, perhaps even modern, two-tone effect? This decision has led to a temporary halt, as I weigh the aesthetic implications of each option. Your opinions would be greatly appreciated in helping me finalize this choice!
The Oven’s Unexpected Turn: A Lesson in Caution
Our oven project, unfortunately, took an unexpected and somewhat tragic turn, as depicted in this poignant image. The incident occurred during a routine cleaning process. In an effort to thoroughly clean the inside of the oven glass, I carefully undid the front screws to separate the panes. However, upon attempting to reassemble them, disaster struck: the glass shattered into countless pieces. It was a disheartening moment, transforming a planned makeover into an unforeseen appliance replacement. This serves as a powerful reminder of the delicate nature of some appliance components and the importance of extreme caution during disassembly.
Despite this setback, there was a silver lining: the oven’s bottom drawer, which I had painted, turned out absolutely magnificent! Because the drawer presented a perfectly smooth surface, the Liquid Stainless Steel paint adhered flawlessly, creating an incredibly convincing stainless steel illusion. Seriously, the results were so impressive that they looked indistinguishable from genuine stainless steel. The pictures truly don’t capture the authentic, high-end finish that was achieved on that drawer. This success further solidified my belief in the product’s capabilities when applied to ideal surfaces. While the tragic oven incident means we are now in the market for a new stove, I remain convinced that the Liquid Stainless Steel paint would have performed exceptionally well on the rest of the oven’s exterior, had I not, in a moment of clumsy eagerness, shattered its glass. It’s a bittersweet outcome, highlighting both the product’s potential and the occasional pitfalls of DIY.
Essential Tips for Your Liquid Stainless Steel Project
My experience with Liquid Stainless Steel, while occasionally challenging, was ultimately incredibly rewarding. It proved to be a valuable lesson in DIY transformation and the power of perseverance. If you’re considering embarking on a similar project, here are some crucial tips gleaned from my journey that I believe will significantly contribute to your success:
- **Be Vigilant for Drips:** This cannot be stressed enough. After applying each coat, dedicate the first 10 minutes to meticulously inspecting every nook, cranny, and especially along edges, joints, screw holes, and bumps. Paint has a sneaky way of accumulating and forming drips in these areas. If these drips dry, they become incredibly difficult to smooth out or conceal without affecting the overall finish. An “eagle eye” approach during this critical window will save you immense frustration later.
- **Manage Expectations for the First Coat:** Don’t be alarmed by the appearance of the first coat. It will inevitably look streaky, uneven, and far from the desired stainless steel finish. This is completely normal and part of the process. Resist the urge to over-apply or try to fix it at this stage. Trust the process; the subsequent coats, combined with the top coat, will gradually build up the desired uniform metallic appearance. Patience is key here.
- **Master the Squeegee Tool:** The kit comes with a specialized squeegee tool, designed to create the characteristic brushed stainless steel effect. This tool is essential for achieving an authentic look. After rolling on the paint, you use the squeegee to create subtle, uniform streaks. The key word here is *precise*. Any crooked or uneven lines made by the squeegee will be visible once the paint dries, compromising the professional finish. Practice on a spare piece of material if you’re unsure, and always strive for straight, consistent strokes.
- **Maintain Your Squeegee:** After each pass with the squeegee over the wet paint, it’s crucial to wipe off any excess paint from the foam. A buildup of paint on the squeegee can hinder its effectiveness, leading to less consistent streaks and a more challenging application. Keeping the squeegee clean throughout the process ensures optimal results. Furthermore, for breaks between coats or if storing the tool, keep it in a plastic bag to prevent the foam from drying out and hardening.
- **Adhere to Drying Times:** The instructions specify waiting periods between coats for a reason. These aren’t arbitrary suggestions but critical components of the paint’s curing process. Rushing the process by applying the next coat too soon can lead to adhesion issues, unevenness, or a less durable finish. While it can be tempting to speed things up, especially towards the end of a long project, impatience can result in imperfect spots that are difficult to correct later. Trust the recommended waiting times.
- **Turn Off Your Refrigerator:** The product videos might suggest you can leave your fridge on during the painting process, but based on my experience, I strongly advise against it. The convenience of keeping perishables inside does not outweigh the significant benefits of turning the appliance off. Transfer your food to a cooler, unplug the fridge, and allow yourself the freedom to leave the doors wide open. This dramatically simplifies the painting process, especially when tackling edges, corners, and the insides of the doors, allowing for a much cleaner and more precise application without constantly battling closing doors or awkward angles.
A Unified Kitchen Awaits: My Final Thoughts and Future Plans
Despite the minor setback with the oven glass, I am profoundly glad I took the plunge and gave Liquid Stainless Steel a chance. It was undeniably nerve-wracking to embark on such a visible home improvement project, but the rewards far outweighed the initial anxieties. The significant cost savings compared to purchasing new, high-end stainless steel appliances, combined with the dramatic visual upgrade, makes this product an exceptional choice for anyone looking to refresh their kitchen on a budget.
Our kitchen is well on its way to achieving that coveted cohesive look. We’ve already taken advantage of Home Depot’s Black Friday appliance deals, securing a new stainless steel oven and microwave. I absolutely cannot wait to share the final, fully unified kitchen with you once these new additions are installed and everything is perfectly in place. This journey has not only transformed our appliances but also instilled a greater confidence in tackling ambitious DIY projects.
For those interested in seeing how these painted appliances hold up over time, be sure to check out my UPDATE: How The Appliances are Holding Up Three Months Later. It provides a valuable long-term perspective on the durability and resilience of the Liquid Stainless Steel finish.
Stay Connected for More DIY Inspiration!
If you’re looking for more inspiring makeovers and creative home improvement ideas, I highly recommend exploring Liquid Stainless Steel’s presence on social media. They share a wealth of stunning transformation photos and project ideas that can ignite your own DIY spirit. You can find them on Facebook and Pinterest for a continuous stream of awesome makeover photos and inspiration.







