
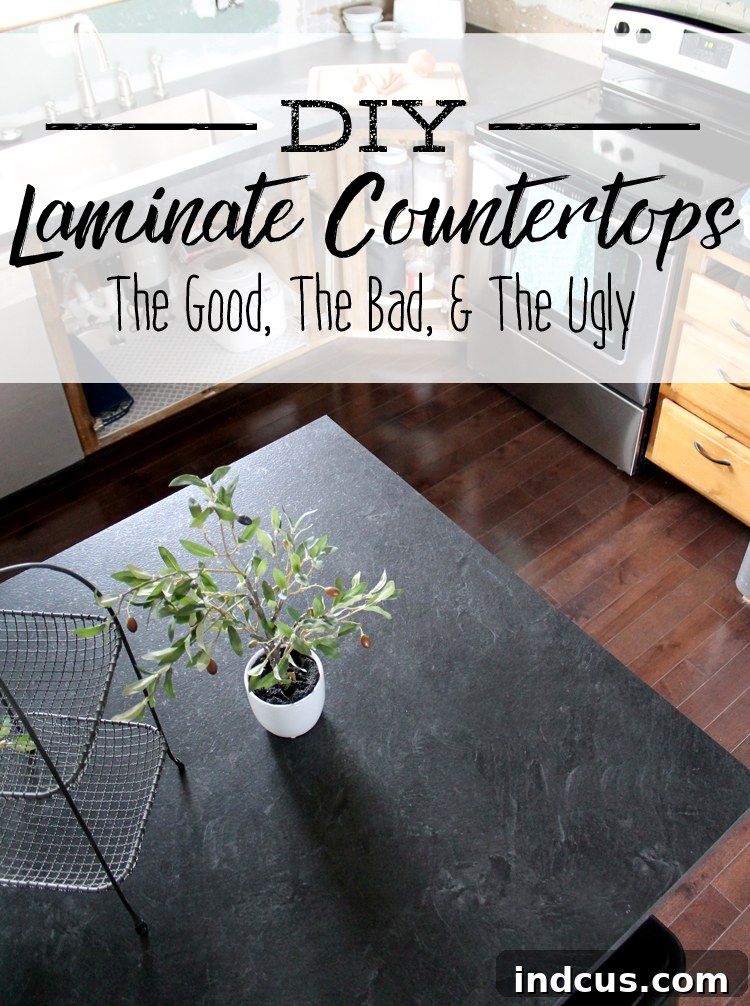
Transform Your Kitchen: A Comprehensive Guide to DIY Laminate Countertop Installation
Embarking on a kitchen remodel is an exciting journey, often filled with dreams of beautiful new spaces and, let’s be honest, a significant dose of budget reality. When it came time to upgrade our kitchen, one of the biggest hurdles was the cost of countertops. Like many homeowners, we quickly discovered that natural stone options such as granite or quartz could easily consume a large chunk of our renovation budget – often running into thousands of dollars. Faced with such steep prices, we knew we needed to find a more affordable yet equally stylish solution. This quest led us to an incredible discovery: building our own laminate countertops!
Gone are the days when laminate countertops were considered a compromise. Today, modern laminate boasts an impressive array of designs, textures, and finishes that mimic natural stone, wood, and other premium materials with remarkable realism. The advancements in manufacturing mean you can achieve a high-end look without the high-end price tag. If you’re looking for durable, attractive, and budget-friendly countertops that you can install yourself, then DIY laminate might just be the perfect answer for your home.
Why Choose DIY Laminate Countertops for Your Kitchen Remodel?
When renovating on a budget, every dollar counts. After exploring various countertop options, we meticulously weighed the pros and cons of several DIY alternatives:
- Concrete Countertops: While appealing for their industrial aesthetic, my husband was concerned about their susceptibility to staining, their overtly rustic feel, and their potentially fleeting trendiness.
- Butcher Block Countertops: We loved the warmth of wood, but the extensive maintenance requirements, especially with a busy family kitchen, seemed daunting. We needed something robust that could withstand daily wear and tear from active kids.
Ultimately, custom-built laminate countertops emerged as the clear winner. This wasn’t just about saving money; it was about finding a versatile material that offered both beauty and resilience. Modern laminate is incredibly diverse, offering patterns that can flawlessly imitate the elegance of marble, the sophistication of slate, or the warmth of granite. Its non-porous surface makes it exceptionally easy to clean and maintain, resisting stains and spills better than many natural materials.
The aesthetic appeal of contemporary laminate is truly remarkable. When we explored samples, we were genuinely surprised by the variety and quality. We considered options like the soft, elegant Formica Argento Romano, which offered a beautiful blend of gray and white, creating a serene and timeless look. The idea of Formica 180fx Calacatta Marble was also tempting – who wouldn’t want the luxurious appearance of marble without the demanding upkeep?
However, our vision for a kitchen with crisp white cabinets and a white backsplash called for a touch more contrast. This led us to narrow our choices down to a darker, more dramatic black countertop. We eventually selected Formica Basalt Slate with a Scovato Finish. This choice delivered a rich, deep black with subtle natural movement, avoiding any splotchy or overly busy patterns. It perfectly complemented our desired aesthetic, providing striking contrast while maintaining a sophisticated feel.
Essential Materials and Tools for Your DIY Laminate Countertops
Before diving into the construction, it’s crucial to gather all your materials and tools. Preparation is key to a smooth and successful DIY project. Here’s what you’ll need to build stunning, custom laminate countertops:
Materials:
- Laminate Sheets: Measure your countertop area accurately and purchase sheets slightly larger than needed. We bought one 4’x12’ and one 4’x8’ sheet of Formica Basalt Slate. Buying from a local home improvement store can save on shipping costs.
- MDF (Medium-Density Fiberboard): Two pieces of 3/4-inch MDF for each countertop section, glued together to achieve the desired 1.5-inch thickness. Ensure you have enough to cover your entire counter footprint.
- Contact Cement: High-quality contact cement for bonding laminate to MDF. You’ll need enough to apply two coats to both the laminate backs and the MDF surfaces.
- Wood Glue: For securely bonding the two layers of MDF together.
- Dowels: Approximately 3/8″ to 1/2″ diameter wooden dowels, cut into 12-18 inch lengths. You’ll need enough to cover the width of your largest countertop section, spaced every 3-5 inches.
- Fine-grit Sandpaper: For smoothing MDF edges.
- Optional: Pre-made Laminate Edges: If you desire decorative edges (ogee, bevel, bullnose) and prefer an easier application method, specialized pre-made edges are available for various laminate types.
- Safety Gear: Safety glasses, gloves, and a respirator mask (especially when working with contact cement and MDF dust).
Tools:
- Circular Saw or Table Saw: For cutting MDF and rough-cutting laminate sheets. A fine-tooth blade is recommended for laminate.
- Router: Essential for trimming laminate edges.
- Laminate Trimming Bit: A specialized router bit with a bearing to guide along the countertop edge, ensuring a flush trim.
- Clamps: Plenty of clamps (bar clamps, C-clamps) for securing MDF layers while glue dries.
- Drill/Driver: For screwing MDF layers together from the underside.
- Measuring Tape & Pencil: For precise measurements and markings.
- J-Roller or Laminate Roller: For firmly pressing laminate onto the MDF, ensuring maximum adhesion and eliminating air bubbles.
- Cheap Foam Rollers & Paint Trays: Ideal for applying contact cement evenly.
- Utility Knife: For scoring and snapping laminate, if preferred for smaller cuts, or cleaning up edges.
- Metal File: For chamfering and smoothing the freshly cut laminate edges.
- Heat Gun (Optional): Useful for bending laminate around curved edges.
- Workhorses or Sturdy Workbench: For supporting your countertop sections during assembly.
Step-by-Step Guide to Building and Installing Laminate Countertops
With your materials and tools ready, let’s walk through the process of creating beautiful, custom laminate countertops for your kitchen. This project requires precision and patience, but the results are incredibly rewarding.
1. Plan and Measure Accurately
Before cutting anything, take precise measurements of your existing countertops or cabinet bases. Create a detailed diagram of your kitchen layout, noting all dimensions, angles, and locations for sinks, cooktops, and other cutouts. Remember to account for a standard overhang (typically 1 inch beyond the cabinet face). A good template made from cardboard or thin plywood can be invaluable for complex shapes or angled corners.
2. Build the MDF Countertop Bases
Your countertop base needs to be robust and perfectly flat. Glue and screw two pieces of 3/4-inch MDF together to achieve a total thickness of 1.5 inches, mimicking standard countertop dimensions. Apply wood glue generously between the layers and secure with screws from the bottom side to prevent any visible fasteners on the top surface. Use plenty of clamps to ensure a tight bond as the glue dries. Once dry, cut the combined MDF to your planned countertop shapes, carefully sanding all edges smooth. Remember that these bases will need to be slightly pulled away from the wall during laminate application to allow for proper edge wrapping.
3. Rough Cut Laminate Sheets
Measure and rough-cut your laminate. Start by cutting strips to cover the vertical edges of your countertops, ensuring they are at least an inch wider than the MDF thickness. Then, cut a large piece for the top surface, leaving a generous overhang of at least two inches on all sides. This extra material is your “safety net” – it gives you room for error and allows for precise trimming later. A circular saw with a fine-tooth blade, cutting from the decorative side down, works well for laminate. Always wear safety glasses.
4. Glue Counter Sides (Applying Edge Strips)
This is where precision becomes paramount. Apply an even, thin layer of contact cement to the back of your pre-cut laminate edge strips and to the corresponding MDF countertop edges. Foam rollers are excellent for achieving a smooth, consistent coat. Allow the contact cement to dry according to the manufacturer’s instructions (usually 15-30 minutes), until it’s tacky but not wet. Ensure good ventilation in your workspace during this step.
Alternative: Pre-made Laminate Edges: For those seeking intricate edge profiles like ogee, bevel, or bullnose without the complexity of routing, pre-made laminate edges are a fantastic option. These pre-formed strips are simply glued onto your countertop edges. They save time and ensure a professional finish, though they add a small cost (around $30 for an 8-foot piece). This can be a worthwhile investment for a refined look. You can find excellent video tutorials on applying these edges, such as here and here. Cabinetmaker Warehouse is a good resource for purchasing various laminate edge profiles.
5. Adhere Side Strips to Countertops
Critical Warning: Contact cement bonds instantly and permanently upon contact. You have one chance to get this right! Carefully align your laminate strip with the MDF edge, starting at one end. Slowly and steadily press the laminate onto the MDF, smoothing it down the entire length. The generous overhang you allowed is your safeguard against minor misalignments. For angled or curved corners, you may need to gently heat the laminate with a heat gun before applying glue to allow it to conform to the shape. Resources like Heating Laminate to Bend and Curving Around an Outside Radius can provide guidance.
6. Route and Trim the Edges
Once the side strips are firmly adhered, use a router fitted with a laminate trimming bit (a flush trim bit with a bearing) to carefully trim off the excess laminate. Guide the router along the MDF edge, allowing the bearing to ride smoothly against the wood. You may need to make multiple passes to achieve a perfectly flush edge. It is highly recommended to practice on a scrap piece of laminate and MDF first to get a feel for the tool and prevent mistakes on your actual countertops.
7. Prepare for the Top Surface
After all the side edges are laminated and trimmed, it’s time to prepare the main countertop surface. Apply an even layer of contact cement to both the back of your large top laminate sheet and the top surface of the MDF base. Again, use foam rollers for a consistent application and allow the cement to dry to the touch, ensuring proper ventilation.
8. The Dowel Trick: A Crucial Step for Perfect Adhesion
Because contact cement is unforgiving, using dowels is absolutely essential. Lay your wooden dowels across the entire surface of your countertop, spaced every 3-5 inches. These dowels prevent the freshly glued laminate sheet from prematurely touching and sticking to the MDF, giving you the critical opportunity to position the laminate perfectly before bonding. This step eliminates the risk of misalignment and ensures a smooth, bubble-free application.
9. Bond Laminate to the Wood Base
Carefully place the large laminate sheet on top of the dowels. Double-check that it is perfectly aligned with your countertop base, ensuring ample overhang on all sides. Once satisfied with the alignment, begin pressing the laminate onto the wood. Start from the middle and slowly remove the dowels one by one, working your way towards one end, then repeating for the other side. As you remove each dowel, firmly press the laminate down with a J-roller to ensure full contact and eliminate any air pockets. This methodical approach is vital for a smooth, professional finish.
10. Final Routing and Edge Finishing
After the entire top surface is bonded, use your router with the laminate trimming bit again to carefully trim off the excess laminate from the top surface, just as you did with the side strips. The goal is a perfectly flush edge all around your countertop. Once trimmed, the edges of the freshly cut laminate will be sharp. Use a metal file, holding it at a 45-degree angle, to gently chamfer and smooth these edges. This not only makes them safer but also gives them a cleaner, more finished appearance.
Reflecting on Our DIY Laminate Journey: Tips and Lessons Learned
Seeing our new countertops installed brought immense satisfaction! The Formica Basalt Slate looks fantastic, resembling honed marble or slate. It cleans beautifully, hides smudges, and truly doesn’t look inexpensive at all.
However, I want to be completely transparent about the realities of a project like this:
- The Learning Curve is Real: This was one of the more challenging and stressful DIY projects we’ve undertaken. There’s a definite learning curve with the router, and we did have a few instances where we accidentally “chewed through” or nicked the colored layer of the laminate. Thankfully, a black permanent marker works wonders for discreet touch-ups!
- Mistakes Happen (and Cost): My biggest piece of advice: take your time, especially with contact cement. In a moment of exhaustion, we laid the laminate crooked on our main countertop section. Remember that “one chance” warning? We learned it the hard way, ruining a piece of laminate. This mistake cost us an additional $70 for a new sheet, several hours scraping dried cement, and a week without a kitchen sink. Practice on scrap pieces until you feel confident!
- Unbeatable Value: Despite our setback, the total cost for our new countertops, including the replacement laminate, was approximately $470. Considering we have a large kitchen with a 12’8” main section and a 3’x5’ island, this represents an astonishing 90% savings compared to granite!
- Embrace the Seam: Our longest countertop run required a seam, and I initially worried it would be glaringly obvious. However, with careful placement (ours is discreetly under our dish drying mat) and a well-executed joint, it’s hardly noticeable. Don’t let a seam deter you from achieving your dream kitchen.
- Edge Perfection: While fancy pre-made edges offer a seamless look, we achieved excellent results by simply touching up the slightly visible white core of our laminate with a permanent marker after filing. It’s a simple trick that makes a huge difference!
UPDATE (Five Years Later): We are now five years post-remodel, and our DIY laminate countertops are still holding up beautifully! They have a few tiny dings, as expected with daily family use, but thanks to the chosen color and natural variations, these imperfections are almost invisible. We still occasionally use a permanent marker for touch-ups. We can confidently say we would make the exact same choice again, 100%.
Embracing the Undermount Sink in Laminate Countertops
One of the most exciting aspects of our kitchen transformation was the ability to install an undermount sink directly into our laminate countertops. Many people mistakenly believe this isn’t possible, but thanks to innovative products like the Karran sink designed specifically for laminate, you can enjoy the sleek, easy-to-clean benefits of an undermount sink. This feature significantly elevates the functionality and aesthetic of the kitchen, proving that DIY laminate doesn’t mean sacrificing modern conveniences. Learn all the details about our undermount sink installation here.
Before and After: Our Kitchen Transformation
It’s always amazing to look back at where we started and see how far we’ve come. Our journey from an outdated kitchen to a bright, modern space with custom laminate countertops is a testament to the power of DIY.
Here’s a glimpse of our kitchen before the remodel:
And this is where we are today, proudly showcasing our DIY laminate countertops:
Click here to see the finished kitchen remodel!
Final Thoughts on DIY Laminate
In summary:
- We are incredibly happy with the finished product. Our laminate countertops are beautiful, budget-friendly, and simple to keep clean.
- While it was a challenging DIY, particularly for our large 12’8” section, smaller projects like our island were much more manageable.
- Knowing what we know now, we would absolutely undertake this project again. The cost savings and custom look are truly unbeatable.
If you’re considering DIY-ing your kitchen laminate countertops, I hope this detailed guide encourages you. It’s a project that delivers significant impact and value for your home. Feel free to ask any questions you may have – I’d be happy to share more insights!
Disclaimer: This post is based on our personal experience and research. We were not compensated for this content and chose all materials and methods based on what we believed was best for our home. All opinions shared are honest and our own.







