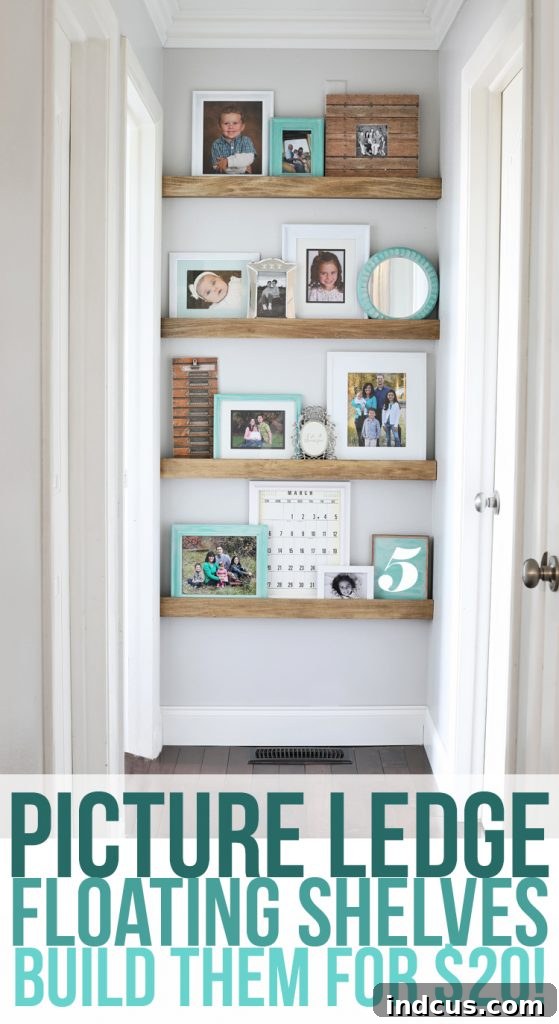
Build Stunning Picture Ledge Floating Shelves: The Perfect DIY Solution for Narrow Hallways (Under $20!)
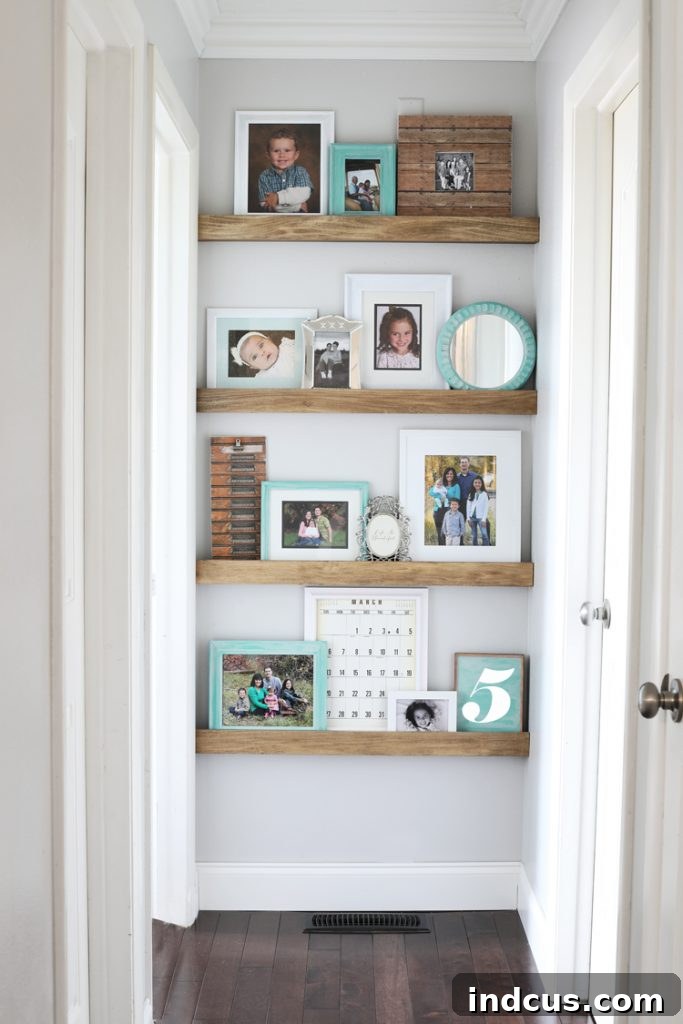
Are you looking to add character and functionality to an often-overlooked area of your home, like a narrow hallway? Do you dream of a dedicated space to showcase cherished family photographs and decorative accents, but feel constrained by limited wall depth? You’re not alone! Many homeowners face the challenge of decorating confined spaces, where traditional shelving options simply won’t fit or look right. This comprehensive DIY guide will walk you through building elegant, space-saving picture ledge floating shelves that are not only incredibly affordable—costing around $20 for materials—but also surprisingly quick to construct, taking just a few hours of your time.
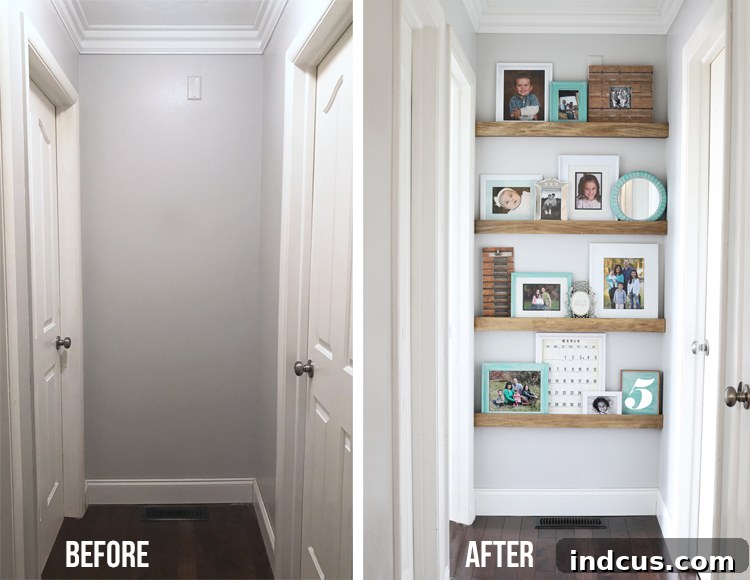
For a long time, the end of my hallway was a blank canvas, begging for a personal touch. I envisioned a beautiful display of my favorite family photos, creating a warm and inviting atmosphere. However, I encountered a common hurdle: the proximity of a door to the back wall left us with a mere 3.5 inches of usable depth. This meant conventional picture ledges, which typically feature both a back and a front piece, would consume too much space, leaving insufficient depth for even standard picture frames. After much deliberation and creative problem-solving, we devised an innovative method for building floating picture shelves that ingeniously eliminates the need for a bulky back piece. This smart design decision freed up just enough precious room, making these shelves perfectly functional and stylish for our tight space.
Why DIY Your Picture Ledge Floating Shelves?
Opting for a DIY approach for your floating shelves offers numerous advantages over purchasing pre-made solutions, especially when dealing with unique spatial requirements:
- Cost-Effectiveness: As you’ll discover, the raw materials for this project are incredibly inexpensive, allowing you to achieve a high-end look without the hefty price tag. For around $20, you can create custom shelving that would cost significantly more to buy.
- Customization to Perfection: Store-bought shelves often come in standard sizes, which rarely fit perfectly into specific nooks or narrow hallways. Building your own allows you to precisely tailor the dimensions to your wall, ensuring a snug, built-in appearance. You also get to choose your preferred wood stain or paint, matching your existing decor seamlessly.
- Personalized Display: These shelves are designed with picture display in mind, offering a shallow ledge that holds frames securely. This enables you to create a rotating gallery of memories, easily swapping out photos for different seasons or occasions.
- Modern Aesthetic: The floating design provides a clean, minimalist look that complements contemporary and traditional interiors alike. It creates a sense of openness and sophistication, making your hallway feel less cluttered and more refined.
- Satisfaction of Creation: There’s immense pride and satisfaction in stepping back and admiring a functional, beautiful piece you’ve crafted with your own hands. This project is beginner-friendly, making it an ideal entry point into home improvement.
The Ingenious Design: Overcoming Narrow Space Challenges
Our specific challenge was the severe limitation of just 3.5 inches of available depth in the hallway. This constraint immediately ruled out traditional picture ledges, which are typically constructed with a solid back panel, a top shelf, and a front lip. Such a design would have eaten up too much of our precious space, leaving virtually no depth for picture frames to rest on. We needed a solution that would maximize the usable surface while maintaining the aesthetic of a floating shelf.
The breakthrough came from simplifying the structure. Instead of a full box, we realized we could create the essential “L-shape” of a picture ledge by attaching a sturdy support beam directly to the wall, then adding a thinner, decorative front piece beneath it. This two-part construction effectively creates a stable, shallow shelf without the need for a back panel. By doing so, we gained critical inches, allowing for a total shelf depth of 3 inches with a generous 2.5 inches of usable space – just enough to artfully layer two standard picture frames, or one larger frame with a smaller accent in front.
Tools and Materials: Your Essential DIY Shelf Shopping List
Before diving into construction, gather all your necessary tools and materials. This project is designed to be budget-friendly, so many of these items you might already have on hand. Remember to prioritize safety by wearing appropriate eye protection and gloves when handling wood and stains.
Supply List
- Two 2″x3″x96″ Pine Boards: These will form the main structural support of your shelves, screwed directly into wall studs. Their sturdy dimension provides excellent stability.
- Four 1/2″x3″x3′ Poplar Boards: These thinner boards will serve as the front lip of your picture ledge, creating the “ledge” effect and giving the shelves their finished look. Poplar is chosen for its smooth finish and good staining properties.
- 3 Inch Screws: Essential for securely attaching the 2×3 support boards into your wall studs. Ensure they are long enough to penetrate the drywall and firmly grip the stud.
- Drill With Countersink Bit: A powerful tool for pre-drilling holes and making sure screw heads sit flush with the wood surface, creating a cleaner, more professional finish.
- Studfinder: Crucial for locating wall studs, which are vital for a strong and safe installation of floating shelves.
- Level: Absolutely necessary to ensure your shelves are perfectly horizontal, preventing items from sliding off and achieving a polished look.
- Sandpaper (various grits, e.g., 120 and 220): For smoothing out any rough edges or imperfections on the wood, especially on the visible front lip.
- Wood Conditioner: A must-have for achieving an even stain application, preventing blotchiness, especially on pine.
- Wood Stain (I used Weathered Oak and Briarsmoke): Choose colors that complement your home’s aesthetic. Combining stains can create unique, layered effects.
- Polycrylic or Polyurethane (optional): A protective topcoat for added durability and a richer finish, though not strictly necessary for purely decorative shelves.
- Finish Nailer (or hammer and small finishing nails): For attaching the front lip board cleanly and securely.
- Wood Putty (optional): To fill any visible nail holes if you desire an ultra-smooth finish.
Step-by-Step Construction Guide: Building Your Picture Ledge Floating Shelves
Follow these detailed steps to construct your beautiful and functional picture ledge floating shelves. Take your time with each step to ensure a professional and lasting result.
Step 1: Precise Measurements and Cuts for a Perfect Fit
Begin by accurately measuring the width of your hallway. Most standard hallways are approximately 3 feet wide, meaning an 8-foot 2×3 board should yield enough material for two shelves. Cut your 2×3 pine boards and your 1/2×3 poplar boards to this exact width. It’s highly recommended to measure the actual space where each shelf will be installed, even if your walls appear straight. Slight inconsistencies in wall construction are common, and custom-cutting each piece ensures a snug, flush fit.
Step 2: Smooth Finish: Sanding for a Polished Look
Once your boards are cut, it’s time to sand them. This crucial step prepares the wood for staining and ensures a smooth, refined surface. Pay particular attention to the 1/2×3 poplar pieces, as these will form the visible front lip of your shelves. Start with a medium-grit sandpaper (e.g., 120-grit) to remove any rough spots or milling marks, then follow up with a finer grit (e.g., 220-grit) for a silky-smooth finish. Don’t forget to lightly sand the 3-inch sides of your 2×3 boards, as these will also be stained.
Step 3: Staining and Finishing: Adding Character and Protection
Before applying stain, use a wood conditioner according to the product directions. This is especially important for pine, as it helps the stain absorb evenly and prevents blotchiness, resulting in a professional-looking finish. Once the conditioner is applied and allowed to penetrate, stain the 3-inch sides of your 2×3 boards and the entire 1/2×3 poplar boards using your chosen stain color. I opted for a beautiful layered effect, applying a coat of “Weathered Oak” first, followed by a very light application of “Briarsmoke” on top to add depth and warmth. While I chose not to seal my wood with polyurethane or polycrylic since these are purely decorative shelves and won’t endure heavy wear, you absolutely can (and should, for added protection) apply a clear coat if desired. Follow the manufacturer’s instructions for drying times between coats.
Step 4: Locating Studs: Ensuring a Secure Foundation
For sturdy floating shelves that can hold your precious items, it’s paramount to attach them directly into wall studs. Use a reliable stud finder to locate the vertical wooden studs within your wall. Mark the center of each stud clearly on the wall. Then, transfer these markings to the 2×3 boards, indicating exactly where your screws will go. A secure attachment to studs prevents sagging and ensures the longevity of your shelves.
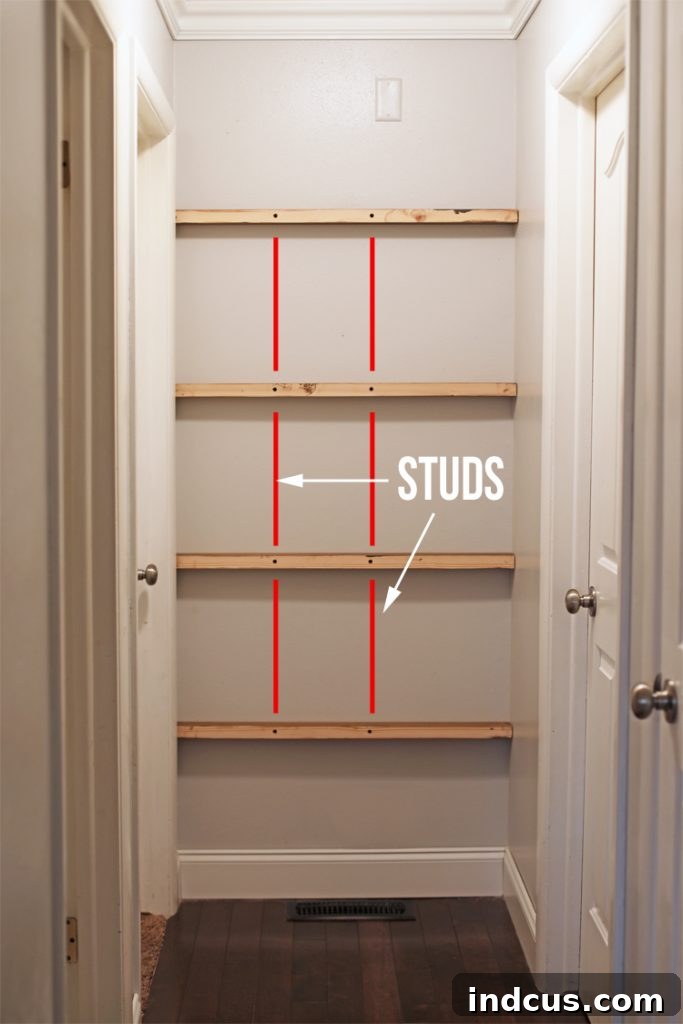
Step 5: Pre-Drilling with a Countersink Bit: The Professional Touch
With your stud locations marked on the 2×3 boards, use a drill fitted with a countersink bit to pre-drill holes through the narrow 2-inch side of the board. Align these holes precisely with your stud markings. The countersink bit creates a wider opening at the surface of the wood, allowing the head of your 3-inch screws to sit flush or slightly below the surface. This technique provides a much cleaner, more professional finish, preventing screw heads from protruding and potentially snagging items.
Step 6: Mounting the Support Board: Level and Secure
Carefully position the pre-drilled 2×3 board against the wall at your desired shelf height. Using a level, ensure the board is perfectly horizontal. This step is critical for the aesthetic and functionality of your shelves. Once leveled, insert your 3-inch screws into the countersunk holes and firmly attach the 2×3 support board to the wall studs. Drive the screws until the board is snug and secure, creating a solid base for your picture ledge.
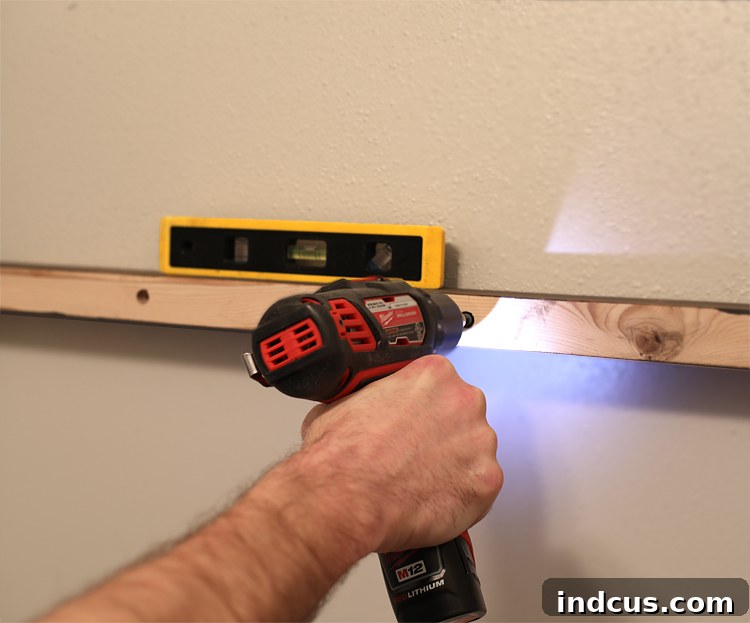
Step 7: Attaching the Front Ledge: The Finishing Touch
Now, take your stained 1/2×3 poplar board, which will form the front lip of your picture ledge. Position it against the 2×3 support board, ensuring the bottom edge of the poplar board sits flush with the bottom edge of the 2×3. This alignment creates the essential “L-shape” that defines a picture ledge, providing the necessary depth for your frames. Using a finish nailer (or small finishing nails and a hammer), face nail the poplar board into place. Drive nails strategically to firmly attach the front lip to the 2×3. As an optional step, you can use wood putty to fill in any visible nail holes for an even smoother appearance. I personally skipped this step because the small finishing nails I used were virtually invisible once in place!
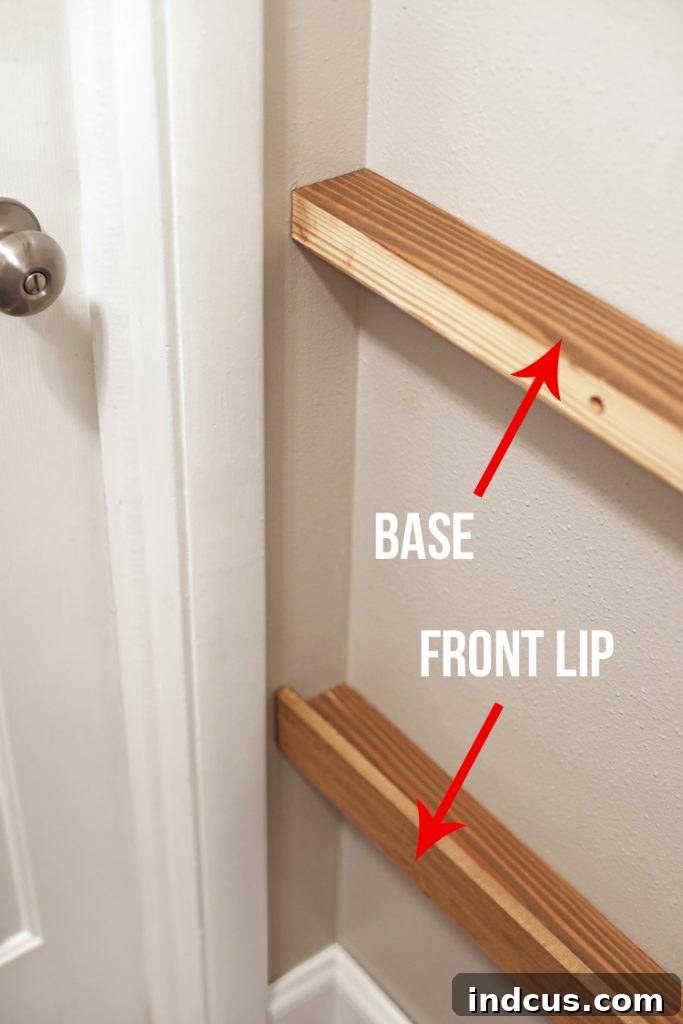
Here’s a close-up of the beautifully finished shelf, demonstrating the clean lines and sturdy construction:
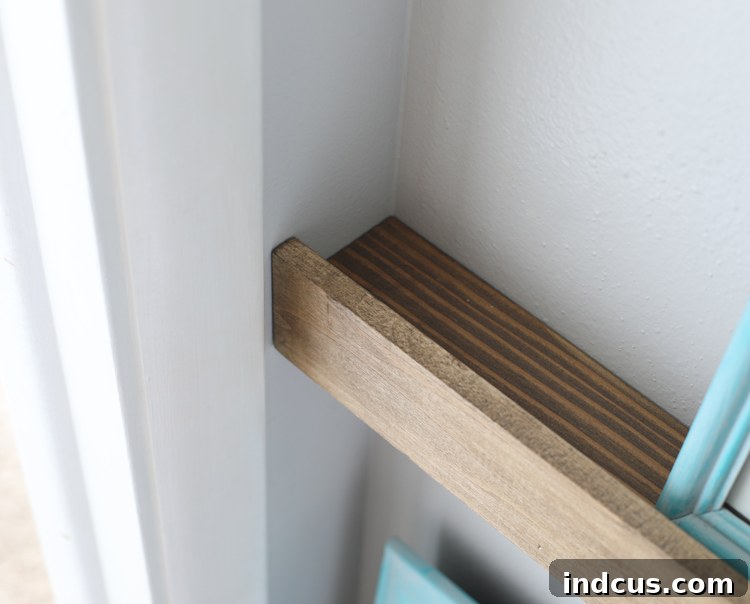
The Finished Product: Maximizing Your Narrow Space
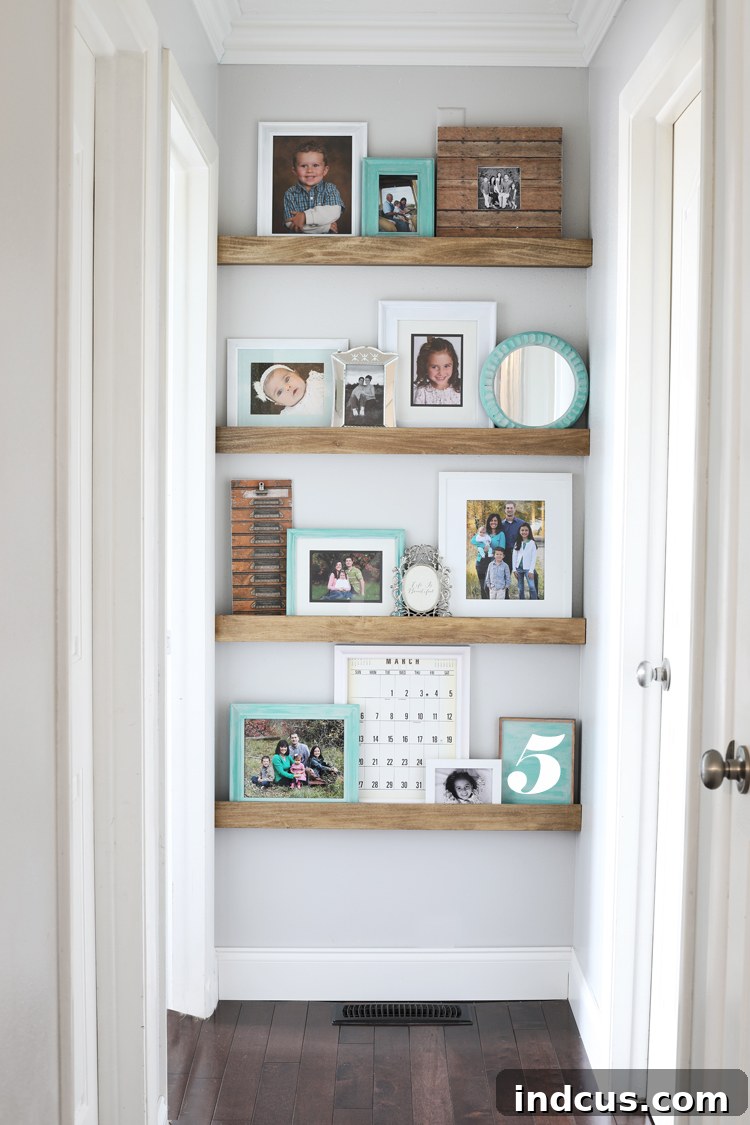
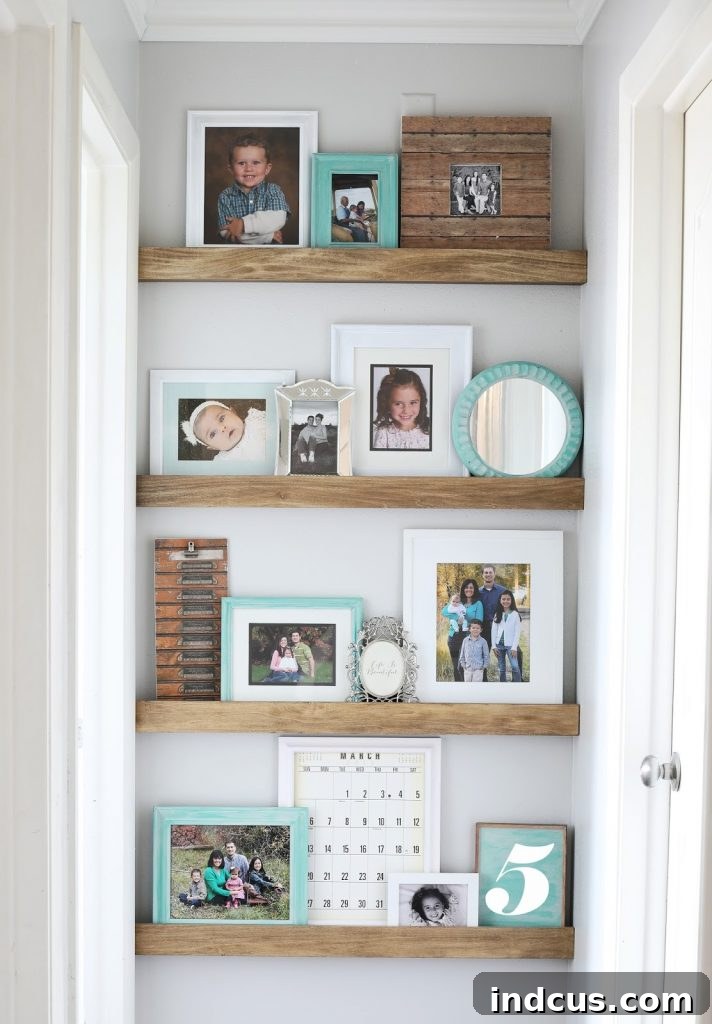
With the front lip securely in place, your picture ledge is complete! The overall shelf, including the lip, measures a sleek 3 inches deep. This clever design provides an impressive 2.5 inches of usable shelf space, which is precisely what we needed to accommodate picture frames effectively in a narrow hallway. This depth allows you the flexibility to layer two standard-sized picture frames next to each other, creating a dynamic and visually appealing display without feeling cramped.
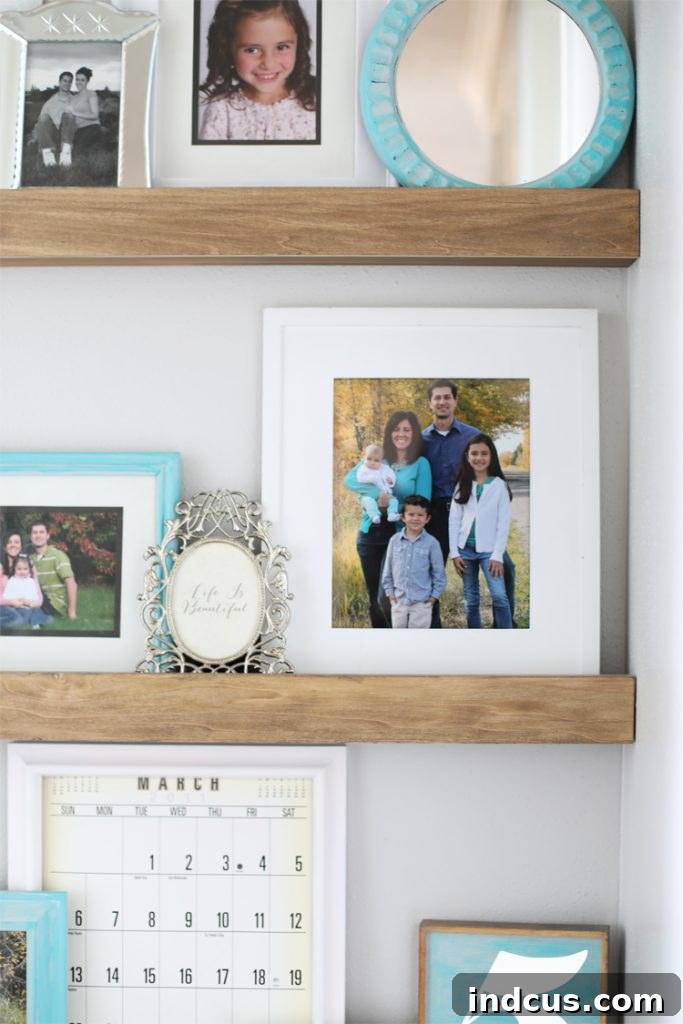
Styling Your Picture Ledge Shelves: Decorating Tips and Tricks
Once your beautiful new shelves are installed, the fun part begins: decorating! Styling picture ledges allows for creative expression and can dramatically enhance the aesthetic of your hallway. Here are some tips for achieving a cohesive and visually appealing display:
- Vary Height and Shape: To create visual interest, don’t just use frames of the same size. Gather a variety of photo frames with different heights and shapes. Mix rectangular frames with square ones, and even incorporate a small round mirror or a piece of small artwork.
- Cohesive Color Scheme: While varying shapes is good, maintaining a cohesive color scheme is key to making the display look “pulled together.” I collected various frames I already owned and unified them by painting them in coordinating shades of white, soft blue, and natural wood tones. This approach creates harmony and elegance.
- Layering is Key: Utilize the 2.5 inches of usable depth by layering frames. Place larger frames at the back and smaller ones in front. This adds depth and dimension to your display.
- Incorporate Small Decorative Elements: Beyond photos, consider adding a few small decorative items. A tiny potted succulent, a small ceramic sculpture, a decorative letter, or a delicate vase can break up the repetition of frames and add personality. Just be mindful of the narrow depth.
- Balance and Asymmetry: While balance is important, perfect symmetry isn’t always necessary. Experiment with asymmetrical arrangements to create a more dynamic and artistic look. Group odd numbers of items together for a visually pleasing composition.
- Consider Lighting: If your hallway is dim, a small battery-operated picture light or LED strip beneath the shelf could highlight your display beautifully.
Transforming Your Home: The Impact of DIY Decor
I am absolutely thrilled with the incredible impact these DIY picture ledge floating shelves have had on my hallway, especially considering how little they cost! It’s truly amazing how a small, inexpensive project can yield such significant aesthetic and emotional returns. Suddenly, what was once an overlooked and somewhat bland passageway has become one of my favorite places in the house. Every time I walk by these beautiful photo ledges and see our treasured family photos displayed so elegantly, a smile comes to my face.
This project is a testament to the power of DIY – not just in saving money, but in creating personalized spaces that genuinely reflect your style and bring joy. It demonstrates that even the most challenging spaces, like narrow hallways, can be transformed into points of interest and beauty with a little creativity and effort. We hope this guide inspires you to tackle this rewarding project and experience the satisfaction of enhancing your home with custom-built solutions!
Frequently Asked Questions About DIY Picture Ledge Floating Shelves
Can I use different types of wood for this project?
Absolutely! While pine and poplar are affordable and easy to work with, you can certainly choose other types of wood like oak, maple, or even reclaimed wood for a different look. Just be aware that denser woods might require more effort for cutting and drilling, and their cost can vary significantly.
What if my walls don’t have wood studs in the desired locations?
If you can’t hit a stud where you want to install your shelf, you’ll need to use heavy-duty drywall anchors specifically designed for weight-bearing applications. Toggle bolts or self-drilling anchors rated for 50+ pounds are good options. However, for maximum stability and weight capacity, always prioritize mounting into studs whenever possible, especially for shelves holding multiple frames.
How much weight can these narrow floating shelves hold?
These shelves are primarily designed for displaying picture frames, small decorative items, and lightweight decor. When properly installed into wall studs, they are very sturdy for their intended purpose. However, they are not designed for heavy objects like stacks of books, large ceramics, or electronics. Always consider the weight rating of your wall anchors if not installing into studs.
Can I paint these shelves instead of staining them?
Yes, absolutely! If painting better suits your decor, simply skip the wood conditioner and stain steps. After sanding, apply a good quality wood primer, followed by two coats of your chosen paint color. Lightly sand between coats for a smooth finish.
How do I clean these shelves?
For stained or painted shelves, a simple dusting with a soft, dry cloth is usually sufficient. For occasional deeper cleaning, a slightly damp cloth with mild soap can be used, but always wipe dry immediately to prevent water damage.
Like this budget-friendly and impactful DIY project? Don’t forget to pin it to your favorite home decor or DIY boards so you can easily find it later!