
Unlock Your Creativity: Crafting Stunning Woven Baskets from Duck Tape!
Welcome back, fellow crafters! Today, we’re embarking on an exciting journey into the world of Duck Tape artistry. Prepare to be amazed as we transform ordinary rolls of Duck Tape into truly extraordinary woven baskets. This isn’t just any basket; we’re going to master a unique diagonal weaving technique that results in a captivating zig-zag edge along the top. The outcome is not only visually appealing but also incredibly sturdy and versatile. I’m thrilled to guide you through every single step of this engaging DIY project, from preparing your materials to putting the finishing touches on your masterpiece. To ensure every detail is clear, I’ve also created a comprehensive video tutorial, allowing you to visualize each stage of the weaving process with ease.
Duck Tape crafts are renowned for their durability and endless possibilities, making them perfect for both seasoned crafters and eager beginners. These woven baskets are a testament to the tape’s strength and your imagination. Whether you’re looking for a chic storage solution, a unique gift idea, or a fun afternoon project, this tutorial has you covered. Get ready to unleash your inner artist and create something truly special!
This post is sponsored by Duck Brand.
Essential Materials for Your Duck Tape Basket
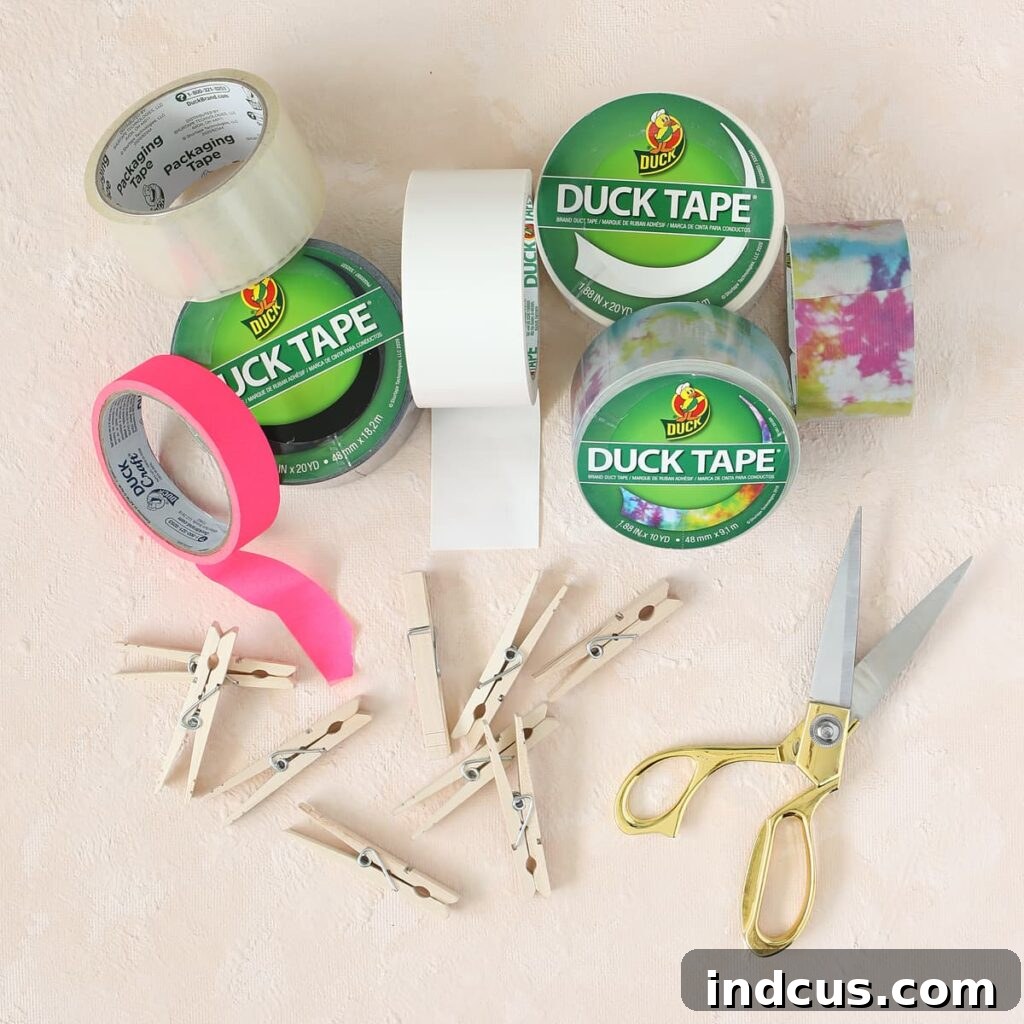
Gathering your materials is the first exciting step in any crafting adventure. For this project, you’ll find that the supplies are minimal and readily available, making it accessible for everyone. The beauty of Duck Tape lies in its vast array of colors and patterns, allowing you to personalize your basket to perfectly match your style or decor. Don’t be afraid to mix and match for truly unique results!
- Duck® Tape: The star of our show! Choose any color or pattern that inspires you. Consider contrasting colors for a more striking weave, or complementary shades for a subtle, elegant look. You’ll need at least one full roll, possibly more if you choose a larger basket size or multiple colors.
- Duck Craft Paper Tape: This is crucial for temporarily holding our base in place and creating our initial diamond shape. Its gentle adhesive ensures it won’t damage your Duck Tape strips when removed.
- Duck Invisible Tape or Packing Tape: Essential for securing the ends of your woven strips, providing a neat and durable finish. Clear tape blends seamlessly with any Duck Tape design.
- Wooden Clothespins: Your best friend during the weaving process! Clothespins will hold your strips in place as you build the basket walls, preventing unraveling and ensuring a consistent weave. Have a good handful ready.
- Sharp Scissors: A good pair of sharp scissors is indispensable for clean, precise cuts through the Duck Tape. This ensures neat edges and a professional-looking final product.
Step-by-Step Instructions: Weaving Your Duck Tape Masterpiece
Patience and precision are key when working with Duck Tape, but the process is incredibly rewarding. Follow these detailed instructions carefully, and don’t hesitate to refer to the video tutorial if you need a visual guide for any of the steps. Let’s begin crafting your unique diagonal-weave Duck Tape basket!
Step 1: Preparing Your Duck Tape Strips
To start, you’ll need to create sturdy, double-sided Duck Tape strips. Begin by cutting two pieces of Duck Tape, each precisely 21 inches long. The 21-inch length is ideal as it provides ample material for both the base and the initial height of your basket, accommodating the diagonal weave without running short. Carefully stick these two pieces together, sticky sides facing inward. Take your time to align them perfectly, pressing firmly to eliminate any air bubbles and create a smooth, double-sided strip that is no longer sticky. This technique ensures your basket strips are strong, durable, and easy to handle during weaving. Once you have this initial double-sided piece, cut it in half lengthwise. This will yield two long, skinny strips. Repeat this entire process until you have a total of twelve identical skinny strips. Consistency in your strip preparation will lead to a more uniform and attractive basket.
Step 2: Constructing the Base Weave
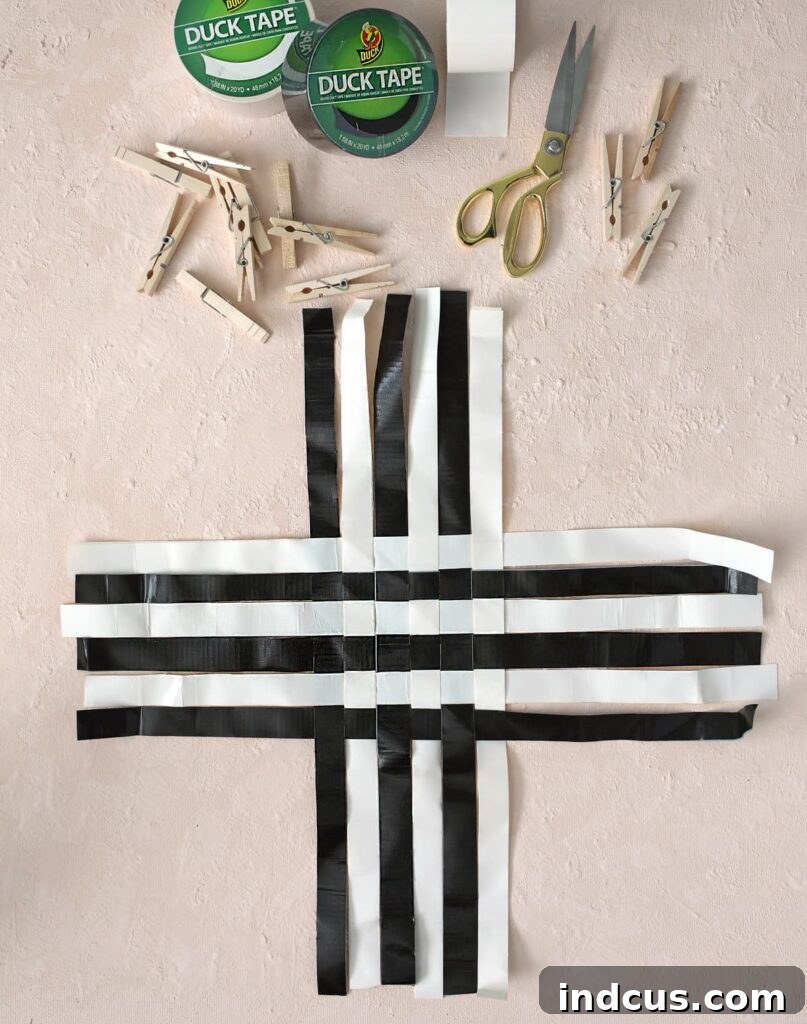
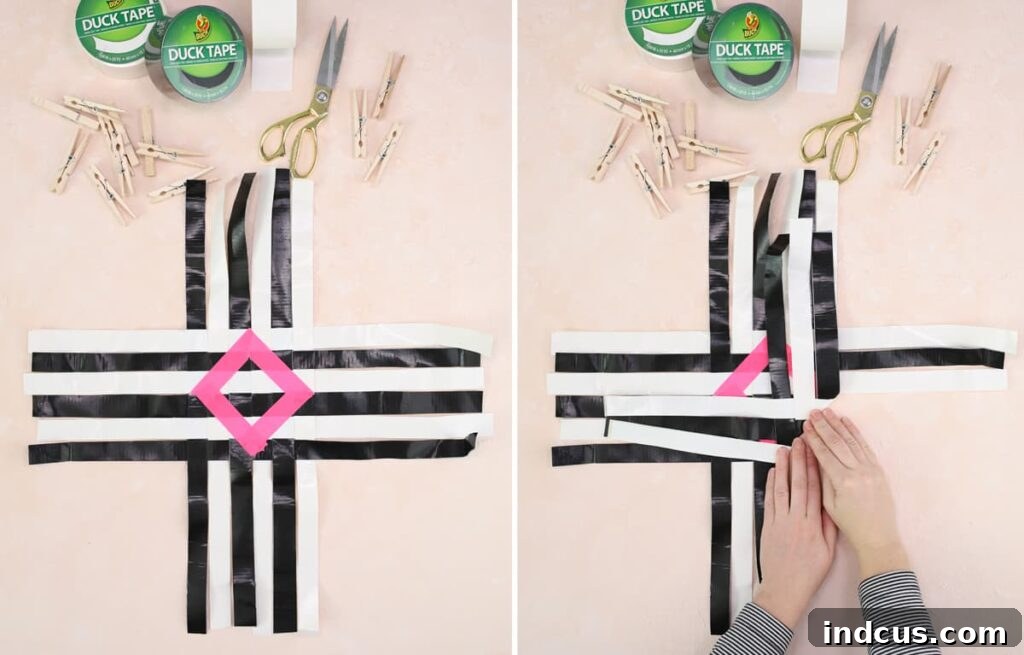
Now that your strips are prepared, it’s time to build the foundation of your basket. On a clean, flat surface, carefully lay down six of your prepared Duck Tape strips horizontally, spaced evenly apart. Think of this as your warp. Next, take the remaining six strips and begin to weave them vertically through your horizontal strips. This is where the classic “over, under, over, under” pattern comes into play. For the first vertical strip, go over the first horizontal strip, under the second, over the third, and so on. For the next vertical strip, alternate the pattern: under the first, over the second, under the third, and so forth. Continue this alternating pattern until all six vertical strips are woven through the horizontal ones, creating a tight and even checkerboard pattern. This forms the flat, initial square base of your basket.
Step 3: Securing and Centering the Base
With all twelve strips woven together, it’s crucial to make sure your base is as tight and neat as possible. Gently push all the woven strips tightly together, eliminating any gaps between them. Use your fingers to ensure all the edges are perfectly aligned and the entire woven square is centered. A compact weave is fundamental for a sturdy basket that will hold its shape. Take a moment to adjust and straighten any misaligned strips. This precision now will save you effort later on and contribute significantly to the overall aesthetic of your finished Duck Tape basket.
Step 4: Defining the Diagonal Base with Masking Tape
This step sets the stage for our unique diagonal weave. Carefully apply Duck Craft Paper Tape (masking tape) to the center of your woven square to create a perfect diamond shape. This diamond will serve as your guide for folding the strips inward, forming the distinct diagonal base of your basket. The masking tape acts as a temporary template. Once the diamond is clearly marked, gently fold each of the outer Duck Tape strips inward, aligning them precisely with the edges of your masking tape diamond. Press firmly along each fold to create a sharp, well-defined crease. These creases are vital as they establish the bottom edges of your basket, dictating its final shape and stability.
Step 5: Forming the Basket Corners
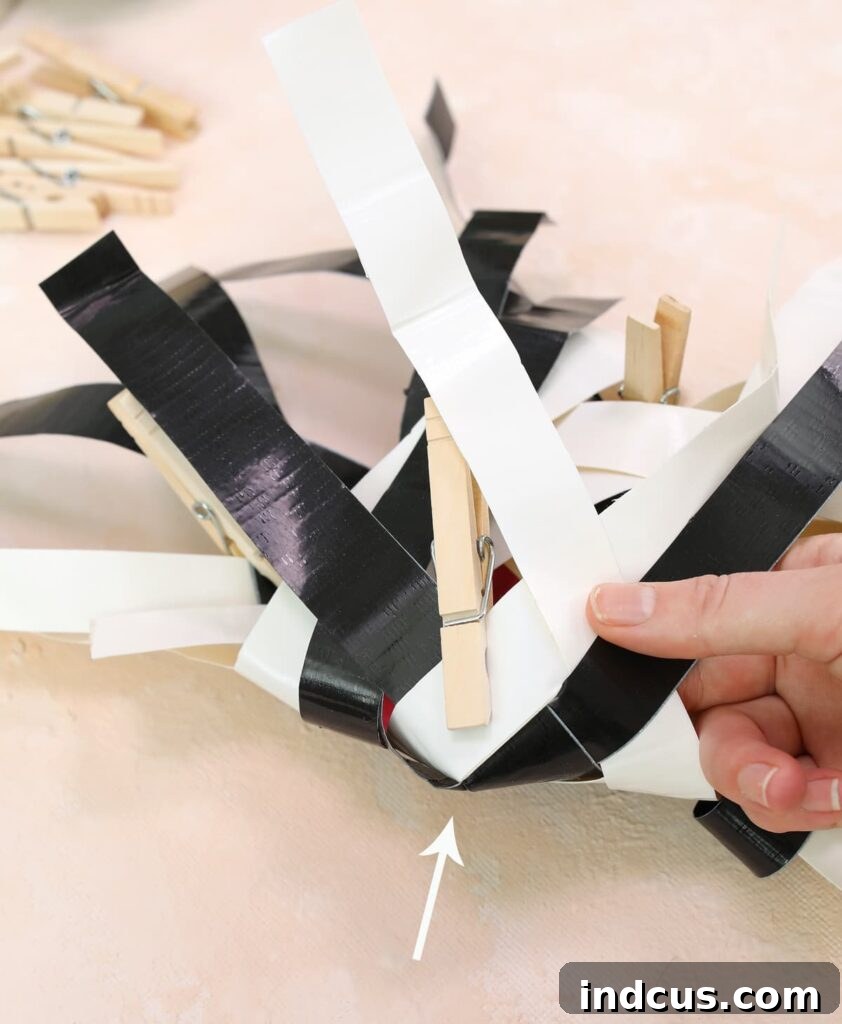
Now we begin to give our basket its three-dimensional form. Locate any one of the four corners of your newly formed diamond base. You will see two adjacent Duck Tape strips extending outwards from this corner. Take these two strips and fold them together, ensuring that the strip coming from the left is positioned neatly on top of the strip coming from the right. This overlap helps to secure the corner. Once aligned, use a wooden clothespin to temporarily clip these two folded strips together. The clothespin will hold them securely in place while you work on the other corners. Repeat this precise folding and clipping process for all four corners of your diamond base. These secured corners are the starting points for the upward weaving of your basket walls.
Step 6: Weaving Up the Walls of Your Basket
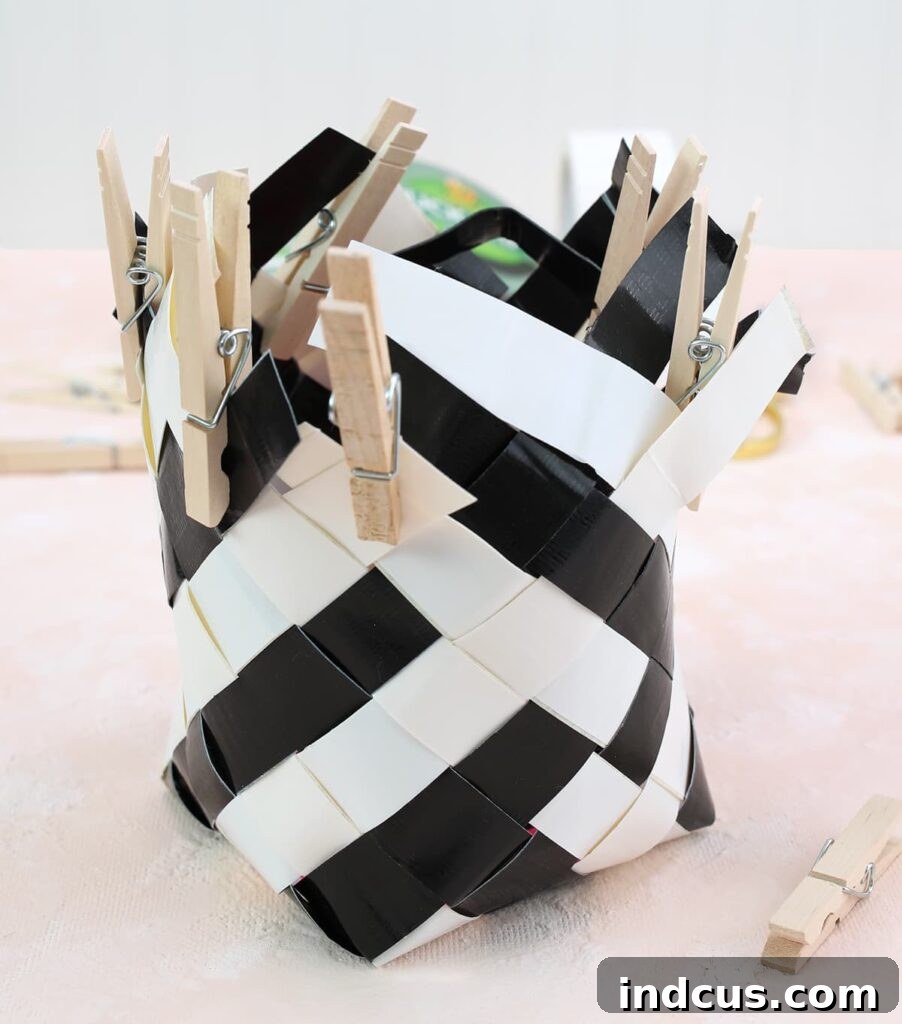
This is where the magic truly happens! With your corners secured, you can now begin weaving the sides of your basket. Identify the pieces that are adjacent to each other and continue the “over, under, over, under” weaving pattern, but now you’re building upwards. As you weave, you’ll notice the basket walls starting to take shape. This stage requires continuous attention to detail. Every time you complete a row or bring two strips together, secure them temporarily with additional clothespins. These little helpers are absolutely essential here, as they prevent your weaving from unraveling and ensure that the tension remains consistent throughout the basket. Work your way around the basket, gradually building up the height, always maintaining a tight and even weave for the best results. Don’t rush; enjoy the meditative rhythm of the weaving.
Step 7: Determining the Basket’s Height
As you continue weaving upwards, you’ll reach a point where your Duck Tape strips start to vary in length. This is a natural occurrence due to the diagonal weave. To determine the overall height of your basket, look for the shortest woven pieces. These strips will naturally dictate the maximum height you can achieve for a neat and uniform top edge. Decide if you want a taller or shorter basket, and plan your remaining weaves accordingly. It’s often best to aim for a height that allows you to cleanly finish the top edge by folding and securing the remaining strips. If you desire a taller basket, you might need to add more length to some strips by taping additional pieces, but for this diagonal weave, the natural tapering often creates a pleasing shape.
Step 8: Creating the Zig-Zag Top Edge
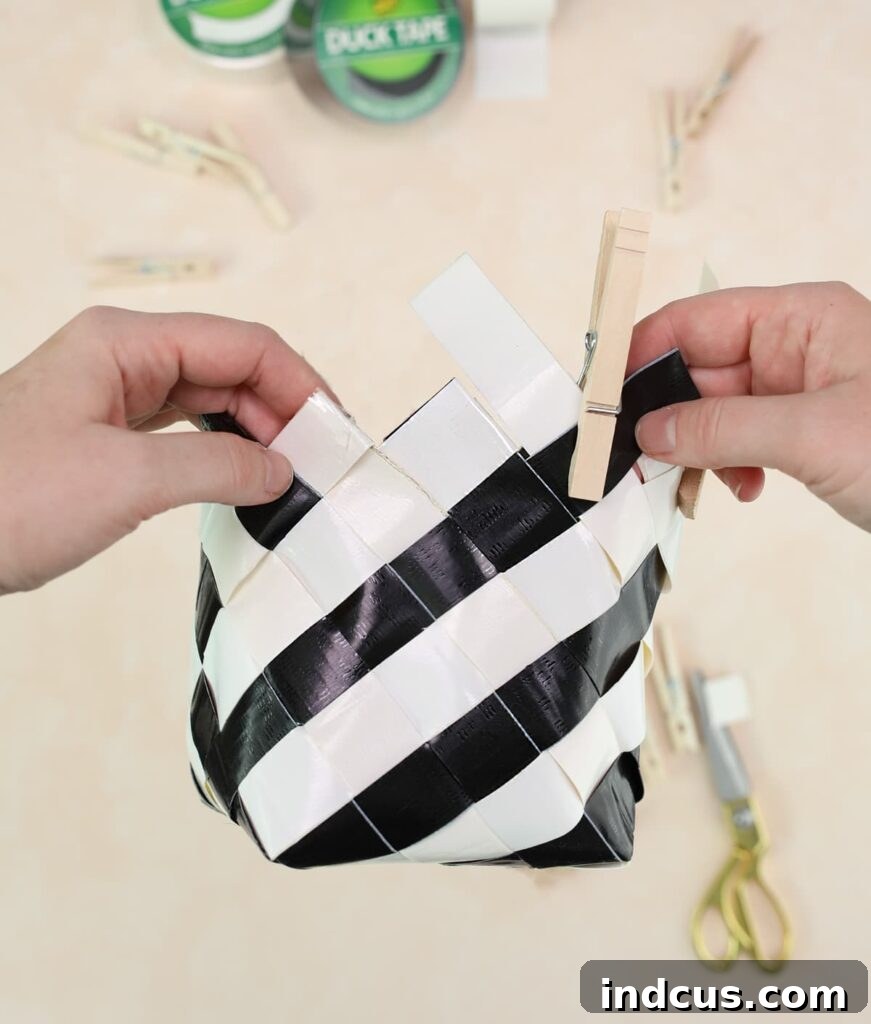
The distinctive zig-zag edge is one of the charming features of this Duck Tape basket. To achieve this, take the overlapping pieces at the top of your weave and fold them together to create a neat point. This point forms one peak of your zig-zag. Once folded, carefully trim away any excess Duck Tape, ensuring a clean and precise edge. To secure this point and prevent any unraveling, use a small piece of Duck Invisible Tape or clear packing tape. Press the clear tape firmly over the folded point, blending it seamlessly into your design. Repeat this process for all the remaining overlapping strips around the top of your basket. The clear tape offers a strong, nearly invisible hold, ensuring your zig-zag edge is both attractive and durable.
Step 9: The Grand Reveal – Finishing Your Basket!
Congratulations, you’re almost done! The final step is incredibly satisfying. Carefully remove all the temporary masking tape from the inside of your basket. Gently peel it away, taking care not to disturb your woven structure. As you remove the masking tape, the base of your diagonal weave will become fully visible, showcasing the unique craftsmanship. Once all the tape is gone, take a moment to admire your handiwork. Your sturdy, waterproof, and beautifully woven Duck Tape basket is now complete and ready for use! Give it a gentle reshape if needed, and prepare to put your new creation to good use.
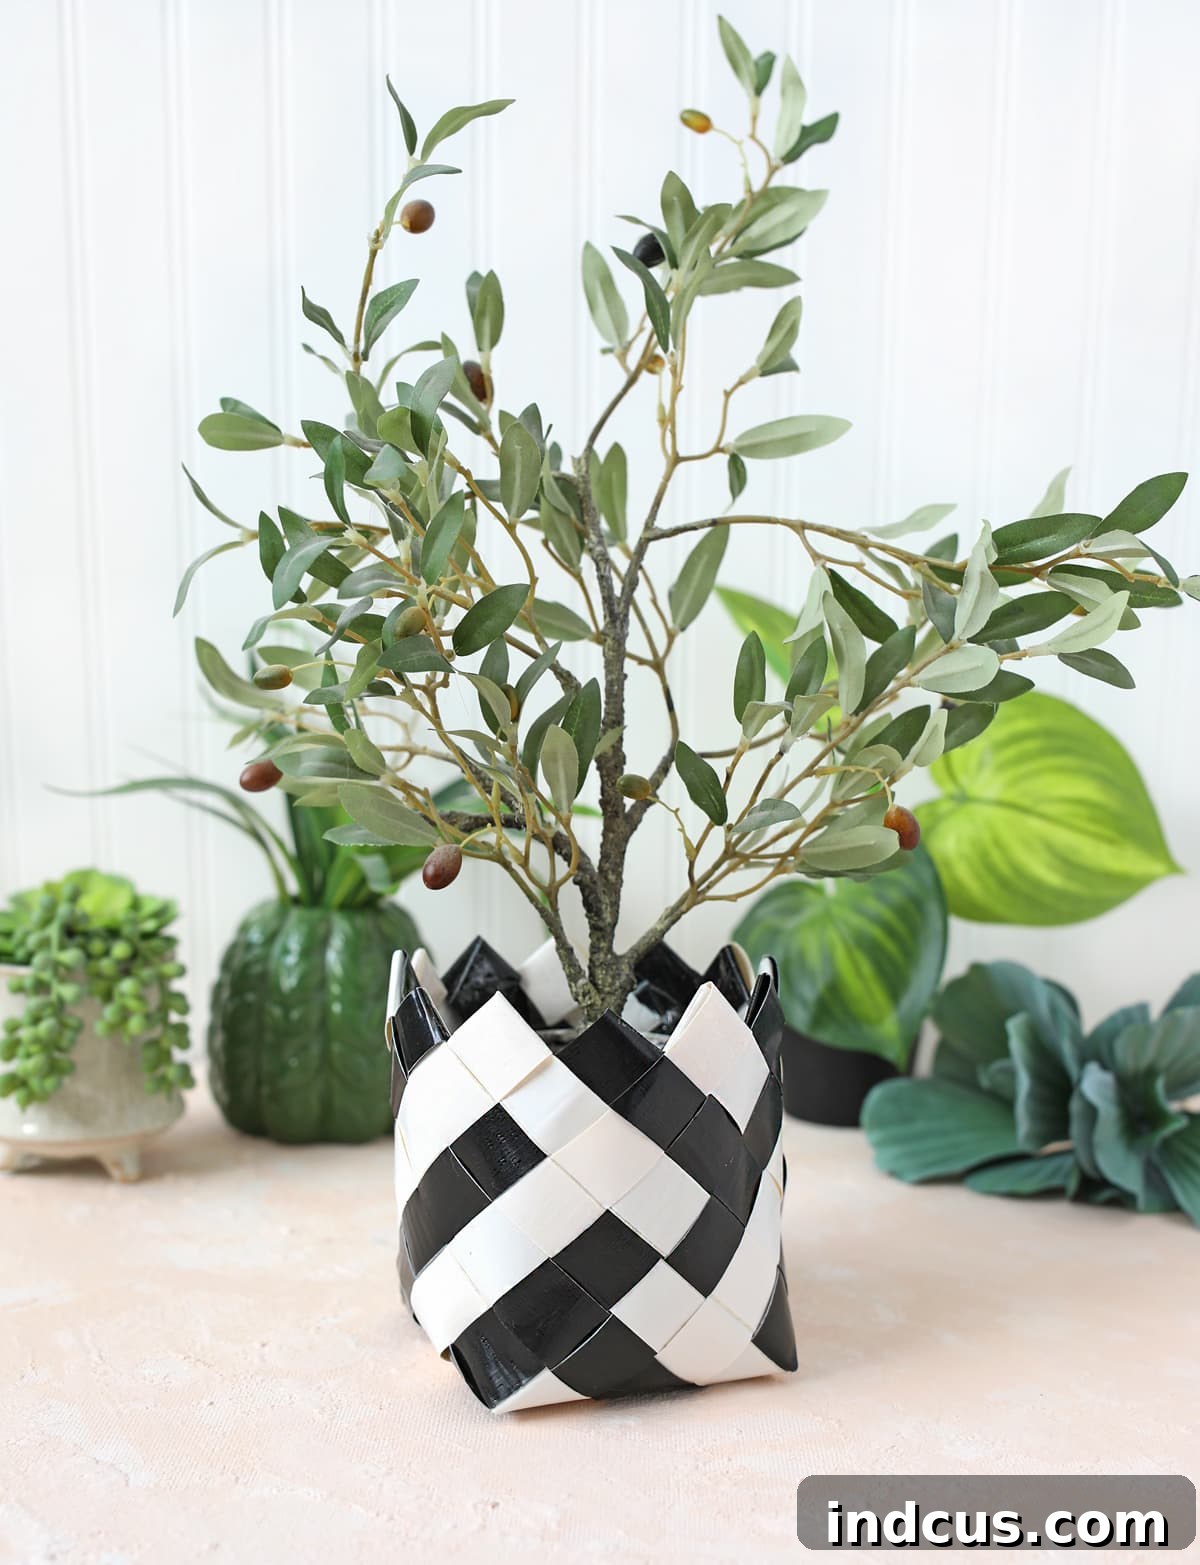
The beauty of a Duck Tape basket lies not only in its creation but also in its versatility. I’ve found mine to be absolutely perfect as a stylish plant cozy. The inherent waterproof nature of Duck Tape means it’s ideal for wrapping around a plain plant pot, adding a pop of color and texture while protecting surfaces from water spills. It’s a chic and practical upgrade for any indoor plant, transforming it from ordinary to extraordinary with minimal effort.
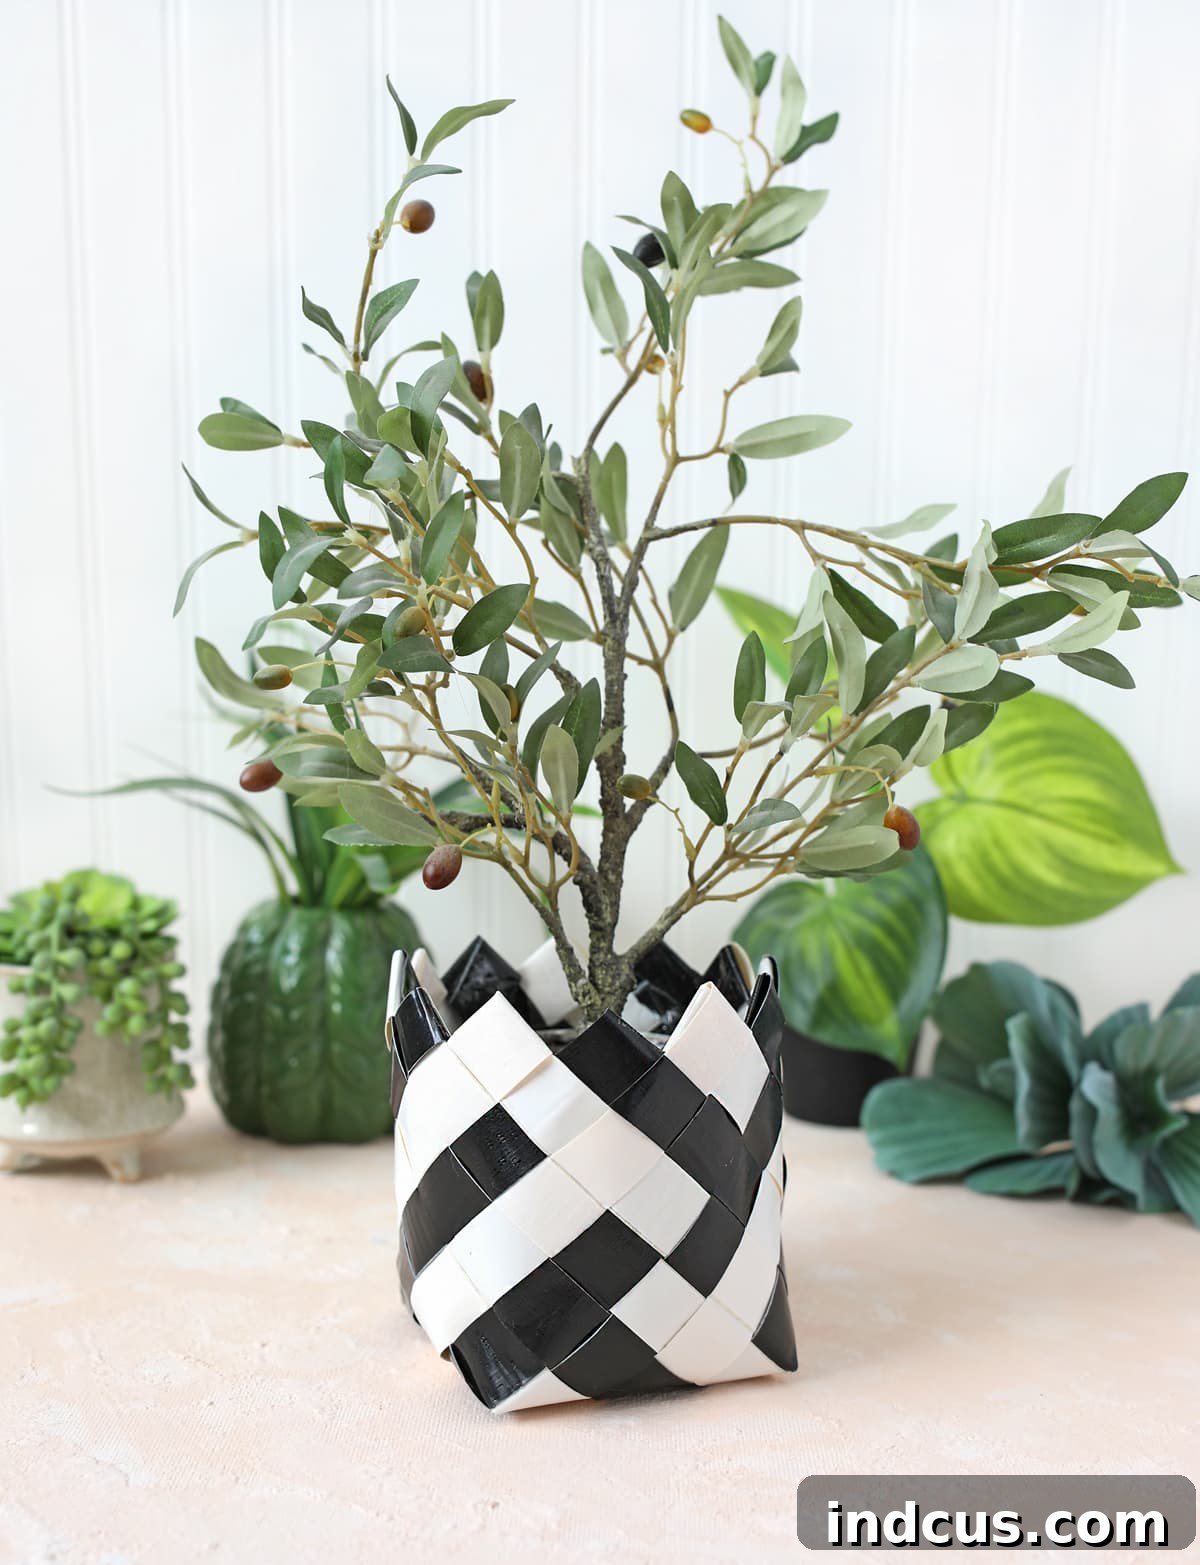
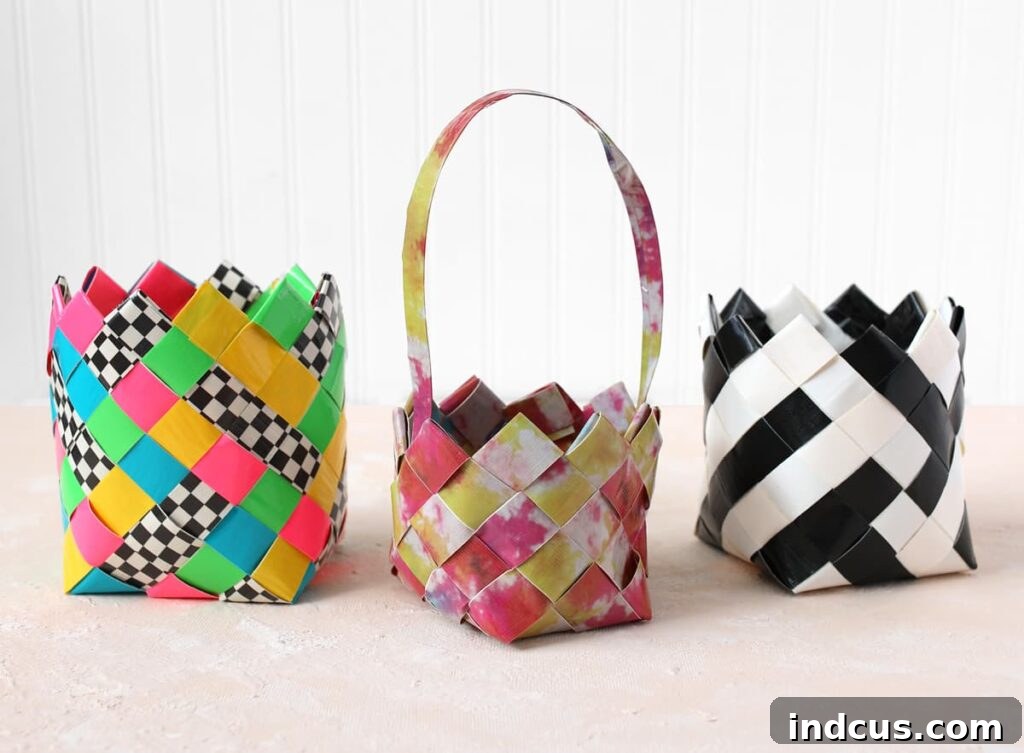
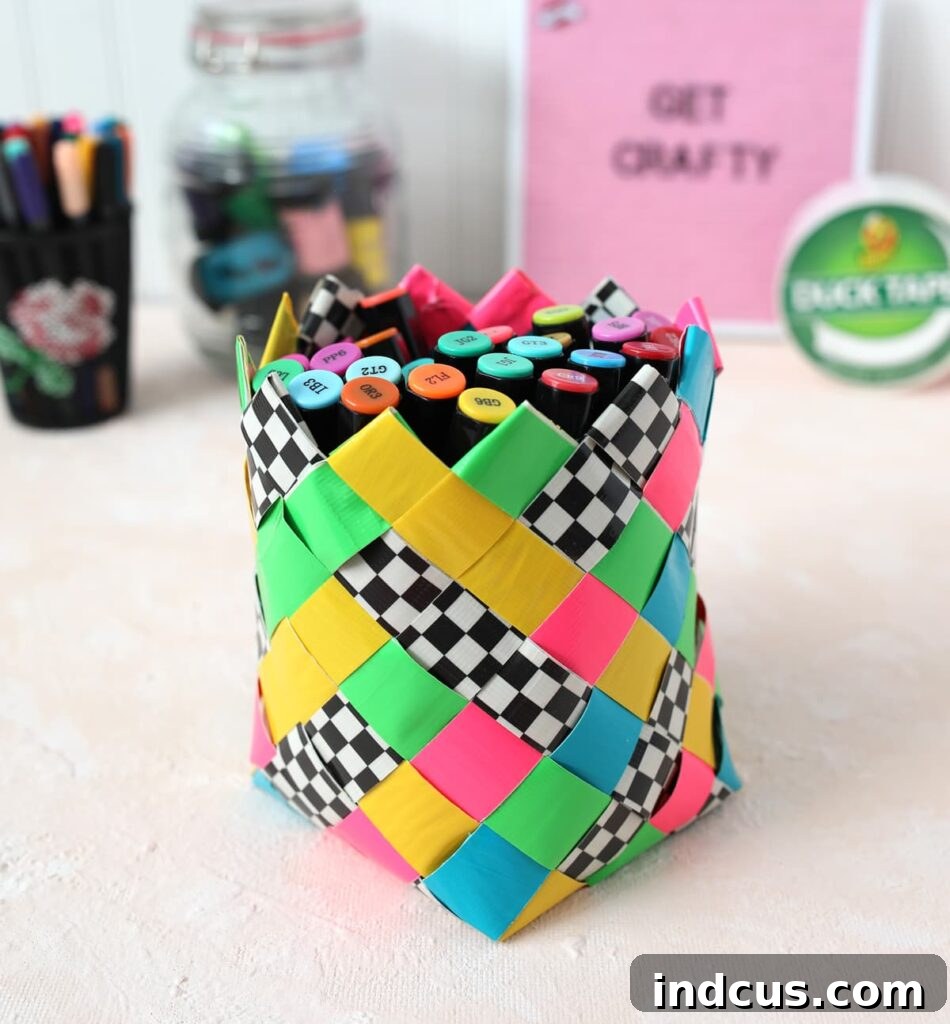
But the possibilities don’t stop there! Imagine the creative potential. Here’s another example where I experimented with different colors and patterns of Duck Tape to achieve a completely distinct aesthetic. This basket, with its vibrant mix of designs, now neatly organizes my markers, proving that these handmade baskets are fantastic for decluttering and adding a touch of personalized flair to any desk or craft space. The options are truly limitless, from holding small toys to organizing craft supplies, or even serving as a decorative centerpiece.
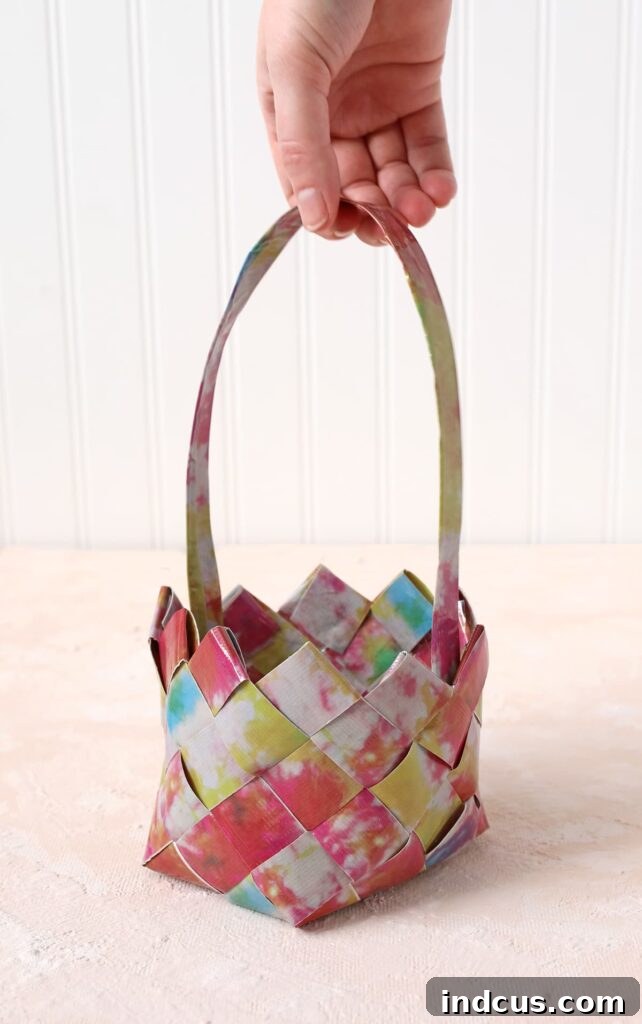
For those who love a more traditional basket look, consider adding a handle! You can easily craft a sturdy handle from more Duck Tape strips and securely attach it inside your woven basket. This simple addition transforms your creation, making it perfect for collecting small treasures, serving as an adorable Easter basket, or even a charming party favor holder. The durability of Duck Tape ensures that your handle will withstand regular use, making your basket even more functional and delightful. Experiment with handle placement and thickness to find the perfect style.
I truly believe these little Duck Tape baskets are among the coolest and most satisfying crafts you can undertake! The combination of their unique diagonal weave, sturdy construction, and endless customization options makes them a standout project. If any of the steps detailed above felt unclear or you’re a visual learner, I highly recommend watching the accompanying video tutorial. Seeing the weaving process unfold in real-time can clarify those intricate parts and help you confidently complete your own amazing Duck Tape basket. Happy crafting, and enjoy your wonderful new creation!







