
Brighten Your Bash: DIY Pinwheel Party Centerpieces That Won’t Break the Bank
Planning a memorable celebration often comes with the challenge of managing a budget, especially when decorating for a large event. Whether you’re hosting a community gathering, a birthday party, or an elegant dinner, creating a vibrant atmosphere doesn’t have to strain your wallet. This guide introduces you to incredibly easy, budget-friendly pinwheel party centerpieces that promise to inject a burst of color and whimsical charm into any setting. Forget expensive floral arrangements or complicated crafts; these DIY decorations prove that sometimes, the simplest ideas are the most impactful.
Recently, I found myself in this exact situation, tasked with helping my mother organize a dinner party for her church congregation. With 33 tables to adorn and a very modest budget, I knew I needed a creative solution that delivered maximum visual appeal without costing a fortune. While I already had a few beautiful floral centerpieces (which you can explore HERE for more inspiration), they were nowhere near enough to cover all the tables. My mission began: hunt for inexpensive, cheerful decorations that could easily be scaled up.
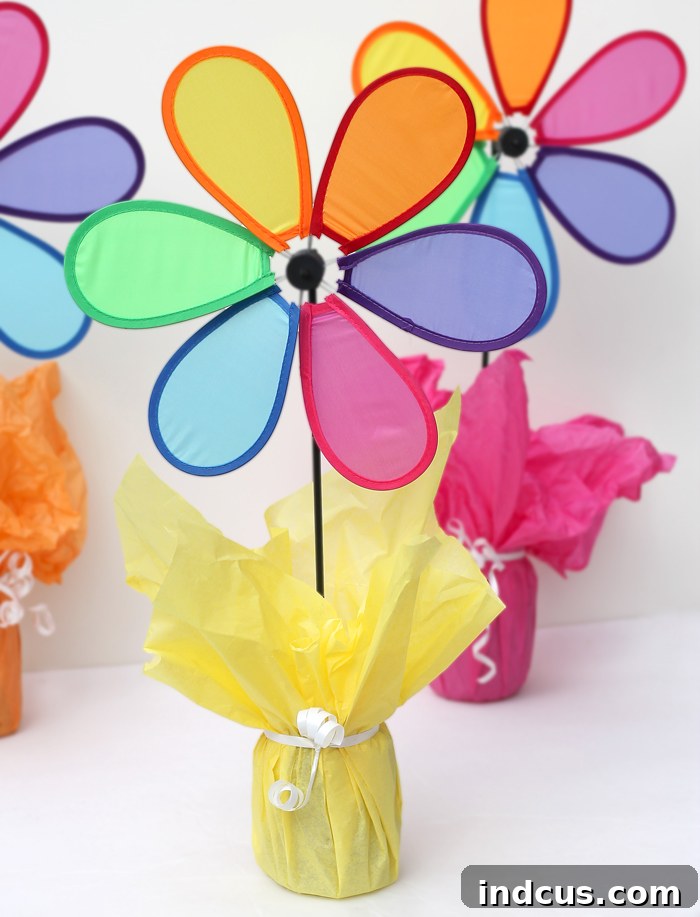
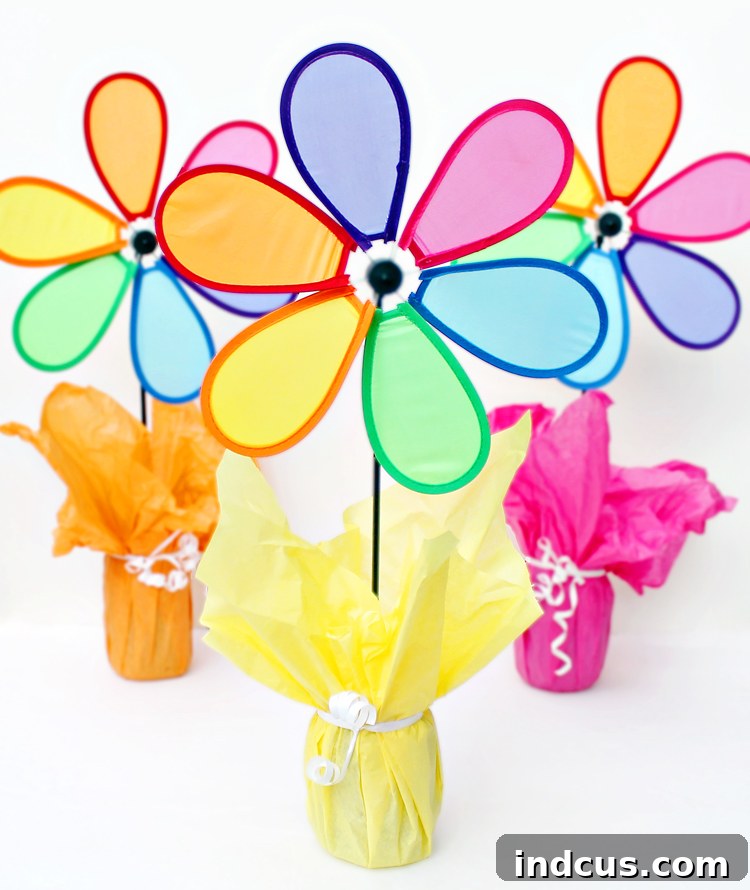
My quest led me, as it often does for fantastic finds, to the Dollar Tree. And boy, did it deliver! I stumbled upon these delightful, colorful flower pinwheels, priced at an astonishing $1 each. Instantly, I knew they were the perfect candidates. Their vibrant hues and playful design were exactly what was needed to transform a simple church hall into a festive, inviting space. To complement these cheerful pinwheels, I decided to craft the “vases” from humble mason jars, elegantly dressed with tissue paper. The result? Adorable, eye-catching centerpieces that truly make a statement!
Why Choose DIY Pinwheel Centerpieces?
These pinwheel centerpieces are more than just pretty decorations; they are a testament to the power of creative crafting on a budget. Here’s why they stand out as an excellent choice for your next event:
- Unbeatable Affordability: Sourcing materials from dollar stores keeps costs incredibly low, allowing you to create numerous centerpieces for a fraction of the price of store-bought alternatives.
- Effortless to Assemble: With just a few simple steps, even novice crafters can create these charming decorations in no time. Perfect for busy hosts!
- Burst of Color: Pinwheels come in an array of colors and patterns, enabling you to perfectly match your party’s theme or simply add a joyful spectrum of hues.
- Versatile for Any Occasion: From birthday parties, baby showers, and bridal brunches to church events, holiday gatherings, and outdoor picnics, these centerpieces adapt beautifully to any celebration.
- Interactive & Fun: The gentle spin of the pinwheels, especially in an outdoor setting, adds a dynamic and delightful element that guests of all ages will appreciate.
- Eco-Friendly Potential: By repurposing mason jars, you’re embracing a sustainable approach to party decor.
Ready to add a splash of color and a dash of fun to your tables? Here’s a detailed guide on how to craft your own easy party centerpieces:
Materials You’ll Need
Gathering your supplies is the first exciting step in any DIY project. For these vibrant pinwheel centerpieces, you’ll be delighted by how few and inexpensive the required items are. Most can be found at your local dollar store or craft supply retailer, making this an incredibly accessible craft for everyone.
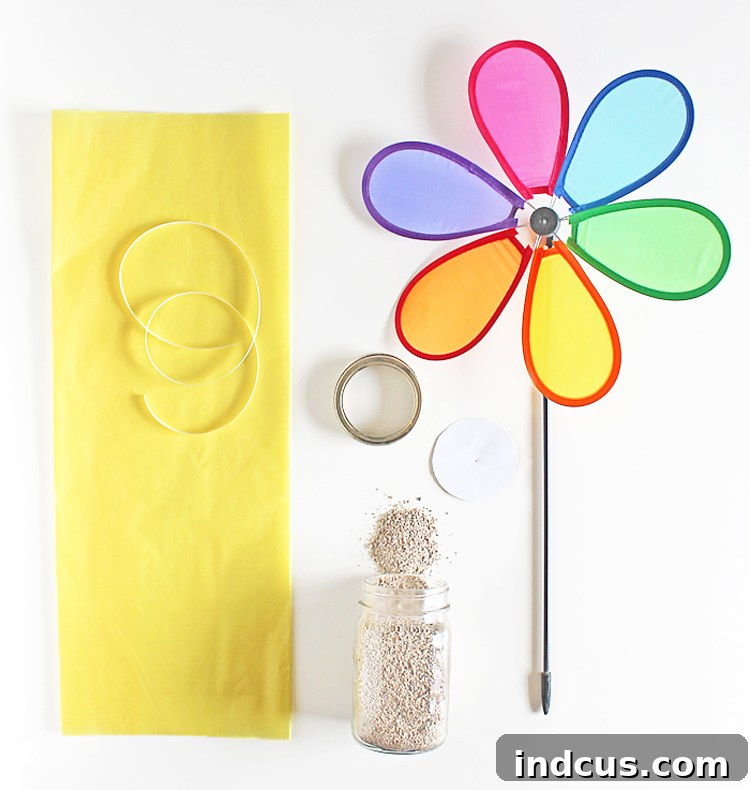
- 1 colorful flower pinwheel (Dollar Tree is a fantastic source!)
- 1 sheet of tissue paper (choose a color that complements your pinwheel and party theme)
- 1 standard mason jar with its ring (any size works, but regular mouth jars are ideal)
- 1 scrap piece of cardstock, any color (this will be hidden, so aesthetic isn’t key)
- Curling ribbon (select a color that ties in with your tissue paper and pinwheel)
- Filler material: sand, dirt, small rocks, or decorative vase filler (for stability)
Step 1: Craft Your Custom Lid Insert
Begin by taking your scrap piece of cardstock. Place the mason jar lid ring on top of the cardstock and carefully trace a perfect circle. This circle should be slightly smaller than the outer edge of the ring, ensuring it fits snugly inside the ring once cut. Using a pair of sharp scissors, meticulously cut out your traced circle. This paper lid will serve as a secure anchor for your pinwheel, preventing it from wobbling and ensuring it stands proudly upright.
Step 2: Prepare the Mason Jar Base
Now, take your clean mason jar. Carefully pour your chosen filler material – whether it’s sand, small rocks, dirt, or decorative vase beads – into the jar. The filler serves a dual purpose: it adds weight to the base, making your centerpiece stable and less prone to tipping, and it provides a firm foundation for the pinwheel stem. Once your filler is in place, position your newly cut paper lid directly on top of the jar, ensuring it covers the opening. Then, screw the mason jar ring firmly over the paper lid. This action will secure the paper in place, creating a stable surface through which you can insert the pinwheel.
Step 3: Secure the Pinwheel
This step requires a little finesse. Take your colorful flower pinwheel. Carefully, but firmly, punch the stem of the pinwheel directly through the center of the cardstock lid you just secured. Aim to push the stem all the way down until it reaches the bottom of the jar and is firmly embedded in the filler material. The resistance from the filler will help hold the pinwheel upright and prevent it from shifting. If you encounter difficulty piercing the cardstock initially, a helpful trick is to create a small starter hole using a ballpoint pen, a sharp pencil, or even a craft knife. This pre-hole will guide the pinwheel stem and make the process much smoother, ensuring your pinwheel stands tall and proud.
Step 4: Dress Your Vase with Tissue Paper
Now for the decorative touch! Spread out one sheet of tissue paper on a flat surface. Position your prepared mason jar, with the pinwheel firmly in place, directly in the center of the tissue paper. Carefully gather all four corners of the tissue paper upwards, bringing them together around the neck of the mason jar. The goal is to create a soft, pleated effect that mimics a wrapped gift or a delicate bouquet. Once you have the tissue paper gathered nicely, take your curling ribbon. Wrap the ribbon tightly around the tissue paper, just below where you gathered the corners, and tie it securely. This not only holds the tissue paper in place but also adds another layer of festive color and texture.
Step 5: The Finishing Touches
You’re almost done! Take a moment to gently “fluff” your tissue paper. Adjust the pleats and folds to create a full, appealing silhouette around the mason jar. If you used curling ribbon, run the blade of your scissors along the underside of the ribbon ends to create playful curls. This small detail adds an extra touch of polish and festivity to your centerpiece. Step back and admire your handiwork – your delightful, budget-friendly pinwheel party centerpiece is complete!
Creative Variations and Customization Tips
One of the best aspects of these DIY pinwheel centerpieces is their incredible adaptability. While the basic design is charming on its own, you can easily customize them to suit any specific party theme, color scheme, or season. Here are some ideas to spark your creativity:
- Pinwheel Variety: Explore different types of pinwheels! Look for metallic, glittery, patterned, or even themed pinwheels (e.g., specific characters for a child’s party). Varying the size of the pinwheels can also add visual interest.
- Mason Jar Makeovers: Don’t limit yourself to plain jars. Paint your mason jars with acrylic paint (chalk paint works wonderfully for a matte finish), add glitter, wrap them in decorative twine or lace, or even stencil on numbers or letters for a personalized touch.
- Filler Fun: Instead of simple sand or dirt, consider more decorative fillers. Colorful glass beads, polished pebbles, dried beans or lentils (for a rustic feel), even small candies or sprinkles can be used to add color and texture at the base.
- Tissue Paper Themes: Match your tissue paper to your event. Use pastel shades for baby showers, bold primary colors for kids’ parties, or elegant metallics for a sophisticated touch. Layering different colored tissue paper can also create a multi-dimensional effect.
- Ribbon & Embellishments: Experiment with different types of ribbon – satin, grosgrain, burlap, or even raffia. Add small charms, adhesive gems, or mini bows to the ribbon for extra flair.
- Seasonal Touches: For holidays, swap regular pinwheels for ones with festive designs (e.g., snowflakes for winter, pumpkins for fall). Use themed tissue paper and fillers to enhance the seasonal vibe.
These cheerful centerpieces were an absolute hit at the church dinner. Their bright colors created an instant festive atmosphere, proving that you don’t need elaborate decorations to make a space feel special. People were too busy enjoying conversations and delicious food to fuss over overly complicated decor, which is precisely the point of a good party, isn’t it? The best part was watching them gently spin, especially when a breeze passed through the hall. It added a subtle, delightful movement that brought a smile to everyone’s face.
The Joy of Simple, Affordable Party Decor
The beauty of these pinwheel centerpieces lies in their inherent simplicity and cheerful disposition. They demonstrate that thoughtful, handmade touches can elevate any event, creating a warm and inviting ambiance without the hefty price tag. They are a fantastic reminder that party planning should be fun, not stressful. By embracing DIY projects like this, you not only save money but also infuse your celebrations with a unique, personal charm that store-bought items often lack.
Whether you’re decorating for a large community event, a backyard barbecue, or an intimate family dinner, these pinwheel centerpieces offer a versatile and delightful solution. Their ease of creation makes them perfect for crafting sessions with friends or family, adding another layer of fun to your party preparations. Imagine a row of these colorful spinners gracing your tables, catching the light and gently turning, bringing a playful energy to your gathering.
Don’t let the thought of expensive decorations deter you from throwing the party of your dreams. With a little creativity and a trip to the dollar store, you can achieve stunning results. These pinwheel centerpieces are a perfect example of how clever crafting can transform ordinary items into extraordinary decor.
Don’t forget to pin the image below to your favorite Pinterest board! Save this fantastic idea for your next budget-friendly party planning adventure. You’ll thank yourself for having such a colorful, easy, and inexpensive decorating solution at your fingertips.
Looking for more DIY party decoration inspiration? You might also love these paper flower party centerpieces. They offer a slightly different, yet equally charming, spin on budget-friendly table decor!







