
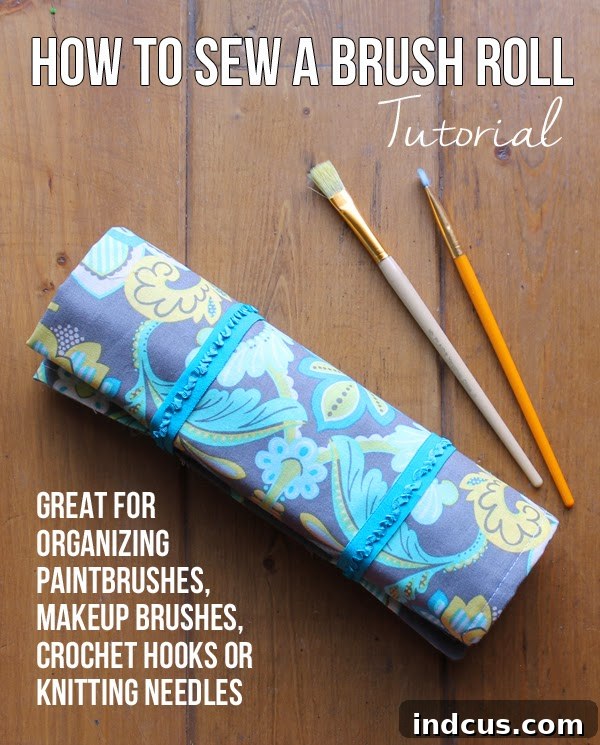
Mastering Organization: Craft Your Own Elegant Brush Roll for All Your Creative Tools
Welcome, fellow creators and organization enthusiasts! Today, we’re diving into a delightfully practical sewing project that’s perfect for sewers of all skill levels, even absolute beginners. Prepare to transform your cluttered workspace into an oasis of order as I guide you through crafting your very own custom brush roll. This isn’t just a simple container; it’s a stylish and portable solution designed to keep your cherished tools safe, accessible, and impeccably organized.
Brush rolls are universally adored for their versatility. Whether you’re an artist with a collection of fine paintbrushes, a makeup aficionado with an array of blending tools, a crafter with numerous crochet hooks or knitting needles, a student with a spectrum of colored pencils, or simply someone who appreciates having their pens and markers neatly arranged, a handmade brush roll offers the perfect bespoke storage. It’s an elegant answer to the common challenge of keeping small, valuable items together and protected, preventing damage and minimizing lost time searching for the right tool.
In this comprehensive guide, I’ll walk you through each step of the process, from selecting your fabrics to adding those final, professional touches. For this particular tutorial, I’m creating a thoughtful, personalized brush roll for a dear friend who is a watercolor artist, ensuring her delicate brushes have a secure and stylish home. But remember, the beauty of this project lies in its adaptability—you can easily customize the dimensions and pocket sizes to suit whatever treasures you wish to organize.
While I initially captured detailed photographs throughout the creation of this brush roll, an unfortunate technical mishap led to the loss of those images. Rest assured, this guide remains crystal clear thanks to a series of helpful computer-generated illustrations. These visual aids are designed to provide perfect clarity for every step, ensuring you can follow along with confidence and precision to successfully complete your own beautiful brush roll.
Why Every Creative Needs a Handmade Brush Roll
Beyond simple storage, a well-made brush roll offers a myriad of benefits that enhance your creative process and protect your investments. Here’s why this DIY project is an absolute must-do:
- Unmatched Organization: Say goodbye to rummaging through drawers or cups. Each tool gets its own dedicated slot, making it incredibly easy to find what you need instantly and keep your workspace tidy.
- Superior Protection: Brushes, hooks, and delicate pencils can be easily damaged when loose. A fabric roll cradles them individually, preventing bent bristles, chipped points, and scratches. When rolled up, your tools are shielded from dust, spills, and accidental knocks.
- Portability and Travel-Friendly: Whether you’re heading to an art class, a craft group, or simply moving your supplies from one room to another, a brush roll keeps everything compact and secure. Just roll it up, tie it, and you’re ready to go! It’s the ideal companion for artists and crafters on the move.
- Customization and Personal Style: Unlike generic store-bought organizers, a handmade brush roll allows you to express your personal aesthetic. Choose fabrics that reflect your style, match your studio décor, or create a unique, heartfelt gift for a loved one.
- Durability and Longevity: By selecting quality fabrics and sewing with care, you’ll create an organizer that stands the test of time, far outlasting flimsy plastic alternatives.
- Eco-Friendly Choice: Opting for a reusable fabric organizer is a sustainable choice, reducing the need for disposable packaging or less durable storage solutions.
Essential Supplies for Your Brush Roll Project
Before we begin stitching, let’s gather all the necessary materials. Choosing the right fabrics and notions is key to achieving a beautiful and durable finished product. I sourced all my supplies from JOANN Fabric, but you can find similar items at any well-stocked fabric or craft store.
- Fabric A (Main Body/Outer Fabric): You’ll need 2/3 yard. This fabric will form the outer shell and the lining of your brush roll. Opt for a durable yet flexible material like quilting cotton, canvas, or even a decor-weight fabric. Consider a fun pattern or a solid color that complements Fabric B.
- Fabric B (Pocket Fabric): You’ll need 1/2 yard. This fabric will create the individual pockets for your tools. A medium-weight quilting cotton works wonderfully here – it’s easy to sew and provides enough stability for the pockets. This is a great opportunity to use a contrasting print or a coordinating solid.
- Decorative Elastic (for Tie Closure): One package (typically 1-2 yards). This elastic will serve as the tie to secure your rolled-up brush roll. Look for elastic that is approximately 1/2 inch to 1 inch wide with an appealing texture or color. It’s often found in the notions aisle near threads and zippers. Alternatively, you could use ribbon or fabric ties for a different look.
- Coordinating Thread: Select a high-quality polyester thread that closely matches the dominant color in your chosen fabrics, especially for your outer fabric. Matching thread ensures your stitches blend seamlessly, giving your brush roll a professional and polished finish.
- Fabric Marking Pen: A disappearing fabric pen (like a water-soluble or air-erasable pen) is indispensable for marking your stitching lines without leaving permanent marks on your fabric. It allows for precise pocket creation and ensures your lines are straight and even.
- Additional Essential Tools: While not listed above, ensure you have a sewing machine in good working order, sharp fabric scissors, an iron and ironing board for pressing, a clear ruler or measuring tape for accurate cutting, and plenty of sewing pins to hold your fabric pieces securely in place.
Step-by-Step Instructions to Sew Your Custom Brush Roll
1. Purchase and Gather Your Essential Supplies
The first and most enjoyable step is to select and acquire all your materials. Take your time choosing fabrics that inspire you and fit the aesthetic of the person (or yourself!) who will be using the brush roll. Think about durability for the main fabric and a complementary design for the pocket fabric. Having all your supplies neatly laid out and ready before you begin cutting or stitching will make the entire process much smoother and more enjoyable. Ensure your sewing machine is threaded and ready, your iron is plugged in, and your workspace is clear and organized.
2. Precisely Cut and Press Your Fabrics
Accuracy in cutting is paramount for a professional-looking finish. Begin by carefully cutting two rectangular pieces of fabric. From Fabric A (your main body/outer fabric), cut one large rectangle measuring 40 inches by 23 inches. From Fabric B (your pocket fabric), cut one smaller rectangle measuring 14 inches by 23 inches. Use a rotary cutter and mat with a ruler for the cleanest, straightest cuts, or sharp fabric scissors if that’s your preferred method. Once cut, take Fabric A and fold it in half lengthwise, wrong sides together, so it measures 20×23 inches. Press this fold firmly with a hot iron to create a crisp crease. Repeat this process for Fabric B, folding it in half lengthwise, wrong sides together, so it measures 7×23 inches, and press it firmly. Pressing not only creates neat folds but also helps to relax the fabric, making it easier to work with and ensuring your finished product lies flat.
3. Crafting the Functional Pocket Section
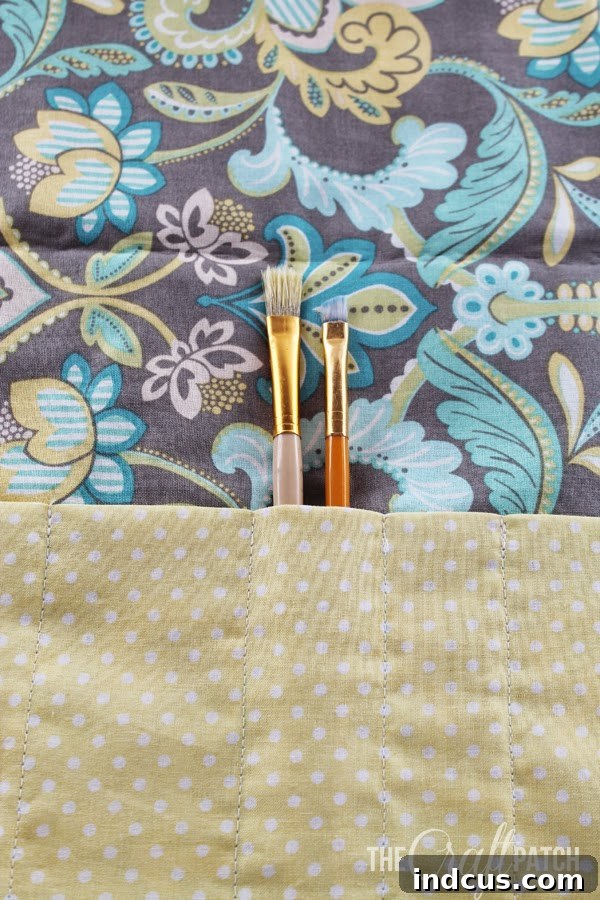
Now it’s time to create the individual pockets that will hold your tools. Take your folded Fabric B (which now measures 7×23 inches) and place it on top of one half of your folded Fabric A. Align the raw bottom edges and side edges of Fabric B perfectly with the raw bottom edge and side edges of Fabric A. This means Fabric B will cover one half of Fabric A, forming the pocket panel. Pin Fabric B securely in place along the bottom and side edges to prevent it from shifting. Using a 1/4 inch seam allowance, stitch around the bottom and side edges of Fabric B, attaching it to Fabric A. Ensure you backstitch at the beginning and end of your seams for added durability. Next, using your disappearing fabric pen, draw vertical lines on Fabric B. These lines will be your guides for creating the individual pockets. The spacing of these lines will determine the width of your pockets, so consider the average size of the tools you’ll be storing. For paintbrushes, varying widths can be useful. Stitch along each of these drawn vertical lines, sewing through all three layers of fabric (two layers of Fabric B and one layer of Fabric A). Remember to backstitch at the start and end of each vertical seam to reinforce the pocket openings, ensuring they can withstand repeated use without tearing.
4. Integrating the Elastic Tie for Closure
The elastic tie is crucial for keeping your brush roll neatly closed when rolled up. Cut two pieces of your decorative elastic, each measuring approximately 7 to 9 inches long. The exact length can be adjusted based on the thickness you anticipate your rolled brush roll will be. Take one elastic piece, fold it in half with right sides together, and position it on the left raw edge of Fabric A. The loop of the elastic should face inward towards the center of the fabric, with the raw ends of the elastic aligned with the raw edge of Fabric A. Pin it securely. Place the lower elastic approximately 3 inches from the bottom edge of your fabric and the upper elastic about 7 inches from the bottom edge. This placement allows for a secure, balanced tie once the brush roll is finished. Stitch these elastic pieces in place using a strong seam, ensuring they are firmly anchored to the fabric. You’ll only be stitching the raw ends of the elastic, forming a loop that extends into the main fabric area. This preparatory step ensures the elastic is perfectly secured before the final assembly.
5. Assembling and Stitching the Main Body
This step brings all the components together. With your pocket panel and elastic ties now secured to one half of Fabric A, take the remaining unstitched top edge of Fabric A and fold it down, aligning it precisely with the bottom edge (the one where Fabric B is attached). When you do this, all the internal components – the pockets and the elastic loops – will be “sandwiched” neatly between the two layers of Fabric A. Only the wrong sides of Fabric A should be visible on the outside. Pin generously around the entire outer perimeter of this folded fabric sandwich. Using a 1/2 inch seam allowance, stitch carefully around all four outer edges. It is crucial to leave an opening of about 3-4 inches along the right-hand side edge. This opening is essential for turning your brush roll right side out in the next step. Remember to backstitch at the beginning and end of your seam, and especially at both ends of your turning hole, to reinforce these points and prevent the stitches from coming undone when you turn the fabric.
6. The Professional Finishing Touches
You’re almost there! Once your brush roll is securely stitched, it’s time for the finishing details. Carefully clip the bottom two corners of your fabric diagonally, making sure not to cut through any of your stitching lines. Clipping the corners reduces bulk, ensuring sharp, crisp corners once the project is turned right side out. Now, reach into the opening you left on the right side and gently pull all the fabric through until your brush roll is completely right side out. Use a point turner or a blunt object (like a chopstick) to carefully push out all the corners so they are sharp and well-defined. Give the entire brush roll a good press with a hot iron, paying special attention to the edges and the opening you used for turning. This pressing step helps to flatten seams and gives your project a professional, crisp appearance. Finally, to seal the turning hole and give your brush roll a beautifully polished edge, topstitch around the entire outer perimeter of the brush roll, approximately 1/8 to 1/4 inch from the edge. This topstitching not only closes the opening but also adds an extra layer of durability and a clean, finished look to your handmade organizer. Backstitch at the beginning and end of your topstitching to secure the thread.
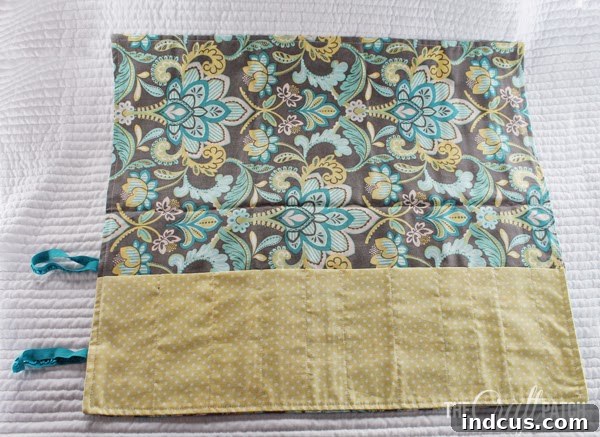
I am absolutely thrilled with how this brush roll turned out! The combination of these two fabrics is simply adorable, creating a cohesive and stylish aesthetic that I know my friend will cherish. The construction is sturdy, the pockets are perfectly sized, and the elastic tie adds both function and charm. I can hardly wait to present this thoughtful, handmade gift to her, knowing it will bring joy and organization to her artistic endeavors.
Unleash Your Creativity: Customization and Beyond
This project offers endless possibilities for customization. Feel free to experiment with different fabric combinations, add embellishments like embroidery or decorative trims, or adjust the dimensions to create brush rolls for larger tools, sketching pencils, makeup palettes, or even small crafting scissors. Consider making a set of varying sizes for different purposes! This basic pattern is a fantastic foundation for all your organizational needs, proving that a little bit of sewing can go a long way in making your creative life more orderly and beautiful. Happy sewing!







