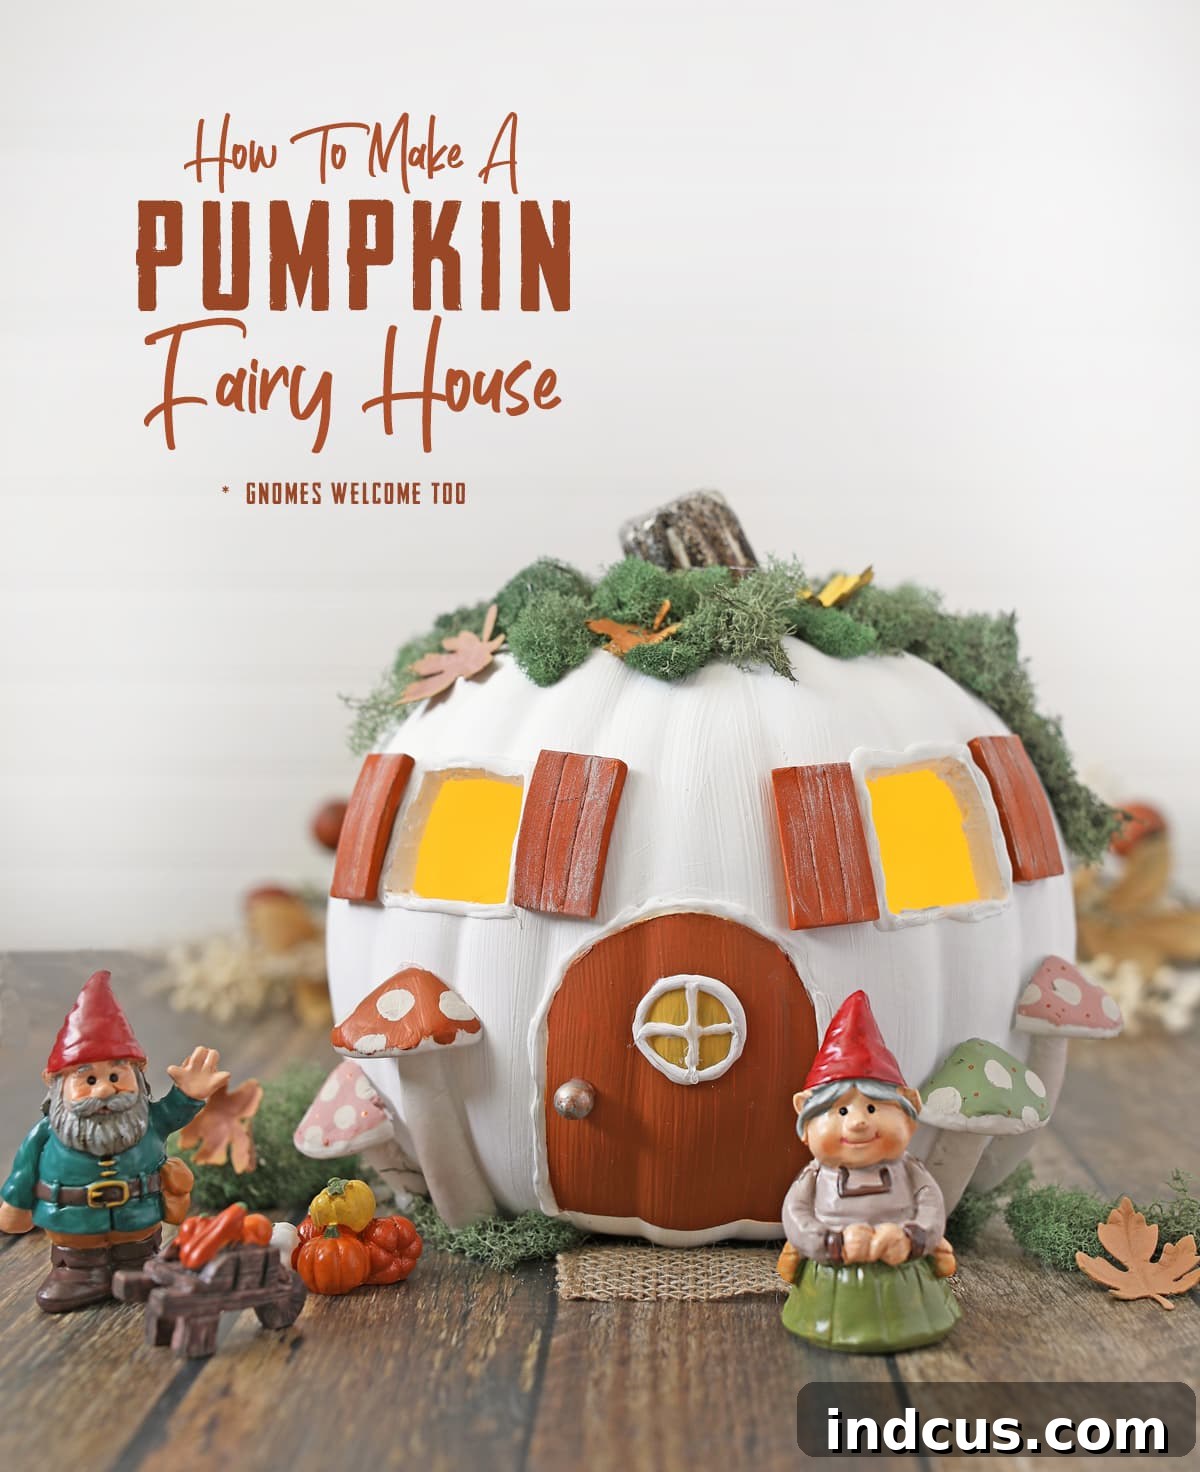
Transform Foam Pumpkins into Enchanting Fairy & Gnome Houses: The Ultimate Fall Decor DIY
As the crisp air of autumn descends and vibrant leaves paint the landscape, our homes yearn for cozy, imaginative decor that captures the season’s magic. If you, like me, are captivated by the whimsical charm of fairy gardens and the miniature worlds they inhabit, you’re in for a treat! This fall, we’re embarking on an enchanting DIY project: transforming humble foam craft pumpkins into adorable, miniature homes perfect for your favorite fairies or gnomes. It’s a delightful way to blend the spirit of autumn with the joy of creating tiny, magical dwellings, promising a unique centerpiece for your seasonal display.
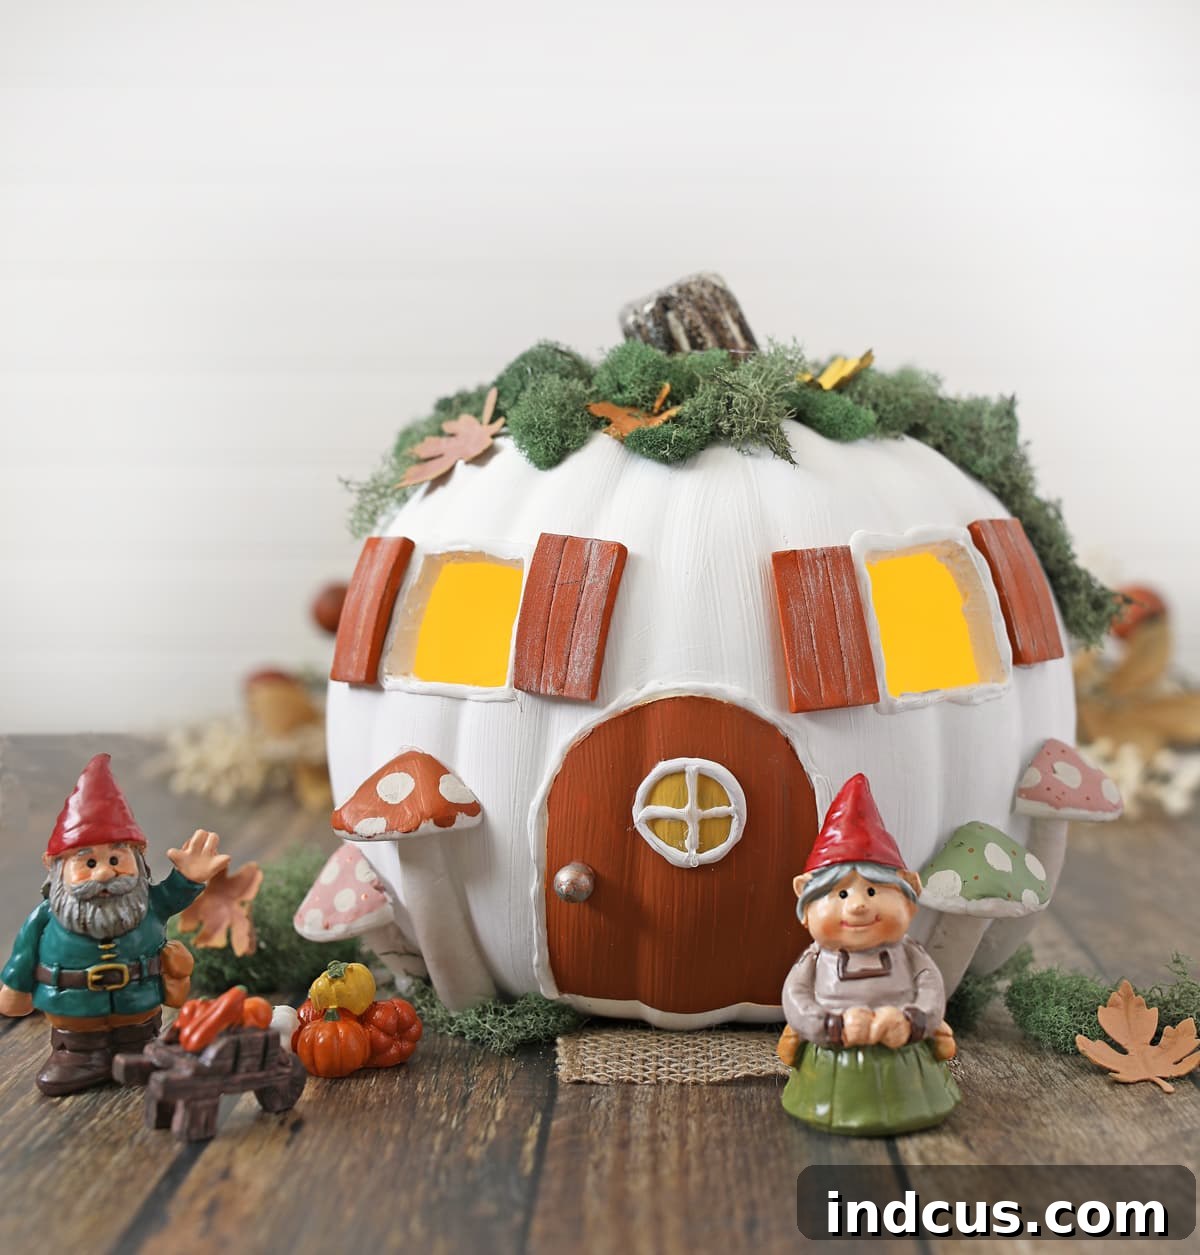
Imagine tiny gnomes peeking out from a brightly lit pumpkin doorway, or delicate fairies flitting around a moss-covered roof. This isn’t just a craft; it’s an invitation to unleash your creativity and build a tiny realm of wonder. The beauty of using foam pumpkins lies in their durability and ease of customization, allowing you to craft a lasting fall decoration that can be cherished year after year. Forget the mess of carving real pumpkins; foam provides a clean, sturdy canvas for even the most intricate designs. Whether you’re a seasoned crafter or looking for a fun, family-friendly autumn activity, creating these miniature pumpkin houses promises hours of enjoyment and a truly captivating result.
Why Craft a Foam Pumpkin Fairy House?
Beyond their undeniable cuteness, these DIY pumpkin fairy houses offer a multitude of benefits. Firstly, they provide a unique and personalized touch to your fall decor, setting your home apart from generic seasonal displays. Secondly, they’re incredibly versatile; once completed, they can adorn your mantelpiece, brighten a tabletop, or even become a charming addition to an existing outdoor fairy garden (if protected from the elements). Thirdly, it’s a fantastic creative outlet, allowing you to experiment with different themes, colors, and embellishments. Imagine an entire village of these enchanting houses – a tiny pumpkin bakery, a gnome schoolhouse, or a cozy fairy library! The possibilities are boundless, sparking imagination for both young and old. Furthermore, crafting with foam pumpkins means no rotting or wilting, ensuring your autumnal masterpiece stays fresh and vibrant throughout the entire season and beyond.
Choosing Your Pumpkin Canvas: The Magic of Foam Craft Pumpkins
For this project, the key ingredient is a foam craft pumpkin, preferably one that’s “carveable” and hollow inside. Unlike traditional pumpkins, these artificial counterparts offer distinct advantages:
- Durability: Your creation will last for seasons to come, making it a sustainable decor choice.
- Ease of Carving: Foam is much easier to cut and shape, allowing for more intricate details without the strain or mess associated with real pumpkins.
- Cleanliness: No pulp, seeds, or sticky residue to deal with, simplifying the crafting process.
- Lightweight: Easy to move and display anywhere without concern for heavy lifting.
- Paint-Friendly: Foam readily accepts various types of craft paint, making customization a breeze.
Selecting a pumpkin size around 9 inches provides ample space for detailing without being too large or cumbersome. However, feel free to experiment with smaller or larger foam pumpkins to create a diverse collection of miniature dwellings.
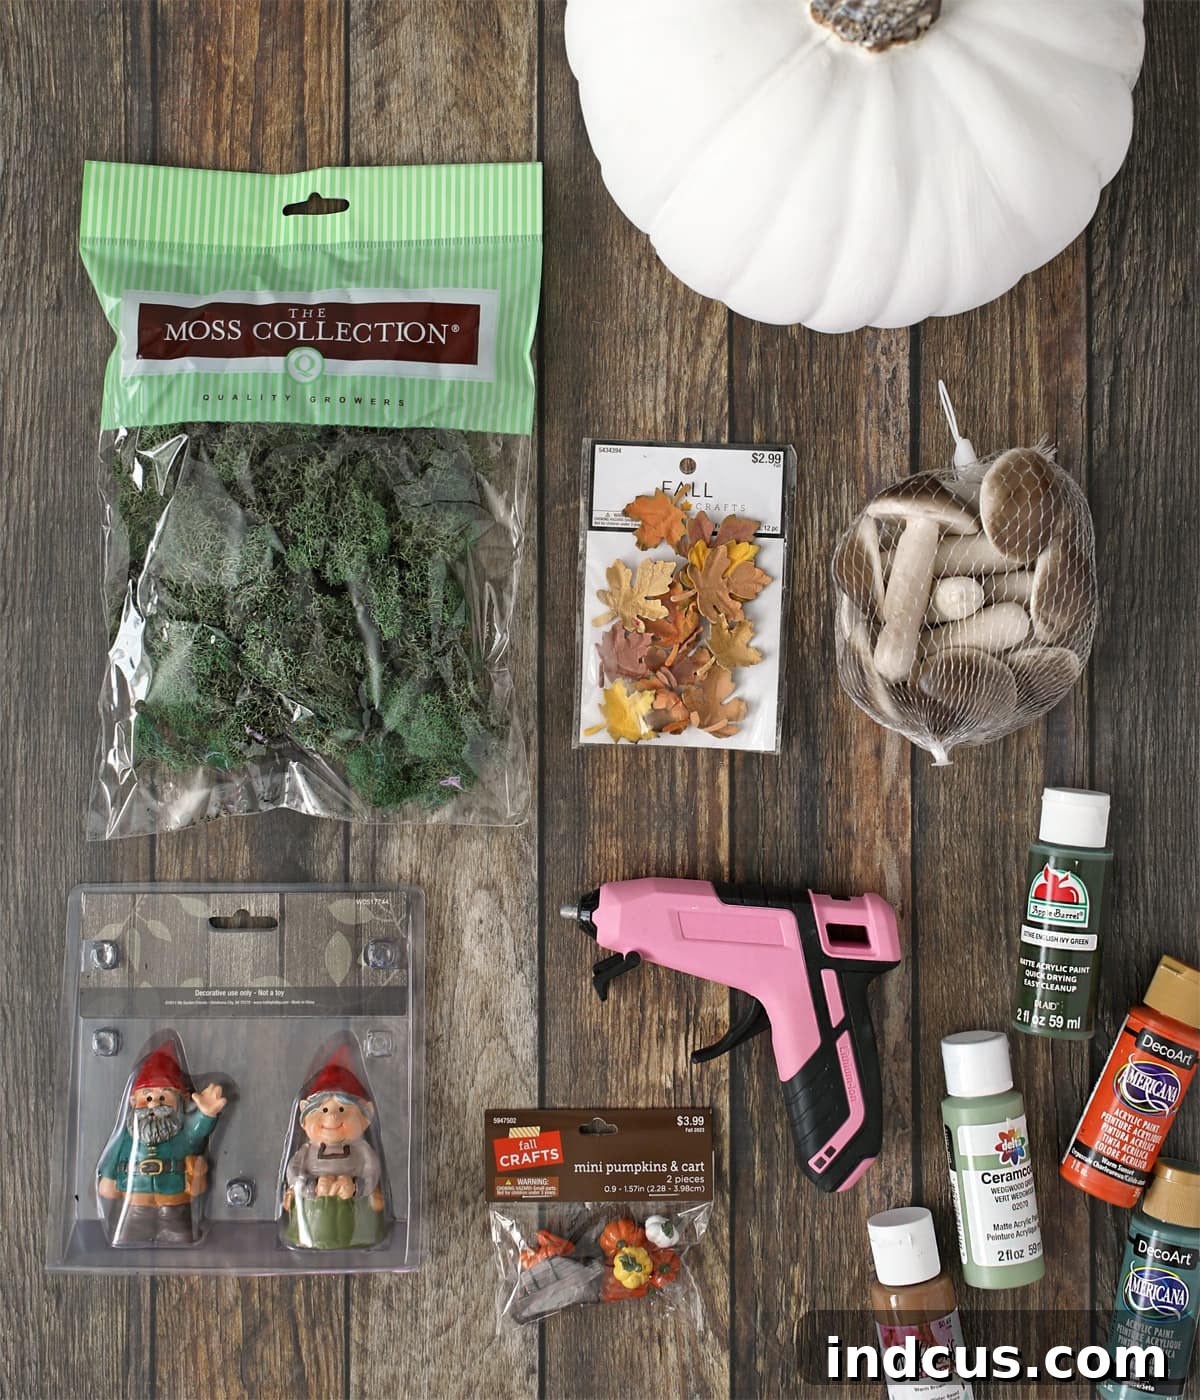
Essential Supplies for Your Miniature Masterpiece
Before diving into the enchanting world of miniature pumpkin homes, gather your tools and materials. Many of these items might already be tucked away in your craft stash, encouraging resourceful crafting. Don’t hesitate to substitute or add items that spark your imagination!
- 9-Inch Carveable Foam Pumpkin (hollow inside is ideal for lighting)
- Dried Moss (reindeer moss, sheet moss, or Spanish moss work well)
- Hot Glue Gun + Plenty of Glue Sticks (an indispensable tool for quick assembly)
- Assorted Craft Paints and Paintbrushes (acrylics work great for foam)
- Gnome or Fairy Figurines (to bring your house to life)
- Mini Fall Leaf Embellishments (for an authentic autumn feel)
- Foam Mushrooms (or craft your own from clay or foam)
- Mini Pumpkins and Cart (charming external accessories)
- Craft Foam Sheet (for shutters, signs, or other details)
- Pencil or Marker (for tracing)
- Craft Knife or Box Cutter (for precise cuts, adult supervision recommended)
- Optional: Small wooden beads, burlap ribbon, fairy lights (battery operated), tea lights.
Step-by-Step Guide: Crafting Your Enchanting Pumpkin Dwelling
This is where the real fun begins! Follow these detailed steps to bring your pumpkin fairy or gnome house to life. Remember, this is your creation, so feel free to adapt these instructions and let your personal style shine through.
Step 1: Carving the Foundation – Doors and Windows
Begin by envisioning the entrance and windows for your miniature home. Using a pencil, carefully draw the desired shapes directly onto your foam pumpkin. Consider classic arched doorways, quaint rectangular windows, or even whimsical round portholes. Tracing first is crucial; it allows you to refine your design before making any permanent cuts. Once satisfied with your outlines, use a craft knife or a sharp box cutter to carefully cut along these lines. The foam material makes this process surprisingly easy, allowing for clean, smooth edges. For safety, always cut away from yourself and use a cutting mat if possible. Save the cutout door piece – it will be transformed into a functional and charming entrance for your dwelling.
Step 2: Crafting Architectural Details – Door and Window Finishes
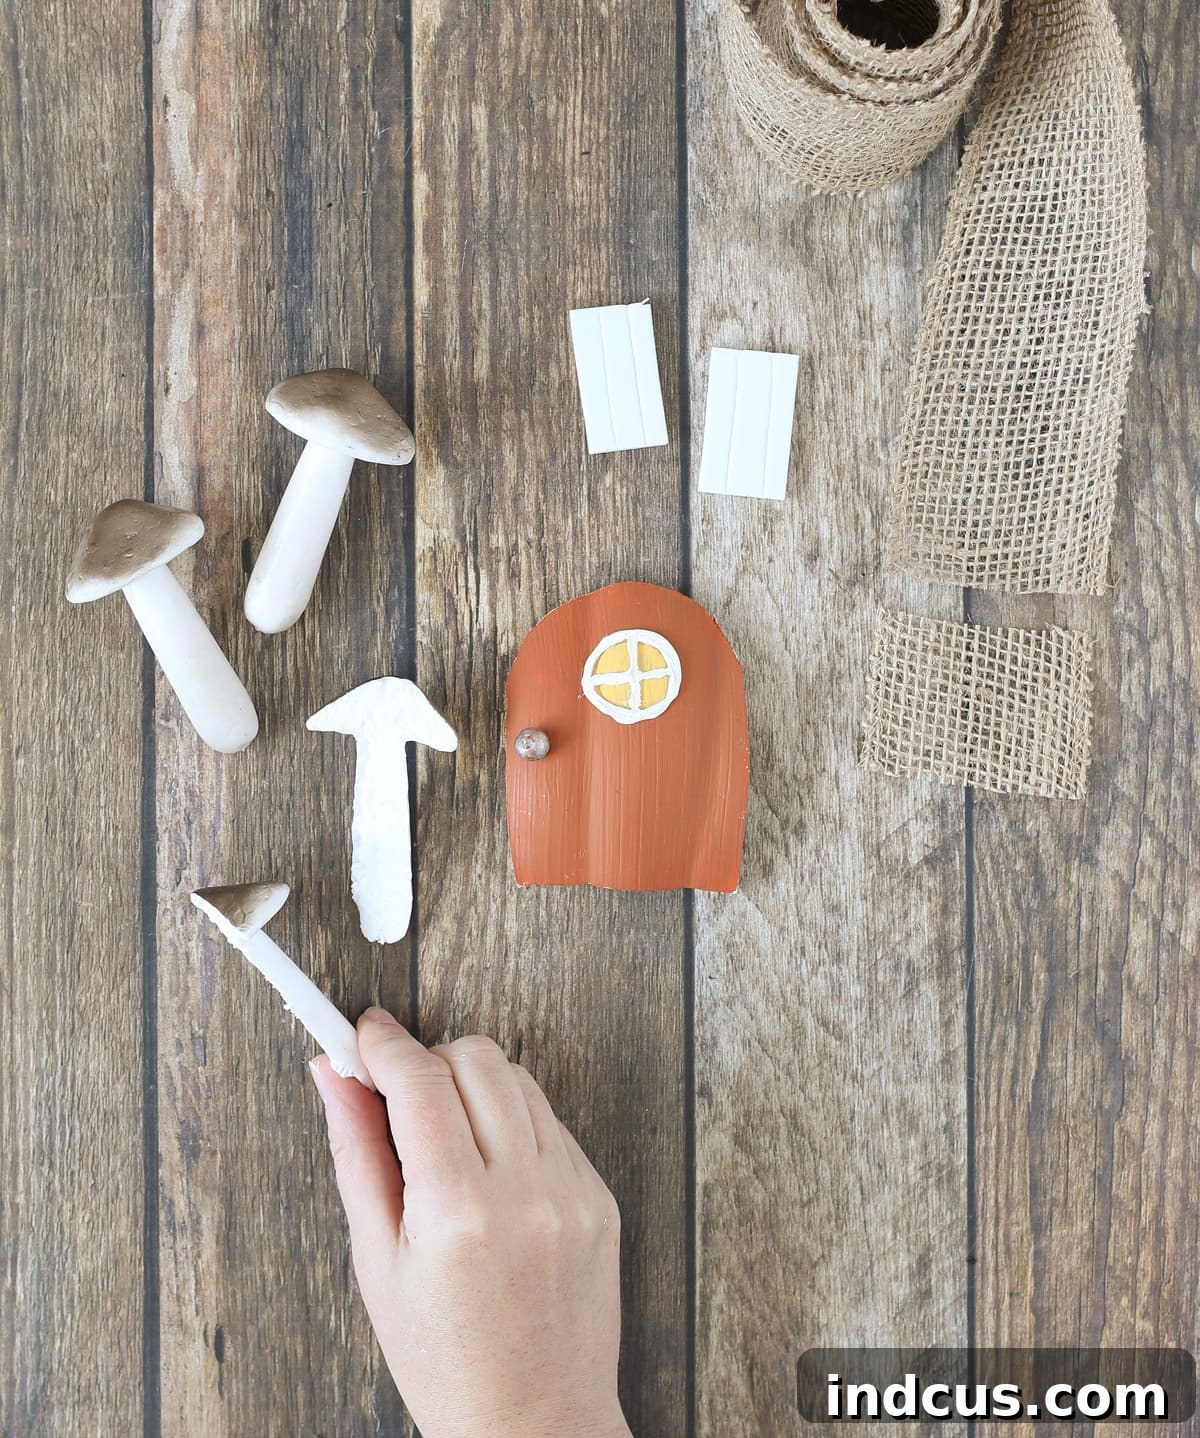
Now, let’s bring those cutouts to life! Take your door piece and paint it in a welcoming color – perhaps a rustic brown, a vibrant red, or an earthy green. While the paint dries, consider adding a window detail directly onto the door. A simple yellow circle can represent a warm glow, outlined with hot glue to add fantastic three-dimensional texture. Once the hot glue dries, you can paint over it, perhaps with white to mimic window frames. For a doorknob, a small wooden bead painted metallic silver or gold works perfectly, adding a touch of realism and elegance. Simply hot glue it into place on your painted door. This attention to small details truly elevates the overall charm of your pumpkin house.
Step 3: Bringing Nature Indoors – Mossy Roofs and Autumn Foliage
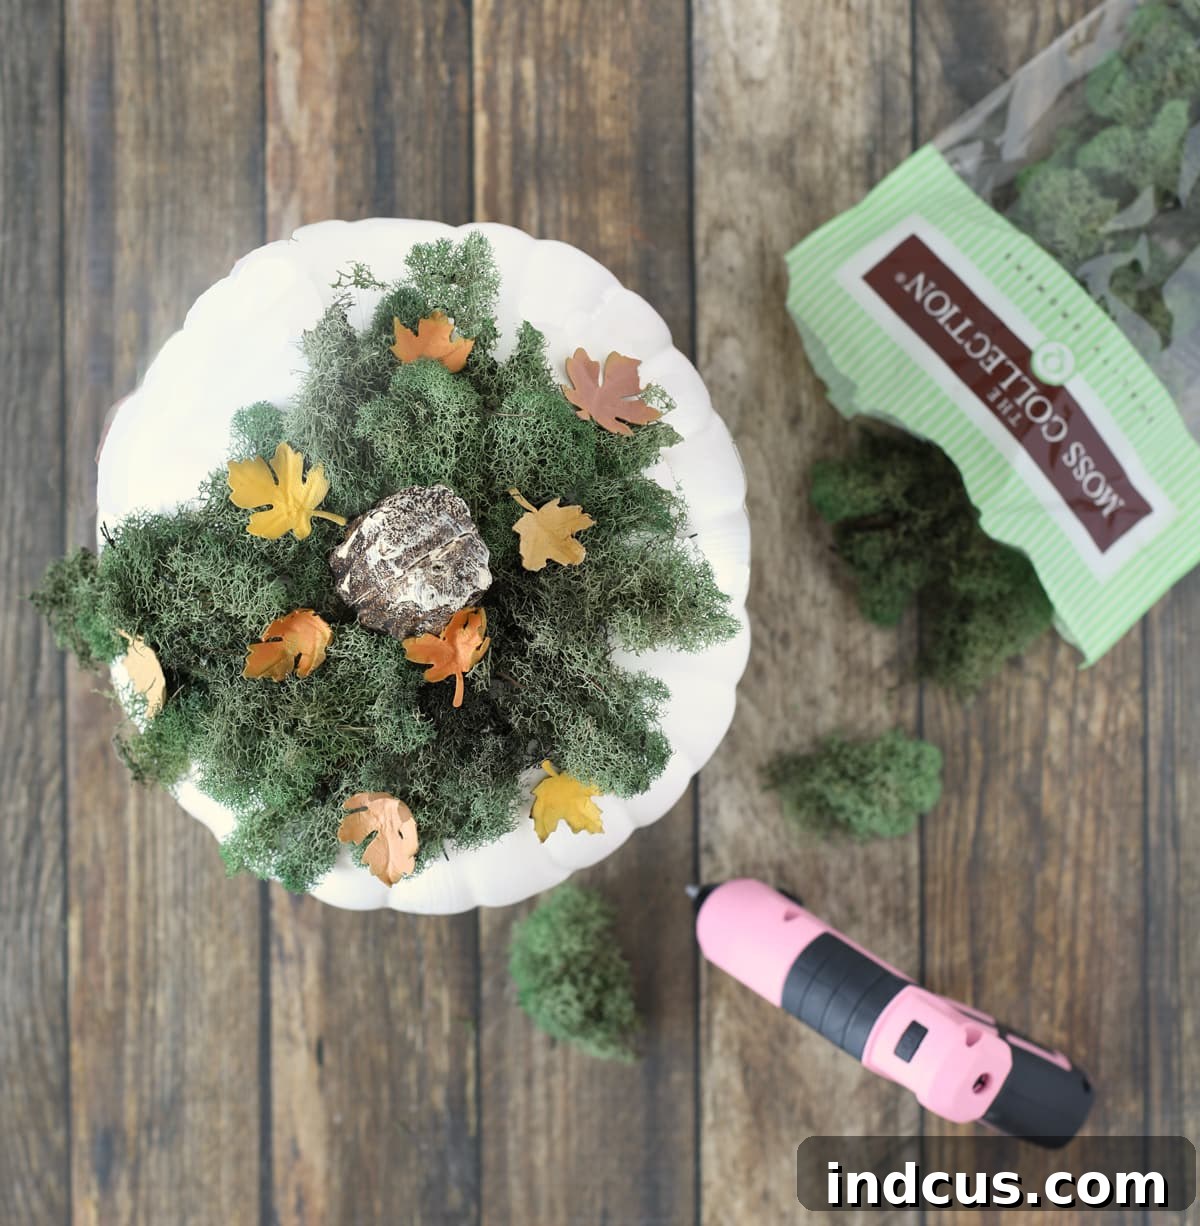
Every magical dwelling needs a touch of nature, and a moss-covered roof provides that enchanting, organic feel. Apply a generous amount of hot glue to the top of your pumpkin, starting from the stem area and working outwards. Press clumps of dried moss firmly onto the glue, ensuring good coverage. Don’t worry about perfection; a slightly uneven, natural look enhances the rustic appeal. Once the moss is securely in place, sprinkle a few mini fall leaves over the moss. These tiny embellishments instantly evoke the spirit of autumn, making your pumpkin house feel nestled within a vibrant fall forest.
Step 4: The Finishing Touches – Embellishments and Personalization
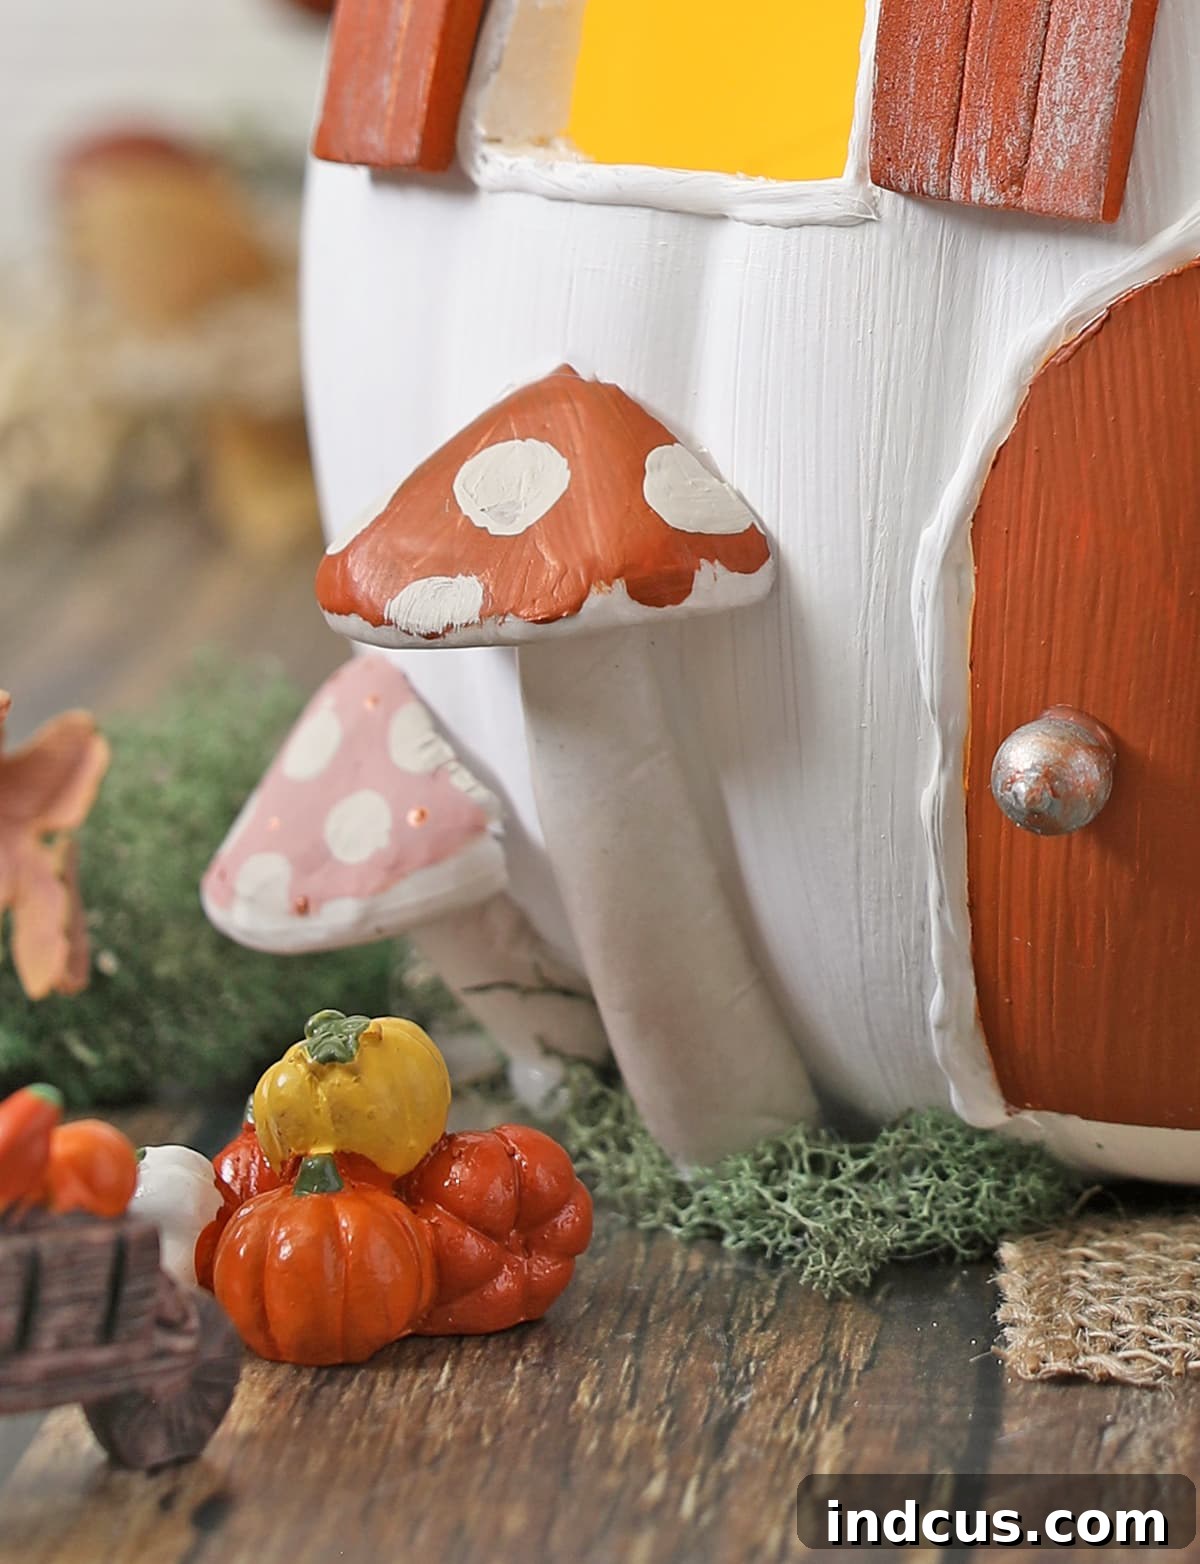
This is where your pumpkin house truly becomes unique. Think about all the charming details that make a house a home. Consider crafting miniature shutters from a craft foam sheet. Score lines into the foam with a ruler and a dull blade to mimic the look of wooden planks, then paint them a contrasting or complementary color to your door. Hot glue them beside your windows. For a welcoming touch, fashion a tiny doormat from a piece of burlap ribbon, fraying the edges slightly for a natural look. If you found foam mushrooms, cut them in half lengthwise, paint their tops vibrant colors, and hot glue them around the base of your pumpkin, creating a charming miniature fungal garden. Don’t be afraid to add other personal touches: tiny signs, flower pots made from bottle caps, or even a miniature clothesline. These small details transform a simple pumpkin into a beloved home.
Illuminating Your Miniature World
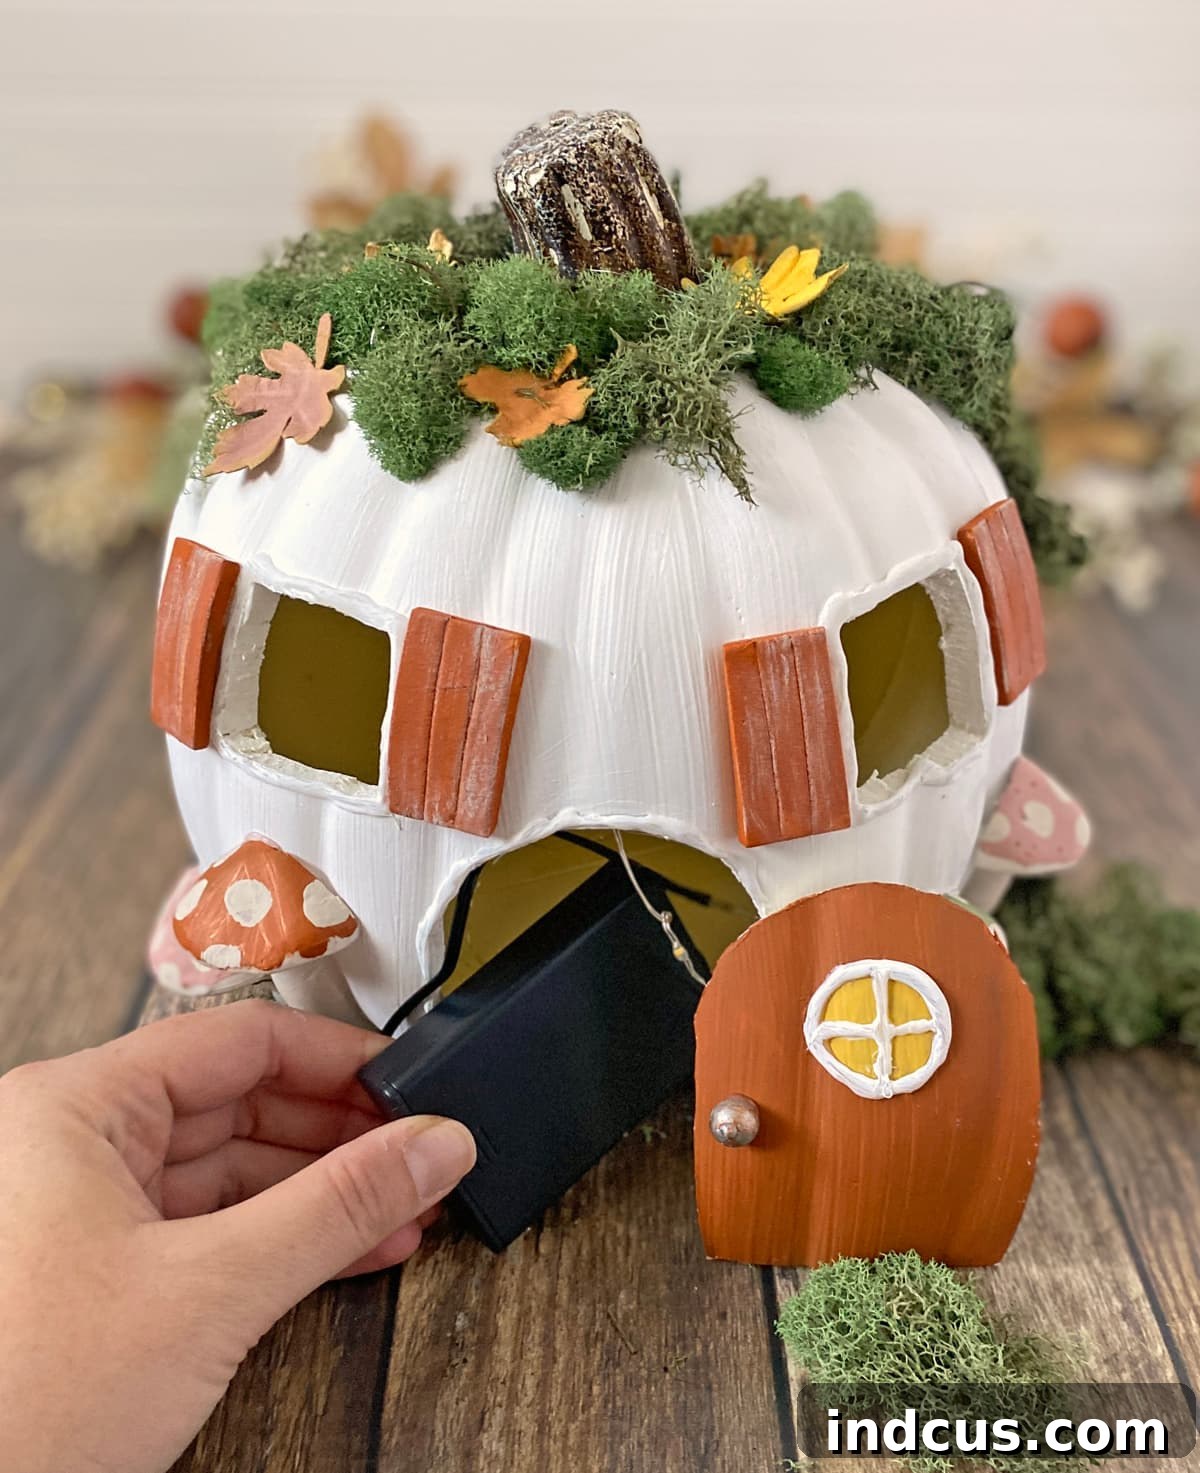
One of the most captivating aspects of these pumpkin houses is the soft, inviting glow they emit. Once all your external details are complete, it’s time to add light. If your foam pumpkin is hollow, you can easily place a battery-operated string of fairy lights or a small LED tea light inside. The gentle illumination spilling from the windows and doorway creates an incredibly cozy and magical ambiance, especially as dusk settles. Carefully place the door cutout back into its opening, allowing the light to peek through charmingly. This internal glow truly brings your miniature dwelling to life, making it a focal point of your fall decor.
Displaying Your Autumnal Creation
With your enchanting pumpkin fairy house complete and softly glowing, the final step is to arrange your external accessories and find the perfect spot for it. Position your gnome or fairy figurines by the door, perhaps with a miniature cart filled with tiny pumpkins or other fall harvest items. Consider placing your finished pumpkin house on a bed of more moss, surrounded by acorns, pinecones, or additional mini pumpkins to create a complete autumnal scene. These miniature worlds look stunning on a mantelpiece, as a centerpiece on your dining table, or nestled on a bookshelf. They can also add a touch of whimsy to a covered porch or entryway, greeting guests with their charm. Prepare to be delighted by this darling creation, and don’t be surprised if you find yourself planning an entire miniature village!
Beyond One House: Creating a Miniature Pumpkin Village
The joy of crafting these pumpkin houses often inspires a desire to create more. Envisioning an entire miniature village allows for even greater creativity and storytelling. Each pumpkin house can have its own unique personality and purpose. Perhaps one is a bustling bakery, complete with tiny painted pretzels and croissants in its windows. Another could be a cozy library, adorned with miniature book stacks. A schoolhouse might feature a tiny chalkboard and benches, while a general store could display miniature barrels and sacks. By varying pumpkin sizes, paint colors, and decorative themes, you can build a rich, intricate world for your fairies and gnomes. This expansion also makes for a fantastic collaborative project for families or crafting groups, where everyone can contribute their unique touch to the growing village.
Tips for a Successful Crafting Experience
To ensure your DIY pumpkin fairy house project is as enjoyable and successful as possible, keep these tips in mind:
- Gather Everything First: Having all your supplies laid out and ready to go will streamline the process and prevent interruptions.
- Work in a Well-Lit Area: Good lighting is essential for detailed work like painting and gluing small embellishments.
- Take Your Time: Rushing can lead to mistakes. Enjoy each step of the process, allowing paint and glue to dry properly.
- Embrace Imperfection: Handcrafted items have character. Don’t strive for absolute perfection; slight irregularities often add to the charm.
- Safety First: When using a craft knife or hot glue gun, always exercise caution. If children are involved, ensure adult supervision.
- Recycle and Repurpose: Look around your home for small items that can be repurposed as miniature accessories – buttons for stepping stones, twigs for fences, or bottle caps for tiny tables.
- Share Your Creation: Once your masterpiece is complete, share photos with friends and family! It’s a great way to inspire others and celebrate your crafting achievement.
This enchanting DIY project offers more than just a beautiful fall decoration; it provides an opportunity to tap into your imagination, create something truly unique, and add a touch of magic to your home. So grab your foam pumpkin, unleash your inner artist, and get ready to build a delightful home for your tiny, mythical friends!
Pin this idea to save it for your next crafting adventure!