Spooktacular Feasts and Family Fun: Crafting the Ultimate Halloween Dinner Experience
As the leaves turn golden and a crisp chill fills the air, there’s an undeniable buzz of excitement for Halloween – a time when spooky meets sweet, and imagination takes center stage. This year, our annual Halloween Spooky Dinner promises to be an extraordinary affair, as I’m thrilled to be joining forces with Grandma! The kids are beyond ecstatic, and honestly, so am I. This collaborative effort ensures an even grander spread of ghoulish delights and heartwarming memories. What you’ll discover below is my contribution to our festive menu, designed to tantalize taste buds and evoke delightful shivers. Get ready to dive into a world of creepy-crawly creations, spectral sweets, and bone-chilling bites!
Halloween is more than just costumes and candy; it’s an opportunity to create cherished family traditions, gather loved ones, and transform ordinary ingredients into extraordinary, themed culinary masterpieces. Our goal for this year’s dinner is to strike the perfect balance between frightful fun and delectable flavor, ensuring every guest, young and old, finds something to savor. So, let’s pull back the curtain on the first half of our magnificent feast, starting with some delightfully eerie appetizers and desserts that are sure to be the talk of the night!
Eerie-sistible Delights: Candy Pretzel Bones
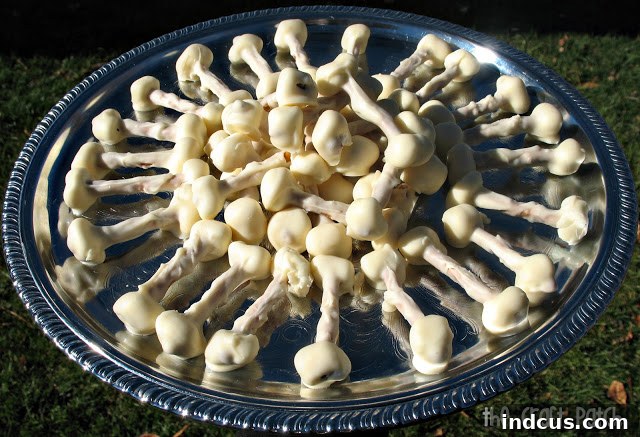
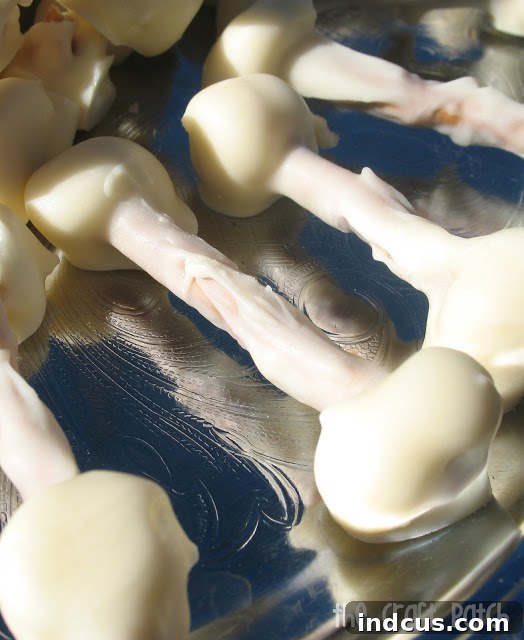
Prepare for a visual and gastronomic treat that looks like it could have been plucked straight from the Addams Family dinner table! Our Candy Pretzel Bones are not just a snack; they’re a statement. Imagine a tray overflowing with these eerie yet utterly delicious skeletal delights, perfectly capturing the spirit of Halloween with their striking appearance and irresistible salty-sweet crunch. They’re simple to make but leave a lasting impression, proving that even bones can be utterly delightful when crafted with a touch of Halloween magic.
Crafting Your Candy Pretzel Bones: A Step-by-Step Guide
The beauty of these pretzel bones lies in their simplicity and the satisfying contrast of textures and flavors. Here’s how to bring these spooky snacks to life:
Ingredients & Equipment:
- Pretzel sticks (thin or standard size)
- Mini marshmallows
- White almond bark or white melting chocolate
- Wax paper or parchment paper
- Baking sheet or flat tray
- Microwave-safe bowl or double boiler
Instructions:
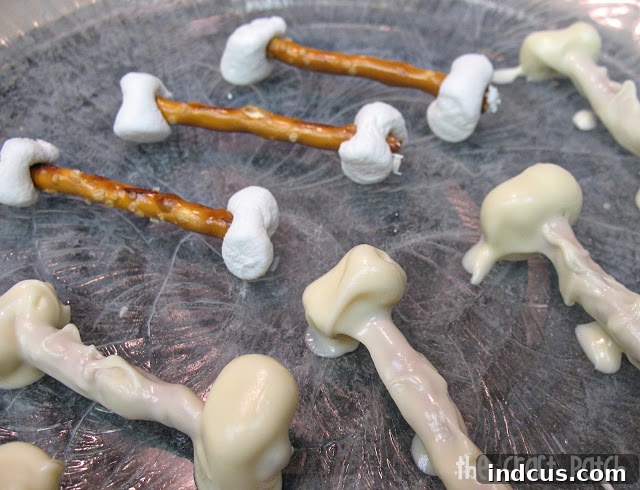
- Prepare Your “Bones”: Carefully spear one mini marshmallow onto each end of a pretzel stick. The marshmallows should be snug but not forced, creating the distinct “knuckle” look of a bone. This step is crucial for the visual appeal. Ensure you have enough assembled bones for your desired quantity.
- Melt the White Chocolate: Break your white almond bark or melting chocolate into small pieces and place them in a microwave-safe bowl. Heat in 30-second intervals, stirring thoroughly after each, until the chocolate is completely smooth and fluid. Alternatively, use a double boiler for a more controlled melting process, ensuring the chocolate doesn’t seize.
- Dip the Bones: Holding the pretzel stick by its middle, dip each assembled “bone” into the melted white chocolate. Ensure the chocolate fully coats the marshmallows and a good portion of the pretzel stick, leaving a small section in the middle uncovered to represent the bone shaft. Allow any excess chocolate to drip back into the bowl.
- Set and Harden: Carefully place the dipped pretzel bones onto a baking sheet lined with wax paper or parchment paper. This prevents them from sticking as they cool and harden. Repeat until all your pretzel bones are dipped.
- Chill to Set: For quicker setting, place the baking sheet in the refrigerator for about 15-20 minutes, or allow them to air dry at room temperature until the chocolate is firm to the touch.
- Serve and Enjoy: Once hardened, arrange your Candy Pretzel Bones on a platter to create a truly creepy and delicious display. The delightful crunch of the pretzel combined with the soft marshmallow and sweet white chocolate creates an irresistible treat that perfectly balances salty and sweet.
Here’s a sneak peek at what these little ghoulish delights looked like before their transforming dip, showcasing their simple beginnings:
Tips for Perfection:
- Quality Chocolate Matters: Using good quality almond bark or melting wafers will give you a smoother finish and better taste.
- Avoid Water: Ensure your melting chocolate is free from any water droplets, which can cause it to seize and become unusable.
- Creative Presentation: Arrange them artfully on a dark platter or even sticking out of a bowl of “dirt” (crumbled chocolate cookies) for an extra spooky effect.
Eight-Legged Wonders: Spooky Spider Deviled Eggs
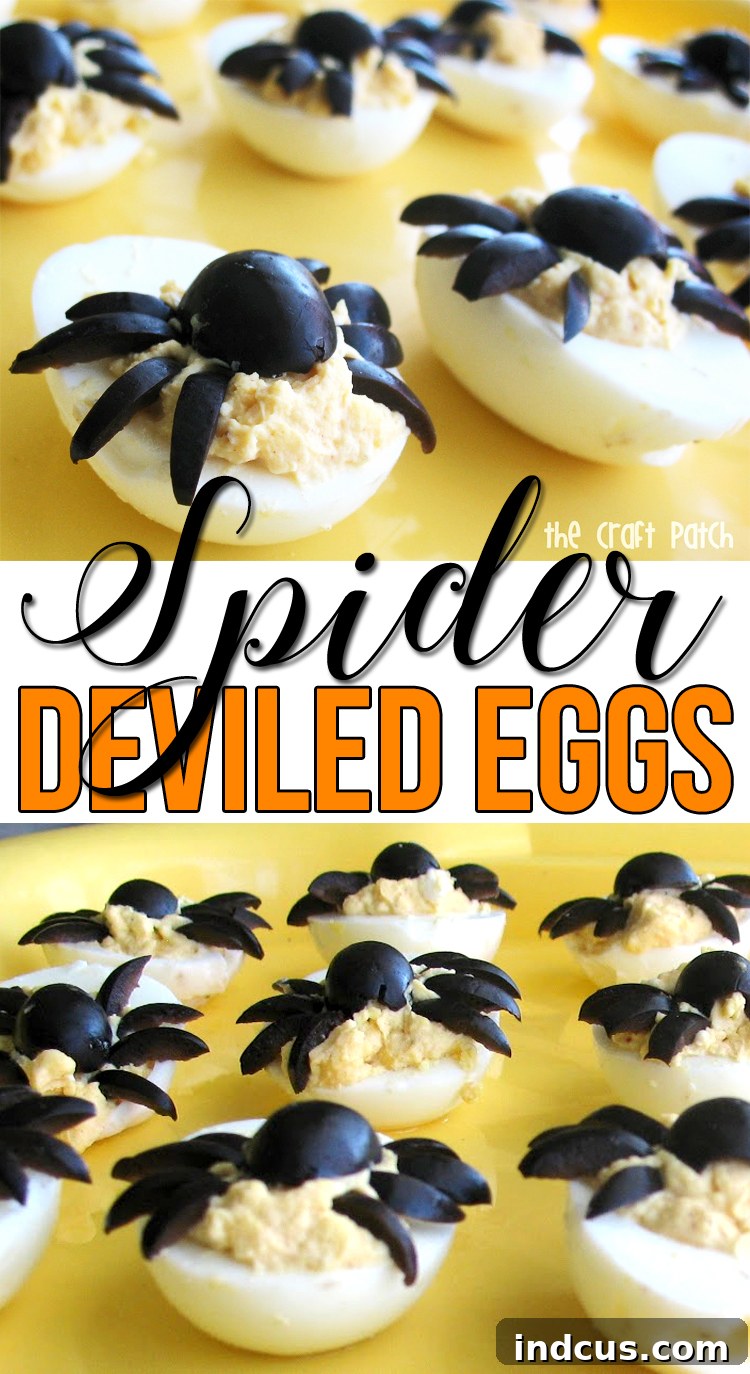
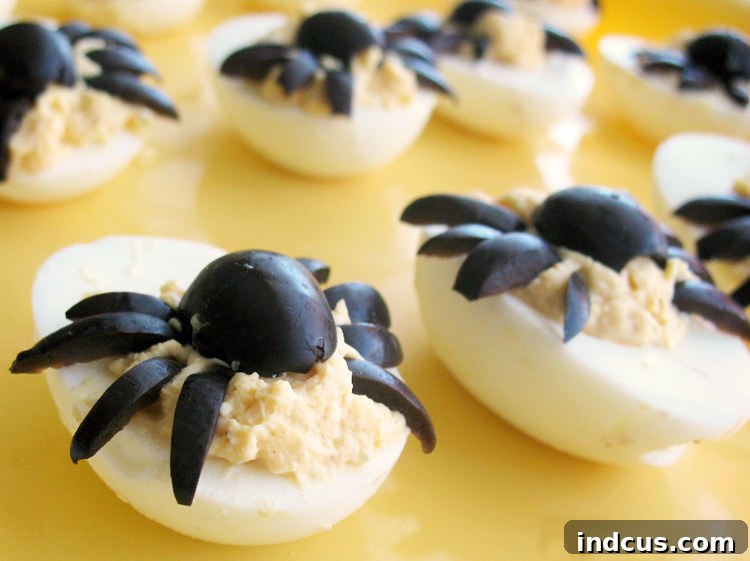
This next culinary creation is guaranteed to give you the willies, in the most delightful Halloween way, of course! Our Spider Deviled Eggs are a testament to how a simple ingredient can be transformed into something truly eerie and unforgettable. The sight of these eight-legged arachnids perched atop creamy, savory deviled eggs is enough to make anyone do a double-take. They are a fantastic savory addition to any Halloween spread, offering a classic flavor with a perfectly creepy twist.
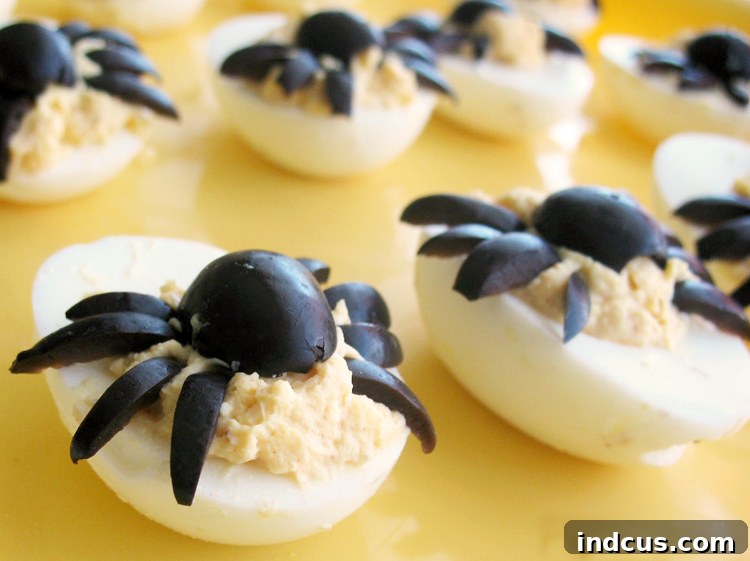
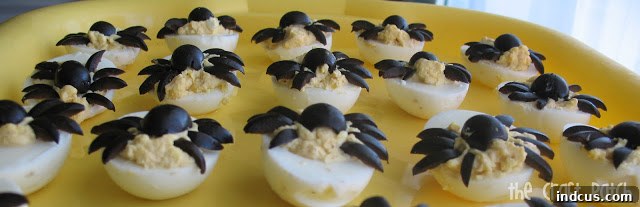
Seeing them all together, an army of creepy-crawlies converging on the platter – it’s an “ick” factor that is pure Halloween gold! They’re not just a snack; they’re a conversation starter, designed to surprise and amuse your guests. Despite their unsettling appearance, the familiar comfort of a perfectly made deviled egg shines through, making them a delicious trick-or-treat for the palate.
Assembling Your Arachnid Appetizers:
Creating these spooky spiders is surprisingly straightforward, adding a touch of intricate detail that elevates the humble deviled egg into a Halloween masterpiece.
Ingredients & Equipment:
- Hard-boiled eggs (chilled)
- Mayonnaise
- Dijon mustard (or yellow mustard)
- White vinegar (optional, for tang)
- Salt and black pepper to taste
- Black olives (pitted, preferably large)
- Small, sharp knife
- Piping bag or a plastic sandwich bag with a corner snipped
Instructions:
- Prepare the Deviled Eggs: Carefully slice your hard-boiled eggs in half lengthwise. Gently scoop out the yolks into a medium bowl.
- Make the Filling: Mash the yolks thoroughly with a fork. Add mayonnaise, mustard, vinegar (if using), salt, and pepper to taste. Mix until the filling is smooth and creamy. Adjust seasonings as desired.
- Fill the Egg Whites: Spoon or pipe the yolk mixture back into the hollowed-out egg white halves. Use a piping bag for a neater, more professional look, or simply use a spoon to create a nice mound.
- Craft the Spiders: This is where the magic happens. Take a pitted black olive and cut it in half lengthwise. One half will serve as the “body” of your spider.
- Create the Legs: Take the other half of the olive and slice it into thin slivers – these will be your spider’s legs. Aim for about 6-8 slivers per spider.
- Assemble the Spiders: Gently place the olive body half on top of the deviled egg filling. Then, arrange the tiny olive slivers around the body, positioning them to resemble spider legs crawling out from under the body.
- Chill and Serve: Arrange your finished spider deviled eggs on a platter. Chill them in the refrigerator until ready to serve to keep them fresh and firm.
Spidery Enhancements:
- Olive Variety: Experiment with Kalamata olives for a different flavor profile, though black olives offer the best contrast.
- Web Effect: For an extra touch, use a thin stream of mayonnaise from a piping bag to draw delicate “spider webs” on the platter around the eggs.
- Garnish: A sprinkle of paprika or a tiny snip of chive can add color and freshness if desired, just be careful not to detract from the spider’s creepiness!
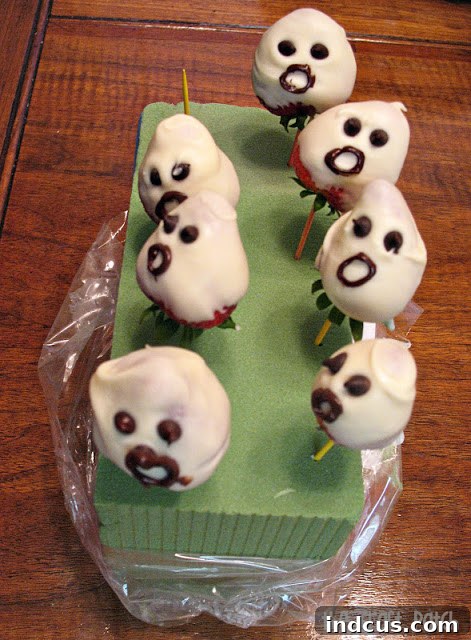
Ethereal Treats: Delightful White Chocolate-Covered Strawberry “Ghosts”
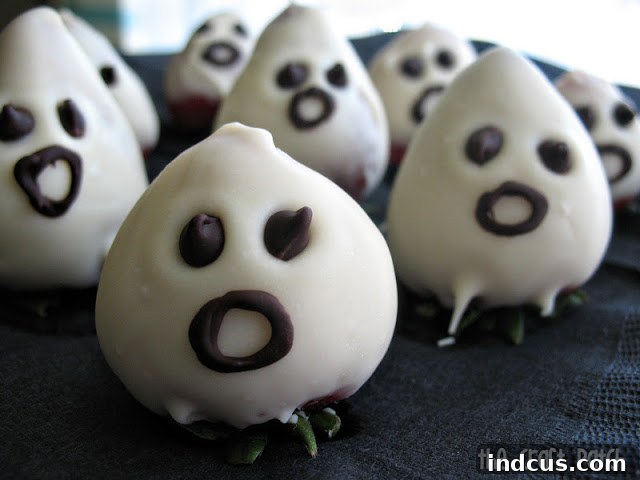
No Halloween dinner is complete without a touch of sweet, spectral charm, and our White Chocolate-Covered Strawberry Ghosts deliver exactly that! These adorable, fruity phantoms are a delightful contrast to the more overtly spooky treats, offering a fresh and light dessert option. They’re incredibly simple to make yet produce a striking visual impact, making them a perfect addition to any festive spread. Each bite offers the juicy sweetness of a fresh strawberry enveloped in smooth white chocolate, with just a hint of mischief from their tiny chocolate chip eyes.
Bringing Your Strawberry Ghosts to Life:
Creating these charming ghosts is a fun and relatively quick process, especially with a clever trick that makes dipping a breeze!
Ingredients & Equipment:
- Fresh strawberries (medium to large size, with green caps intact)
- White melting chocolate or white chocolate chips
- Mini chocolate chips (for eyes)
- Milk chocolate (for mouths, optional)
- Toothpicks
- Florist foam, styrofoam block, or a similar sturdy material
- Plastic sandwich bag (for piping mouths)
- Baking sheet lined with parchment paper
Instructions:
- Prepare the Strawberries: Thoroughly wash and gently dry all your strawberries. This step is critical; any moisture will cause the chocolate to seize or not adhere properly. Ensure they are completely dry before proceeding.
- Melt the White Chocolate: Melt your white chocolate in a microwave-safe bowl in 30-second intervals, stirring until smooth and fluid, or use a double boiler for a gentler melt.
- The Toothpick Trick (Game Changer!): Here’s the secret to perfectly smooth, smudge-free ghosts: Spear each strawberry through its green leafy part with a toothpick. This provides a clean handle for dipping.
- Dip the Strawberries: Holding the strawberry by the toothpick, dip it into the melted white chocolate, rotating it to ensure an even coating. Lift it out, allowing any excess chocolate to drip off.
- Add Eyes Immediately: While the white chocolate is still wet, carefully place two mini chocolate chips onto the strawberry to create the ghost’s eyes. The wet chocolate will secure them in place.
- Dry Without a Mess: This is where the florist foam comes in handy! Poke the toothpick (with the dipped strawberry attached) into the florist foam. This allows the chocolate to harden and drip dry without smudgy fingerprints or pooling at the bottom. Repeat for all strawberries.
- Add Mouths (Optional): Once the white chocolate has fully hardened, melt a small amount of milk chocolate. Transfer it to a plastic sandwich bag, snip a tiny corner, and pipe small, whimsical mouths onto your ghosts.
- Chill and Serve: Once all features are set, carefully remove the toothpicks. Arrange your delightful strawberry ghosts on a platter and chill until ready to serve.
The toothpick trick I discovered truly made these so much easier and cleaner! By spearing each strawberry through its leafy cap with a toothpick, then dipping it in chocolate, I could then poke the toothpicks into some florist foam while the chocolate dried. This method completely eliminated smudgy fingerprints and messy, pooled chocolate. It worked perfectly, ensuring each ghost looked pristine and professionally finished!
Ghostly Variations & Tips:
- Facial Expressions: Get creative with the mini chocolate chips for eyes and piped milk chocolate for mouths to give each ghost a unique personality – happy, surprised, or slightly mischievous!
- Chocolate Drizzle: For an extra artistic touch, drizzle a contrasting chocolate (like dark chocolate) over the hardened white chocolate for a “web” or “swirl” effect.
- Keep Them Cool: These are best served chilled, making them refreshing and ensuring the chocolate remains firm.
Beyond the Bites: Creating a Memorable Halloween Ambiance
While the food is undoubtedly a star of any Halloween gathering, creating a truly immersive experience involves more than just delicious dishes. Think about setting the scene with decorations that range from subtly spooky to outright terrifying, depending on your audience. Dim lighting, artificial cobwebs, carved pumpkins glowing eerily, and perhaps a well-placed fog machine can transform your space into a haunted haven. A curated playlist of classic monster movie themes or eerie soundscapes can further enhance the atmosphere, adding another layer to your guests’ sensory experience.
And let’s not forget the costumes! Encouraging everyone to come dressed in their Halloween best not only adds to the festive spirit but also provides fantastic photo opportunities, capturing the joy and creativity of the evening. For the little ones, engaging them in decorating activities or helping with the simpler food preparations (like placing mini marshmallows on pretzels) can make them feel more involved and excited about the event.
Ultimately, Halloween is a celebration of imagination, community, and the simple joy of sharing a fun, slightly frightful evening with those we hold dear. Whether it’s the thrill of trick-or-treating, the warmth of a pumpkin-spiced beverage, or the laughter shared over a plate of spider deviled eggs, these moments become the threads that weave the rich tapestry of family traditions.
I hope these recipes and ideas inspire you to create your own wonderfully spooky and delicious Halloween memories with family and friends. This annual spooky dinner is a tradition we deeply cherish, and it’s truly wonderful to see the joy it brings, especially when shared with beloved family members like Grandma. What are some of your family’s favorite Halloween traditions or must-have dishes? We’d love to hear about them!