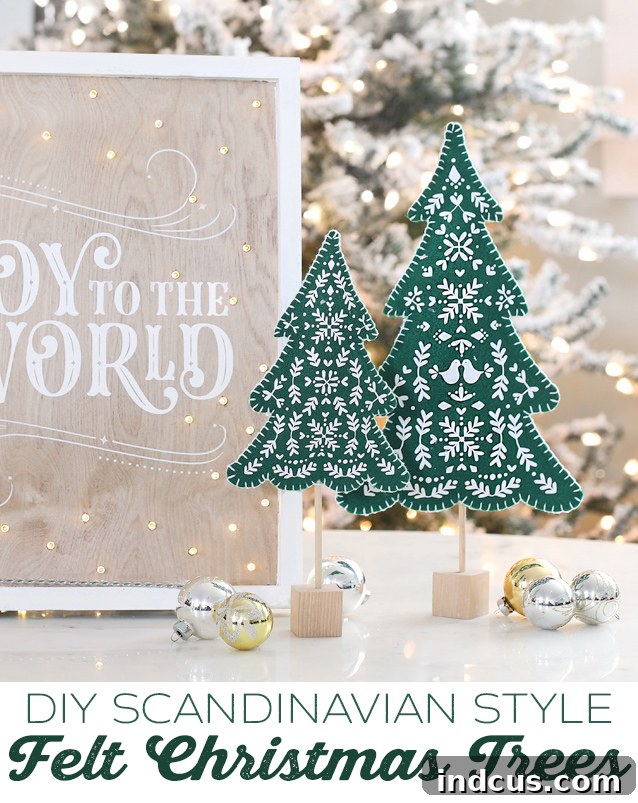
Craft Exquisite DIY Scandinavian Felt Christmas Trees with Your Silhouette Cameo 4 – Free Cut Files Included!
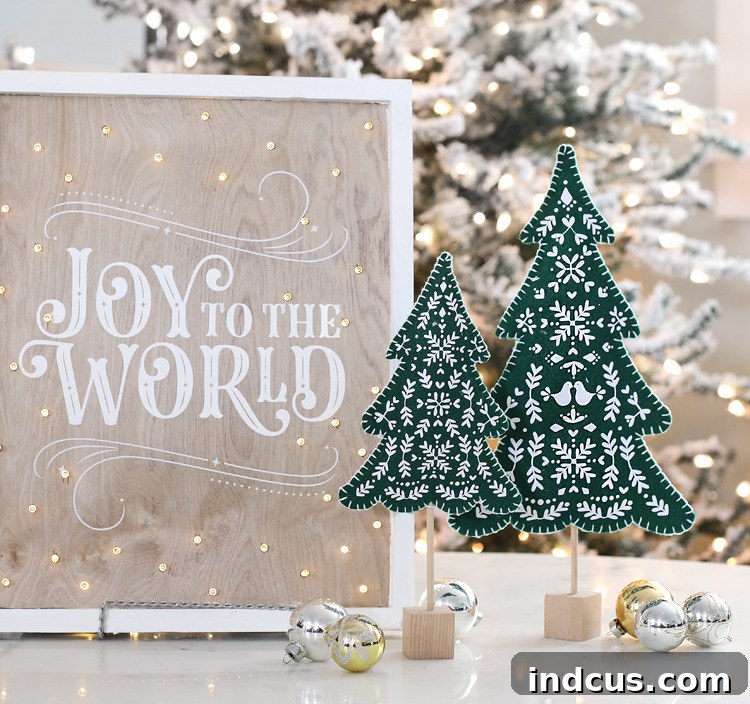
Transform your festive home decor this season with these undeniably charming, handcrafted Scandinavian-inspired felt Christmas trees. Each tree features a beautifully intricate pattern, meticulously applied, and is finished with elegant hand-stitched edge details, lending a truly bespoke and artisan feel. These delightful decorations are perfectly suited to bring a touch of Nordic simplicity and warmth to any space. The most exciting part? You can easily create this entire collection yourself using your trusty Silhouette Cameo 4 machine, thanks to the complimentary cut files we’ve provided. This project is designed to be accessible and rewarding for crafters of all skill levels, offering a wonderful opportunity to personalize your holiday decorations or craft heartfelt, handmade gifts for loved ones.
Unleashing Creative Potential: The Magic of Felt and the Silhouette Cameo 4
My passion for crafting frequently leads me to new and exciting techniques, and without a doubt, my current obsession revolves around the art of cutting felt with my Silhouette machine. The unparalleled precision, efficiency, and sheer ease with which this versatile tool handles felt fabric is nothing short of remarkable. Following the successful creation of a charming felt stuffed animal a few months ago, I was completely captivated by the flawless results and the straightforward process. This initial success immediately sparked an idea: to explore a series of festive felt crafts, perfectly timed to adorn our homes during the joyous Christmas season.
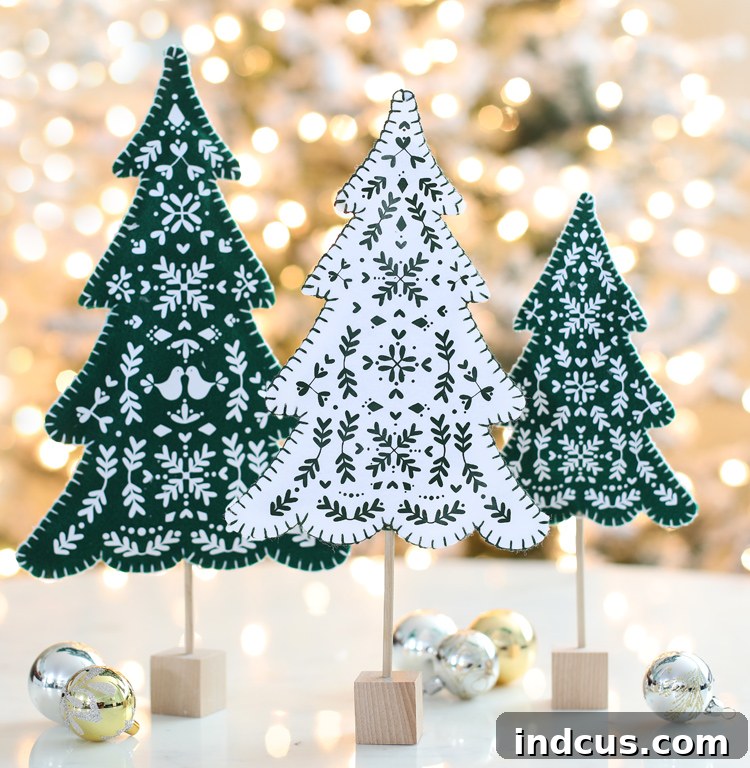
The culmination of this creative exploration is the delightful collection of Scandinavian-inspired felt tabletop Christmas trees you see here. They beautifully embody a minimalist yet incredibly cozy aesthetic, ideal for infusing that coveted ‘hygge’ feeling into your holiday home. Unlike generic, mass-produced ornaments, these DIY trees offer a distinct, handcrafted appeal that is sure to draw admiration and compliments from all who experience their unique charm.
Revolutionizing Felt Crafts: The Power of Heat Transfer Vinyl on Fabric
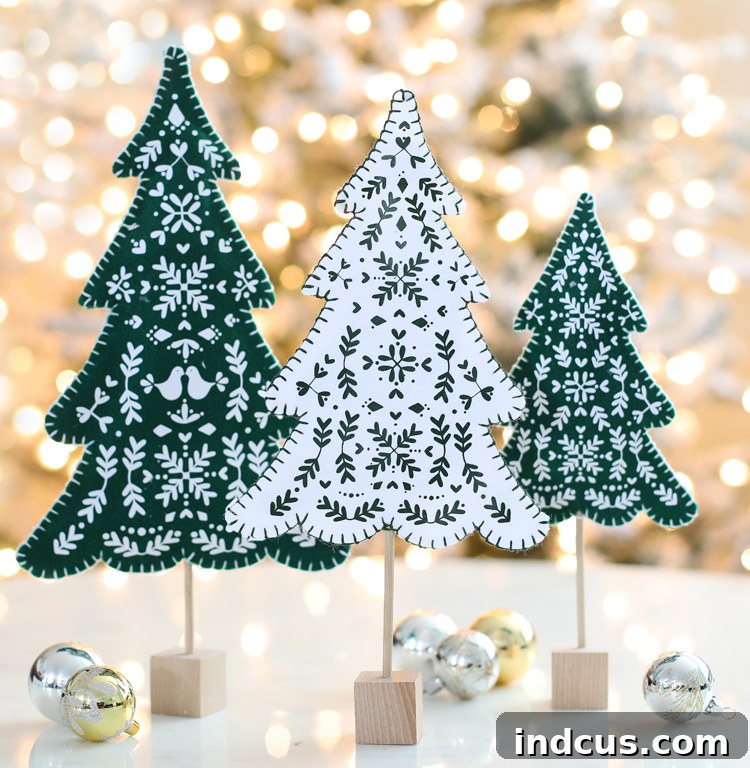
One of the most innovative and exciting techniques showcased in this particular project is the seamless application of heat transfer vinyl (HTV) onto felt. Many crafters might be surprised to discover just how beautifully and effectively HTV adheres to felt, instantly unlocking a vast new realm of creative possibilities. This method enables you to transfer intricate designs and detailed patterns onto your felt projects with impeccable precision, achieving a professional and highly polished finish that would be incredibly challenging, if not impossible, to replicate with traditional hand embroidery or painting techniques.
The inherent durability of HTV, when combined with the soft, tactile quality of felt, results in a unique creation that is both visually appealing and pleasant to touch. I am genuinely eager for you to master this fantastic technique, which is precisely why I’ve meticulously crafted this comprehensive step-by-step photo tutorial. It is designed to expertly guide you through every single stage of creating these breathtaking trees, ensuring your success from the moment you begin until your project is proudly displayed. As an extra special gift to help you get started, you’ll find all the necessary free cut files conveniently located at the very bottom of this post, ready for instant download!
Gathering Your Essentials: A Complete List of Materials for Your Felt Christmas Trees
To embark on this wonderfully creative DIY adventure, you’ll need to assemble a selection of high-quality crafting supplies. Most of these items are readily available at major craft stores, both physically and online, making it quite simple to gather everything required for your project. (Please note: For your convenience, we have included affiliate links for some products. These links do not incur any additional cost to you, but may provide a small commission to support our craft endeavors).
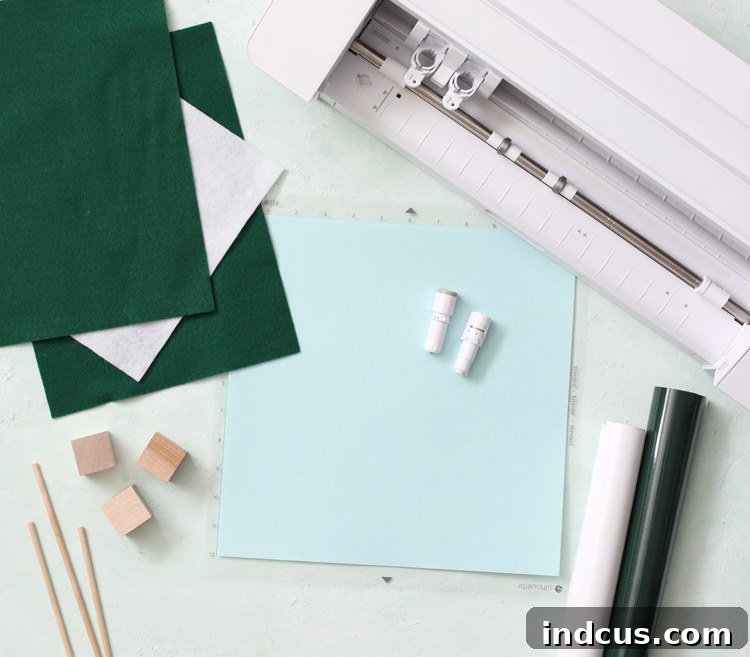
Essential Materials You Will Need:
- Silhouette Cameo 4: This powerful electronic cutting machine is absolutely essential for achieving the precision cuts needed for both your felt and vinyl elements.
- Rotary Blade: Specifically engineered for cutting fabrics like felt, the rotary blade ensures clean, crisp, and fray-free edges, making it a crucial tool for this project.
- Auto Blade: This intelligent blade automatically adjusts to the correct depth settings, making it ideal for accurately cutting your heat transfer vinyl.
- Cutting Mat: A standard 12×12 inch adhesive cutting mat is necessary to securely hold your materials in place while they are being cut by the machine.
- Craft Felt (approximately 6 sheets): Opt for high-quality craft felt for the best results. You can choose classic green and white, or experiment with other festive colors to match your decor.
- Heat Transfer Vinyl (HTV): Select a smooth, durable HTV that is specifically designed to adhere well to fabric. White HTV is perfect for achieving that iconic Scandinavian pattern contrast.
- Wooden Craft Dowels: These dowels will form the sturdy “trunk” of your trees, providing essential support and stability.
- 1 Inch Wood Cubes or Wood Slices: These natural elements will serve as the attractive and stable bases for your tabletop trees.
- Batting: A small quantity of polyester fiberfill is needed for stuffing the trees, giving them a lovely soft, dimensional, and plush feel.
- Hot Glue Gun: An indispensable tool for quickly and securely attaching the dowels and bases.
- Embroidery Floss: Choose a color that beautifully complements your felt for the distinctive and decorative blanket stitching that outlines your trees.
For those moments when inspiration strikes and you need materials immediately, remember that many of these supplies, especially a wide range of Silhouette items, are frequently available in stock at your local Michaels store. This is a fantastic option for avoiding shipping wait times and instantly gratifying your crafting impulses!
Comprehensive Instructions: A Step-by-Step Guide to Crafting Your Felt Christmas Trees
Follow these detailed and easy-to-understand instructions to meticulously bring your beautiful Scandinavian felt Christmas trees to life. Paying close attention to each step will ensure a stunning, professional-quality final product that you’ll be proud to display.
Step 1: Prepare Your Design Files in Silhouette Studio Software
Your crafting journey begins by downloading the exclusive free cut files, which you’ll find conveniently linked at the very end of this post. Once these files are securely downloaded to your computer, proceed to open them within your Silhouette Studio software. Upon opening, the design elements will likely appear as a single, grouped object. To gain full control over individual components, select the entire design on your virtual mat and then click the “Ungroup” icon, or simply right-click and choose “Ungroup.” This crucial action allows you to manipulate each distinct tree shape and Scandinavian pattern independently.
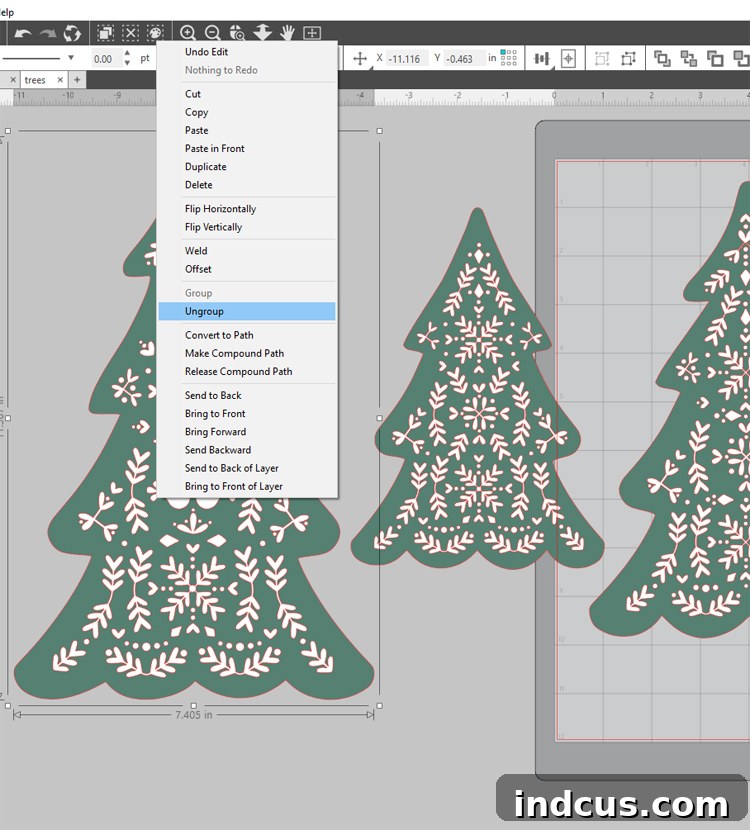
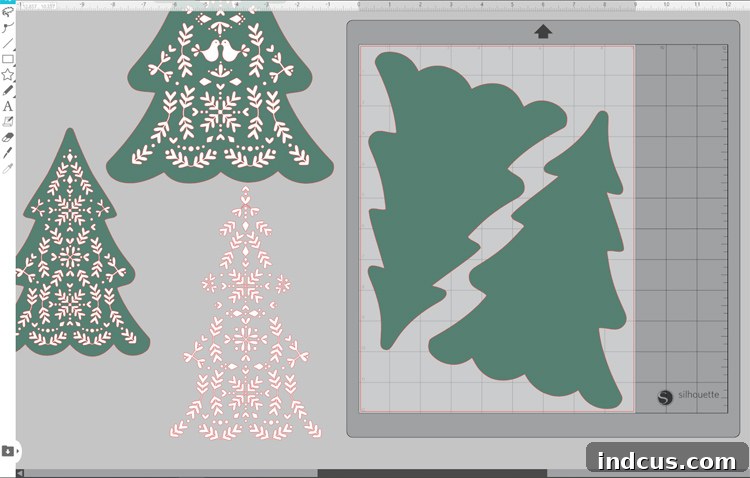
Next, direct your attention to the green tree shapes within your design. These are the specific elements designated to be cut from your felt fabric. Carefully drag and arrange these shapes onto the virtual cutting mat displayed in Silhouette Studio. It’s important to remember that each completed, three-dimensional tree will require two felt pieces – one for the front and one for the back – which will ultimately be sewn together. Strategically plan your layout on the mat to maximize your felt usage and minimize any potential waste, ensuring efficient material consumption.
Step 2: Configure Your Silhouette Cameo 4 for Precision Felt Cutting
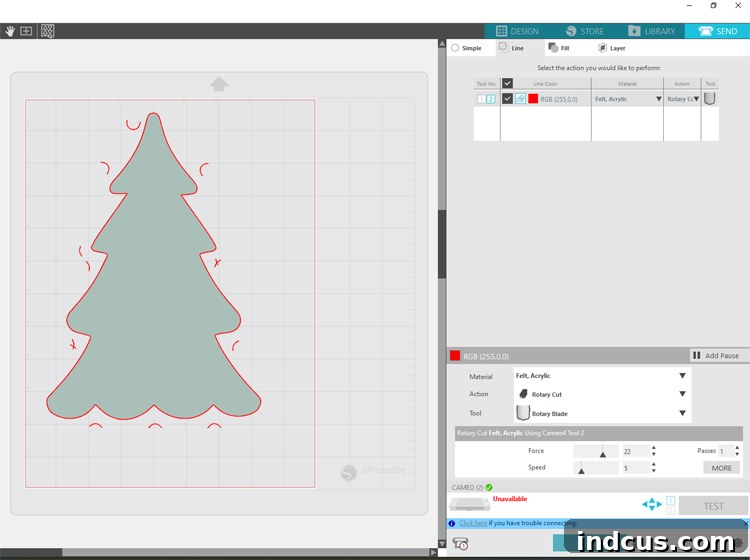
Once your felt tree shapes are meticulously positioned on the virtual mat in Silhouette Studio, it’s time to prepare your physical machine for cutting. Gently but firmly press a piece of your chosen craft felt onto your cutting mat, ensuring it is perfectly smooth and securely adhered to prevent any shifting during the cutting process. Carefully load the prepared cutting mat into your Cameo 4 machine. This is a critical moment: insert the specialized Rotary Blade into the Tool 2 slot of your machine. The rotary blade is uniquely engineered for cutting delicate and fibrous materials like felt without needing a fabric stabilizer, guaranteeing exceptionally clean, crisp, and professional-looking edges that a standard blade cannot achieve on such soft textiles.
Now, navigate to the “SEND” tab located in the upper right-hand corner of your Silhouette Studio interface. Within the SEND panel, locate and click on the “LINE” tab. Here, you will proceed to select “Tool 2” (which corresponds to your rotary blade), choose “Felt” as your specific material type, and then explicitly specify “Rotary Blade” and “Rotary Cut” as your preferred cutting method. These precise settings are absolutely paramount for ensuring a successful and flawless felt cut. For a clear visual reference, please consult the screenshot of my recommended settings provided in the original guide, which will help confirm your configurations.
Step 3: Execute the Felt Cut and Organize Your Pieces
With all your settings thoroughly confirmed and accurately configured, confidently press the “Send” button and observe as your Silhouette Cameo 4 performs its impressive cutting action! The rotary blade will meticulously glide through the felt, effortlessly creating perfectly shaped tree pieces with astonishing precision. Once the cutting process is fully completed, carefully unload the mat from your machine and then gently peel off the newly cut felt designs. You’ll undoubtedly be impressed by the remarkably clean and precise edges achieved by the rotary blade. Repeat this essential process until you have successfully cut two felt tree pieces for each size of tree you intend to create. For the purpose of this particular project, I opted for a harmonious combination of two vibrant green trees and one elegant white tree, as I truly appreciated the striking contrast and versatile aesthetic offered by both color choices.
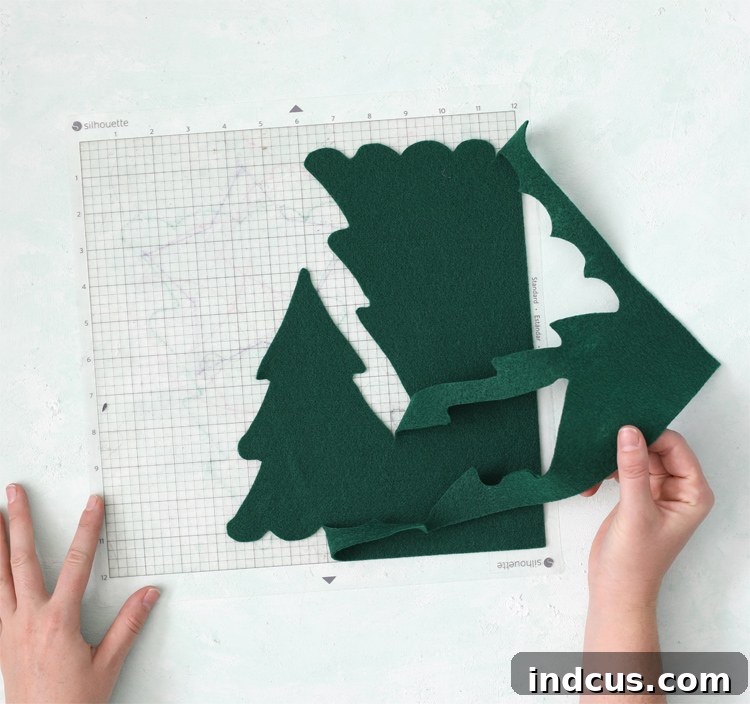
Step 4: Prepare Your Heat Transfer Vinyl Designs and Execute a Crucial Test Cut
Now that your exquisitely cut felt tree shapes are ready for adornment, it’s time to prepare the decorative Scandinavian patterns using heat transfer vinyl (HTV). In Silhouette Studio, carefully clear the cutting mat area by removing all the green felt tree shapes. Then, meticulously drag the white Scandinavian design elements onto the virtual cutting mat, arranging them strategically to maximize space and fit efficiently onto your sheet of HTV.
Before you commit to a full cut, I cannot overstate the paramount importance of performing a test cut. This incredibly simple yet vital step has the potential to save you valuable material, time, and significant frustration. Begin by loading the HTV material you plan to cut into your machine as you normally would. Navigate to the “SEND” tab and locate the “TEST” button, typically found near the bottom of the panel. Your Cameo will then precisely cut a tiny square with a triangle inside it from the top left corner of your vinyl. After the test cut, unload the mat and carefully attempt to peel off the small square. If it weeds effortlessly and the tiny triangle remains perfectly adhered in its place on the carrier sheet, then your cut settings are absolutely ideal. If, however, it doesn’t peel cleanly, adjust your blade depth or force settings incrementally and repeat the test until you achieve that perfect, crisp cut. Trust me, this step is a true game-changer and a hallmark of smart crafting!
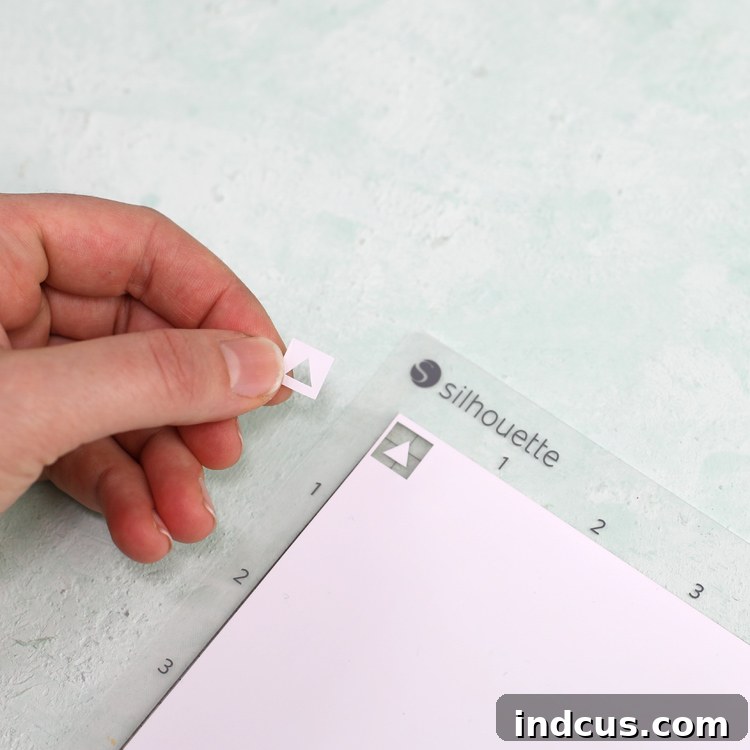
Skipping this crucial test cut is a remarkably common oversight among crafters and frequently leads to wasted sheets of often expensive vinyl, either because the cut wasn’t deep enough to weed properly, or conversely, it cut too deep and went through the carrier sheet. Always, always make time for the test cut – it’s an invaluable feature that ensures your success and saves your materials!
Step 5: Precisely Cut Your Heat Transfer Vinyl Designs
Once your successful test cut unequivocally confirms the perfect settings for your material, proceed to adjust your cut settings within Silhouette Studio specifically for your chosen heat transfer vinyl. Double-check that your Autoblade is correctly and securely loaded into the TOOL 1 slot of your Cameo 4. Before proceeding, make absolutely certain that your design is mirrored (flipped horizontally) in Silhouette Studio, as HTV must always be cut in reverse for proper application. With all parameters meticulously set, you can now confidently send the Scandinavian designs to your machine to be cut.
Step 6: Weed and Apply Heat Transfer Vinyl to Your Felt Pieces
After your HTV designs have been precisely cut, carefully remove the excess vinyl material from around your pattern – a process commonly known as “weeding.” This step will leave only your desired Scandinavian pattern delicately adhered to the clear, sticky carrier sheet. Now, with great attention to detail, meticulously place the weeded white vinyl design onto the corresponding felt tree shape. Take your time to align it perfectly, ensuring the pattern is centered and straight, creating a harmonious look. Once you are completely satisfied with the alignment, use either a heat press or a household iron to firmly attach the vinyl to the felt.
If you are utilizing a heat press, the ideal settings are typically around 305 °F (150 °C) with medium, even pressure for approximately 10-15 seconds. For those using a standard iron, set it to a medium-high heat with no steam, and press down firmly over the design, ideally using a pressing cloth for protection, for about 15-20 seconds. After applying heat, allow the vinyl to cool slightly before gently and slowly peeling away the clear carrier sheet. You should now be left with a beautifully adorned felt tree piece, showcasing a crisp, durable, and eye-catching design.
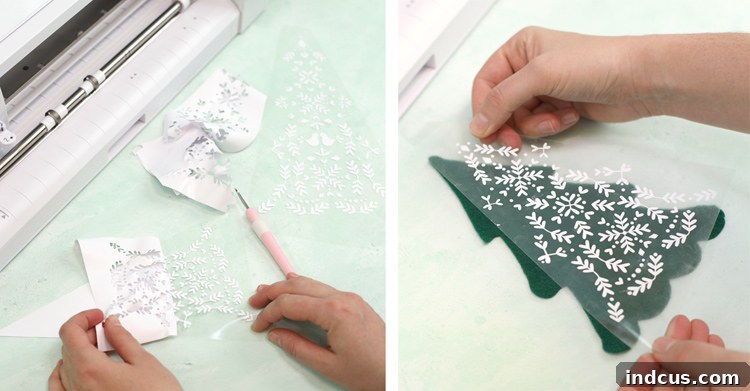
At this stage, you should now possess a collection of exquisitely cut felt tree shapes, some of which are already beautifully adorned with the striking Scandinavian heat transfer vinyl designs. This meticulous foundational work has set the perfect stage for the final assembly of your charming creations.
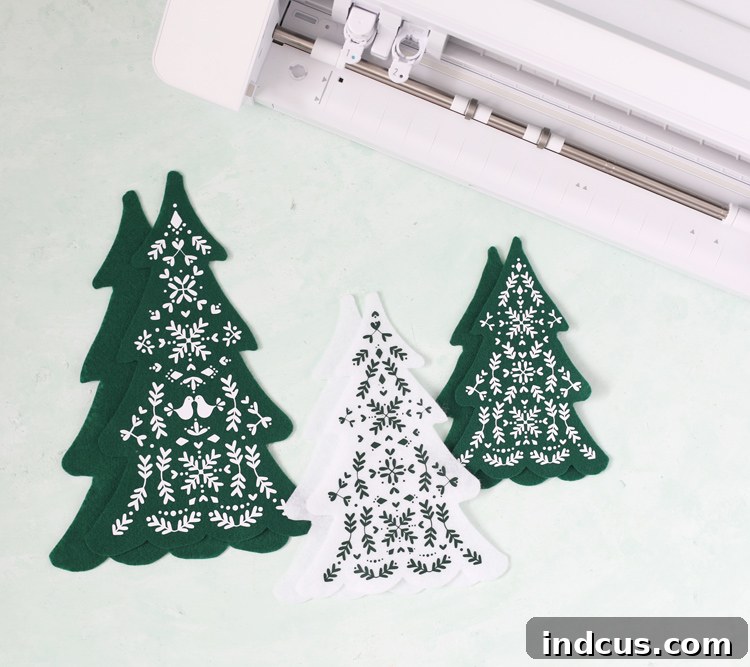
Now, let’s proceed to the exciting phase of assembling these delightful trees and bringing them to their full, charming, and three-dimensional glory!
Step 7: Securely Attach the Wooden Dowel Base
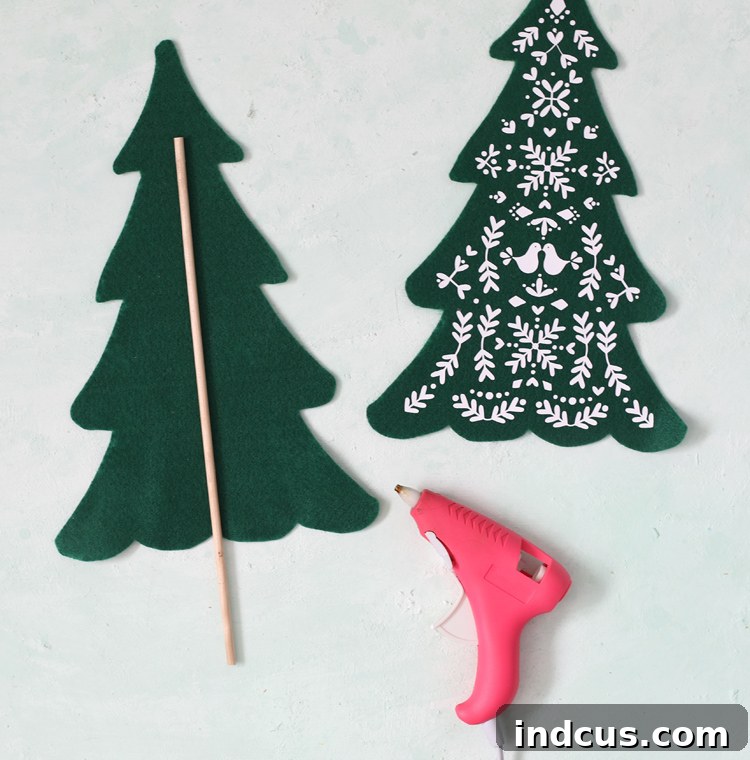
Take one of your unadorned felt tree pieces – this particular piece will serve as the back panel of your tree. Carefully apply a line of hot glue along the center line on the inside surface of this back felt piece, then firmly press a wooden dowel onto the glue. Position the dowel centrally, ensuring it extends from the bottom base of the tree upwards, and check that it is securely adhered. The Scandinavian tree design often features a subtle asymmetry, making this step crucial: take a moment to place the front felt piece (the one with the applied HTV design) directly over the back piece. This allows you to visually confirm that both felt pieces will align perfectly, effectively sandwiching the dowel neatly in between them. This careful alignment ensures your finished tree will stand perfectly straight and maintain its intended symmetrical appearance once fully assembled.
Step 8: Hand-Stitch and Stuff Your Felt Trees Using a Blanket Stitch
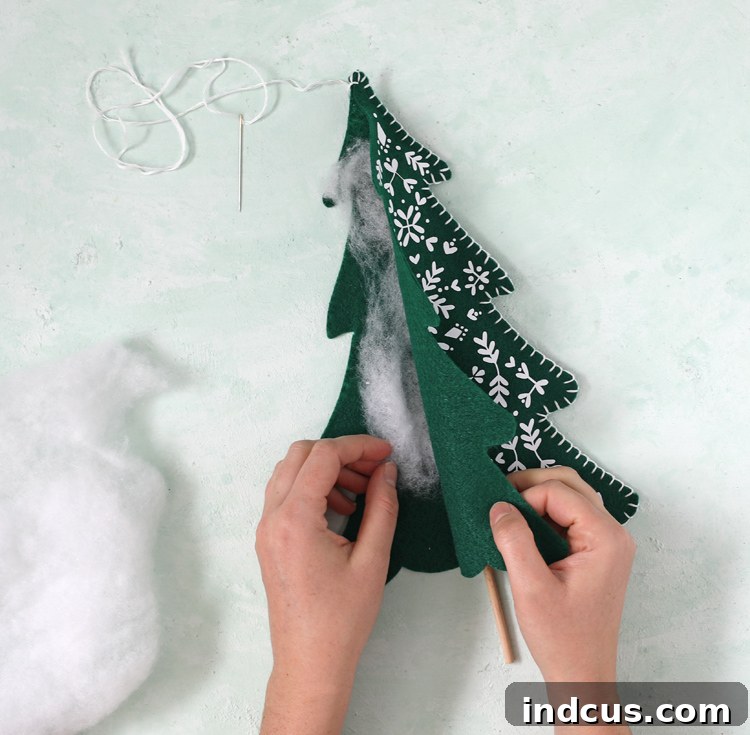
This particular step is where you infuse your trees with a truly beautiful and authentic handcrafted touch. Starting near the base, precisely where the wooden dowel emerges from the bottom of the felt, begin to execute a blanket stitch around the entire perimeter of the two felt pieces. The blanket stitch serves a dual purpose: it provides a neat, highly decorative edge that beautifully frames your tree, while simultaneously and securely joining the front and back felt layers. If you’re a newcomer to this elegant stitch, fret not – this incredibly helpful YouTube video offers an excellent, easy-to-follow tutorial on how to master the blanket stitch. Strive to maintain even, consistent stitches for a truly professional and polished finish.
As your stitching progresses upwards and you approach the delicate top tip of the tree, pause your work. Gently insert a small, carefully measured amount of batting (polyester fiberfill) between the two felt pieces. This thoughtful stuffing will imbue your tree with a lovely soft, appealingly dimensional, and slightly plush appearance. Exercise caution to avoid overstuffing, which could distort the elegant shape of the tree, or understuffing, which might leave it looking disappointingly flat. Once the tree is stuffed to your desired plumpness, gracefully continue the blanket stitch down the other side of the tree, effectively closing it up completely and neatly securing the batting safely inside.
Step 9: Secure the Wooden Bases for a Perfect Display
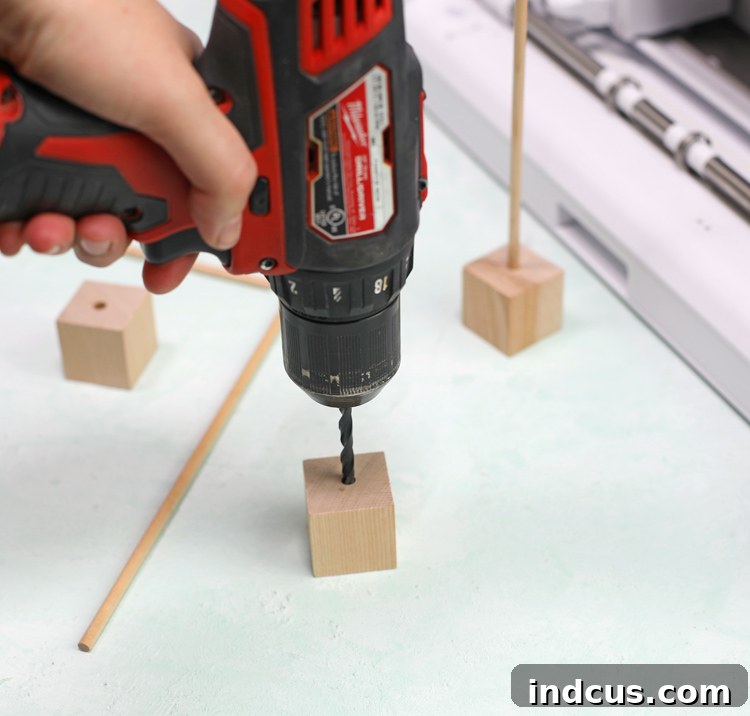
The final and crucial step involves preparing the sturdy wooden bases that will allow your beautifully crafted trees to stand proudly and elegantly. Take your 1-inch wood cubes or natural wood slices and, with precision, carefully drill a hole into the exact top center of each base. It is absolutely essential to ensure that the drill bit size you select perfectly matches the diameter of the wooden dowels you used for your trees, guaranteeing a snug, secure, and wobble-free fit. Once the hole is cleanly drilled, insert the exposed end of the wooden dowel from your felt tree into the newly created hole in the base. For enhanced stability and to ensure the longevity of your decoration, you may opt to apply a small amount of hot glue into the hole before inserting the dowel, thereby securing it permanently and immovably in place.
Your Scandinavian Christmas Decor Masterpiece Awaits!
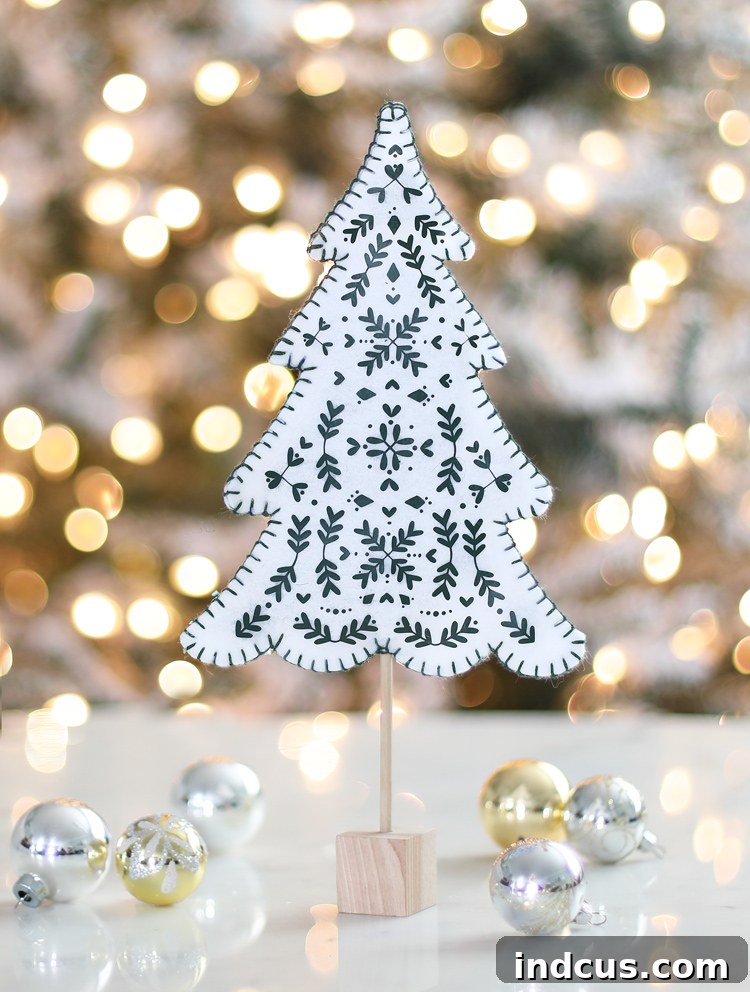
Repeat this wonderfully rewarding process for all three of your trees, or indeed, for as many as you desire to create, and in no time at all, you’ll possess a delightful collection of whimsical, homey, and truly unique Christmas decorations. These charming trees will be perfectly ready to grace your mantelpiece, adorn your shelves, serve as an enchanting festive centerpiece, or simply brighten any tabletop. These DIY felt trees are not merely a joy to create; they are also remarkably durable and possess a timeless appeal, ensuring they can be cherished and enjoyed for many Christmases to come. They beautifully embody the heartwarming spirit of handmade charm and the elegant simplicity of Scandinavian design, making them an instantly cherished and significant addition to your cherished holiday traditions.
Why Choose These DIY Scandinavian Felt Trees? Unveiling the Benefits
Beyond the simple joy of crafting, these DIY Scandinavian felt Christmas trees offer a multitude of benefits that make them a standout choice for your holiday decor:
- Unique Aesthetic: The minimalist and elegant Scandinavian design provides a refreshing and sophisticated alternative to more traditional Christmas decorations. Their clean lines and understated charm blend seamlessly with a wide range of interior styles, from modern minimalist to cozy rustic.
- Personalized Touch: Handcrafting these trees allows for unparalleled customization. You are free to experiment with a myriad of felt colors, explore different HTV patterns beyond those provided, or even add delicate embellishments like tiny beads, sequins, or subtle glitter for a truly unique and personal display that reflects your individual style.
- Durable & Reusable: Constructed from high-quality craft felt and featuring secure, sturdy construction, these trees are built to last. They are designed to withstand the test of time, ensuring they remain a cherished and beautiful part of your family’s Christmas traditions for many holiday seasons to come.
- Eco-Friendly Crafting: By opting for DIY decorations, you actively reduce your reliance on mass-produced, often disposable, items. This project offers a more sustainable and environmentally conscious approach to holiday decorating, allowing you to create beauty with a smaller ecological footprint.
- Incredibly Rewarding Project: The process of creating something beautiful and tangible with your own hands is an immensely satisfying experience. This specific project is thoughtfully designed to be approachable and enjoyable for crafters of all skill levels, consistently yielding professional-looking and impressive results.
- Perfect Handmade Gifts: These charming and heartfelt trees make exceptionally thoughtful and unique handmade gifts for friends, family members, teachers, or colleagues. A handmade gift demonstrates a level of thoughtfulness and care that pre-made items simply cannot match.
Loved making this rewarding project? Don’t forget to pin it to your favorite holiday crafting board on Pinterest! This way, you can easily find it again in the future and inspire other crafters with your beautiful work!