
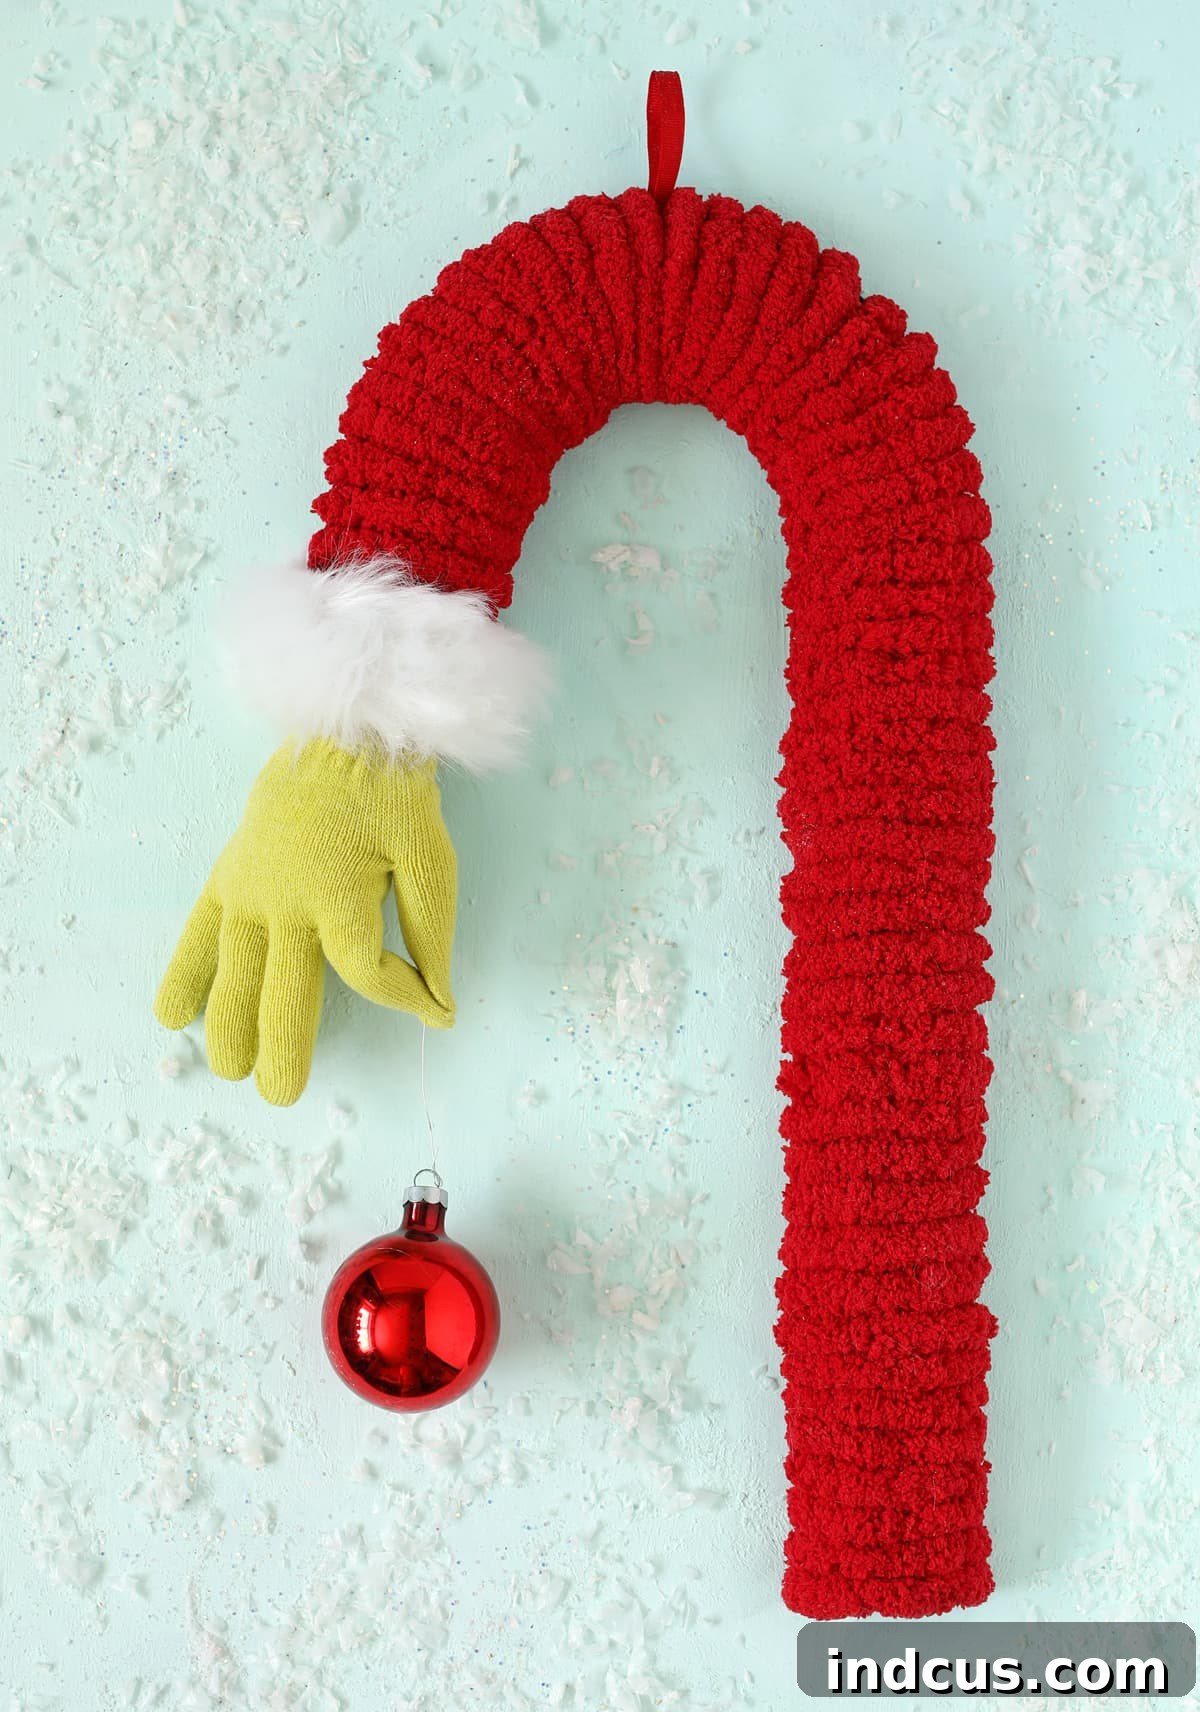
Craft a Whimsical Grinch Hand Christmas Decoration: Your Ultimate DIY Guide
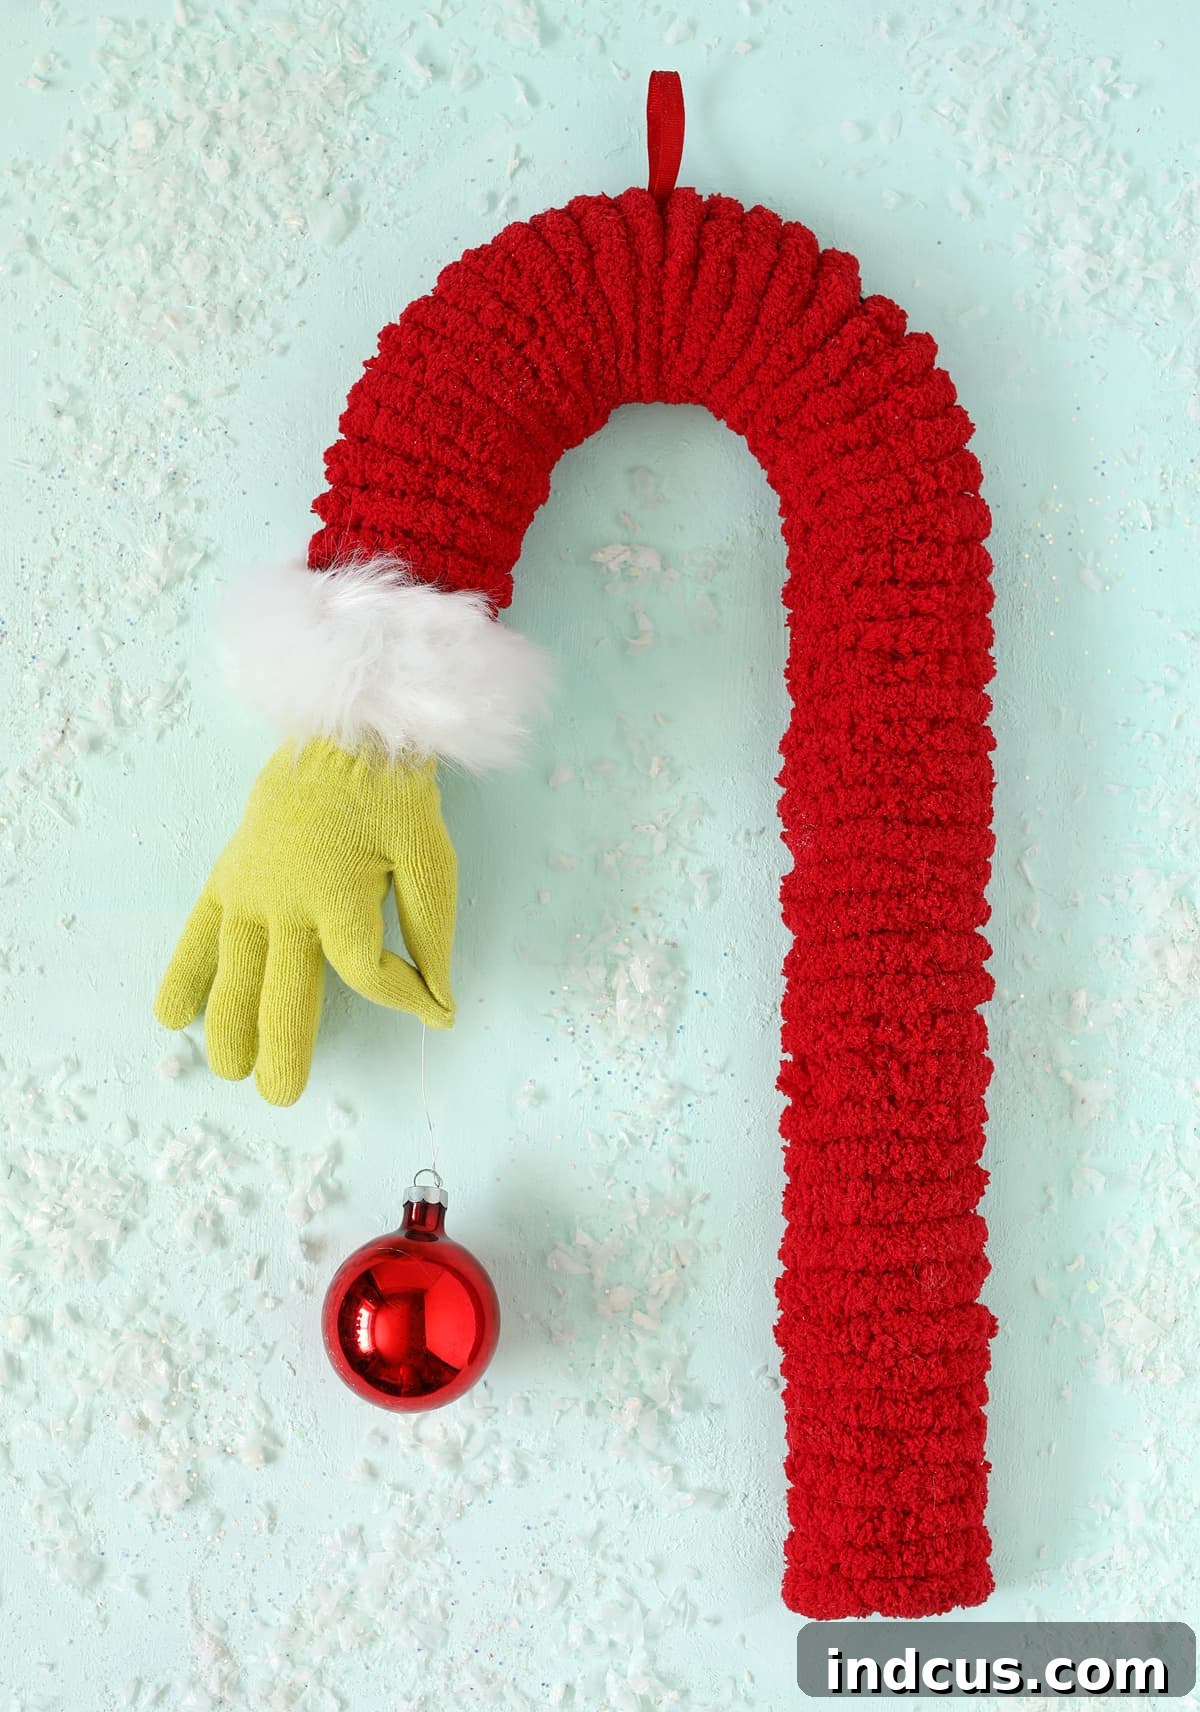
Bring Whoville Charm Home This Christmas with an Iconic Grinch Hand Craft
Are you ready to infuse your home with a dose of festive mischief this holiday season? If you’re a devoted fan of Dr. Seuss’s beloved character, The Grinch, then you’ve stumbled upon the perfect DIY project! We’re about to embark on a delightful crafting journey to create a truly unique Christmas decoration: The Grinch’s iconic green hand, playfully reaching down to “snatch” a shimmering red ornament. This isn’t just any holiday craft; it’s a whimsical tribute to one of the most memorable moments from the classic tale, designed to bring smiles and chuckles to everyone who sees it.
Imagine the joy of a handmade decoration that stands out from the usual festive fare. This Grinch-inspired door hanger or wall accent captures the mischievous spirit of Christmas in a way that’s both charming and incredibly easy to achieve. Forget complicated techniques and hours of work – this project is quick, straightforward, and yields impressive results in less than an hour. Whether you’re a seasoned crafter or just looking for a simple, fun holiday activity, you’ll love how effortlessly this Grinch hand comes together, transforming simple materials into a conversation-starting piece of decor.
Why You’ll Love Crafting This Festive Grinch Decoration
- Unleash Your Creativity: This project allows you to express your love for The Grinch and add a personal touch to your Christmas decor.
- Perfect for All Skill Levels: With clear, step-by-step instructions, even beginners can achieve a professional-looking result.
- Unique Holiday Statement: Stand out from traditional decorations with a whimsical piece that’s sure to capture attention and spark conversation.
- Quick & Rewarding: Complete this delightful craft in under an hour, making it an ideal last-minute addition to your holiday preparations or a fun afternoon activity.
- Budget-Friendly: Utilize readily available and affordable materials to create a high-impact decoration without breaking the bank.
- Creates Lasting Memories: Enjoy the satisfaction of making something beautiful with your own hands, a decoration you’ll cherish for many Christmases to come.
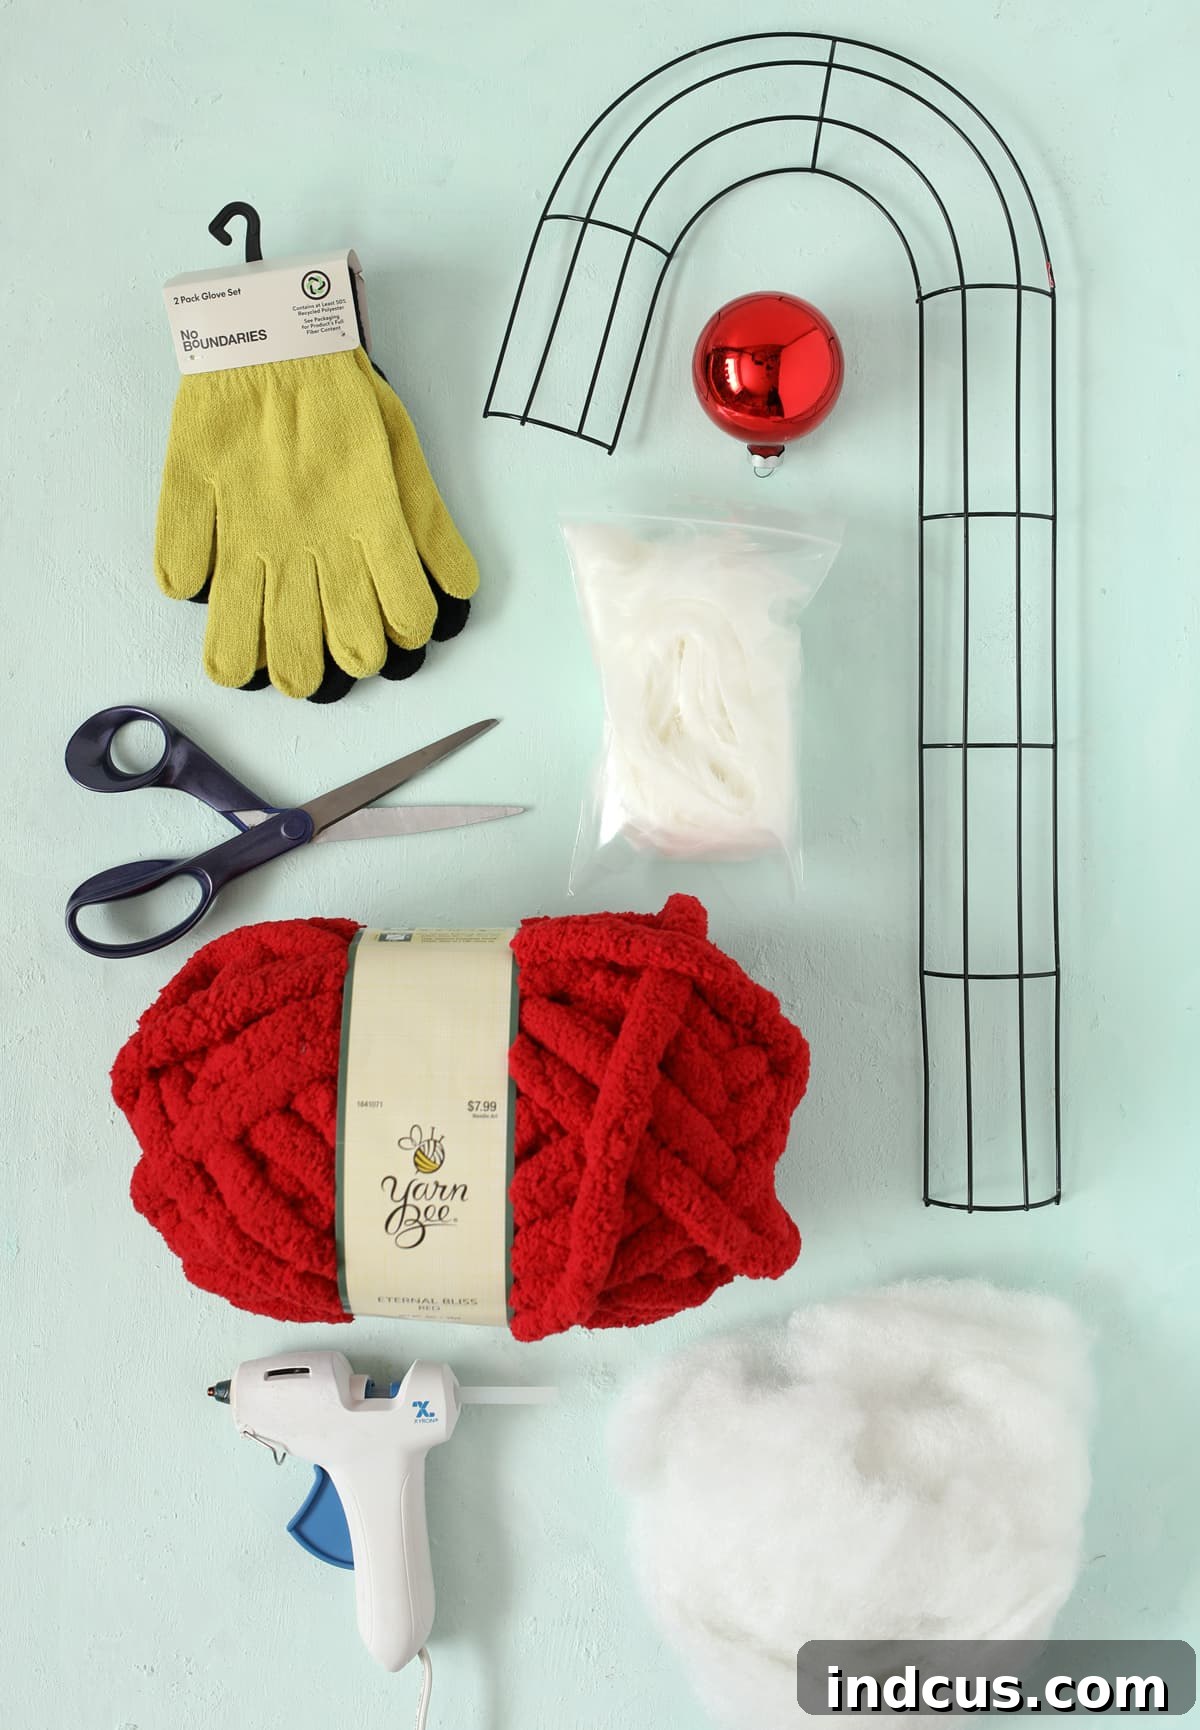
Essential Supplies for Your Grinch Hand Masterpiece
Before you dive into crafting, gather all your materials. We’ve made it easy by linking to the specific products used; simply click on any item in the list below for more information and sourcing options.
- Candy Cane Wire Frame: This forms the core structure of our decoration, giving it that iconic candy cane shape. Look for one sturdy enough to support the Grinch’s hand.
- Green Stretch Gloves: Opt for a vibrant green color like “iced pear” to truly capture the Grinch’s essence. Stretchy gloves work best for easy stuffing and a natural hand shape.
- Poly-Fil (Stuffing): Essential for giving the glove a soft, lifelike form. You’ll want enough to fill the glove completely and firmly.
- Jumbo Red Yarn or Wide Red Ribbon: This will be wrapped around the candy cane frame to create a bold, festive look. Jumbo yarn offers a cozy texture, while wide ribbon gives a sleek finish.
- Small Scrap of Red Ribbon: A short piece will be used for creating a hanging loop at the top of your decoration.
- White Faux Fur Trim: Crucial for replicating the Grinch’s signature Santa suit cuff. Choose a soft, plush trim for an authentic look.
- Red Christmas Ornament: A classic round red ornament is perfect, but feel free to experiment with a different shape or shade if you prefer.
- Wire Ornament Hanger: To securely attach the ornament to the Grinch’s hand. Alternatively, a small piece of ribbon or twine can work.
- Hot Glue Gun + Glue Sticks: Your best friend for this project, providing quick and strong adhesion for all components. Ensure you have plenty of glue sticks on hand!
Step-by-Step Instructions: Creating Your Iconic Grinch Hand Decoration
Follow these detailed steps carefully, and you’ll have your charming Grinch hand ready to spread holiday cheer in no time!
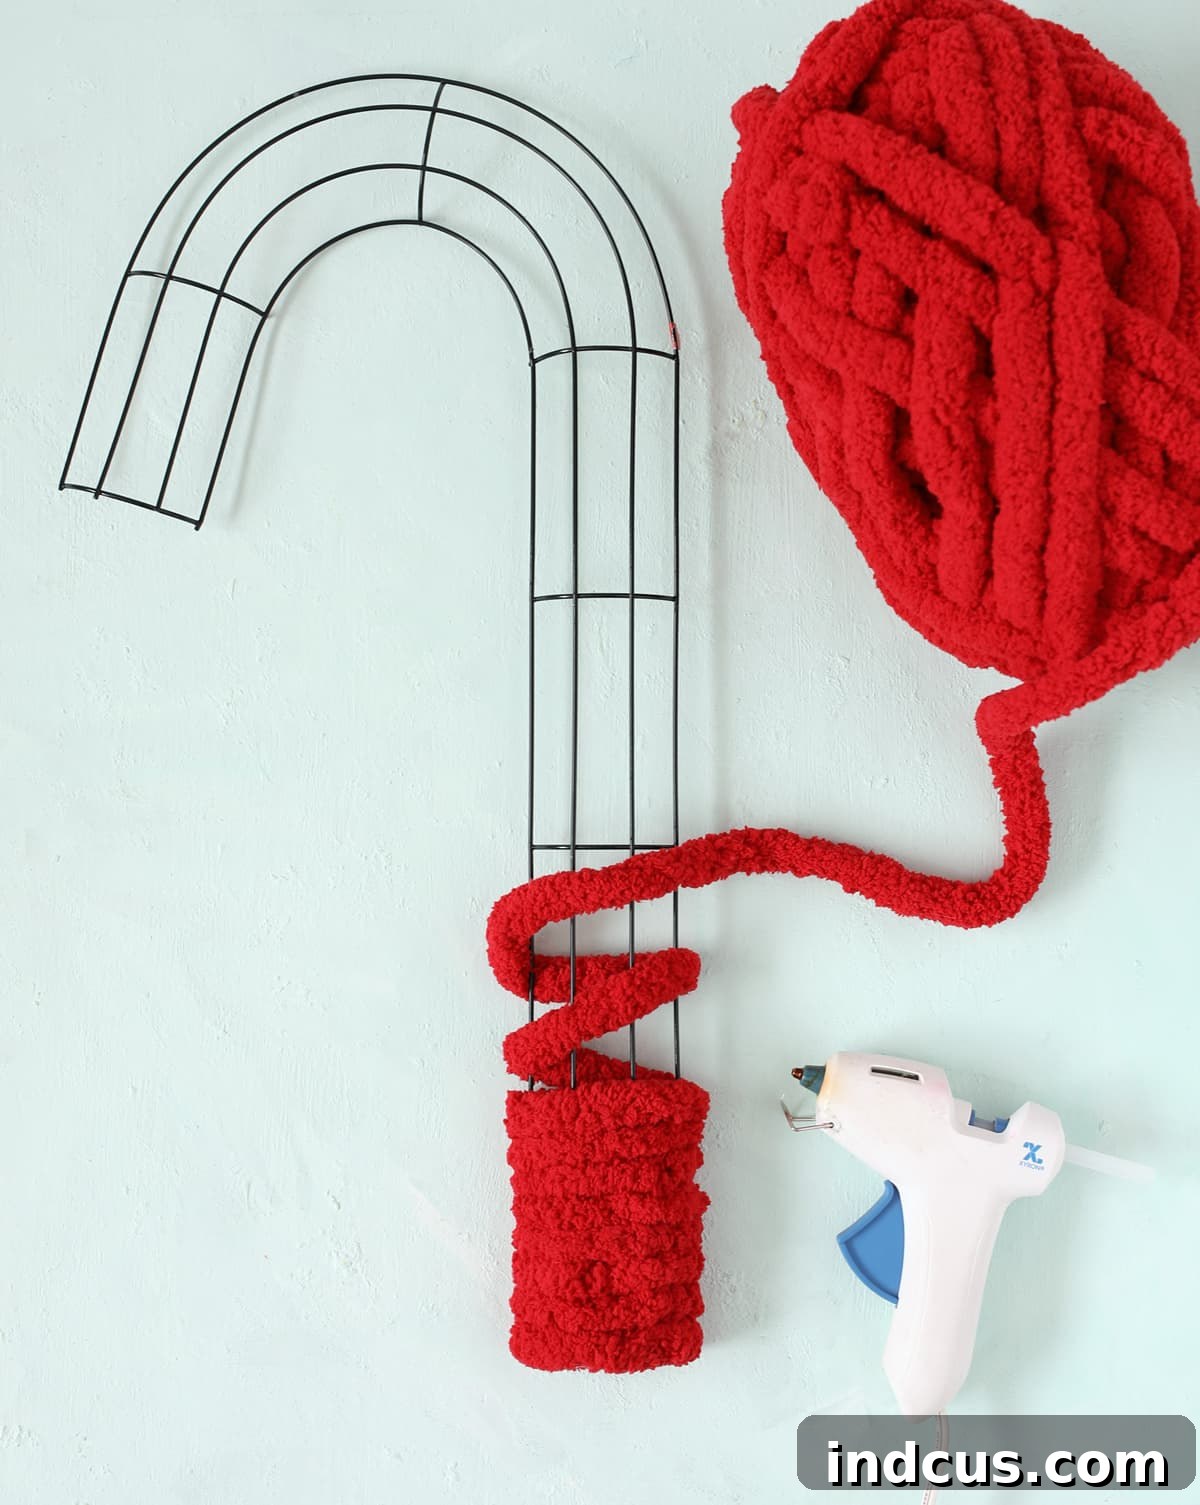
Step 1: Prepare the Candy Cane Form with Festive Red Yarn
Begin by securing one end of your jumbo red yarn (or wide red ribbon) to one end of the candy cane wire frame using a dab of hot glue. Once it’s firmly attached, start tightly wrapping the yarn around the entire frame. Overlap your wraps slightly to ensure no wire shows through, creating a solid, vibrant red base. As you go, apply small dots of hot glue periodically to the underside of the yarn, especially at curves and ends, to keep it taut and prevent it from unraveling. This meticulous wrapping creates the bold candy cane stripe that frames our Grinch’s hand.
Step 2: Stuffing the Grinch’s Hand with Care
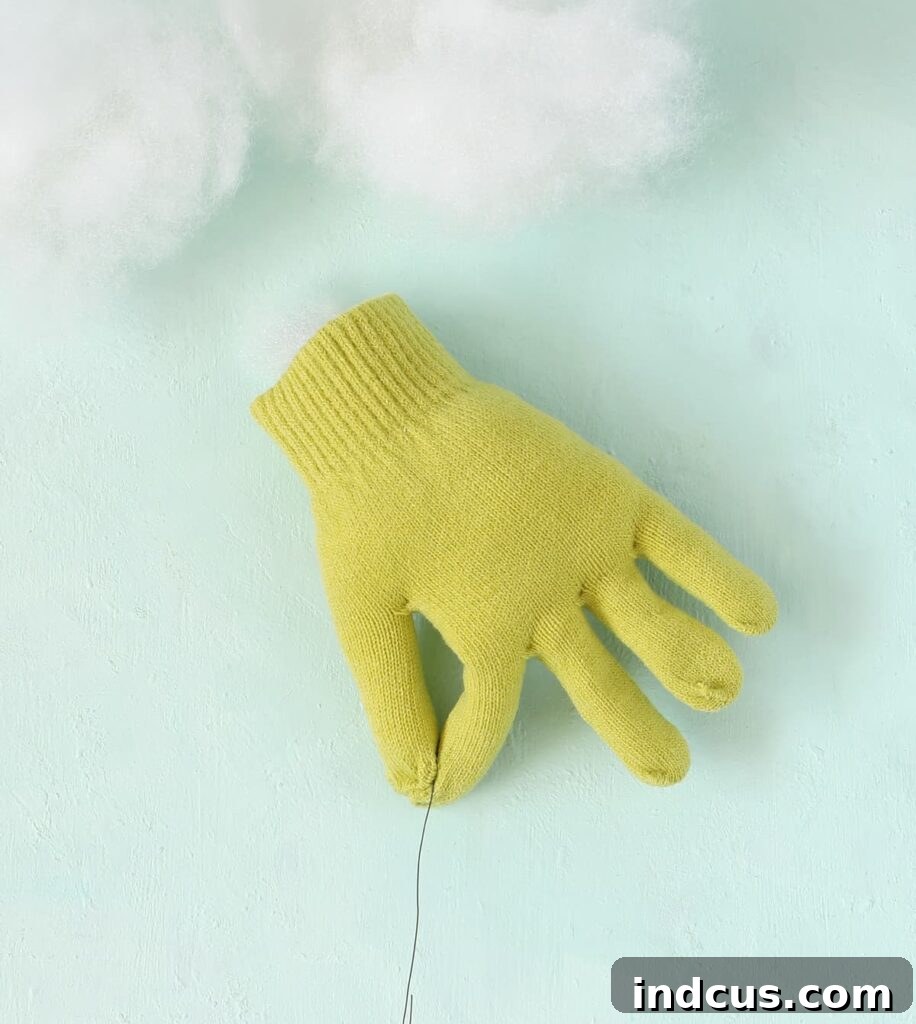
Take one of your green stretch gloves and begin stuffing it with Poly-Fil. Start by pushing small tufts of stuffing all the way into each fingertip, ensuring they are firm and well-formed. Gradually work your way down, filling the palm and wrist area until the glove looks like a natural, slightly oversized hand. The goal is to make it plump and realistic without overstuffing it to the point of stretching the fabric too thin. Periodically gently squeeze and shape the hand to distribute the stuffing evenly and achieve a lifelike appearance.
Step 3: Positioning the Ornament Hook for the Perfect Grasp
Carefully insert a wire ornament hook between the thumb and pointer finger of the stuffed glove. To get the most natural and iconic “grasping” position, hold your own hand in the desired pose and use it as a reference. You want the hook to emerge slightly from the glove in a way that looks like the Grinch is subtly holding the ornament. Once you’re satisfied with the placement, use a generous amount of hot glue to secure the base of the hook inside the glove, ensuring it’s firmly anchored and won’t detach when the ornament is hung.
Step 4: Attaching the Hand to the Candy Cane Form
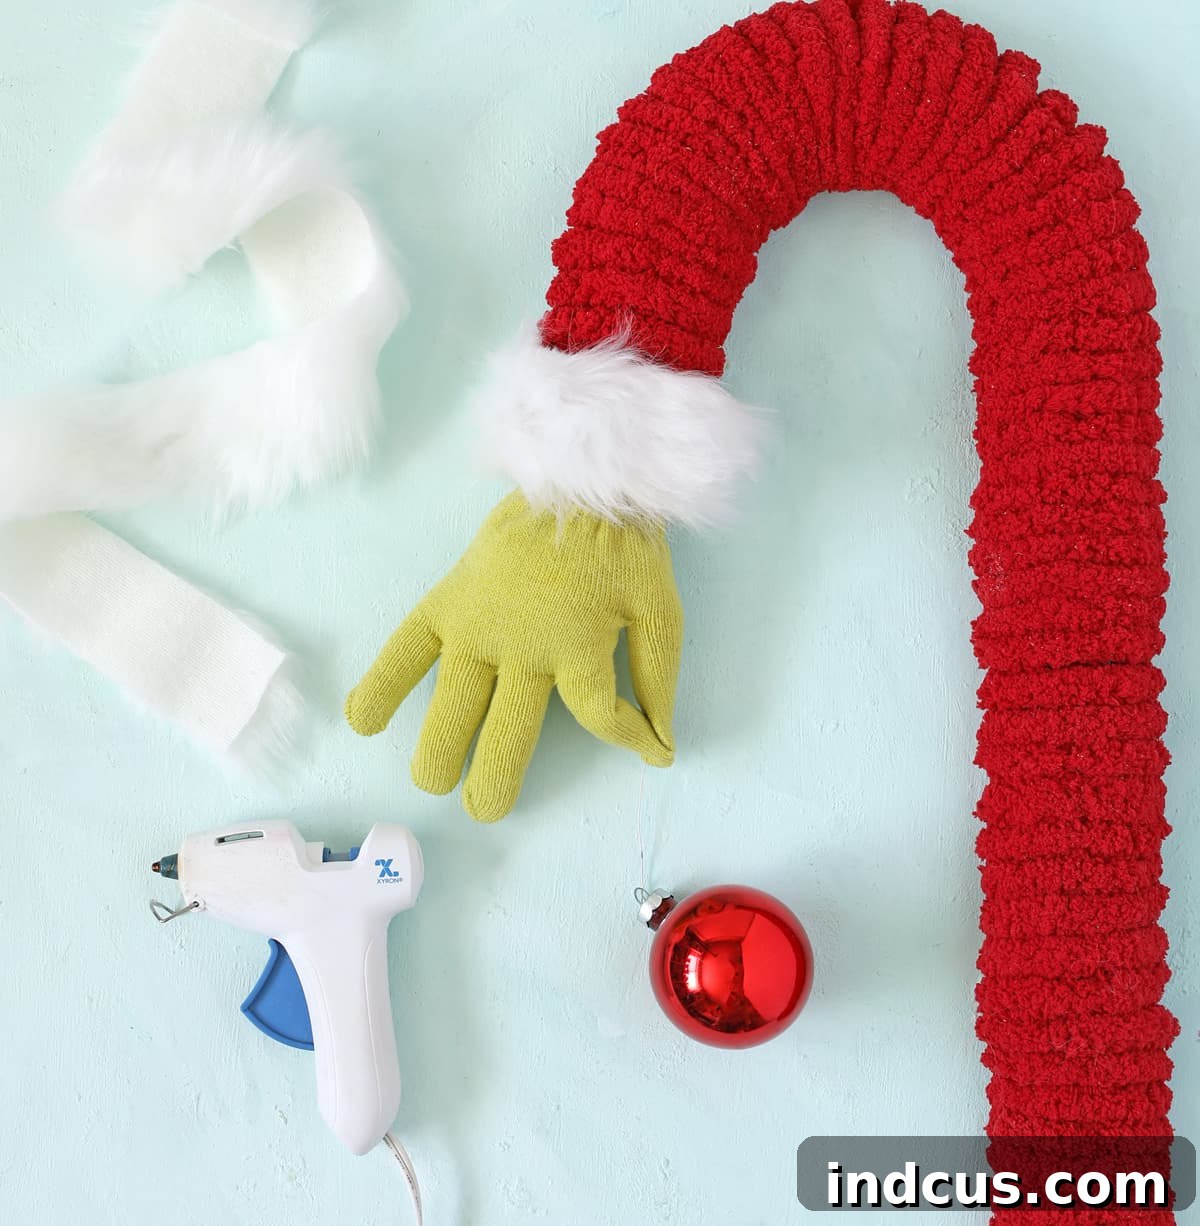
Now, it’s time to bring the two main components together. Take the stuffed glove and carefully “shove” the cuff end into the curved crook of the wrapped candy cane form. Play around with the positioning until you achieve a look that appears natural and balanced, as if the hand is gracefully extending from the candy cane. Once you’re happy with the angle and placement, apply a substantial amount of hot glue to the inside of the candy cane curve and firmly press the glove cuff into place. Hold it securely until the glue cools and sets, ensuring a strong bond.
Step 5: Adding the Festive Faux Fur Cuff
Measure a piece of white faux fur trim to fit perfectly around the cuff of the green glove where it meets the candy cane form. You want it to completely encircle the wrist area, creating the iconic white “Santa suit” cuff. Once measured, cut the trim cleanly. Apply a line of hot glue along the raw edge of the glove cuff, then carefully press the faux fur trim into place, making sure it’s snug and even all the way around. Overlap the ends of the fur slightly and glue them down for a seamless finish. This detail truly brings the Grinch’s Santa persona to life!
Step 6: Crafting the Hanging Loop for Easy Display
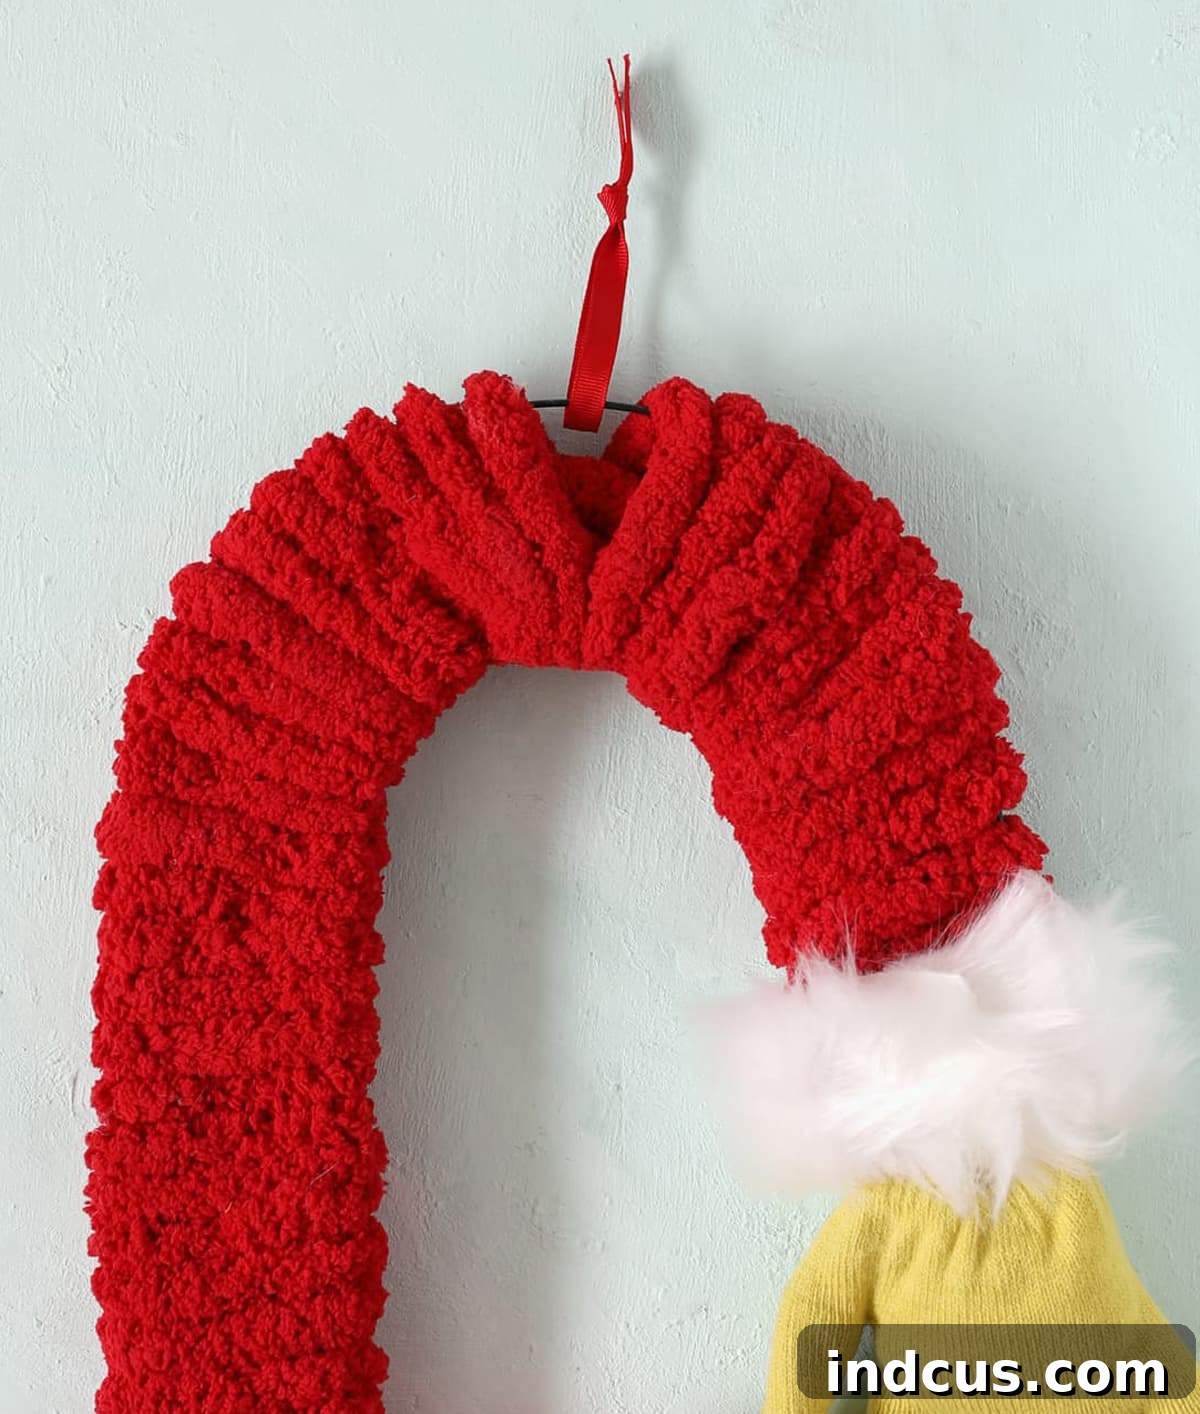
To make your Grinch hand decoration easy to display, create a sturdy hanging loop. Take your small scrap of red ribbon and identify the top center of your candy cane form. Gently nudge aside some of the red yarn wrapping to expose a small section of the metal wire frame underneath. Tie the red ribbon directly onto this exposed metal, creating a secure loop. Once tied, carefully push the red yarn back into place around the ribbon, concealing the knot and making the hanging loop appear as an integrated part of the design. Ensure the loop is strong enough to hold the decoration’s weight.
Step 7: The Grand Finale: Attaching the Christmas Ornament
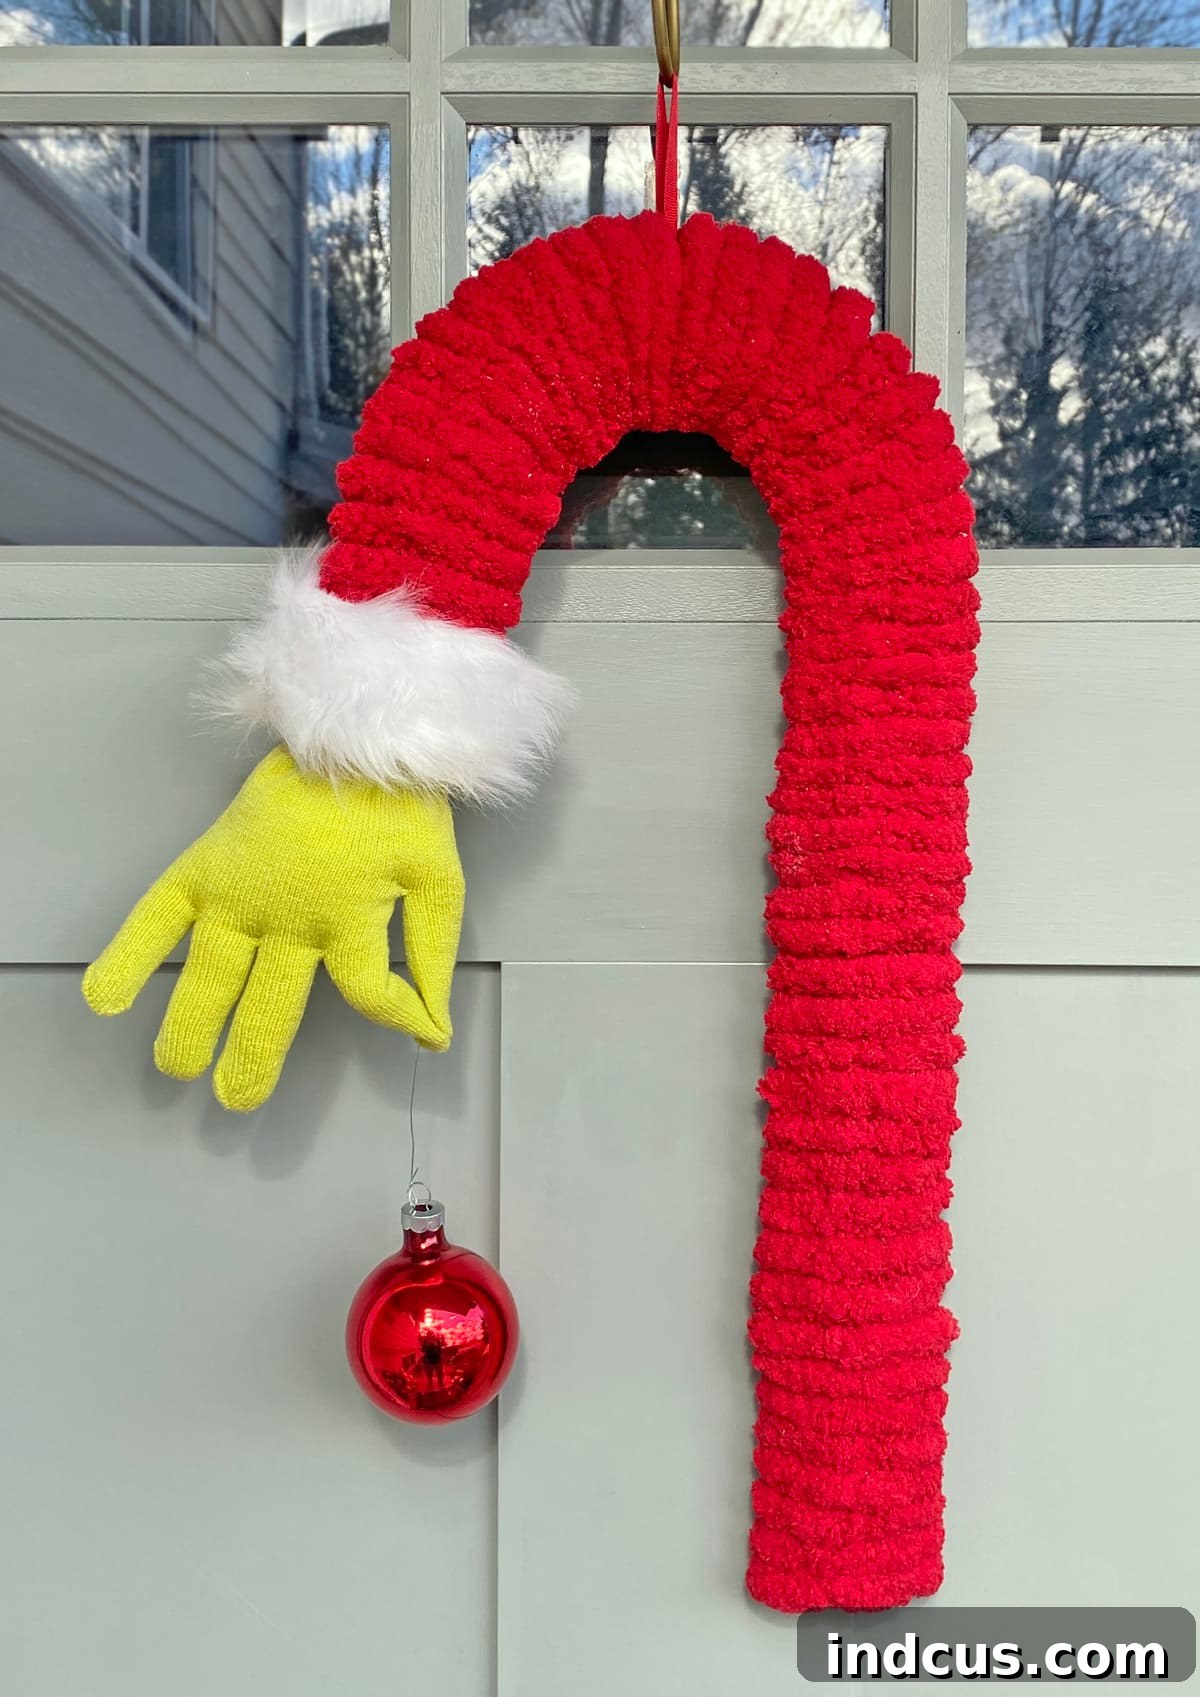
The final, exciting step is to attach your red Christmas ornament to the wire hook you’ve already secured in the Grinch’s hand. Simply slide the ornament’s cap onto the hook, ensuring it hangs freely and looks as if the Grinch is just about to “pick it up.” Take a moment to adjust the ornament’s position for the most charming effect. And just like that, your whimsical Grinch hand Christmas decoration is complete and ready to bring a touch of holiday mischief to your home!
Expert Tips for a Flawless Grinch Decoration
- Hot Glue Mastery: Always work in a well-ventilated area when using hot glue. Apply glue in small sections and press firmly, holding until cool. A silicone mat can be helpful for protecting your work surface from drips.
- Stuffing for Realism: Don’t be afraid to really work the Poly-Fil into the glove. The more evenly and firmly you stuff, the more lifelike and less lumpy your Grinch hand will appear. Pay extra attention to the fingertips.
- Material Substitutions: While specific items are linked, feel free to substitute. If you can’t find jumbo red yarn, a wide, thick red ribbon can achieve a similar effect on the candy cane. For the glove, any stretchy green glove in the right shade will work.
- Personalization Ideas: Want to make your Grinch hand even more unique? Consider adding a touch of glitter to the red ornament for extra sparkle, or use a different color ornament (like gold or silver) to match your existing decor. You could even add a tiny bell to the Grinch’s cuff for a subtle jingle!
- Safety First: If crafting with children, ensure adult supervision, especially when using a hot glue gun.
Displaying Your Whimsical Grinch Hand Ornament
This “Grinch stealing Christmas” hand decoration is incredibly versatile, perfect for adding a touch of humor and charm to various spots in your home. Here are some ideas to inspire you:
- Front Door Charm: Hang it proudly on your front door to greet guests with a festive smile. It’s an unexpected and delightful alternative to a traditional wreath.
- Christmas Tree Focal Point: Make it a standout piece on your Christmas tree. Its unique shape and story will draw attention and become a favorite among your ornaments.
- Elegant Mantel Display: Drape it over your fireplace mantel, letting the Grinch’s hand extend playfully over the edge. Pair it with twinkling lights and greenery for a magical scene.
- Unique Wall Art: Use it as a whimsical wall hanging in your living room, entryway, or even a child’s bedroom. It adds personality and a pop of festive color.
- Festive Gift: This handmade Grinch decoration makes a thoughtful and memorable gift for friends, family, or any Grinch enthusiast in your life.
Care and Storage for Your Handcrafted Treasure
To ensure your beloved Grinch hand decoration brings joy for many Christmases to come, a little care goes a long way. When it’s time to pack away your holiday decor, gently dust the Grinch hand with a soft cloth or a feather duster. Avoid harsh cleaners or excessive moisture, which could damage the yarn, fabric, or glue. For storage, find a sturdy box and wrap your Grinch hand in tissue paper or soft fabric to protect it from dust and crushing. Store it in a climate-controlled area to prevent extreme temperature changes from affecting the materials. With proper care, this charming piece will be a cherished part of your holiday traditions year after year.
Watch the Magic Happen: Video Tutorial for Your Grinch Craft
Sometimes, seeing is believing, especially when it comes to crafting! For a visual guide to complement these written instructions, be sure to watch the video tutorial below. You’ll get to see each step in action, which can be incredibly helpful for understanding techniques like yarn wrapping and glove stuffing. Plus, you might even enjoy a good chuckle at my expense – I made a little mistake at first, but don’t worry, I fixed it in the end! It’s a reminder that crafting is all about the process and finding creative solutions.
DIY Grinch Christmas Craft Video
Explore More Festive DIY Ideas
If you’ve enjoyed making this Grinch hand decoration and are looking for more ways to spruce up your home for the holidays, be sure to check out our other inspiring projects. Discover a collection of creative Christmas Wreath Ideas to adorn your doors and walls with even more festive charm.
Final Thoughts: Embrace the Holiday Spirit with DIY Crafting!
There’s something truly magical about crafting your own holiday decorations. This DIY Grinch hand project is more than just a craft; it’s an invitation to tap into your creativity, share joy, and add a personal, whimsical touch to your Christmas celebrations. Whether it hangs on your front door, adorns your tree, or graces your mantel, this charming Grinch decoration is sure to bring smiles and warm memories throughout the season. So, gather your materials, put on some festive tunes, and enjoy the process of bringing a little piece of Whoville into your home. Happy crafting and happy holidays!







