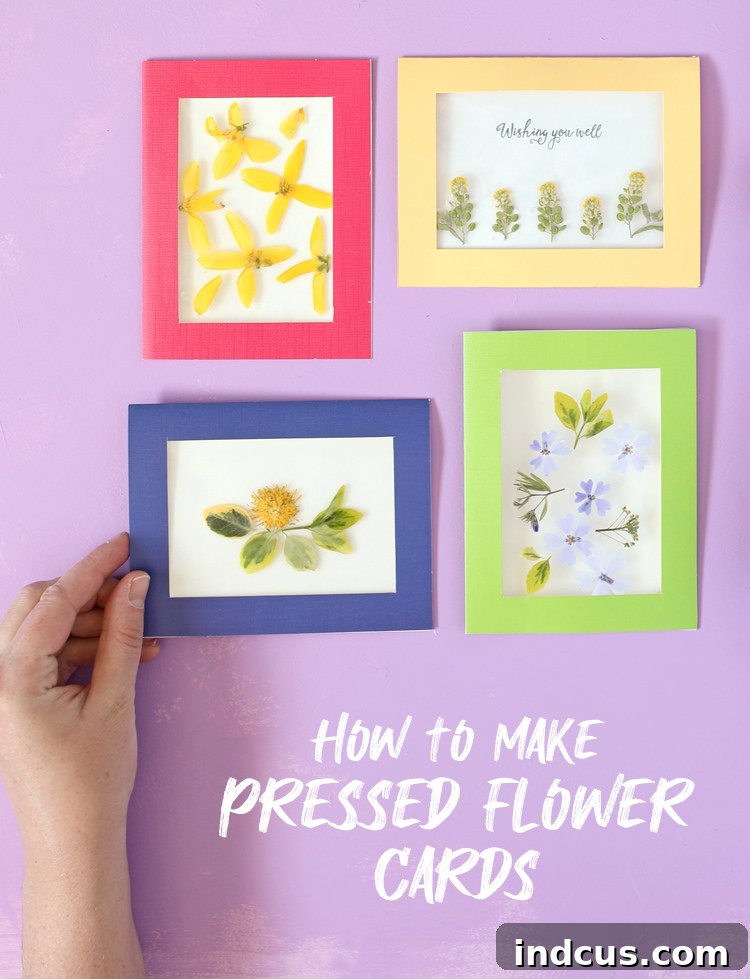
Create Stunning Pressed Flower Window Cards: A Complete DIY Guide
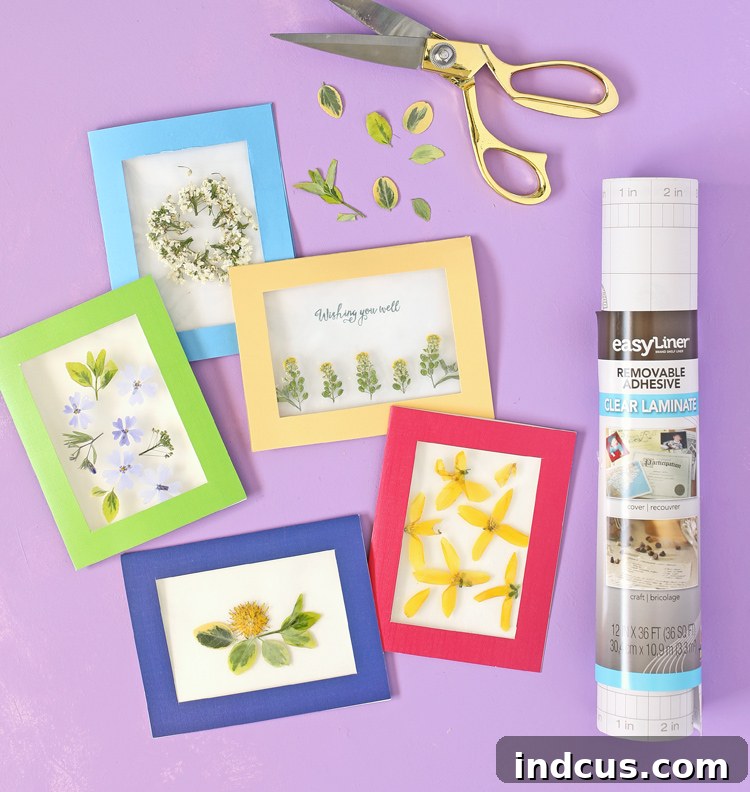
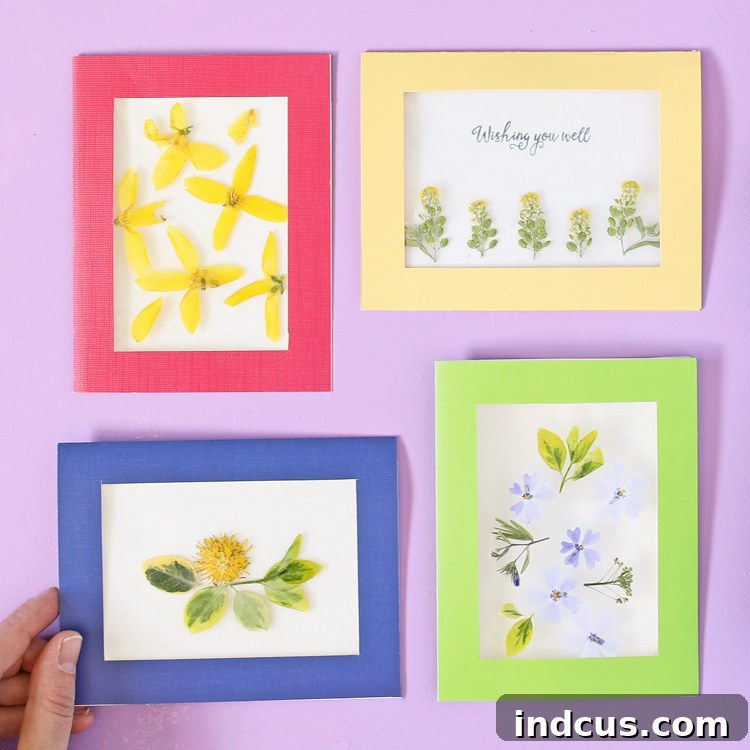
There’s a unique charm in giving a handmade card, especially one that captures the delicate beauty of nature. This comprehensive guide will walk you through the delightful process of crafting exquisite see-through window cards adorned with pressed flowers. Perfect for any season, this project offers a wonderful opportunity to connect with nature, explore your creativity, and create truly personalized gifts. Whether you’re a seasoned crafter or looking for a relaxing new hobby, this DIY is suitable for all skill levels and ages, making it a fantastic activity for both kids and adults. Imagine the joy of wandering through your garden or a local park, carefully selecting vibrant flowers and lush leaves, knowing they’ll soon be transformed into cherished keepsakes.
This post is sponsored by Duck Brand. All ideas and opinions are my own.
These pressed flower window cards are not just pieces of paper; they are miniature works of art that preserve the fleeting beauty of blossoms, allowing you to send a piece of spring or summer to loved ones, no matter the time of year. The clear window design ensures your botanical treasures are beautifully showcased and protected, making each card a thoughtful gesture and a memorable gift.
Essential Materials You’ll Need
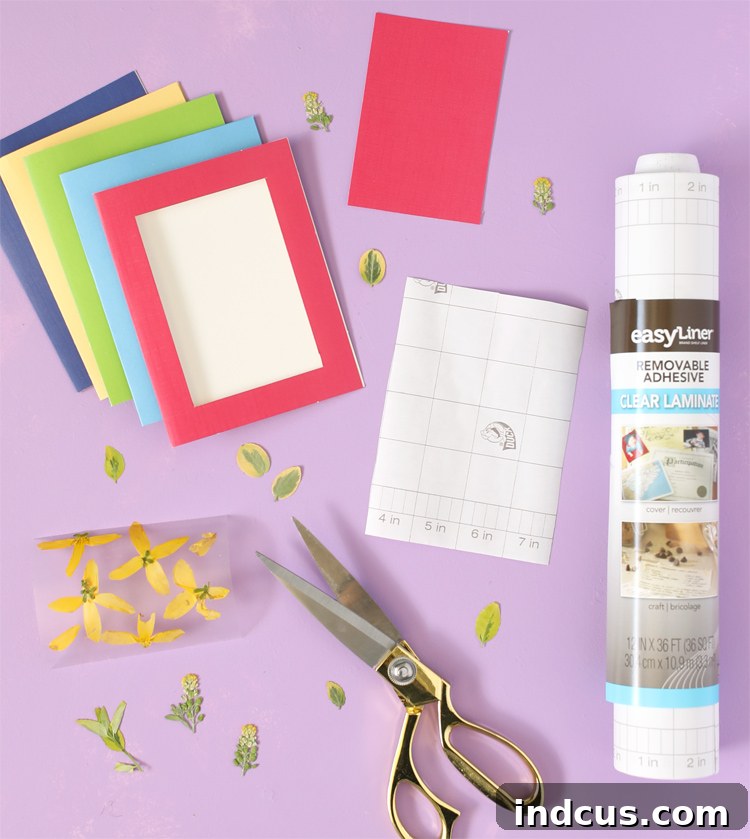
Gathering your supplies is the first exciting step in any crafting adventure. For these stunning pressed flower cards, you’ll need a few readily available items:
- Standard A2 Cards (4.25 inches x 5.5 inches): These pre-folded cards are a perfect size for greeting cards and provide a sturdy base for your project. You can find them at any craft store or stationery shop.
- Duck Brand EasyLiner®Adhesive Laminate: This clear adhesive liner is the star of our show, acting as both the “window pane” and the protective layer for your pressed flowers. Its ease of use makes it ideal for this project.
- Live Flowers and Leaves: The heart of your design! Choose small, flat flowers and delicate leaves that press well. Consider a variety of colors and shapes for visual interest.
- Large Heavy Book or Flower Press: Essential for drying and preserving your botanical specimens. A heavy book like an encyclopedia or dictionary works wonderfully, or invest in a dedicated flower press for consistent results.
- Sharp Scissors or Craft Knife: For precise cutting of cards and laminate. A craft knife with a cutting mat is recommended for clean window cuts.
- Optional: White Copy Paper: To protect your books from moisture and stains when pressing flowers.
- Optional: Tweezers: For handling delicate pressed flowers during arrangement.
Step-by-Step Instructions to Craft Your Cards
Let’s dive into the creative process! Follow these steps carefully to bring your pressed flower window cards to life.
Step 1: Gather and Preserve Your Botanical Treasures
The journey begins outdoors. Take a leisurely stroll through your garden, a local park, or even a nature trail. Look for fresh, vibrant flowers and leaves that are relatively flat. Avoid anything too thick or already wilting, as these won’t press well. Good choices include pansies, violas, small ferns, daisies, sprigs of lavender, or tiny wildflowers. The key is variety in color, shape, and size to create compelling designs.
Once collected, it’s time to preserve them. Place your chosen flowers and leaves between the pages of a large, heavy book or within a dedicated flower press. If using a book, it’s highly recommended to line the pages with white copy paper on either side of the flowers. This protects your book from moisture and any natural pigments that might stain the pages. Distribute the flowers evenly, ensuring they don’t overlap. Close the book tightly or secure your flower press, and place additional heavy objects on top to apply consistent pressure. Patience is key here; leave your flowers to press for approximately one week, or until they are completely dry and brittle to the touch. Rushing this step can lead to mold or incomplete preservation.
Pro Tip: If you’re short on time or access to fresh flowers, you can easily purchase pre-pressed flowers online. This offers a convenient alternative, allowing you to jump straight into the card-making process.
Step 2: Create the Card’s Window Opening
Now, let’s prepare your card base. Take one standard A2 card and, with a ruler and pencil, carefully mark out a rectangular window on the front. We recommend leaving approximately a 1-inch border around all outside edges of the card. For an A2 card (4.25 inches x 5.5 inches), this will result in a window opening of roughly 3.25 inches x 4.5 inches. Precision is important here for a professional finish. Using a sharp craft knife and a self-healing cutting mat, carefully cut along your pencil lines to remove the rectangular section, creating a neat window. If you’re working with children, pre-cutting the windows or using sturdy scissors with adult supervision is advisable.
Design Idea: While a rectangular window is classic, feel free to experiment with other shapes like a heart for Valentine’s Day, a circle for a whimsical look, or even a star for festive occasions. Just ensure the shape leaves enough border for the card’s structure and the laminate attachment.
Step 3: Prepare the Adhesive Laminate Pieces
The Duck Brand EasyLiner Adhesive Laminate will form the clear display and protective layers for your pressed flowers. You’ll need two pieces for each card:
- First Piece (Flower Layer): Cut a piece of EasyLiner slightly larger than the card’s window opening. For our A2 card example, aim for about 3.3 inches x 4.6 inches. This piece will hold your flower arrangement.
- Second Piece (Sealing Layer): Cut a second piece of EasyLiner that is just slightly smaller than the entire outside edges of the card when unfolded. For an A2 card, approximately 4.15 inches x 5.25 inches. This piece will create a sticky border to adhere the flower display into the card.
Carefully measure and cut these pieces. A clean, straight cut ensures a polished final product. Take your time handling the laminate, as it’s quite sticky!
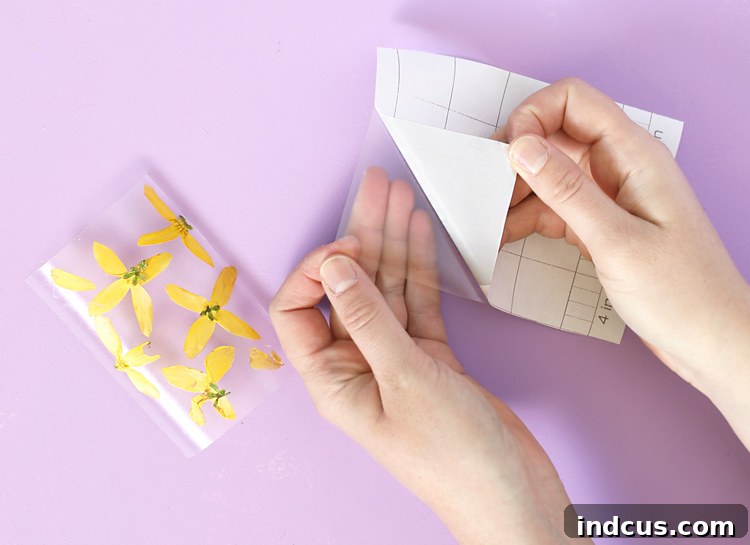
Step 4: Arrange Your Pressed Flowers
This is where your artistic vision comes to life! Carefully remove the paper backing from the smaller piece of EasyLiner (the one cut for the flowers) and place it on your clean work surface, sticky side facing upwards. Now, delicately arrange your dried and pressed flowers onto this sticky surface. Remember this crucial tip: place the front of the flower facing down onto the laminate. This way, when you view the card, the beautiful front of the flower will be visible through the clear window.
Experiment with different compositions. You can create a dense cluster of tiny blossoms, a minimalist design with a single striking flower, or a flowing pattern using leaves and petals. Use tweezers to handle particularly fragile flowers. Once you’re happy with your design, gently press each flower onto the adhesive to ensure it sticks securely.
Creative Ideas: Think about themes! A delicate sprig for a sympathy card, a vibrant mix for a birthday, or a collection of spring blooms for Mother’s Day. The possibilities are endless.
Step 5: Seal Your Floral Masterpiece
With your flower arrangement complete, it’s time to seal it permanently. Take the larger piece of EasyLiner (the one cut to almost the size of the whole card) and carefully remove its paper backing. Align this piece precisely over the smaller piece containing your flowers, ensuring the sticky sides face each other. Gently lower the larger piece onto the smaller one, starting from one edge and smoothing it down to prevent air bubbles. The goal is to sandwich the pressed flowers securely between the two sticky laminate layers. Press firmly across the entire surface to ensure a strong, air-tight seal around your botanical arrangement. You should now have a sealed window with your flowers beautifully encased inside, and a small sticky border around the edges of this laminated piece.
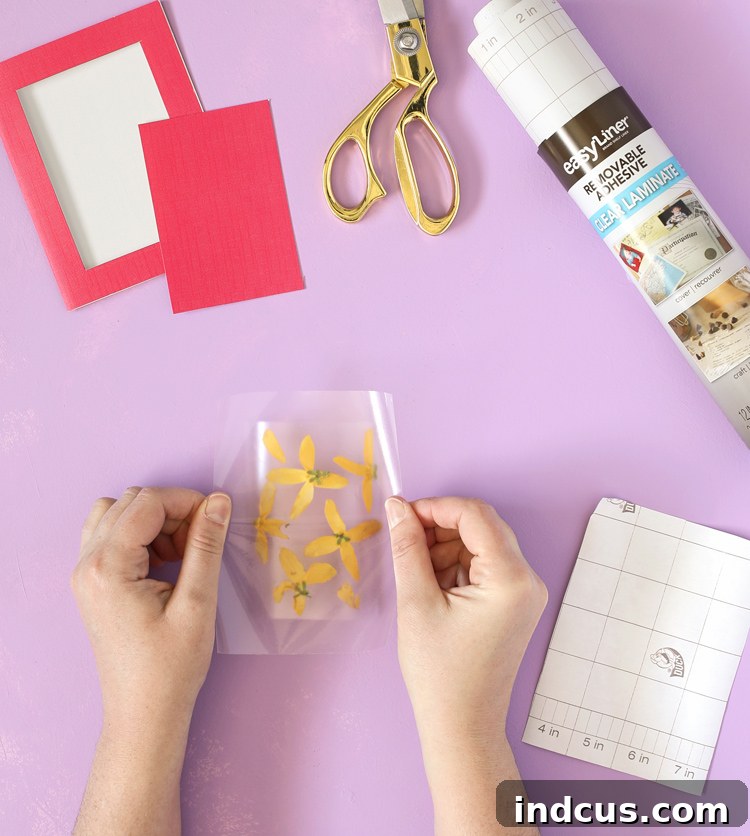
Step 6: Assemble the Window Card
The final step brings everything together. Open your pre-cut card flat. Carefully position your pressed flower laminate window over the opening you created in the card’s front. Make sure the flowers are centered and the sticky border of the laminate aligns with the inner edges of your card’s window. Once perfectly aligned, press down firmly around the edges of the laminate to attach it securely to the inside of the card. The sticky border on the laminate will adhere to the card stock, creating a beautiful, transparent window showcasing your preserved flowers.
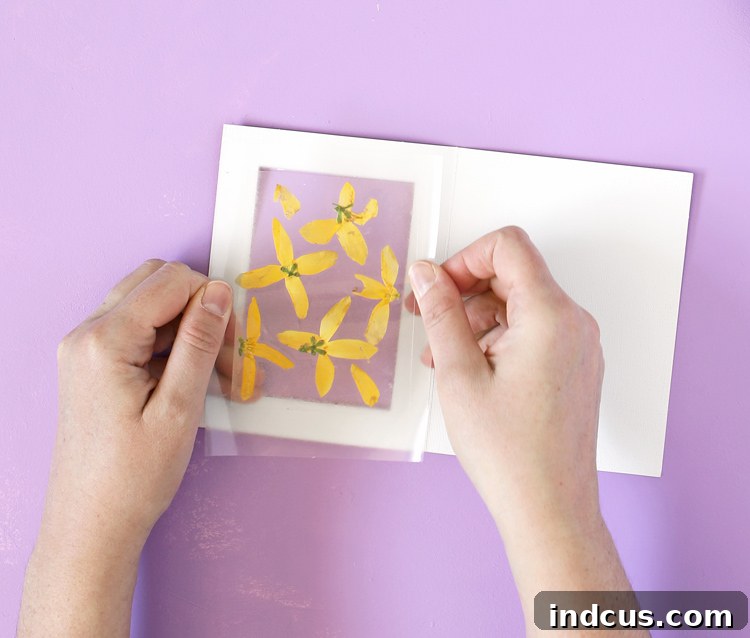
And there you have it! A stunning, unique handmade card featuring the enduring beauty of nature. The delicate pressed flowers are now safely preserved within the crystal-clear laminate, protected from the elements, yet on full display for everyone to admire. This method ensures your botanical art will last for years to come, making your cards truly special keepsakes.
The Enduring Appeal of Handmade Pressed Flower Cards
Crafting these cards is more than just a project; it’s an experience. From the meditative hunt for the perfect blossom to the satisfying arrangement and final assembly, each step offers a moment of joy and creativity. Handmade cards carry a personal touch that store-bought alternatives simply cannot replicate. They convey thoughtfulness, effort, and a genuine desire to make the recipient feel special. These cards are perfect for an array of occasions:
- Birthdays: A unique card for a unique person.
- Thank You Notes: Express gratitude with natural elegance.
- Mother’s Day: A beautiful tribute to a beloved mother or maternal figure.
- Anniversaries: Symbolize enduring love with preserved beauty.
- Sympathy or Get Well Soon: Offer a gentle touch of nature and hope.
- “Just Because”: Brighten someone’s day unexpectedly.
Unleash Your Creativity: Endless Variations and Ideas
The beauty of this craft lies in its versatility. Once you’ve mastered the basic technique, you can explore countless variations to make each card truly your own:
- Shape Exploration: Beyond rectangles, try cutting heart-shaped windows for Valentine’s Day, star shapes for holiday greetings, or even whimsical animal silhouettes.
- Themed Collections: Group flowers by color palette (e.g., all blues and purples for a serene feel, vibrant reds and yellows for energy) or by theme (e.g., autumn leaves for fall, tiny evergreens for winter).
- Abstract Designs: Instead of realistic arrangements, try creating abstract patterns, mandalas, or geometric designs with petals and small leaves.
- Layering and Depth: Experiment with layering different types of laminate or adding a very thin piece of colored tissue paper behind the flowers for a subtle tint.
- Adding Embellishments: Once the card is complete, you can further adorn it with a delicate ribbon tied around the spine, a touch of glitter glue, or a handwritten sentiment directly onto the cardstock frame.
- Botanical Art Scenes: Use tiny stems and flower heads to create miniature landscape scenes or whimsical figures within your window.
These pressed flower window cards are not just beautiful; they are a testament to the simple yet profound beauty of the natural world, preserved and presented with care. They make cherished gifts and are a wonderful way to express yourself creatively while spreading joy to others.
Loved this creative project? Pin it now to save it for later and inspire others!