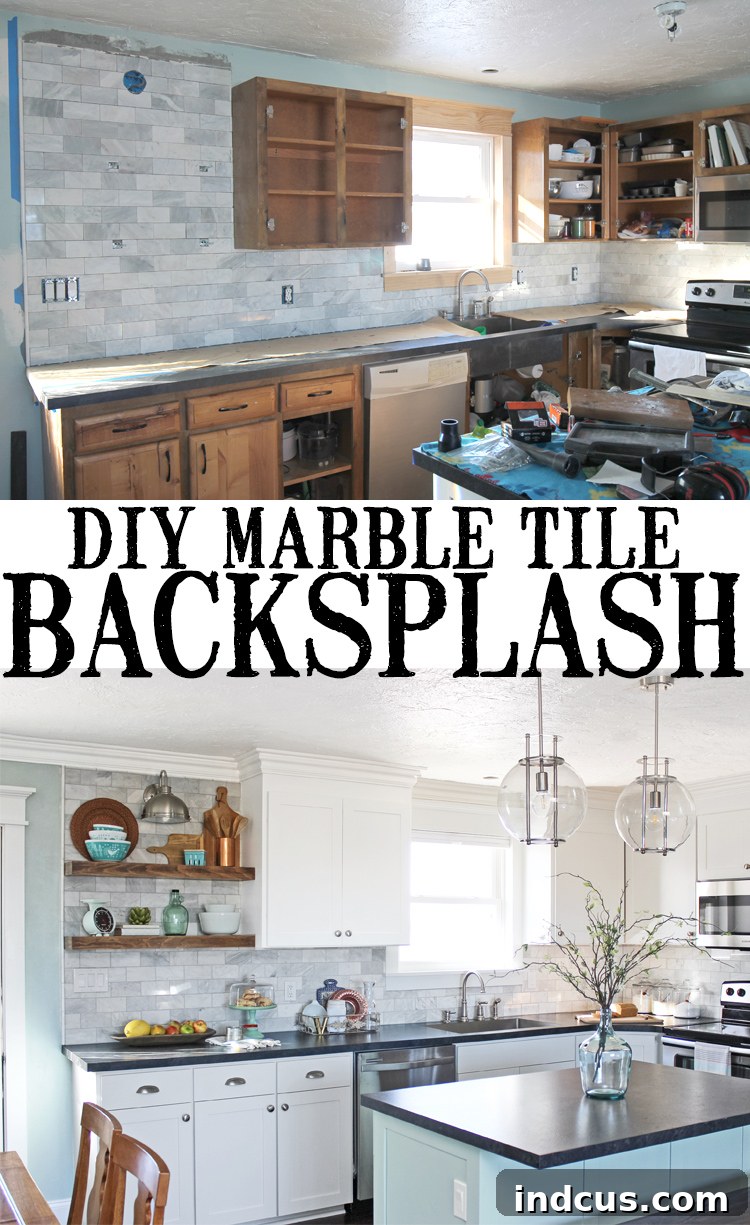
Unveiling Elegance: Your Comprehensive Guide to DIY Marble Tile Backsplash Installation
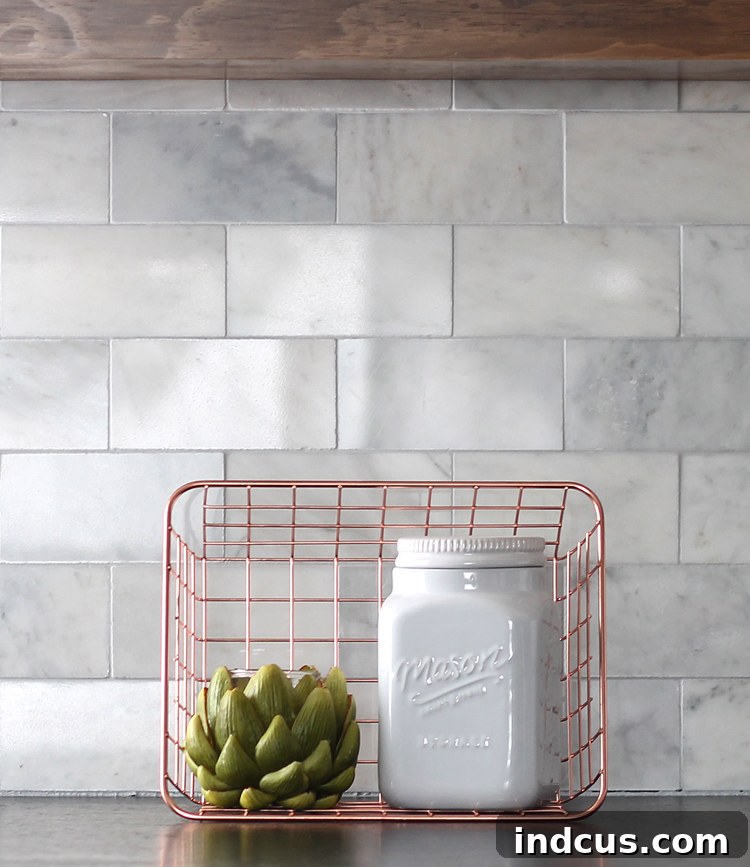
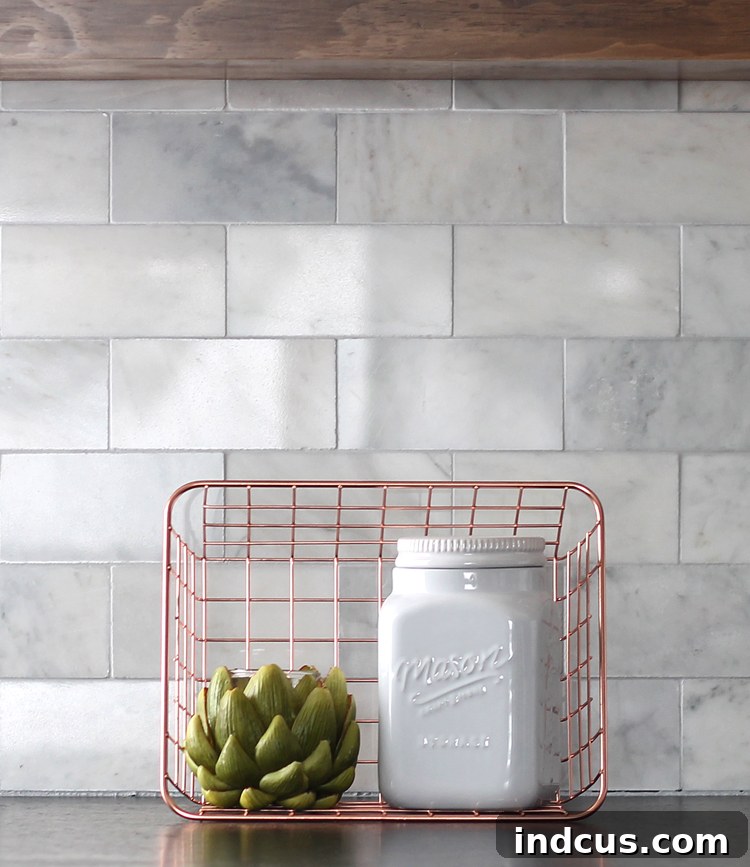
Transforming your kitchen with a stunning backsplash might seem like a daunting task, especially when luxurious materials like marble are involved. Many homeowners shy away from DIY tiling projects, assuming professional expertise is essential. However, we’re here to demystify the process and assure you that installing your own marble tile backsplash is an achievable and incredibly rewarding endeavor. Having recently completed our very first tiling job – a gorgeous marble subway tile backsplash in our kitchen – we’ve gathered a wealth of practical tips, clever tricks, and valuable lessons learned to share with you. This detailed guide is designed to empower you with the confidence and knowledge needed to tackle your own backsplash installation, ensuring a professional-looking finish you’ll be proud of. Prepare to dive into a post packed with actionable insights that will make your DIY journey significantly smoother.
Meticulous Preparation: The Foundation of a Flawless Backsplash
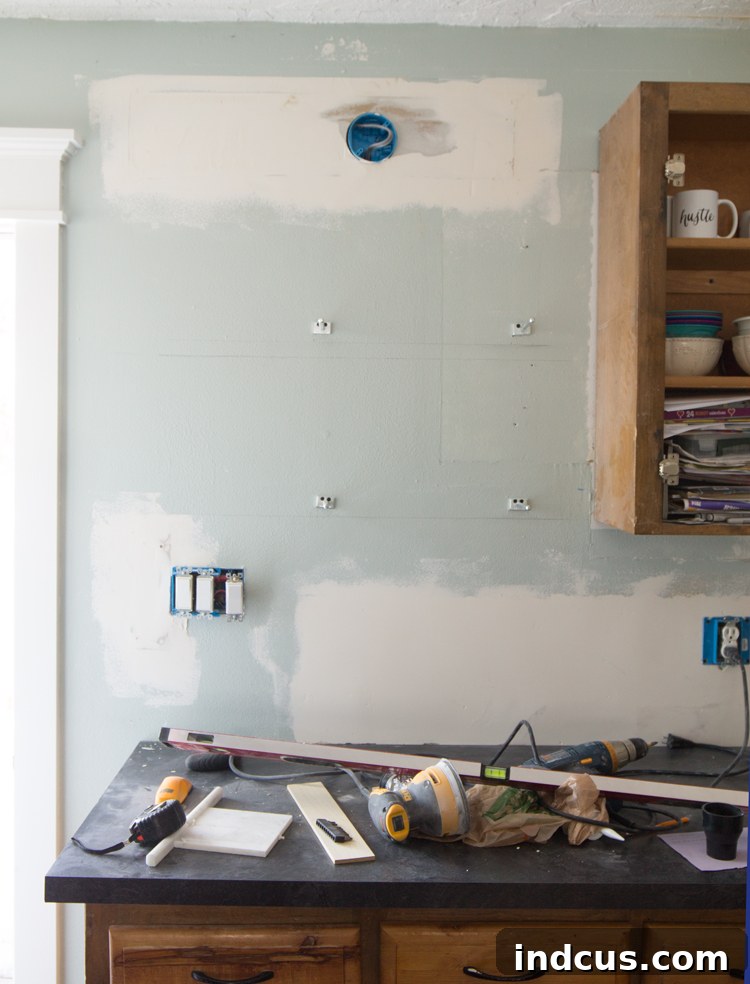
Before any tile adhesive even touches the wall, meticulous preparation is paramount. This initial phase, though often overlooked, is arguably the single most critical step to ensure your tile lays perfectly flat, with consistent spacing and no unsightly irregularities. Our own prep work took a considerable amount of time, largely because removing our old backsplash left our walls in disarray. We faced the task of patching numerous holes, replacing sections of torn drywall, and sanding diligently to achieve a perfectly smooth and even surface. Rushing this stage will inevitably lead to frustration later, as any imperfections on the wall will translate directly to your tile installation.
Additionally, if you’re planning to incorporate elements like floating shelves, it’s wise to install their brackets before tiling. We opted to secure our metal floating shelf brackets directly into wall studs for maximum stability. Doing this prior to tiling prevents the need to drill through your newly installed, delicate marble tiles and ensures the structural integrity of your shelves.
Navigating Outlets and Switches: Essential Adjustments
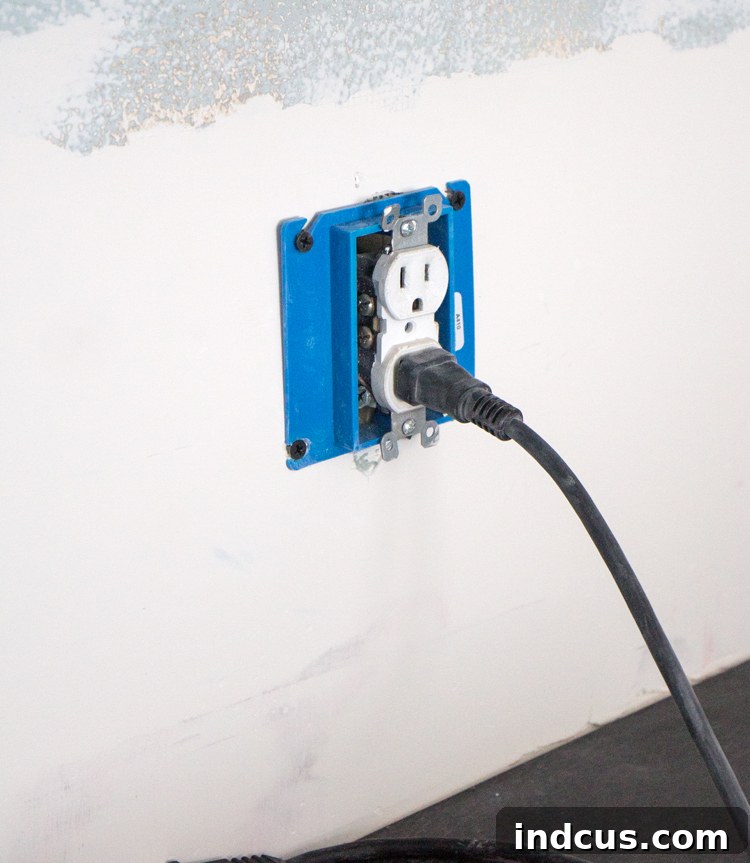
Another crucial preparatory step involves installing outlet extenders on all electrical switches and plugs that will fall within the backsplash area. Tile, especially natural stone like marble, adds significant thickness to your wall. Without extenders, your outlets and switches will appear recessed, creating an unprofessional and potentially unsafe look. Outlet extenders effectively bring these electrical components forward to the correct depth, ensuring they sit flush with your finished tile surface.
During this stage, we encountered a minor hurdle that became a valuable learning experience. Most standard outlet extenders come with a small face plate designed to sit flat against the wall. While seemingly innocuous, attempting to tile directly over this slight bump will result in an uneven, unsightly tile surface. We initially tried this, and the outcome was far from ideal, creating noticeable bulges in our tile. Our solution was to carefully trim away the flat parts of the extender’s face plate that would interfere with the tile. Alternatively, you can seek out different styles of outlet extenders that are specifically designed for tiling applications or have a slimmer profile. The key is to ensure the surface around the outlet box is as flat as possible.
Seamless Integration Around Window Trim
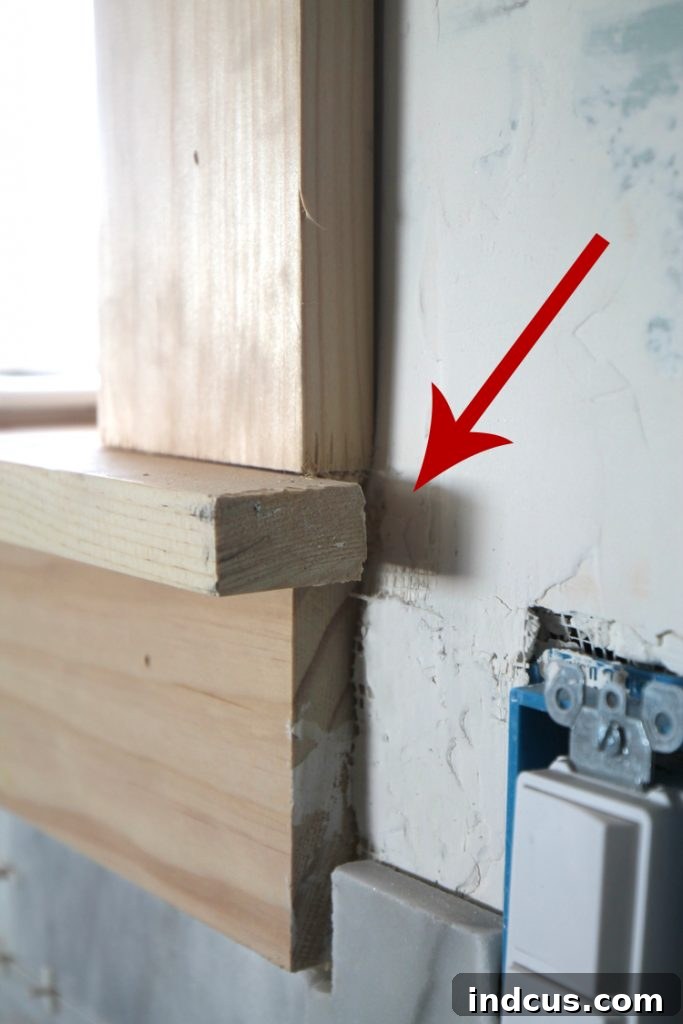
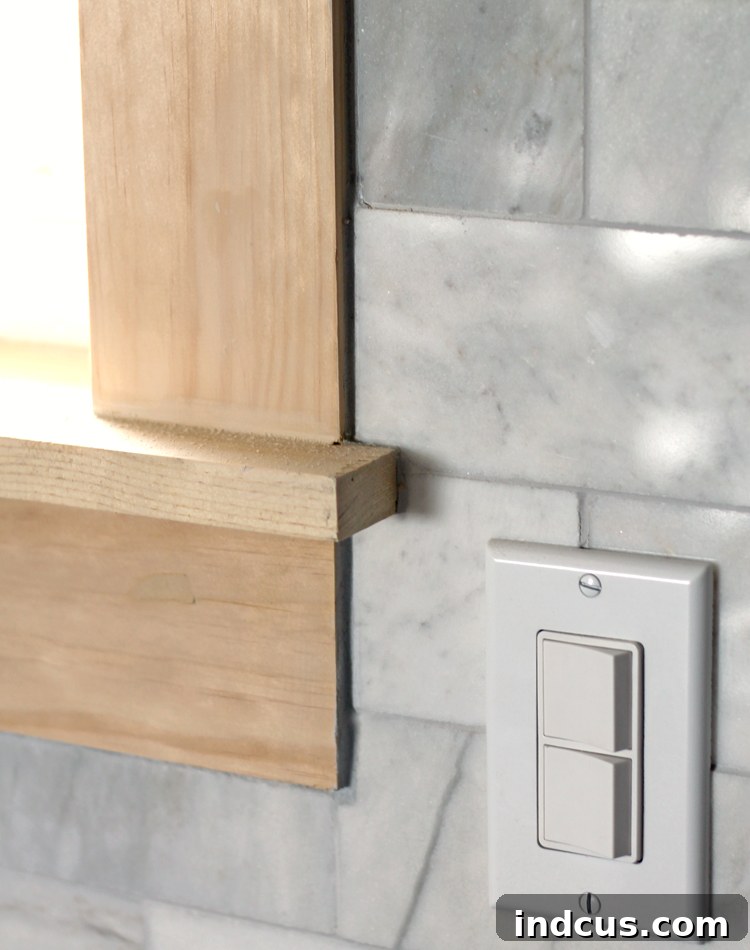
Tiling around window trim can present a particular challenge, especially if your trim protrudes from the wall. Our window trim had a slight projection, which would have necessitated cutting very small, intricate pieces of marble tile to fit around it. Such precise cuts on delicate marble are difficult to achieve cleanly and can be prone to chipping. To circumvent this, we employed a clever technique using an oscillating tool. We carefully cut a shallow notch into the back of the wooden window trim, precisely the same thickness as our marble tile.
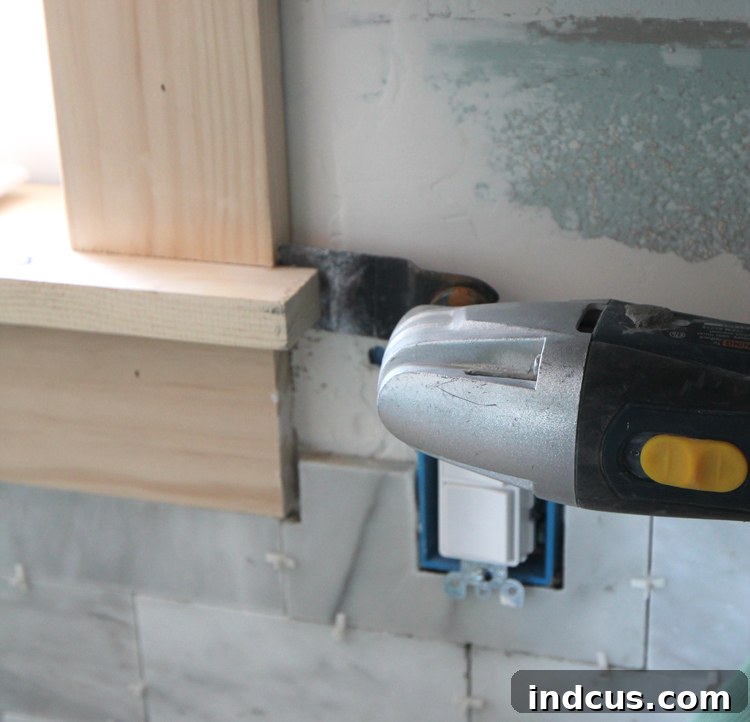
This allowed the tile to neatly slide directly behind the molding, creating an incredibly clean and seamless finish without any awkward cuts. This method worked flawlessly and is one we wholeheartedly recommend for anyone tiling around window trim.
Expert Tips and Essential Tricks for Installing Your Marble Tile Backsplash
Now that the walls are perfectly prepped, let’s delve into the actual tiling process. These are our best tips, hard-won tricks, and common mistakes to avoid when installing any backsplash, with a special focus on the nuances of working with marble subway tile.
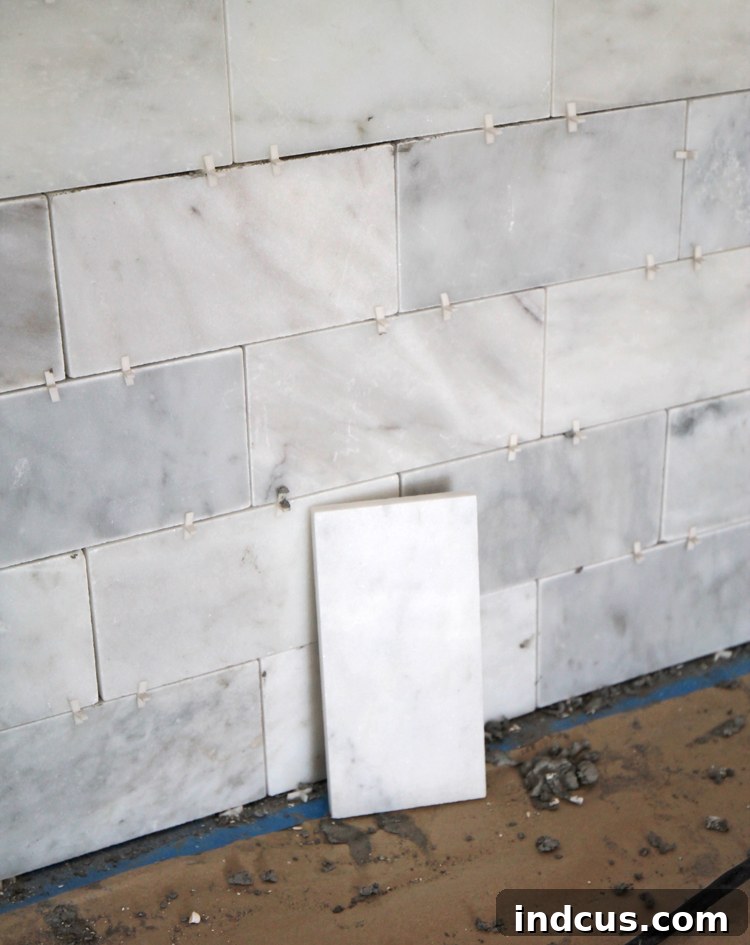
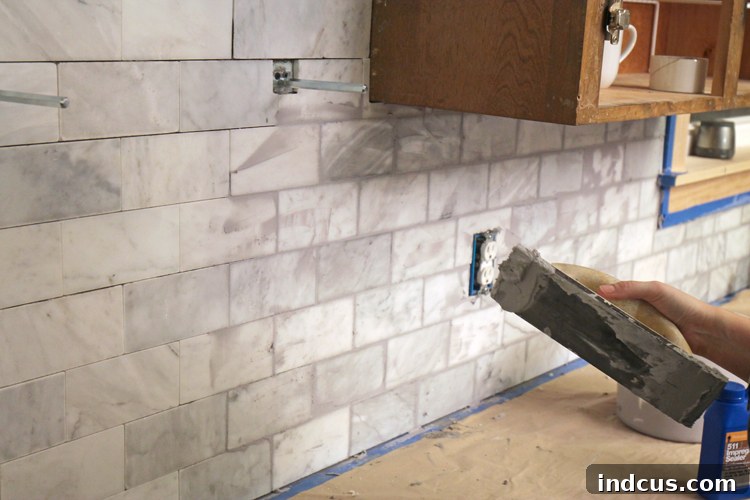
1. Marble’s Metamorphosis: Don’t Panic When Wet. This is perhaps the most important caveat when working with natural marble. Upon initial application of thinset and moisture, marble darkens considerably. I’ll admit, my heart sank when I saw our beautiful, light marble transform into a deep, almost charcoal gray. It was so distinctly different from the elegant, bright backsplash I had envisioned. The photo below vividly illustrates how water seeps into the porous marble, causing this dramatic darkening. It’s a natural reaction due to the stone’s absorbency.
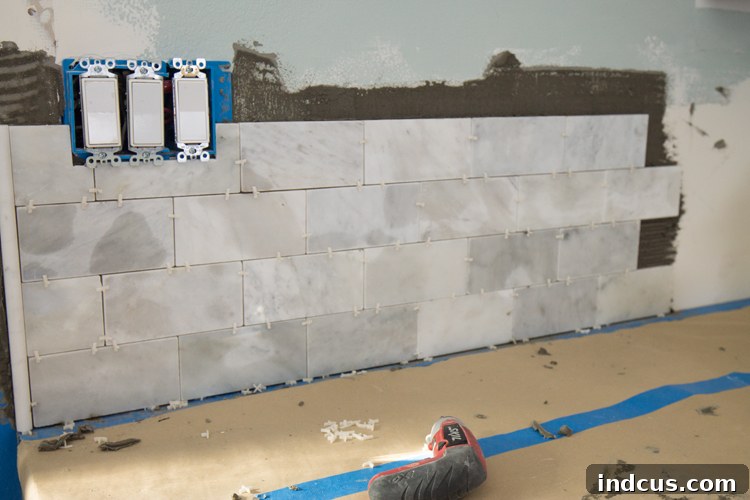
Another image further highlights this stark contrast: a dry tile resting against the freshly installed, darkened sections. The color difference is profound. Rest assured, this temporary discoloration is completely normal! It gradually disappears as the tile fully dries, a process that took approximately two full days for our backsplash. Patience is truly a virtue here – do not let this initial change cause alarm.
2. The Strategic Choice of Mortar Color. When selecting your mortar or thinset, aim for a color that closely matches your tile. We opted for a dark gray mortar, and while it performed its adhesive function perfectly, a lighter shade would have simplified the cleanup process significantly. Small amounts of thinset inevitably squeeze out between tile joints as you press them into place. While these bits typically wipe off even after drying, any missed spots are far less noticeable if the mortar color blends seamlessly with your tile. This small detail contributes to a cleaner, more professional final appearance.
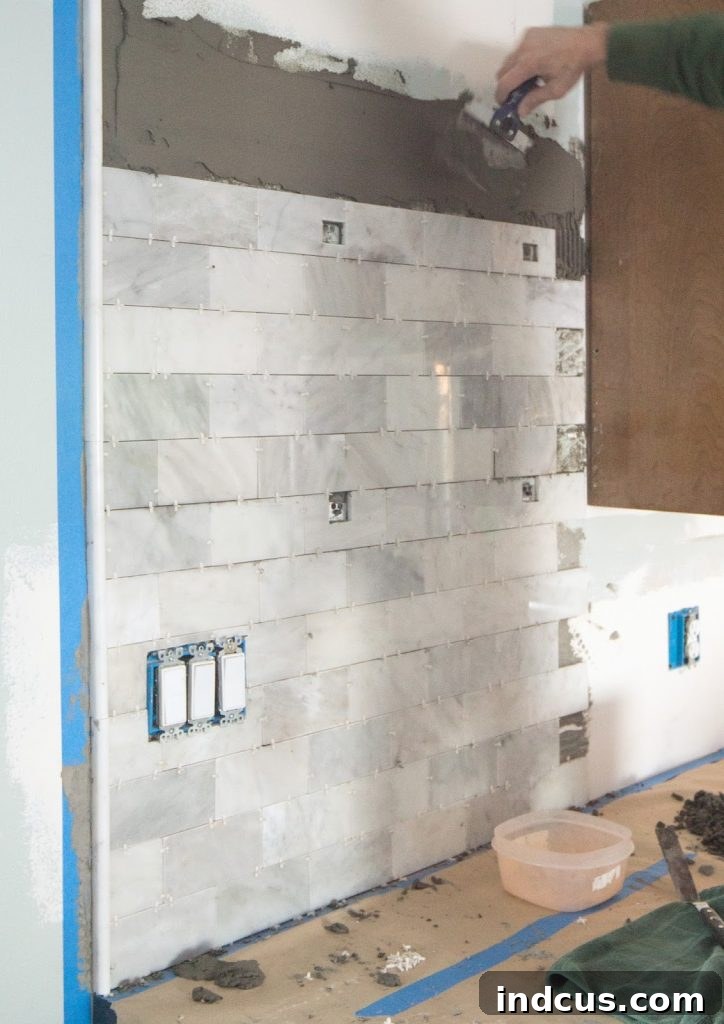
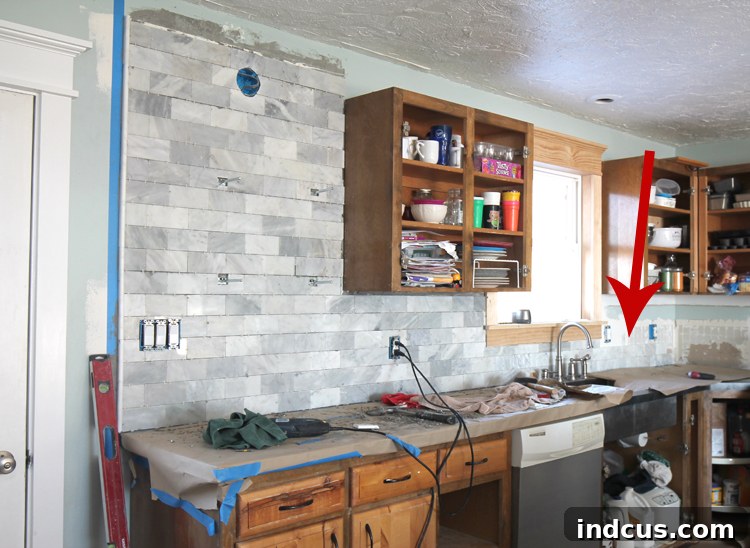
3. The Importance of a Strategic Starting Point. If this is your first time tackling a tiling project, resist the urge to start in the most visible or focal point of your room. We made this exact mistake, beginning our installation directly on our kitchen’s main feature wall. As beginners, our technique naturally improved with practice. By the time we moved to less prominent areas, our tile placement was smoother, our cuts were more precise, and our overall efficiency had dramatically increased. In hindsight, we strongly recommend starting on a less conspicuous wall, perhaps behind the oven or refrigerator. This allows you to hone your skills and gain confidence before working on areas that will be consistently in view.
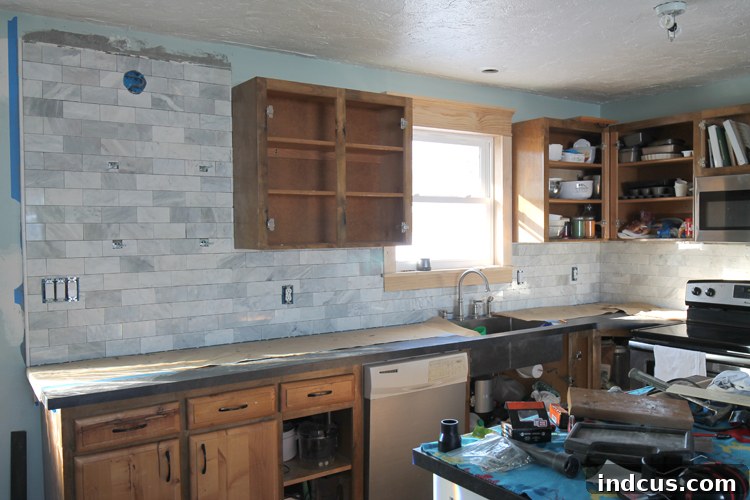
4. Allocate Ample Time: This is a Marathon, Not a Sprint. Tiling a backsplash is a substantial home improvement project that typically takes far longer than anticipated. For our kitchen backsplash, two adults worked continuously for approximately 25 hours to complete both the tile installation and the grouting. This figure does not even include the extensive preparation work detailed earlier. It’s purely the hands-on tiling and grouting time. The accompanying photo illustrates our progress after an initial 8-hour day of labor. Planning for sufficient time, perhaps spreading the project over a few weekends, will prevent burnout and ensure a higher quality outcome. If we were to undertake this project again, knowing what we know now, we could undoubtedly shave off several hours, but the initial learning curve requires patience and dedication.
5. Work in Manageable Sections. When applying thinset, resist the temptation to spread a large amount across the wall at once. Thinset has a working time, and spreading it too far ahead of your tiling pace will cause it to skin over, reducing its adhesive properties and making proper tile placement difficult. Instead, work in small, controlled sections that you can comfortably tile within 15-20 minutes. This eliminates the frantic race against the clock and allows for precise tile positioning. Our preferred method is to “back-butter” each tile individually, much like spreading butter on a piece of bread. This ensures full coverage of the tile’s back, promoting strong adhesion and preventing hollow spots.
6. Informed Product Choices: Our Tried-and-True Selections. The tile aisle can be overwhelming with countless options for mortars, grouts, sealers, and tools. After extensive research and personal experience, we’ve compiled a list of the specific products that delivered excellent results for our marble subway tile backsplash. Choosing the right products is essential for the longevity and beauty of your installation.
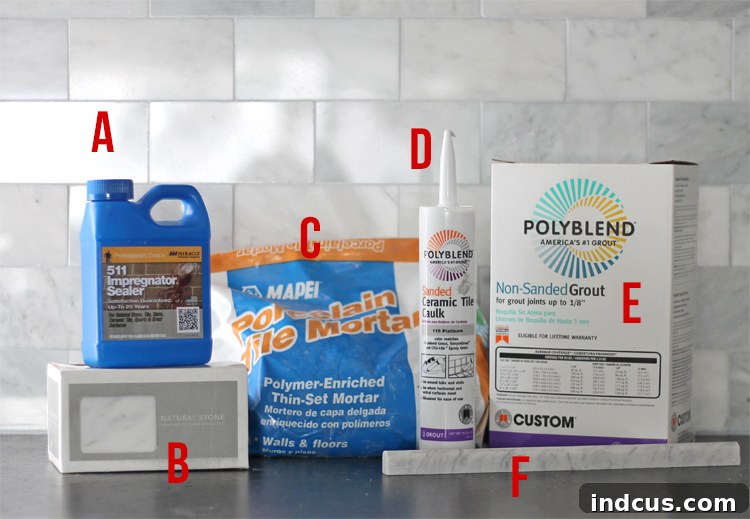
A. 511 Impregnator Sealer. This product is a dual-purpose hero for marble. We applied a coat to our marble tiles *before* grouting. This pre-grout application acts as a “grout release,” significantly simplifying cleanup and preventing the grout pigments from staining the porous marble. Once the entire project was complete and the grout had cured, we applied a final coat of this sealer. This crucial step protects both the tile and the grout from future stains, moisture, and etching, ensuring the lasting beauty of your marble. After considerable research into sealers suitable for natural stone, especially marble, this one stood out, and we are thoroughly pleased with its performance.
B. Marble Subway Tile. Our quest for the perfect marble tile led us through countless online options and visits to several local stores. We ultimately settled on this standard 3×6 inch subway tile from Lowe’s. Priced at $5.98 per square foot, it offered the best value we could find for genuine marble. Purchasing from a local store was invaluable; it allowed us to inspect the tile in person, verifying its color, veining, and quality. An added benefit was the ease of returning several extra boxes we purchased, which is always a good practice to ensure you have enough tile and account for cuts and breakage.
C. Mapei Porcelain Tile Mortar Polymer Enriched Thin-Set Mortar. This thinset performed admirably in terms of adhesion and workability. Our only regret was not selecting a lighter color, as discussed in tip #2. For marble, a polymer-enriched thinset is often recommended as it offers enhanced bonding strength and flexibility, accommodating the slight movements and characteristics of natural stone.
D. Polyblend Tile Caulk in Platinum. Finding a caulk that perfectly matches your grout color is a game-changer. This Polyblend caulk in ‘Platinum’ was an exact match for our chosen grout, making for an incredibly cohesive and professional finish. Using standard white caulk would have created an unsightly contrast. Caulk is essential where the tile meets a different surface that might expand or contract, such as around the window, along the seam between the tile and the cabinets, and where the tile meets the countertop. To achieve impeccably straight caulk lines, apply painter’s tape on either side of the gap you intend to fill. Dispense the caulk, smooth it with a moistened finger, and then immediately peel away the tape while the caulk is still wet. This technique guarantees crisp, clean edges every time.
E. Polyblend Non-Sanded Grout in Platinum. For our 1/16th inch grout lines (the smallest available spacers), we opted for non-sanded grout. This choice was also critical due to the softness of marble; sanded grout contains aggregates that can scratch and damage the delicate surface of natural stone tiles. Non-sanded grout provides a smooth finish and is ideal for narrow grout lines. If your project involves floor tiles or grout lines wider than 1/8th inch, sanded grout would be the appropriate choice for its strength and crack resistance.
F. Marble Pencil Tile. This small but mighty detail truly elevates the finished look. We purchased these marble pencil liners from Lowe’s, and while they were relatively expensive at $6 per piece, they were undoubtedly worth the investment. Pencil tiles provide a refined, finished edge where your backsplash ends, preventing a raw or unfinished look. They were instrumental in creating a polished aesthetic for our open edges.
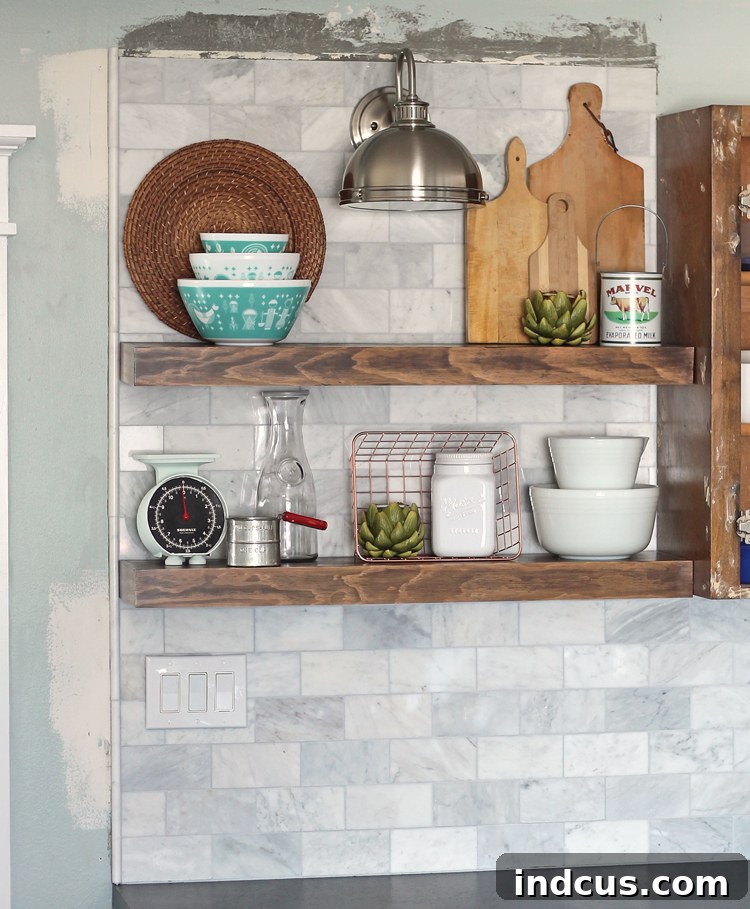
We used them to neatly cap off exposed edges, as seen here:
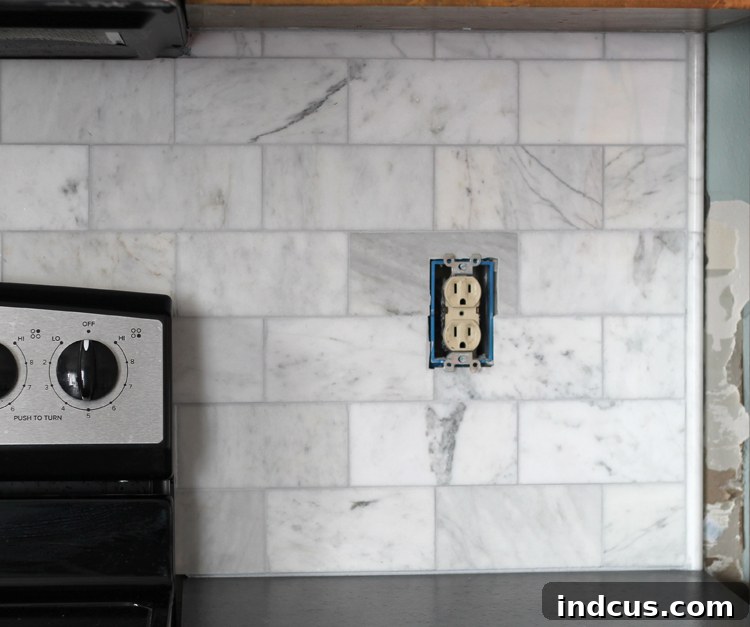
These two areas represented the only open edges of our backsplash, making the pencil tile a crucial finishing touch.
7. The Smart Way to Install Pencil Tile. We discovered that installing the pencil tile first, allowing it to fully dry and set, and then tiling the subway tile alongside it was significantly easier and yielded a superior result. To ensure a perfectly straight edge for your pencil tile, use a level to draw a pencil line on the wall, then apply painter’s tape along this line. This tape acts as an invaluable guide for your installation. Remember to use appropriate spacers between the bottom pencil tile and the countertop, and also between each individual pencil tile as you stack them vertically. This guarantees consistent spacing and a uniform appearance.
8. The Magic of Grout: Hiding Imperfections and Unifying the Look. Choosing the right grout color and applying it properly can dramatically transform your tile installation. We are incredibly pleased with our light gray grout choice. After reviewing numerous online photos, we concluded that a subtle light gray offered the best complement to marble tile, highlighting its natural beauty without overpowering it. Pure white grout can sometimes appear too stark or harsh against marble, while darker grouts can make the overall pattern look too busy or even slightly dirty, in our personal opinion. The most astounding revelation was how much better the tile looked once grouted. Grout effectively fills in the small imperfections, slight variations in tile thickness, and even minor chips along tile edges, creating a unified and polished surface. Our primary tip for grouting is to meticulously inspect your work from every conceivable angle. It’s surprisingly easy to miss small spots or leave tiny “holes” in your grout lines, which can detract from the overall finish. Take your time during cleanup to ensure all excess grout is removed from the tile surface.
9. Strategic Tile Layout Planning. Before you even mix your first batch of thinset, take the time to meticulously plan your tile layout. Determine your starting point, visualize how the tile will flow across the walls, and anticipate what the end cuts in corners or at cabinet edges will look like. The goal is to avoid ending up with numerous skinny, awkward, or visually disruptive tile pieces in prominent areas. We prioritized our feature wall as the most visually important section. By starting with full tiles there, we were fortunate that our corner cuts worked out seamlessly. A valuable trick for tiling inside corners is to “wrap” the design visually. Observe our corner installation:
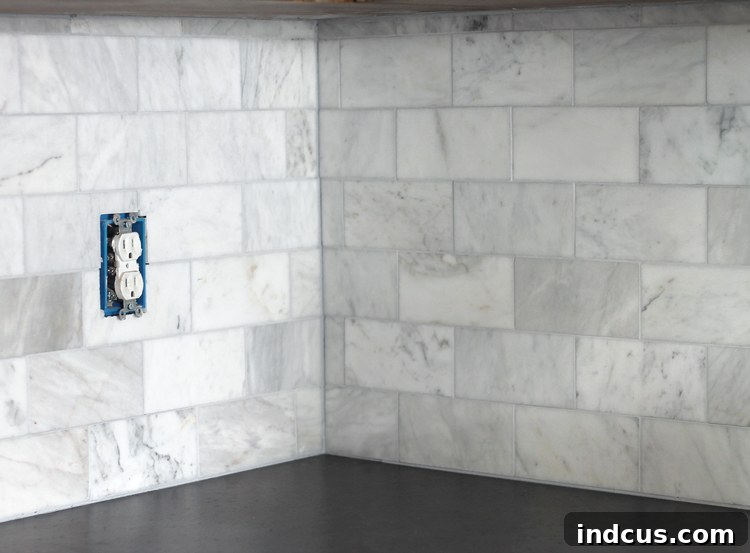
Notice how we used a shorter piece on one side of the corner, immediately followed by a longer piece on the adjacent wall. This creates a visual continuity, making the tile pattern appear to flow smoothly around the corner rather than abruptly ending. This subtle detail, picked up from various online resources, truly makes a significant difference in the professional appearance of the installation.
Another crucial decision involved vertical tile spacing. We opted to have a small, narrow piece of tile tucked discreetly under the cabinets, rather than having a small piece near the countertop. You can glimpse this in the corner picture above. Our reasoning was that a small sliver of tile under the cabinets would be far less noticeable unless one intentionally bends down to look, preserving the clean lines along the countertop. This choice worked exceptionally well for our specific kitchen layout.
Essential Tools for Your DIY Backsplash Project
While we borrowed some of our tools, having a list of necessary equipment is crucial for planning your project. Here’s what you’ll need:
- Wet Tile Saw: Absolutely essential for cutting marble tiles cleanly and accurately.
- Notched Trowel: Used to apply thinset evenly to the wall or tile.
- Tile Spacers: To ensure consistent grout lines. We used 1/16th inch spacers.
- Level: For keeping your lines straight and true.
- Measuring Tape and Pencil: For accurate measurements and markings.
- Oscillating Tool: Highly recommended for notching window trim or making intricate cuts.
- Utility Knife: For cutting drywall, tape, or shims.
- Rubber Grout Float: For applying and pressing grout into the joints.
- Large Sponges and Buckets: For cleaning up excess grout and thinset.
- Safety Glasses and Gloves: Always prioritize safety when cutting and mixing.
- Drill: For installing outlet extenders and shelf brackets.
DIY Backsplash Cost Breakdown
One of the significant advantages of DIY is the cost savings. Here’s a breakdown of our expenses for a high-end marble backsplash:
- Tile (40 sqft): $240
- Pencil Tile Trim (7 pieces): $42
- Grout: $14
- Sealer: $16
- Thinset: $14
- Caulk: $8
- Spacers: $6
- Outlet Extenders: $7
TOTAL: $347
We were fortunate to borrow the tile saw, trowels, sponges, and other tile-specific tools from a generous friend, which significantly reduced our overall project cost! This highlights the value of networking or considering tool rentals for specialized equipment.
The Enduring Appeal of a DIY Marble Backsplash
While the marble backsplash represented a bit of a splurge – we could have opted for plain white ceramic subway tile and saved around $100 – my heart was absolutely set on the timeless elegance of natural marble. And I can say, without a shadow of a doubt, it was WORTH. EVERY. SINGLE. PENNY. The transformation it brought to our kitchen is nothing short of incredible, truly elevating the space to the next level of sophistication and style. While it was undeniably a learning experience, requiring patience and a significant time investment, we would absolutely embark on another DIY tiling adventure in the future. The immense satisfaction of stepping back and admiring a professional-looking installation that you created with your own hands is unparalleled. Despite our initial nerves and reliance on frequent Google searches for guidance, the finished result betrays no hint that it was crafted by two enthusiastic amateurs. 😉
For those planning to integrate floating shelves into their newly tiled space, we’ve documented our entire process in a separate, detailed post: How to Install Floating Kitchen Shelves Over Tile Backsplash. It’s a must-read for anyone considering adding this stylish and functional element.
Witness the complete kitchen transformation and see the finished kitchen reveal here.
UPDATE: It’s now been approximately two years since we completed the installation of our marble subway tile backsplash, and my affection for it has only grown. It remains, unequivocally, my absolute favorite feature in our entire home. The elegance, the character, and the subtle variations of the marble continue to bring immense joy and beauty to our kitchen every single day. If you’ve been contemplating this upgrade but find yourself on the fence – our resounding advice is: DO IT! You won’t regret embracing the timeless charm and undeniable luxury of a marble backsplash.
Pin this comprehensive guide now, so you can easily reference it when you’re ready to start your own DIY marble backsplash project!