
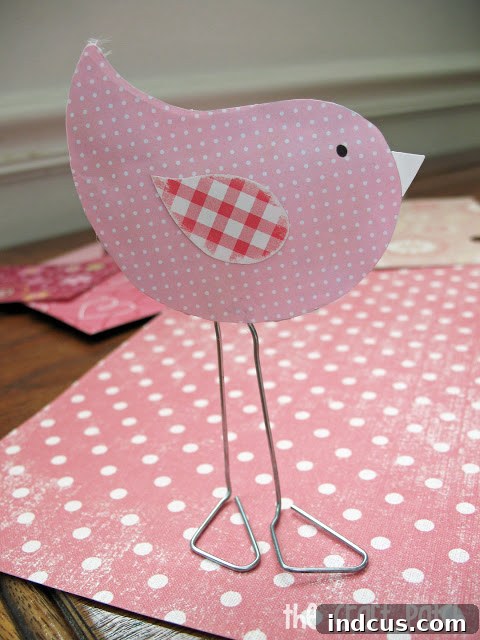
Craft Adorable Valentine’s Day Love Birds: A DIY Guide to Paper Clip Art
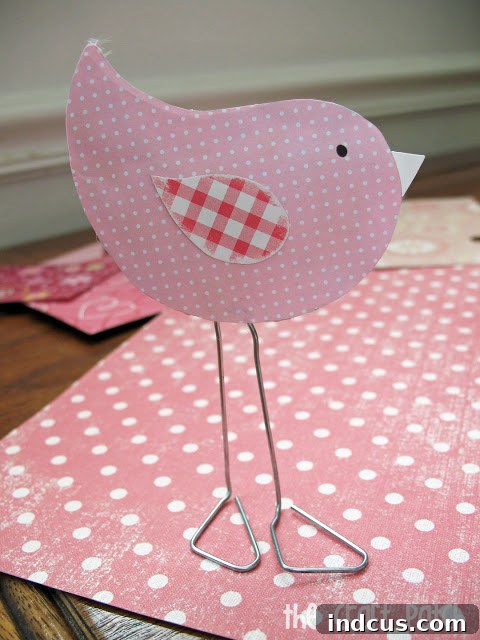
As Valentine’s Day approaches, the air fills with sentiments of love, warmth, and heartfelt gestures. What better way to embrace this loving spirit than by creating charming, handcrafted decorations that bring a smile to your face? This year, we invite you to dive into a delightful DIY project: crafting adorable “Love Birds” using simple scrapbook paper and metal paper clips. These endearing little creatures have a way of brightening any space, and once you make them, you’ll find yourself eager to display them year after year.
This project is not only incredibly easy and fun, but it also utilizes materials you likely already have lying around your home or craft stash. Imagine the joy of transforming everyday items into a personalized piece of Valentine’s Day decor! Whether you’re a seasoned crafter or just starting, these paper clip love birds offer a rewarding experience with beautiful results. Let’s gather our supplies and begin creating these sweet symbols of affection!
Why These DIY Love Birds Are Perfect for Valentine’s Day
Handmade crafts hold a special charm, especially during holidays like Valentine’s Day. Our paper clip love birds stand out as an ideal project for several reasons:
- Simplicity: The steps are straightforward, making this a fantastic craft for all skill levels, including children (with adult supervision for hot glue).
- Affordability: Utilizing paper scraps and inexpensive paper clips keeps the cost low, allowing you to create beautiful decor without breaking the bank.
- Personalization: The wide array of scrapbook papers available means you can customize your birds to match any decor style or color scheme. Choose vibrant reds, soft pinks, elegant whites, or even patterns with hearts and flowers.
- Versatility: Once completed, these love birds can adorn shelves, sit on tabletops, perch on plants, or even be incorporated into larger Valentine’s Day displays. They make charming additions to greeting cards or gift toppers too!
- Nostalgia: Creating something with your hands often brings a sense of accomplishment and nostalgia, making these birds a delightful yearly tradition.
What You’ll Need: Your Creative Toolkit
Before we embark on this creative journey, let’s ensure we have all the necessary supplies within reach. One of the best aspects of this craft is its reliance on common household and craft items, making it accessible to almost everyone.
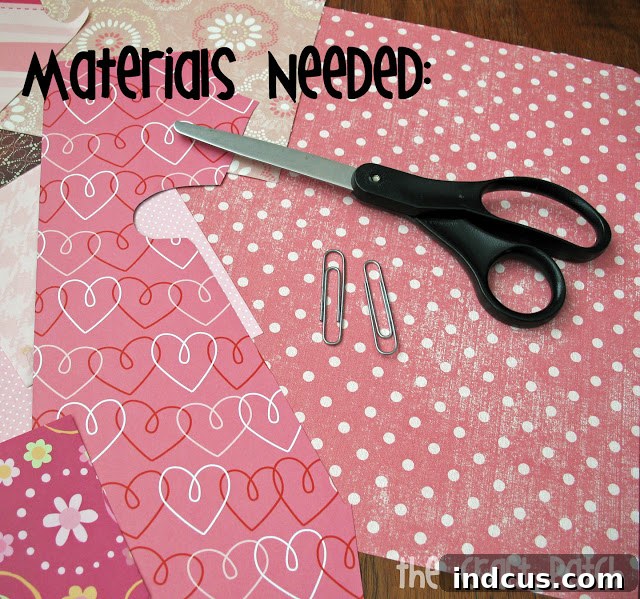
Here’s a detailed list of materials:
- Scrapbook Paper: Focus on colors traditionally associated with Valentine’s Day – reds, pinks, whites, and purples. Patterned papers with hearts, stripes, or polka dots will add extra charm. You only need small scraps, making this a perfect project for using up leftover paper from other crafts. The quality of the paper isn’t critical, but a slightly thicker paper (like cardstock) will give your birds more durability and a professional finish.
- Metal Paper Clips: You will need two paper clips per bird. For optimal stability and strength in the bird’s legs, we highly recommend using larger, thicker metal paper clips. These provide a more substantial base and are easier to bend into the desired shapes. Standard-sized paper clips can work, but may require more delicate handling.
- Sharp Scissors: A good pair of craft scissors will ensure clean cuts for your bird’s body, wings, and beak. If working with children, safety scissors are appropriate for the paper cutting, but adult assistance may be needed for intricate shapes.
- Hot Glue Gun and Glue Sticks: A hot glue gun is preferred for this project due to its quick drying time and strong hold. This allows for immediate assembly and reduces waiting time. Always exercise caution when using a hot glue gun, especially around children. Alternatively, a strong craft glue or super glue can be used, but allow ample drying time between steps.
- Optional Embellishments: To truly make your love birds unique, consider adding:
- Googly Eyes: For an extra dose of personality.
- Markers or Pens: To draw eyes, add details, or write tiny messages.
- Glitter: For a touch of sparkle and festive flair.
- Small Feathers: To stick out of the tail for a more realistic or whimsical look.
- Craft Punches: For perfectly shaped hearts or tiny circles for eyes.
Having a clean, flat workspace will also make the crafting process much smoother. Now that our creative toolkit is complete, let’s move on to shaping our materials!
Step-by-Step Guide: Crafting Your Love Birds
Step 1: Sculpting the Sturdy Foundations – Crafting Paper Clip Legs
The legs are the first crucial component of your love birds, giving them their characteristic stance and stability. This step involves carefully bending metal paper clips into the desired shape.
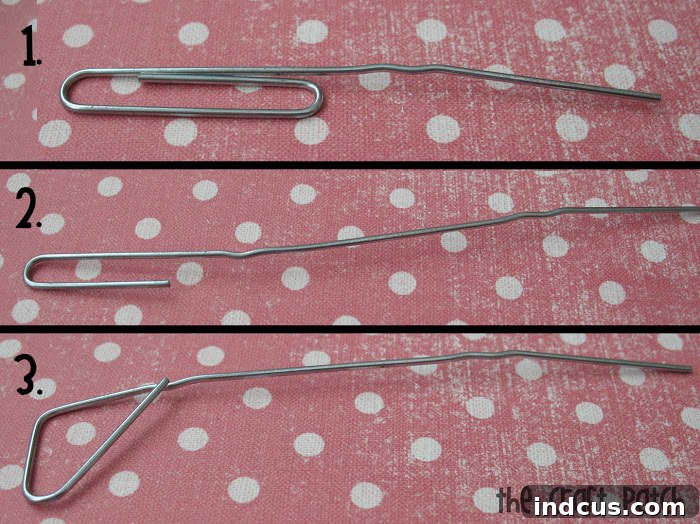
Take two of your chosen paper clips. The goal is to create two “legs” that will eventually support the bird’s body and allow it to stand upright. Follow these bending instructions, referring to the image provided for visual guidance:
- First Bend: Start by holding one paper clip. Bend the outer loop inwards to create the first part of the “leg.” This will be the portion that attaches to the bird’s body.
- Second Bend: Create a sharp angle downwards, forming the main shaft of the leg. This should be long enough to give your bird some height.
- Third Bend (Foot): At the bottom of the shaft, bend the wire outwards and then back in to form a small “foot” or base. This wider base is essential for stability.
- Repeat: Follow the same process for the second paper clip to create the other leg. Try to make them as symmetrical as possible for better balance.
The final bend you will need to make is crucial for enabling your birds to stand independently. This might require a bit of patience and adjustment. You’ll likely find yourself gently wiggling and bending the feet and lower legs until you achieve a stable, upright position. Don’t be afraid to experiment with slight adjustments; a little tweak can make all the difference in achieving perfect balance.
Once you have two stable legs, set them aside. The next step will bring your bird’s body to life!
Step 2: Bringing Your Birds to Life – Paper Body and Embellishments
This is where the personality of your love birds truly shines through! You’ll be cutting out the paper components and assembling them around the legs.
- Cut Out Bird Shapes: From your chosen scrapbook paper, carefully cut out the following shapes for each bird:
- Bird Body (Front and Back): Create a simple, symmetrical bird silhouette. Think of a stylized, plump bird shape with a distinct head and tail. You’ll need two identical pieces for each bird.
- Wing: Cut out a single wing shape. This can be a simple oval, a teardrop, or a more detailed feather shape. You can use a contrasting paper for the wing to add visual interest.
- Beak: A small triangle or a diamond shape folded in half works perfectly for a beak.
Tip for Symmetry: To get identical body pieces, fold a piece of paper in half, draw half a bird shape along the fold, and cut it out. When unfolded, you’ll have a perfectly symmetrical bird.
- Attach the Legs: Take one of your cut-out bird body pieces – this will be the back. Apply a small amount of hot glue to the top, flattened part of each paper clip leg. Carefully position and press the glued ends onto the back side of the paper body. Ensure they are spaced appropriately and pointing downwards. Hold them in place for a few seconds until the glue sets.
- Encase the Legs: Now, take the second bird body piece (the front). Apply hot glue generously along the edges of this piece, leaving the very bottom open if you wish for a slightly more dimensional look, or glue all around if you prefer a flatter bird. Carefully align this front piece directly over the back piece, sandwiching the paper clip legs between them. Press firmly, making sure the pretty sides of both paper pieces are facing outwards. This step effectively hides the paper clips and creates a clean finish for your bird’s body.
- Add Embellishments:
- Beak: Glue the beak in place at the front of the bird’s head.
- Wing: Attach the wing to one side of the bird’s body, slightly overlapping the main body shape. You can glue it flat or just at the top edge to give it a little lift.
- Eyes: Use small googly eyes for a playful look, or draw eyes with a black marker or pen.
- Optional Feather: If you wish to add a touch of whimsy, hot glue a small decorative feather to the back of the bird, peeking out from its tail.
- Additional Details: Feel free to add glitter, small heart cut-outs, or even draw patterns onto your bird’s body for extra flair.
And just like that, your charming love birds are complete! Now you just need to find the perfect spot for them to perch and spread their Valentine’s Day cheer.
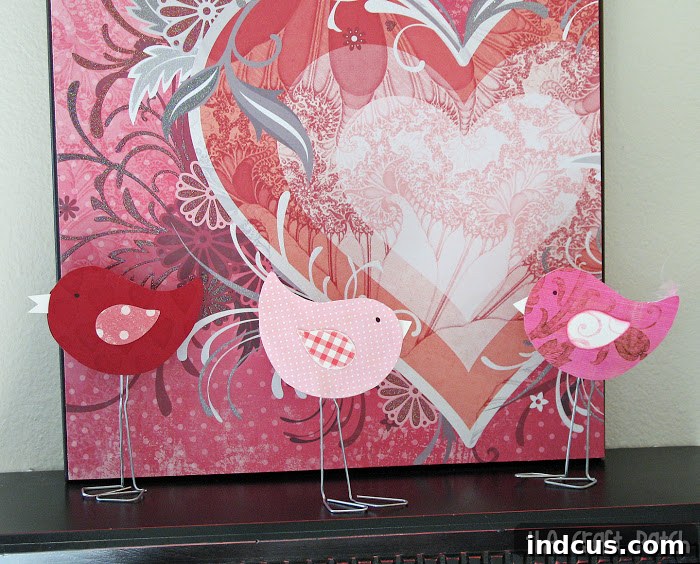
Displaying Your Feathered Friends with Style
Once your delightful paper clip love birds are assembled, it’s time to showcase their charm! Finding the right perch can elevate their presentation and make them an integral part of your Valentine’s Day decor.
- Natural Perches: A small, clean tree branch or twig can make an excellent rustic perch. Simply balance your birds on the branch, or secure their feet with a tiny dot of glue for more stability.
- Shelf or Mantelpiece: Arrange them on a shelf, fireplace mantel, or windowsill amidst other decorations like candles, flowers, or framed photos.
- Tabletop Centerpiece: Group several birds together on a decorative tray or inside a small planter for an instant Valentine’s Day centerpiece.
- Book Nooks: Let them peek out from a bookshelf, adding a whimsical touch to your reading corner.
- Creating a Scene: Design a mini diorama with artificial grass, tiny flowers, or other miniature elements to create a sweet romantic setting for your birds.
If you find that your love birds are a little tipsy or prone to falling over, a simple solution is to create a coordinating base. Cut out a small circle or heart shape from a piece of sturdy cardstock that matches or complements your bird’s colors. Apply hot glue to the feet of your paper clip birds and firmly attach them to this cardstock base. This will significantly increase their stability, allowing them to stand proud and steady wherever you place them. This is especially useful if you plan to move them around frequently or display them in a high-traffic area.
Love Birds Video Tutorial (For Visual Learners)
Sometimes, seeing the steps in action can be incredibly helpful. While this article provides comprehensive written instructions, we understand that visual learners may benefit from a live demonstration. Below is a conceptual placeholder for a video tutorial, which would walk you through each step of bending the paper clips and assembling your charming love birds.
This video aims to complement the written guide, offering practical tips and a clearer view of the bending and gluing process, ensuring you can craft your love birds with confidence and ease.
Variations and Creative Ideas
The beauty of DIY crafts lies in the ability to personalize and innovate. Don’t stop at the basic design; let your creativity soar with these variations:
- Themed Birds: Beyond Valentine’s Day, adapt this craft for other seasons! Use pastels for spring birds, vibrant colors for summer, autumnal hues for fall, or festive reds and greens for Christmas ornaments.
- Message Birds: Attach tiny rolled-up scrolls with sweet messages or names written on them to your bird’s beak or tail.
- Photo Birds: Print tiny photos of loved ones and attach them to the birds, creating a personalized keepsake.
- Glitter Galore: Apply glue and sprinkle fine glitter over the wings or body for a shimmering effect.
- Different Textures: Experiment with felt, foam paper, or even fabric scraps for varied textures.
- Functional Birds: Glue a magnet to the back of the birds to turn them into refrigerator magnets, or attach a string to hang them as ornaments.
The Enduring Joy of Handmade Crafts
Crafting these paper clip love birds is more than just a simple project; it’s an opportunity to engage in a mindful activity, express creativity, and produce something tangible and beautiful. The satisfaction of seeing your handmade decorations adorning your home, knowing you created them with your own hands, is truly rewarding. It’s a wonderful way to unwind, focus your energy, and add a personal touch to your surroundings. Moreover, if you involve family or friends, it becomes a cherished shared experience, creating memories along with the craft itself.
Found this project inspiring? Pin it so you don’t forget it! Share your beautiful creations with friends and family, and let the love birds spread joy!
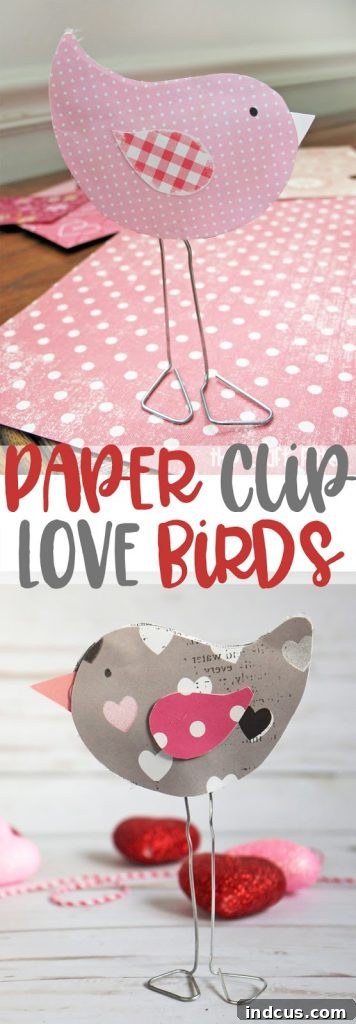
We hope this detailed guide has inspired you to create your own flock of Valentine’s Day love birds. They are a charming, affordable, and incredibly fun way to celebrate the season of love. Happy crafting!







