Craft the Perfect DIY Candy Bar Guitar: A Creative & Sweet Gift for Every Occasion

Searching for a truly unique and thoughtful gift that will leave an indelible impression? Imagine the sheer delight on their face when they receive a meticulously crafted guitar, not fashioned from wood and strings, but entirely composed of their favorite candies! This DIY candy bar guitar transcends a mere sweet treat; it’s a personalized masterpiece, perfectly suited for commemorating Father’s Day, celebrating a momentous graduation, or marking a special birthday. Whether the recipient is a dedicated musician, a passionate rock music enthusiast, or simply someone who appreciates a clever, handmade gesture, this chocolate guitar stands out remarkably from conventional presents.
The inherent beauty of this project lies in its seamless blend of creativity and sentiment. While many personalized gifts often demand significant time and advanced artistic skills, we have streamlined the entire process to ensure that anyone, regardless of their crafting experience, can create this show-stopping item. We understand that numerous DIY candy creations can appear intimidating, which is precisely why this comprehensive guide provides everything you need: from a straightforward, printable template to a clear list of estimated candy quantities. Our ultimate goal is to make your crafting journey utterly enjoyable and entirely stress-free, empowering you to focus solely on the immense satisfaction of making something truly special that is guaranteed to brighten someone’s day.
Why Choose a DIY Candy Bar Guitar as Your Next Gift?
- Unforgettable Personalization: A handmade gift inherently communicates immense thought, effort, and care. By carefully selecting candies that you know the recipient adores, you tailor the gift even further, demonstrating a profound understanding and appreciation for them. It’s a tangible expression of your connection.
- Remarkable Versatility for Any Celebration: This imaginative candy guitar is far from being limited to a single event. It serves as an ideal Father’s Day surprise, a sweet and memorable tribute for a graduate, an exciting birthday present, or even a heartfelt thank-you gesture. Its universal appeal and adaptability make it a fitting choice for friends, cherished family members, dedicated teachers, or esteemed colleagues.
- The Ultimate “Wow” Factor: In stark contrast to a standard gift card or a mass-produced, store-bought item, a candy bar guitar is an instant conversation starter. It is visually stunning, immediately evokes a smile, and creates a memorable moment that will be cherished and talked about long after the last piece of candy has been savored.
- An Opportunity to Express Your Creativity: This project offers a fantastic and accessible avenue to tap into your innate creative side. Even with the assistance of a template, there is ample room to infuse personal touches, ensuring that each candy guitar you craft is genuinely one-of-a-kind and reflects your unique flair.
- A Sweet Symphony of Flavors: Beyond its undeniable visual appeal, this gift is bountifully packed with an assortment of delicious treats, offering a delightful and indulgent experience that will satisfy any sweet tooth, making it a feast for both the eyes and the palate.
- Budget-Friendly Brilliance: Compared to purchasing high-end musical instruments or elaborate store-bought gifts, crafting a candy bar guitar is a wonderfully cost-effective option that still delivers a high impact. You get to control the budget by choosing your candies, making it an affordable yet impressive present.
We completely understand that embarking on a DIY project can occasionally feel overwhelming, particularly when your aim is to achieve a polished, impressive result. It’s easy to get discouraged by projects that seem overly complex or require specialized tools. That’s precisely why we have meticulously designed this project to be incredibly accessible and profoundly enjoyable for crafters of all skill levels, from beginners to seasoned DIY enthusiasts. By providing a readily downloadable template, we have ingeniously eliminated all the guesswork regarding sizing, spacing, and precise placement, thereby enabling you to achieve a professional-looking candy guitar with remarkable ease and confidence. No longer will you find yourself staring blankly at a piece of foam board, wondering where to even begin – our intuitive template guides you gracefully through every single step, making the entire crafting process smooth, rewarding, and deeply satisfying.
Essential Materials for Crafting Your Custom Candy Bar Guitar
Gathering your materials is the initial and most exciting step in the journey of bringing your candy guitar to vibrant life. We have carefully curated a list of supplies that are both easy to procure and guaranteed to result in a sturdy, undeniably beautiful finished product. While our template is thoughtfully designed around specific candies for optimal fit and aesthetic harmony, you are absolutely welcome to substitute with other similar-sized favorites if you wish to further personalize your creation and cater to specific tastes!
- 1 x 20×30″ White Foam Core Board: This crucial component provides the robust yet lightweight foundation for your guitar. Its smooth, clean surface is ideal for securely attaching candies and for elegantly inscribing your personalized message.
- Printable Guitar Template: This indispensable, pre-designed guide dramatically simplifies the entire layout process. Be sure to look for the prominent blue button located towards the end of this post to download your exclusive template.
- 2 – 17.6 oz bags of Reese’s Miniature Cups: These iconic peanut butter cups form the distinctive main body of the guitar, offering a visually appealing texture and, of course, a universally beloved, delicious flavor. While one bag might initially appear sufficient, having two ensures you possess an ample supply (with a few delightful extras for well-deserved snacking!).
- 3 Standard Sized Hershey’s Chocolate Bars: These classic, rectangular chocolate bars are perfectly sized and shaped for constructing the elegant neck of the guitar, providing a smooth, continuous, and delicious surface.
- 6 Hershey’s Kisses: Small, iconic, and perfectly conical, these kisses are ideal for adding intricate detailing, often serving as the charming tuners on the guitar’s headstock.
- 6 Hershey’s Miniature Bars: These smaller, bite-sized chocolate bars wonderfully complement the standard Hershey’s bars and are perfect for filling in smaller sections or adding extra dimension to the guitar’s neck, enhancing its visual richness.
- 2 Fun Sized Kit Kat Bars: The unique, segmented shape of Kit Kat bars can be strategically utilized to introduce creative accents or distinct structural elements to your candy guitar design, adding another layer of visual interest.
- Hot Glue Gun + Plenty of Glue Sticks: This is your indispensable tool for securely and quickly attaching all the candies to the foam core board. Always ensure you have a generous supply of glue sticks on hand to avoid interruptions during your creative flow!
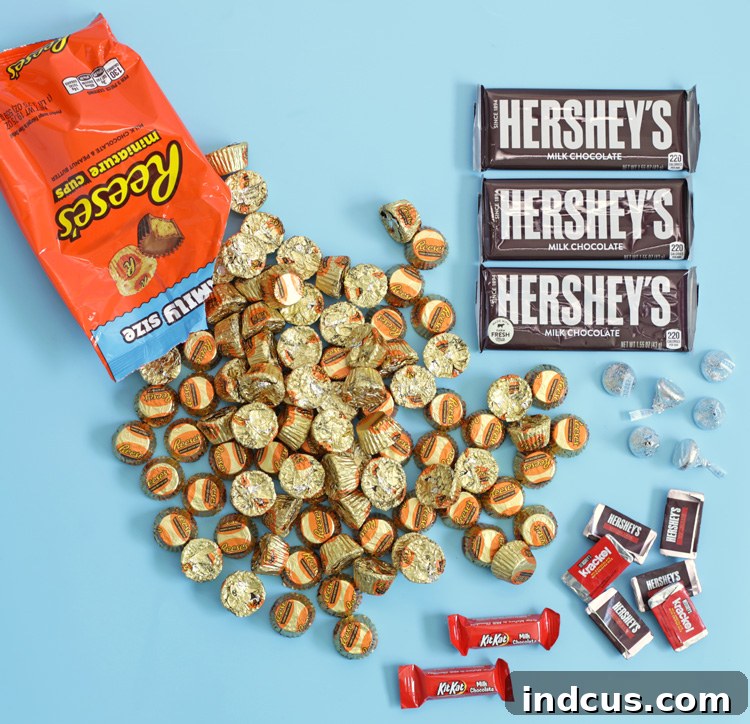
Step-by-Step Instructions: Crafting Your Sweet Masterpiece
Follow these detailed instructions meticulously, and remember, for an even clearer understanding, there’s also a highly informative video tutorial provided further below that visually demonstrates each crucial stage of the process, guaranteeing that your candy bar guitar comes together absolutely perfectly.
Step 1: Prepare and Print Your Template. Begin by downloading the exclusive printable guitar template files, which you can easily access via the blue button located near the bottom of this post. Once downloaded, print these files on standard white paper. For the most accurate results and to ensure the candies fit perfectly as intended, it is vital to set your printer scaling to 100%. Having a crisp, well-printed template is the foundational key for precise candy placement and achieving a truly professional, polished finish.
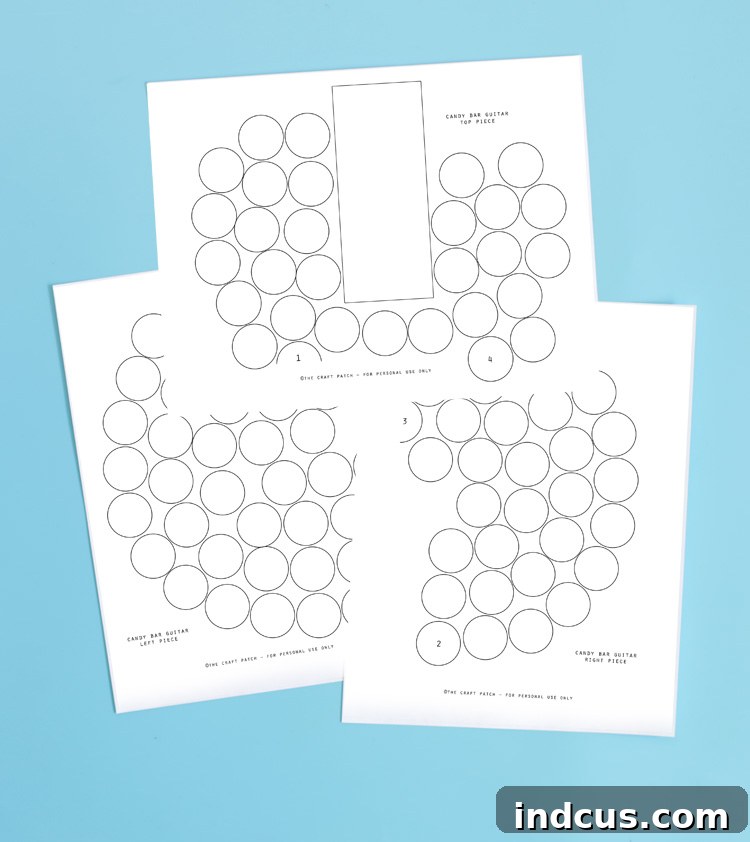
Step 2: Organize and Review Your Candies. Before you even think about applying glue, meticulously gather all your specified candies and arrange them neatly within easy reach. This simple preparatory step prevents any frantic searching or interruptions mid-project. While you certainly possess the creative freedom to substitute other candies if you wish, please be mindful that the provided template has been exquisitely designed and calibrated to fit the specific candies listed. If you opt for substitutions, conscientiously choose candies of very similar dimensions to avoid unsightly gaps or inconvenient overcrowding on your template.
Step 3: Assemble the Template Sections. Carefully and precisely cut out each individual section of your printed template. You will observe distinct numbered circles strategically placed on the edges of each section – these are your infallible guides! Overlap the corresponding numbered circles from adjacent sections and meticulously align the entire design to flawlessly form the complete, cohesive guitar shape. Once you are satisfied with the alignment, securely fasten the sections together using clear adhesive tape. Devote sufficient time to this crucial step to ensure the guitar’s overall outline is both accurate and perfectly seamless.
Step 4: Secure the Template to the Foam Core. With your template fully and accurately assembled, select a prominent bottom corner of your 20×30″ foam core board. Delicately apply a few small, precise dots of hot glue to the back of your paper template and then firmly affix it to the foam core at an aesthetically pleasing angle. This angled placement often helps to mimic the dynamic, spirited look of a real guitar and concurrently provides ample, clear space for your personalized message later on. Double-check that it is securely attached, as this forms the stable foundation for all your subsequent candy placements.
Step 5: Artfully Lay Down the Guitar Body Candies. Now for the truly sweet and satisfying part! Begin by carefully hot gluing the Reese’s Miniature Cups onto each of the designated circles on the guitar body section of your template. Apply a small, controlled dab of hot glue to the back of each candy wrapper (or directly to the candy itself if it’s unwrapped and appropriate) and press it firmly onto its corresponding template circle. Work in a systematic, unhurried manner, ensuring that each cup is perfectly centered and evenly spaced to create a uniform, visually appealing, and deliciously textured look for the guitar’s main body.
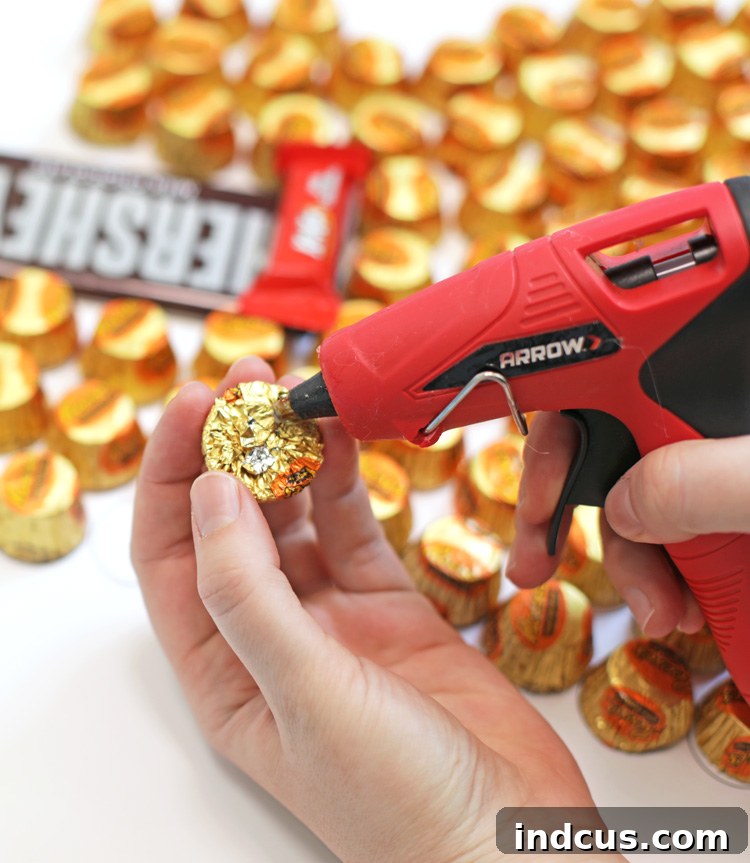
Step 6: Construct the Guitar Neck and Headstock with Precision. With the guitar body now beautifully complete, gracefully transition to the neck of the guitar. Carefully and precisely glue down the Hershey’s Chocolate Bars, Hershey’s Miniature Bars, Hershey’s Kisses, and Fun Sized Kit Kat Bars according to the template to form the elegant neck and detailed headstock. Refer very closely to the provided photo (and definitely consult the video tutorial!) for the exact placement and specific orientation of each individual candy. This step demands a high degree of precision to ensure the guitar’s neck appears perfectly proportional, structurally sound, and beautifully defined. Using very small amounts of hot glue is paramount here to avoid any unsightly or messy spills.
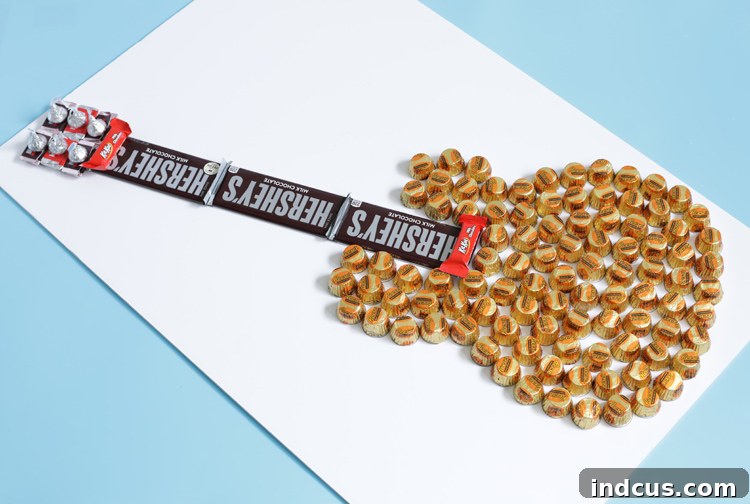
Step 7: Add Your Heartfelt Personalized Message. Once all the candies are firmly in place and the hot glue has had ample time to set and dry completely, it’s finally time to infuse your gift with your unique, heartfelt touch. Utilize a permanent marker to eloquently write a fun, personalized message on the exposed foam core area surrounding your candy guitar. This is truly where your gift radiates its unique charm and personal significance! Consider creative ideas such as “Happy Birthday, Rock Star!”, “Congratulations, Graduate!”, “Dad, You Rock!”, or simply a loving, sincere message that resonates with the recipient. Crucially, don’t forget to proudly sign your name to make it undeniably yours. For an extra flourish, you might consider adding subtle embellishments like glitter glue, decorative stickers, or even a small, themed ribbon.
Watch the Full Candy Bar Guitar Video Tutorial for Visual Guidance
For an absolutely comprehensive visual guide and to observe each intricate step in dynamic action, you simply must not miss our detailed video tutorial! It provides invaluable, step-by-step demonstrations, along with expert tips, and clever tricks to ensure your DIY candy bar guitar project culminates in a resounding success. Watching the video can effortlessly clarify any potential ambiguities, boost your confidence, and empower you to craft your sweet masterpiece with ease and precision.
Isn’t it truly amazing how much simpler, more enjoyable, and significantly less intimidating a crafting project becomes when you possess a precise, guiding template? This DIY candy bar guitar project comes together much faster than you might initially anticipate, yet it consistently creates an incredibly impactful and profoundly impressive gift. The meticulous planning, coupled with these straightforward instructions, effectively removes all the guesswork and potential frustrations, allowing you to focus purely on the unadulterated joy of creation and the anticipation of giving. Who in your life is truly deserving of this ultimate sweet gesture? Whether it’s for a cherished family member, an irreplaceable best friend, or a beloved mentor, this handmade candy guitar is absolutely guaranteed to hit all the right notes and leave a lasting impression!
Loved this project and found it inspiring? Don’t forget to pin it now to save this awesome DIY candy bar guitar tutorial for later reference and to inspire other fellow crafters and gift-givers!